
8 Cheerful Easter Egg Decorating Ideas That Are Safe, Colorful and Easy
Easter eggs look best when you decide up front whether they’re for eating or for keeping, because that choice sets which dyes, markers and glitter are safe to use.


Never miss an update — choose FarmFoodFamily as your preferred source on Google.
How it works: Tap the button below to open Google's settings page, then check the box next to FarmFoodFamily.
Tap the checkbox to turn it blue — that's how you know it's set.
Easter eggs look best when you decide up front whether they're for eating or for keeping, because that choice sets which dyes, markers and glitter are safe to use.
Products We Recommend
This post contains affiliate links. We may earn a commission on qualifying purchases at no extra cost to you.

PAAS Classic Easter Egg Decorating Kit
Dye tablets, a wax crayon for the resist patterns in idea 2, a dipper, egg stands and stickers.
Shop Now
Chefmaster Food Decorating Pens, 10 Pack
Dual-tipped edible markers made for food, for the drawn details in idea 5.
Shop Now
OXO Good Grips Silicone Egg Rack
Silicone rack that holds eggs in a single layer for cooking and cooling before you dye them.
Shop NowMost Easter egg roundups show you 45 pretty eggs and skip one question. Can you eat them?
That matters. Nail polish, permanent marker and craft glitter make gorgeous eggs, but none of them belong near food. A food-safe egg and a keepsake egg need different supplies.
These eight ideas sort it out. Each one says whether the egg is for eating or keeping, and gives the steps, the timing and the checks.
Answer 4 quick questions and get matched to the exact fix for your yard — drainage, budget, layout, or something else entirely.
Take the Free QuizQuick Answer
Decide first: eat it or keep it. Eggs you’ll eat need food coloring, food-grade dye or natural dye. Eggs you’ll keep can take paint, marker and craft glitter.
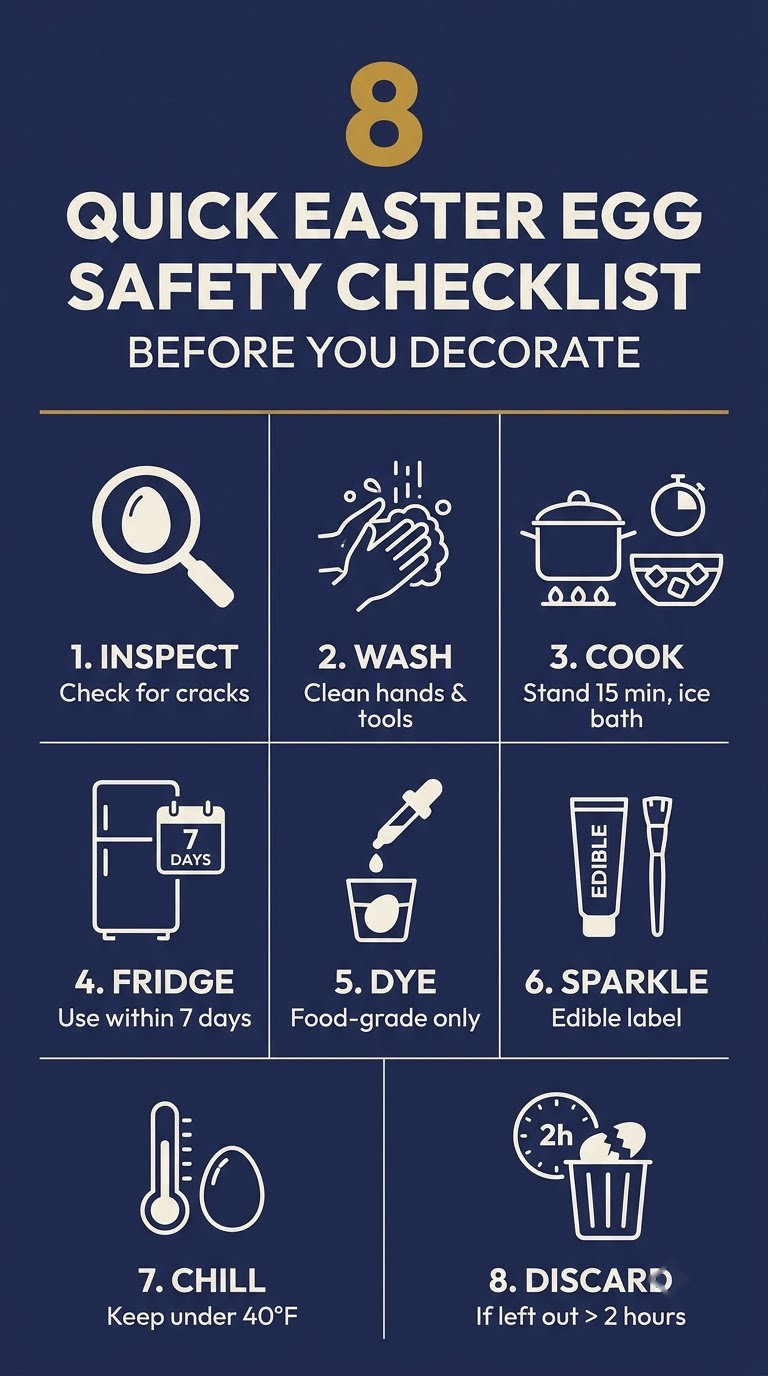
Cook and chill them right. NC State Extension says to let eggs stand covered for 15 minutes off the heat, cool them in ice water and skip any cracked shell. It also says to use cooked eggs within seven days.
Check your sparkle. The FDA says a label that says only “non-toxic” or “decorative only,” with no ingredients list, shouldn’t go on food.
Keep hunt eggs away from pets, wildlife and lawn chemicals, and refrigerate them promptly after the hunt. Use cooked eggs within seven days.



Sort your eggs into two baskets, one for eating and one for display, so nobody bites into a glitter egg.
Most yard problems trace back to one specific, fixable cause. Find yours in 4 quick questions.
Take the Free QuizWhich Idea Fits You?
Pick by who’s decorating and whether you’ll eat the egg. This table sorts the eight ideas below.
| Idea | Eat or keep? | Best for | Budget tier | Skill |
|---|---|---|---|---|
| 1. Natural dye eggs | Eat | Families | Low | Beginner |
| 2. Wax-resist patterns | Eat (peel first) | Older kids and adults | Low | Intermediate |
| 3. Rubber band and plant prints | Eat | Kids | Low | Beginner |
| 4. Ombre dip eggs | Eat | Groups | Low | Beginner |
| 5. Food-safe marker and sticker details | Eat | Little kids | Low | Beginner |
| 6. Blown-egg keepsakes | Keep | Teens and adults | Low to mid | Intermediate |
| 7. Sprinkles and glitter | Depends on the product | Any age | Low | Beginner |
| 8. Displays and hunt setups | Both | Hosts | Low to mid | Beginner |
Before You Start: Safety Basics for Decorated Eggs
Pretty eggs are still eggs. Run through these checks first.
How do you hard-cook eggs for decorating?
NC State Extension gives a clear method. Put eggs in a single layer, cover them with water by one inch and bring the pot to a boil.
Turn off the heat and let the eggs stand covered for 15 minutes. Then cool them quickly in ice water.
Can you eat dyed Easter eggs?
Yes, if you used food coloring or food-grade dye and handled the eggs well. NC State says to use food coloring or food-grade dye if you plan to eat the eggs.
It also says not to color eggs with cracked shells, and not to eat eggs with cracked or broken shells. Refrigerate eggs right after dyeing, and use cooked eggs within seven days.
How long can eggs sit out?
Keep it short. NC State says cooked eggs shouldn’t sit at room temperature longer than four hours, though some extension pages use two hours.
Dye tablets, a wax crayon for the resist patterns in idea 2, a dipper, egg stands and stickers.
Shop NowThis post contains affiliate links. We may earn a commission on qualifying purchases at no extra cost to you.
We use two hours, since it’s the stricter number and a hunt is a good reason to be careful. Put eggs back in the fridge after the hunt.
Which sparkle and shine is safe?
Check the label. The FDA says edible glitter lists its ingredients, and common ones include sugar, gum arabic, maltodextrin and cornstarch.
The average homeowner spends $616/year on yard fixes that don't address the real problem. Find out what yours actually is — before you spend another dollar.
Take the Free QuizA label that says only “non-toxic” or “for decorative purposes only” shouldn’t go directly on food. If you use a non-edible decoration, remove it before anyone eats the egg.
1. Natural Dye Eggs

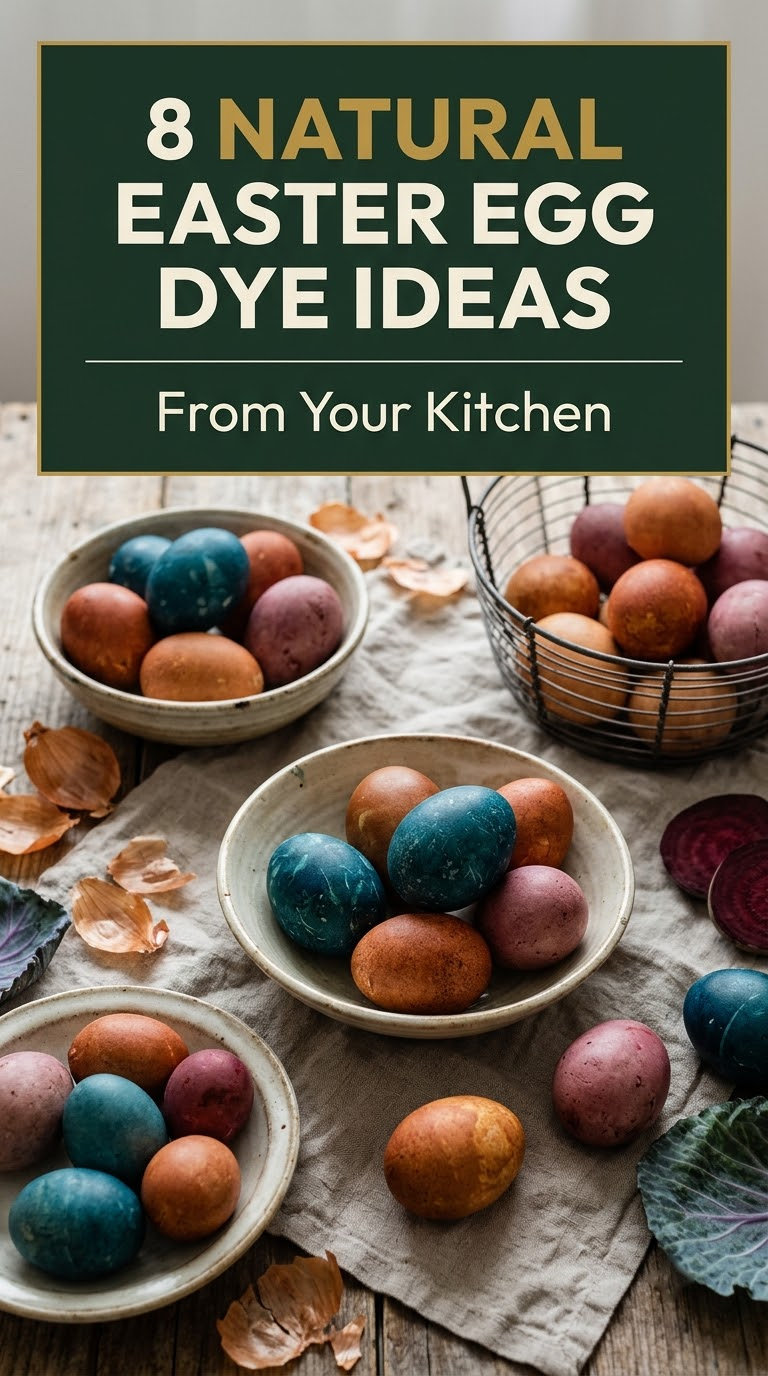
Natural dye gives soft, earthy color. It also uses what’s already in your kitchen.
Healthy Schools Campaign gives the base method. Simmer the ingredient in water, covered, for 15 to 30 minutes on low heat after it boils, then strain it. Add 1 tablespoon of vinegar per cup of strained liquid, and soak the eggs in the refrigerator until the color looks right.
Use this table to pick a color. Brown eggs give deeper, muted shades than white ones.
| Ingredient | Color on white eggs | Color on brown eggs |
|---|---|---|
| Purple cabbage | Blue | Green |
| Yellow onion skins | Orange | Rusty red |
| Beets | Pink | Maroon |
| Ground turmeric | Gold | Gold |
| Red onion skins | Lavender or red | Lavender or red |
| Coffee | Chocolate brown | Chocolate brown |
Soak in the fridge. The source keeps the eggs in the refrigerator while they soak, which also keeps them safe. Check them every hour at first.
Be patient. Deep shades take longer, so soak overnight for the richest color. Pull one egg early to see how it looks.



Dry and shine. Pat the eggs dry on a rack. A tiny bit of cooking oil on a cloth adds a soft glow, but skip it if you plan to dye again.
For the basic food coloring method, see our guide to dyeing eggs with food coloring.
Eat or keep: eat. Budget: low. Skill: beginner.
2. Wax-Resist Patterns
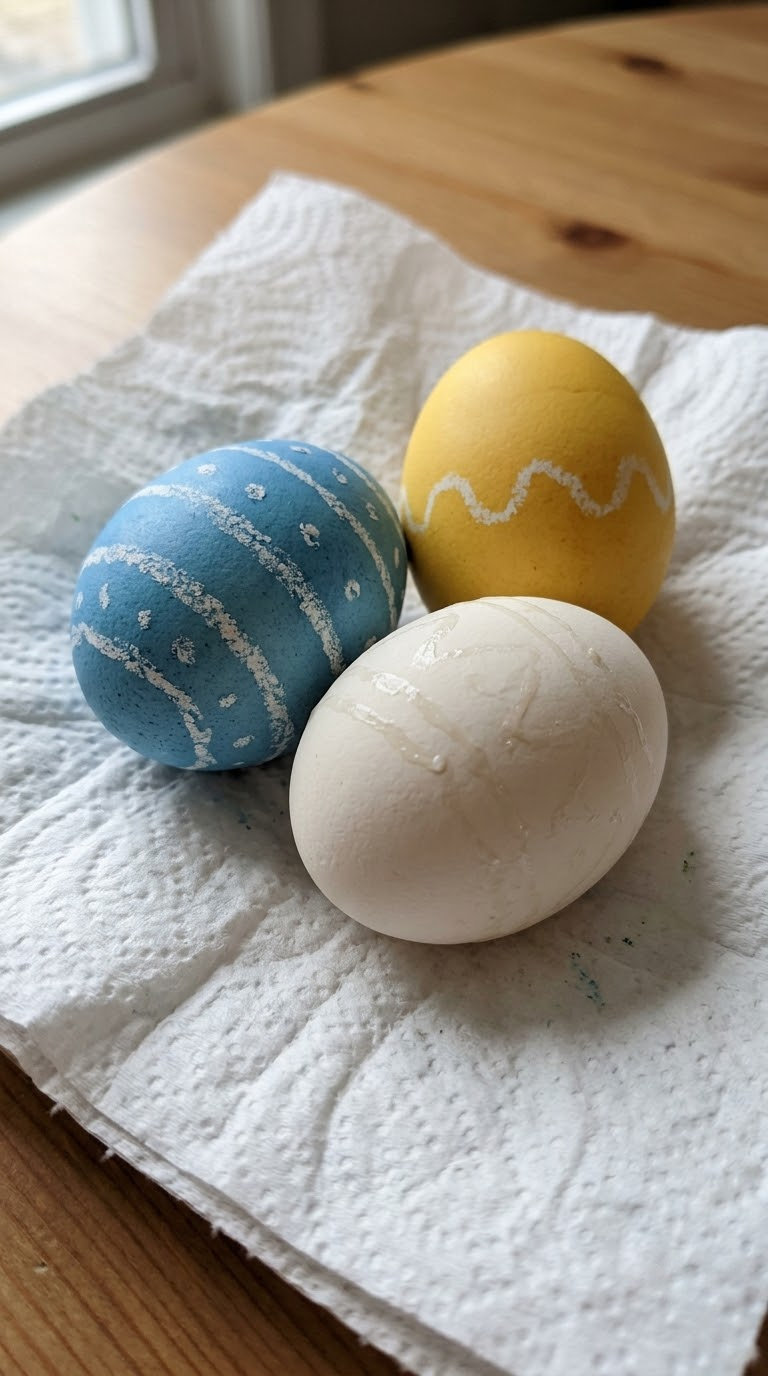
Wax-resist is the classic way to get white lines on a dark egg. Wax blocks dye wherever you draw.
Draw your pattern on a cooled, dry egg with a white crayon or a stick of beeswax. Then dip the egg in dye and let it dry. The wax stays white where the dye can’t reach.
Go light to dark. Draw, dip in yellow, draw more lines, then dip in orange. Each layer keeps the shapes from the step before.
Keep it simple. Stripes, dots and zigzags look sharp. Tiny detail is hard to draw on a curved egg.
Peel before eating. The wax is on the shell, so peel the egg and throw the shell away. Don’t bite into the wax.
Dry fully. A wet egg smears wax. Wipe the shell dry before you draw.
Remove the wax if you want a solid look. Hold the dry egg near a warm light and wipe it with a soft cloth. Skip direct flame.
Eat or keep: eat, after peeling. Budget: low. Skill: intermediate.
3. Rubber Band and Plant Prints

These two tricks need almost no supplies. They also suit kids best.
Wrap rubber bands around the egg before dyeing. Dye the egg, dry it and remove the bands, and you’ll see crisp stripes where the bands sat.
Press a leaf for a print. Place a small, flat leaf or herb sprig against the egg and hold it in place with a piece of cut nylon stocking or cheesecloth. Tie it tight so the dye can’t creep under the leaf.
Use herbs from the kitchen. Parsley, dill and thyme leave delicate shapes. Wash the leaves first.
Mix both. Use bands for stripes and a leaf for a focal point on the same egg.
Test one egg first. Dye seeps under loose rubber, so try one egg before you do a dozen.
Our Easter crafts for kids list more projects for little hands.
Eat or keep: eat. Budget: low. Skill: beginner.
4. Ombre Dip Eggs
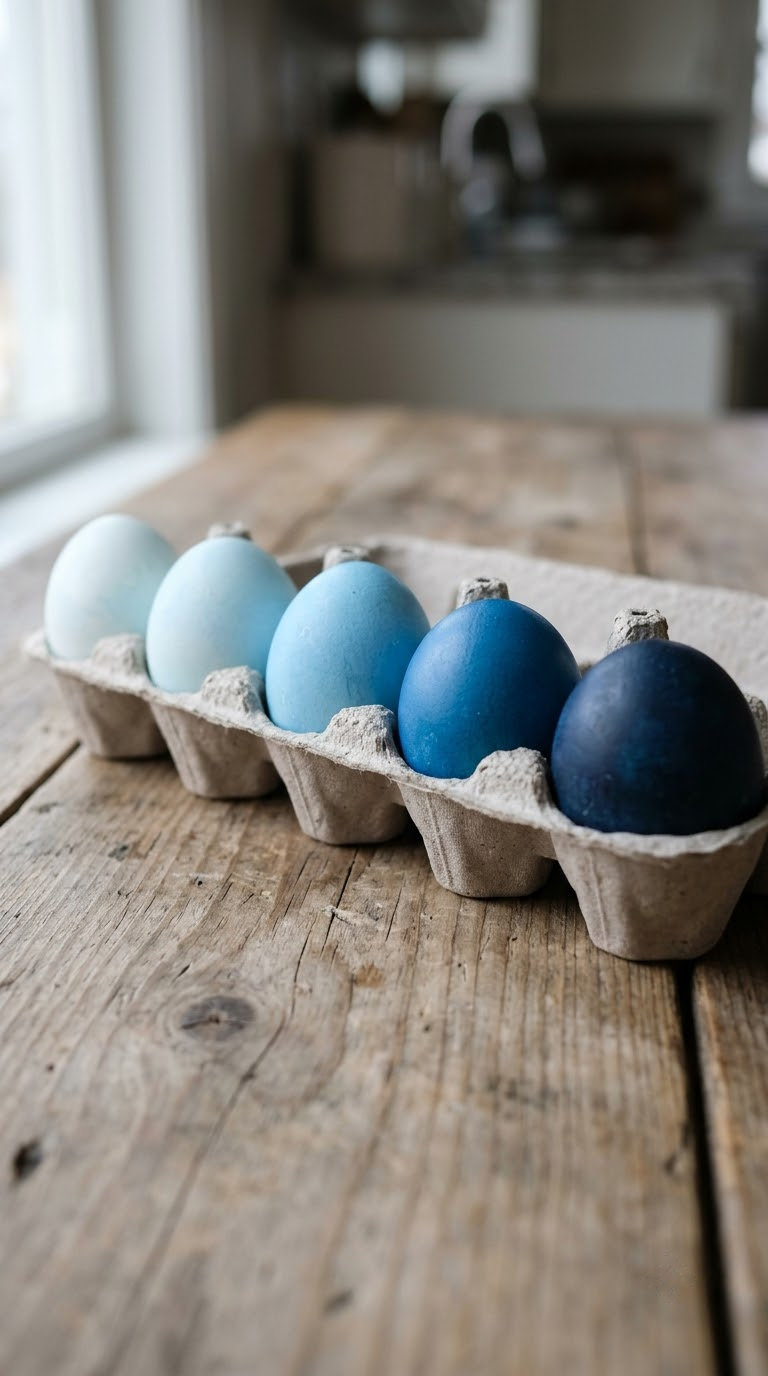
An ombre egg fades from light to dark with no skill needed. You just dip it in stages.
Fill one cup with dye. Lower the whole egg for a short dip, then lift it out. Dip it again so a little more of the egg sits in the dye, and repeat until the bottom is the deepest color.
Use a deep cup. A tall cup lets you dip in stages without tipping. A glass jar works well.
Pick one color family. One dye in different depths looks more polished than three bright colors.
Dry on a rack. Set the egg upright in a carton to dry so the colors don’t bleed.
Make a set. Dye five eggs in one color, each with a different depth, for a gradient row.
Hang on to food safety. Return the eggs to the fridge between steps if the process takes more than a short while.
Our guide to Easter basket ideas shows ways to display a finished set.
Eat or keep: eat. Budget: low. Skill: beginner.
5. Food-Safe Marker and Sticker Details
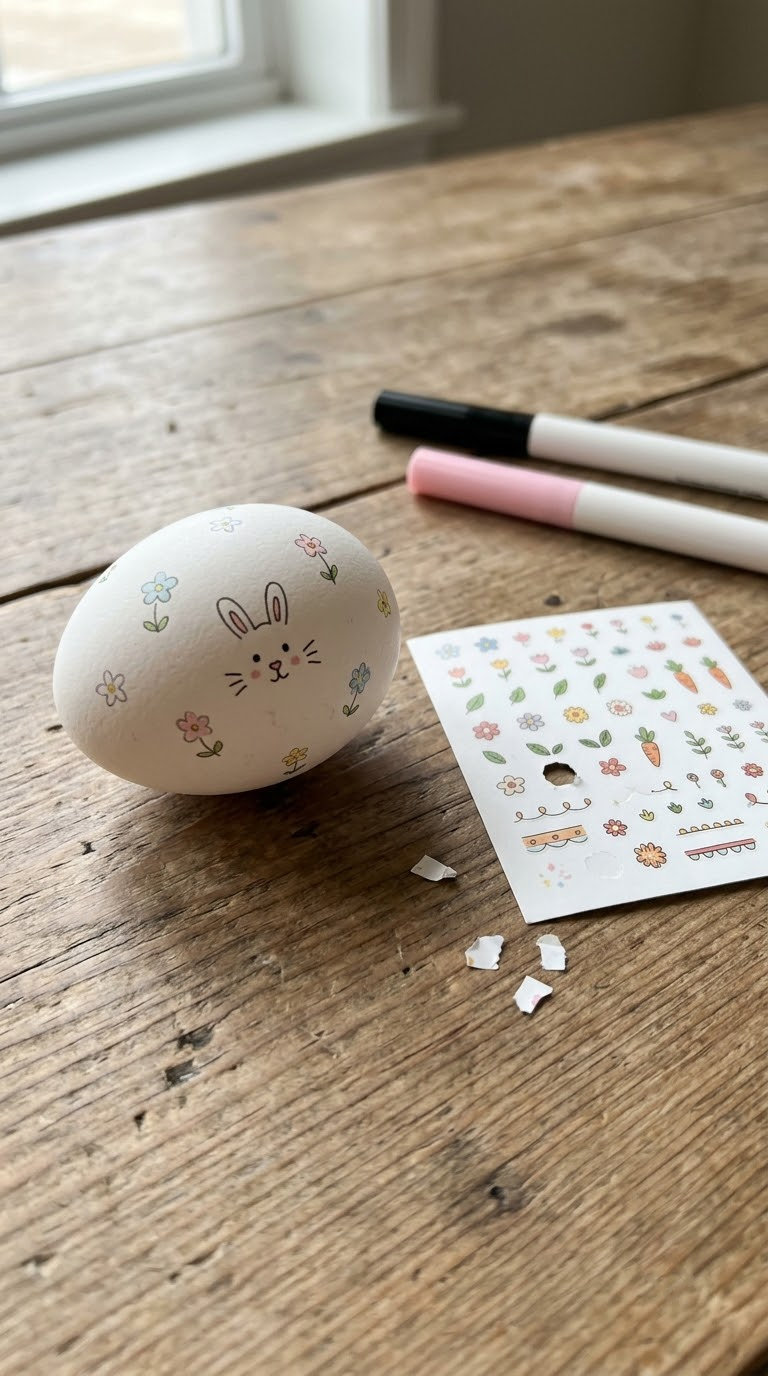
White eggs with simple drawings look sweet and take minutes. They’re a good pick for little kids.
Use food-safe markers sold for decorating eggs and baked goods. Check that the package says it’s for food, since a regular marker isn’t. This matches the FDA’s rule that a “non-toxic” label alone doesn’t make something edible.
Start with a dyed base. Light dye plus a dark drawing stands out. White eggs show every color.
Add stickers to display eggs. Paper stickers and washi tape stick well, but peel them off before anyone eats the egg.
Draw faces. A bunny face or a chick works on a round egg. Draw the eyes first, then the nose and whiskers.
Let it dry. Wait a few minutes before you stack or handle the egg so lines don’t smear.
Eat or keep: eat, if the marker is made for food. Budget: low. Skill: beginner.
6. Blown-Egg Keepsakes

A blown egg lasts for years. It’s also where you can use paint, markers and nail polish.
Make a small hole at each end of a raw egg, then blow the contents into a bowl. Rinse the shell, and let it dry fully before you paint. Cook the egg contents right away, or throw them out.
Treat these eggs as decoration only. Paint, permanent marker and nail polish aren’t food products, and the FDA’s rule is simple. If a product isn’t made to be edible, don’t put it on food.
Wash your hands. Wash after handling raw egg, and wash the tools too.
Mark them as decor. Keep blown eggs away from the food eggs so nobody grabs one by mistake.
Try nail polish marbling. Drip a few drops of polish into a bowl of water, swirl, and roll the dry shell through. Work in a ventilated room.
Hang them. Thread a ribbon through the top hole and tie a bead on the end to hang them on a branch.
Store them well. Wrap them in tissue paper in a sturdy box. Keep them dry.
Our Easter wreath ideas show how to use keepsake eggs on a door.
Eat or keep: keep. Budget: low to mid. Skill: intermediate.
7. Sprinkles and Glitter
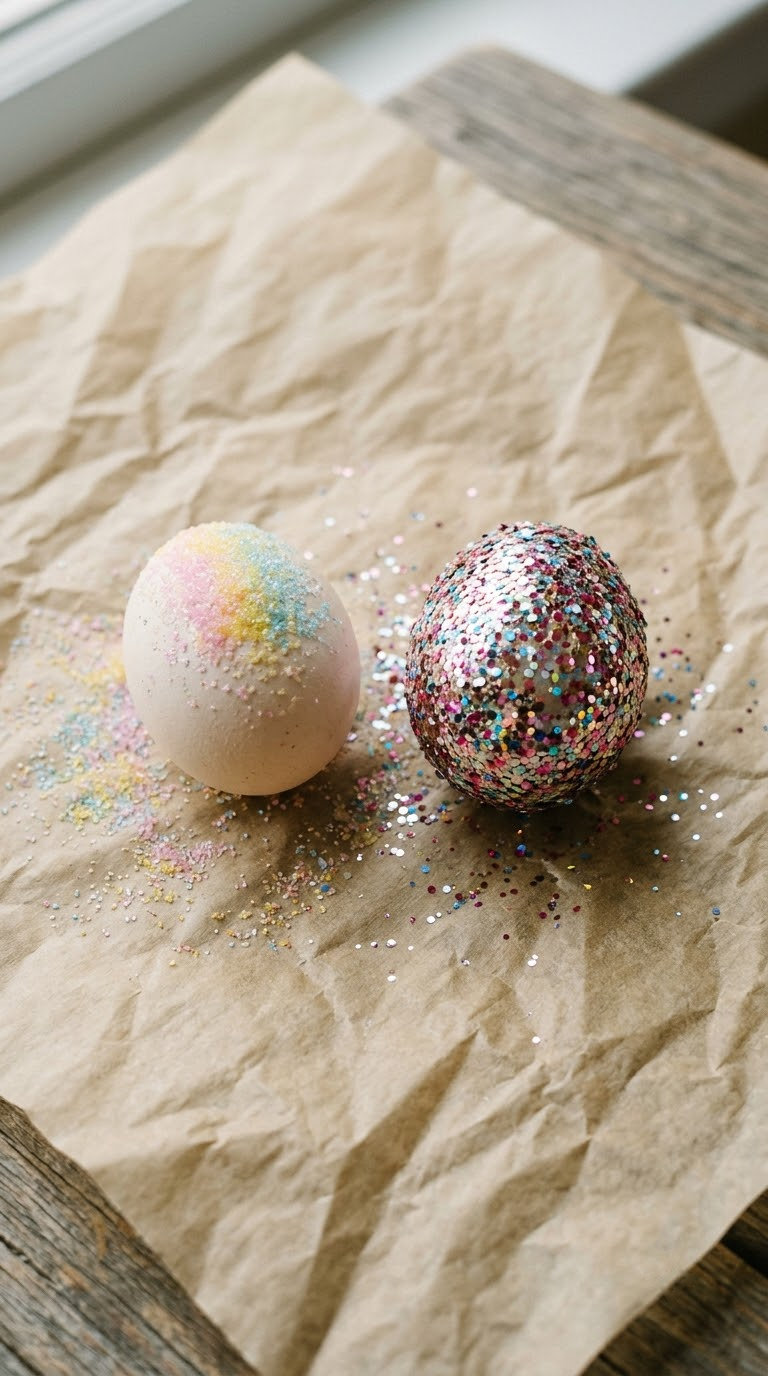
Sparkle makes eggs pop. But it’s where food safety gets muddy.
The FDA says to avoid glitter and dust products on foods unless they’re made to be edible. Edible versions list their ingredients, and common ones include sugar, gum arabic, maltodextrin and cornstarch.
Pick by the label. If it lists ingredients and says “edible,” it’s fine for eggs you’ll eat. If it says only “non-toxic” or “decorative only,” keep it for display eggs.
Use sanding sugar for food eggs. Colored sanding sugar works like glitter and is easy to find. Brush a thin coat of edible glue or egg white on a dry shell, then roll the egg in sugar.
Use craft glitter on keepsakes. Glue it on blown eggs and seal it with a clear spray. Don’t put these eggs near food.
Mix the two. A food egg with sugar sparkle sits on the table, and a glitter egg sits on the shelf.
Remove what you can’t eat. The FDA says to take off non-edible decorations before serving.
Eat or keep: depends on the product. Budget: low. Skill: beginner.
8. Displays and Egg Hunt Setups

How you show the eggs matters as much as how you make them. A nest, a bowl or a hunt each needs a plan.
NC State Extension says to keep hidden eggs away from pets, wild animals, insects and chemicals. It also says to refrigerate eggs promptly after the hunt, and not to eat cracked ones.
Use plastic eggs for the hunt. Fill them with candy or toys, and keep your decorated eggs for the table. It’s our own tip, and it’s the simplest way to avoid a lost egg in the yard.
Count the eggs. Write down how many you hide so you can find them all.
Build a nest. Line a bowl with moss, shredded paper or straw, and tuck in the dyed eggs. Keep the eggs you plan to eat in the fridge until the party.
Make a centerpiece. Fill a tray with display eggs and fresh flowers. Our spring and Easter centerpieces have more ideas.
Label the food eggs. A small card that says “safe to eat” avoids guesses.
Eat or keep: both. Budget: low to mid. Skill: beginner.
How Should You Plan the Budget?
Eggs are cheap, so spend on the supplies that save time. Use this table to see where each dollar goes.
| Spend more on | Save on |
|---|---|
| Food-grade dye or markers | Extra decorations |
| A dozen sturdy cups or jars | Fancy stickers |
| A drying rack or carton | Specialty tools |
| Plastic hunt eggs that reuse | Extra baskets |
A box of food coloring and a pack of white crayons cover most ideas on this list. Add one sparkle item if you want something special.
What to Do First
Start with the safety basics, then pick a method. This order keeps it simple.
First, decide how many eggs are for eating and how many are for keeping. Second, hard-cook the food eggs and cool them in ice water. Third, pick two or three techniques.
Then set up the dye station and decorate. Last, refrigerate the food eggs and display the keepsake ones.
Common Mistakes to Avoid
Most egg projects go wrong in the same few ways.
Using cracked eggs. NC State says not to color eggs with cracked shells, and not to eat them.
Using non-food products on eggs you’ll eat. The FDA says to remove non-edible decorations before serving. When in doubt, keep that egg for display.
Leaving eggs out too long. NC State says four hours, and some pages say two. We use two for the hunt, since it’s the stricter number.
Skipping the fridge. Refrigerate dyed eggs promptly, and use them within seven days.
Mixing food eggs and craft eggs. Keep the two sets apart so nobody bites into a glitter egg.
Rushing the dye. Natural dye needs time. Soak longer for deeper color.
FAQ
Can you eat Easter eggs you’ve dyed?
Yes, if you used food coloring or food-grade dye and the eggs stayed cold. NC State Extension says to use food coloring or food-grade dye for eggs you plan to eat.
How long do hard-cooked Easter eggs last?
NC State says to use cooked eggs within one week. Keep them in the refrigerator.
How do you hard-cook eggs for dyeing?
Cover eggs with water by one inch and bring to a boil. Turn off the heat and let them stand covered for 15 minutes, then cool them in ice water.
Is edible glitter safe on Easter eggs?
Only if it lists its ingredients and says it’s edible. The FDA says a “non-toxic” label with no ingredients list shouldn’t go on food.
Can you eat eggs decorated with markers?
Only with markers made for food. Regular markers, paint and nail polish are for display eggs only.
How do you dye eggs naturally?
Simmer cabbage, onion skins, beets or turmeric in water for 15 to 30 minutes, then strain. Add 1 tablespoon of vinegar per cup and soak the eggs in the refrigerator.
Related Posts
Never miss an update — choose FarmFoodFamily as your preferred source on Google.
How it works: Tap the button below to open Google's settings page, then check the box next to FarmFoodFamily.
Tap the checkbox to turn it blue — that's how you know it's set.