20 Clever Ways to Repair and Reuse Your Favorite Things (Without Making Them Unsafe)
A cracked cup, a torn sofa, or a worn pair of shoes can get a second life, as long as you know which repairs are for show only.

Never miss an update — choose FarmFoodFamily as your preferred source on Google.
How it works: Tap the button below to open Google's settings page, then check the box next to FarmFoodFamily.
Tap the checkbox to turn it blue — that's how you know it's set.
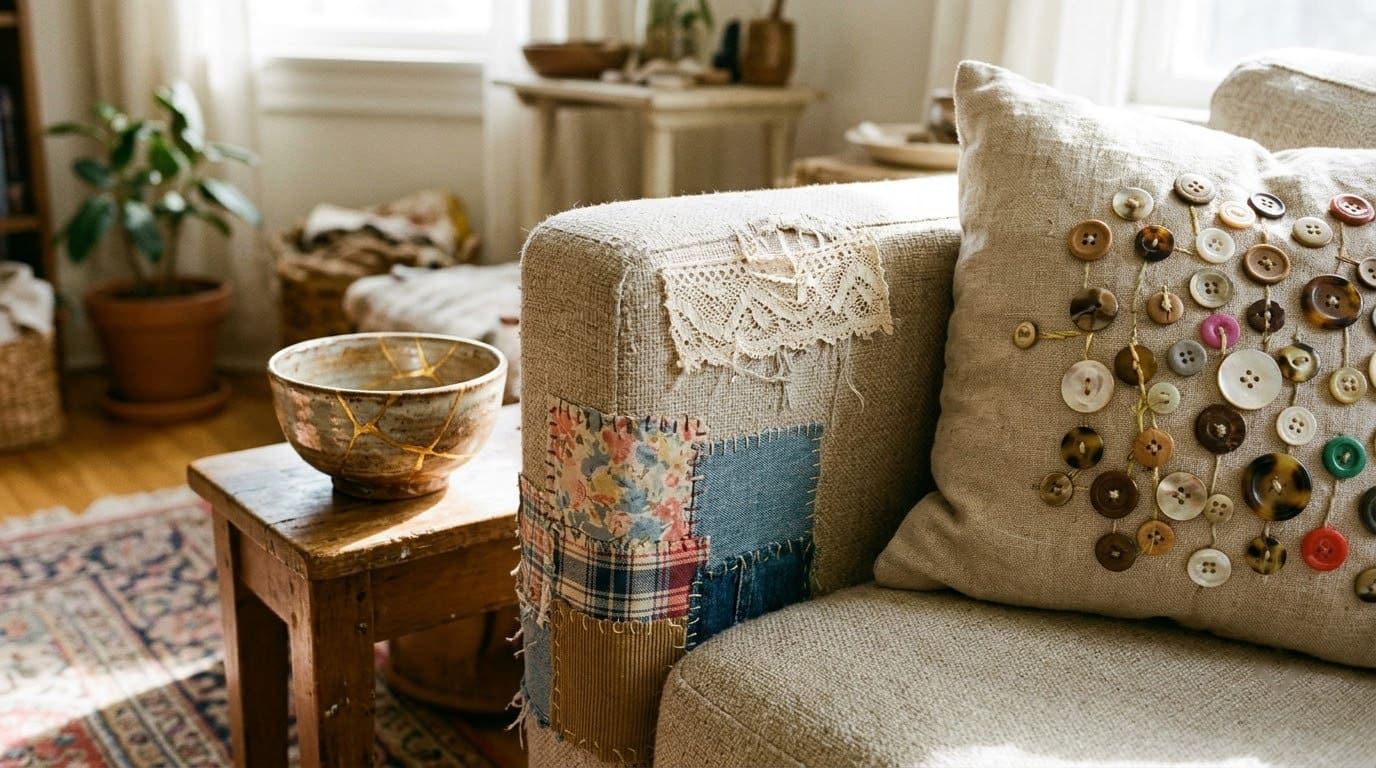
A cracked cup, a torn sofa, or a worn pair of shoes can get a second life, as long as you know which repairs are for show only.
Products We Recommend
This post contains affiliate links. We may earn a commission on qualifying purchases at no extra cost to you.

Fabric Glue Permanent, 60 ML Washable Clear Clothing Glue
Clear fabric glue for patches, denim, and flats (ideas 3 and 18)
Shop Now
PLANTIONAL Upholstery Repair Sewing Kit, 47PCS
Heavy duty needles and thread for sofas, cushions, and chair seats
Shop Now
NoCry Clear Safety Glasses, Anti-Fog, ANSI Z87
Eye protection for cutting CDs, tile, and glass
Shop NowMost of us keep a few favorite things that are almost ruined. A mug with a chip, a sofa with a tear, or a pair of flats with scuffed toes can all be saved.
The risk is that some repairs make an item unsafe. This guide gives you 20 repair ideas plus the glue, lead, and old paint rules that most lists skip.
In this article
Answer 4 quick questions and get matched to the exact fix for your yard — drainage, budget, layout, or something else entirely.
Take the Free QuizWhat’s the Quick Answer for Repairing and Reusing Favorite Things?
Treat repaired ceramics as decorative only. Lakeside Pottery says repaired cracks, chips, and breaks are never food safe. It says not to use restored items with liquids, heat, oils, or food.
Be careful with old dishes. The FDA lists antique, handmade, and damaged or excessively worn pottery as problem types. It says no amount of washing or boiling can remove lead.
Do not sand old paint dry. The EPA says homes built before 1978 are more likely to have lead paint. It says to fix small damaged areas without sanding, and to wet the area first if you must sand.
Use soft, flexible patches on fabric and shoes. Save glue and mosaic for display pieces. Wear gloves and eye protection when you cut glass, tile, or old CDs. Test every glue on a hidden spot first.
Which Repairs Are Safe for Daily Use?
This table is our own planning guide. The ceramics rows follow Lakeside Pottery and the FDA. The rest is general practice.


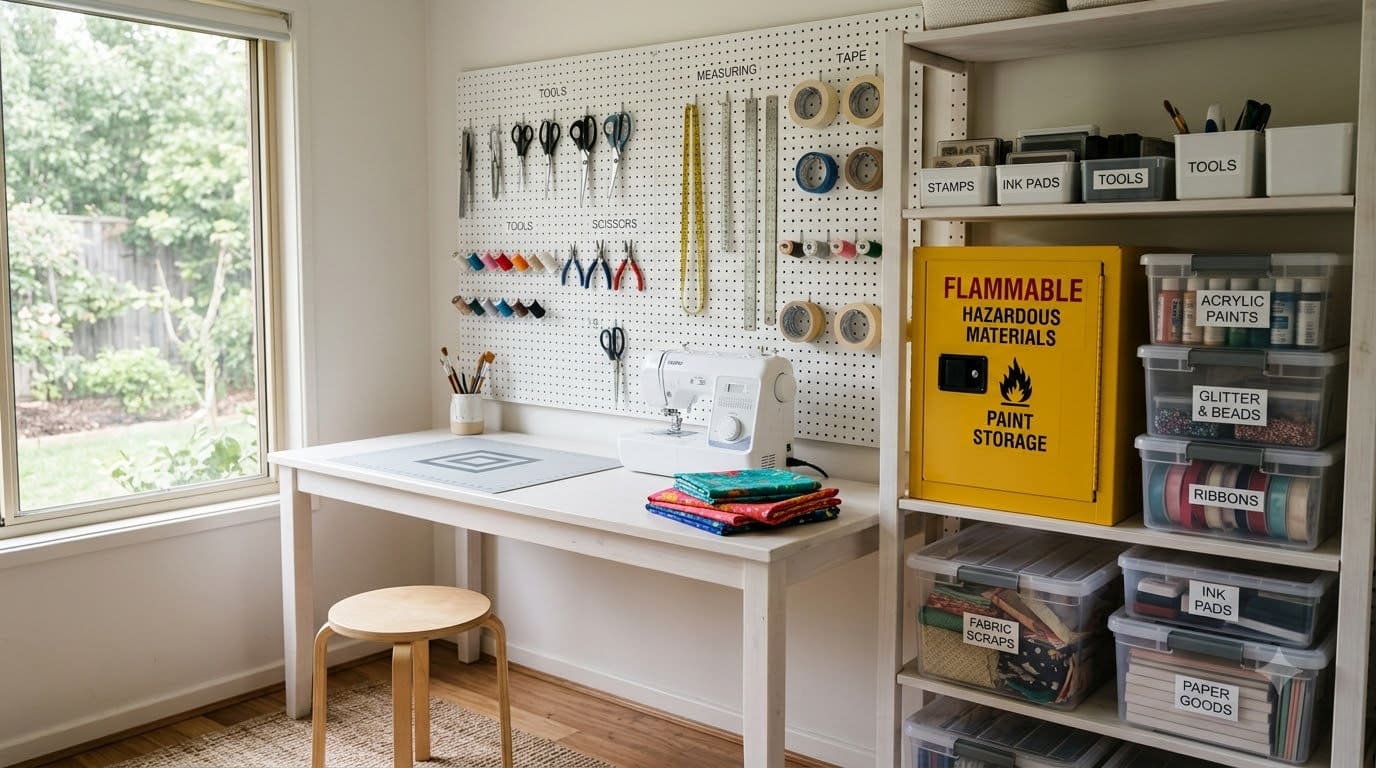
| Item | Repair idea | Daily use? | Display only? |
|---|---|---|---|
| Clothes and shoes | Patches, stitching, tape | Yes | No |
| Sofa and chairs | Lace, buttons, new fabric | Yes | No |
| Cup or mug | Glue, gold accents | No | Yes |
| Plate or bowl | Glue, mosaic | No | Yes |
| Mirror | Mosaic over crack | No | Yes |
| Flowerpot | Glue and drain hole | Yes, for plants | No |
Most yard problems trace back to one specific, fixable cause. Find yours in 4 quick questions.
Take the Free Quiz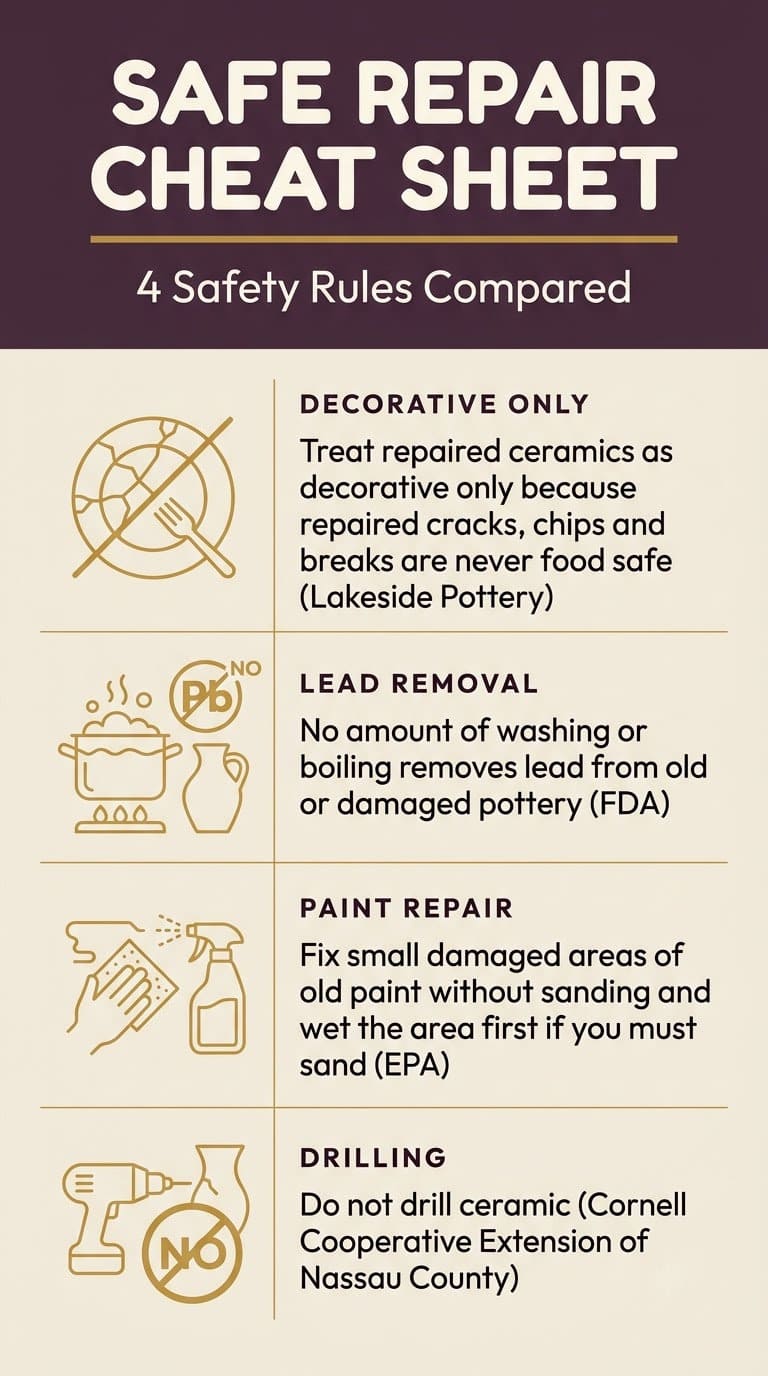
Why Should a Mended Cup Never Hold Your Coffee?
Lakeside Pottery is a pottery seller, so treat it as one view. It says two-part epoxies, super glues, and polyurethane glues have not been validated as food-contact repairs. It lists well-known brands in those groups.
It also says a food-contact label on a glue does not make a repaired cup safe. Restored pieces should not go in the dishwasher, microwave, or oven.
The FDA adds a second concern. Old, handmade, or damaged pottery can release lead. If you cannot test a piece or confirm the maker, the FDA says to consider not using it for food or drinks.
So a mended cup is a shelf piece. Use it for pens, small plants, or display. Never for tea.
Is Your Old Furniture Safe to Sand or Scrape?
The EPA says paint in homes built before 1978 is more likely to contain lead. It says intact paint is usually not a problem, but chipping and peeling paint can become a hazard.
For a small damaged area under six square feet, the EPA says to fix it without sanding. If sanding cannot be avoided, wet the area first. It also says not to remove lead paint yourself.
Settled lead dust can rise again when you sweep or vacuum. The EPA says to wet-mop and wet-wipe hard surfaces.
Clear fabric glue for patches, denim, and flats (ideas 3 and 18)
Shop NowThis post contains affiliate links. We may earn a commission on qualifying purchases at no extra cost to you.
What Glue and Tools Do You Need?
Match the glue to the job. Fabric glue suits patches. Wood glue suits chair joints. Epoxy suits display ceramics. Never use any of them for food contact.
Gather a needle and thread, fabric scissors, a small brush, and clamps. Add wet wipes and a respirator mask if you sand.
The average homeowner spends $616/year on yard fixes that don't address the real problem. Find out what yours actually is — before you spend another dollar.
Take the Free QuizWork on a protected surface. Test each glue on a hidden spot first. Let every repair cure for the time on the label. Keep glue, paint, and small buttons away from children and pets while you work.
How Do You Decide What Is Worth Repairing?
Ask three questions. Do you love it? Is the damage small? Can you fix it without a risky material?
Fabric, shoes, and furniture are good candidates. They take stitches, patches, and glue well, and a repair rarely makes them unsafe. Ceramics are good for display. They are risky for food.
Skip items that protect you. A cracked helmet, a frayed climbing rope, or a split car seat belt should be replaced. A craft repair does not restore their strength.
Set a time limit. If a repair takes more than an afternoon, ask whether a professional would do it better. A tailor or an upholsterer often charges less than a replacement.
How Do You Care for a Repaired Item?
Keep a mended piece out of harsh conditions. Heat, direct sun, and soaking can loosen glue. Lakeside Pottery says never to put restored items in a dishwasher, microwave, oven, or direct sunlight.


Wash patched clothes by hand or on a gentle cycle. Turn them inside out first. Dry them flat so patches do not pull.
Check stitches and glue lines every few months. Reinforce them early. A small fix now keeps the repair from failing at a bad moment.
Label display-only ceramics. A small note under a mended cup keeps guests, and children, from using it for a drink.
20 Clever Ways to Repair and Reuse Your Favorite Things
Each idea lists what you need, the steps, a detail that makes the repair last, and a note on time and cost. Ideas 4, 10, 12 to 17, 19, and 20 lean on the sources in this guide. The rest use general repair practice that we planned ourselves.
1. Glitter Refresh for Worn Heels
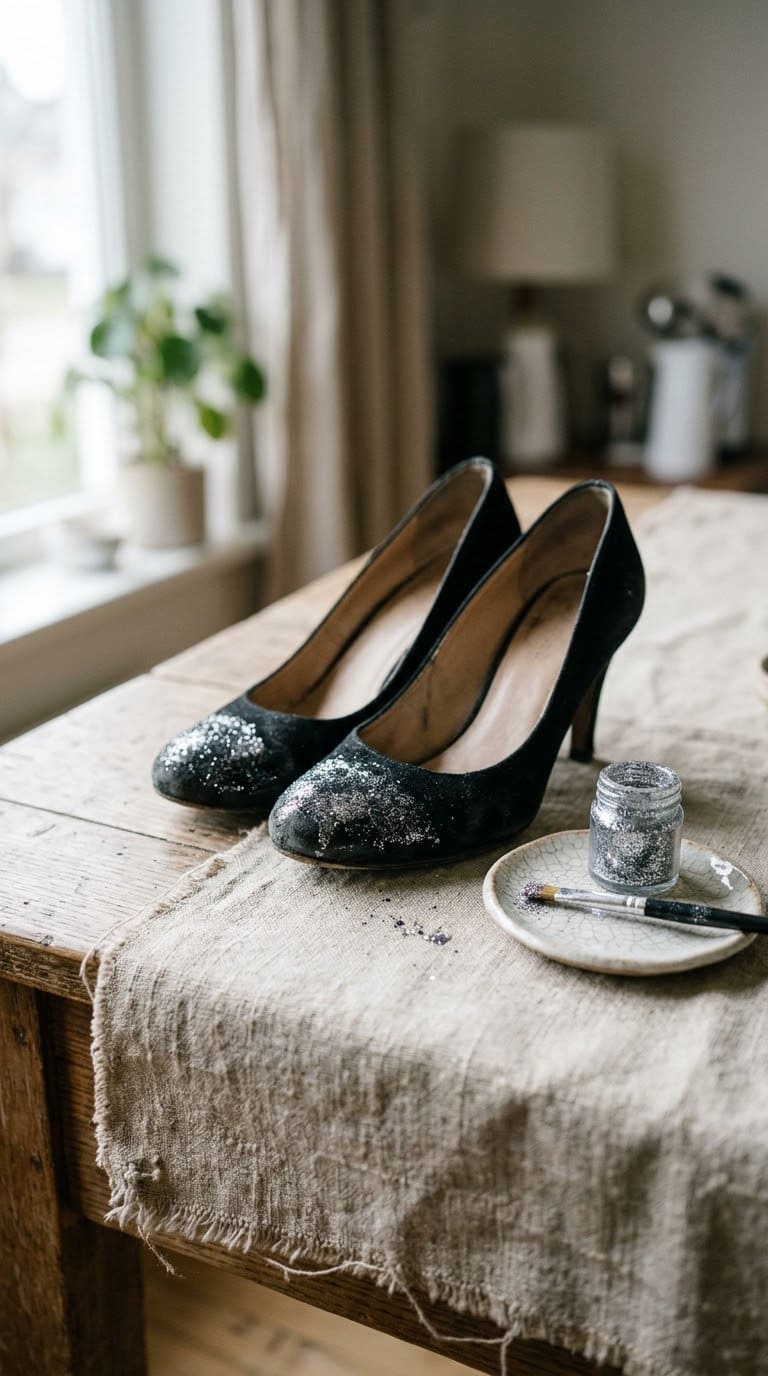
What you need: Shoe-safe craft glue, fine glitter, a small brush, a clear shoe sealer, and a soft cloth.
Steps:
- Wipe the heel with a damp cloth and let it dry fully.
- Brush a thin coat of glue over the scuffed area only.
- Press fine glitter onto the glue and tap off the extra.
- Let it dry, then add a thin coat of clear sealer.
- Repeat the sealer once the first coat is dry.
Detail that helps: Work on a tray so you can pour the extra glitter back into the jar. A second light coat of glitter covers thin spots better than one thick coat.
Care: Glitter wears off with hard use. Keep these shoes for occasions, not for daily walking.
Time and cost: about 30 minutes plus drying, very low cost.
2. Colored Tape on a Bike Seat
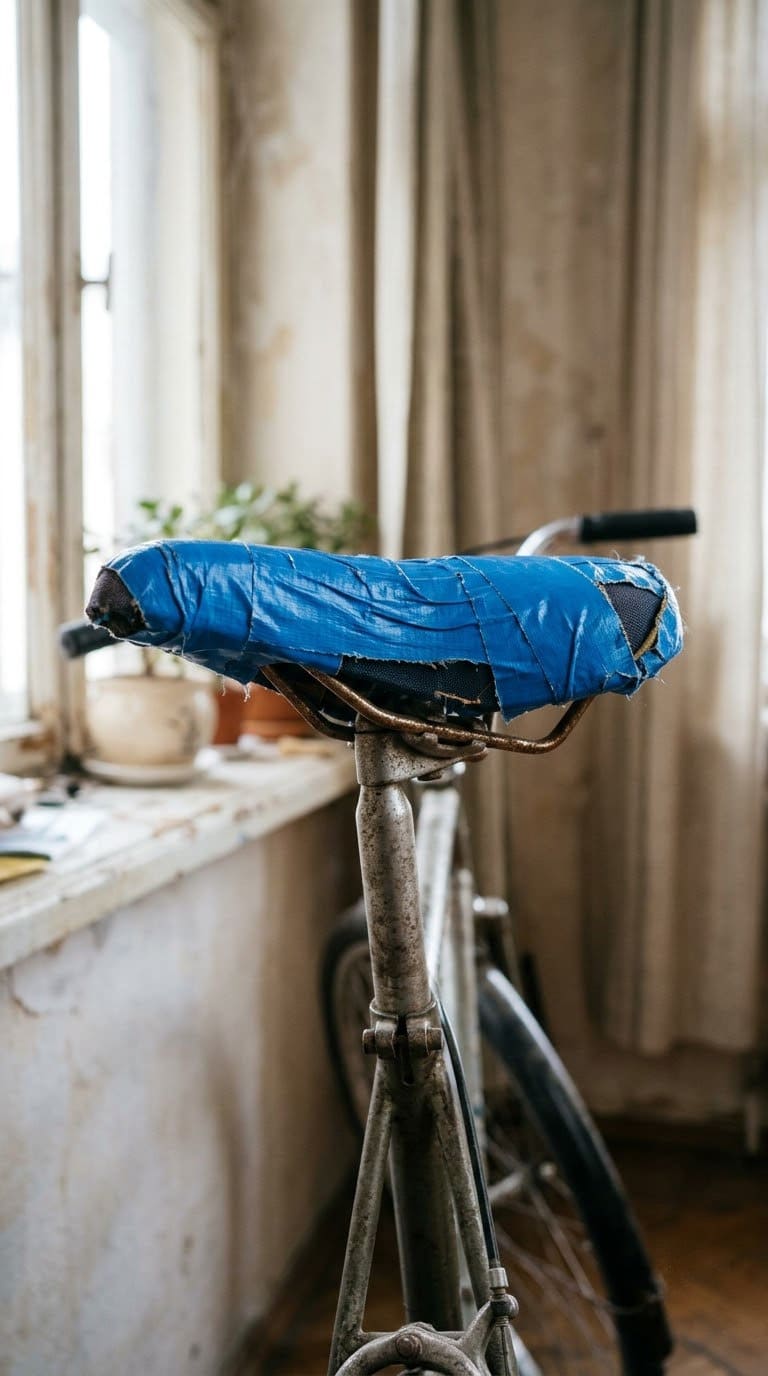
What you need: Weatherproof cloth or vinyl tape, scissors, and a scrap of thin fabric.
Steps:
- Trim loose cover material around the tear with scissors.
- Press a thin patch of fabric over the tear to hold the foam in.
- Start the tape at the back of the seat and wrap forward.
- Overlap each wrap by half and stretch it lightly.
- Finish under the seat so the end cannot peel up.
Detail that helps: Choose weatherproof tape if the bike lives outside. Our guide to types of tapes compares options.
Care: If the foam is gone or the seat frame is cracked, replace the seat. Tape only fixes the cover.
Time and cost: about 15 minutes, very low cost.
3. Fabric Patch on Worn Flats
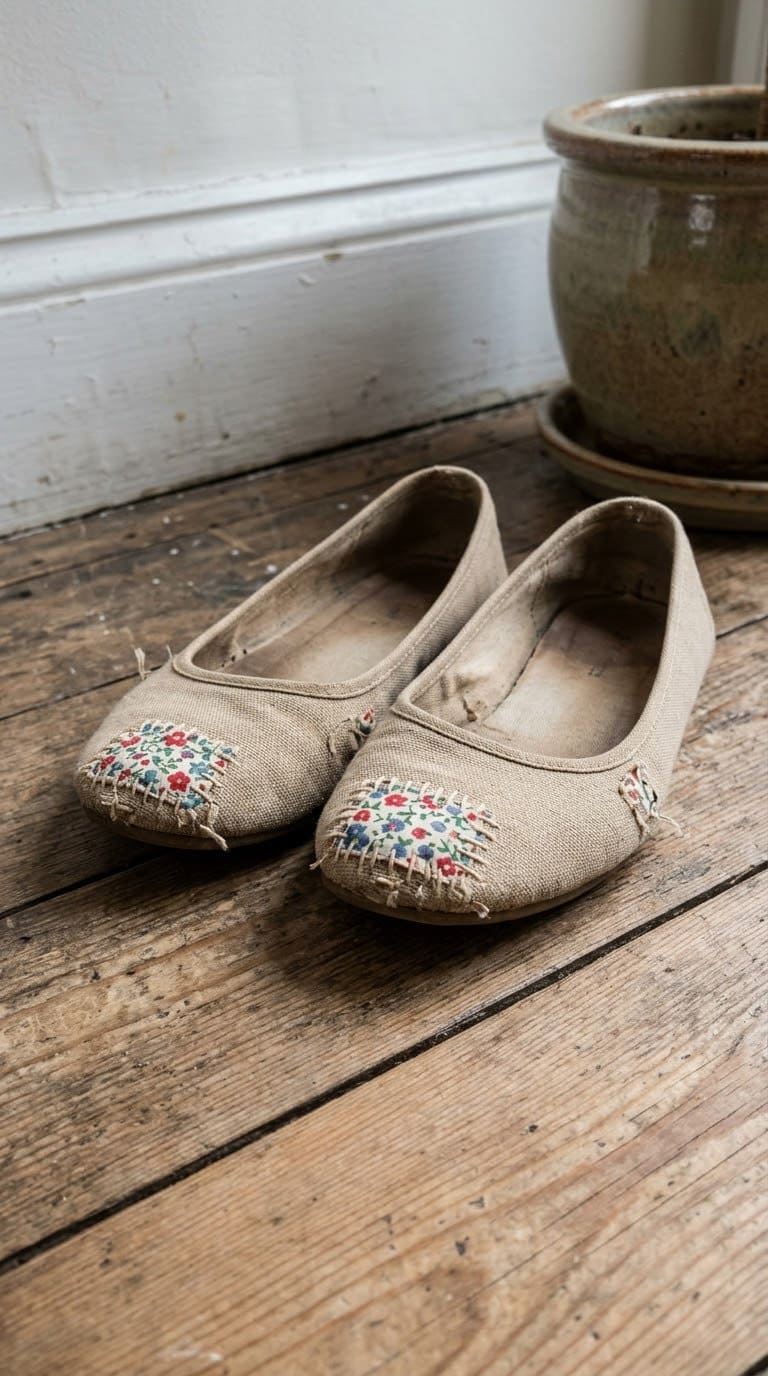
What you need: Fabric scraps, washable fabric glue, scissors, and a flat weight such as a heavy book.
Steps:
- Clean the toe with a damp cloth and let it dry.
- Cut a patch about a quarter inch larger than the worn area.
- Round the corners so they do not catch and peel.
- Spread a thin layer of glue and press the patch in place.
- Weight it flat until the glue sets.
Detail that helps: Thin cotton hugs a curved toe better than stiff fabric. A pattern turns a repair into a feature.
Care: Fabric glue holds best on dry, clean surfaces. Spot clean the flats and do not soak them.
Time and cost: about 20 minutes plus setting, very low cost.
4. Visible Mending on Jeans
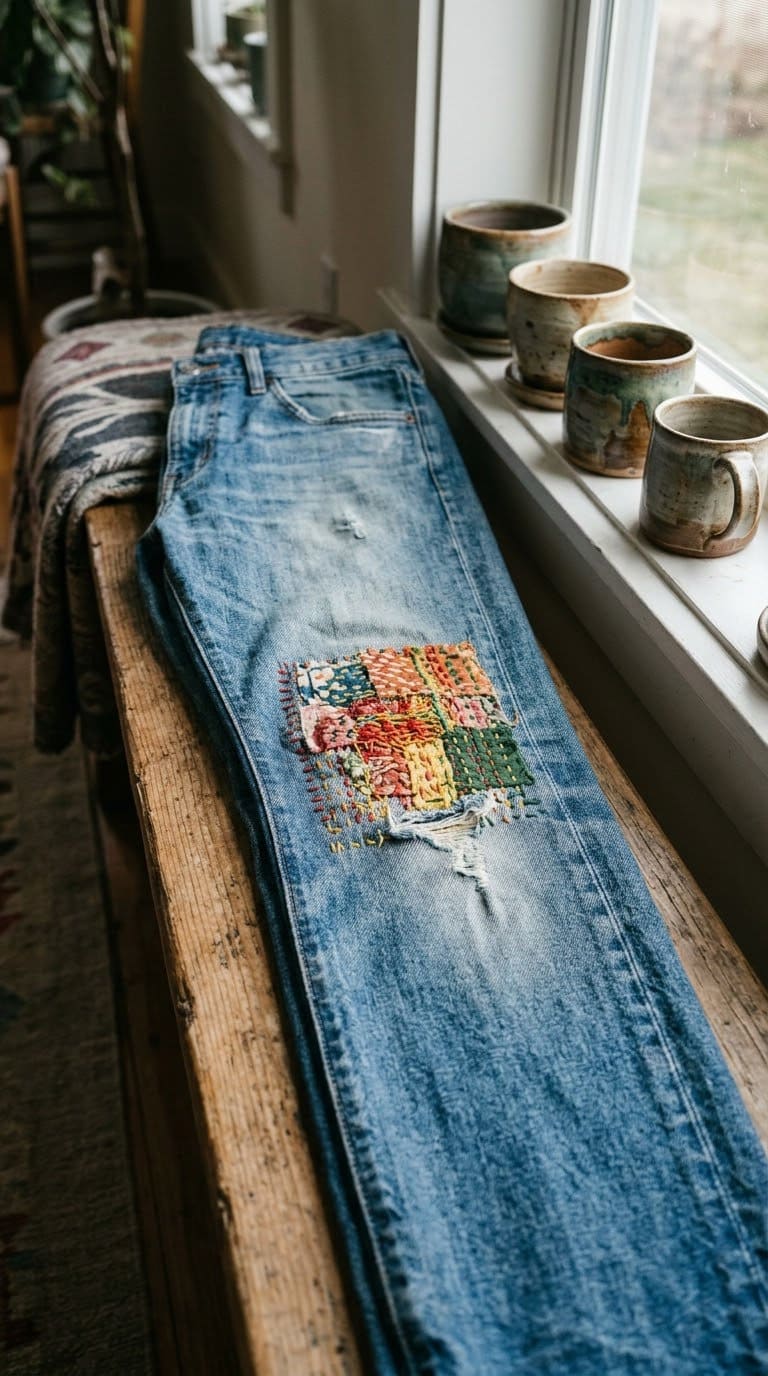
What you need: A needle, thread, fabric scissors, pins, and a scrap of similar denim.
Steps (following the iFixit denim darning guide):
- Trim the frayed ends around the hole.
- Cut a denim patch that extends at least 1/2 inch beyond the hole on every side.
- Turn the jeans inside out and pin the patch over the hole.
- Cut about 3 feet of thread, thread the needle, and tie a small square knot.
- Stitch around the patch edge until it is fully attached.
- Turn the jeans right side out and lay parallel rows of stitches across the hole, starting about 1/2 inch beyond it.
- Weave the needle over and under those rows in the other direction.
- Pull the thread tight inside the leg, knot it, and trim the end.
Detail that helps: iFixit used a thicker, more visible thread so the stitches show. A thinner thread makes the repair less visible. Match the color for an invisible look.
Care: iFixit rates the job moderate and says it takes 1 to 2 hours. Store needles safely after use.
Time and cost: 1 to 2 hours, very low cost.
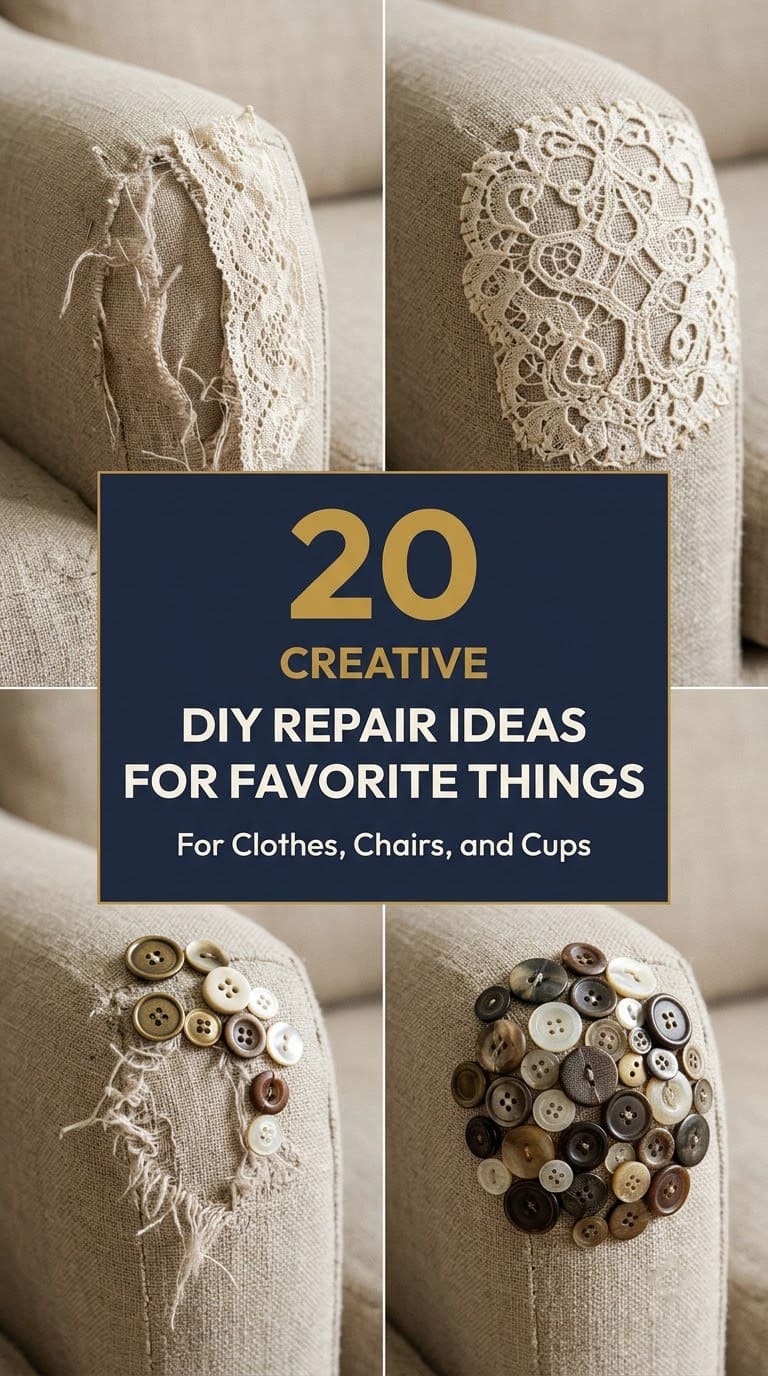
5. Lace Over a Sofa Tear
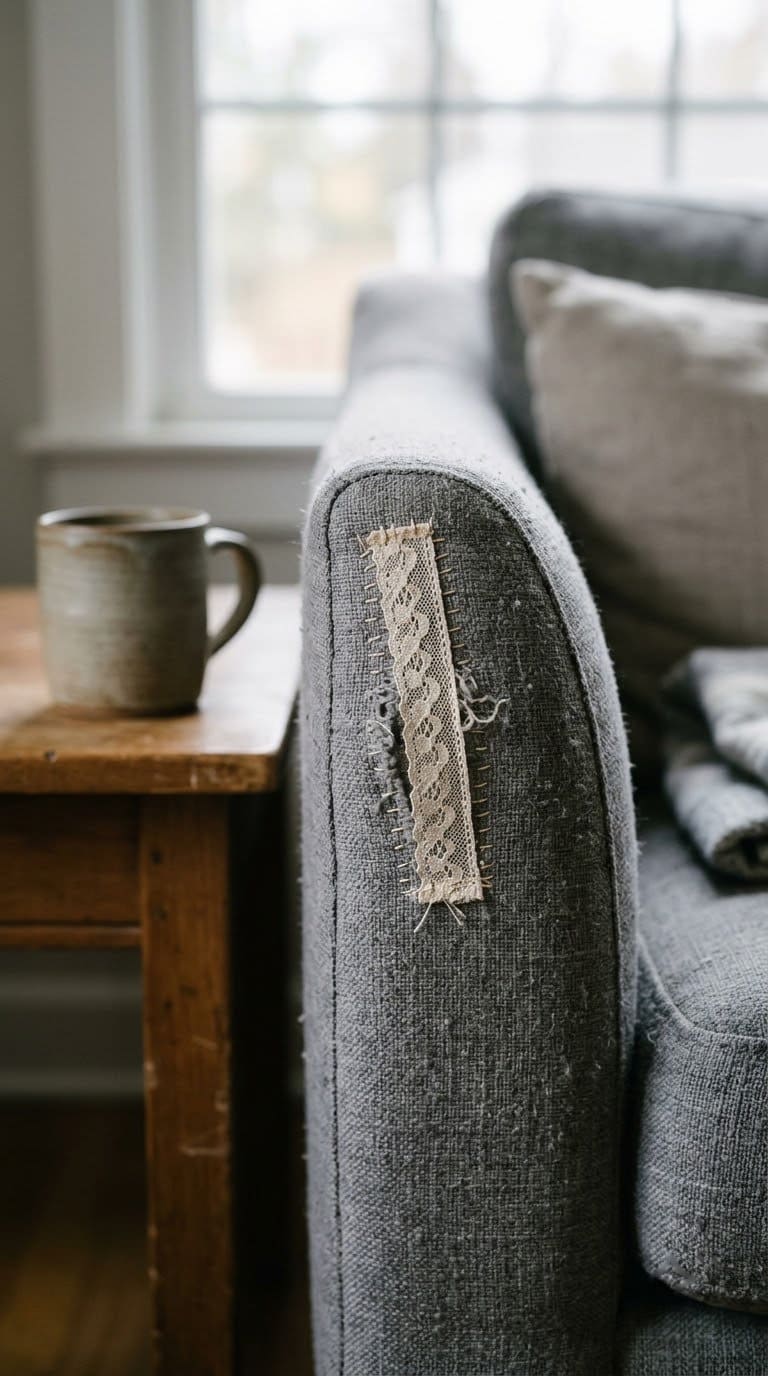
What you need: A strip of lace, matching thread, a needle, scissors, and pins.
Steps:
- Trim any loose threads around the tear.
- Cut a lace strip an inch longer than the tear on each end.
- Pin it flat over the tear and check how it looks.
- Hand-stitch around the edges with small stitches.
- Go past the tear on every side so the stitches sit on strong fabric.
Detail that helps: Choose a lace weight close to the sofa fabric. A heavy lace on thin fabric will pull and pucker.
Care: Check the sofa cleaning code before you wash. Vacuum gently around the lace.
Time and cost: about 45 minutes, low cost.
6. Buttons Over Worn Sofa Spots
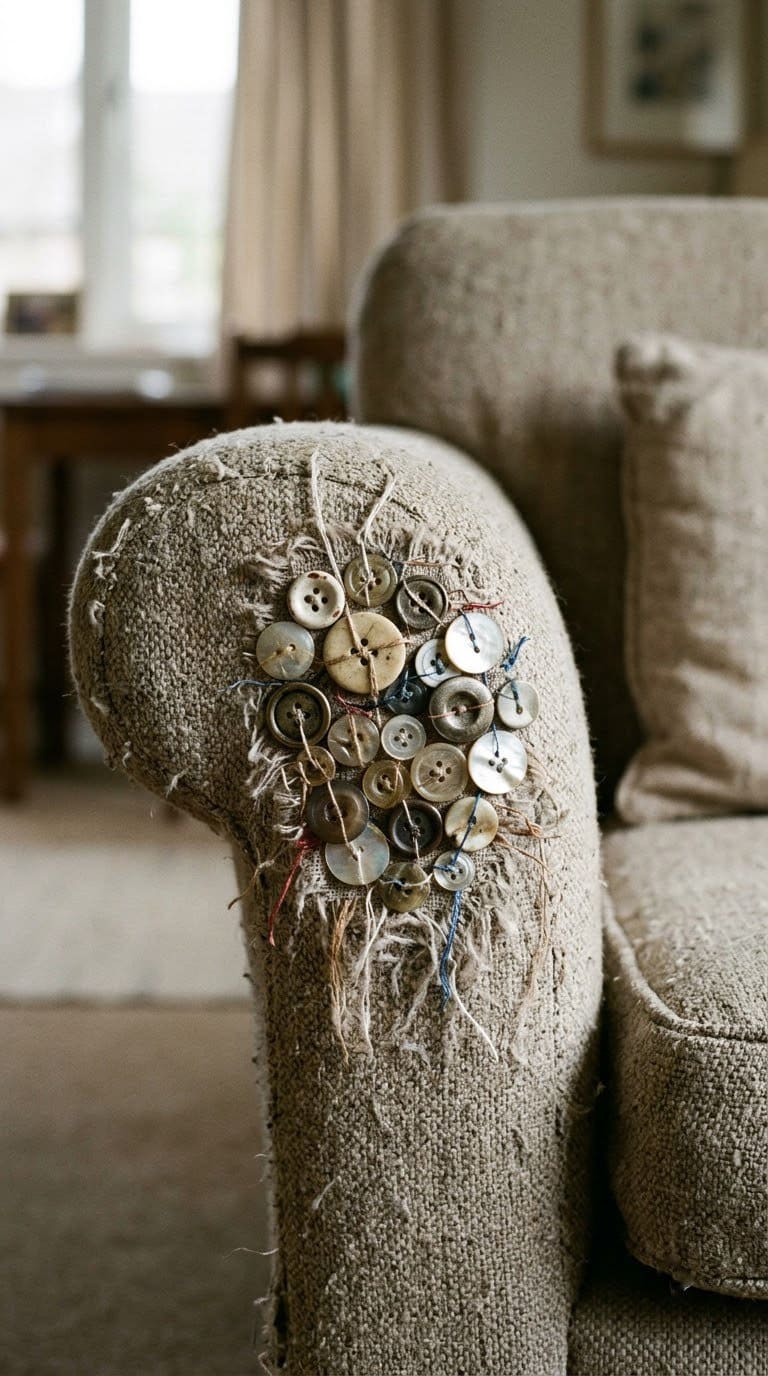
What you need: A mix of buttons, strong thread, a sturdy needle, and a thimble if you have one.
Steps:
- Lay the buttons out on the worn spot to plan the cluster.
- Thread the needle with a double strand of strong thread and knot the end.
- Sew each button on with at least four passes through each hole.
- Knot the thread under the button and cut the tail.
- Add buttons until the worn patch is covered.
Detail that helps: Mix sizes and colors for a collected look. Sew the biggest buttons first, then fill gaps with small ones.
Care: Keep buttons away from areas where small children sit. Check them every few months and tighten any loose stitches.
Time and cost: about an hour, low cost.
7. Belt-Woven Chair Seat
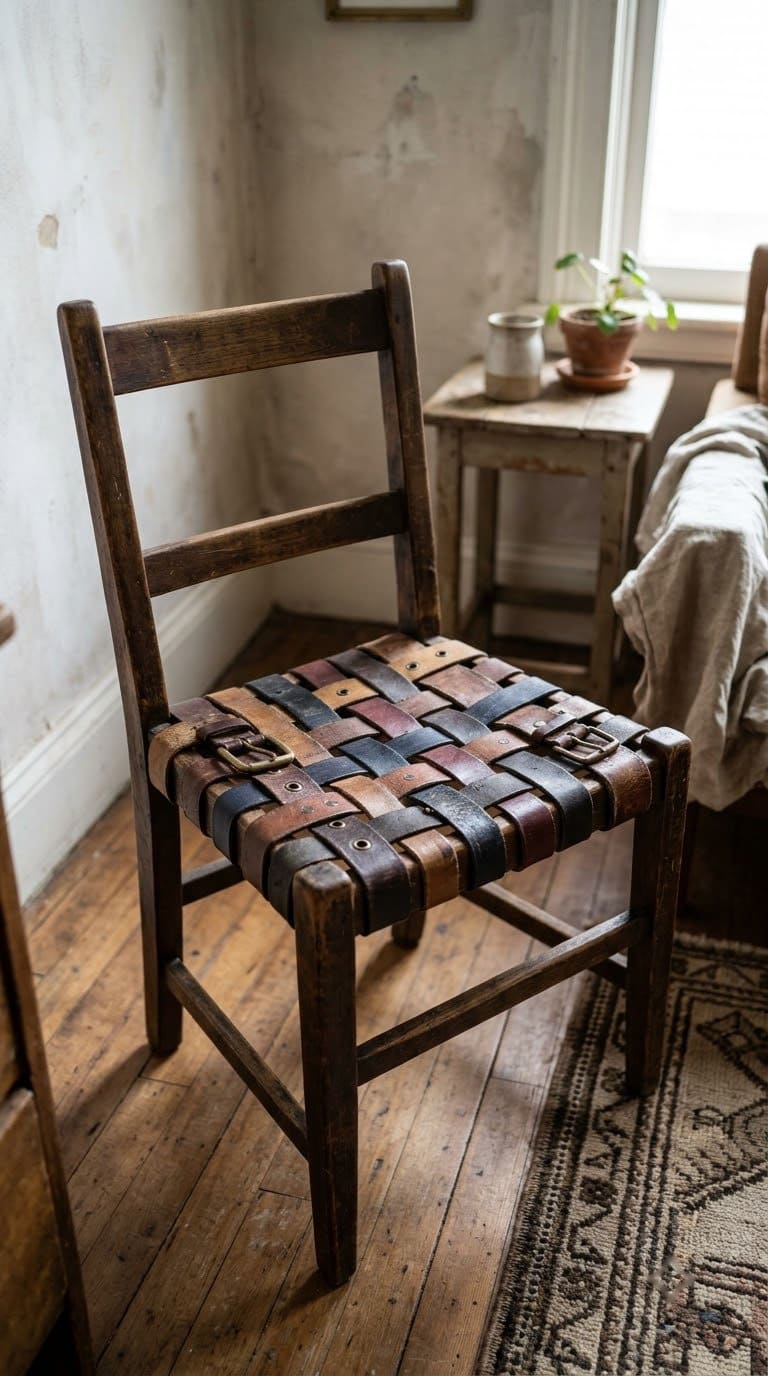
What you need: Old belts of the same width, a staple gun, a screwdriver, scissors or a utility knife, and a tape measure.
Steps:
- Unscrew the seat and remove the old cover and padding if worn.
- Measure the frame and cut belts to the length plus a few inches.
- Staple the first set of belts across the frame, pulled snug.
- Weave the second set over and under the first.
- Pull each belt tight and staple the ends underneath.
- Screw the seat back in place.
Detail that helps: Belts of the same width give a tidy weave. Mixing colors gives a patchwork look.
Care: Cut belts cleanly and file any rough metal buckle edges. Leather can stretch, so retighten after a month.
Time and cost: about 2 hours, low cost.
8. New Fabric on a Chair Seat
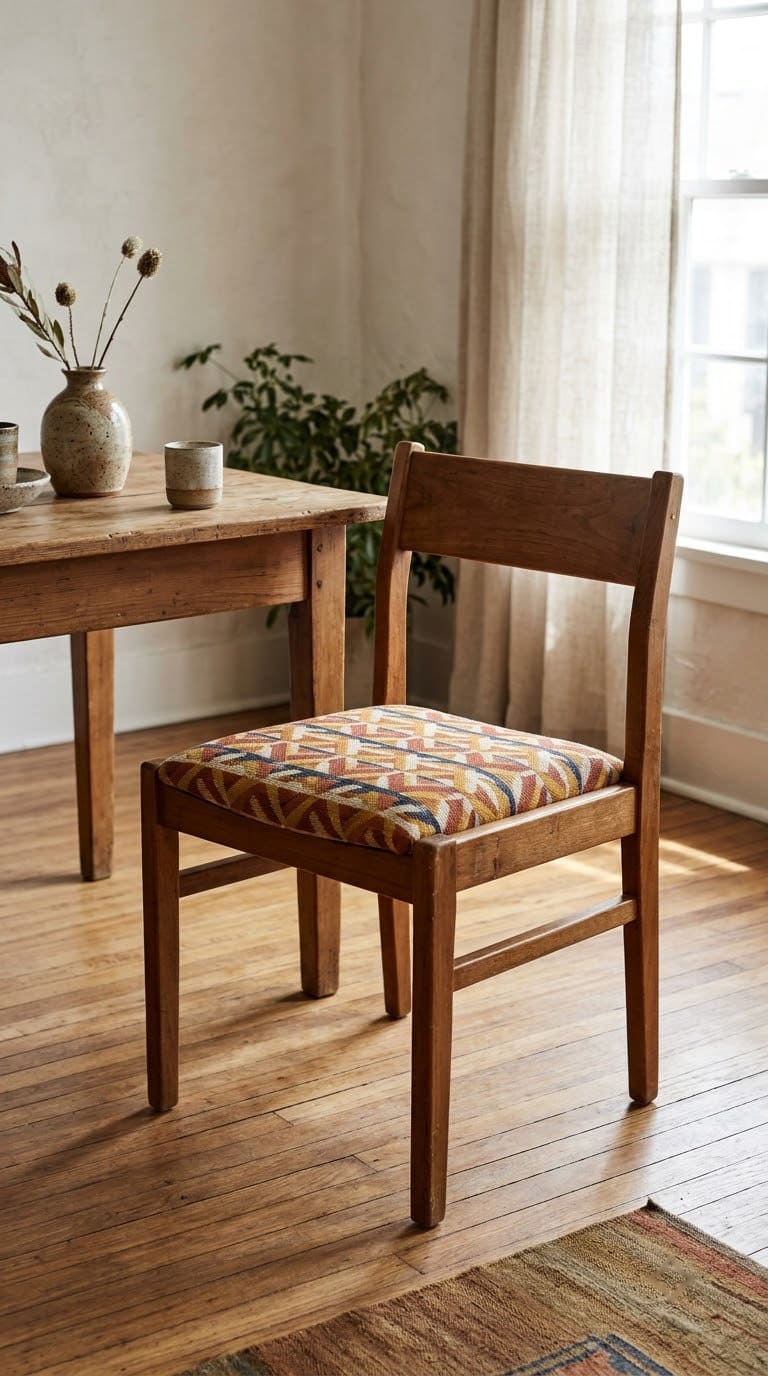
What you need: Sturdy fabric, a staple gun, a screwdriver, scissors, and foam if the old padding is flat.
Steps:
- Unscrew the seat from the chair frame.
- Pull out old staples and set the old fabric aside as a pattern.
- Lay the new fabric face down and center the seat on it.
- Pull the fabric over the edge and staple at the middle of each side first.
- Work toward the corners, pulling evenly.
- Fold the corners neatly and staple them last.
- Trim extra fabric and screw the seat back on.
Detail that helps: Stapling the four middle points first keeps the pattern straight. Check the foam and replace it if it is crumbly.
Care: If you repaint an old chair frame, see the EPA note above about sanding. Do not dry sand paint on a chair from an older home.
Time and cost: about an hour, low cost.
9. Reglue a Loose Chair Joint
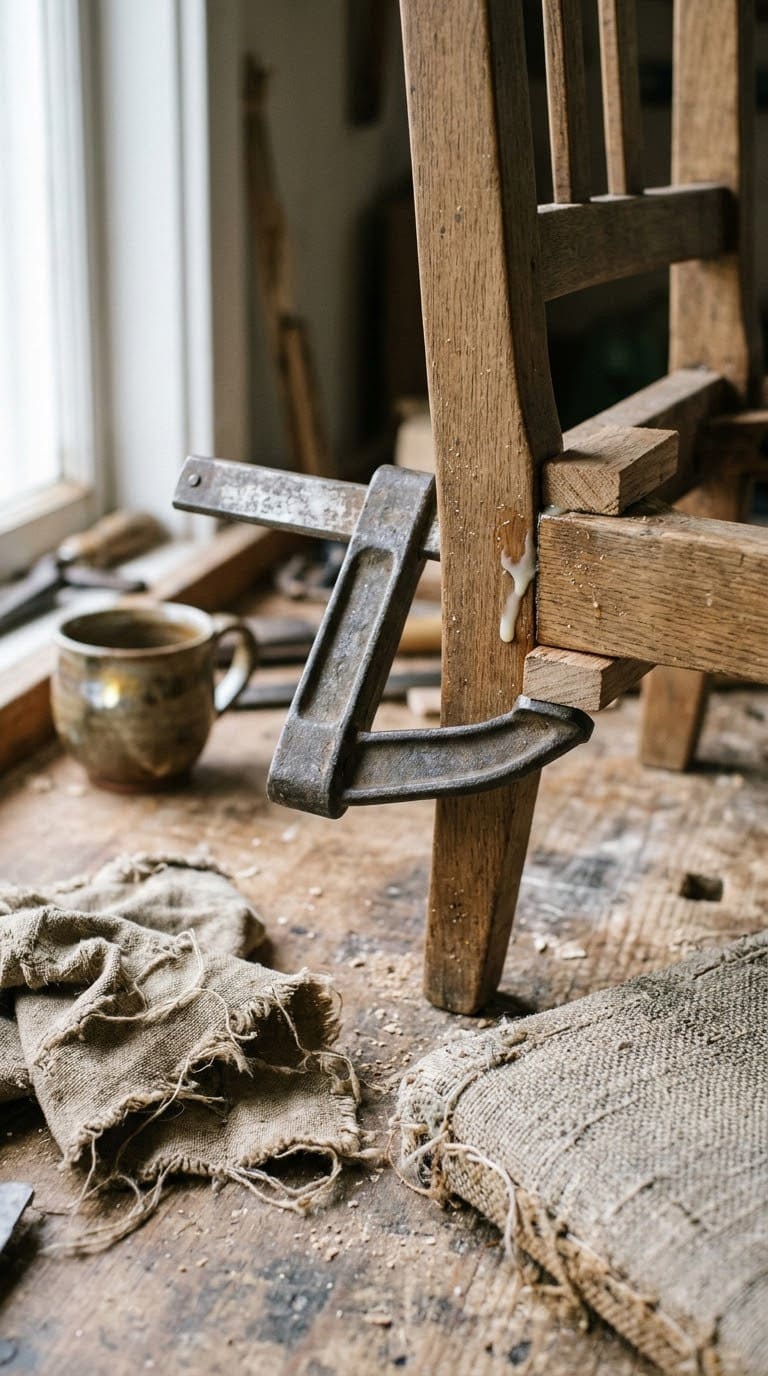
What you need: Wood glue, a clamp or strap clamp, a small knife or scraper, and a damp rag.
Steps:
- Pull the loose joint apart gently.
- Scrape off old glue and dirt from both parts.
- Test fit the parts without glue to check the alignment.
- Spread fresh wood glue on both surfaces.
- Push the parts together and clamp them.
- Wipe away any glue that squeezes out.
- Leave the clamp on for the time on the glue label.
Detail that helps: Check that the chair sits flat before the glue sets, since a twisted frame will set that way. If the joint is loose again after regluing, it may need pins or a new part.
Care: Wait for the full cure before you sit on it. Do not stand on a chair you have just repaired.
Time and cost: about 30 minutes plus cure time, very low cost.
10. Painted Stencil Over a Scuffed Table
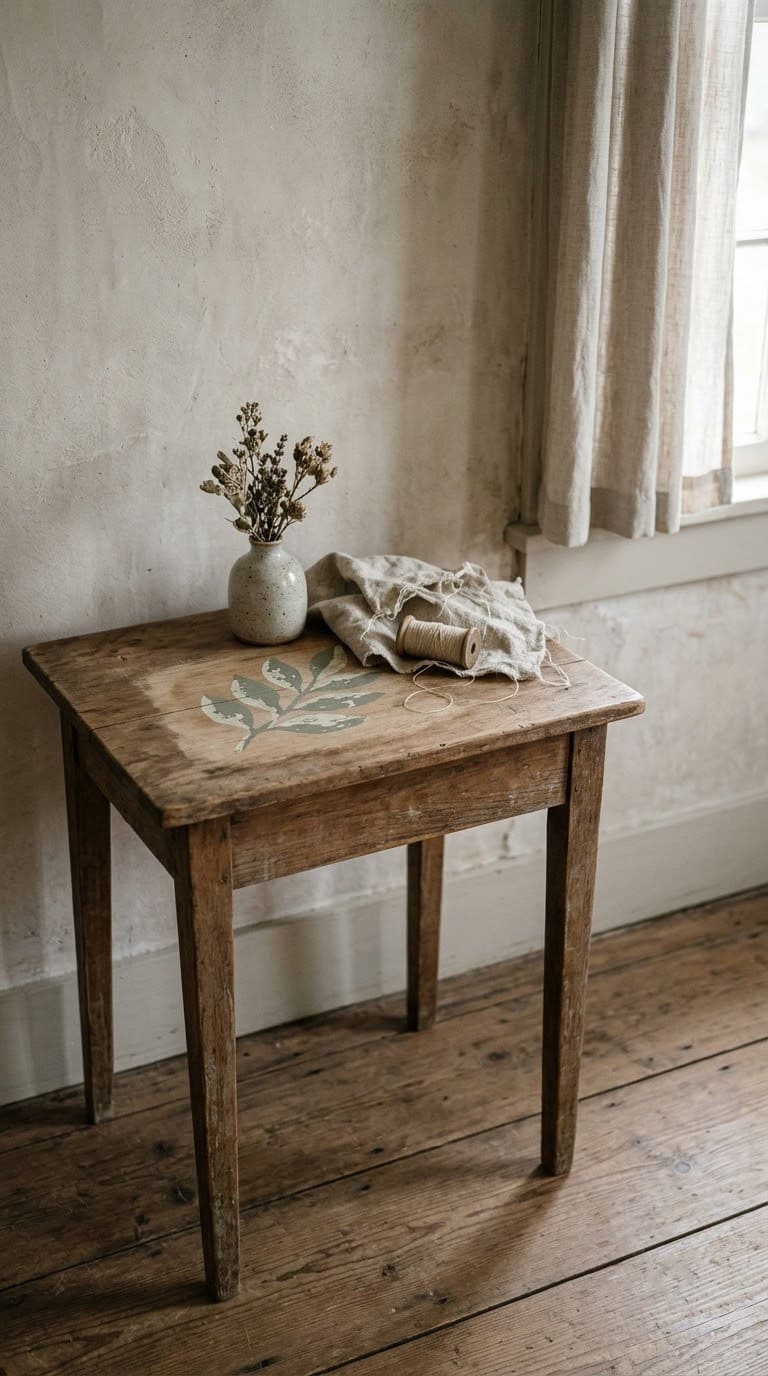
What you need: A stencil, painter’s tape, small craft paint, a stencil brush or sponge, and clear sealer.
Steps:
- Check the age of the table. If it may have lead paint, read the EPA points below.
- Wipe the scuffed area clean with a damp cloth.
- Tape the stencil over the scuff.
- Dab thin paint through the stencil with a sponge.
- Lift the stencil straight up and let the paint dry.
- Seal the design with a clear finish.
Detail that helps: Dab, do not brush, so paint does not creep under the stencil. The EPA says to fix small damaged areas under six square feet without sanding.
Care: If you must sand, the EPA says to wet the area first. It also says not to remove lead paint yourself and to wet-wipe dust afterward.
Time and cost: about 30 minutes plus drying, low cost.
11. Mosaic Over a Cracked Mirror
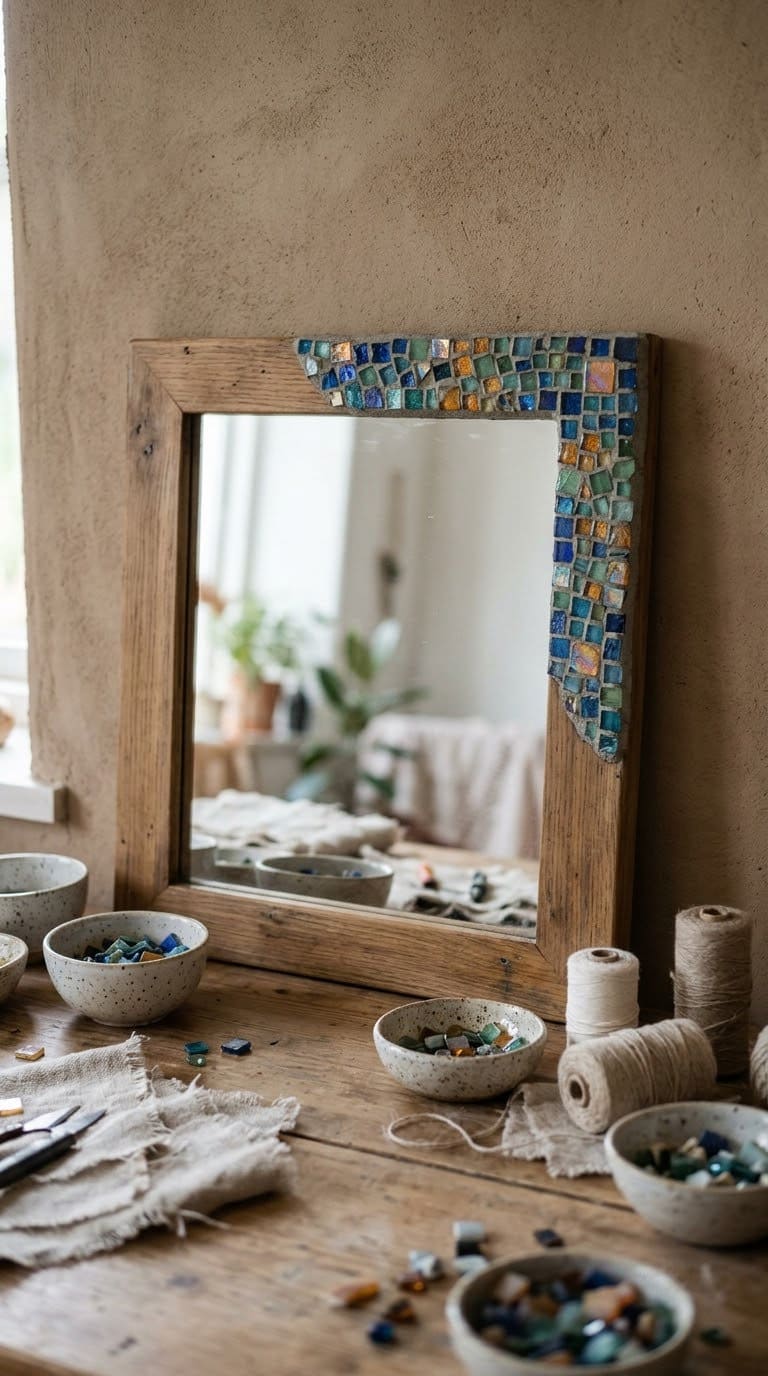
What you need: Glass tiles, strong adhesive, grout, a small trowel, gloves, and eye protection.
Steps:
- Take the mirror off the wall and lay it flat on a table.
- Wear gloves and eye protection.
- Tape over any loose cracked glass so it cannot fall.
- Glue the tiles over the cracked corner.
- Let the glue set, then grout between the tiles.
- Wipe off extra grout with a damp sponge.
Detail that helps: Plan the tile layout dry first. Cover only the damaged corner so the rest of the mirror still reflects.
Care: Glass edges are sharp. Dispose of loose shards in a puncture-proof container. See our guide to reusing broken mirrors.
Time and cost: about 2 hours plus drying, low cost.
12. Colored-Glue Mend on a Cup
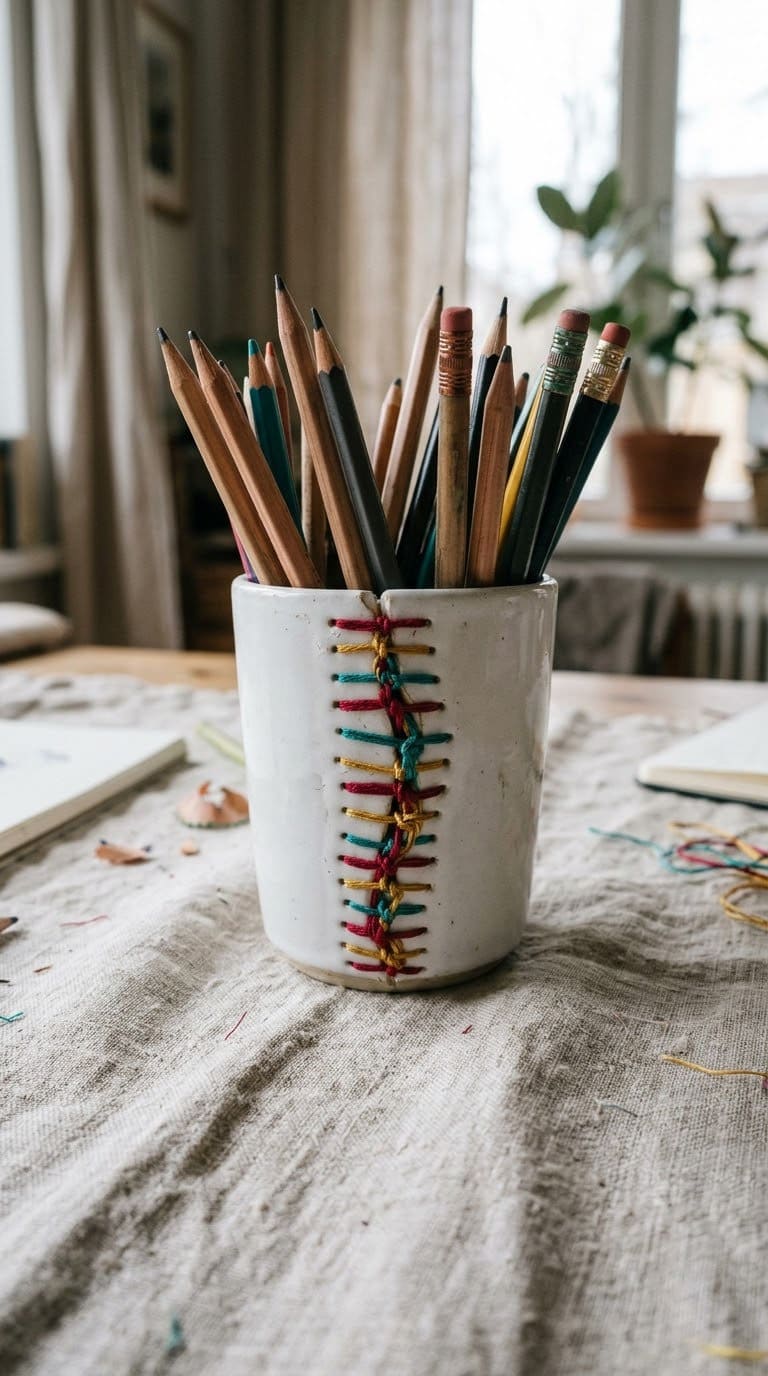
What you need: The broken pieces, a glue made for ceramics, a bit of tint, and masking tape.
Steps:
- Wash the pieces and let them dry fully.
- Do a dry fit to see how they join.
- Tint a small amount of glue if you want a colored seam.
- Apply glue to the edges and press the pieces together.
- Hold them with masking tape until the glue sets.
- Wipe away squeeze-out with a damp cloth.
Detail that helps: Lakeside Pottery says two-part epoxies, cyanoacrylate super glues, and polyurethane glues have not been validated as food-contact repairs. So treat the cup as a display piece.
Care: Lakeside says repaired cracks, chips, and breaks are never food safe. Use the cup for pens or small plants, never for drinks.
Time and cost: about 30 minutes plus glue cure, very low cost.
13. Gold Accent on a Cracked Bowl
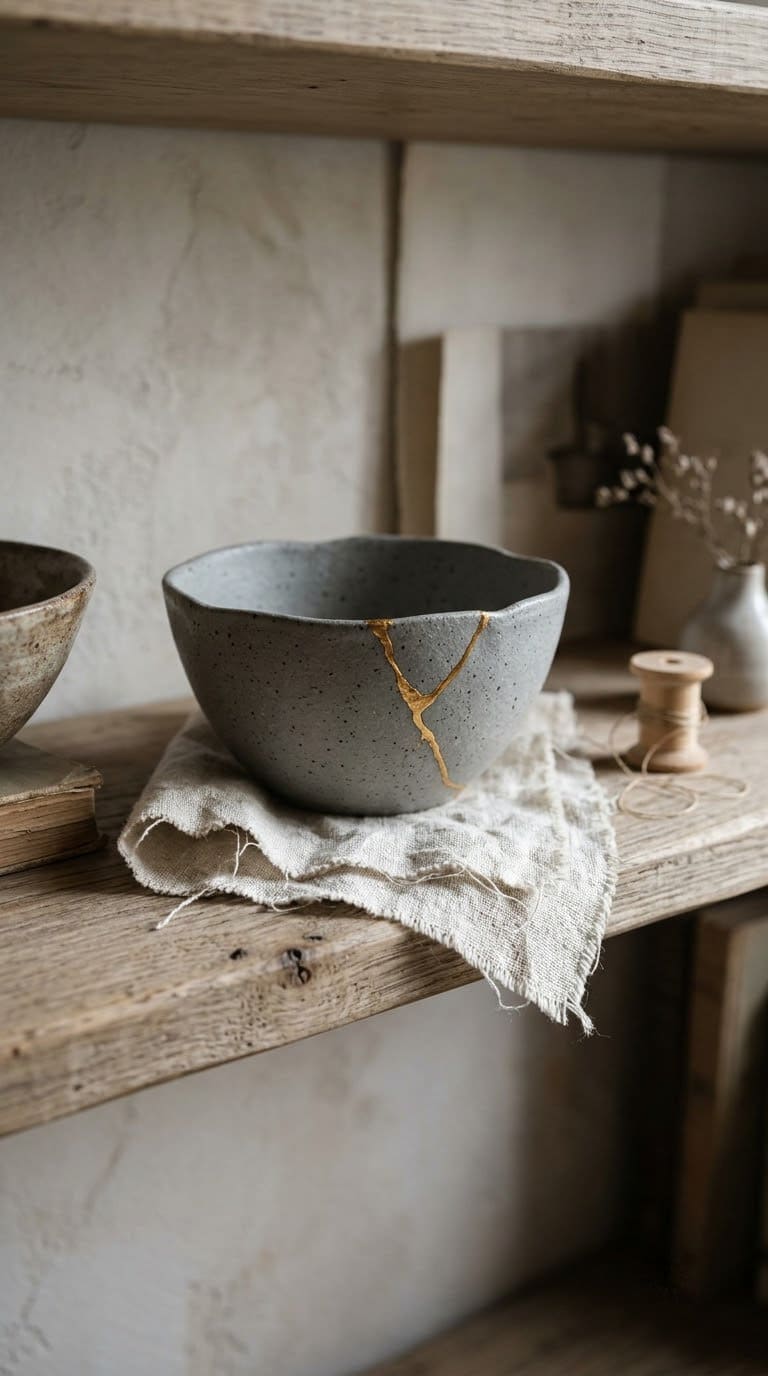
What you need: The broken pieces, ceramic glue, gold paint, a fine brush, and masking tape.
Steps:
- Wash and dry the pieces.
- Glue the pieces together and tape them until set.
- Scrape off squeeze-out once the glue is firm.
- Paint the seam with gold paint using a fine brush.
- Let the paint dry and add a second thin coat if needed.
Detail that helps: Lakeside Pottery says epoxy-based kintsugi is never food safe. Real urushi kintsugi can be food safe when fully cured, but even then, repaired vessels are best treated as decorative.
Care: Keep the bowl out of the dishwasher, the microwave, the oven, and direct sun. The FDA notes that decorative-only pieces may be stamped “Not for Food Use”. A small label under the bowl does the same job.
Time and cost: about 45 minutes plus drying, low cost.
14. CD Mosaic Wall Plate
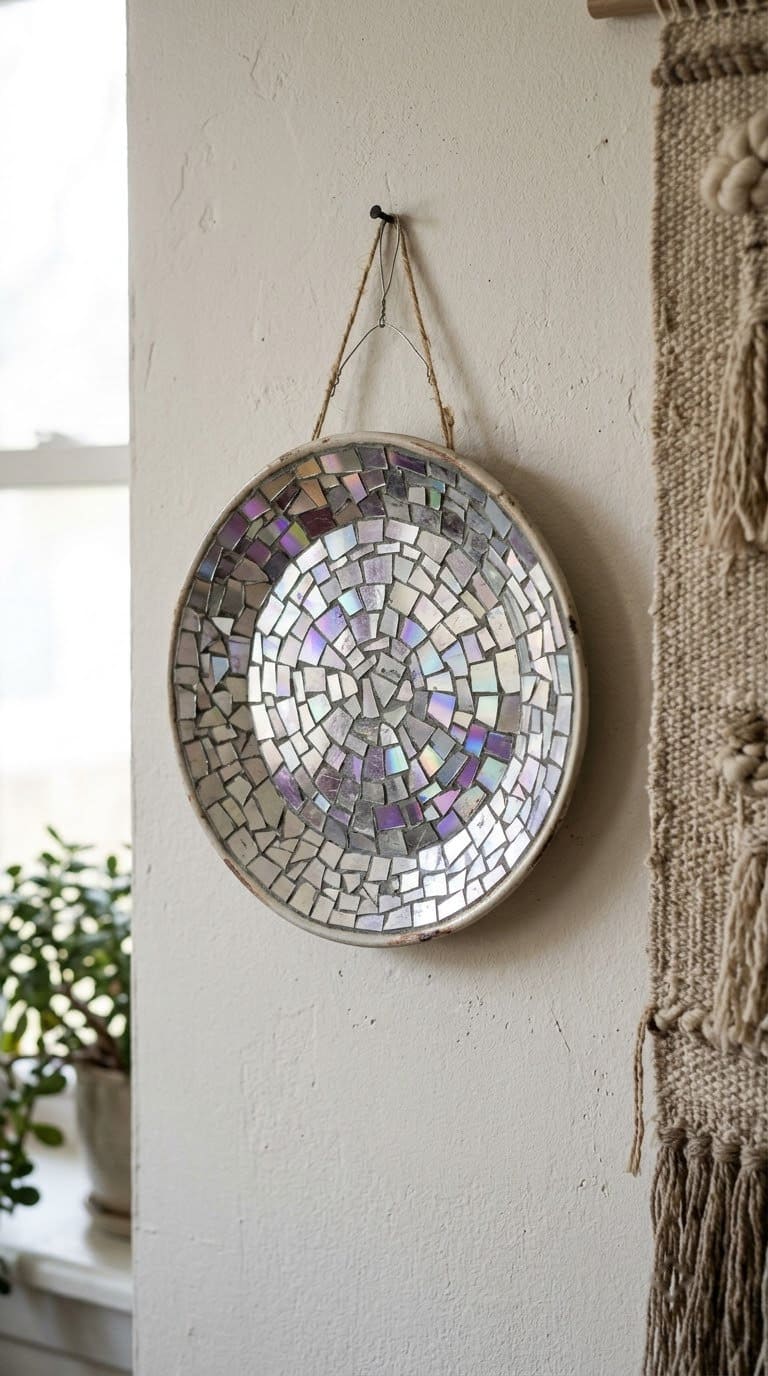
What you need: A plain plate, old CDs, strong scissors, adhesive, grout, gloves, and eye protection.
Steps:
- Put on eye protection and gloves.
- Cut CDs into small pieces with strong scissors.
- Arrange the pieces on the plate without glue first.
- Glue each piece in place and let the adhesive set.
- Grout between the pieces and wipe off extra.
- Let it cure, then attach a plate hanger to the back.
Detail that helps: Small pieces curve better than large ones. Smooth any sharp edge with a file.
Care: This is a wall plate only. Never serve food on it, in line with the FDA and Lakeside Pottery cautions about damaged and repaired pottery.
Time and cost: about 2 hours plus drying, low cost.
15. Mug Planter
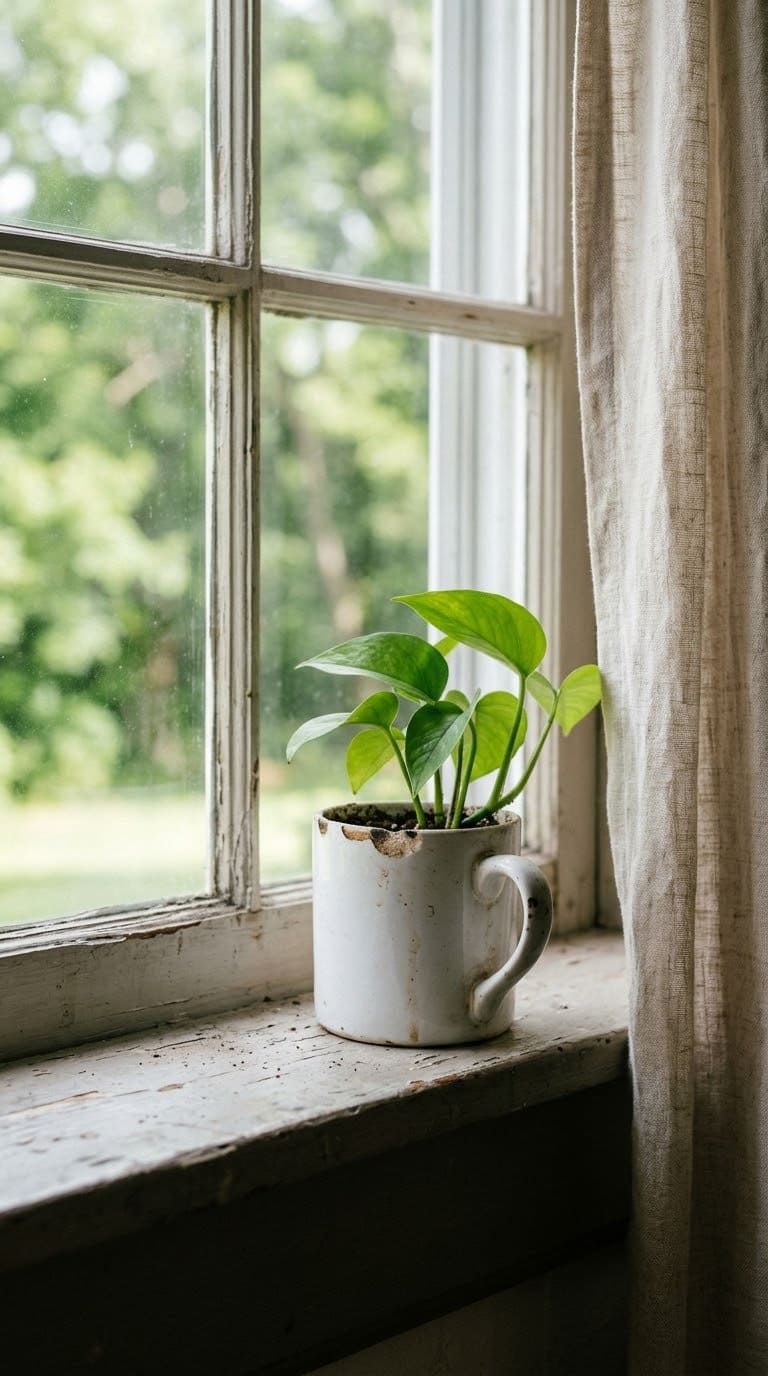
What you need: A chipped mug, a small nursery pot that fits inside, potting mix, and a small plant.
Steps:
- Choose a nursery pot that sits just inside the mug rim.
- Keep the plant in its nursery pot, which has drainage holes.
- Add a little potting mix to the pot if the roots need cushioning.
- Set the pot inside the mug.
- Water the plant in a sink, let it drain, then return it to the mug.
Detail that helps: Cornell Cooperative Extension of Nassau County says containers must have drainage holes and not to drill ceramic. So use the mug as a cache pot, not as a direct planter.
Care: Nassau says to use a soilless potting mix, not garden soil. Empty any water that collects in the mug so roots do not sit in it.
Time and cost: about 10 minutes, very low cost.
16. Broken Flowerpot Reuse
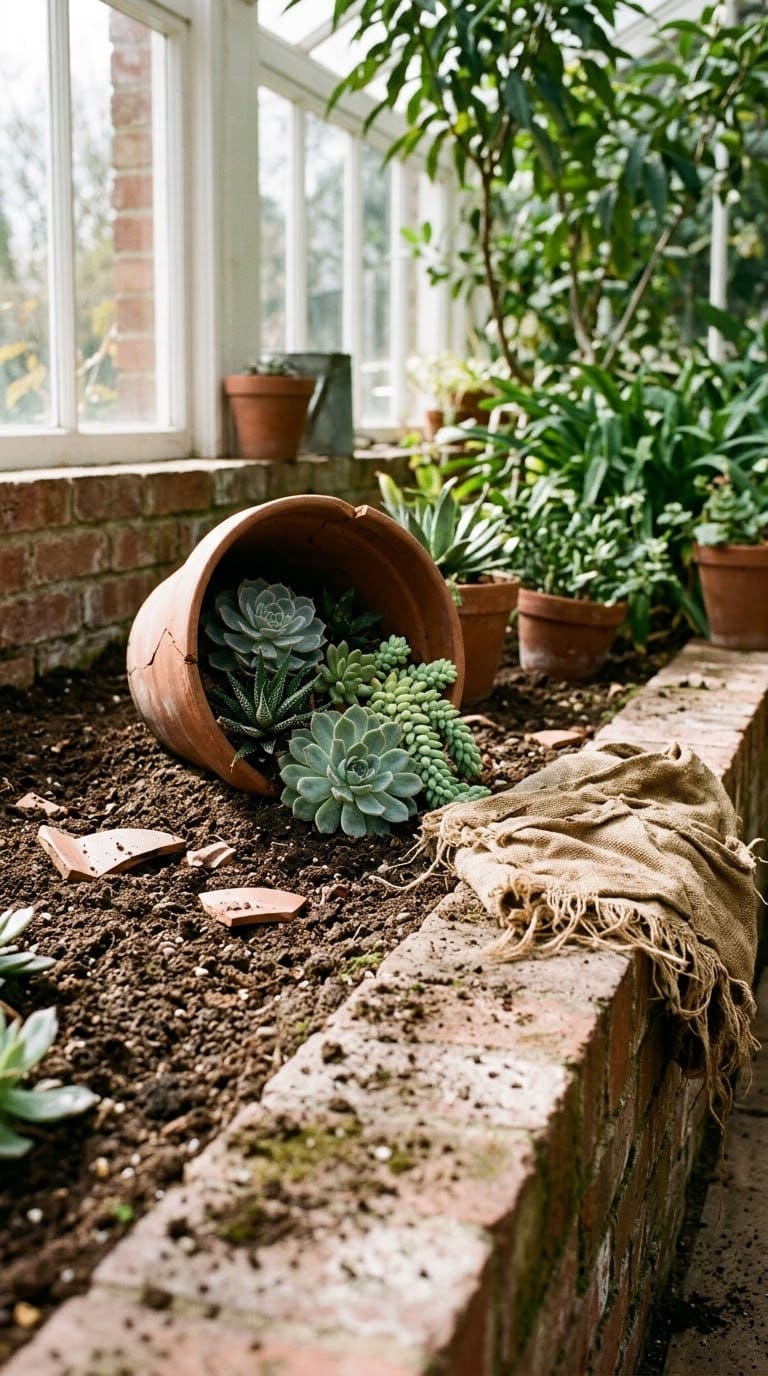
What you need: A cracked clay pot, potting mix, plants, and a shovel.
Steps:
- Wash the pot and let it dry.
- Pick a spot with the right sun for your plants.
- Dig a shallow hollow and lay the pot on its side.
- Fill the pot and the spill area with potting mix.
- Plant so the plants appear to flow out of the pot.
- Water until the water drains out.
Detail that helps: Nassau says clay pots dry out quickly because they absorb water, so soak them before planting and expect to water more often. Plants in a half-buried pot also benefit from the surrounding soil.
Care: At season’s end, Nassau says to wash containers and soak them in one part bleach to nine parts water for at least one hour. It also says not to reuse old potting mix.
Time and cost: about 30 minutes, very low cost.
17. Cracked Plate Wall Display
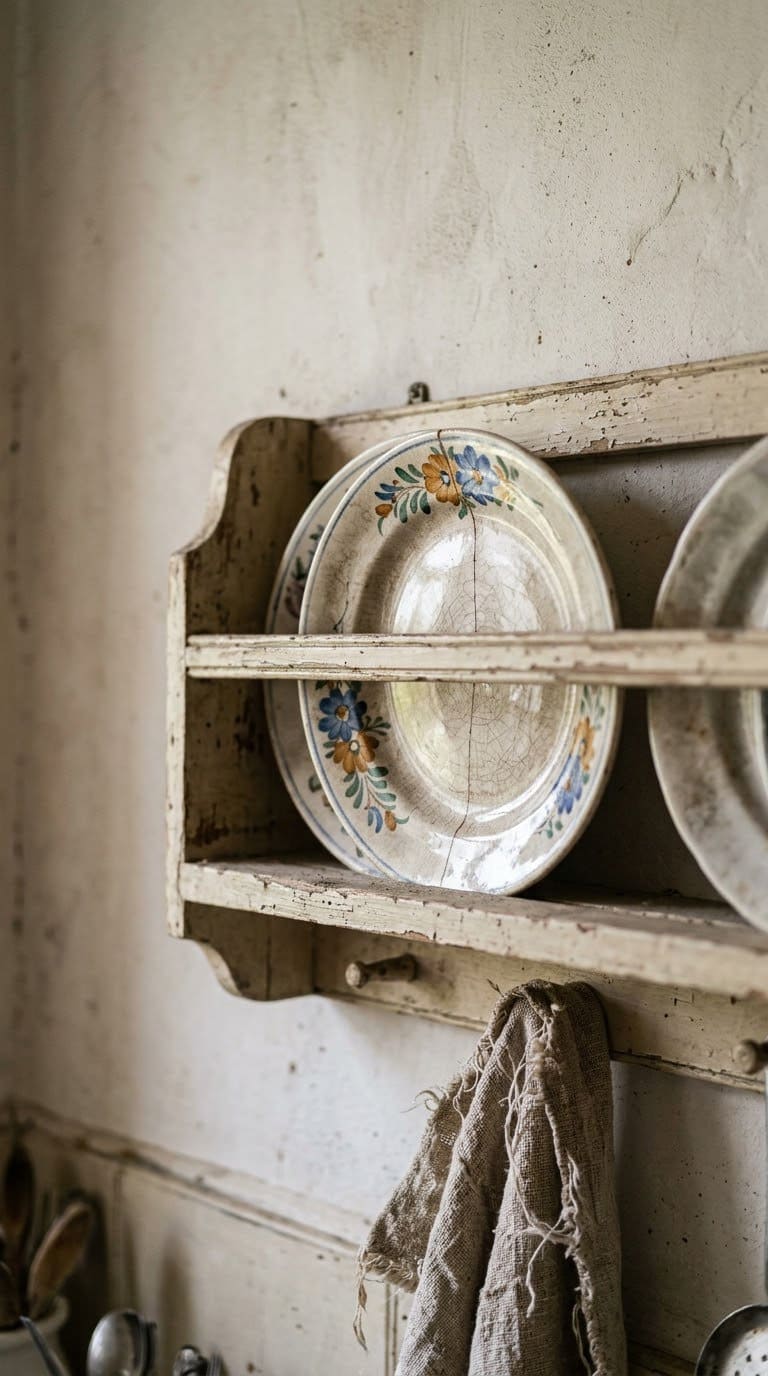
What you need: The cracked plate, ceramic glue, tape, and a plate hanger or rack.
Steps:
- Wash and dry the plate pieces.
- Glue the pieces together and tape them until set.
- Let the glue cure fully.
- Attach a plate hanger to the back, or set the plate on a rack.
- Hang it on a stud or use a wall anchor.
Detail that helps: A rack that holds the plate from below puts less strain on the glue line than a hanger.
Care: The FDA says antique, handmade, and damaged or excessively worn pottery are problem types for food use. Keep it on the wall, away from heat and steam.
Time and cost: about 30 minutes plus cure, low cost.
18. Patch on a Cushion Cover
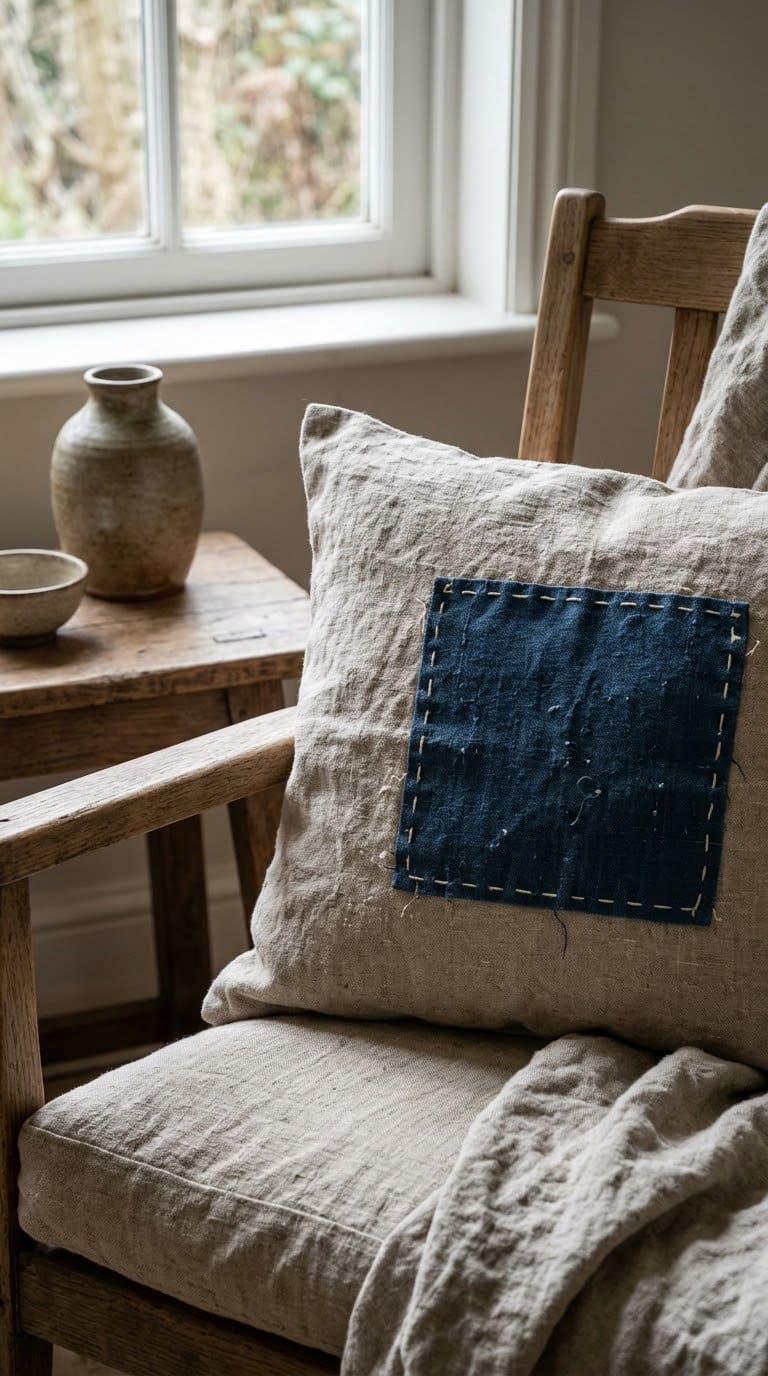
What you need: A fabric scrap, thread in a bright color, a needle, and pins.
Steps:
- Remove the insert and turn the cover inside out.
- Cut a square patch larger than the worn spot.
- Fold the edges under a quarter inch and pin the patch over the spot.
- Stitch around the edge with a running stitch.
- Turn right side out and press lightly.
Detail that helps: Bold thread makes the stitching part of the design. Keep the stitches evenly spaced.
Care: Wash the cover on a gentle cycle after the repair. Dry it flat so the patch does not pull.
Time and cost: about 40 minutes, very low cost.
19. Stencil Over a Door Scuff
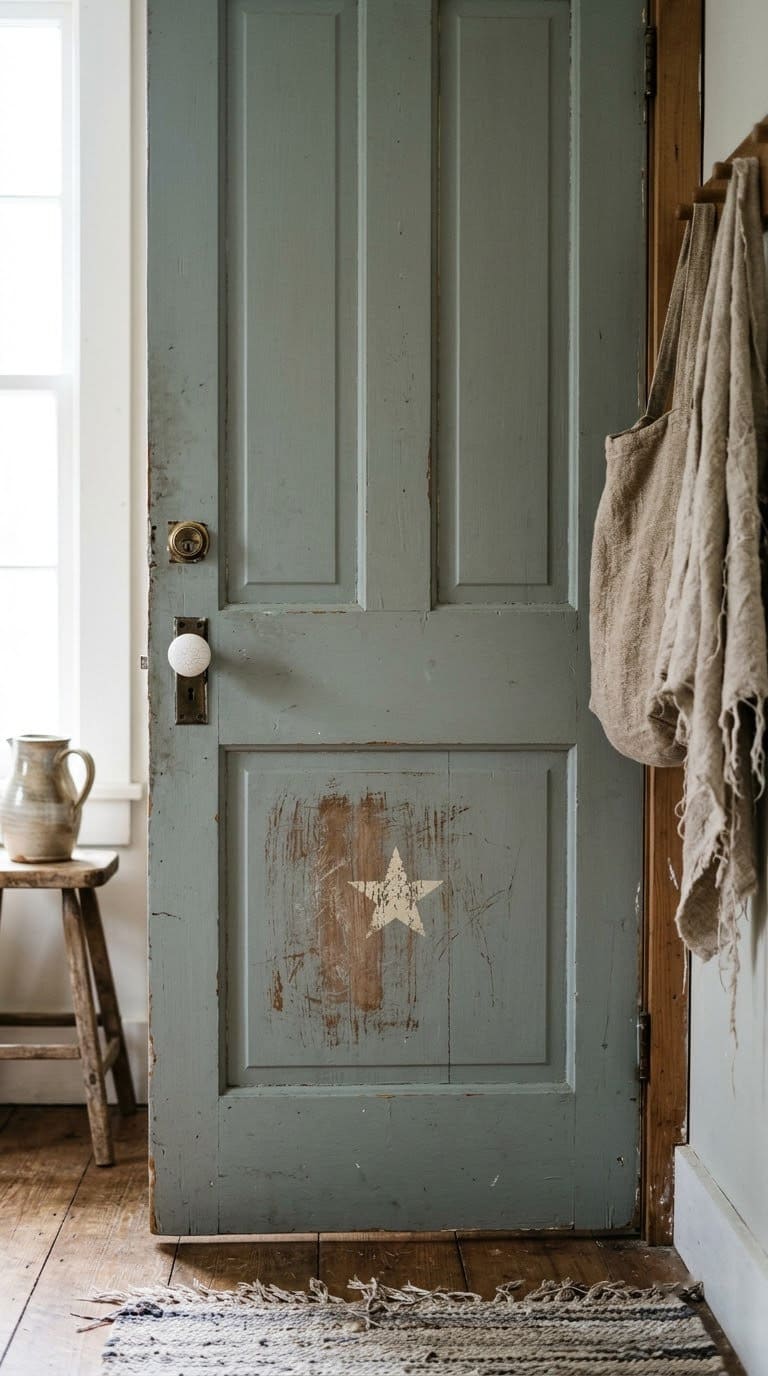
What you need: A stencil, painter’s tape, matching door paint, and a small brush or sponge.
Steps:
- Check the age of the door. A door in a home built before 1978 may have lead paint.
- Wipe the scuffed area with a damp cloth.
- Tape the stencil over the scuff.
- Dab thin paint through the stencil and lift it straight up.
- Let the paint dry before closing the door.
Detail that helps: The EPA says paint in homes built before 1978 is more likely to contain lead. Intact paint is usually not a problem, but chipping or peeling paint is.
Care: Do not dry sand a door from an older home. The EPA says to wet the area first if you must sand, and to wet-wipe dust afterward.
Time and cost: about 30 minutes plus drying, low cost.
20. Chipped Bowl Key Tray
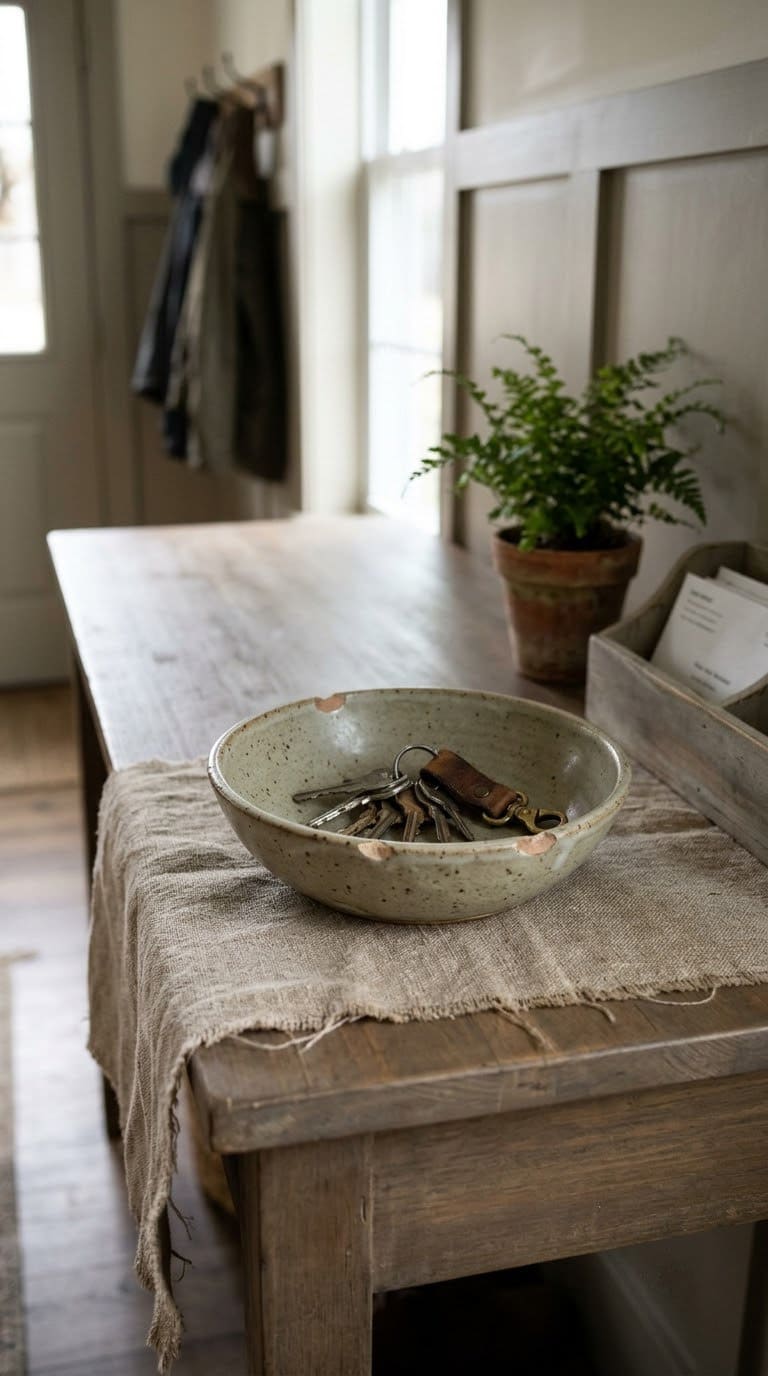
What you need: A chipped bowl, a fine file or sandpaper, and a felt pad for the base.
Steps:
- Run a finger along the chip to find sharp spots.
- Smooth any sharp edge with a fine file.
- Wipe away the dust.
- Stick a felt pad on the base so it does not scratch the table.
- Place it by the door.
Detail that helps: Pick a bowl with a wide rim. A flat base keeps keys from sliding off.
Care: The FDA says that if you cannot test a piece or confirm the maker, consider not using it for food or drinks. Use it for keys and coins only.
Time and cost: about 10 minutes, very low cost.
Common Mistakes to Avoid
Drinking from a mended cup is the first mistake. Lakeside Pottery says repaired cracks are never food safe.
Trusting a food-safe glue label is the second. Lakeside says a food-contact claim on a glue does not certify the repaired vessel.
Dry sanding old paint is the third. The EPA says to fix small damaged areas without sanding, and to wet the area first if you must sand.
Assuming washing removes lead is the fourth. The FDA says no amount of washing or boiling can remove lead from pottery.
Drilling ceramic is the fifth. Nassau County says not to drill ceramic.
FAQ
Can I drink from a cup I repaired with glue?
No. Lakeside Pottery says repaired cracks, chips, and breaks are never food safe, and a glue label does not change that.
Is real kintsugi food safe?
Lakeside Pottery says traditional urushi kintsugi can be food safe when fully cured, but it still treats repaired pieces as decorative. Epoxy-based kintsugi is never food safe.
Can washing remove lead from old dishes?
No. The FDA says no amount of washing, boiling, or other process can remove lead from pottery.
How do I fix scuffed paint on old furniture?
The EPA says to fix small damaged areas under six square feet without sanding. If you must sand, wet the area first.
Can I drill a hole in a ceramic mug?
Nassau County says not to drill ceramic. Use the mug as a cache pot instead.
Never miss an update — choose FarmFoodFamily as your preferred source on Google.
How it works: Tap the button below to open Google's settings page, then check the box next to FarmFoodFamily.
Tap the checkbox to turn it blue — that's how you know it's set.