20 Cheap DIY Projects That Look Expensive (With Safety Notes for Candles, Lip Tints, and Cutters)
Candles, soap, rings, and pillows cost little to make, as long as you know which projects need a fire rule, a cutter rule, or a skin-safety rule.

Never miss an update — choose FarmFoodFamily as your preferred source on Google.
How it works: Tap the button below to open Google's settings page, then check the box next to FarmFoodFamily.
Tap the checkbox to turn it blue — that's how you know it's set.
Candles, soap, rings, and pillows cost little to make, as long as you know which projects need a fire rule, a cutter rule, or a skin-safety rule.
Products We Recommend
This post contains affiliate links. We may earn a commission on qualifying purchases at no extra cost to you.

Nancia 100PACK Flameless LED Tea Lights Candles, Battery-Powered
Flameless candles for the jar lantern gift, matching the USFA flameless suggestion
Shop Now
Anezus Craft Knife and Self Healing Cutting Mat Set
A knife and mat for the hidden-storage book and other cutting projects
Shop Now
Wire Cutters Heavy Duty Snips Flush Cut Side Cutters
Flush cutters for wire rings and headbands
Shop NowA good DIY project costs less than the store version and feels more personal. It also makes a thoughtful gift.
The catch is that some of these projects involve flame, blades, or products that touch your skin. This guide gives you 20 projects plus the safety notes that most roundups skip.
In this article
Answer 4 quick questions and get matched to the exact fix for your yard — drainage, budget, layout, or something else entirely.
Take the Free QuizWhat’s the Quick Answer for Cheap DIY Projects?
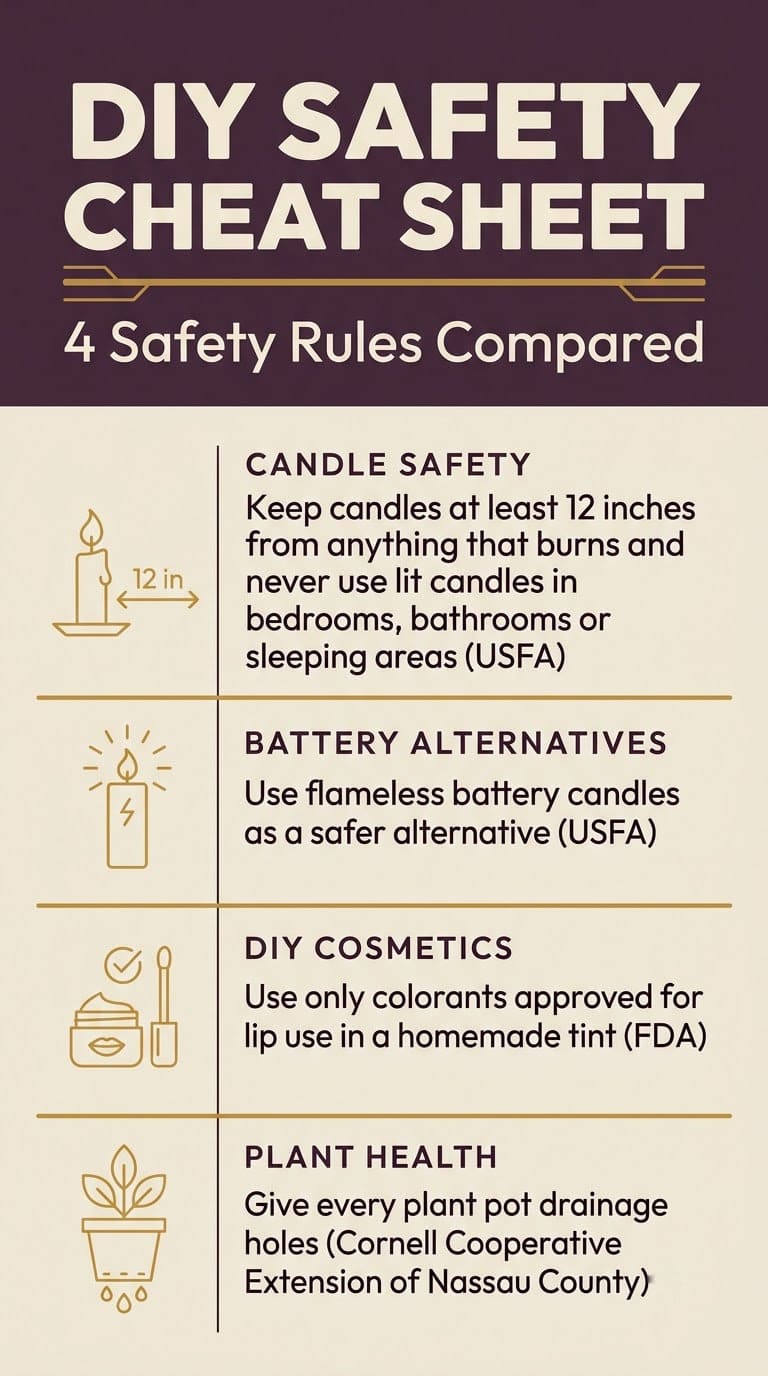
Respect the flame. The U.S. Fire Administration says to keep candles at least 12 inches from anything that burns. It also says not to use lit candles in bedrooms, bathrooms, and sleeping areas.
Use flameless light when you can. The USFA suggests battery-operated flameless candles, which can look, smell, and feel like real candles. They are a safer choice for gifts and kids’ rooms.
Be careful with lip products. The FDA says color additives must have FDA approval for their intended use. It adds that exposure to lead from lipstick is mainly by swallowing.
Give every plant a way to drain. Cornell Cooperative Extension of Nassau County says containers need drainage holes. Start with the projects that need no heat and no blade. Read every label and keep supplies away from children and pets.
How Much Do These Projects Cost and How Hard Are They?
This table is our own planning guide. The cost tiers and skill levels are general practice, not from a tested source.



| Project type | Cost tier | Skill level | Safety note |
|---|---|---|---|
| Candle or flameless light | Low | Beginner | Fire rules |
| Lip tint or soap | Low | Intermediate | Skin contact |
| Wire ring or headband | Very low | Beginner | Sharp ends |
| Painted dish | Low | Beginner | Display only |
| Pillow or sock craft | Very low | Beginner | None |
| Succulent pot | Low | Beginner | Drainage |
Most yard problems trace back to one specific, fixable cause. Find yours in 4 quick questions.
Take the Free QuizHow Do You Make Candles Without a Fire Risk?
The USFA says candle holders must be stable and placed where they cannot be knocked over. It says to blow candles out when you leave a room, leave home, or go to bed.
It also says that on average, 20 home candle fires are reported each day, citing the National Fire Protection Association. So a gift candle should come with a note.
Flameless candles avoid the problem. Battery-operated ones need no wick and no wax. You can still decorate the jar with ribbon, dried flowers, or paint.
Is a Homemade Lip Tint Safe?
Making cosmetics at home is a place to be careful. The FDA says color additives must have FDA approval for their intended use. That means a craft dye is not automatically safe for lips.
The FDA also says exposure to lead from lipstick is mainly by swallowing, such as when you lick your lips. It has issued draft guidance recommending that lip products not contain more than 10 ppm lead.
So buy cosmetic-grade colorants from a supplier that states they are approved for lip use. Do not use craft paint, marker ink, or food dye. Keep homemade tints for personal use, not for sale.
What Tools Do You Need?
Most of these projects need only scissors, glue, thread, and a few jars. Add a self-healing mat and a craft knife for the cutting projects. Keep the blade sharp, since a dull blade slips.
Flameless candles for the jar lantern gift, matching the USFA flameless suggestion
Shop NowThis post contains affiliate links. We may earn a commission on qualifying purchases at no extra cost to you.
Cut away from your body and keep your free hand behind the blade. Put the cap on the knife when you finish.
For wire projects, use flat-nose pliers and a wire cutter. File the cut ends smooth, since raw wire can scratch. Wear eye protection when you snip.
The average homeowner spends $616/year on yard fixes that don't address the real problem. Find out what yours actually is — before you spend another dollar.
Take the Free QuizHow Do You Keep the Cost Low?
Shop your own home first. Jars, scraps of fabric, old sweatshirts, and leftover paint cover many of these projects. Use what you have before you buy.
Buy small quantities of anything you are unsure about. A single skein, a small jar of paint, or one sheet of felt costs little. If you like the craft, buy more.
Buy basic tools once. A pair of sharp scissors, a craft knife, and a glue gun serve many projects. Cheap tools that slip cost you more in wasted material.
Check thrift stores and clearance aisles. Plain tote bags, glass jars, and small pots are easy to find. Plain items take paint and fabric well.
Which Project Should You Start With?
Pick a project that matches your time. A fabric-covered notebook or a jar organizer takes under an hour. A headboard or a candle batch takes an afternoon.
Pick one that matches your tools. If you own a glue gun, start with the pillow or the notebook. If you own pliers, start with wire rings.


Pick one that matches the recipient. Gifts should fit the person, not just your skills. A small, thoughtful item beats a large, rushed one.
Finally, try one project from each group. A gift, an accessory, and a home piece show you which craft you enjoy most.
20 Cheap DIY Projects That Look Expensive
Each project lists what you need, the steps, a detail that makes it look better, and a note on time and cost. Ideas 1, 2, 3, 7, and 15 follow the sources in this guide. The rest use general craft practice that we planned ourselves.
1. Jar Gift Candle
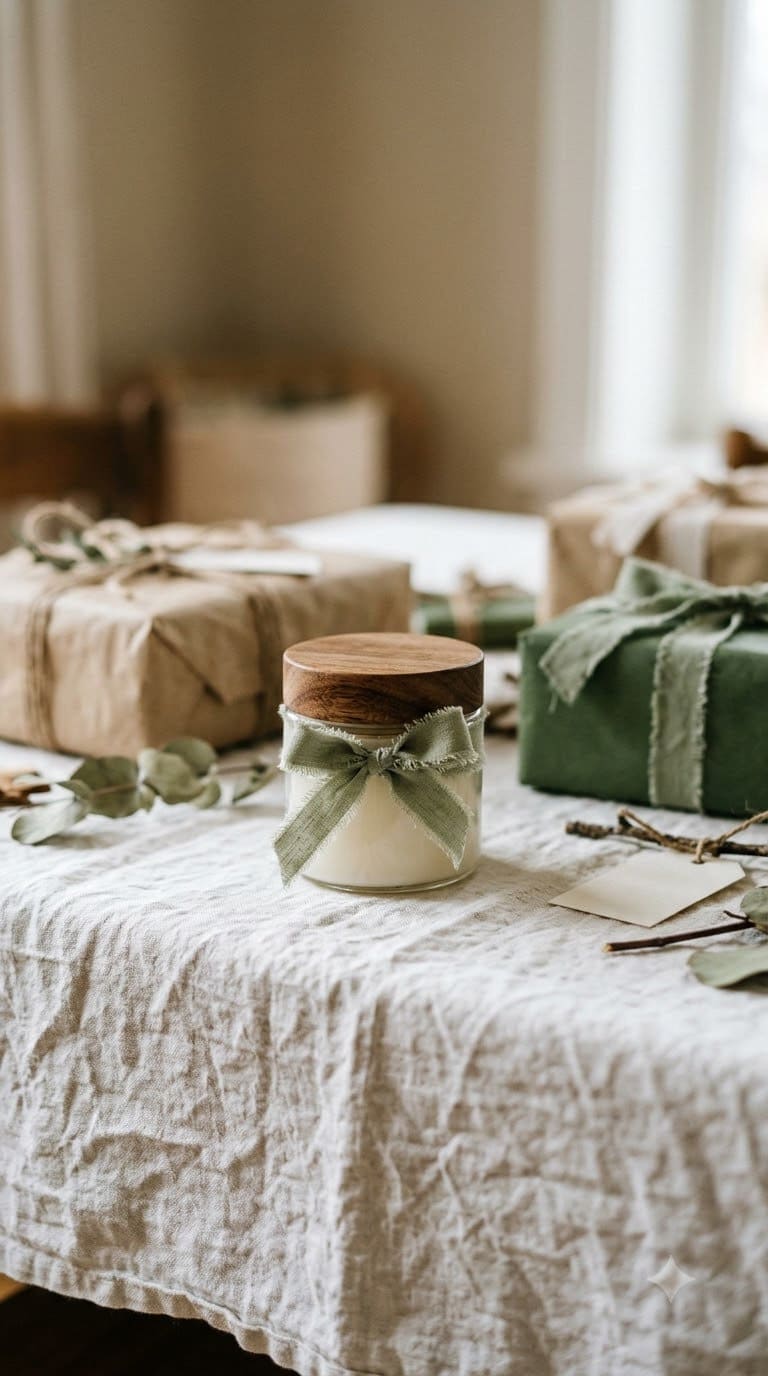
What you need: Candle wax, a pre-waxed wick, a wick sticker, a wick bar, a clean glass jar, fragrance oil, a scale, a pouring pitcher, and a double boiler or hot plate.
Steps (following the CandleScience tutorial):
- Wipe each jar with isopropyl alcohol and a clean paper towel.
- Use a wick sticker to center the wick in the jar.
- Weigh 16 oz of wax and melt it in a double boiler or on a hot plate.
- Weigh the fragrance oil. The tutorial uses 1.6 oz, about a 10% fragrance load.
- Add the fragrance when the wax reaches 185°F, and stir gently for 2 minutes.
- Let the wax cool to 170°F, then pour carefully into the jars.
- Hold each wick upright with a wick bar and let the candle cool completely.
- Trim the wick to 1/4 inch and add a warning label on the bottom.
- Let the candle cure for 1 to 2 days before you give it away.
Detail that helps: Wax types differ, so follow the data sheet for your own wax. The tutorial uses one coconut apricot wax and gives no steps for soy, paraffin, or beeswax. Tie a ribbon and a tag with the USFA basics: keep the candle 12 inches from anything that burns and blow it out before bed.
Time and cost: about 90 minutes plus cure time, low cost.
2. Flameless Lantern Gift
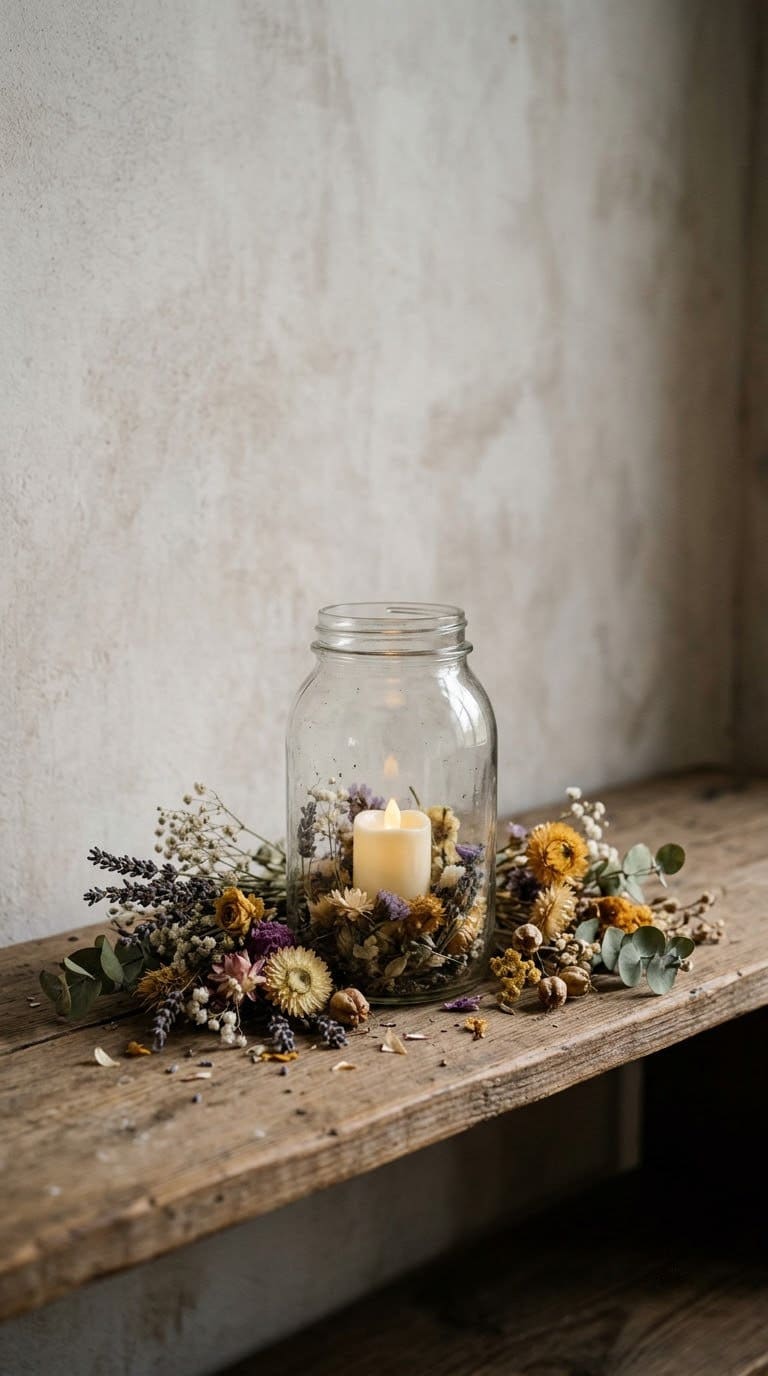
What you need: A glass jar with a wide mouth, a battery LED candle, dried flowers, ribbon or twine, and a little glue.
Steps:
- Wash the jar and let it dry fully.
- Drop in the flameless candle so it sits flat on the bottom.
- Tuck dried flowers around the candle, keeping them below the rim.
- Tie ribbon or twine around the neck of the jar.
- Test the light and add a spare battery in the gift box.
Detail that helps: The USFA suggests battery-operated flameless candles, which can look, smell, and feel like real candles. They give the glow without the flame, so they suit bedrooms and kids’ rooms. The USFA also says not to use lit candles in bedrooms, bathrooms, and sleeping areas.
Time and cost: about 15 minutes, low cost.
3. Lip Tint Gift Kit
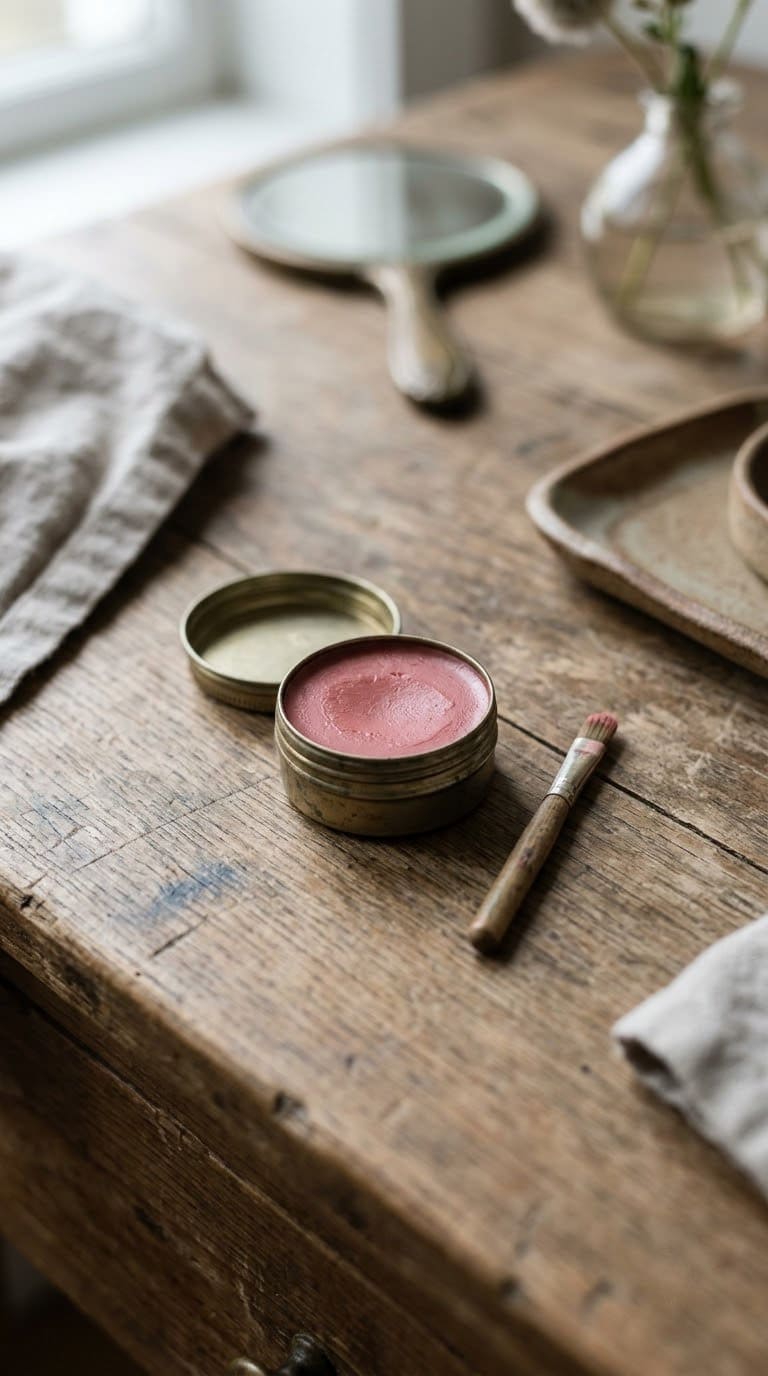
What you need: A simple balm base, a cosmetic-grade colorant stated as approved for lip use, a small tin, a clean spatula, and a label.
Steps:
- Wash and dry the tin, the spatula, and your work surface.
- Melt a small amount of balm base gently.
- Stir in a tiny amount of the lip-approved colorant until the shade looks right.
- Pour into the tin and let it set.
- Label the tin with the date you made it.
Detail that helps: The FDA says color additives must have FDA approval for their intended use, so check that the colorant is approved for lips. The FDA also says exposure to lead from lipstick is mainly by swallowing, such as when you lick your lips. So avoid craft dye, marker ink, and food dye.
Care: Keep the tint for personal use, not for sale. Throw it out if it smells off.
Time and cost: about 30 minutes, low cost.
4. Hidden-Storage Book
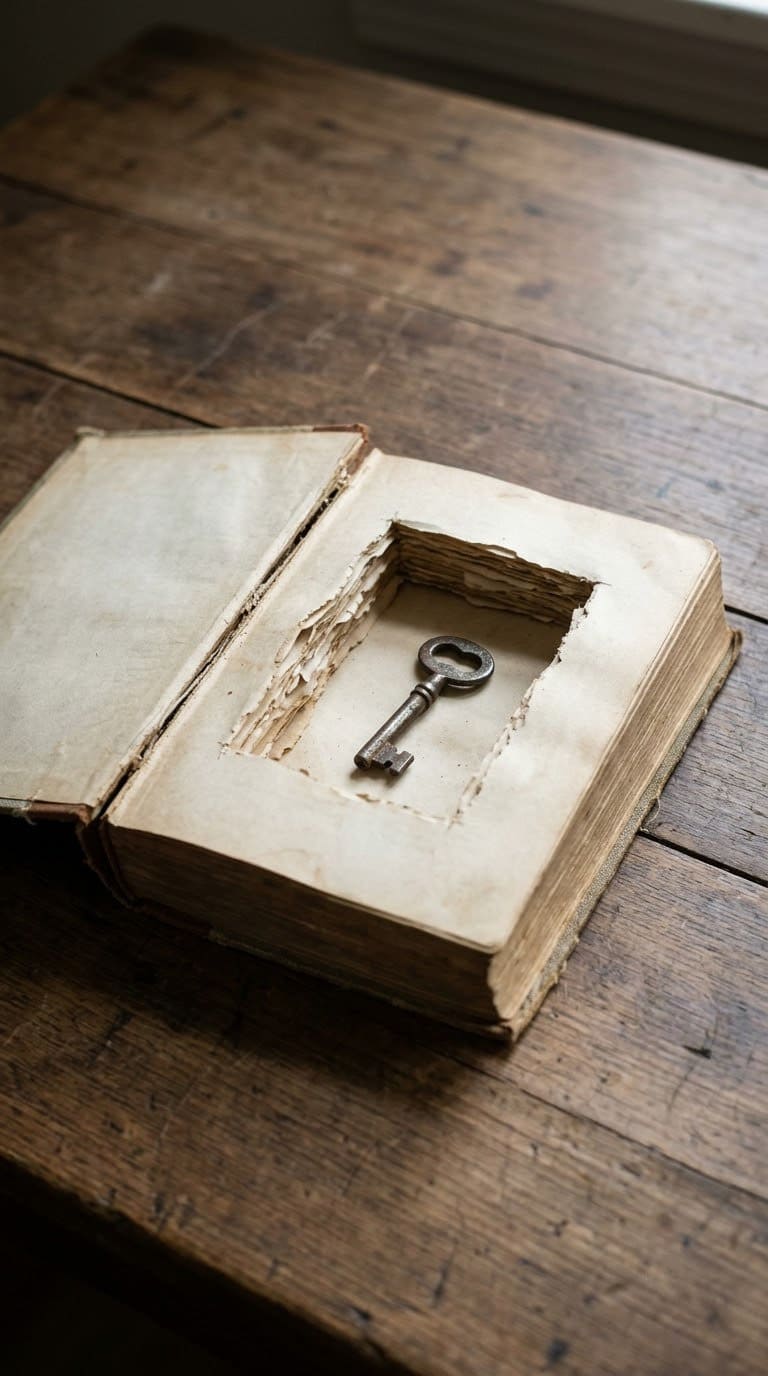
What you need: An old hardcover book, a ruler, a pencil, a craft knife, a self-healing mat, white glue, and a small brush.
Steps:
- Choose a thick book you do not need.
- Brush white glue along the page edges and let it dry so the pages stay together.
- Mark a rectangle inside the pages with a ruler and pencil.
- Cut along the lines a few pages at a time, working on a self-healing mat.
- Keep cutting until the hollow is as deep as you need.
- Glue the inside walls of the hollow and let them dry.
Detail that helps: Leave a margin of at least half an inch around the cutout so the book stays sturdy. Use a metal ruler as a guide, since a plastic one can nick.
Care: Cut away from your body and keep your free hand behind the blade. Put the cap on the knife when you finish.
Time and cost: about 1 hour, very low cost.
5. Watercolor-Painted Dish
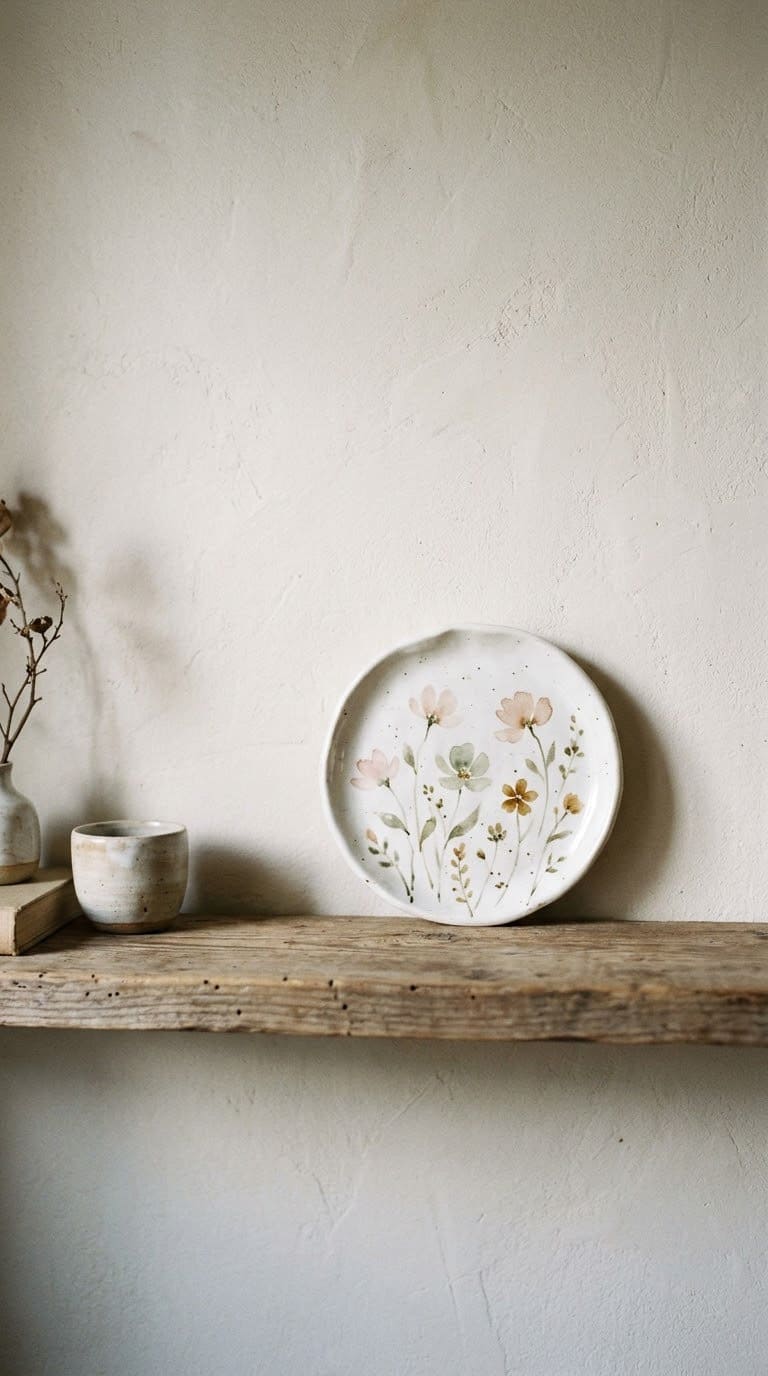
What you need: A new plain white ceramic dish, ceramic paint, a soft brush, a pencil, and a clear sealer if the paint label calls for one.
Steps:
- Wash the dish and let it dry fully.
- Sketch light flowers with a pencil.
- Paint thin, watery washes and let the first layer dry.
- Add a second layer for depth and fine details.
- Cure or seal the paint as the label says.
Detail that helps: Buy a new, plain dish with a smooth glaze. A clean, undamaged surface takes thin washes of paint evenly, and it avoids the cracks and chips of an old dish.
Care: Keep it for display, trinkets, or soap. Do not serve food on a hand-painted dish unless the paint states it is food safe.
Time and cost: about 1 hour plus drying, low cost.
6. Decorative Toilet Roll Holder
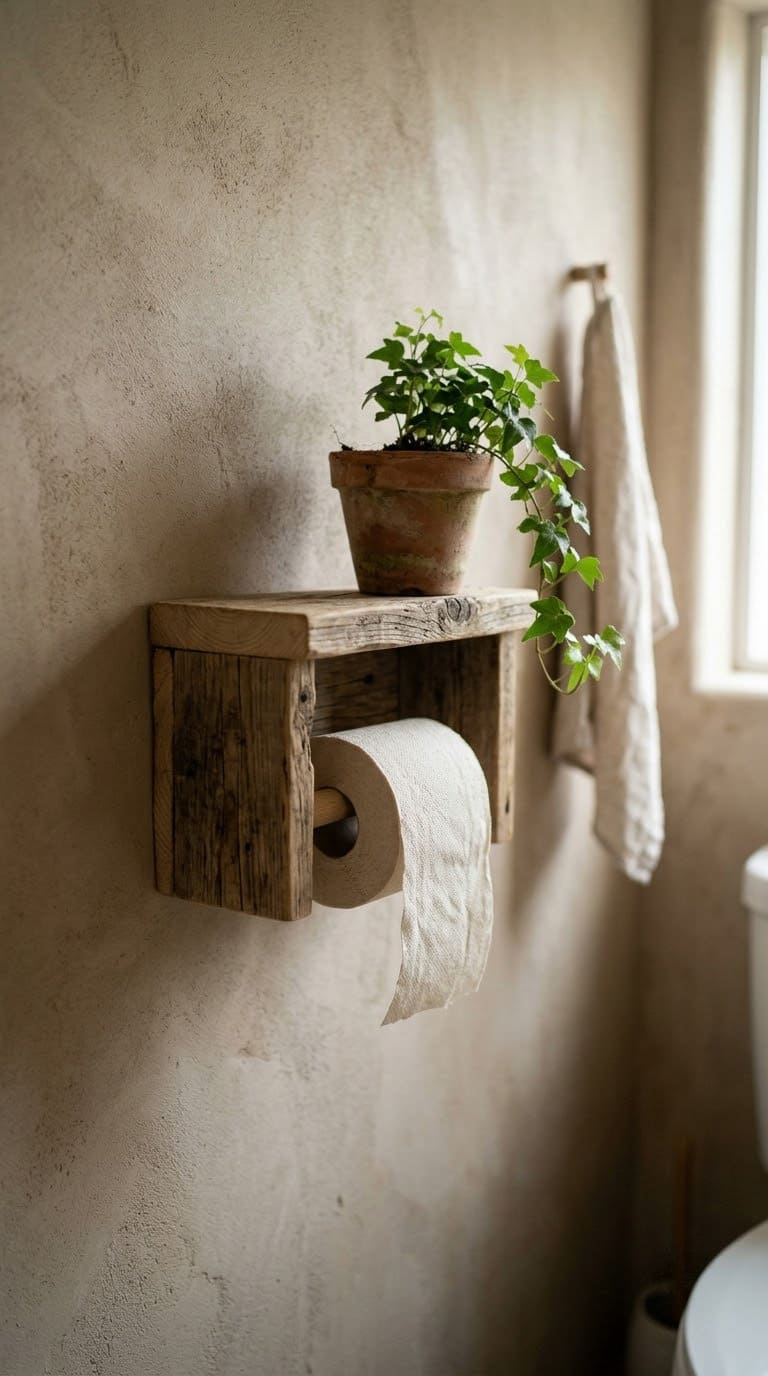
What you need: A wooden dowel or a sturdy branch, two wall brackets, sandpaper, clear sealer, a drill, and wall anchors or screws.
Steps:
- Cut the dowel to the length you need, a little longer than a roll.
- Sand every surface until it is smooth.
- Seal the wood with a clear finish and let it dry.
- Mark the bracket positions on the wall with a pencil.
- Drill pilot holes and fix the brackets into studs or with proper anchors.
- Rest the dowel in the brackets.
Detail that helps: Seal the wood on every side, since bathrooms are damp. Hang it at a height you can reach easily.
Care: Check the screws every few months. A loose bracket can drop the roll.
Time and cost: about 1 hour, low cost.
7. Soap Rocks
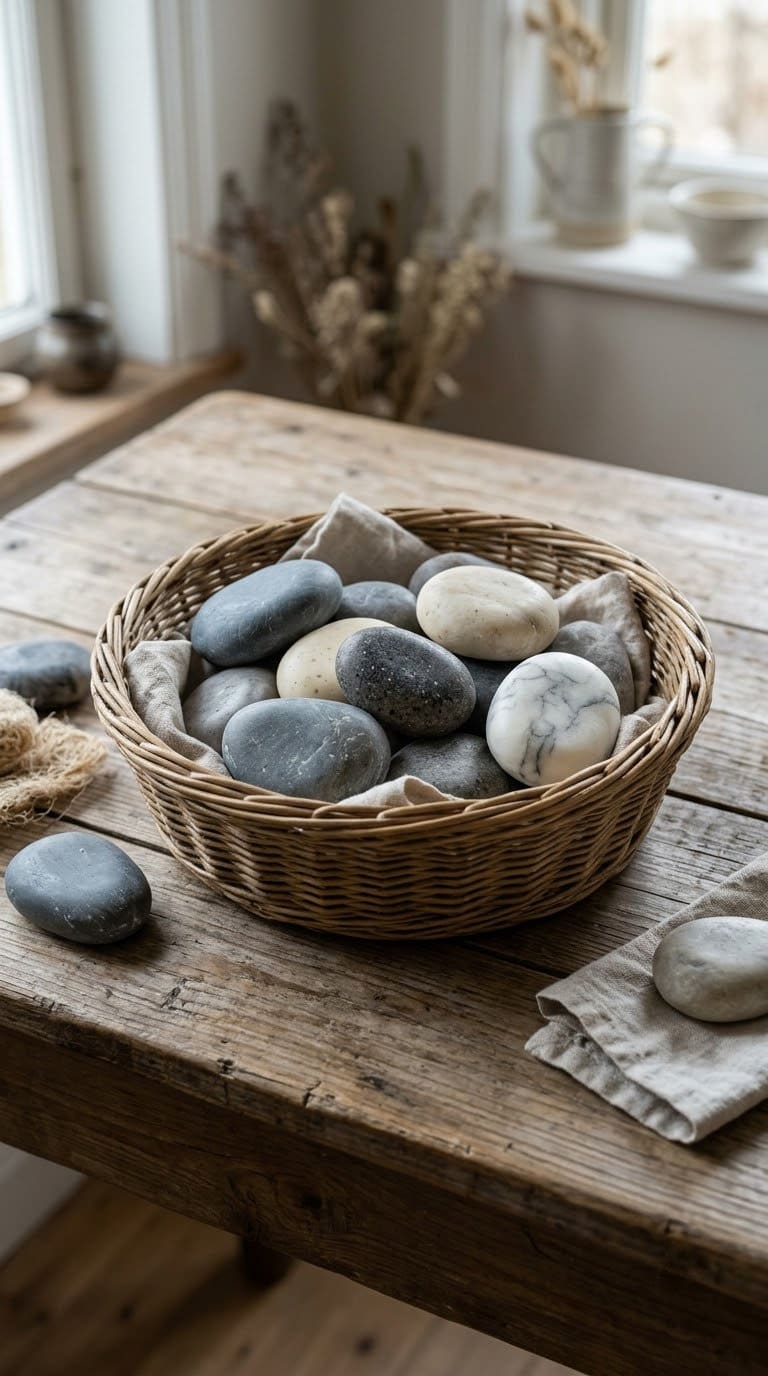
What you need: Melt-and-pour soap base, soap-safe fragrance oil, soap-safe colorant, a stone-shaped mold, a microwave-safe pitcher, a spatula, and rubbing alcohol in a spray bottle.
Steps (following the CandleScience melt-and-pour guide):
- Spray the workspace and tools with rubbing alcohol.
- Cut the soap base into 1-inch cubes and weigh it.
- Melt it in the microwave for 1 minute, then in 30-second bursts, stirring between each.
- Stir in fragrance. The guide uses up to 0.5 oz for a 1 pound batch.
- Add soap-safe colorant for a gray or white stone look.
- Spray the mold with alcohol and pour slowly to reduce bubbles.
- Spray any bubbles on the surface with alcohol.
- Let the soap set. The guide says up to 3 hours, but best overnight.
- Press gently on the bottom to pop the soap out.
Detail that helps: The guide warns that overheating can make soap rubbery. Check the fragrance maker’s skin-safe limit and use soap-safe oils only. For essential oils, check the recommended usage and the IFRA certificate.
Care: No cure time is needed, so the soap is ready to use. Wrap it and add an ingredients label for gifts.
Time and cost: about 45 minutes plus setting, low cost.
8. Upholstered Headboard
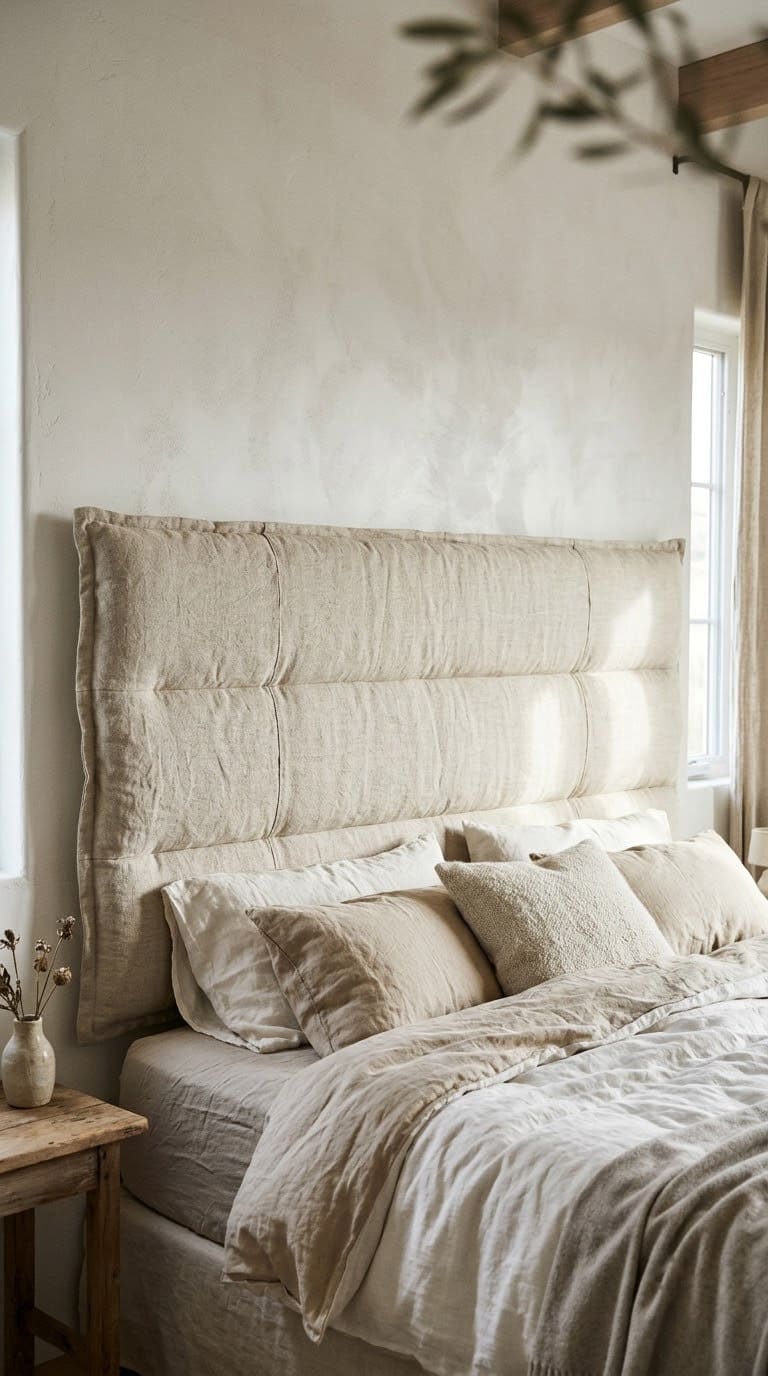
What you need: A plywood panel, foam, batting, fabric, a staple gun, a stud finder, screws or a French cleat, and a saw if you cut the panel.
Steps:
- Cut the plywood to the width of your bed.
- Lay foam on the panel and trim it to match.
- Add a layer of batting over the foam.
- Lay the fabric face down, set the panel on it, and pull the fabric over the edge.
- Staple the middle of each side first, then work out to the corners.
- Fold the corners neatly and staple them last.
- Find studs with a stud finder and mount the panel with screws or a cleat.
Detail that helps: Stapling the four middle points first keeps the pattern straight. Smooth wrinkles before you add more staples.
Care: A headboard is heavy. Mount it securely into studs and ask a helper to hold it while you screw.
Time and cost: about 3 hours, medium cost.
9. Custom Handbag
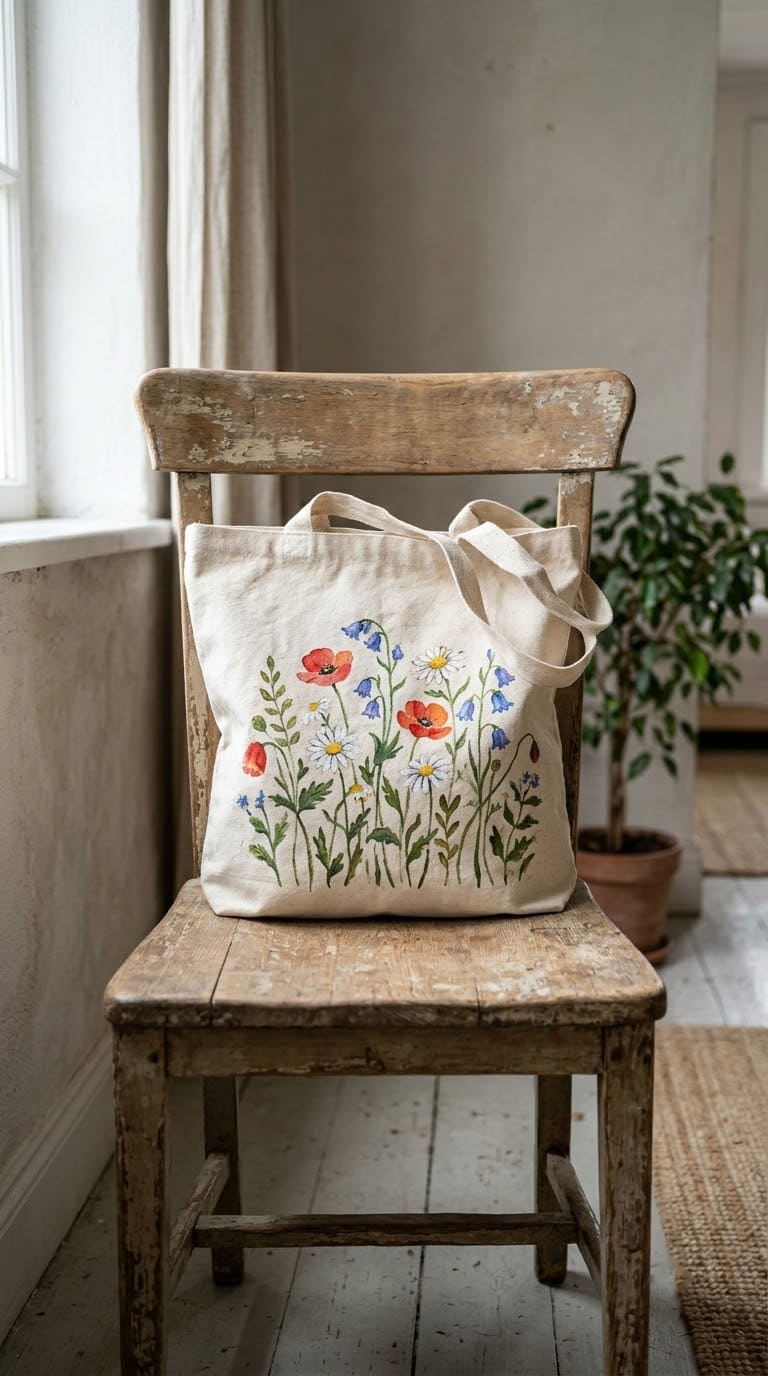
What you need: A plain canvas tote, fabric paint, brushes, cardboard, a pencil, and an iron with a pressing cloth.
Steps:
- Wash and dry the tote without fabric softener.
- Slip cardboard inside so paint does not bleed through.
- Sketch the design lightly in pencil.
- Paint the design in thin layers.
- Let it dry, then heat-set it by pressing with a cloth as the paint label says.
Detail that helps: Choose a simple pattern. Test the paint on a fabric scrap first to see how it dries.
Care: Wash by hand or on a gentle cycle after the paint has fully set, and turn the bag inside out.
Time and cost: about 1 hour plus drying, very low cost.
10. Wire Rings
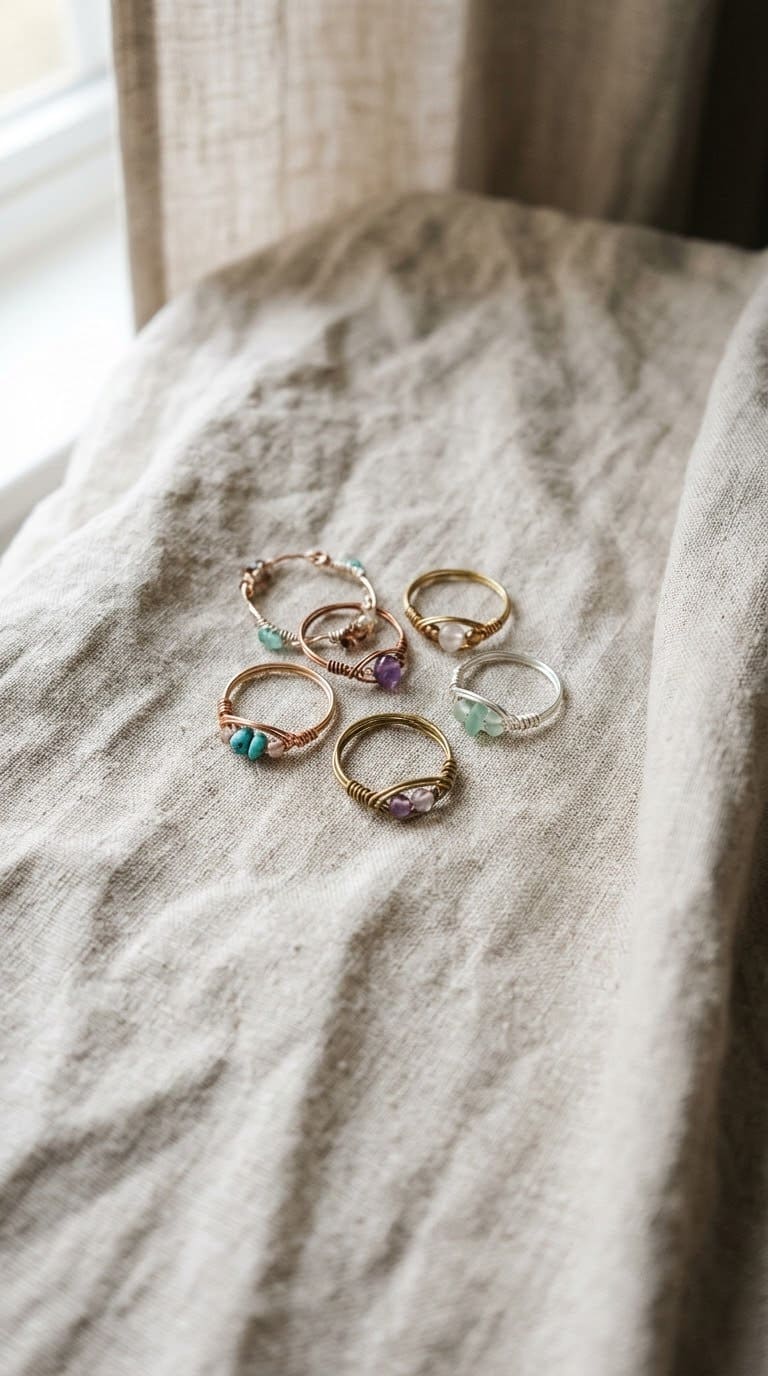
What you need: Craft wire, small beads, flat-nose pliers, flush wire cutters, a ring mandrel or marker, and a fine file.
Steps:
- Wrap wire around the mandrel or marker two or three times.
- Slide a bead onto the wire and cross the ends over it.
- Wrap each end around the band to hold the bead.
- Cut the ends flush with the cutters.
- Press the cut ends flat with the pliers.
- File the ends smooth.
Detail that helps: Make the band a little larger than your finger size, since wire rings can bend smaller. Round every cut end so it will not scratch.
Care: Wear eye protection when you snip wire. If you have sensitive skin, test a wire type before you give it as a gift.
Time and cost: about 20 minutes each, very low cost.
11. Decorated Sweatshirt

What you need: A plain sweatshirt, iron-on patches or fabric scraps, embroidery thread, a needle, and an iron.
Steps:
- Wash and dry the sweatshirt.
- Lay it flat and arrange the patches with chalk or pins.
- Press iron-on patches according to the package, or stitch fabric ones with a running stitch.
- Add a few stitched flowers or lines with embroidery thread.
- Check the back of each patch for loose edges.
Detail that helps: Plan the layout on paper first. Group patches in odd numbers for a balanced look.
Care: Wash inside out on a gentle cycle. Air dry so the patches stay in place.
Time and cost: about 1 hour, very low cost.
12. Faux Cactus Sock Toy
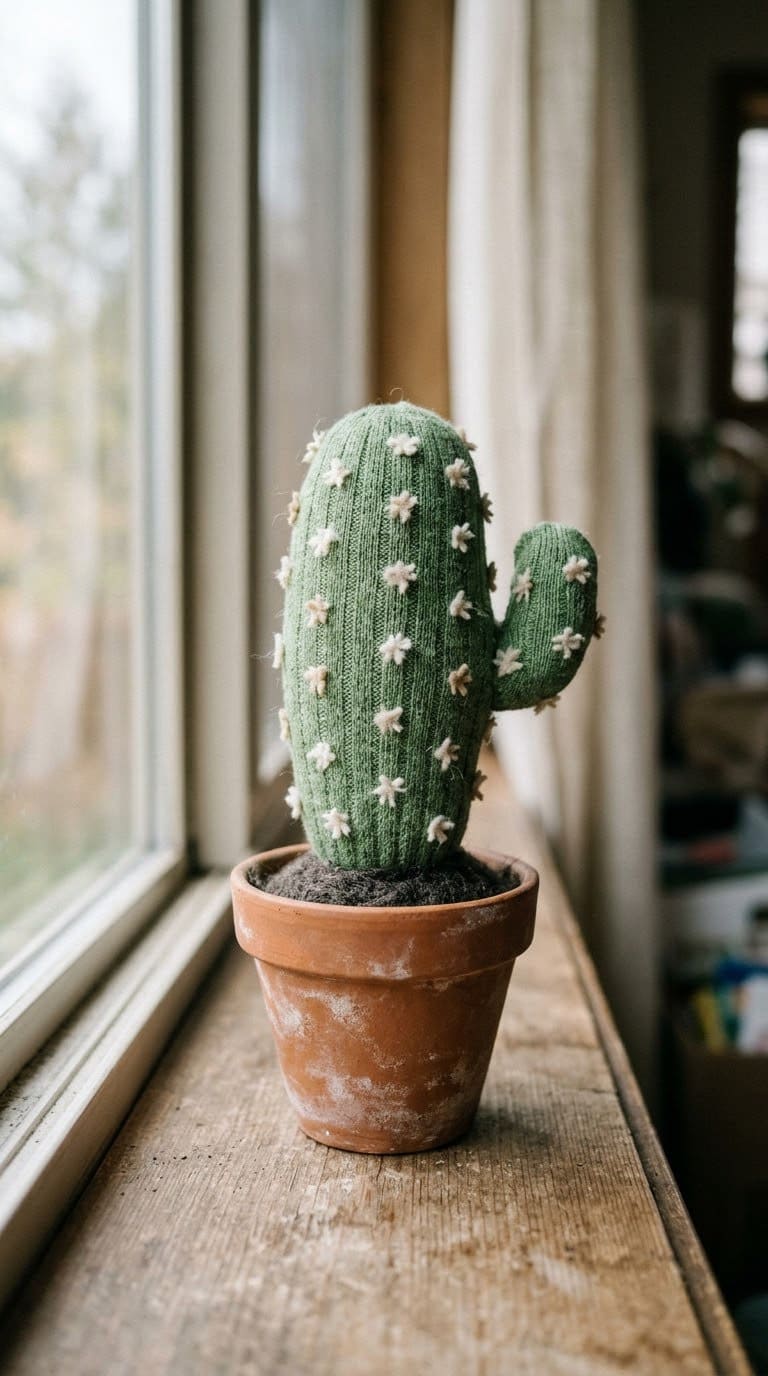
What you need: A green sock, polyester filling, felt scraps, a needle and thread, and a small plastic pot.
Steps:
- Fill the sock with stuffing, packing it firmly.
- Tie off the open end with strong thread.
- Fold the open end under and stitch it closed.
- Cut small felt spines and a flower.
- Sew the spines and flower onto the sock.
- Place the cactus in the pot with a little extra filling.
Detail that helps: Pack the filling a little at a time to avoid lumps. A firm tube stands upright better.
Care: For toddlers, sew all the details on and do not glue them. Check that no piece can pull loose.
Time and cost: about 40 minutes, very low cost.
13. Wire Headband
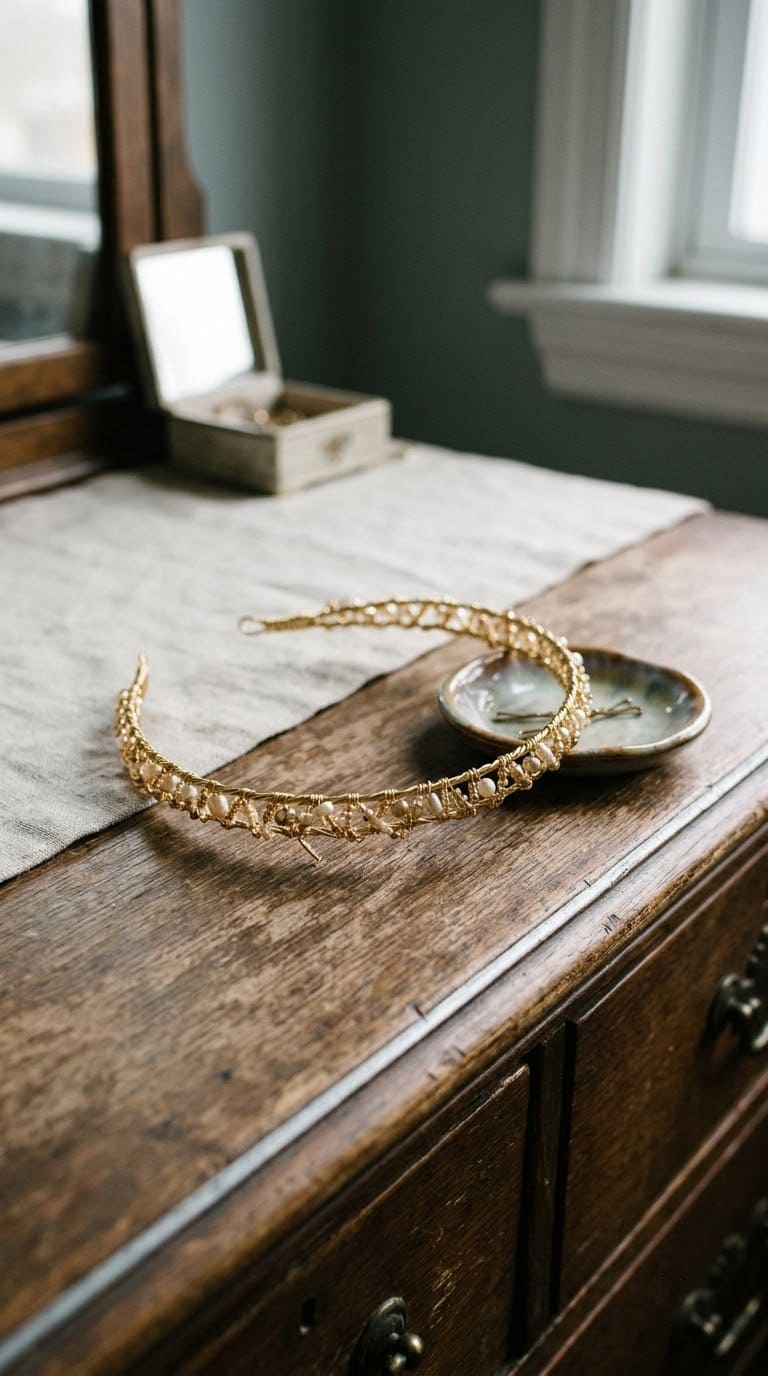
What you need: Sturdy craft wire, round-nose pliers, wire cutters, beads, and tape or small end beads.
Steps:
- Measure from ear to ear over the top of your head.
- Cut the wire a few inches longer than that.
- Bend the wire gently into a curve.
- Curl each end into a small loop with the pliers.
- Slide on beads and wrap small beads at the ends.
- Cover any sharp tip with tape or an end bead.
Detail that helps: Wrap the wire around a bottle or jar to set the curve. Try it on as you go.
Care: Round every end. A stiff wire can press on the head, so test the fit before gifting.
Time and cost: about 30 minutes, very low cost.
14. Personalized Ring Dish
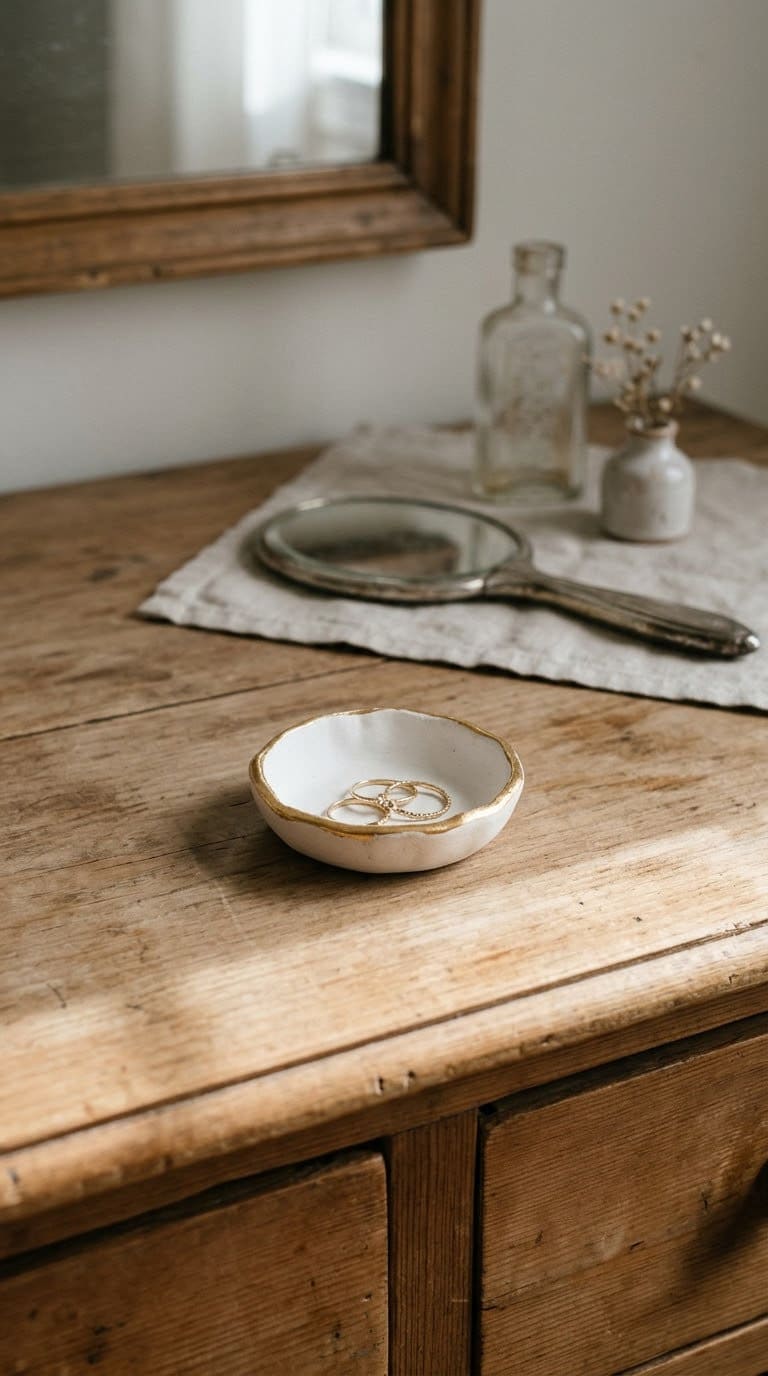
What you need: Air-dry clay, a rolling pin, a small bowl as a mold, a stamp or toothpick, paint, and sealer.
Steps:
- Roll the clay out to about a quarter inch thick.
- Press it into or over a small bowl to make a shallow dish.
- Smooth the edge with a damp finger.
- Press in a name or a pattern.
- Let the clay dry as the package says, then paint the rim.
- Seal the dish with a clear coat.
Detail that helps: Dry the clay slowly in a cool spot so it does not crack. Sand any rough spots lightly when dry.
Care: Use the dish for jewelry only. Do not use it for food.
Time and cost: about 1 hour plus drying, low cost.
15. Succulent Pot Garden
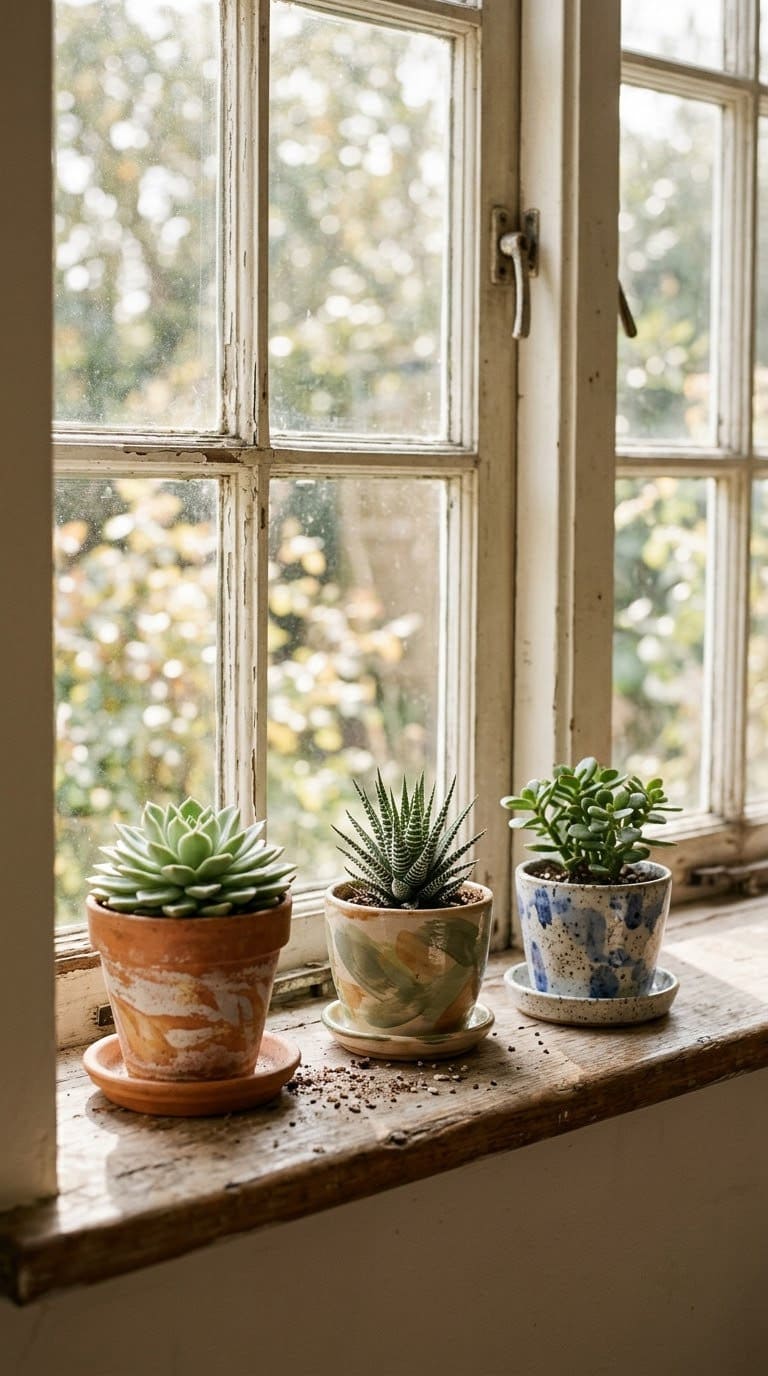
What you need: Small pots with drainage holes, succulents, potting mix, window screening, and saucers.
Steps:
- Check that each pot has drainage holes.
- Cover the holes with a piece of window screening.
- Fill the pot with a lightweight potting mix.
- Plant the succulent and firm the mix around it.
- Water until it drains, then let the pot sit on a saucer.
Detail that helps: Nassau County says containers must have drainage holes. If a plastic pot has none, drill four to six evenly spaced holes. Do not drill ceramic. It also says to use a soilless potting mix, not garden soil.
Care: Nassau says larger containers mean less watering and that plants needing water several times a day should move to a pot 2 inches larger. Most flowering plants need at least 3 to 4 hours of sun for limited blooms and 6 to 8 hours to flourish. Our best DIY house craft ideas have more plant crafts.
Time and cost: about 20 minutes, low cost.
16. No-Sew Cake Slice Pillow
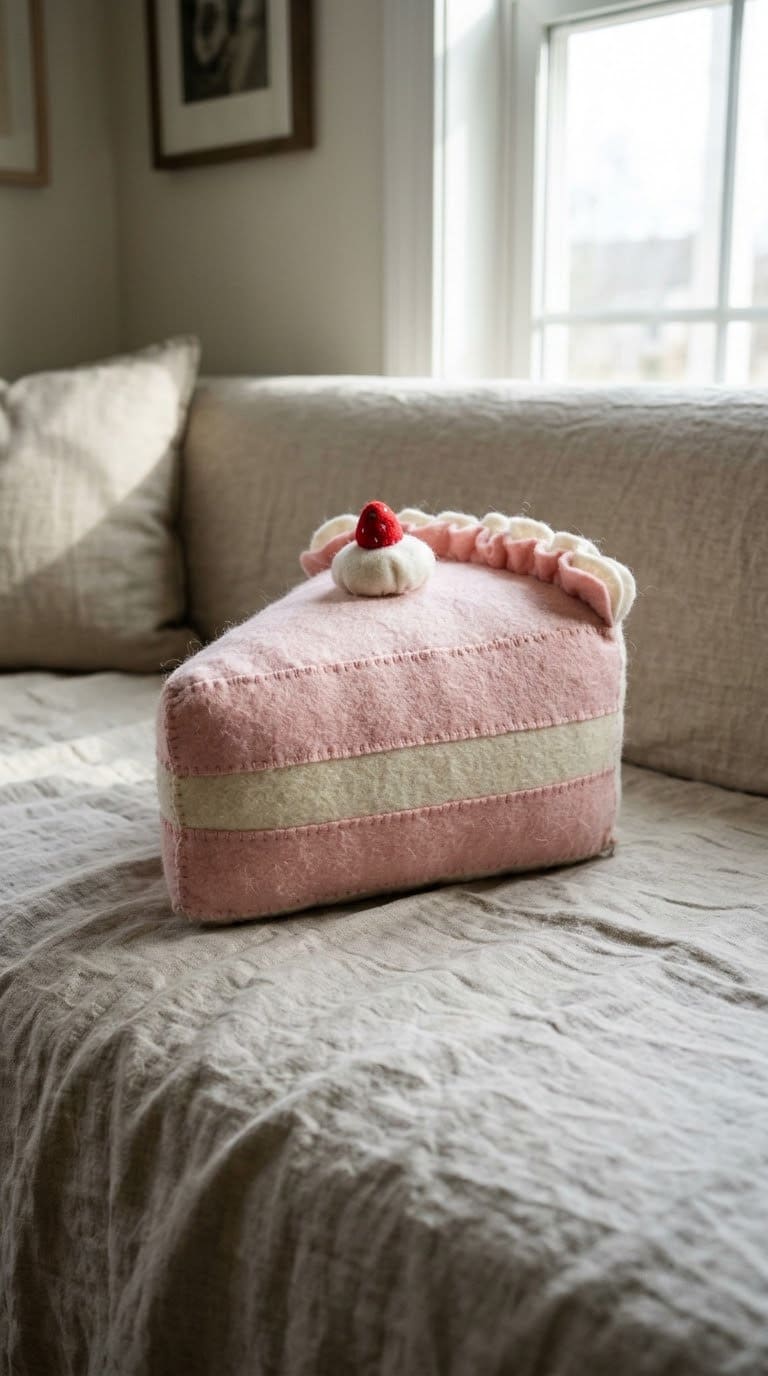
What you need: Felt in two or three colors, fabric glue, scissors, stuffing, and a paper pattern.
Steps:
- Draw a wedge pattern on paper and cut it out.
- Cut two wedges and one long side strip from the felt.
- Glue the strip to the edge of one wedge, leaving a gap.
- Glue the second wedge on top.
- Let the glue set, then stuff the pillow through the gap.
- Glue the gap shut and add a felt strawberry or frosting on top.
Detail that helps: Press the glued edges firmly and hold them for a minute. Use a weight while they dry.
Care: Use washable fabric glue and spot clean only.
Time and cost: about 1 hour plus glue time, very low cost.
17. Fabric-Covered Notebooks
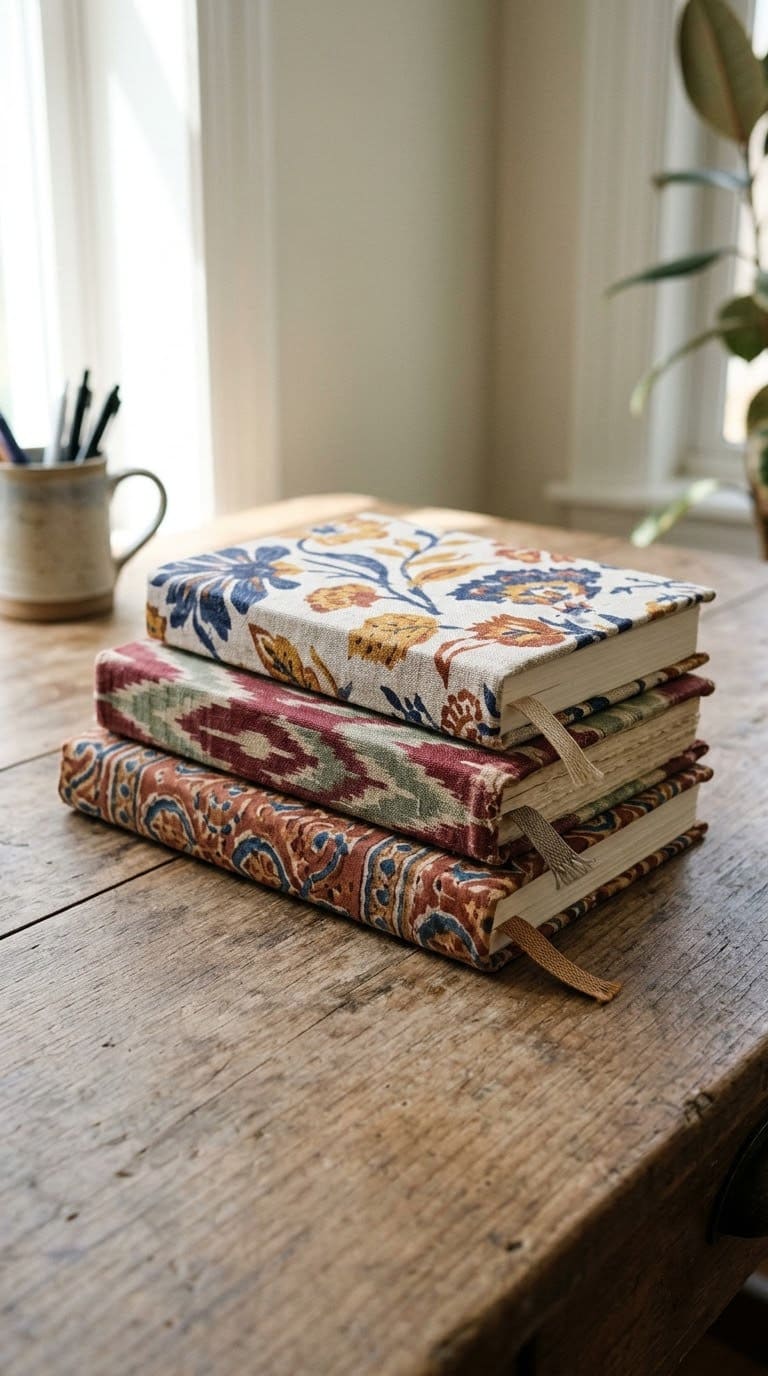
What you need: Cotton fabric, a notebook, fabric glue or spray adhesive, scissors, and a ruler.
Steps:
- Open the notebook flat and lay it on the back of the fabric.
- Cut the fabric one inch larger than the cover on every side.
- Glue the fabric to the cover, smoothing it with a ruler.
- Fold the edges in and glue them down.
- Glue a plain sheet of paper over the inside cover to hide raw edges.
Detail that helps: Cotton folds neatly and does not fray as much. Iron the fabric first to remove wrinkles.
Care: Use spray adhesive outdoors. Keep fingers off the cover until the glue sets.
Time and cost: about 30 minutes, very low cost.
18. Painted Terracotta Pots
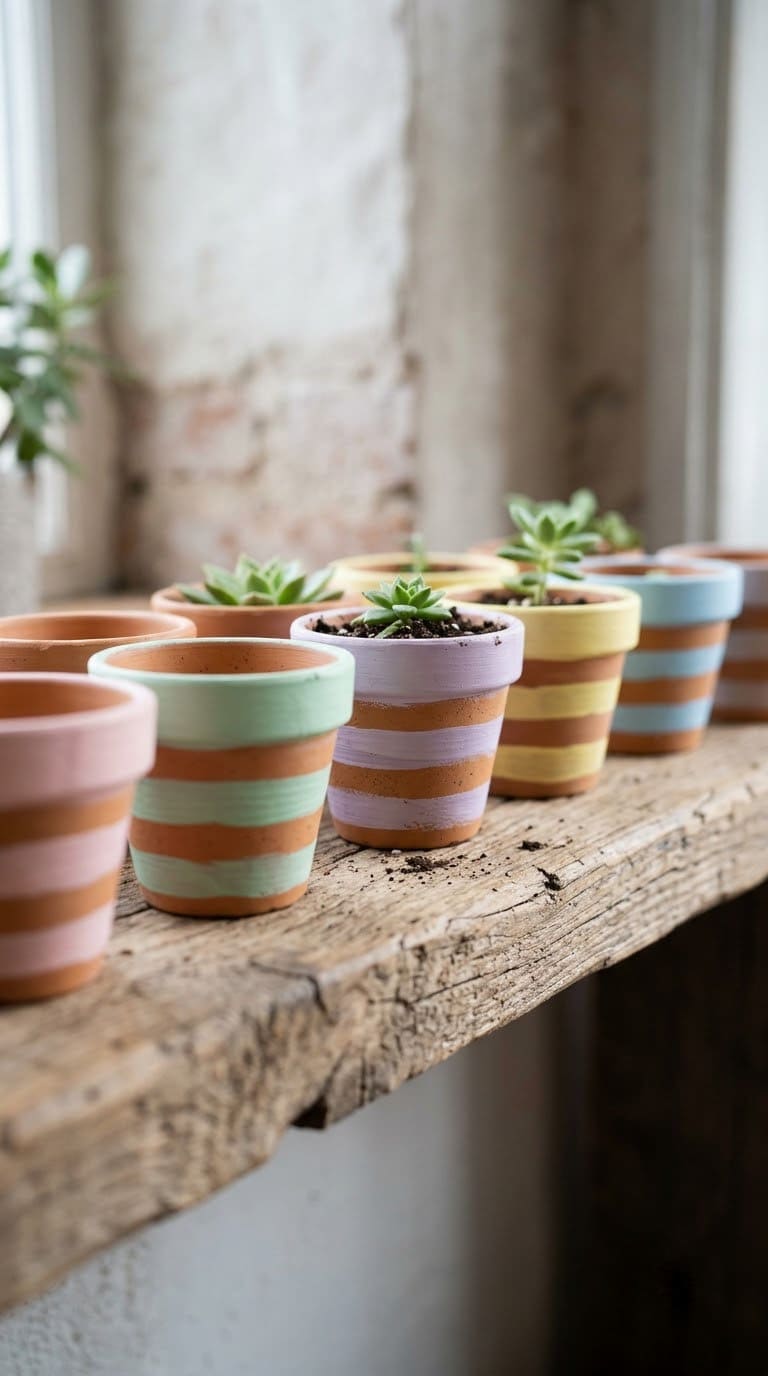
What you need: Small terracotta pots, acrylic paint, painter’s tape, brushes, and a clear spray sealer.
Steps:
- Wash the pots and let them dry.
- Tape off stripes if you want clean lines.
- Paint the outside in thin coats and let each dry.
- Peel the tape while the last coat is slightly tacky.
- Seal the outside with a clear coat.
- Keep the drainage hole clear of paint.
Detail that helps: Nassau County says clay pots and moss baskets dry out quickly because they absorb water, so they need more frequent watering. It also says to soak clay pots in water before planting. For more projects, see our DIY ideas that improve your home.
Care: Paint the outside only. Sealing the inside can trap moisture.
Time and cost: about 45 minutes plus drying, very low cost.
19. Jar Desk Organizers
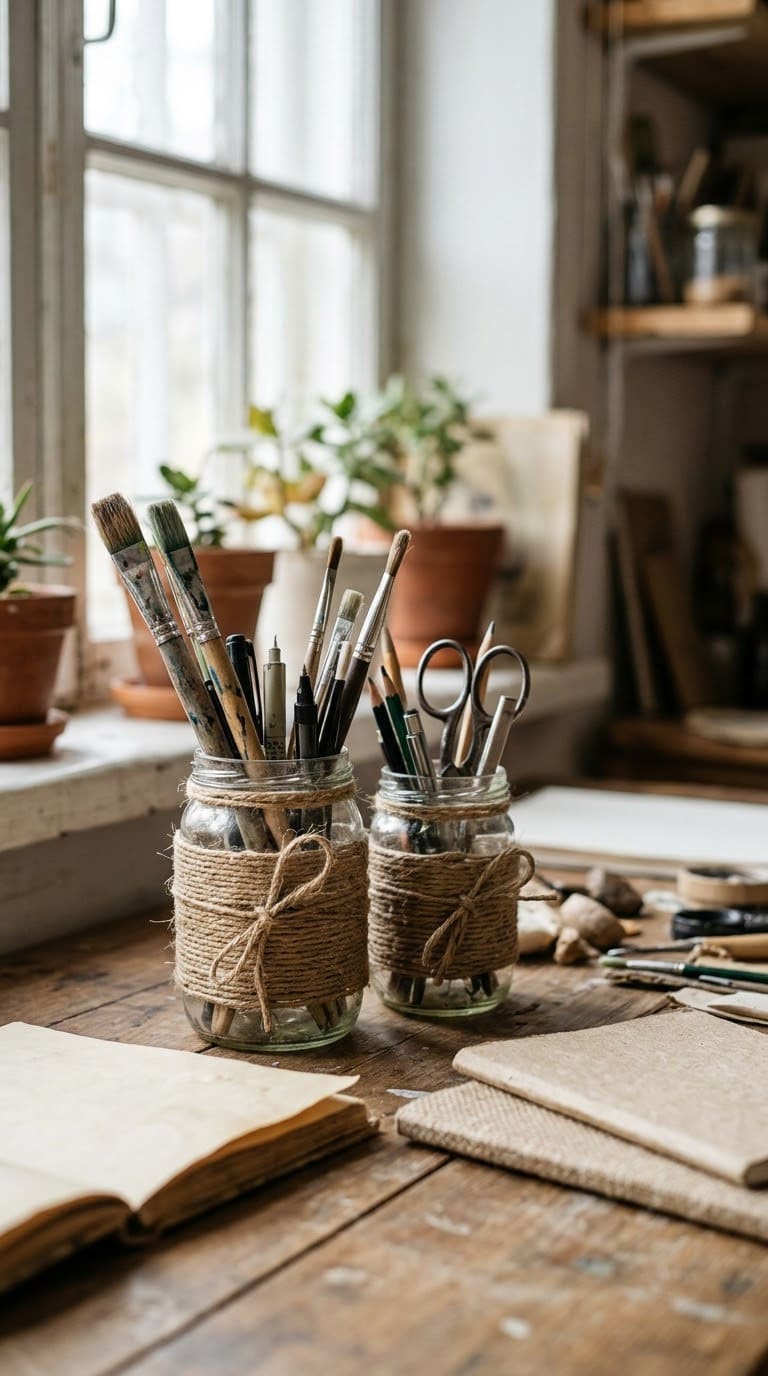
What you need: Clean glass jars, twine or fabric, white glue or a hot glue gun, and scissors.
Steps:
- Wash the jars, remove labels, and let them dry.
- Glue the end of the twine at the base of the jar.
- Wrap the twine tightly up the jar, adding glue every few rows.
- Glue the top end and trim.
- Group jars by height for pens, scissors, and brushes.
Detail that helps: Set a heavy jar on a non-slip pad so it does not slide on a smooth desk.
Care: Hot glue guns burn. Let the glue cool before you handle the jar, and keep the gun away from children.
Time and cost: about 30 minutes, very low cost.
20. Washi Tape Wall Art
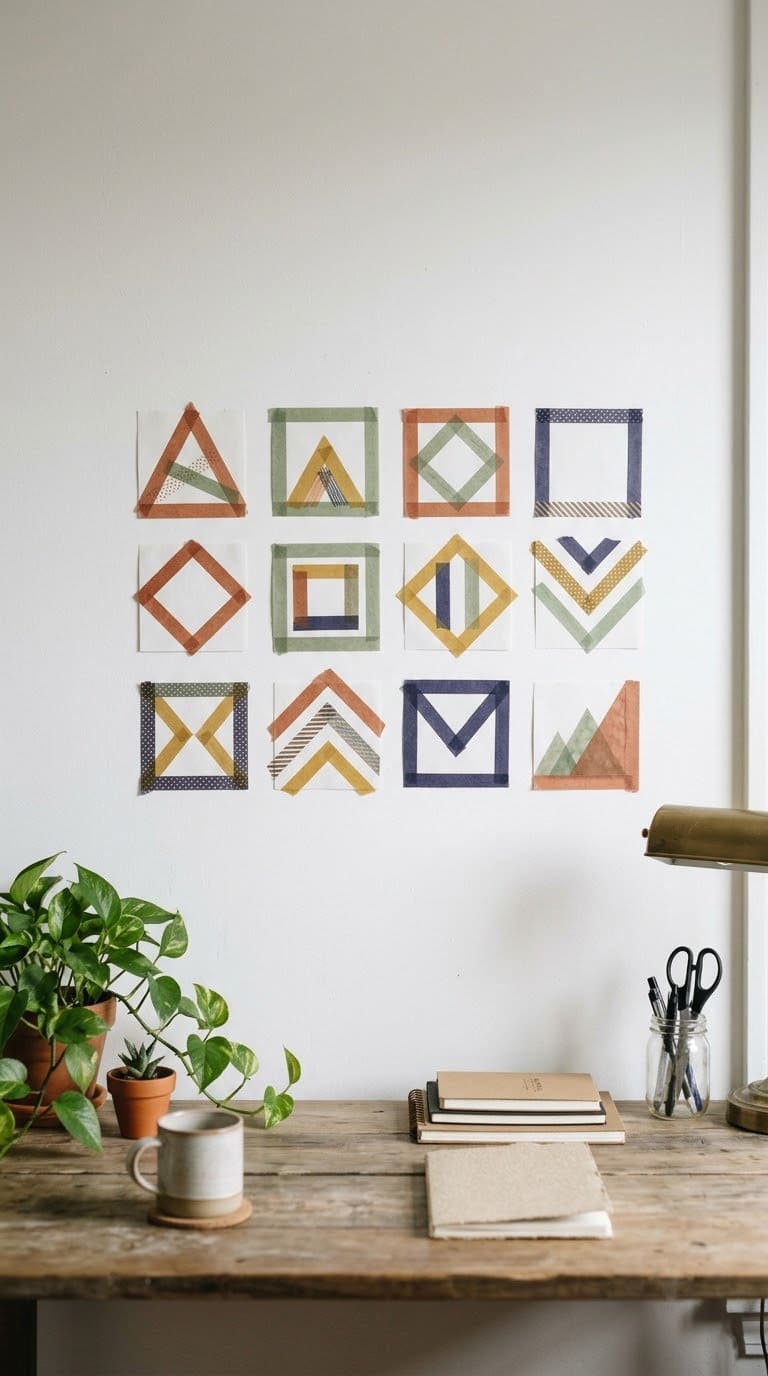
What you need: Washi tape in several colors, scissors, a ruler, a pencil, and a small level.
Steps:
- Test a small piece of tape on a hidden spot of the wall.
- Mark light guide lines with a pencil and level.
- Press the tape in shapes: triangles, lines, or a grid.
- Trim the ends with scissors.
- Press the edges flat with your fingers.
Detail that helps: Our guide to types of tapes helps you pick. Washi tape peels off most painted walls without damage, but test first.
Care: Peel slowly at a low angle. If the paint lifts, stop and test a different spot.
Time and cost: about 30 minutes, very low cost.
How Do You Give a Handmade Gift Well?
Wrap it with care. A simple box and a ribbon make a cheap project feel special. Add a short card with care notes.
Match the gift to the person. A candle suits someone who likes a quiet evening. A sock cactus suits a child. A succulent pot suits a plant lover.
Include safety notes where they matter. For a candle, mention the 12-inch rule. For a lip tint, mention the date made. For a wire ring, mention that the ends are filed.
Common Mistakes to Avoid
Leaving a candle in a bedroom is the first mistake. The USFA says not to use lit candles in bedrooms, bathrooms, and sleeping areas.
Using craft dye on lips is the second. The FDA says color additives must have approval for their intended use.
Skipping drainage is the third. Nassau County says containers need drainage holes.
Cutting without a mat is the fourth. A craft knife can slip and damage your table or your hand.
Serving food on a painted dish is the fifth. Keep hand-painted pieces for display.
FAQ
How far should a candle be from things that burn?
The USFA says at least 12 inches from anything that burns.
Can I use a candle in a bedroom?
The USFA says not to use lit candles in bedrooms, bathrooms, and sleeping areas.
Is homemade lip color safe?
The FDA says color additives must have FDA approval for their intended use. Use colorants stated as approved for lip use.
Do succulent pots need holes?
Yes. Nassau County says containers need drainage holes and to cover them with screening.
Can I eat from a hand-painted dish?
Not unless the paint states it is food safe. Keep it for display.
Never miss an update — choose FarmFoodFamily as your preferred source on Google.
How it works: Tap the button below to open Google's settings page, then check the box next to FarmFoodFamily.
Tap the checkbox to turn it blue — that's how you know it's set.