8 Cheerful Colorful DIY Garden Crafts That Label, Feed and Brighten Your Beds
Bright garden crafts earn their place when they label a plant, feed a bird or hold a flower, as long as you seal the paint and give every container a way to drain.

Never miss an update — choose FarmFoodFamily as your preferred source on Google.
How it works: Tap the button below to open Google's settings page, then check the box next to FarmFoodFamily.
Tap the checkbox to turn it blue — that's how you know it's set.
Bright garden crafts earn their place when they label a plant, feed a bird or hold a flower, as long as you seal the paint and give every container a way to drain.
Products We Recommend
This post contains affiliate links. We may earn a commission on qualifying purchases at no extra cost to you.

TFIVE Acrylic Paint Markers, 8 colors, extra fine tip
Permanent paint pens for lettering plant names on rocks, spoons and stakes in ideas 1 to 3.
Shop Now
FolkArt Outdoor Sealer, 8 ounce, gloss
Outdoor sealer for painted rocks, stakes and the hubcap flower in ideas 1, 3 and 8.
Shop Now
River Rocks for Landscaping, 2 to 3 inch, 40 lb
Smooth river rocks that suit painted plant markers in idea 1.
Shop NowA colorful garden craft should do more than sit there. The best ones label a plant, hold a flower or feed a bird.
But bright paint fades, containers drown roots and feeders spread disease. A craft that fails in a month is just clutter.
These eight ideas give you color and a job. Each one includes the steps, the drying times and the checks that keep it working all season.
Answer 4 quick questions and get matched to the exact fix for your yard — drainage, budget, layout, or something else entirely.
Take the Free QuizQuick Answer
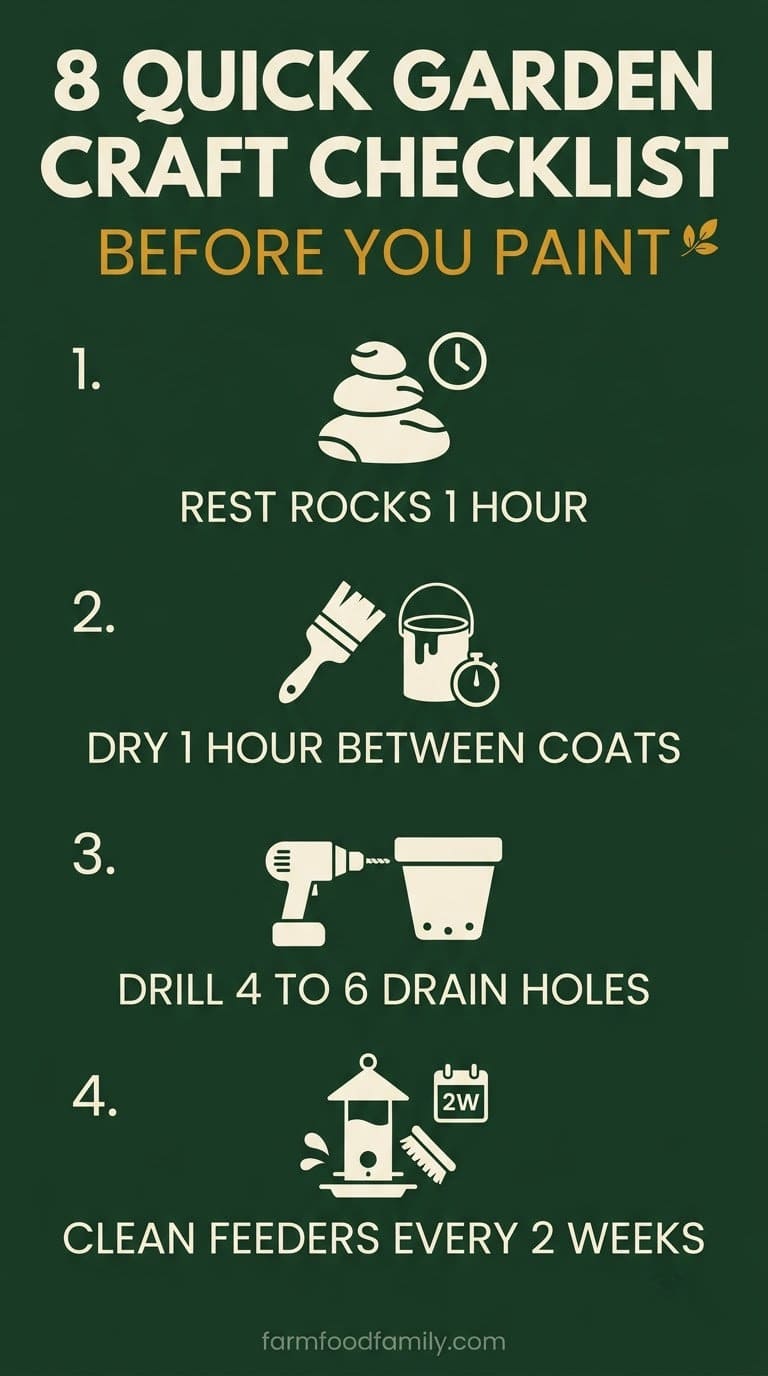
Seal and dry every painted piece. Crafts by Amanda says to rest washed rocks for about an hour, wait at least an hour between paint coats and let a clear coat dry overnight.
Give every planter drainage. Cornell Cooperative Extension Nassau County says a container needs drainage holes, and to drill four to six evenly spaced holes if it has none. Fill it with potting mix, not garden soil.
Keep feeders clean. Tancey Cullum Belken at Clemson Extension says to clean seed feeders at least every two weeks with a 1 to 9 bleach solution.
Pick light base colors and white lettering, which the A Cultivated Nest team says read best on rocks.

And size the container to the plant. The University of Wisconsin Extension says containers holding at least 2 gallons of soil work best.
Most yard problems trace back to one specific, fixable cause. Find yours in 4 quick questions.
Take the Free QuizWhich Idea Fits You?
Pick by the job you want done and the time you have. This table sorts the eight ideas below.
| Idea | Job it does | Budget tier | Skill | Main risk |
|---|---|---|---|---|
| 1. Painted river-rock markers | Label plants | Lowest | Beginner | Fading paint |
| 2. Spoon markers | Label herbs | Low | Beginner | Sharp edges |
| 3. Arrow stake markers | Label rows | Low | Beginner | Rot at the ground |
| 4. Rubber boot planter | Grow flowers | Lowest | Beginner | No drainage |
| 5. Teacup bird feeder | Feed birds | Low | Beginner | Dirty feeder |
| 6. Flower-pot bird feeder | Feed birds | Low | Intermediate | Dirty feeder |
| 7. Watering can planter | Grow herbs | Low | Beginner | Waterlogged roots |
| 8. Hubcap flower stake | Add color | Lowest | Beginner | Rust and sharp edges |
Before You Start: Paint, Drainage and Hygiene
Three rules keep every craft in this list working. Read them once, then use them on every project.
How do you make painted crafts last?
Crafts by Amanda and the A Cultivated Nest team agree on the basics, and both show their steps in full. Wash the surface, paint in thin coats and seal it.
| Step | What the tutorials say |
|---|---|
| Wash and dry rocks | Rest them about an hour, since rocks are porous |
| Paint | Use outdoor craft or patio paint, with at least an hour between coats |
| Coats | Two coats, plus a third if needed |
| Lettering | White paint works best, per A Cultivated Nest |
| Dots and details | Dry for 2 to 3 hours |
| Clear coat | Spray it outdoors because of the fumes, and dry overnight |
The A Cultivated Nest team says a clear sealer may help markers last if they get very wet. Choose lighter base colors, since they make lettering easy to read.
How do you make a container drain?
The Nassau County fact sheet is clear. Containers must have drainage holes to let excess water out, which helps prevent overwatering and may reduce root rot.
If a container has no holes, drill four to six evenly spaced holes of 1/4 to 1 inch, depending on its size. It says not to drill ceramic containers. Cover the holes with a piece of window screen or a coffee filter, so soil stays in.
What soil goes in a craft container?
Use potting mix, not garden soil. The fact sheet says garden soil has the wrong weight and texture, and may carry weed seeds or disease.
Permanent paint pens for lettering plant names on rocks, spoons and stakes in ideas 1 to 3.
Shop NowThis post contains affiliate links. We may earn a commission on qualifying purchases at no extra cost to you.
It also says not to reuse old potting mix. At the end of the season, wash containers and soak them for at least an hour in a solution of 1 part bleach to 9 parts water.
How do you clean a feeder?
Belken at Clemson says seed feeders need cleaning at least every two weeks, and more often with many visitors, rain or dead birds nearby.
The average homeowner spends $616/year on yard fixes that don't address the real problem. Find out what yours actually is — before you spend another dollar.
Take the Free QuizScrub off debris, soak each part for 10 minutes in 10 percent bleach (1 part bleach to 9 parts water), rinse well and let it dry fully before you refill.
1. Painted River-Rock Markers
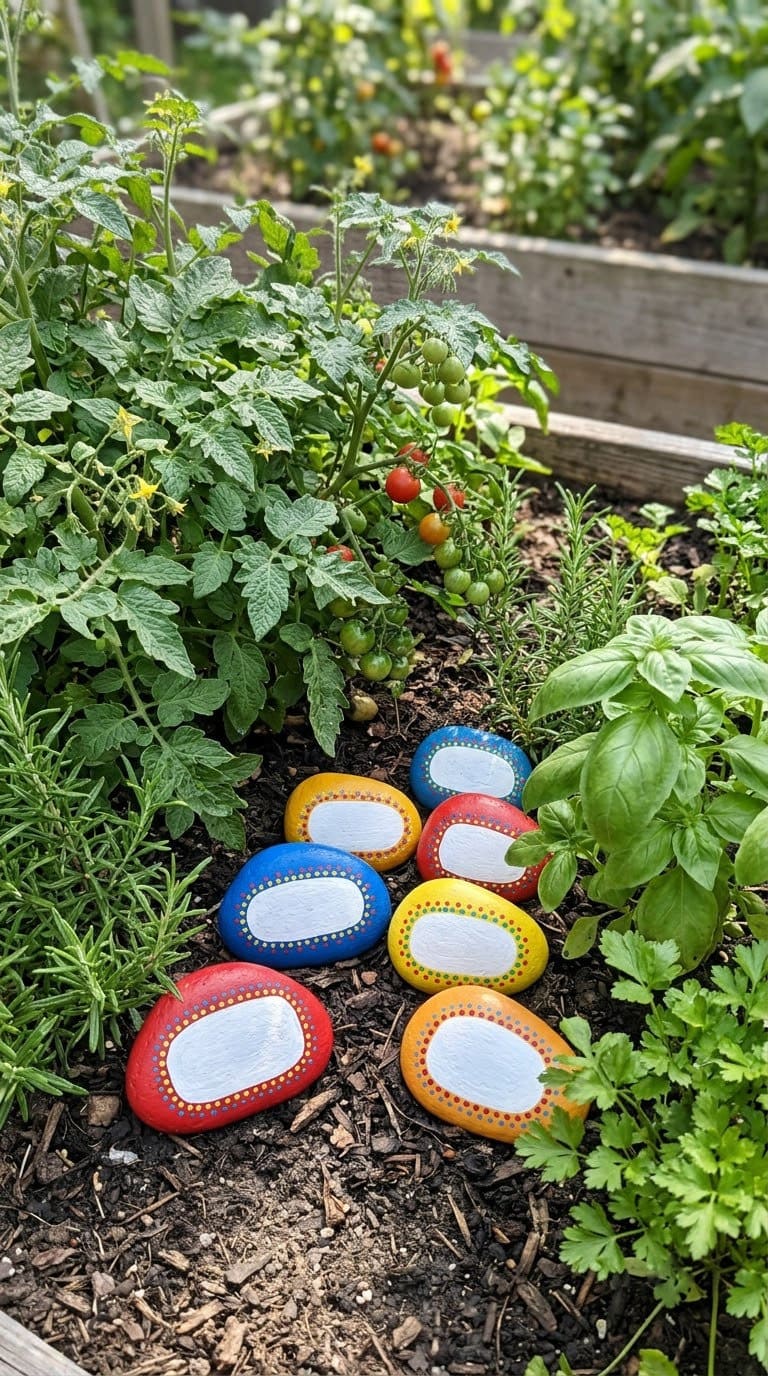
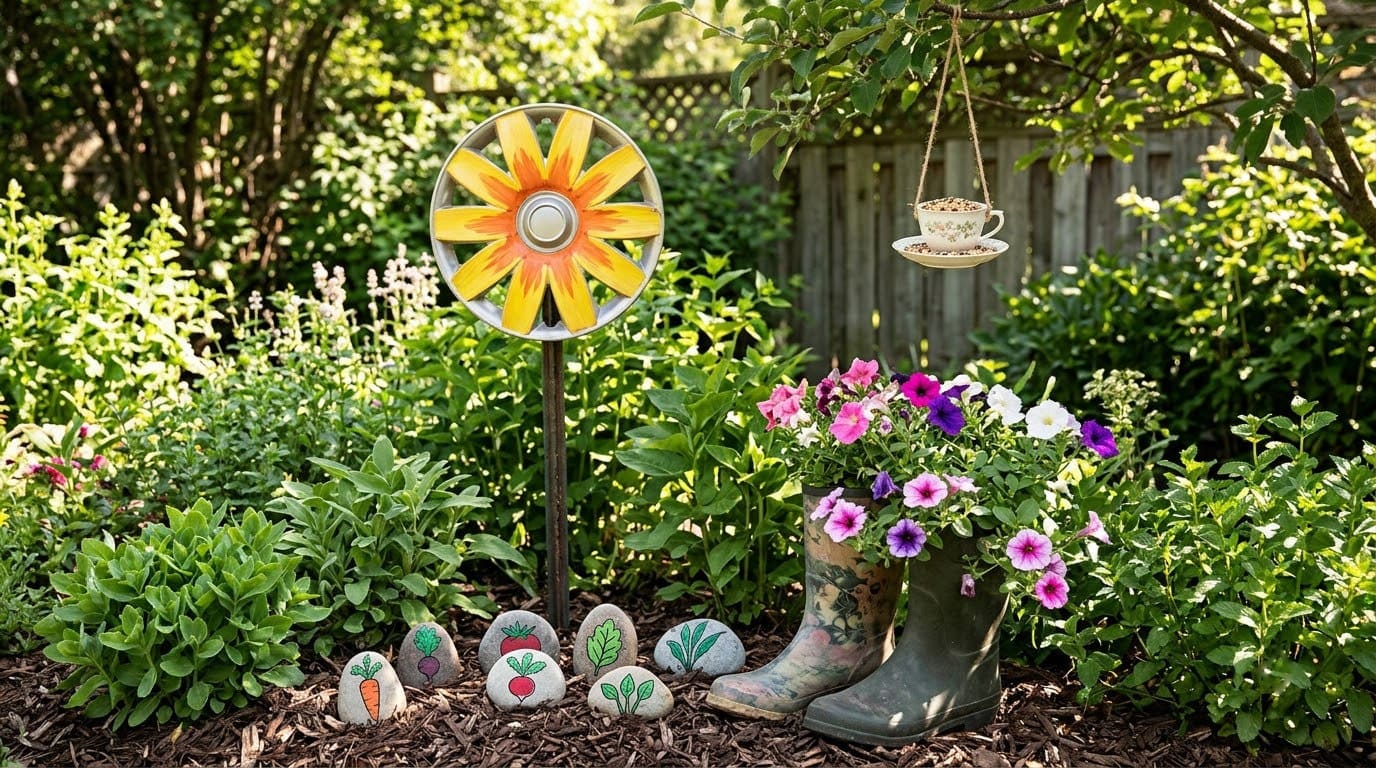
A painted rock marker is the easy way to add color and tell your basil from your mint. It’s also a great project for kids.
Pick palm-sized, flat, smooth rocks. The A Cultivated Nest team says lighter paint colors work best. Crafts by Amanda says to choose the rock size by name length, so longer names get larger rocks.
Follow the steps. Wash the rocks with warm soapy water and dry them well. Let them sit for about an hour, since rocks are porous. Paint two coats of outdoor paint, with at least an hour between coats, and add a third if the color looks thin.
Add the details. Write each plant name in white paint with a thin brush, which the A Cultivated Nest team says works best. Use the handle end of a brush to dot on spots, and let the dots dry for 2 to 3 hours.
Seal them. Spray a clear coat outdoors, because of the fumes. Let the markers dry overnight before you put them in the garden.


Plan the layout. Map each name to a rock on paper before you paint. Place each marker at the base of its plant, facing the path.
Make a set for a theme. Paint all your herb markers in one color family and your vegetable markers in another. A row of matched rocks looks planned and helps visitors read the garden.
Keep a spare set. Paint a few blank rocks in your colors. When you add a new plant, you only need to write its name and seal it.
Check them each spring. Look for chipped paint or faded lettering. Touch up the white lettering with a thin brush, then add a fresh coat of clear sealer.
For more painted rock ideas, see our DIY painted rock ideas. Budget: lowest. Skill: beginner.
2. Silverware Spoon Markers
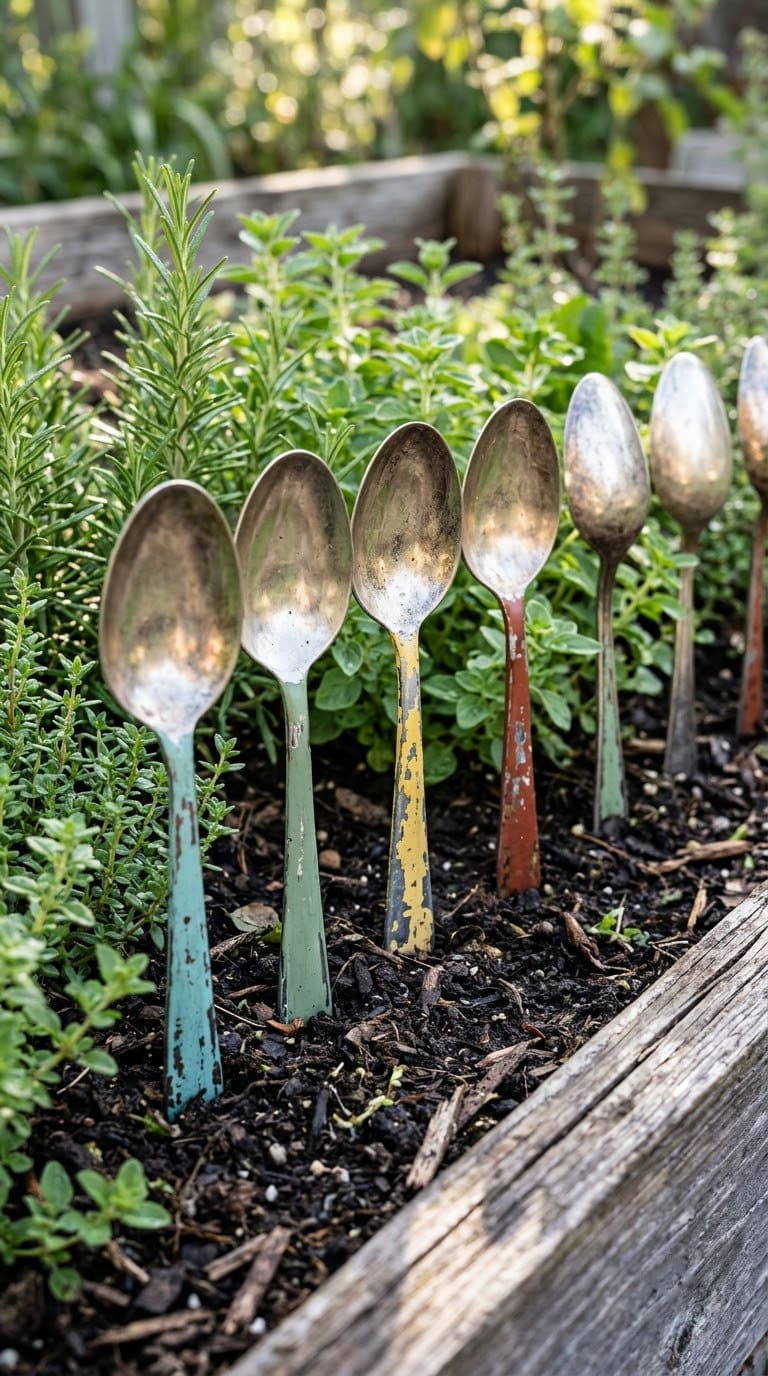
An old spoon makes a neat herb marker. The bowl carries the name and the handle pushes into the soil.
Look for stainless spoons at thrift stores and yard sales. Choose spoons with a flat, wide bowl so the name fits.
Make them in steps. Wash the spoon and dry it. Write the plant name on the bowl with a paint pen, or stamp the letters with a set of metal stamps and a hammer on a steady surface. Let the ink or paint dry fully.
Add color. Paint the handle with outdoor craft paint in two thin coats, letting each dry. Finish the bowl with a clear coat spray outdoors, as Crafts by Amanda does for rocks.
Keep it safe. Sand any rough edge or bent tip so it can’t scratch you when you weed. Use spoons you don’t need for food, and don’t put spoons that you eat from in the garden.
Pick the right spoon. A deep bowl holds less lettering than a flat one. Match the spoon to the length of the plant name.
Test the stamping. Practice on a scrap spoon first. Hit the stamp with one firm tap, and keep the spoon on a solid surface so the bowl doesn’t bend.
Use a color code. Paint all the herb handles one color, so you know which row is which at a glance.
For signs with more words, see our DIY garden sign ideas. Budget: low. Skill: beginner.
3. Colorful Arrow Stake Markers
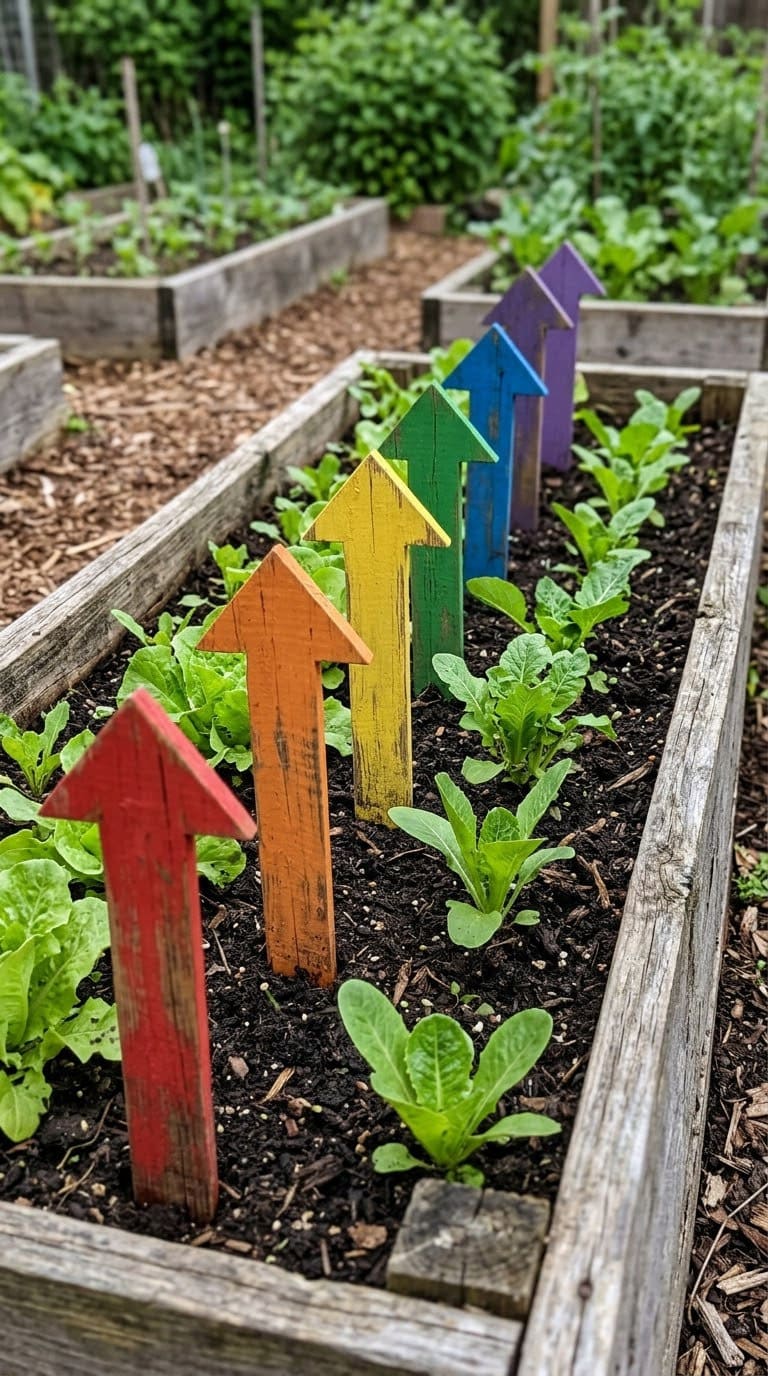
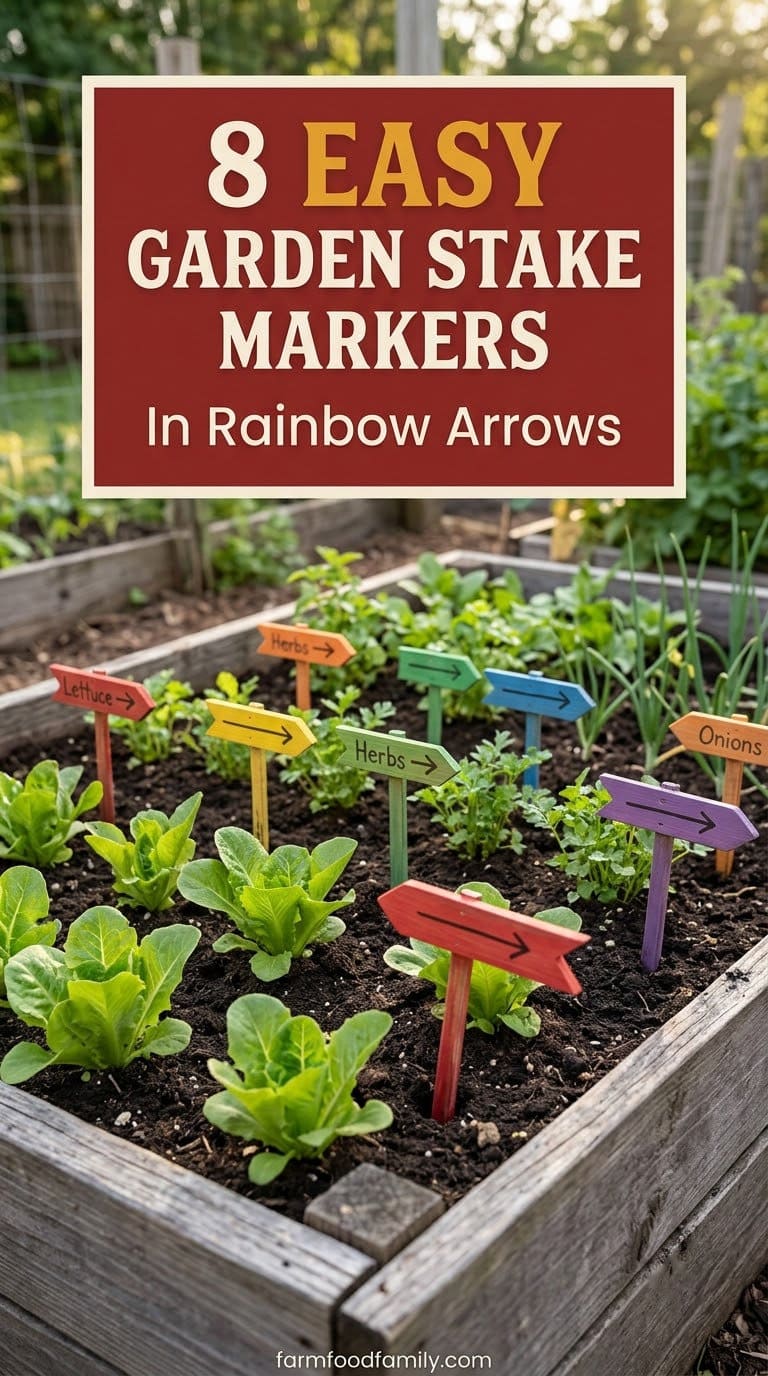
An arrow stake points right at the plant. It reads well from a path and lasts when you protect the wood.
Cut a thin strip of scrap wood into a pointed end, or use paint stirrers. Paint the arrow tip in a bright color and the shaft in a lighter tone.
Follow the steps. Cut the wood to length, with a point at the bottom for the soil and an arrow shape at the top. Sand the edges.
Paint two coats of outdoor paint, drying between coats. Write the name with a paint pen, then seal the stake with a clear outdoor sealer.
Protect the base. Wood rots where it touches soil. Paint or seal the bottom end well, and let it dry before you push it in. Use cedar or another rot-resistant wood if you can.
Group by color. Use one color for herbs, one for greens and one for flowers. A glance tells you which bed is which.
Make them in a batch. Cut ten stakes at once and paint them in an assembly line. Do all the base coats, then all the tips, then all the lettering.
Keep the letters readable. Write the name in black on a light stripe, or in white on a dark one. High contrast reads well from a few feet away.
Add the date. Write the planting date on the back. It helps you track when to harvest.
For more bottle and recycled markers, see our wine bottle crafts for the garden. Budget: low. Skill: beginner.
4. A Rubber Boot Planter
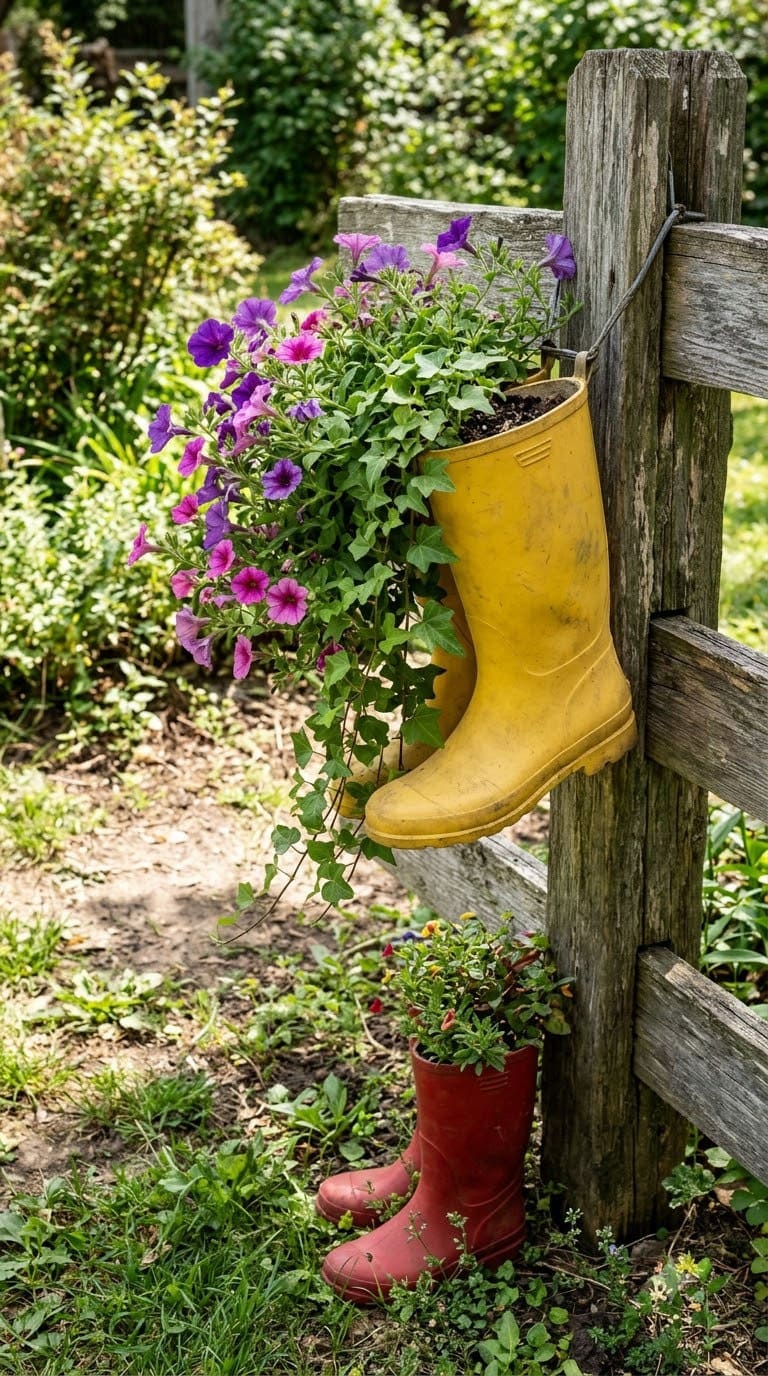
An old rain boot makes a cheerful planter. It’s cheap, bright and a little silly.
The key is drainage. The Nassau County fact sheet says containers must have holes, and to drill four to six evenly spaced holes if a container has none. Rubber isn’t ceramic, so you can punch or drill small holes in the sole.
Prepare the boot. Wash it inside and out. Drill four to six holes in the sole, at 1/4 inch or a little larger. Place a piece of window screen or a coffee filter in the bottom so soil doesn’t wash out.
Choose the right plants. The University of Wisconsin Extension says containers holding at least 2 gallons of soil work best. A boot holds far less, so pick small plants such as succulents, trailing flowers or a few herbs, and water often.
Hang or stand it. Hang the boot on a fence with a screw through the back, or stand a pair on a step. Elevate a standing boot on a brick so the holes can drain.
Use potting mix. Fill it with potting mix, not garden soil.
Pick the plants. Use plants that stay small, such as trailing petunias, creeping thyme or a few small succulents. Don’t try tomatoes in a boot, since the University of Wisconsin Extension says they need at least 5 gallons.
Water the right way. A boot is small and dries fast. Check the soil with a finger each day in hot weather, and water until you see water drain from the holes.
Stuff it well. Put the screen over the holes, then fill with potting mix and press it down lightly around the roots. Leave an inch below the rim.
Make a pair. Plant two boots in matching colors and hang them on either side of a gate or a door.
For more containers like this, see our repurposed garden container ideas. Budget: lowest. Skill: beginner.
5. A Teacup Bird Feeder
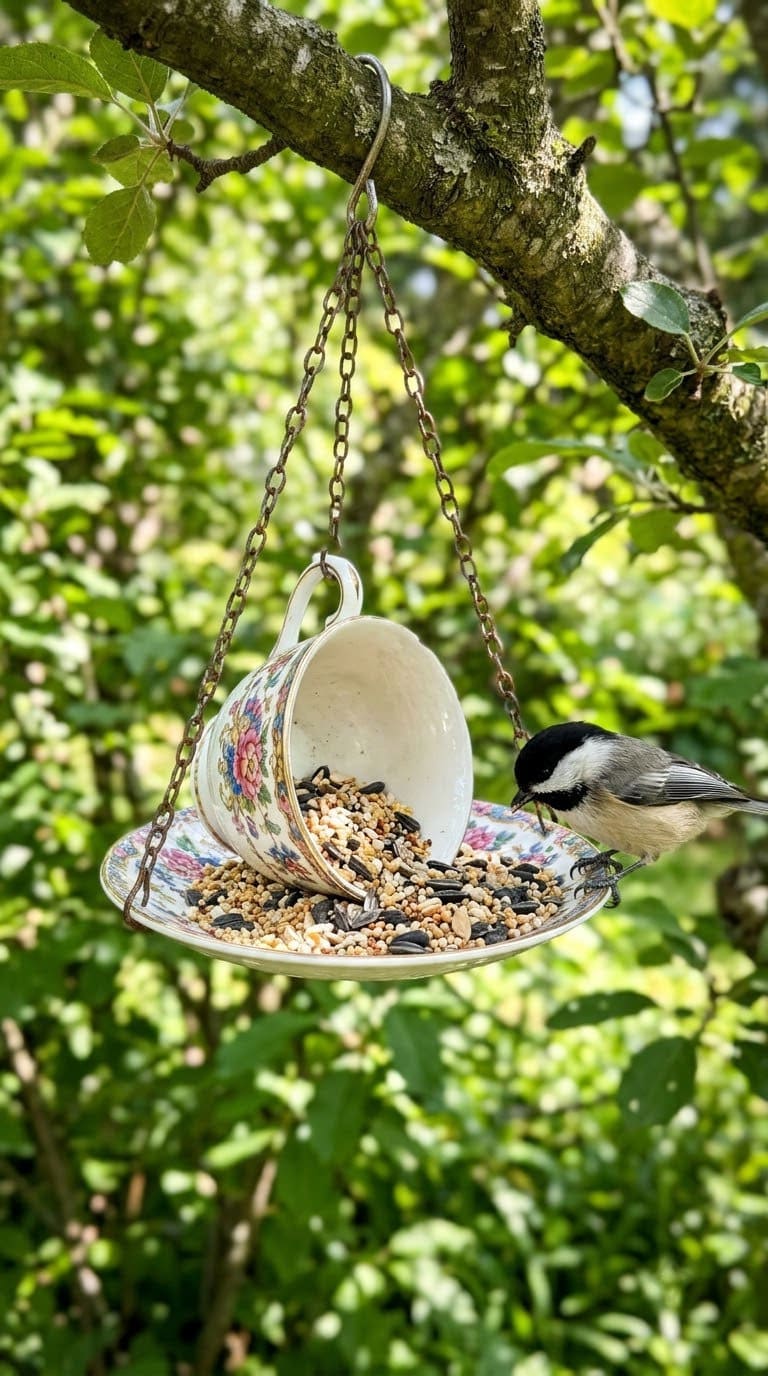
A teacup feeder looks like a tea party for birds. It hangs from a branch and holds a few handfuls of seed.
Choose a teacup with a sturdy handle and a flat saucer that fits under it. Pick a pretty pattern, since it will hang right in your view.
Make it in steps. Wash the cup and saucer. Rough up the inside of the saucer and the bottom of the cup lightly with fine sandpaper. Glue the cup to the saucer with a waterproof, outdoor-rated adhesive.
Read the label to check that it cures non-toxic, and let it cure fully. Attach a chain or a strong cord through the handle and around the saucer.
Hang it well. Hang the feeder from a sturdy branch or a hook, away from the house walls and out of reach of cats. Place it where you can see it, but where birds have cover nearby.
Keep it clean. Belken says to clean seed feeders at least every two weeks, and more often with many visitors, rain or dead birds nearby. Take the feeder down, scrub it, soak it for 10 minutes in a 1 to 9 bleach solution, rinse and dry fully.
Fill it sparingly. A small cup holds little seed, so fill it with a small amount. That way the seed doesn’t sit and spoil.
Wire it with extra hold. Wrap a loop of wire around the handle and twist it tight. A cord alone can slip, and the cup can tip.
Choose a good spot. Birds like feeders near cover but away from places where a cat can hide. Hang the feeder high enough that a cat can’t jump to it.
Keep a second cup. Make two teacups, so one can dry while you clean the other. That way the feeder is never empty for long.
Wash after storms. After a rainy week, empty and rinse the cup, even if it isn’t two weeks yet. Belken says to clean more often when it rains.
For more feeder types, see our guide to bird feeders. Budget: low. Skill: beginner.
6. A Flower-Pot Bird Feeder
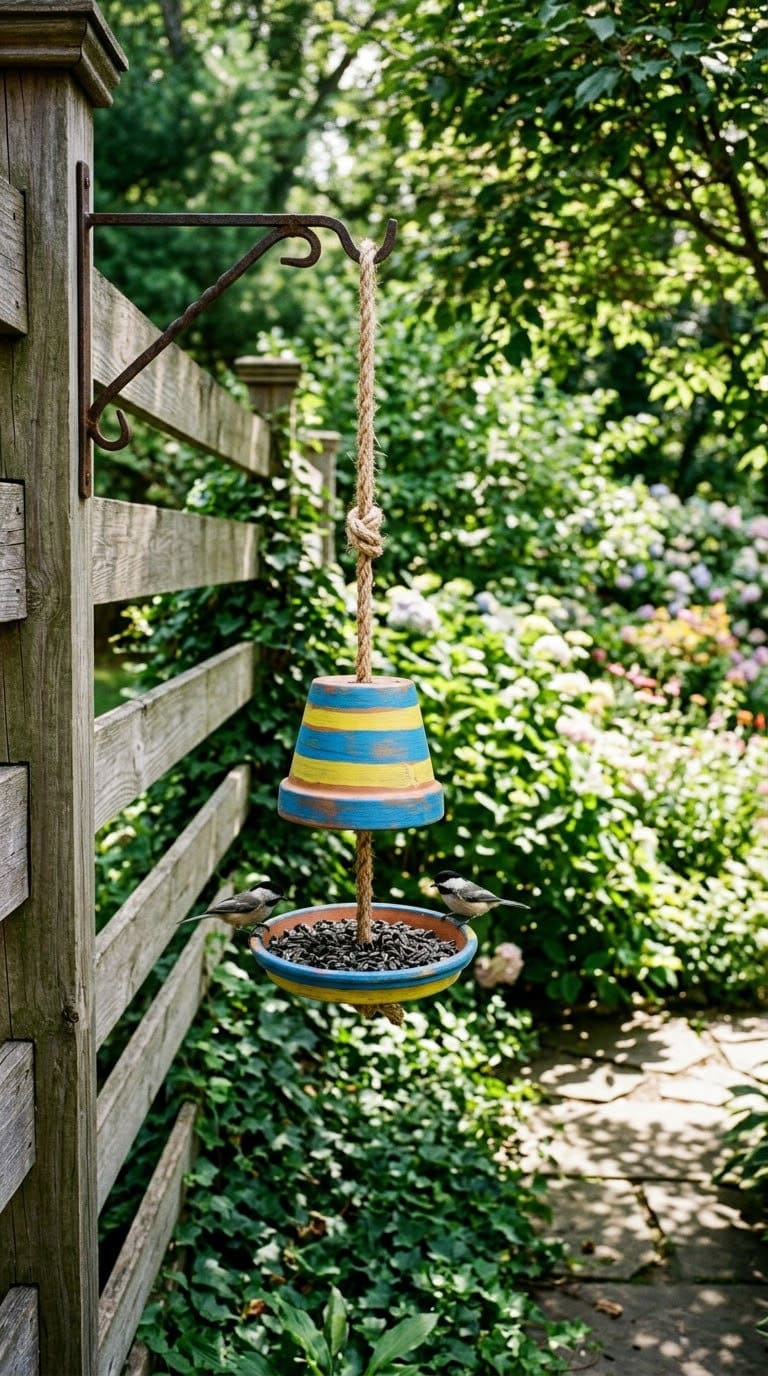
A painted flower pot makes a roomy feeder. A saucer on top acts as a tray.
Use a terracotta pot and a saucer. Paint the outside with outdoor paint in two coats and seal it. Leave the inside bare, so no paint touches the seed.
Assemble it. Turn the pot upside down and glue the saucer on top. Use a waterproof outdoor adhesive and let it cure fully. Thread a strong cord or chain through the drainage hole of the pot and tie it to a hook.
Think about weather. Seed in a tray can get wet and spoil. Hang the feeder under a roof edge or a branch that gives cover, and check it after rain.
Clean it often. Belken says to clean feeders more often when it rains. Scrub the tray, rinse it and let it dry fully before you refill it.
Seal the outside only. Paint and seal the outside of the pot, and leave the inside bare. That keeps paint away from the seed.
Add a drain. The pot’s own drainage hole lets rain run out of the tray if you tilt it slightly. Check that the tray doesn’t hold a puddle.
Mind the weight. A pot of seed is heavier than a teacup. Use a strong hook and a chain, and check that the branch can hold it.
Rotate and refill. Take the feeder down every couple of weeks for a full clean. Keep a second saucer so you can swap in a clean, dry one.
For more pot projects, see our terracotta pot ideas and wine bottle bird feeders. Budget: low. Skill: intermediate.
7. A Watering Can Planter
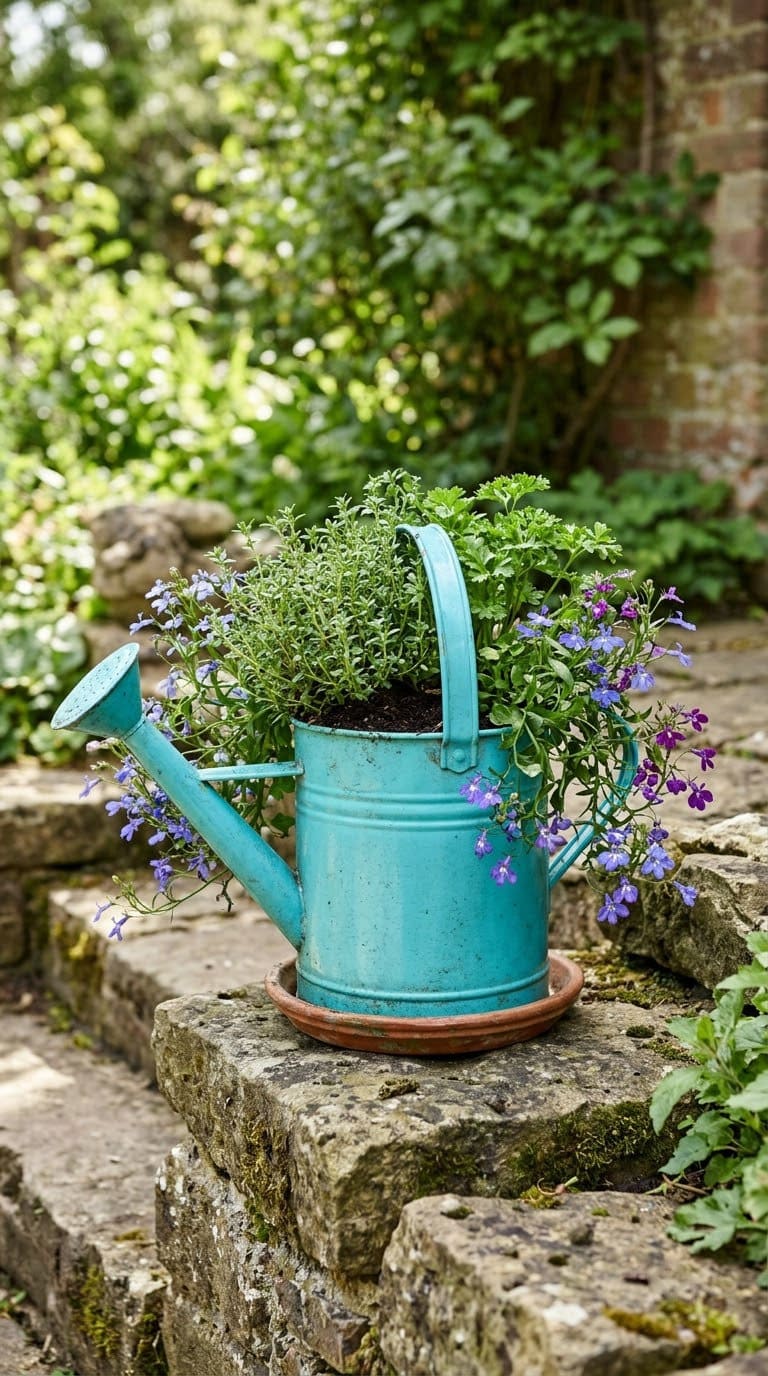
A vintage watering can makes a bold herb planter. The spout adds charm and the handle makes it easy to move.
Pick a can that holds a decent amount of soil. The University of Wisconsin Extension says containers holding at least 2 gallons of soil work best, and that small containers dry out quickly.
Add drainage. Drill four to six evenly spaced holes in the bottom, as the Nassau County fact sheet advises. Cover the holes with window screen or a coffee filter.
Plant and place it. Fill the can with potting mix and plant herbs or flowers that match the can’s size. Stand the can on bricks or feet so the holes can drain.
Mind the heat. A metal can heats up in the sun. Keep it in part shade or water it more often in hot weather.
Paint the outside. Use outdoor metal paint in a bright color. Let it cure before you plant.
Choose herbs that like drying out. Many herbs do well in a small can. Group plants with the same water needs, as the Nassau County fact sheet advises for mixed containers.
Remember the weight. The University of Wisconsin Extension says large containers are heavy when wet. A can filled with soil is heavier than it looks, so set it where you want it before you fill it.
Add a saucer for a patio. If the can sits on a deck, add a saucer or tray beneath it so water doesn’t stain the wood.
Use the spout. Let a trailing plant spill from the spout for a charming look.
For more ways to reuse containers, see our low-budget DIY garden pot ideas. Budget: low. Skill: beginner.
8. A Sealed Hubcap Flower Stake
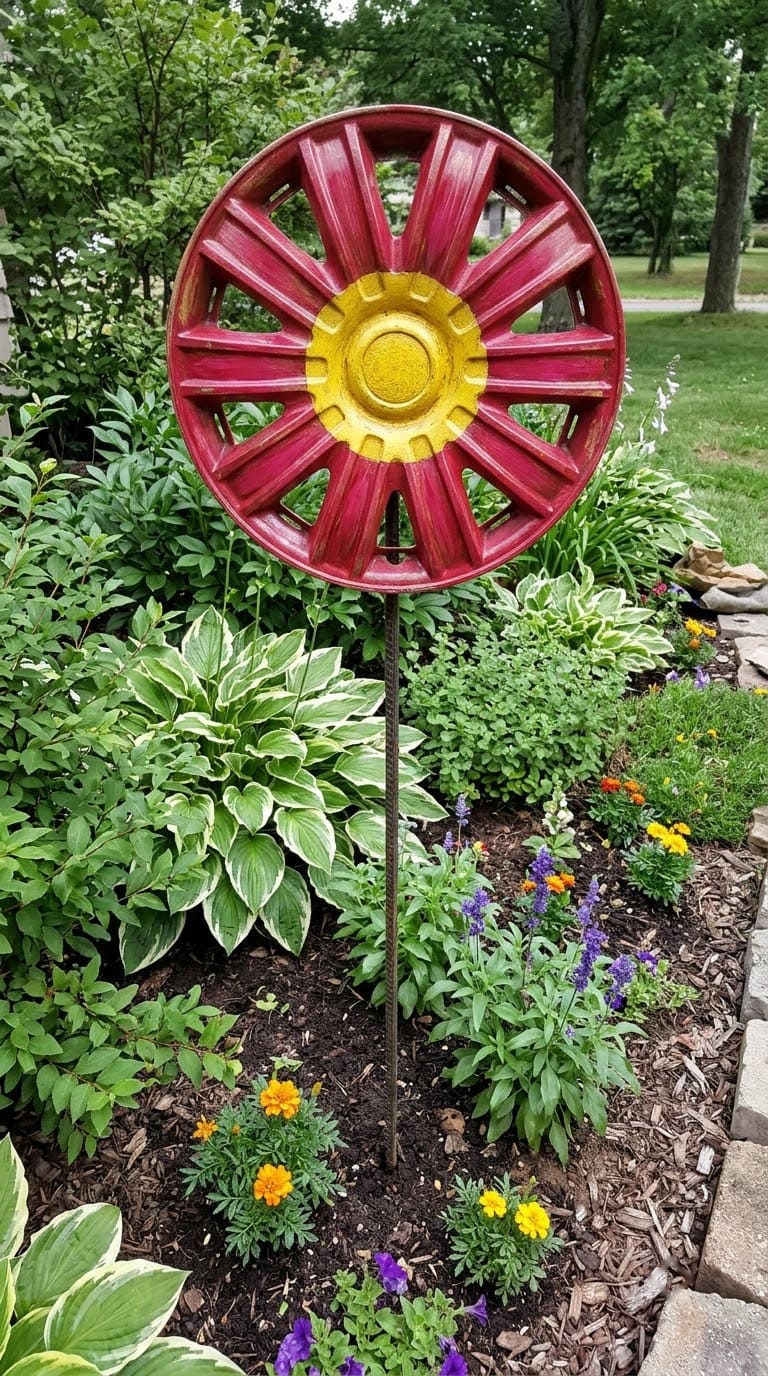
A hubcap makes a big, bright flower for the back of a bed. It’s a fun way to turn scrap into a focal point.
Wash the hubcap and sand it lightly so paint grips. Paint a large flower, with a bright center and petals in a ring.
Prep and paint. Use a rust-resistant primer, then two coats of outdoor paint in thin layers. Let each coat dry fully. Finish with a clear outdoor sealer.
Mount it safely. Attach the hubcap to a metal or wood stake with strong exterior screws. Push the stake deep into the soil so the flower stands firm in wind.
Protect your hands. Wear gloves when you handle the hubcap. Sand any sharp edge and round it with a file.
Place it well. Put it at the back of the bed, where it won’t be bumped. Check the mounting each season.
Choose the colors. A red flower with a yellow center stands out against green leaves. Use a high-contrast pair, like blue and orange, for a modern look.
Dry between coats. Wait until each coat is fully dry before the next. Rushing makes paint peel on a smooth metal surface.
Check it each season. Look at the paint and the mounting each spring. Touch up chips right away to stop rust from starting.
Keep it out of reach of kids. The edges can be sharp. Mount it high enough that a child can’t bump into it.
For more art ideas, see our garden art projects and painted garden decoration ideas. Budget: lowest. Skill: beginner.
How Do You Plan the Colors?
Color makes a garden craft look planned. A simple plan keeps the garden calm instead of busy.
Pick two main colors and one accent. Use the main colors on markers and planters, and the accent on the feeders and the hubcap flower.
Repeat each color at least three times around the garden. The repetition ties everything together.
Choose colors that suit your plants. Warm reds and yellows pop against green leaves. Blues and purples look good beside silver foliage.
A Weekend Craft Plan
You can finish most of these in a weekend. This plan keeps it simple.
On Friday evening, gather rocks, spoons, boots and cups. Wash and dry everything and lay it out. On Saturday morning, do the base coats and let them dry.
On Saturday afternoon, drill the drainage holes, plant the boot and the watering can and glue the feeders. On Sunday, add the lettering and sealer, then place everything in the garden.
A Seasonal Care Calendar
A short routine keeps the crafts working. Use this table as a guide.
| When | Task |
|---|---|
| Every two weeks | Take down and clean seed feeders, per Belken |
| After heavy rain | Empty and rinse feeders |
| Every week in hot weather | Check small planters for dry soil |
| Each spring | Touch up markers, stakes and paint, and reseal |
| End of season | Wash planters and soak them for at least an hour in 1 part bleach to 9 parts water |
What to Do First
Start with the jobs, then add the color. This order keeps the garden useful.
First, make the markers, since they label your plants right away. Second, set up the planters with drainage. Third, hang the feeders and set up a cleaning routine.
Then add the bright accents, like the hubcap flower, once the beds are planted.
Common Mistakes to Avoid
Most garden craft problems come from a short list of oversights. Here’s what to watch for.
Skipping the drainage holes. The Nassau County fact sheet says containers must have drainage holes. Drill them before you plant.
Painting without drying time. Crafts by Amanda says adequate drying time between coats helps the markers last. Wait at least an hour between coats.
Forgetting to clean the feeder. Belken says to clean seed feeders at least every two weeks. A dirty feeder can spread disease.
Using garden soil in a pot. The fact sheet says garden soil is unsuitable for containers. Use a soilless potting mix.
FAQ
How do I make painted garden markers last?
Wash and dry the rock, paint in two thin coats with at least an hour between them, and add a clear coat. The A Cultivated Nest team says a sealer may help if markers get very wet.
Do I need drainage holes in a craft planter?
Yes. The Nassau County fact sheet says containers must have drainage holes, and to drill four to six evenly spaced holes if there are none.
How often should I clean a bird feeder?
Belken says at least every two weeks, and more often with many visitors, rain or dead birds nearby. Use a 1 to 9 bleach solution and let the feeder dry fully.
How big should a container be?
The University of Wisconsin Extension says containers holding at least 2 gallons of soil work best, and larger plants like tomatoes need at least 5 gallons.
Can I use garden soil in a craft planter?
No. The Nassau County fact sheet says garden soil is unsuitable for containers. Use a soilless potting mix instead.
Is it safe to put paint near vegetables?
Paint the outside of stakes and rocks, and keep paint off the soil and the plants. Seal everything, and use markers beside the plants rather than on them.
What kind of paint works outdoors?
Crafts by Amanda uses patio paint or outdoor craft paint, with a clear coat on top. Check the label for outdoor use.
How do I keep birds safe at a homemade feeder?
Keep the feeder clean, fill it with a small amount of seed and hang it away from cat hiding spots. Belken says to clean seed feeders at least every two weeks.
Related Posts
Never miss an update — choose FarmFoodFamily as your preferred source on Google.
How it works: Tap the button below to open Google's settings page, then check the box next to FarmFoodFamily.
Tap the checkbox to turn it blue — that's how you know it's set.