
Got a front yard that’s feeling a bit too normal for Halloween? Why not kick things up a notch with some homemade spookiness? DIY Halloween Yard Decorations are your ticket to not just saving a few bucks but also to having a yard that stands out.
This isn’t just about throwing some pumpkins around. It’s about creating a vibe that can chill the bravest souls.
We’re talking about a range of projects here—from simple ones like ghostly lanterns to more involved setups like your own graveyard complete with tombstones.
Each project comes with a list of what you’ll need and clear steps to follow. No vague hints, just straight-up guidance. Plus, these aren’t your everyday store-bought decorations. These are personalized touches that show off your style and creativity.
Whether you’re looking to mildly frighten your neighbors or give them full-blown nightmares, we’ve got something in this list for you. So, roll up your sleeves and let’s get to it!
Spooky Signage
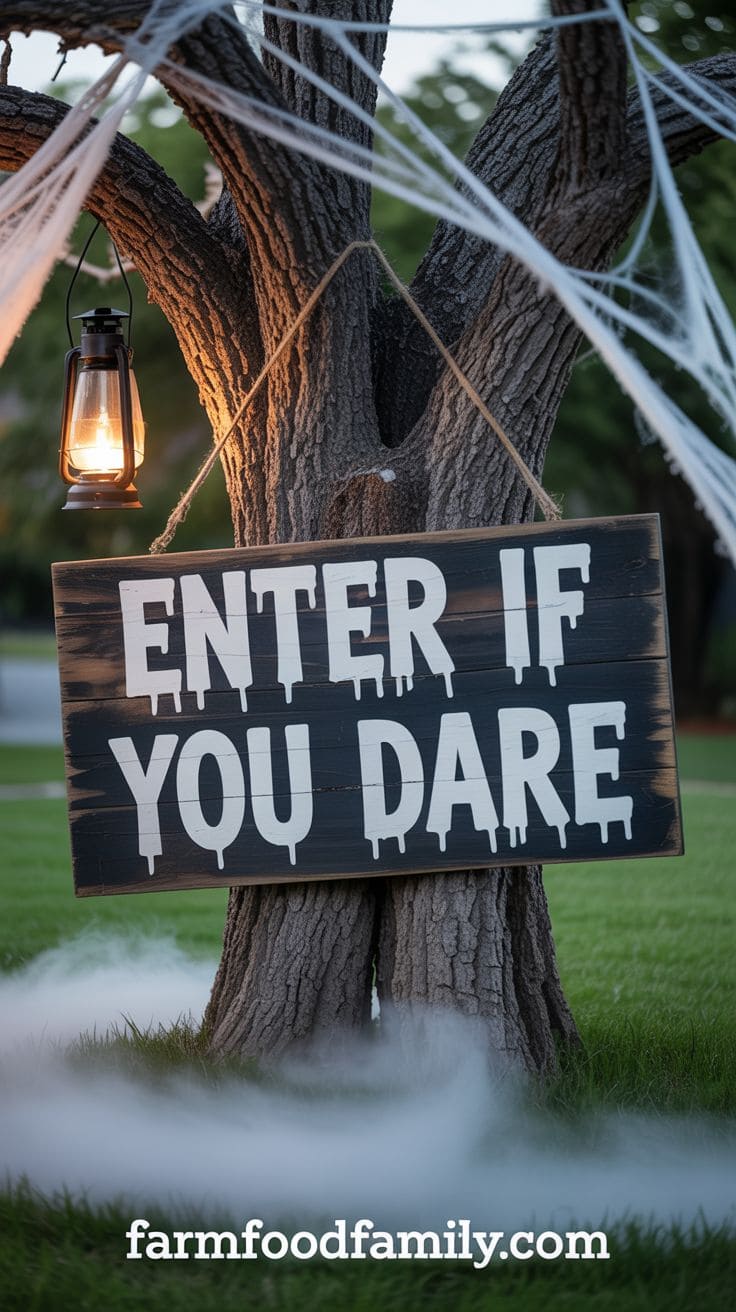
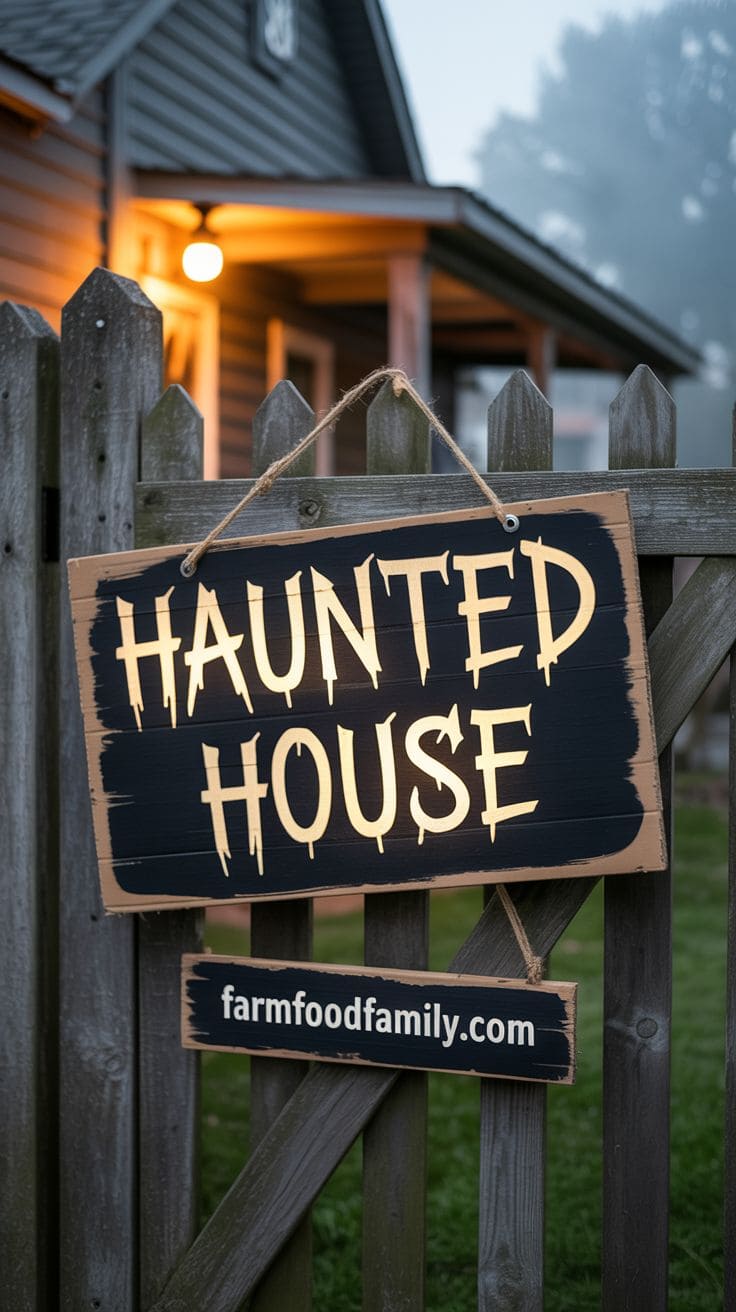
Haunted House Signs


Materials needed: You’ll need some old wood planks or cardboard, paint (preferably black and white), and a brush. If you want it to last longer, grab some sealant.
Step-by-step instructions: First, cut your wood or cardboard to the desired size. Paint your spooky message like “Enter if you dare” or “Haunted House” in creepy lettering. Let the paint dry, and if you used wood, seal it to withstand the weather.
Decoration ideas and tips: Hang these signs at your entrance or on trees leading up to your house. Adding some fake cobwebs or a small light can make the words pop out at night, giving everyone the chills as they walk by.
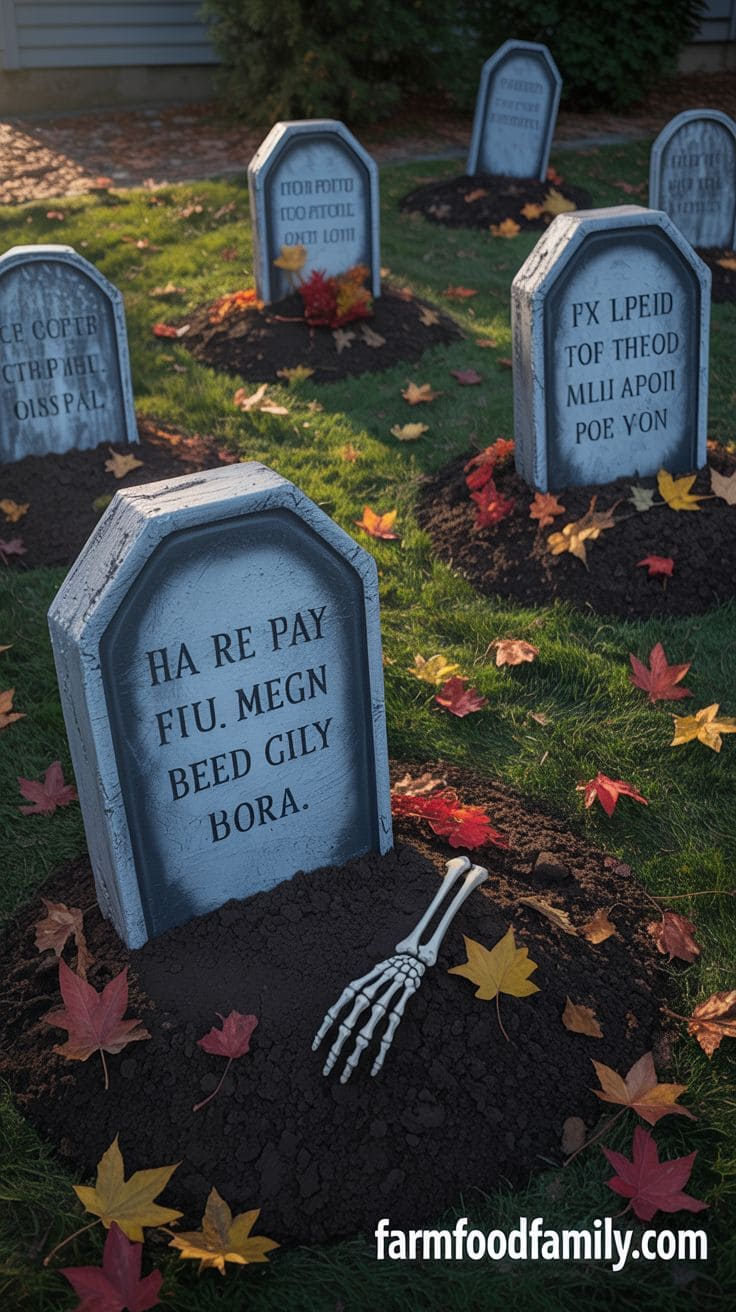
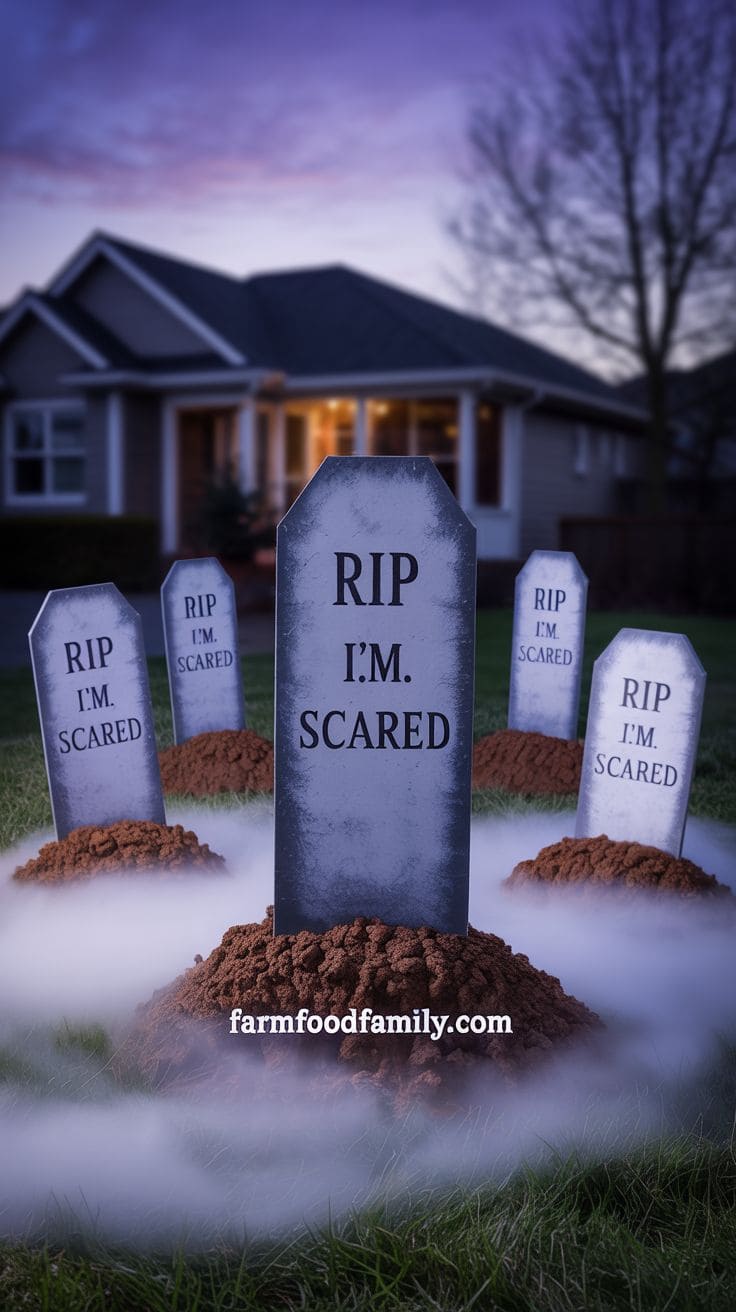
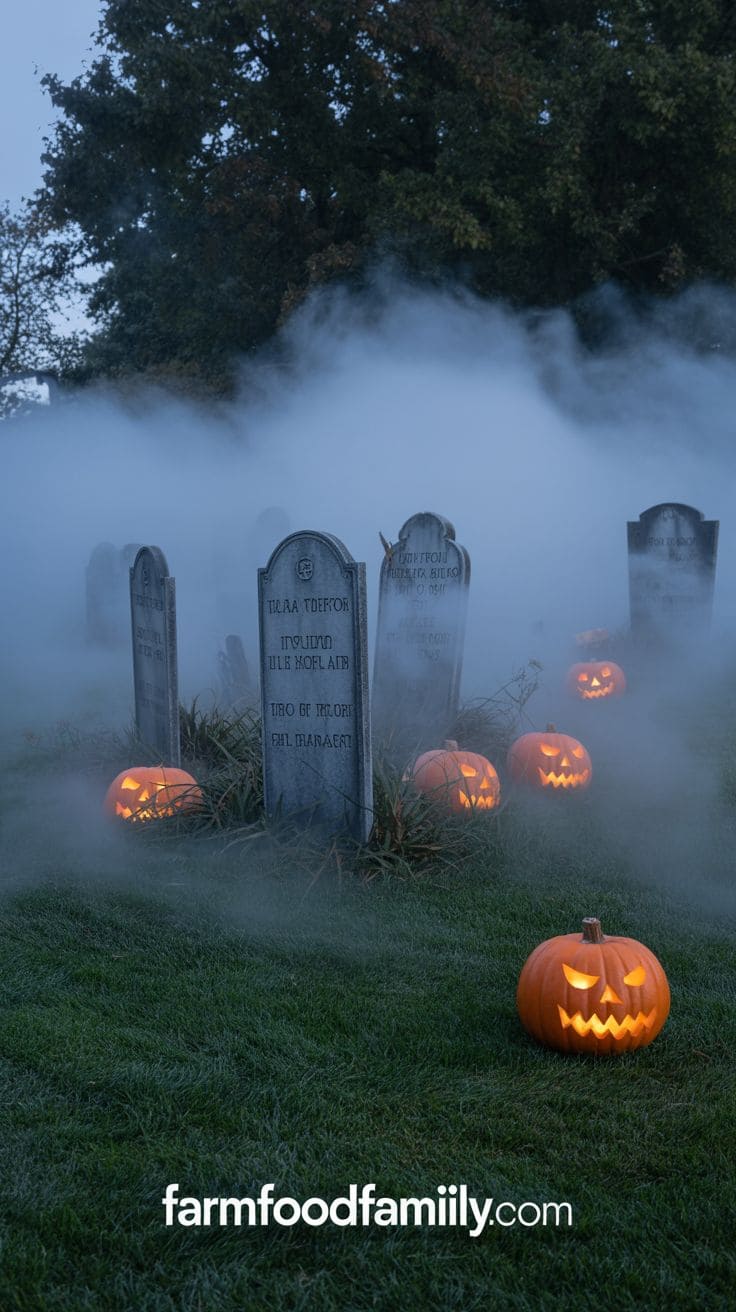
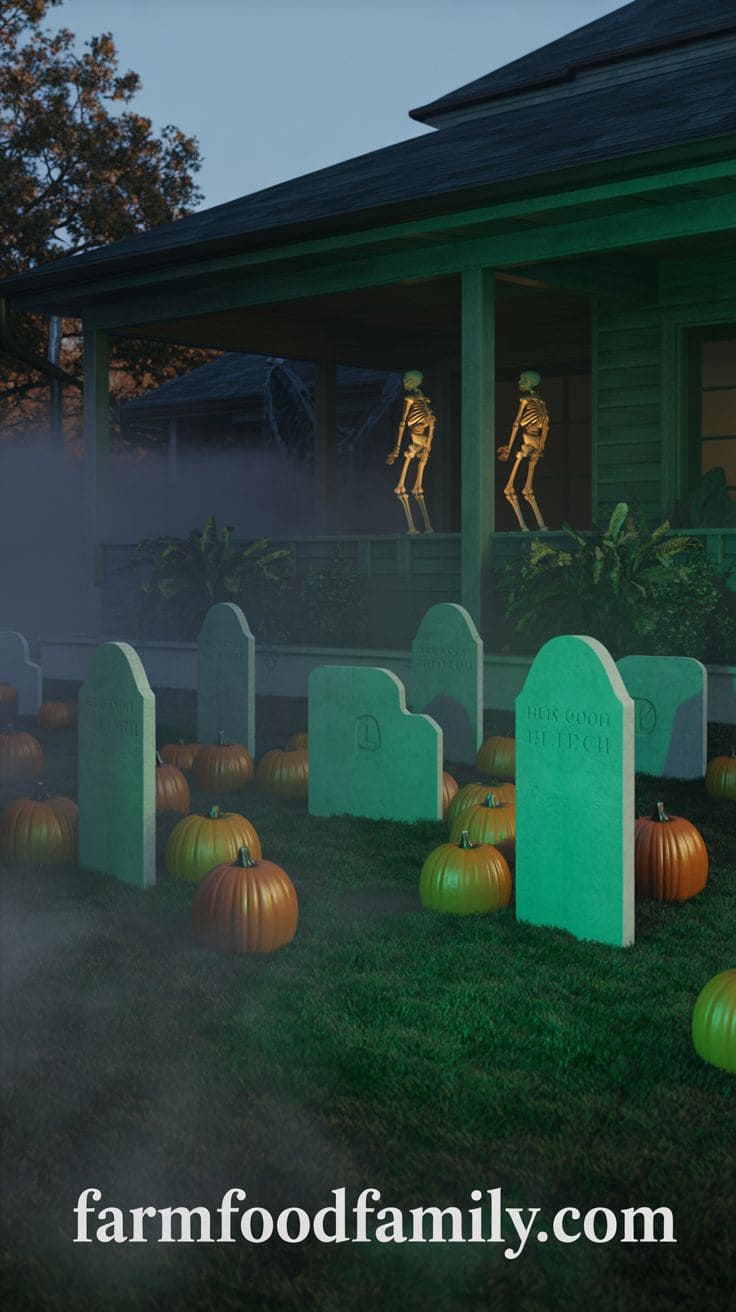
Graveyard Tombstones


Materials needed: Grab some foam boards or cardboard, gray spray paint, and a black marker or paint.
Step-by-step instructions: Cut the boards into tombstone shapes. Paint them gray and wait for them to dry. Write funny or spooky names and epitaphs with the black marker.
Decoration ideas and tips: Place these tombstones in your yard with some dirt piled around the base to make them look like they’re sticking out of the ground. Scatter some leaves and maybe place a skeleton hand reaching out for a super creepy touch.
Eerie Lighting
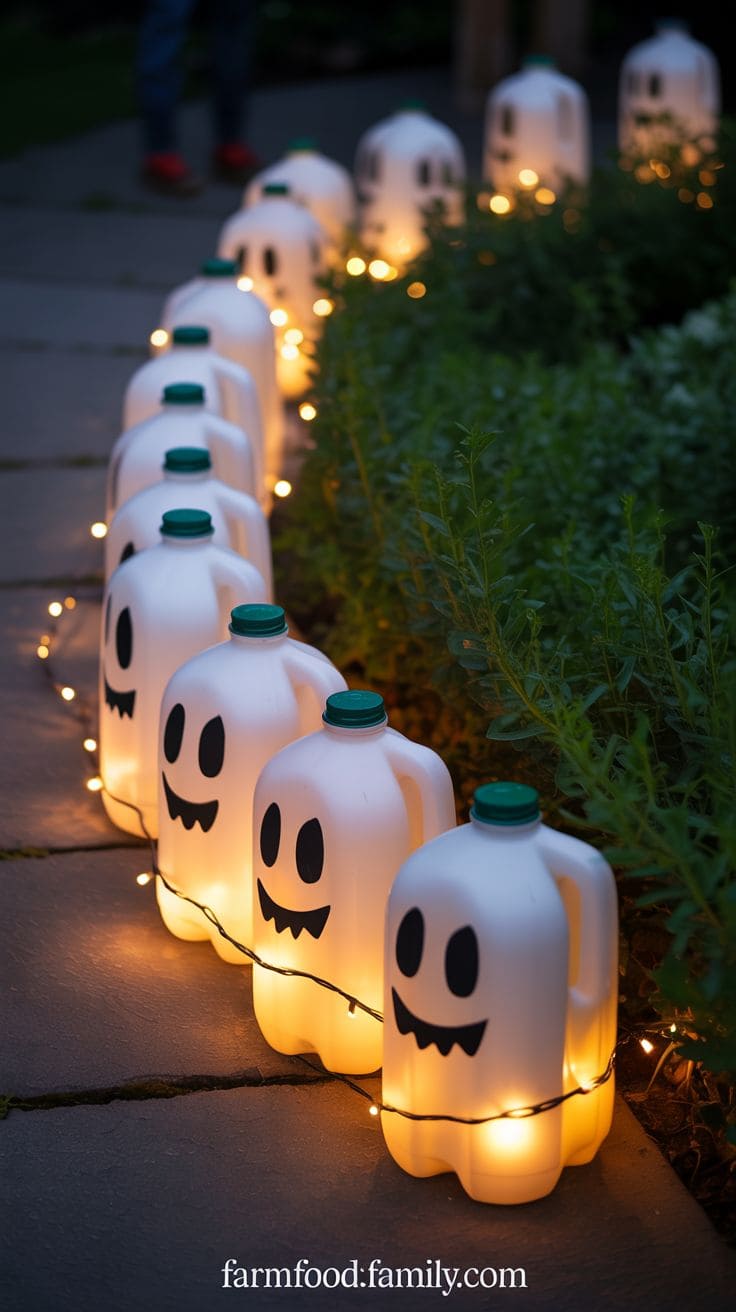
Ghost Lanterns


Materials needed: Grab some empty milk jugs, a black sharpie, and string lights.
Step-by-step instructions: First thing, clean your milk jugs and dry ’em good. Draw spooky ghost faces on them with the sharpie. Cut a small hole on the back of each jug to thread your lights through.
Decoration ideas and tips: String these lanterns along your walkway or hang them from trees. They glow like friendly spirits in the night, giving your yard a fun, ghostly atmosphere without being too scary for the little ones.
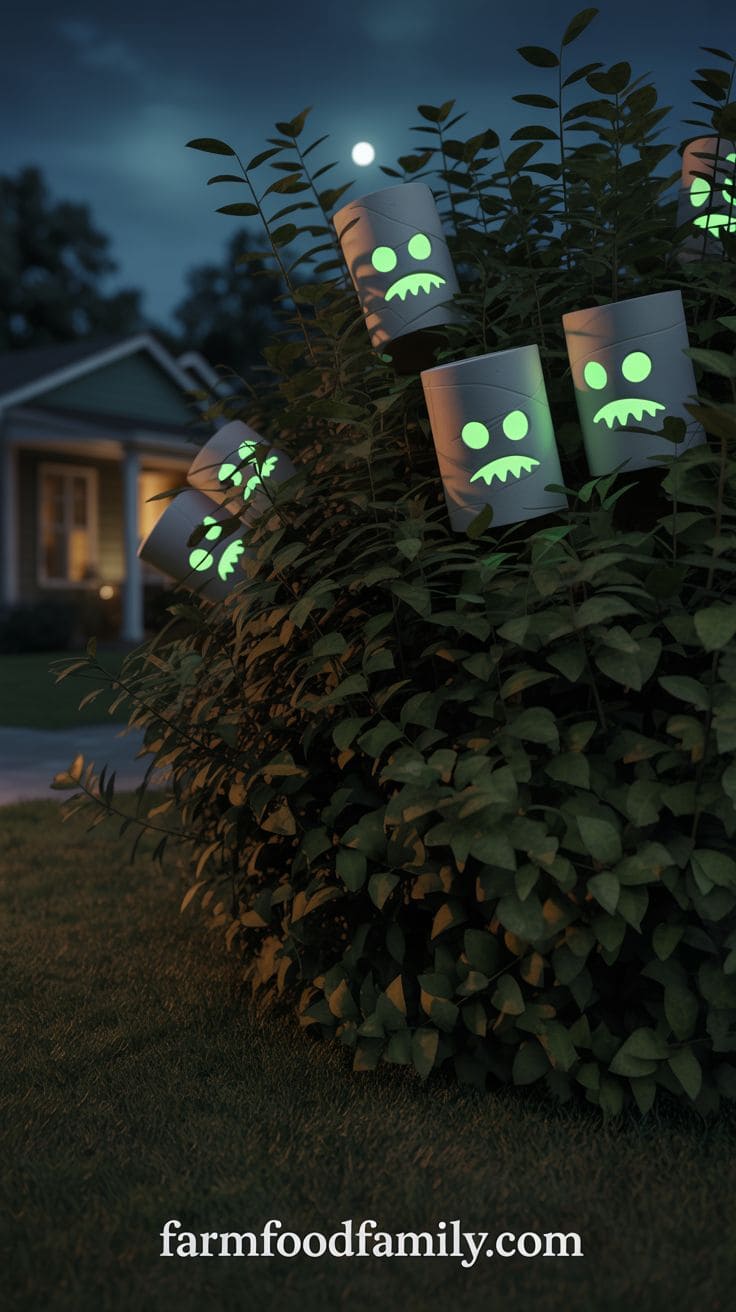
Glowing Eyes in the Bushes


Materials needed: You’ll need some toilet paper rolls, glow sticks, and scissors.
Step-by-step instructions: Cut eye shapes into the rolls. Crack the glow sticks active and slip them into the rolls.
Decoration ideas and tips: Hide these glowing eyes in your bushes or shrubs. They’ll look like mysterious creatures peeping out, giving everyone a little startle as they pass. This trick is easy and really effective for a quick eerie touch!
Creepy Creatures
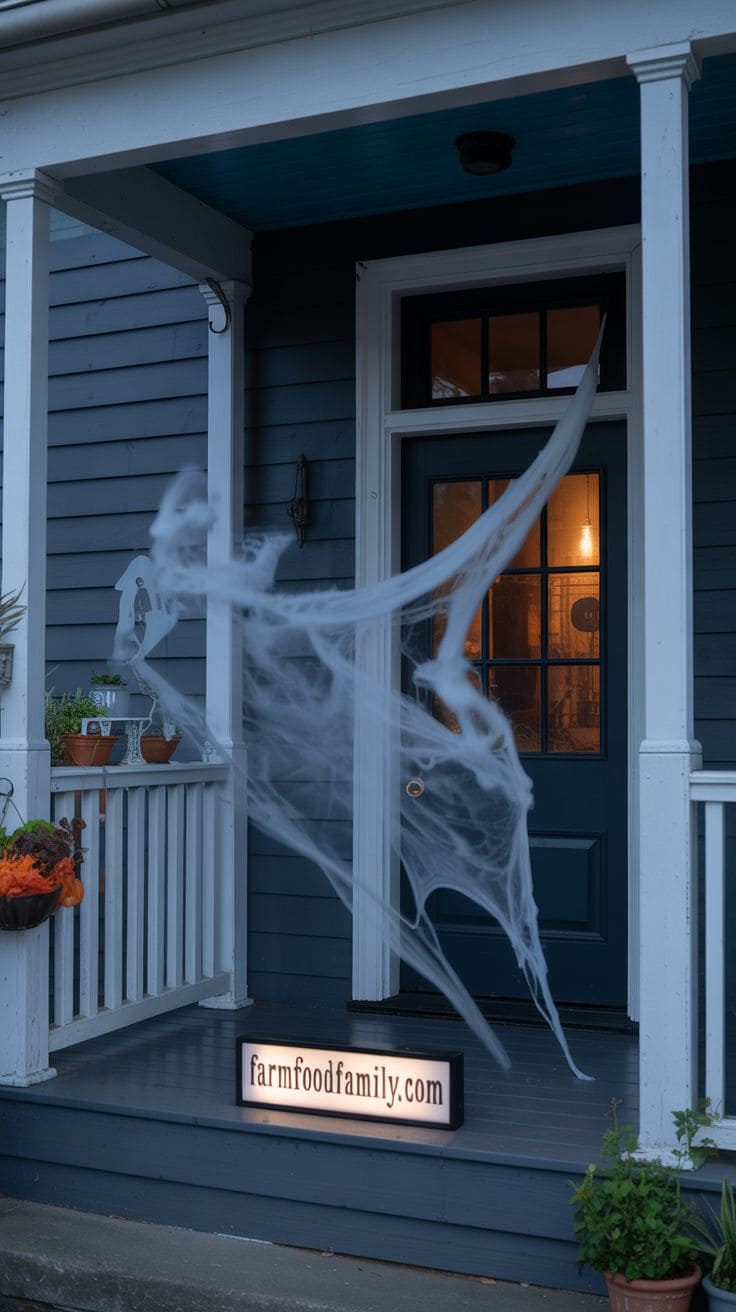
Spider Webs


Materials needed: You’ll need some white cotton batting or commercial webbing, clear fishing line for hanging, and some small plastic spiders for extra creepiness.
Step-by-step instructions: Spread out the cotton or pull apart the webbing to create the desired shape and thickness. Use the fishing line to hang the webs across corners or in your trees. Tuck the spiders into the webs here and there.
Decoration ideas and tips: These webs look best when they bridge over walkways or dangle from eaves. Add a bit more spook by using a black light to make them glow at night.


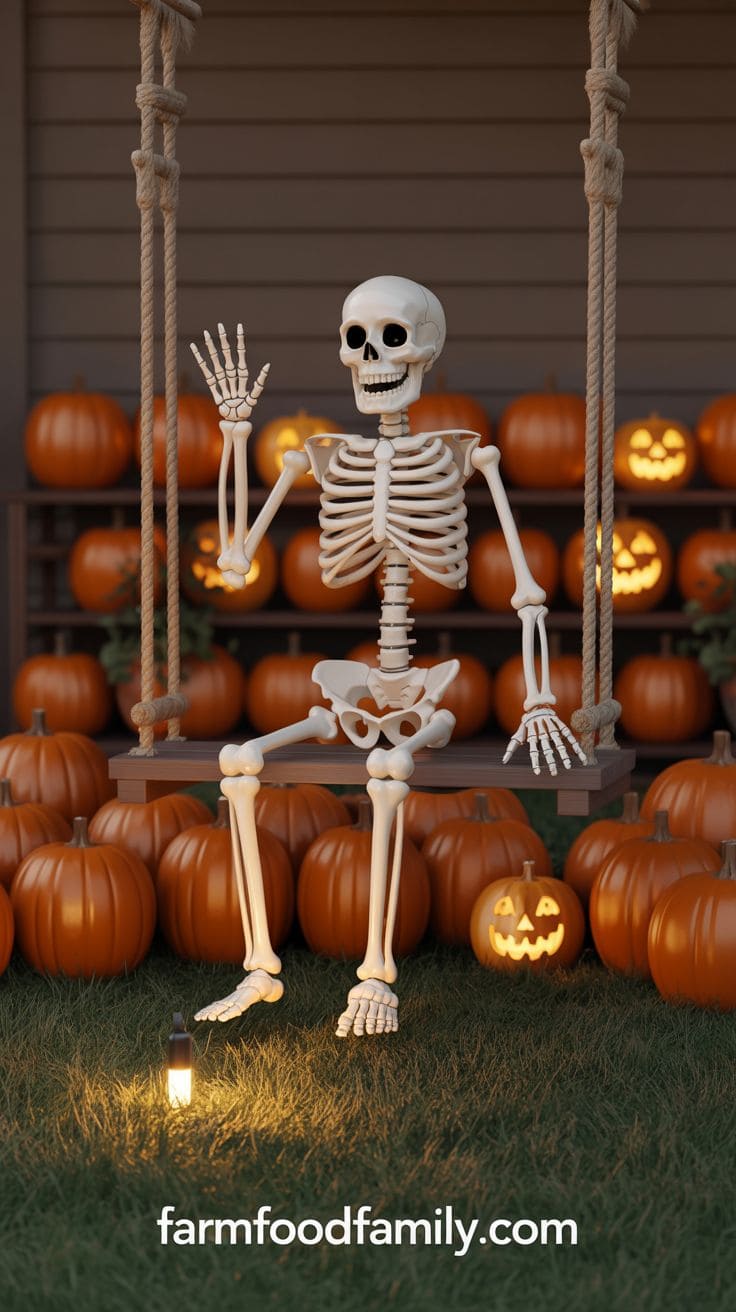
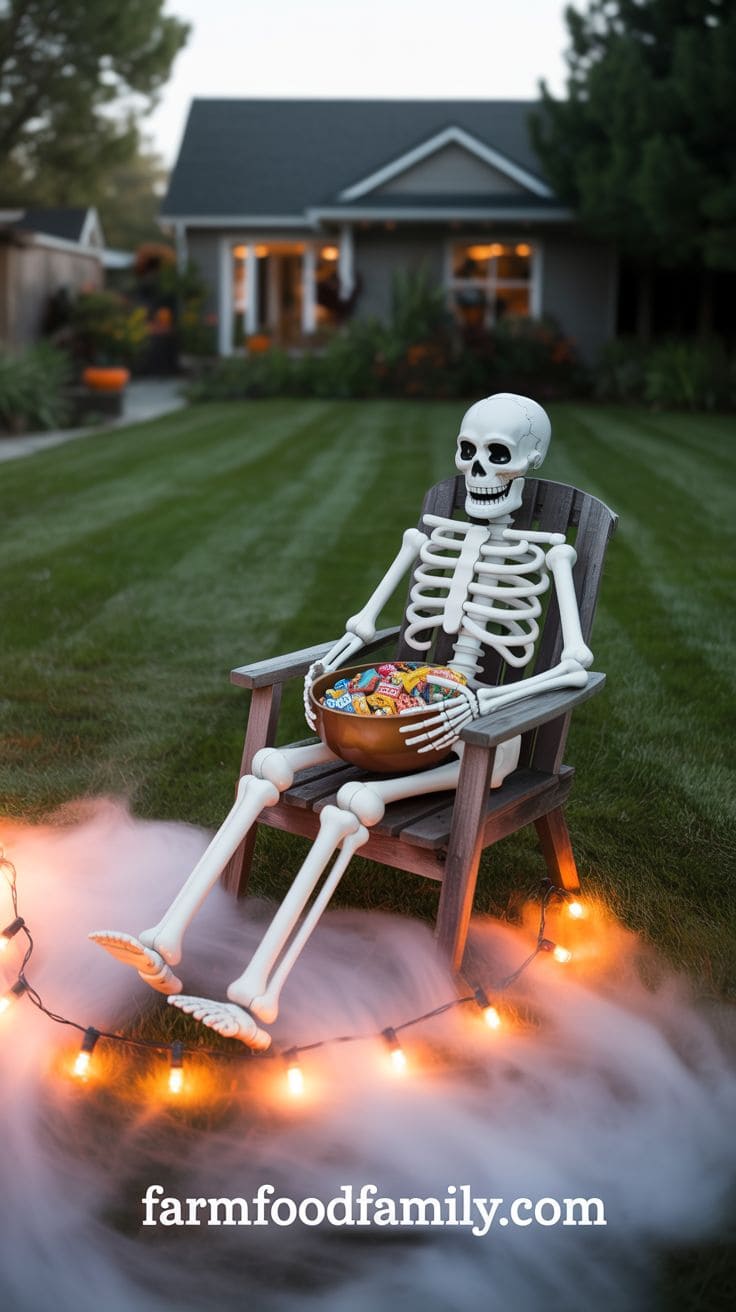
DIY Skeletons


Materials needed: Get some PVC pipes for the bones, connectors to join them, and white spray paint to give that bone-like finish.
Step-by-step instructions: Assemble the PVC pipes using the connectors to create a skeleton shape. Once your skeleton is pieced together, spray it with the white paint for a more realistic look.
Decoration ideas and tips: Position your skeletons in funny poses, like sitting on porch swings or waving at passersby. They can be a humorous yet eerie addition to your yard’s Halloween setup.
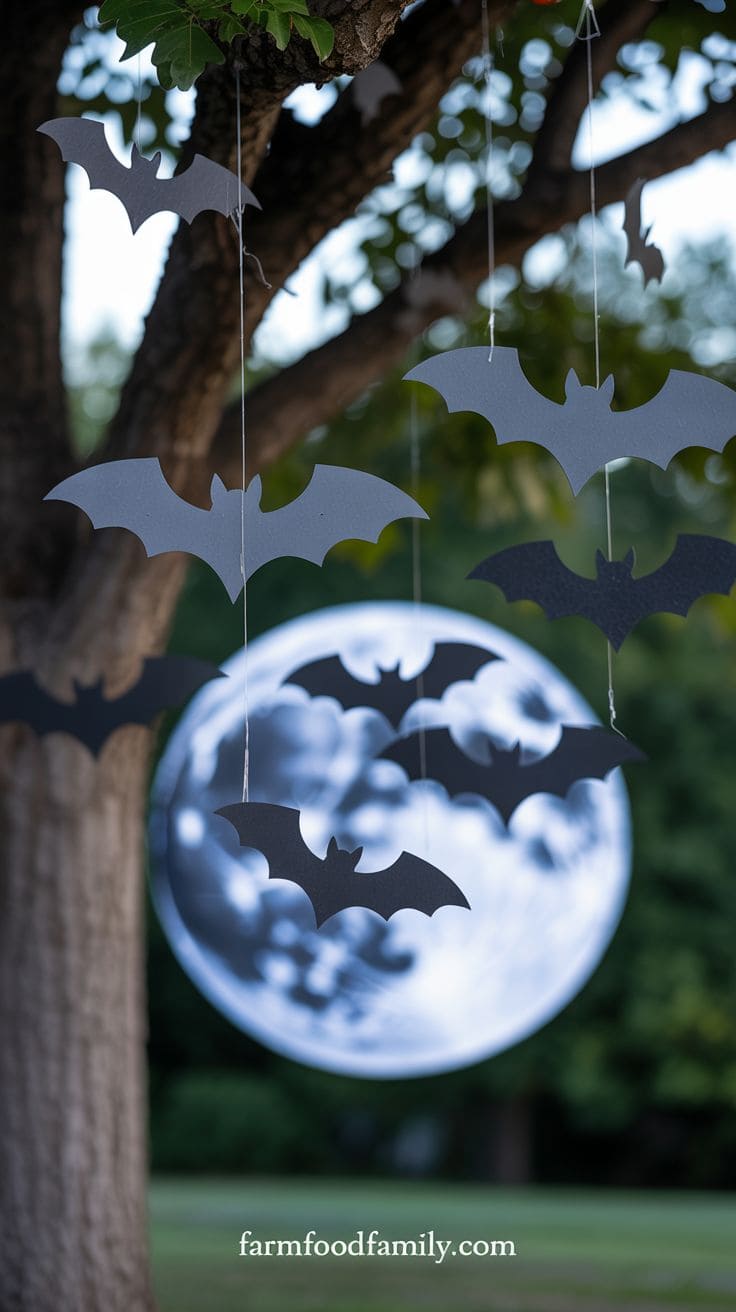
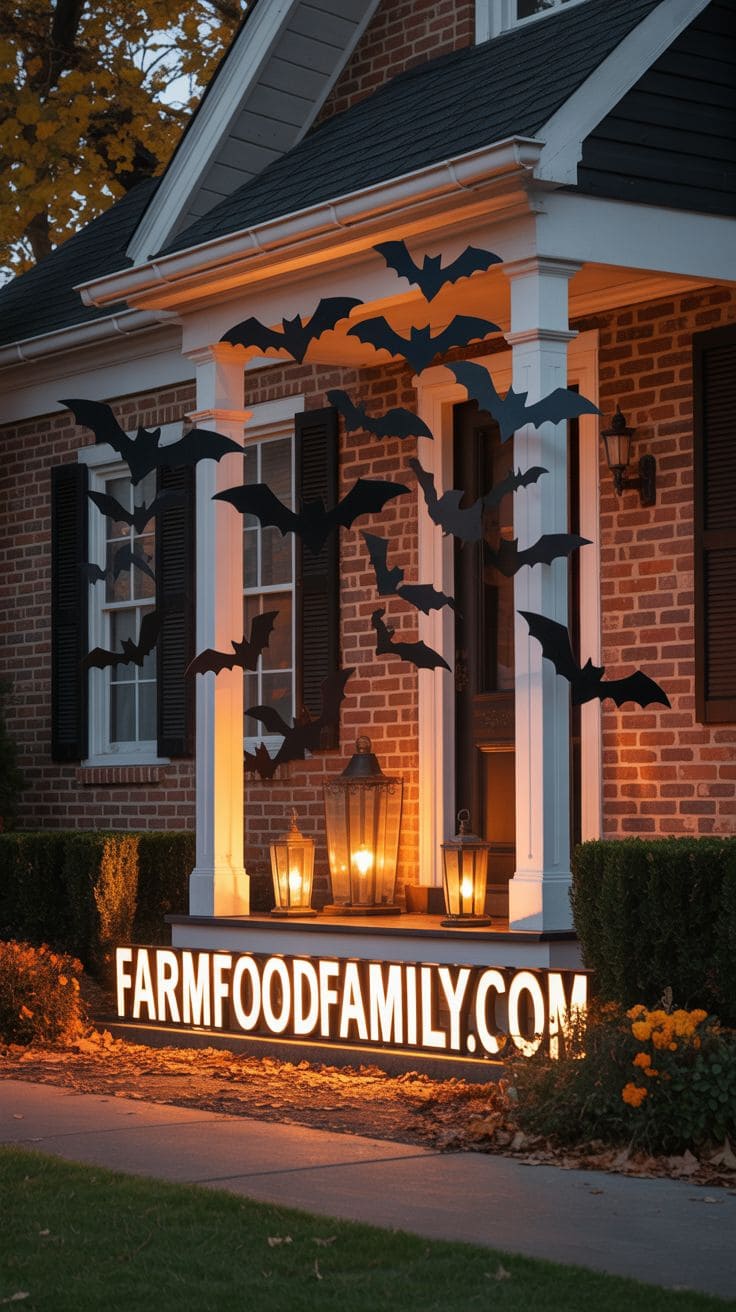
Flying Bats


Materials needed: Grab some black craft foam, fishing line, and scissors.
Step-by-step instructions: Cut out bat shapes from the craft foam. Make holes in the tops of the bats to tie the fishing line, then hang them from your trees or porch ceiling.
Decoration ideas and tips: These bats are perfect for creating a swarm effect. Hang them at different heights to make it look like they’re swooping through your yard. This setup is especially effective with a light breeze that makes them move.
Haunted Atmosphere
Fog Machine

Materials needed: Get your hands on a fog machine and some fog juice. Don’t forget an extension cord if your yard’s big.
Step-by-step instructions: Fill the machine with fog juice, plug it in, and let it warm up. Once it’s ready, position it where you want the fog to roll out.
Decoration ideas and tips: Place the fog machine near the ground behind a bush or a prop to hide it. The fog creeping out from hidden spots creates a spine-chilling effect that feels like something’s lurking in the mist.
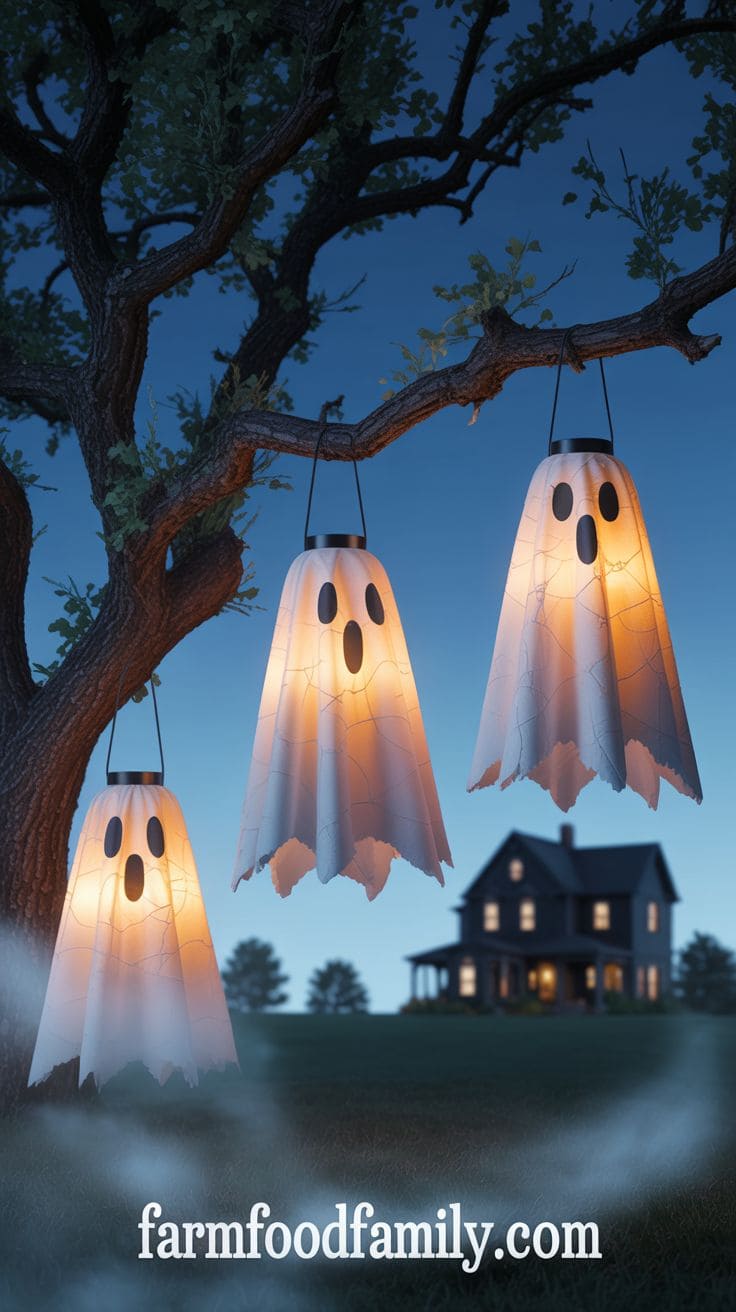
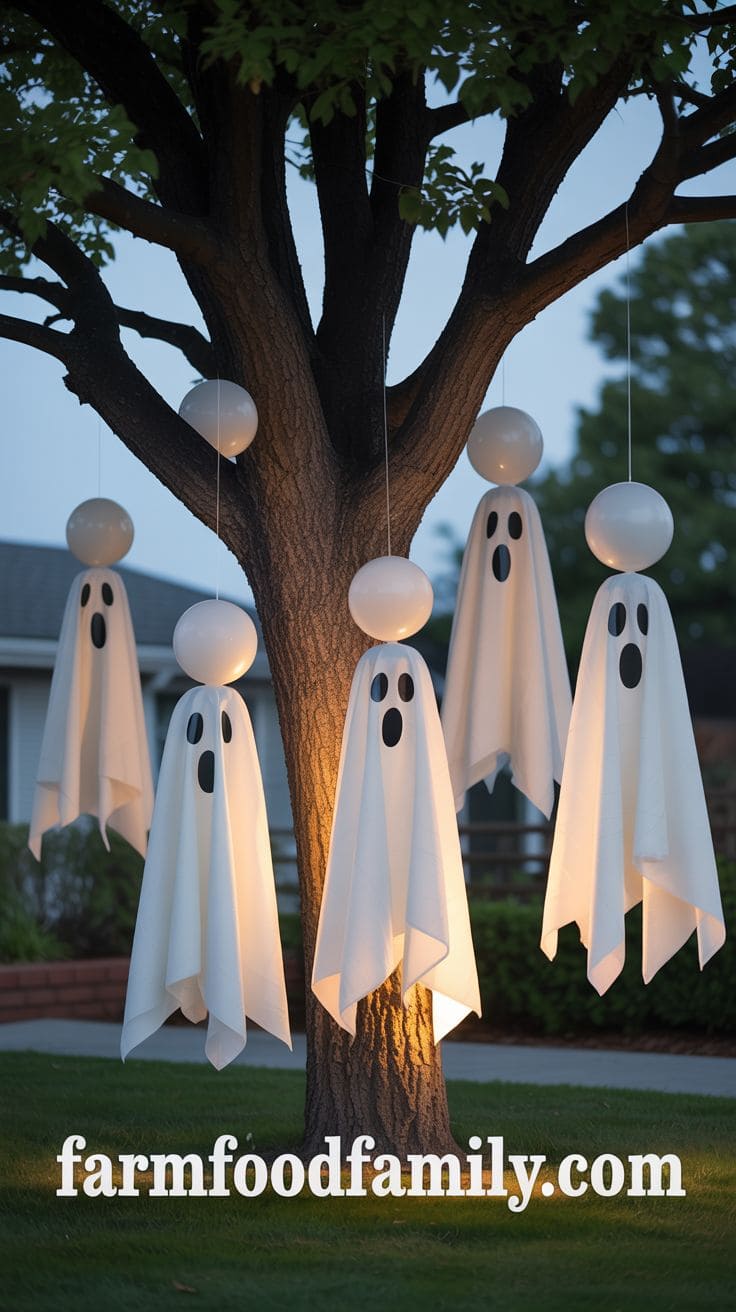
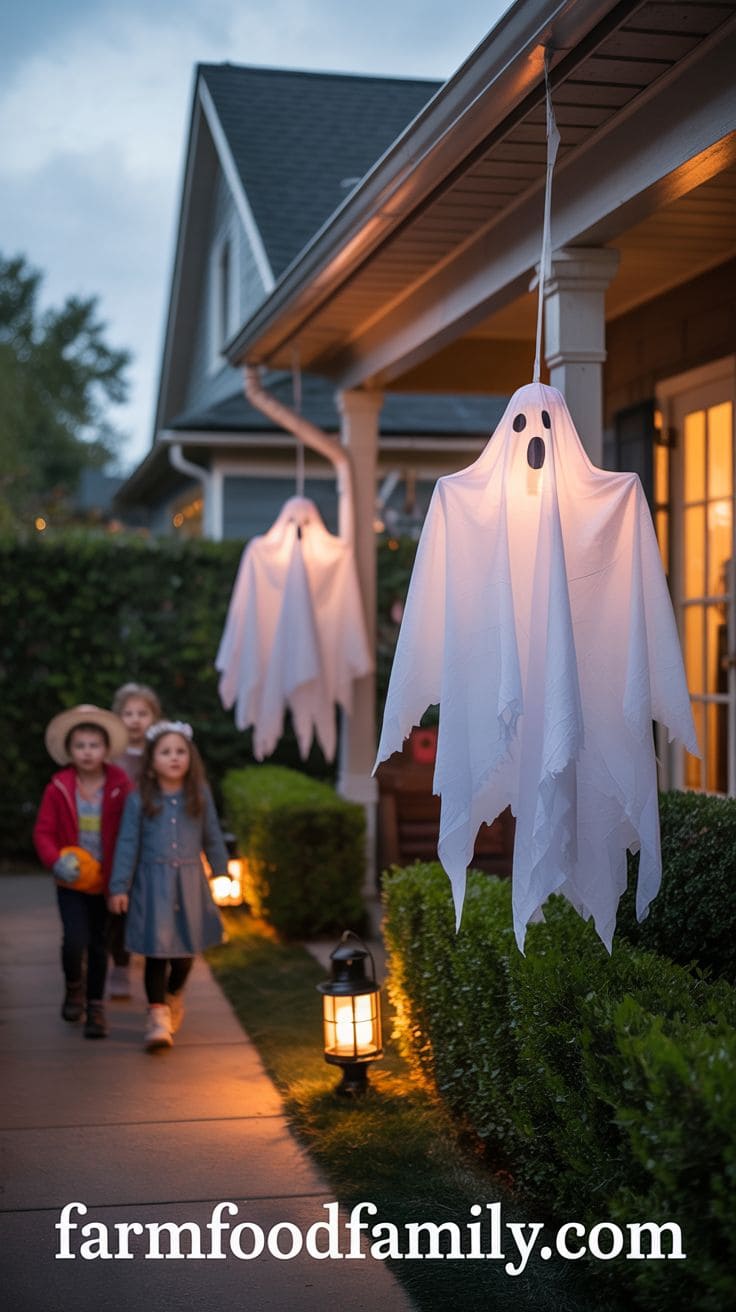
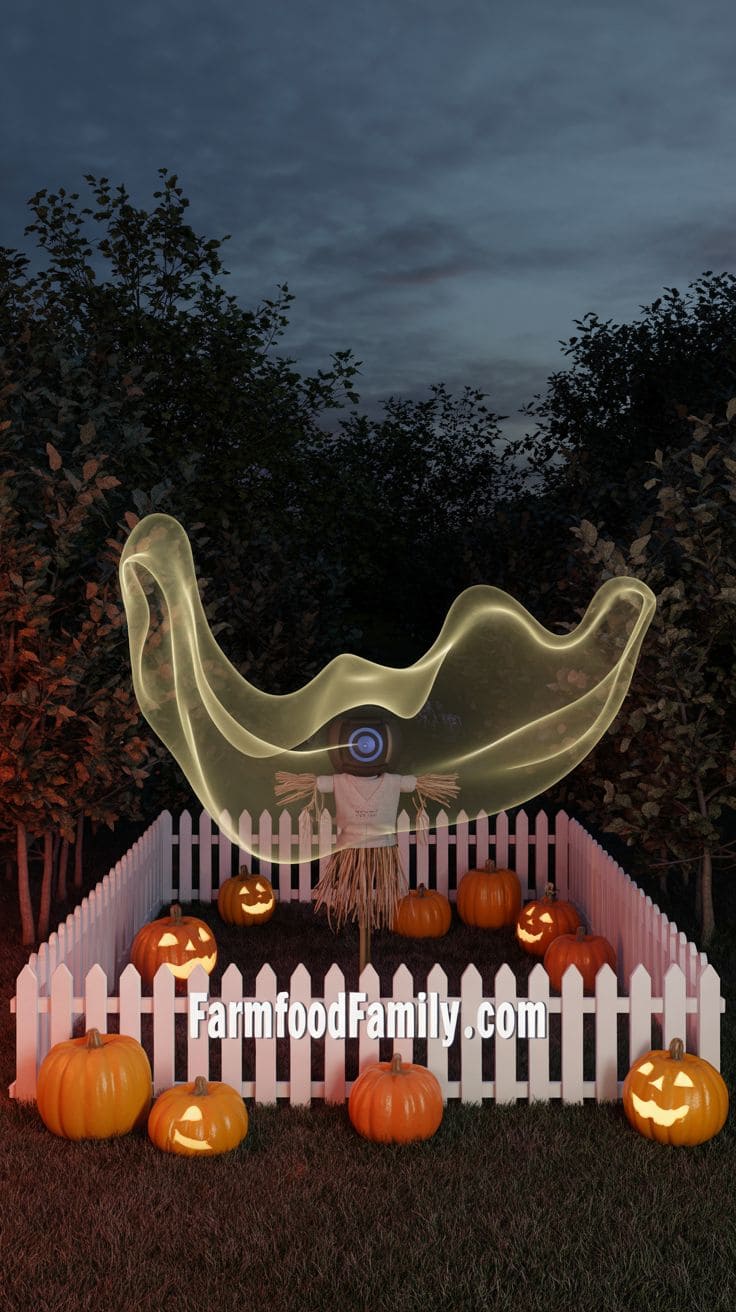
DIY Ghosts

Materials needed: You’ll need some white sheets, balloons or styrofoam balls for the heads, and string to hang them.
Step-by-step instructions: Inflate the balloons or grab your styrofoam balls and drape the sheets over them. Tie the sheet at the base of the balloon or ball to form the head, then hang your ghosts from trees or the porch ceiling.
Decoration ideas and tips: Use a black marker to draw eerie faces on your ghosts. Fluctuating breezes make them flutter, adding to the spooky ambiance. Pair them with dim lighting for a ghostly dance in your yard.
Creepy Sound Effects

Materials needed: Secure a Bluetooth speaker and some creepy soundtracks which you can find online or create your own.
Step-by-step instructions: Connect your speaker to your smartphone or any sound system, and play the spooky tracks. Hide the speaker in a discreet location to make the sounds come from an unknown source.
Decoration ideas and tips: Place the speaker near your front door or under a window. Sounds like ghostly whispers, eerie winds, or sudden screams add an intense layer of fright to your Halloween decor.
Ghoulish Gardens
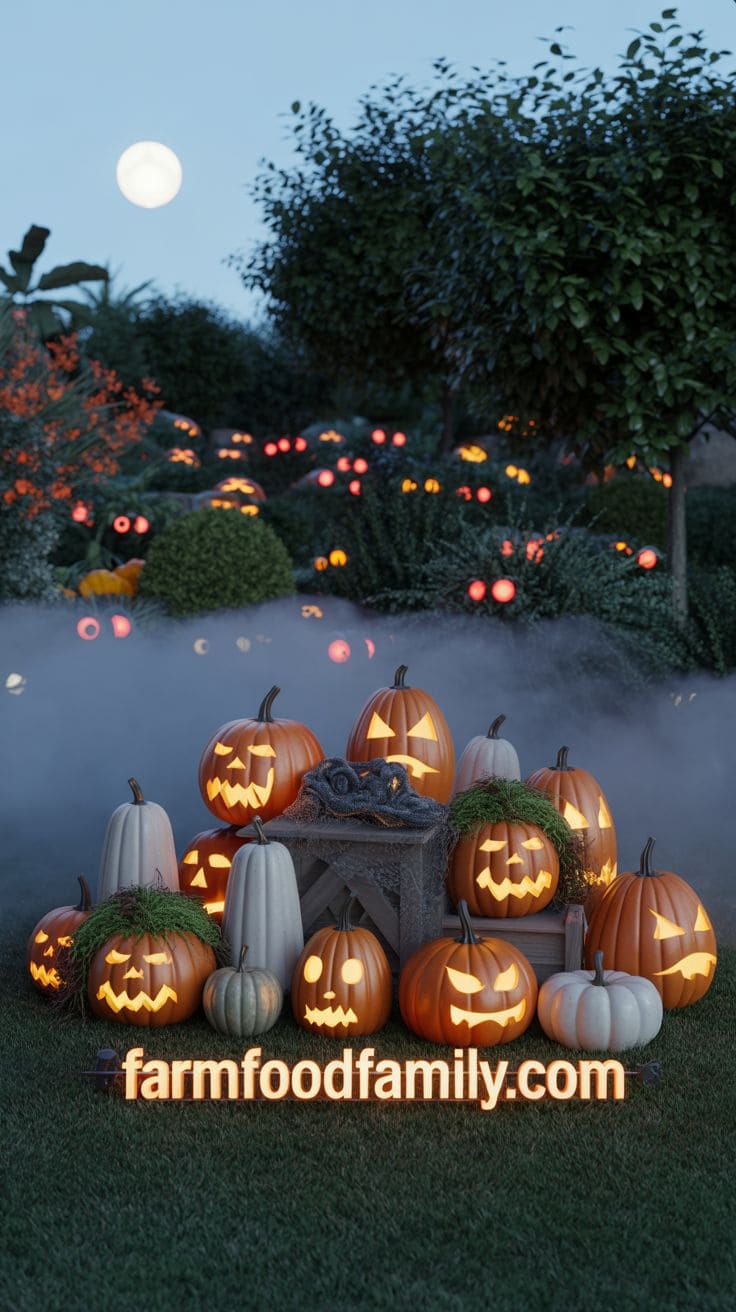
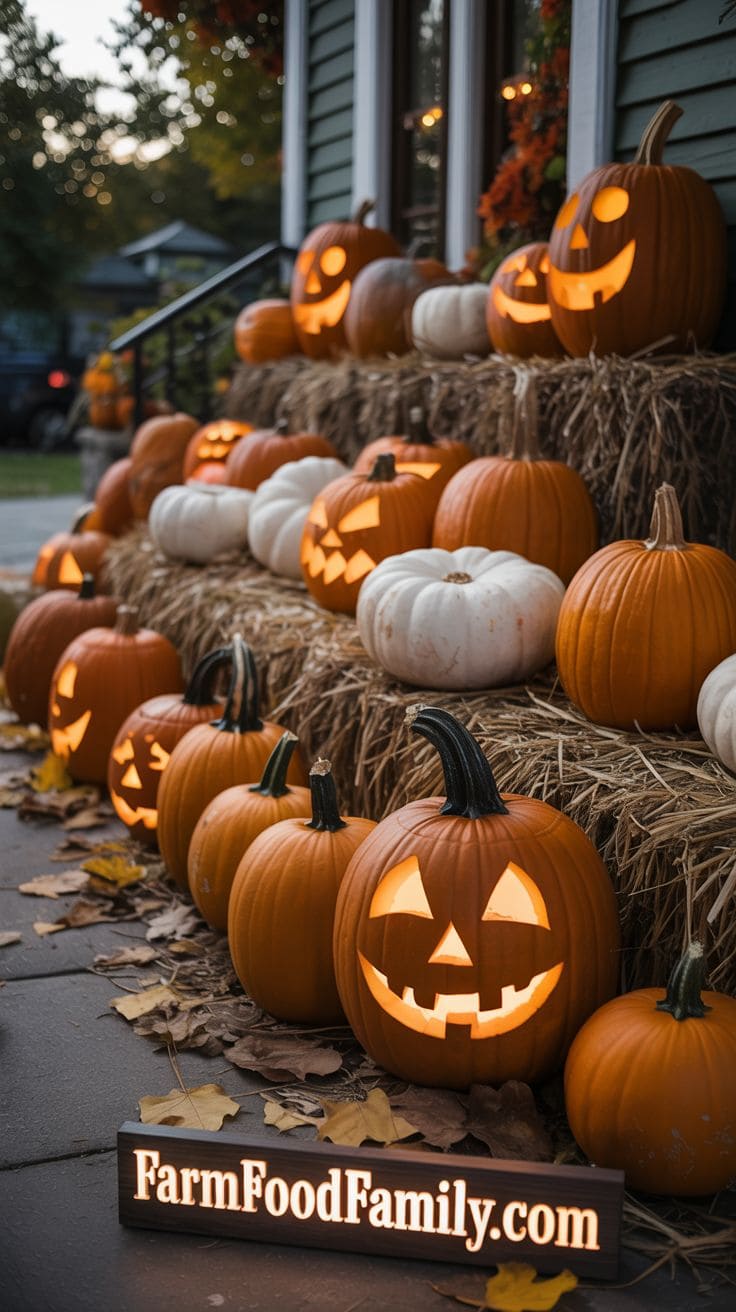
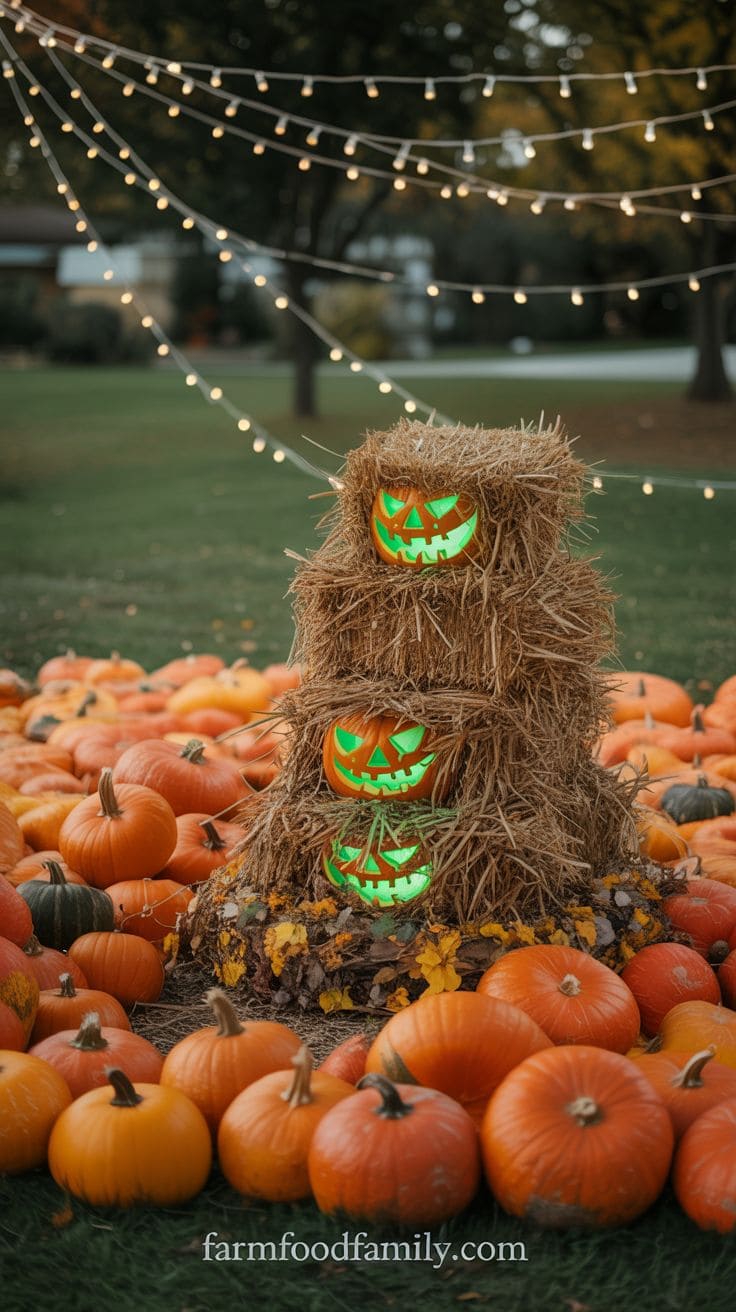
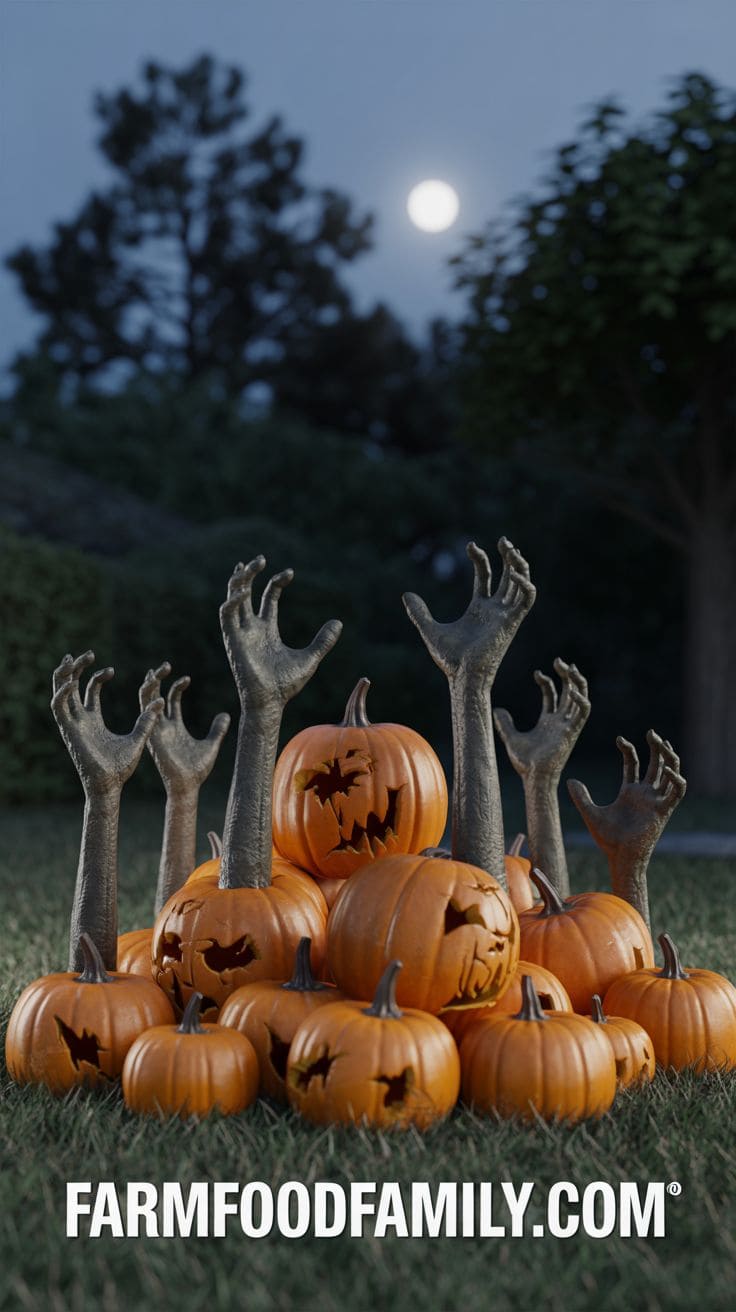
Pumpkin Patch

Materials needed: You’ll need pumpkins of various sizes, straw or dry leaves, and some garden space or large containers.
Step-by-step instructions: Choose a spot in your yard or fill the containers with soil. Arrange the pumpkins, varying them by size for a natural look, and scatter straw or leaves around them to fill in gaps.
Decoration ideas and tips: Enhance your patch with small solar lights or glow-in-the-dark paint on the pumpkins for an eerie night glow. Carving a few with spooky faces can add a fun, interactive element for visitors.
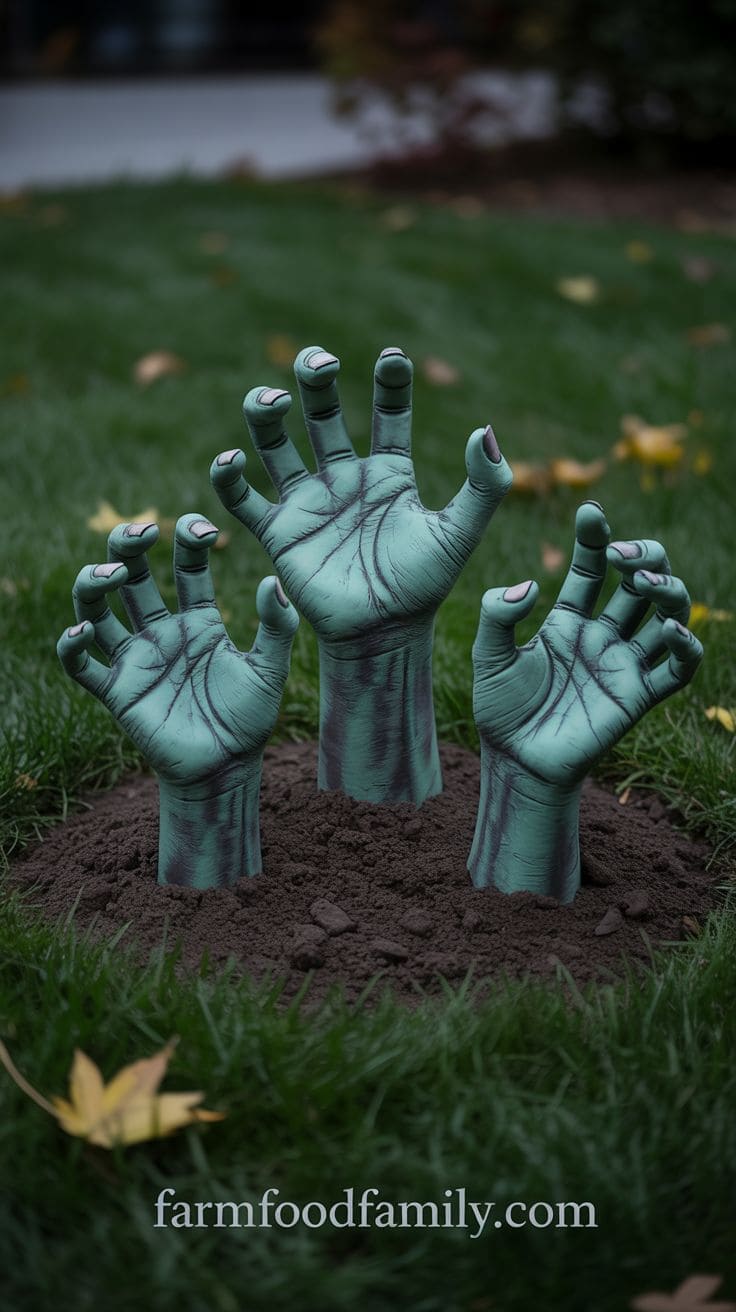
Zombie Hands

Materials needed: Get some old gloves, plaster of Paris, wooden stakes, and green or grey paint.
Step-by-step instructions: Mix the plaster and fill the gloves. Insert a stake into each glove before it sets. Once dry, paint the hands to look like zombie skin.
Decoration ideas and tips: Plant these hands in your garden soil or lawn as if they are breaking through the earth. Positioning them near your pumpkin patch can make it seem like zombies are rising to attack the pumpkins!
Creepy Sound Effects
Materials needed: A Bluetooth speaker is essential here, plus some downloaded creepy soundtracks or effects.
Step-by-step instructions: Hide the speaker in a discreet spot within your garden. Play the creepy sounds intermittently or on a loop, depending on your preference.
Decoration ideas and tips: Focus the sound effects around areas like the zombie hands or near the entrance to startle visitors. Mixed with the visual scare, the audio will double the terror!
Frightening Figures
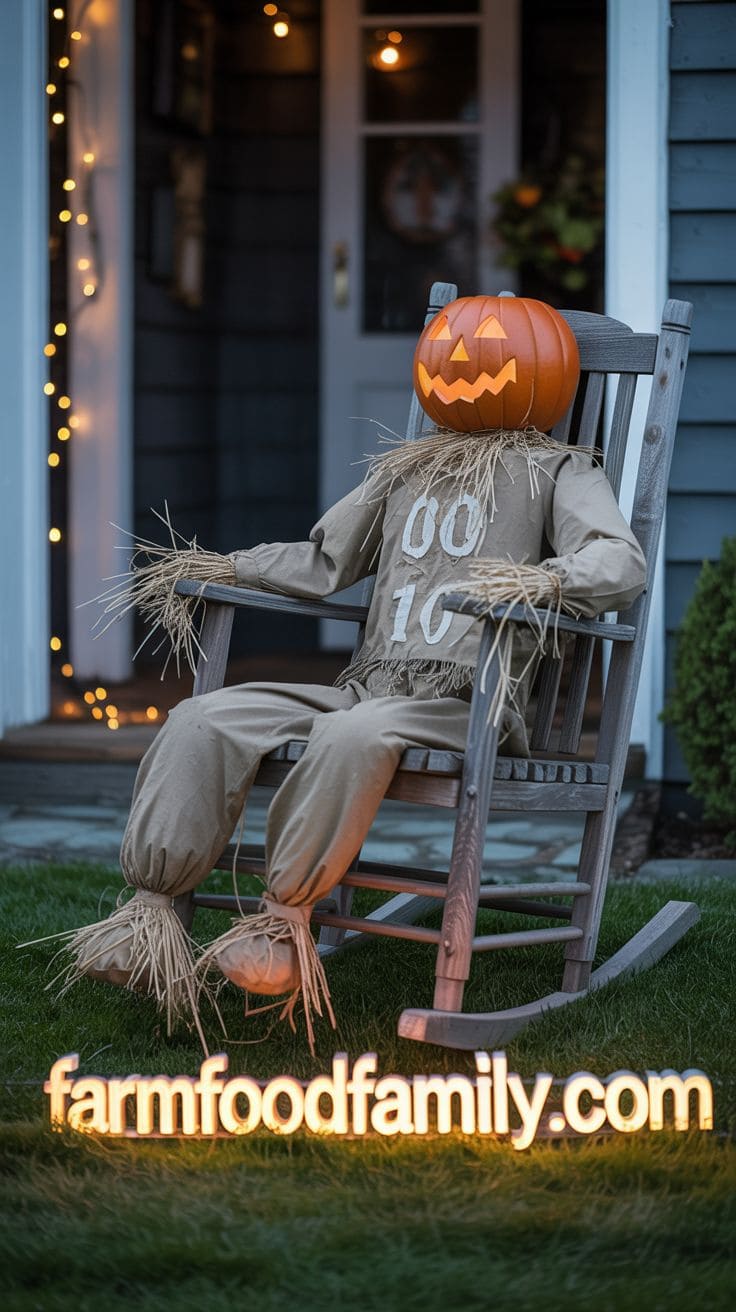
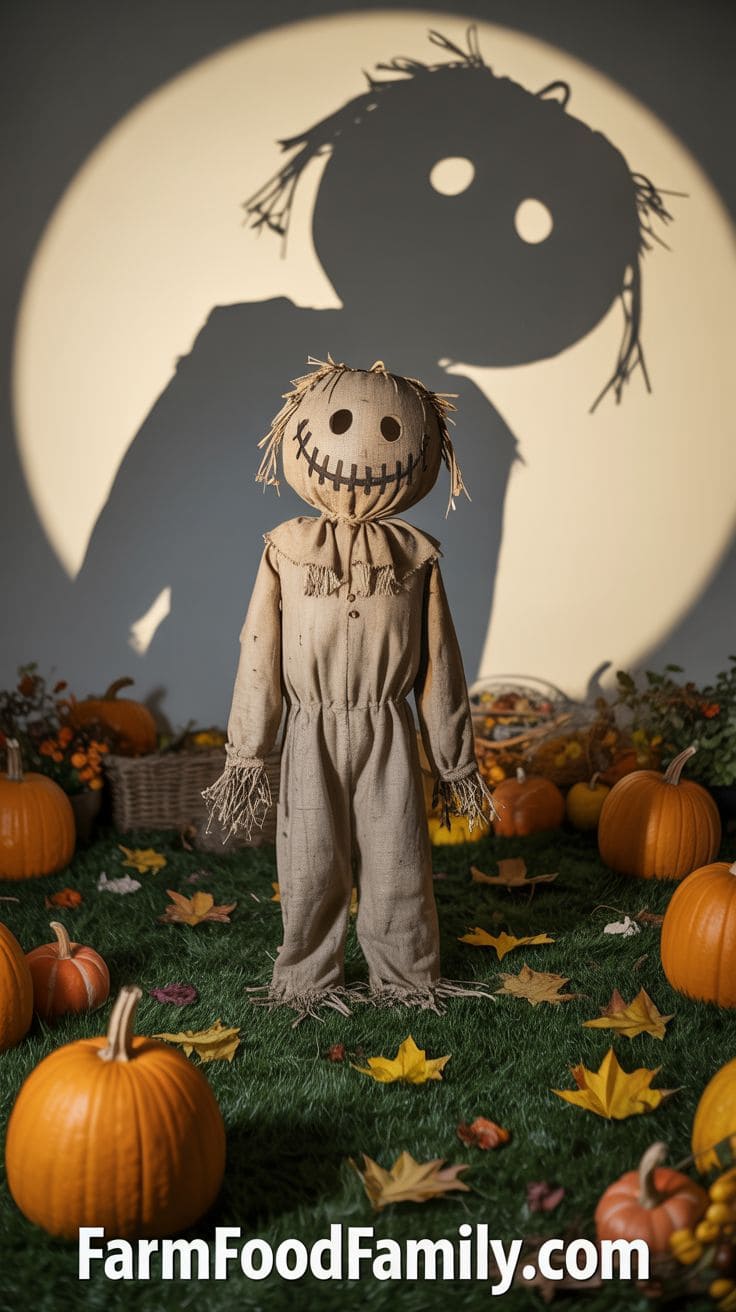
Scarecrows

Materials needed: Gather some old clothes, straw, a stick or a pole for the body, and a burlap sack or a pillowcase for the head.
Step-by-step instructions: Dress the pole or stick with old clothes and stuff them with straw to fill out the form. Attach the burlap sack or pillowcase to the top as the head and draw or sew on a face.
Decoration ideas and tips: Place your scarecrow in a chair by your front door or have it standing among your garden plants. To add a spooky twist, position the scarecrow in unexpected places like behind curtains or peeking out from behind a tree.
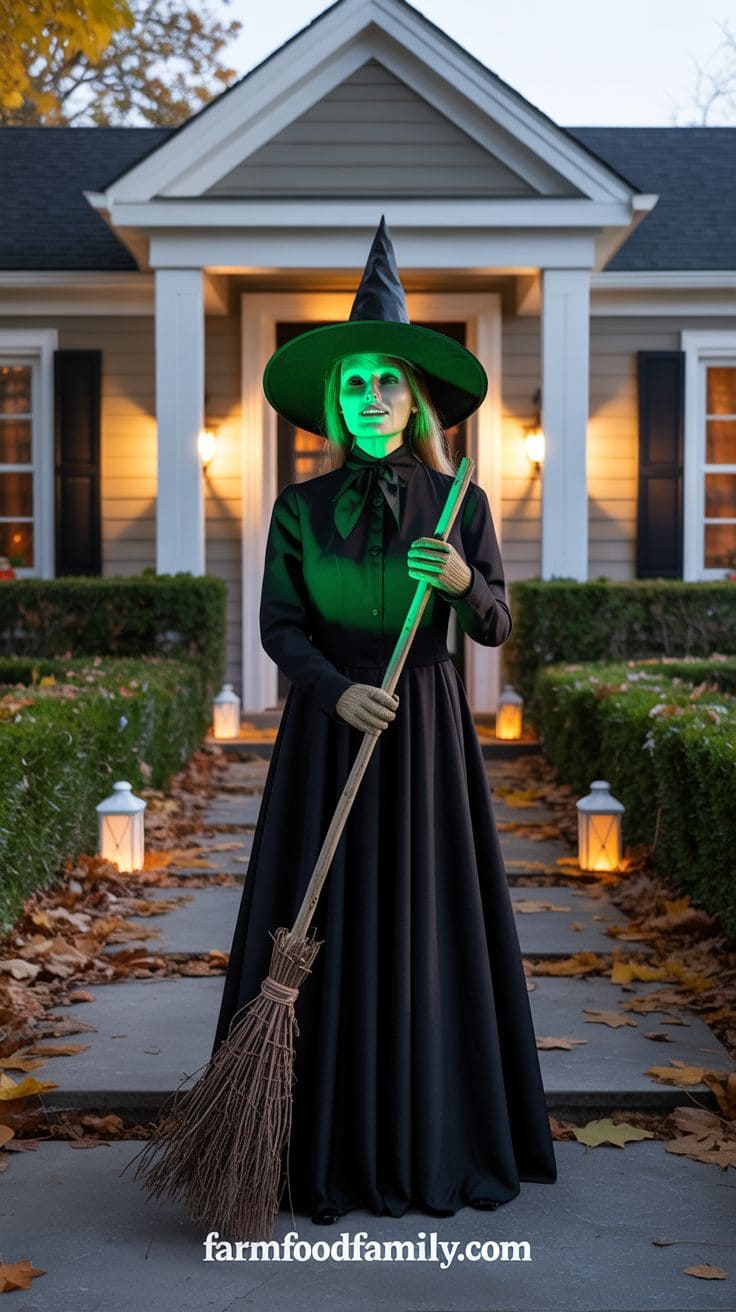
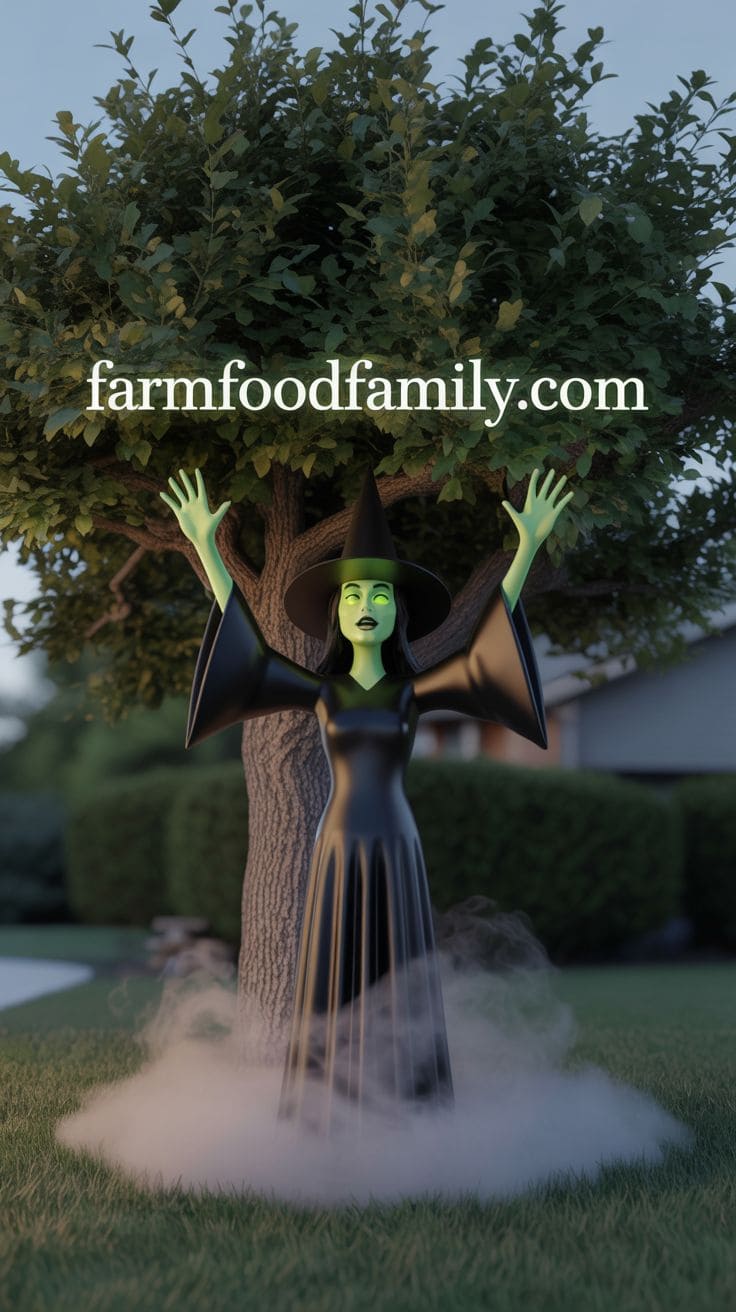
Witches


Materials needed: You’ll need a witch’s hat, black dress, broom, and some green face paint for any exposed skin parts of a mannequin or doll.
Step-by-step instructions: Dress the mannequin or doll in the black dress and place the witch’s hat on its head. If part of the face or hands is visible, apply green face paint to give it a classic witchy look.
Decoration ideas and tips: Position your witch as if she’s casting a spell with her broom in the garden or beside the front door. An eerie green spotlight can enhance her menacing presence during the night.
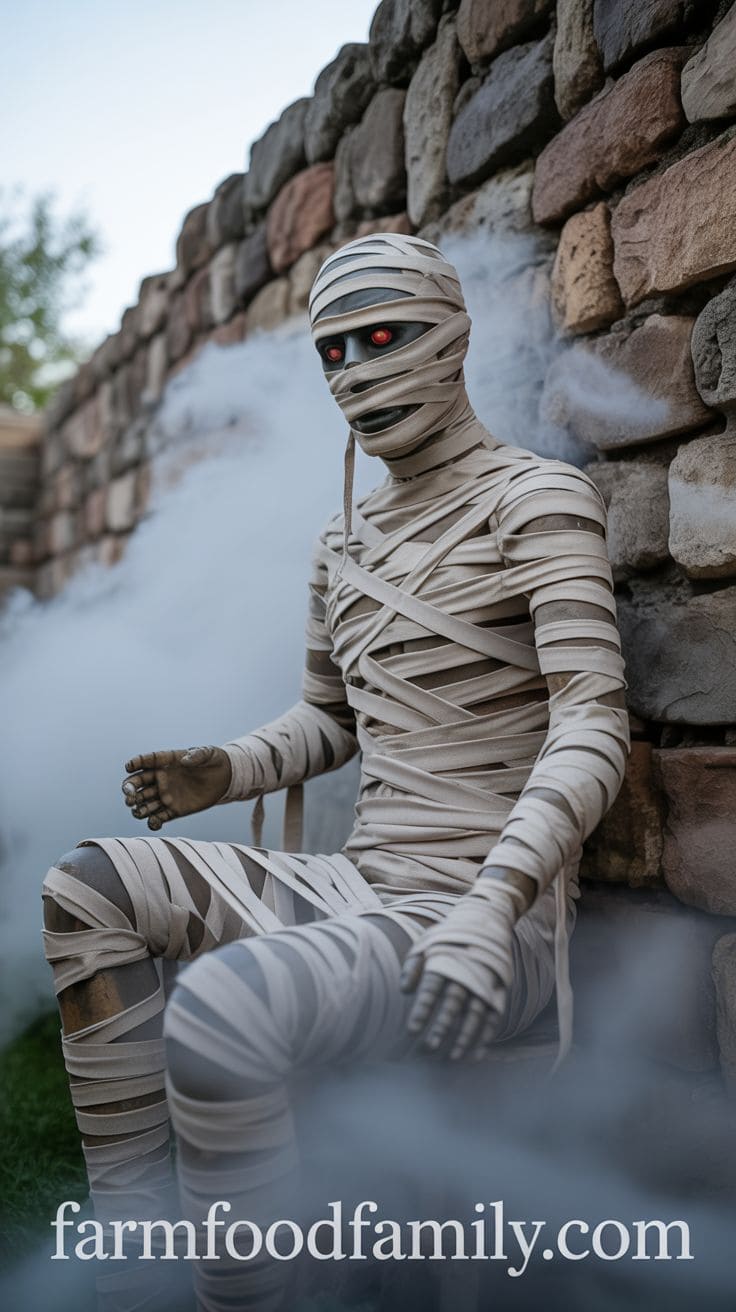
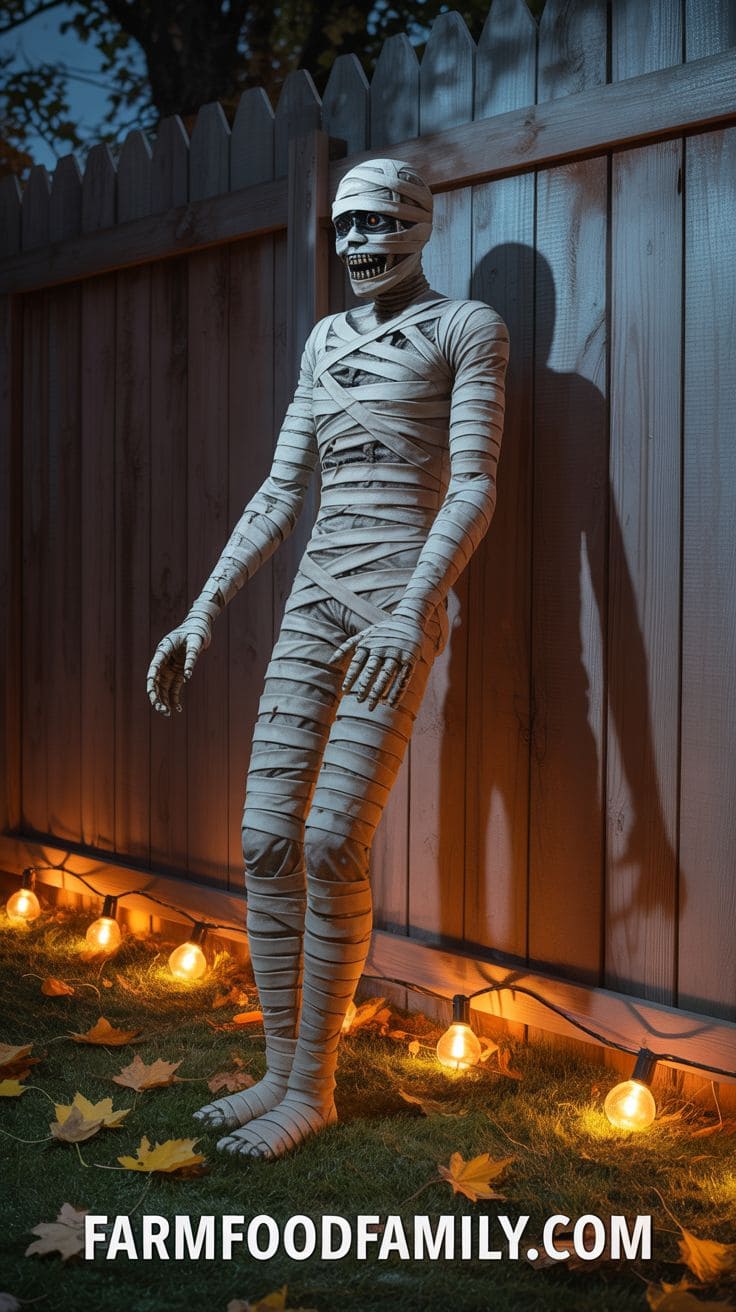
Mummies

Materials needed: Secure some white bandages or strips of white cloth, white spray paint if you’re using non-white materials, and a mannequin or doll to wrap.
Step-by-step instructions: If necessary, spray paint your strips or bandages white. Wrap the mannequin or doll tightly from head to toe, leaving only the eyes slightly visible for a more dramatic effect.
Decoration ideas and tips: Lay your mummy down as if it has just risen from an ancient tomb, or sit it up against a wall. Low lighting and a fog machine nearby will make the scene even more haunting, as if a mummy has just escaped from its sarcophagus.
Sinister Signs and Symbols
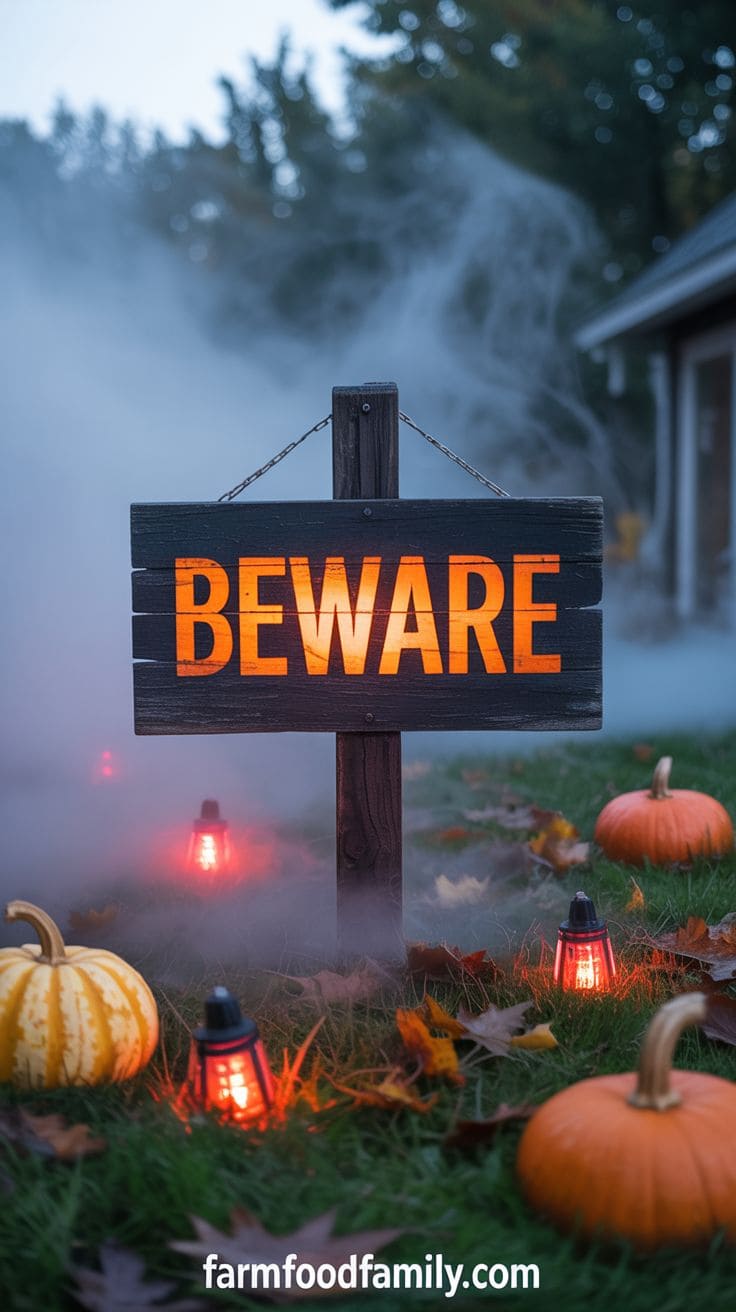
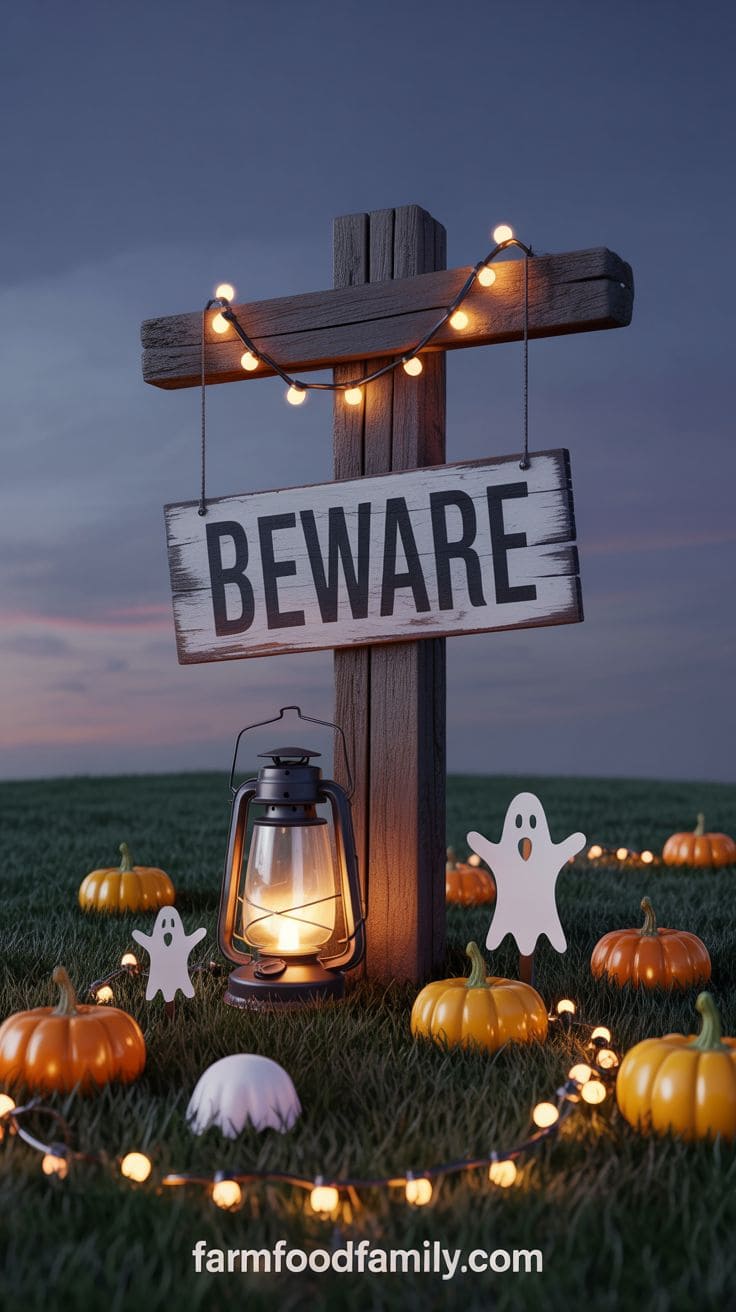
Beware Signs

Materials needed: You’ll want some wooden boards, black and orange paint, and brushes.
Step-by-step instructions: Paint your wooden boards black as the base. Once dry, use orange paint to add the word “Beware” or any other spooky messages you like.
Decoration ideas and tips: Stick these signs around your yard, especially near places where guests might wander. Adding some red LED lights around the signs can make them even more ominous at night.
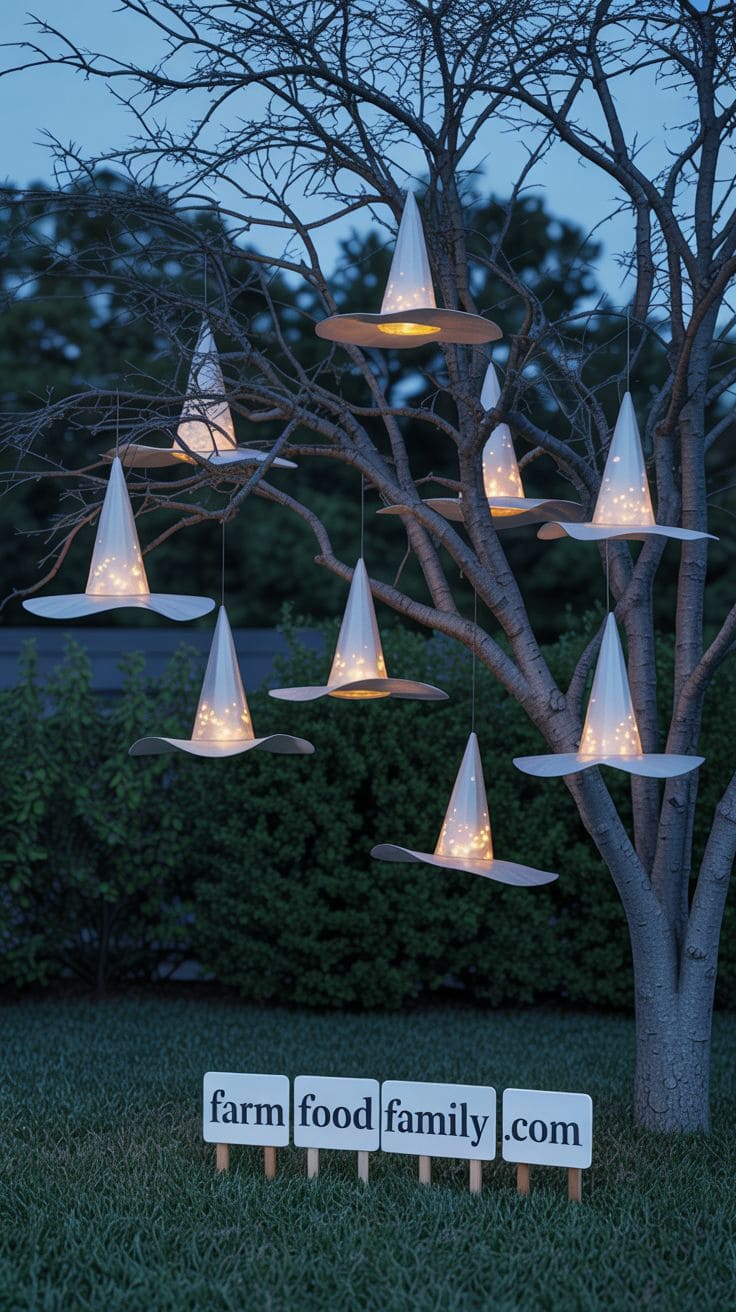
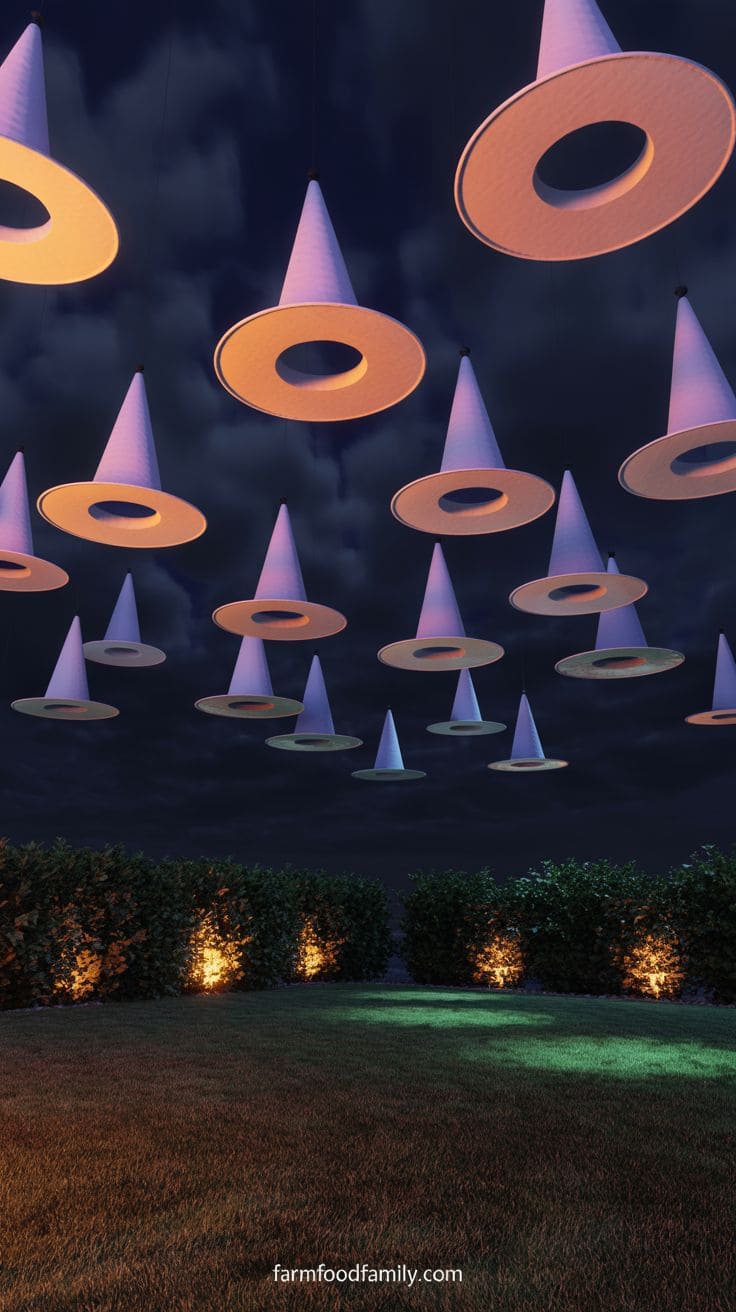
Witch Hats on Trees

Materials needed: Obtain several witch hats, some fishing line to hang them, and glow sticks to light them up.
Step-by-step instructions: Insert a glow stick inside each hat to give them a gentle eerie glow. Tie the fishing line at the top of each hat and hang them from your trees at varying heights.
Decoration ideas and tips: These floating witch hats look magical and haunting, especially when they sway in the breeze. It’s like a coven of witches has just zoomed through your yard!
Ghastly Garlands
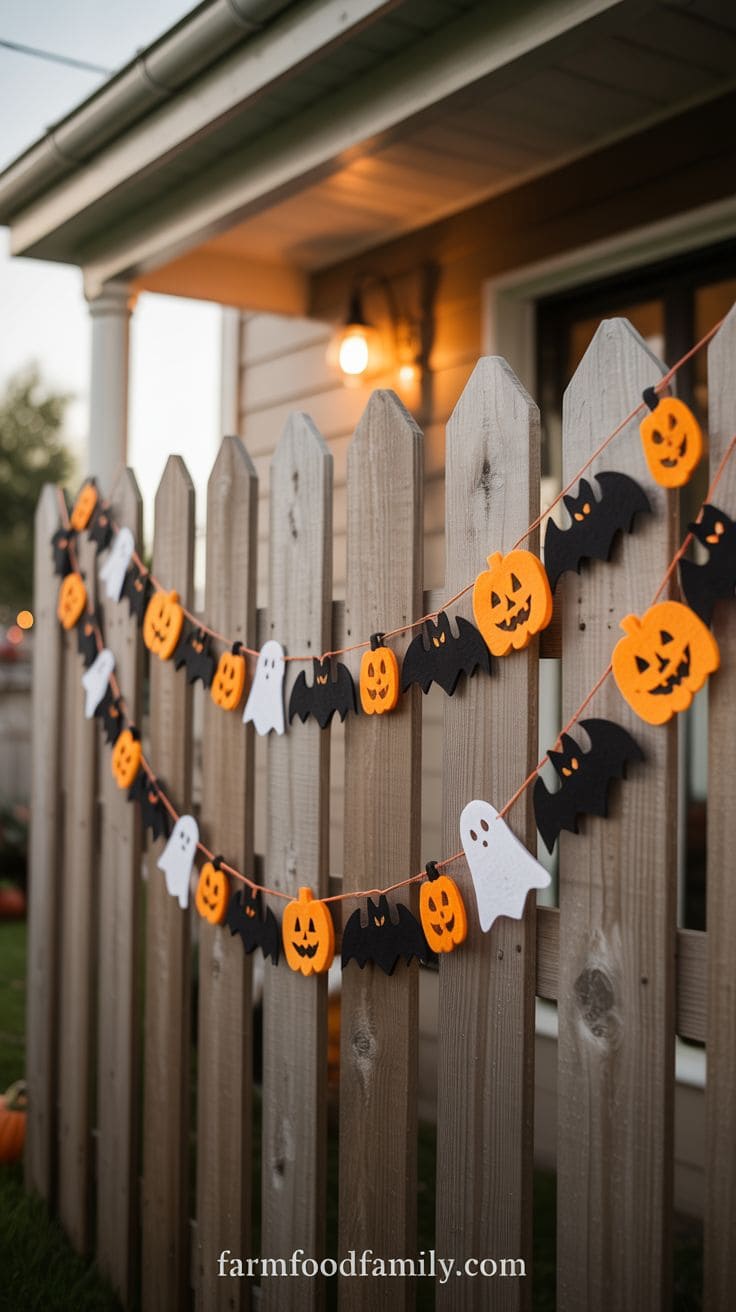
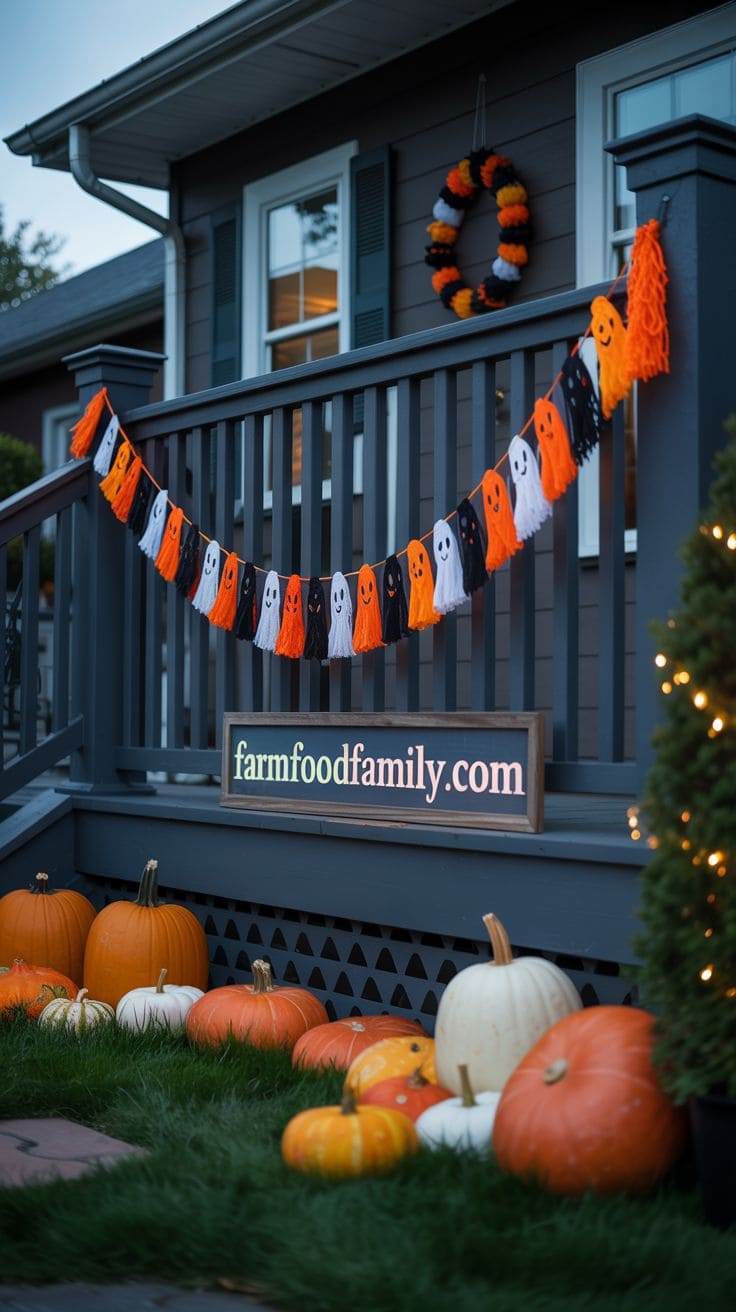
Halloween Garland

Materials needed: For this project, grab some orange and black yarn, felt in various colors, scissors, and a hot glue gun.
Step-by-step instructions: Cut the felt into shapes like ghosts, bats, and pumpkins. Use the hot glue gun to attach these shapes to a long string of yarn.
Decoration ideas and tips: Drape your colorful garland across mantels, around door frames, or along fence lines. Adding small LED lights can make your garland pop during the nighttime, bringing a festive yet spooky flair to your decor.
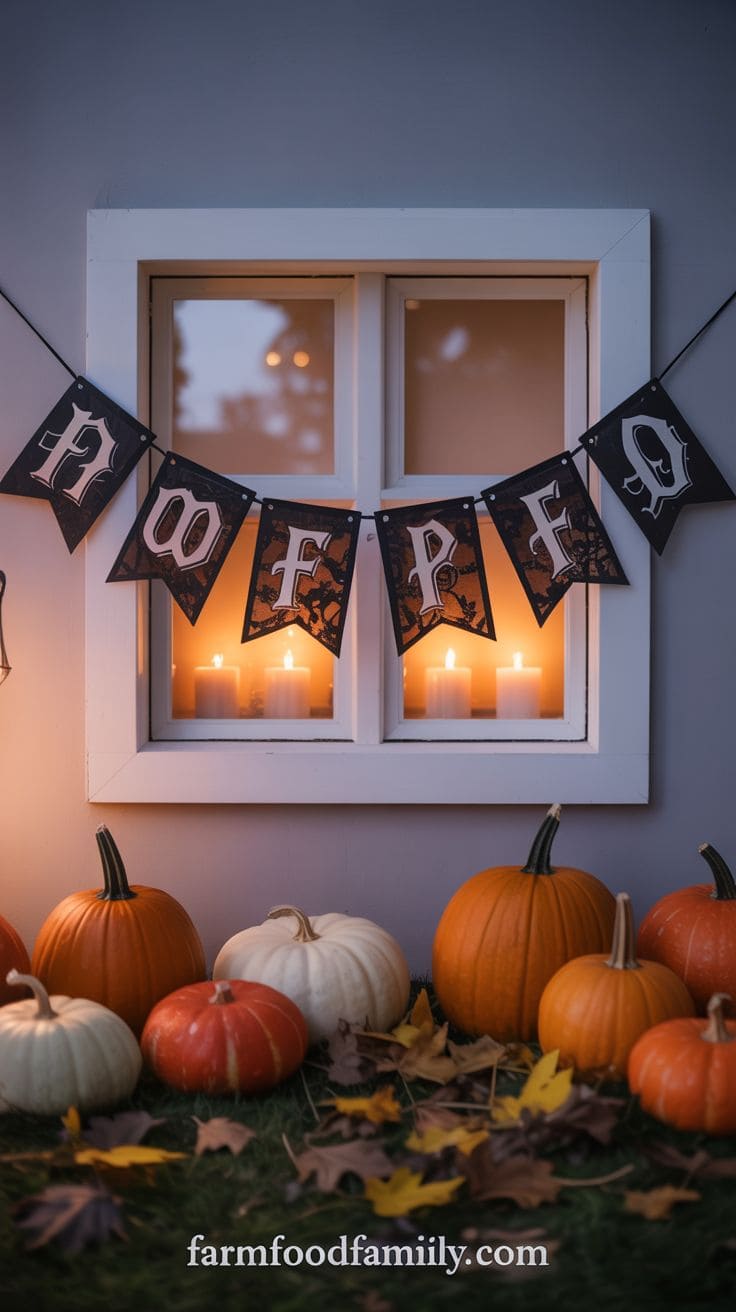
Spooky Banners

Materials needed: You’ll need black cardstock, white paint, a paintbrush, and some string.
Step-by-step instructions: Cut the cardstock into triangular banner shapes. Paint spooky letters or symbols like skulls and crossbones on each triangle. Once dry, punch holes in the corners of the triangles and string them together.
Decoration ideas and tips: Hang your spooky banners above doorways or windows. They work great as party decorations or just to give your home a haunted house vibe during the Halloween season. The stark black and white contrast makes them visible from afar, perfect for catching the eyes of trick-or-treaters.
Wicked Windows
Silhouette Cutouts

Materials needed: To start, you’ll need some black poster board, scissors, and tape.
Step-by-step instructions: Trace spooky shapes such as witches, ghosts, or bats onto the poster board. Carefully cut out these shapes. Stick them onto your windows with tape.
Decoration ideas and tips: These silhouettes look best when they’re backlit by indoor lighting. As Martha Stewart, an expert in all things home and holiday, says, “Simple shapes can create dramatic effects when placed correctly.” Position different shapes in various windows to create a story or scene that unfolds across your home. This adds an eerie and fun element to your Halloween décor, captivating anyone who passes by your house.
Conclusion


We’ve journeyed through a haunted collection of DIY decorations that can transform any ordinary yard into a delightful den of Halloween horrors. From eerie silhouette cutouts to ghastly garlands, each idea is designed to add a unique touch of spookiness to your celebrations.
A few final tips to ensure your spooky setup is the talk of the town: continuity is key. Link your decorations thematically or with consistent lighting to create a cohesive look. Dim lighting and strategic placement can amplify the scare factor of any decoration. Remember, sometimes less is more—a few well-placed items can have a bigger impact than a cluttered space.
Now, why not take these ideas and make them your own? Get creative, and when you’re done, share your haunted masterpieces on social media. Nothing beats seeing your hard work pay off with likes, shares, and maybe even a few screams. Dive in, have fun, and create a haunting atmosphere that will be remembered long after the candy has vanished!