13 DIY Lamp Ideas You Can Build Safely at Home
A vase, a bottle or a few wood slices can become a lamp, if you start with a kit, match the bulb to the rating and keep heat away from fabric and paper.

Never miss an update — choose FarmFoodFamily as your preferred source on Google.
How it works: Tap the button below to open Google's settings page, then check the box next to FarmFoodFamily.
Tap the checkbox to turn it blue — that's how you know it's set.
A vase, a bottle or a few wood slices can become a lamp, if you start with a kit, match the bulb to the rating and keep heat away from fabric and paper.
Products We Recommend
This post contains affiliate links. We may earn a commission on qualifying purchases at no extra cost to you.

VINO LIGHT Bottle Lamp Kit With 9mm Glass Drill Bit, UNO Slip-on Socket, 8 ft Black Cord
A bottle lamp kit with socket, 8 ft cord and a glass bit. The listing says UL Listed, and you should still match the bulb to the kit's rating.
Shop Now
2 Pack Plug-In Pendant Light Cord, 15 FT, Hemp Rope, With On/Off Switch
A plug-in pendant cord set for a bowl, cardboard or wire shade. The listing says UL E26 socket. Use a cool LED bulb and keep shades back from it.
Shop Now
BOSCH GT3000 8 pc. Glass & Tile Bit Set
Carbide-tipped bits for drilling glass and tile, such as a vase base. Wear eye protection and gloves, as Hunker says.
Shop NowThe safest DIY lamp starts with a lamp kit, not loose wire. Apartment Therapy’s guide drills a hole in a vase, feeds the cord up through the base and wires the socket to two screws. A kit does the hard part for you, and it sets clear limits on the bulb you can use.
Keep heat away from fabric. A CPSC review of lighting incidents found 79 with outside factors, and 40 were bulb heat igniting nearby combustibles like curtains, clothes and bedding.
And match the bulb to the kit. One Lowe’s bottle lamp kit allows a 60-watt incandescent, a 13-watt CFL or a 6-watt LED.
These 13 ideas give you steps, a style tip and a safety note for each one. Pick one that fits a kit you can buy, and finish it in a weekend.
What Do You Need to Make a Lamp?
Start with a base, a kit and a shade. The base can be a vase, a bottle, a planter or a stack of wood. The kit holds the socket, cord and switch.
Apartment Therapy lists the basics. You need a vase or planter, a keyless socket adapter kit, a cord set with a switch, a metal crossbar, a shade, screws and a bulb. You also need a drill, a small screwdriver, pliers and a wire cutter.
Use this table to match a base to a method. The skill levels are our own guess.

| Base | Method | Skill | Drill glass? |
|---|---|---|---|
| Vase or planter | Kit with socket mount | Medium | Maybe |
| Bottle | Bottle lamp kit with stopper | Easy | No |
| Wood slices | Stack on a kit rod | Medium | No |
| Wood bowl | Pendant kit through a hole | Easy | No |
| Pipe or dowel | Standing lamp kit | Medium | No |
| Terrarium or lantern | Swag kit | Medium | Maybe |
If you are new to wiring, begin with a bottle lamp kit.
What Safety Rules Apply to DIY Lamps?
A lamp is a heat source and an electric device. Read these rules first.
Use a kit and follow its limits. The Lowe’s bottle lamp kit says to use a 60-watt maximum incandescent bulb, a 13-watt CFL or a 6-watt LED. It says to unplug the lamp before you put on or take off parts. It says not to place the fixture against carpeting, furniture or other fabric.
Don’t use a damaged cord. The same kit says not to use it if the cord is frayed or broken. It says the polarized plug, with one wide blade, reduces shock risk, so don’t alter it. It also says to consult a qualified electrician before installation.
Keep heat off fabric. The CPSC report by electrical engineer Anna Luo reviewed 150 portable lighting incidents. It found 79 with outside factors, such as a lamp knocked onto combustible material, a lamp shade touching a bulb, a pinched cord or too much wattage. It found 40 were bulb heat igniting curtains, clothes or bedding.
Wire it right. Apartment Therapy says the ribbed cord wire is neutral and goes to the silver screw. It says the smooth wire is hot and goes to the gold screw. It says to screw the mount in so the socket doesn’t wobble.
Drill glass with care. Hunker says to use a specialty drill bit made for glass, and to wear eye protection and heavy-duty gloves with glass or flames.
1. A Vase Lamp
A vase makes a classic table lamp. Apartment Therapy’s tutorial uses a vase or planter, a keyless socket kit, a crossbar and a globe shade. Its author drilled a hole in the side of a wooden vase for the cord.
A bottle lamp kit with socket, 8 ft cord and a glass bit. The listing says UL Listed, and you should still match the bulb to the kit's rating.
Shop NowThis post contains affiliate links. We may earn a commission on qualifying purchases at no extra cost to you.
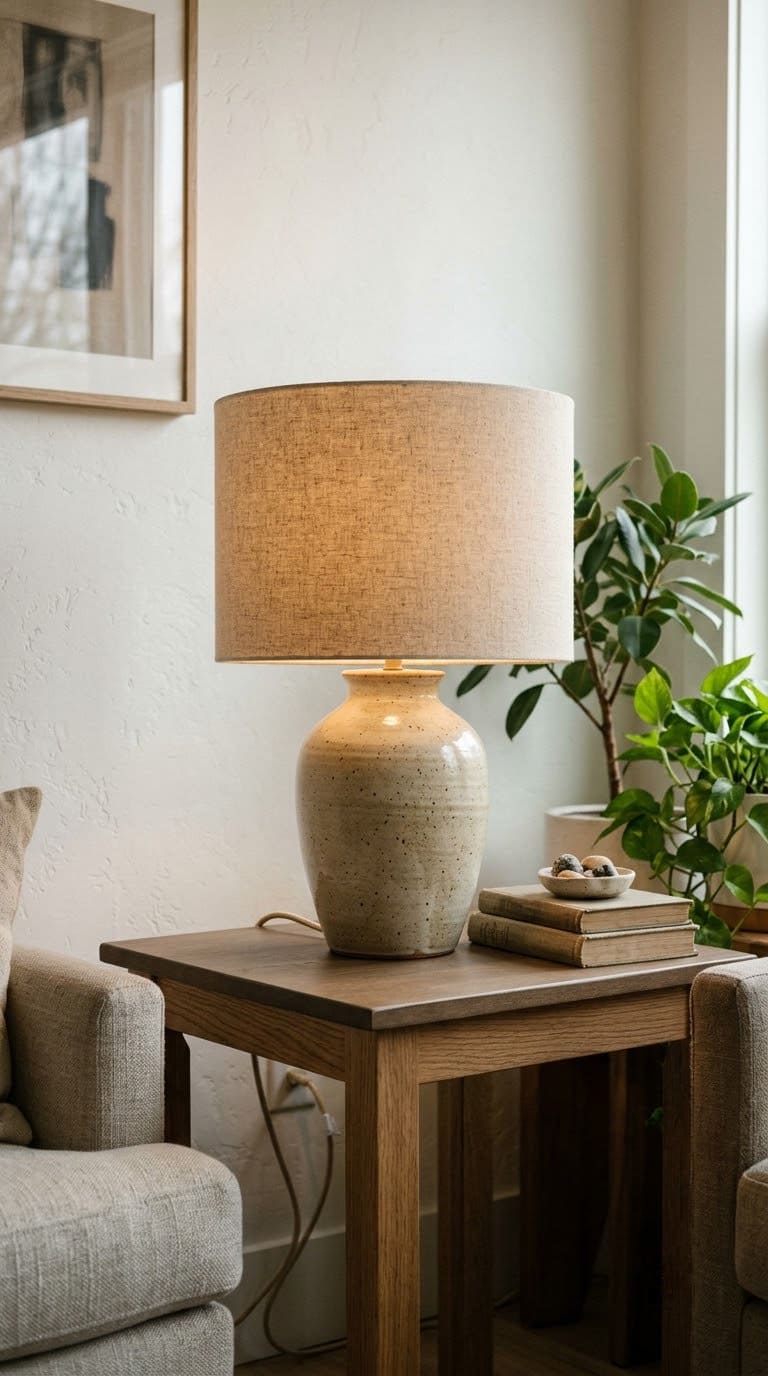
- Drill a hole in the side of the base, just wide enough for the cord.
- Bend a metal crossbar so it fits inside the vase, as a mount.
- Attach the socket base to the crossbar with the kit’s threaded tube.
- Feed the cord up through the tube, and wire it. Neutral goes to the silver screw, and hot goes to the gold one.
- Screw the mount into the vase, and add the bulb and shade.
Style tip: pick a shade in a color from the room.
Safety: keep the shade away from the bulb.
More: see our homemade lamp shade ideas.
2. A Bottle Lamp
A bottle lamp is the easiest start. Hunker says any bottle works if it has a flat base. A kit includes wiring, socket, switch, plug and harp.
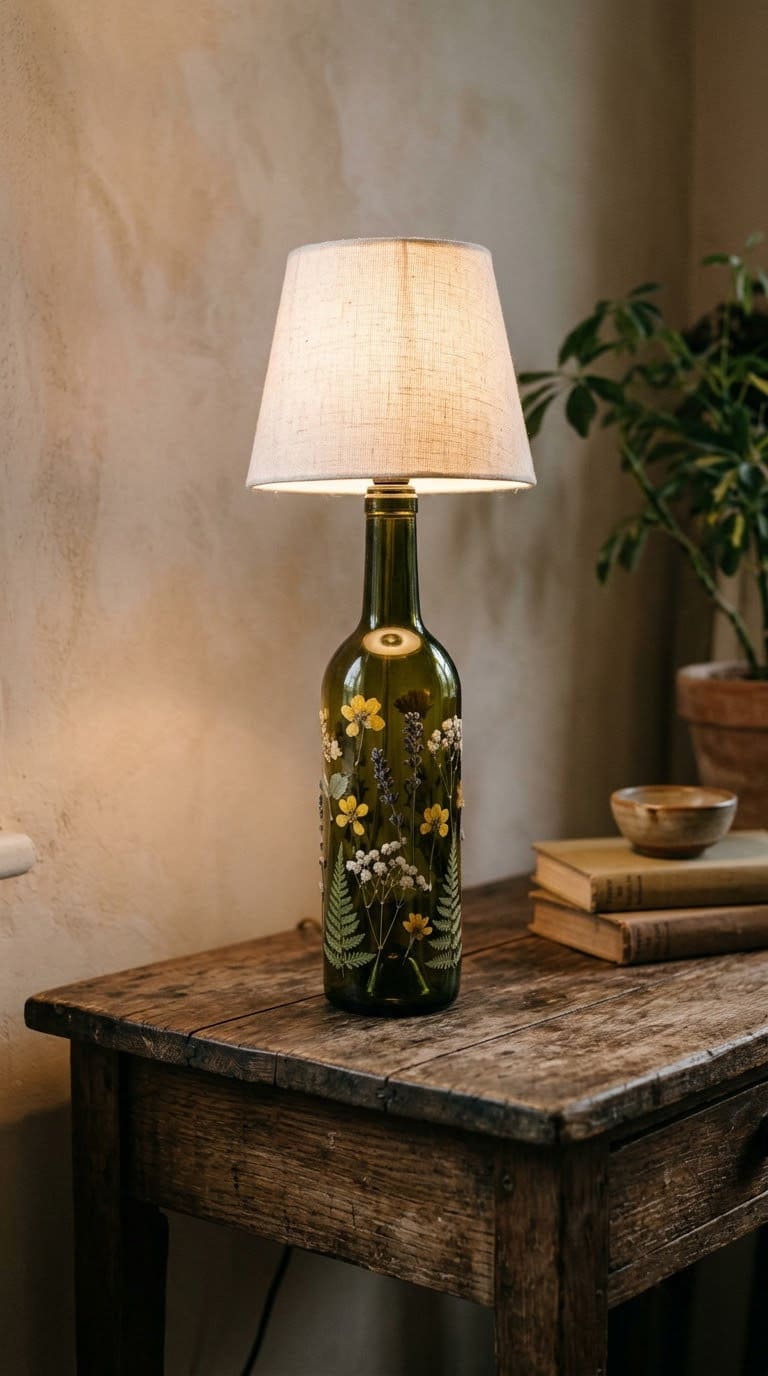
- Pick a bottle with a flat base, and clean it.
- Buy a bottle lamp kit with a stopper-style adapter.
- Mount the socket in the bottle neck.
- Run the cord out the top, or drill a hole with a glass bit.
- Add a bulb that fits the kit’s rating, then a shade.
Style tip: decorate the bottle with dried flowers, as Hunker shows.
Safety: wear eye protection and gloves when you drill glass.
3. A Stacked Wood Slice Lamp
Wood slices make a warm lamp. Bob Vila’s lighting ideas list has a version that uses 15 to 20 birch slices, a lighting kit and wood glue.
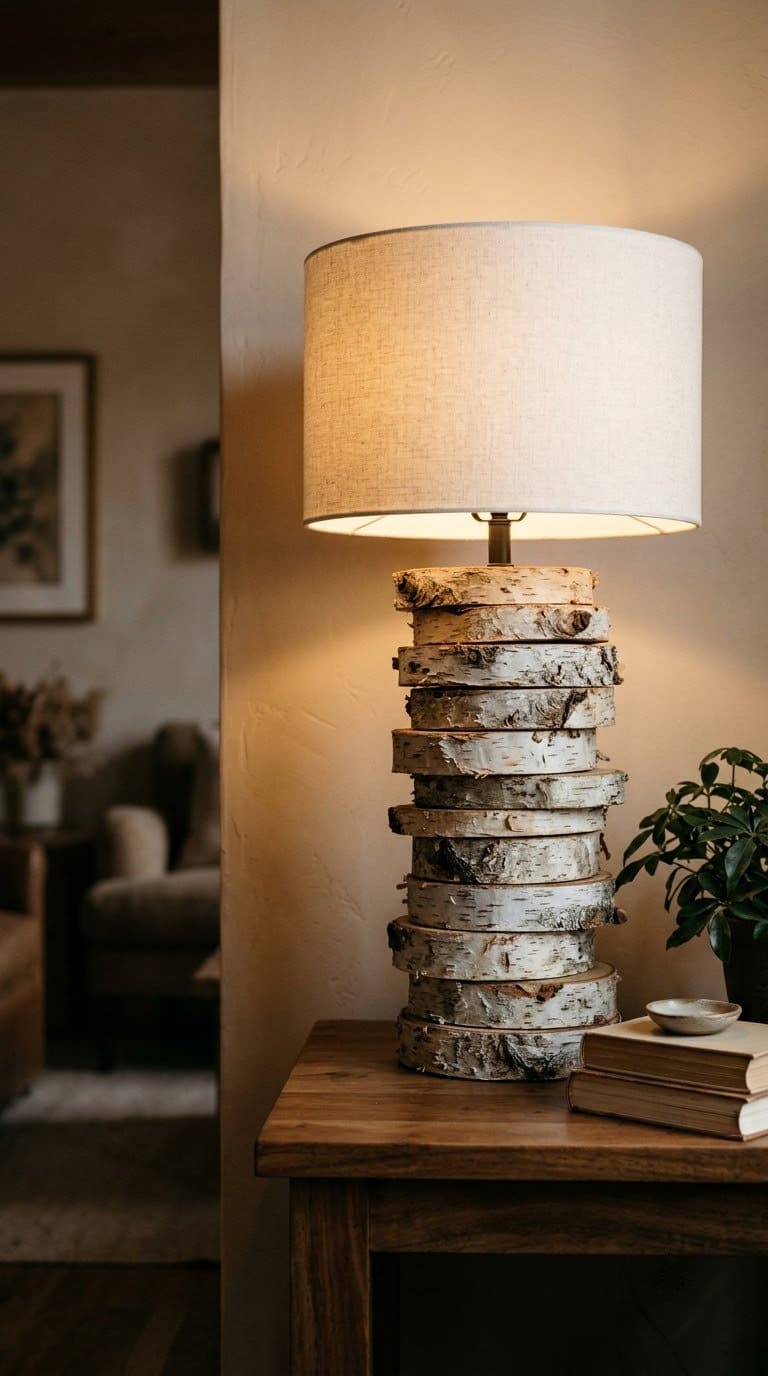
- Drill roughly centered holes through each slice.
- Stack the slices, and string the kit cord through.
- Glue between each slice, and let it dry.
- Add a shade and a bulb.
Style tip: pick slices of similar size for a clean column.


Safety: keep the bulb wattage within the kit’s rating.
4. A Copper and Wood Standing Lamp
A copper pipe on a wood base looks modern. Bob Vila’s version glues a dowel into a thick wood base and adds an angled copper pipe.
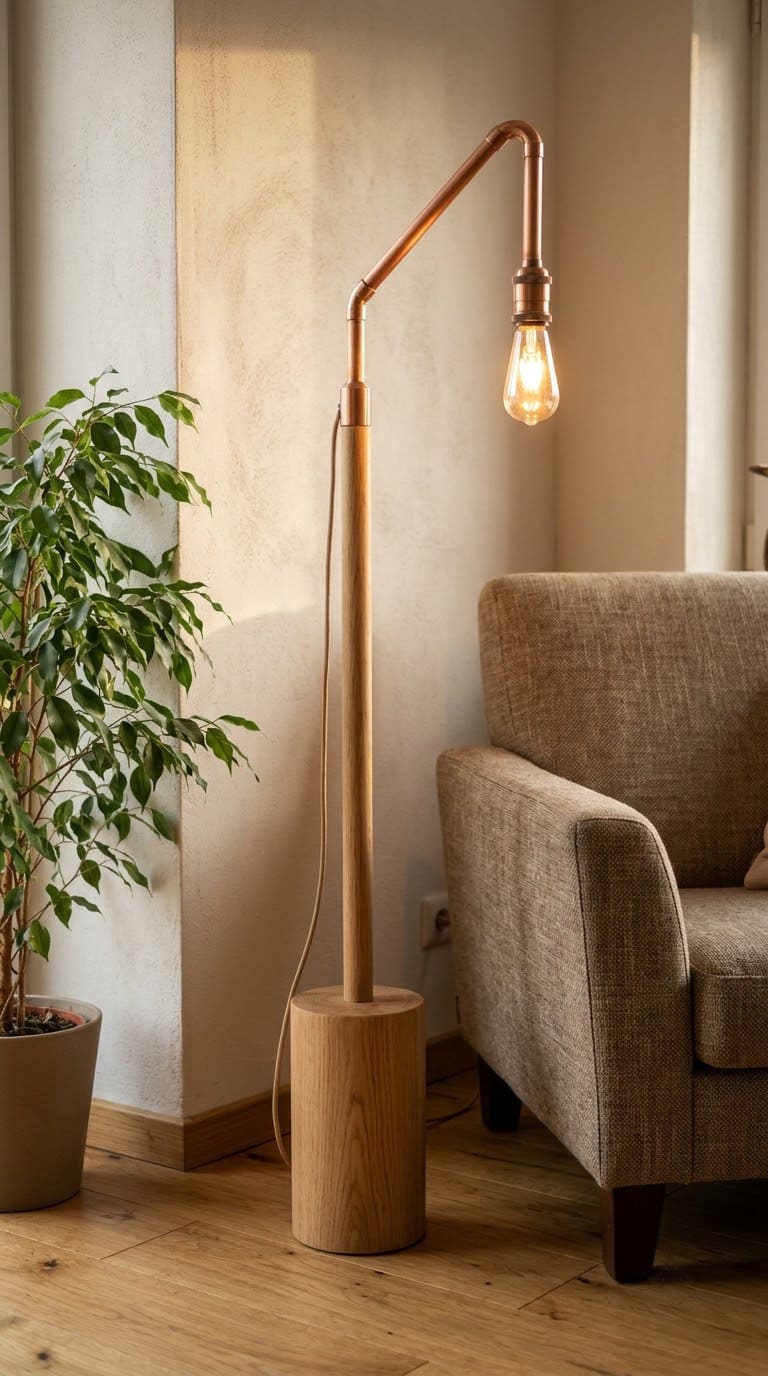
- Drill a hole in the base, and glue in a large dowel.
- Drill an angled hole through the dowel, and glue in the copper pipe.
- Thread the lamp kit cord through the pipe.
- Fit the socket and shade.
Style tip: pick a light wood base so the copper stands out.
Safety: make the base wide and heavy so the lamp won’t tip.
5. A Wooden Tripod Floor Lamp
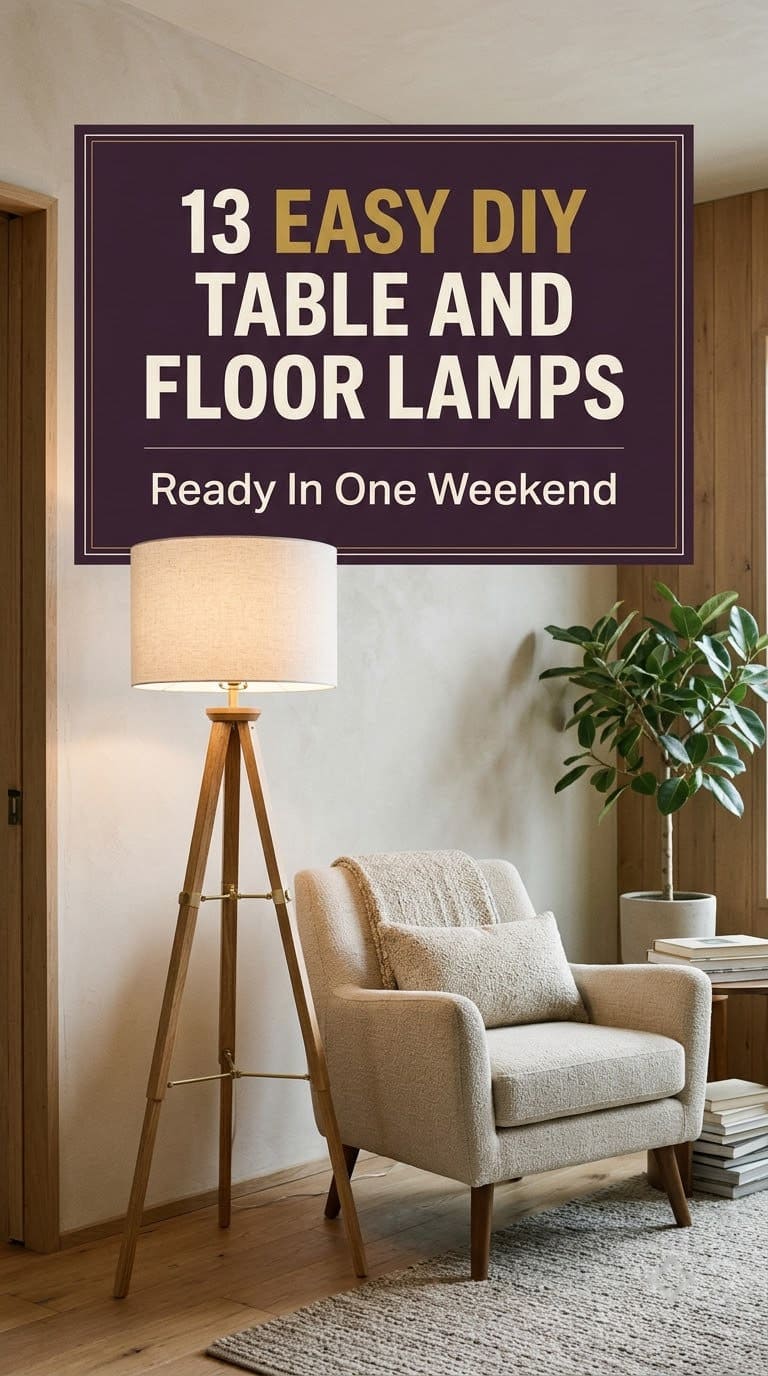
A tripod floor lamp is sturdy and stylish. Bob Vila’s version uses a lighting kit, pine boards and a plank cut into a triangle.
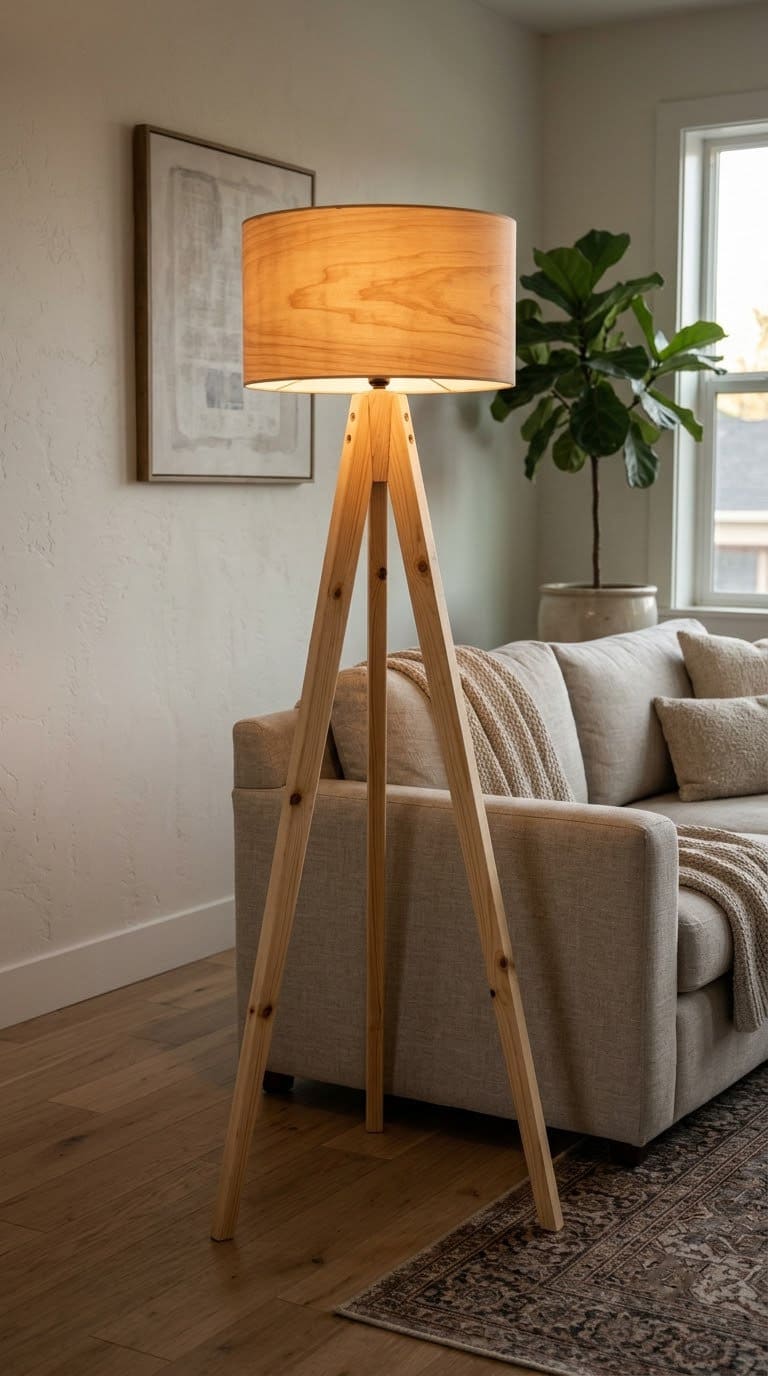
- Fit three trimmed boards together for each leg.
- Cut a plank into a triangle with a tab at each corner.
- Screw one leg to each tab.
- Drill a hole for the lighting kit, and add the shade.
Style tip: use a veneer-look shade for a warm glow.
Safety: put the lamp where it can’t be knocked over.
More: see our floor lamp ideas.
6. A Wooden Bowl Pendant
A wooden bowl makes a simple pendant. Bob Vila’s version uses a large, lightweight wooden serving bowl and a pendant light kit.
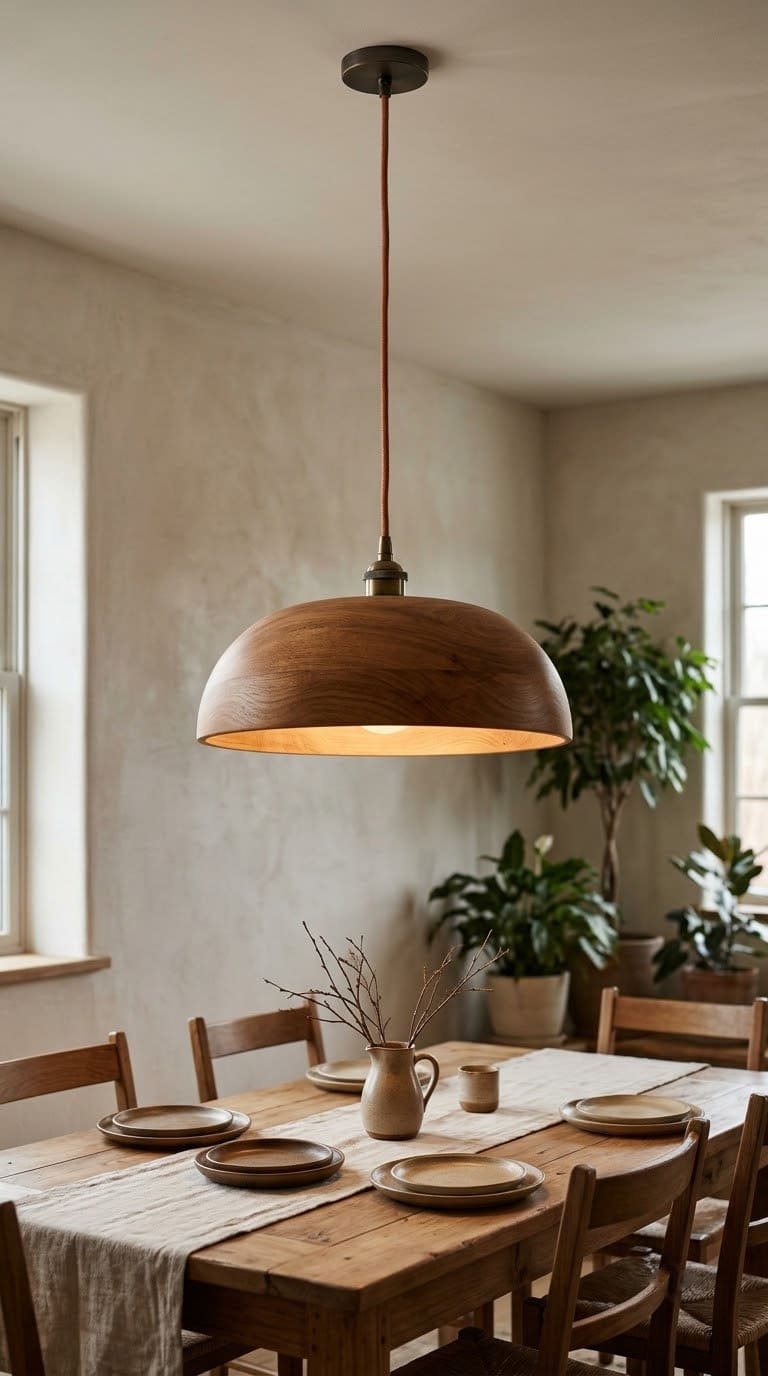
- Drill a hole in the center of the bowl.
- Thread the pendant kit through the hole.
- Add the bulb inside the bowl.
- Hang it from a ceiling hook rated for the weight.
Style tip: pick a colored cord for fun.
Safety: check the bulb’s heat against the wood, and use an LED. That tip is our own.
7. A Cardboard Pendant
Cardboard makes a cheap, light pendant. Bob Vila’s version cuts two squares and eight side strips, then sprays them and fits them onto a pendant kit.
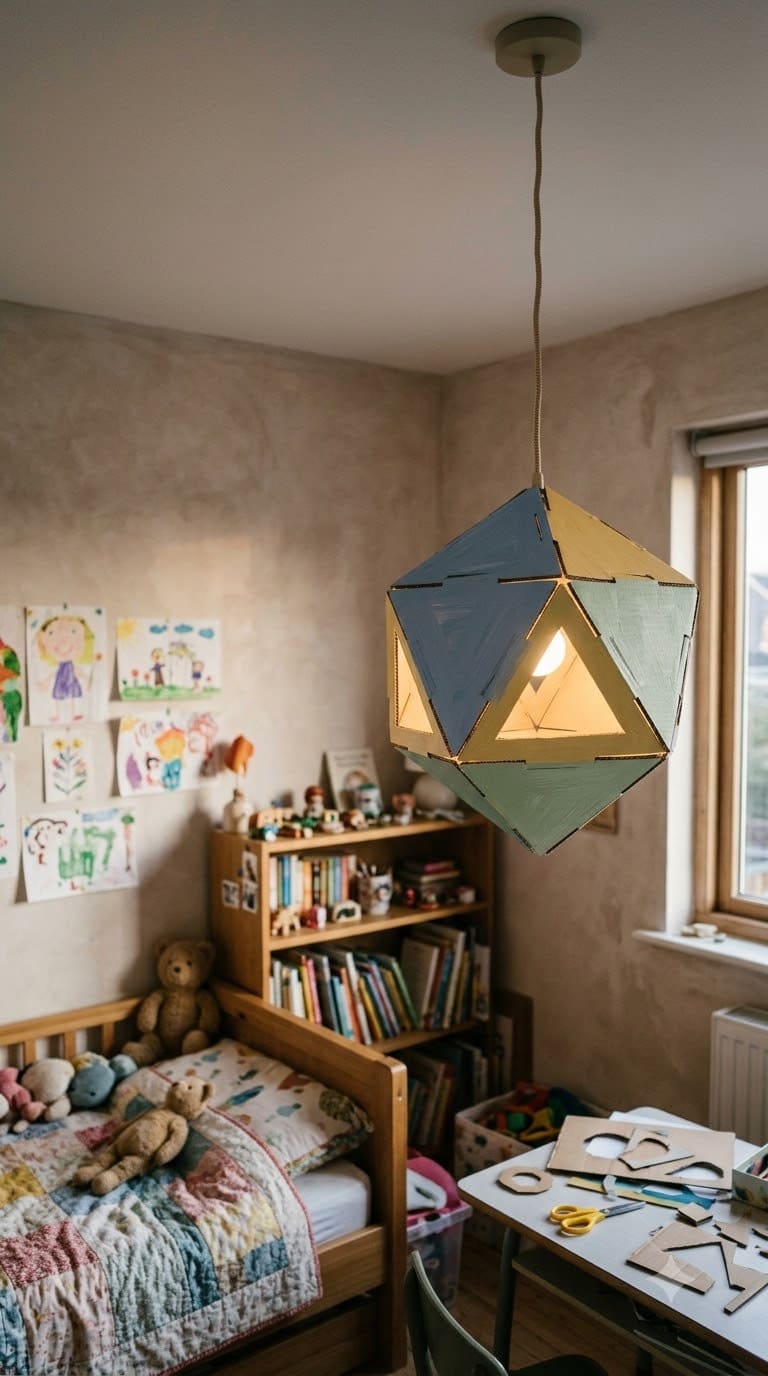
- Cut the top and bottom squares and eight side strips.
- Cut a hole in the top for the socket.
- Notch the pieces, and fit them together.
- Spray the shape, let it dry, and fit it onto the kit.
Style tip: pick a bold color for a kid’s room.
Safety: use a cool LED bulb, and keep the cardboard well away from it. That tip is our own, since the source didn’t cover heat.
8. A Rope Chandelier
Rope turns a plain chandelier into a nautical one. Bob Vila’s version glues sisal rope around a metal chandelier, with a hula hoop for bulk.
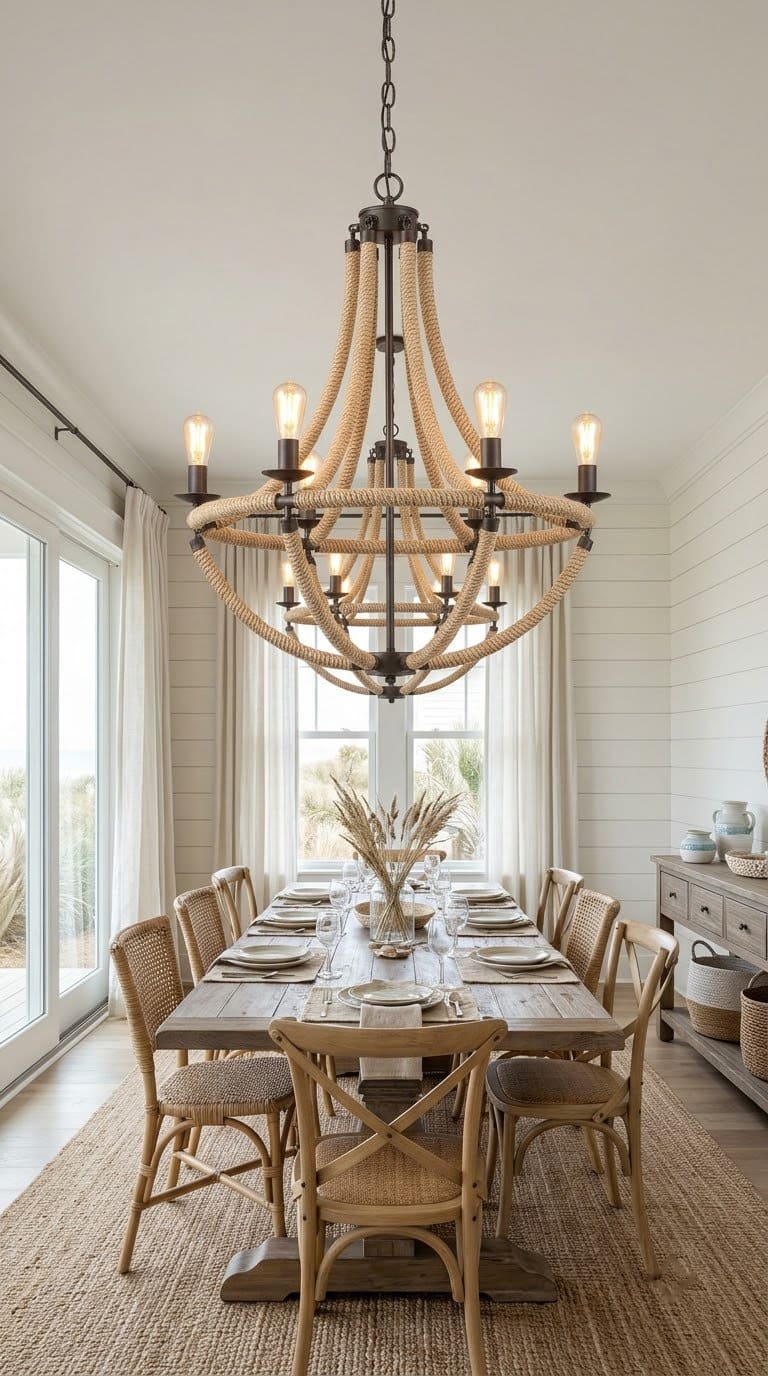
- Pick a plain metal chandelier.
- Hot-glue sections of rope onto the arms.
- Wrap the rope until the arms are covered.
- Keep the rope away from the sockets.
Style tip: use natural sisal in a coastal room.
Safety: rope can burn. Use LED bulbs and keep the rope back from the sockets. That tip is our own.
9. A Geometric Copper Pipe Pendant
A copper pipe shade adds sparkle. Bob Vila’s version cuts copper pipe into 30 equal pieces, cleans them and wires them into triangles around a black pendant.
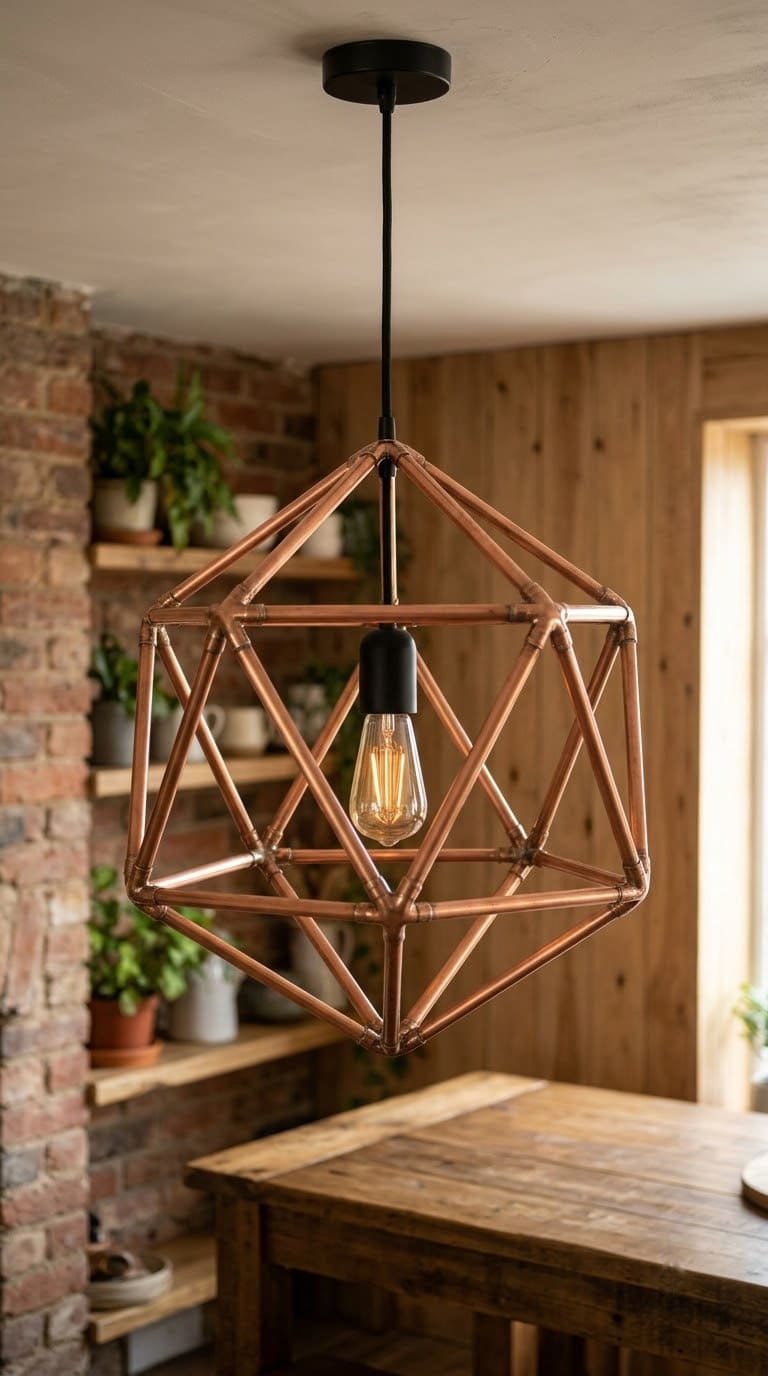
- Spray a basic pendant black.
- Cut copper pipe into 30 equal pieces, and clean them with steel wool.
- Wire the pieces into triangles.
- Join the triangles around the pendant, and hang it.
Style tip: use a warm LED to show the shadows.
Safety: wear gloves and eye protection when you cut pipe. That tip is our own.
10. A Terrarium Pendant
A glass terrarium makes a fun pendant. Bob Vila’s version flips a terrarium upside down, drills the metal base and fits a swag kit with an Edison bulb.
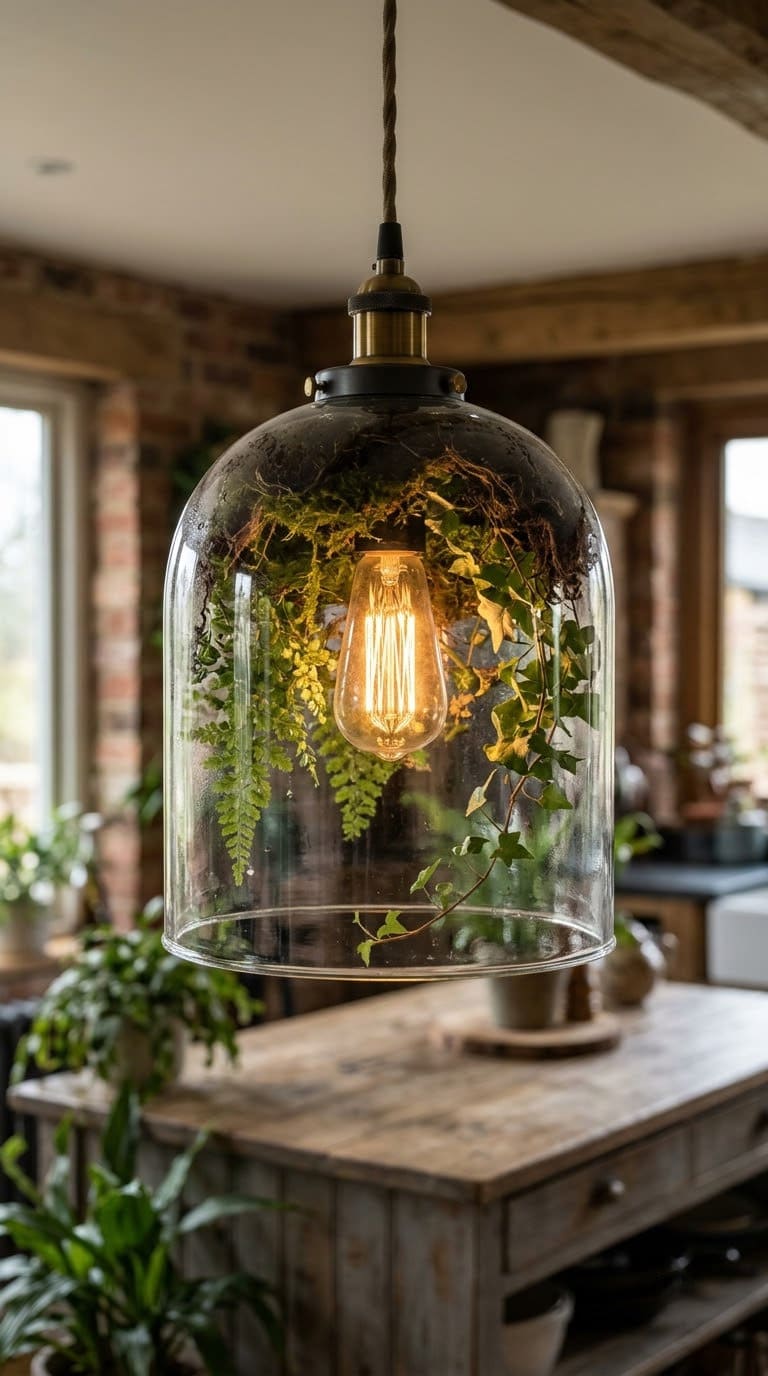
- Flip the terrarium over.
- Drill a hole through the metal base. Bob Vila’s was two inches wide.
- Screw in the swag kit, as the maker says.
- Fit the Edison bulb, and hang it from a ceiling hook.
Style tip: hang a few at different heights.
Safety: use a hook rated for the weight.
11. Halo Pendant Lights
Wire rings make a playful halo. Bob Vila’s version bends four wires into graduated circles, paints them and slides them onto a pendant kit. It says they suit a kid’s room so long as they are well out of reach.
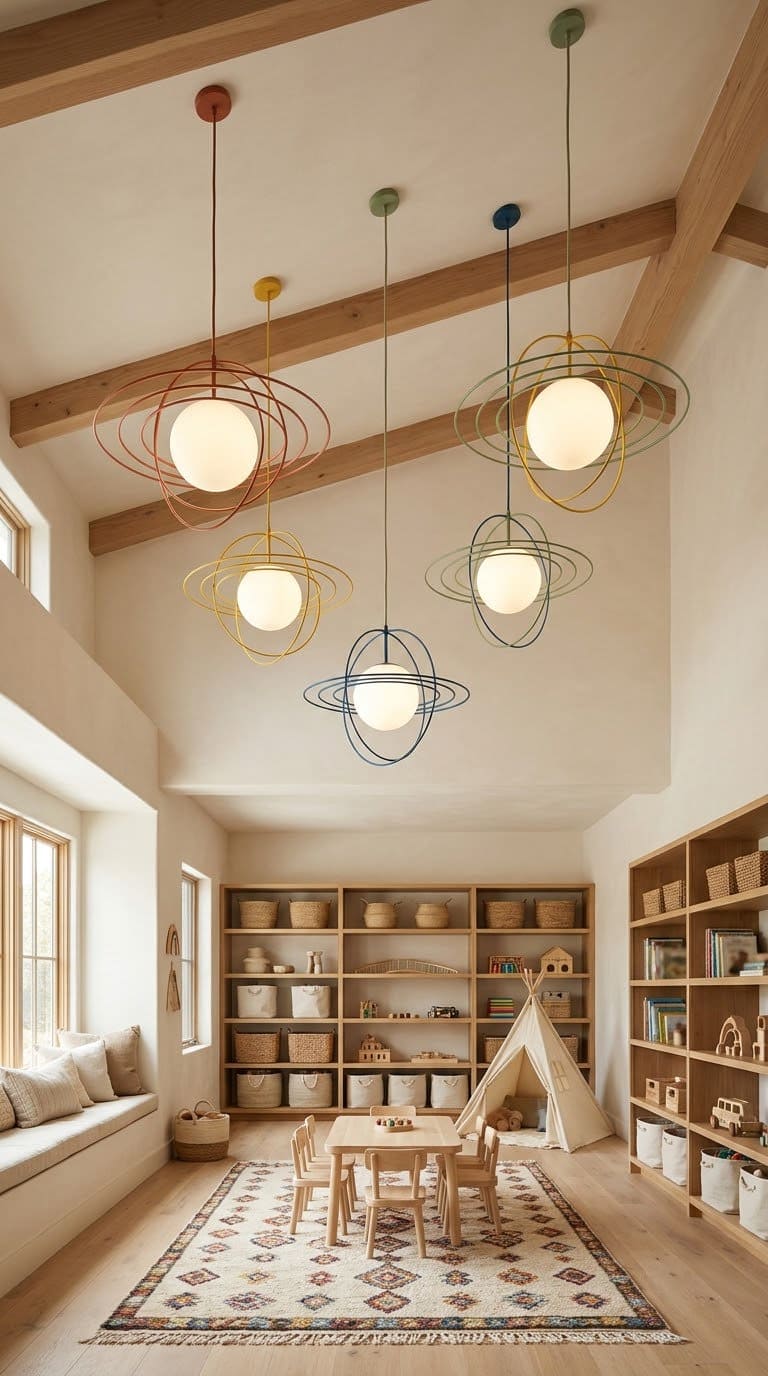
- Cut wire into four lengths.
- Shape the shortest into a circle that fits the pendant top.
- Bend the larger wires into big circles with loops.
- Paint both sides, let dry, and slide the loops on.
Style tip: pick a bright color.
Safety: hang them out of reach, as Bob Vila says.
12. A Wall Sconce for Reading
A sconce frees up the nightstand. Bob Vila shows a wooden wall sconce made from two bracket pieces with a routed channel for the cord. It calls these bedroom reading lights.
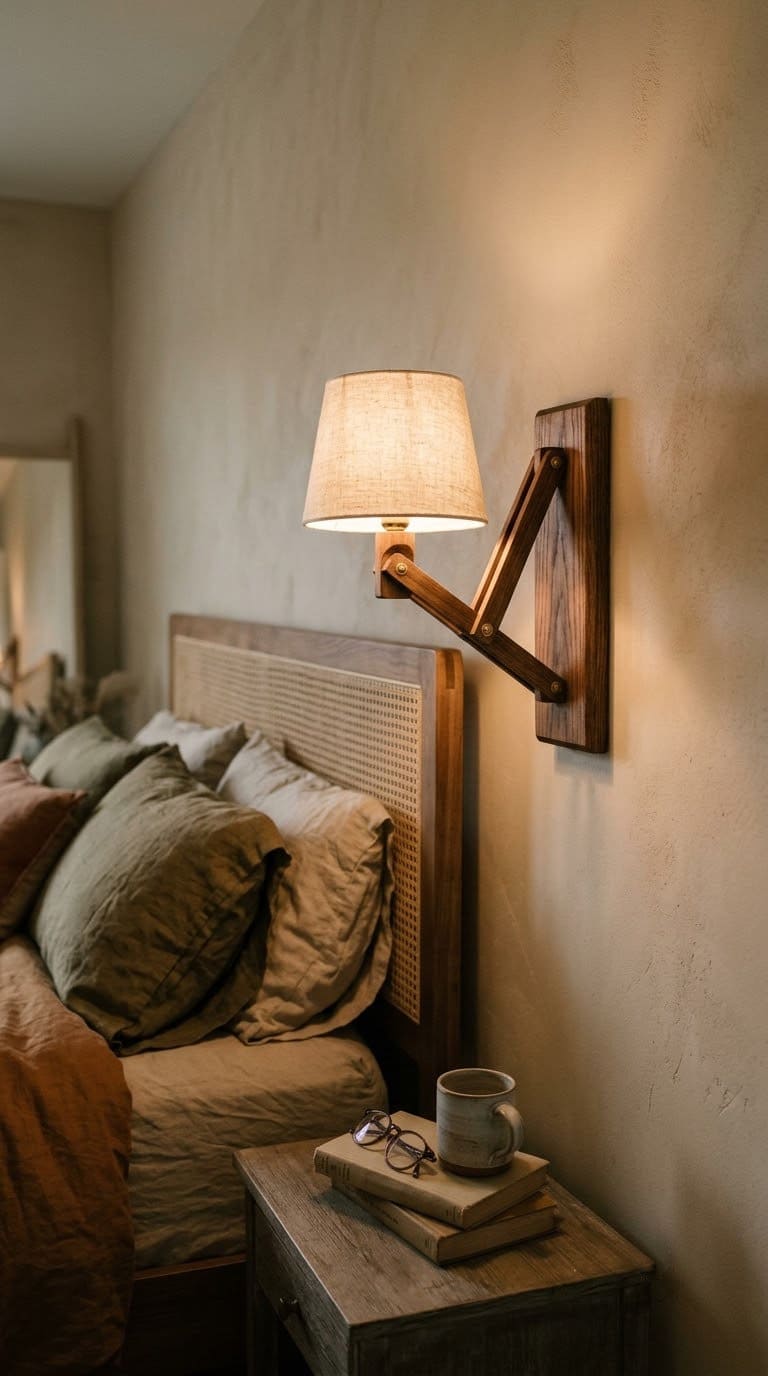
- Cut two bracket pieces, and route a cord channel.
- Screw the pieces into a right angle, and stain them.
- Run the cord through the hole and down the back.
- Mount the sconce on the wall, and add the bulb.
Style tip: pick a warm bulb for reading.
Safety: hire an electrician if you want a wired sconce, since the Lowe’s kit says to consult a qualified electrician. That use is our own.
13. A Piñata Lamp
A piñata makes a party light. Bob Vila’s version fits a piñata over a table lamp with the shade removed. It says to use a low-temperature bulb to avoid a fire hazard, and never to leave it on unattended.
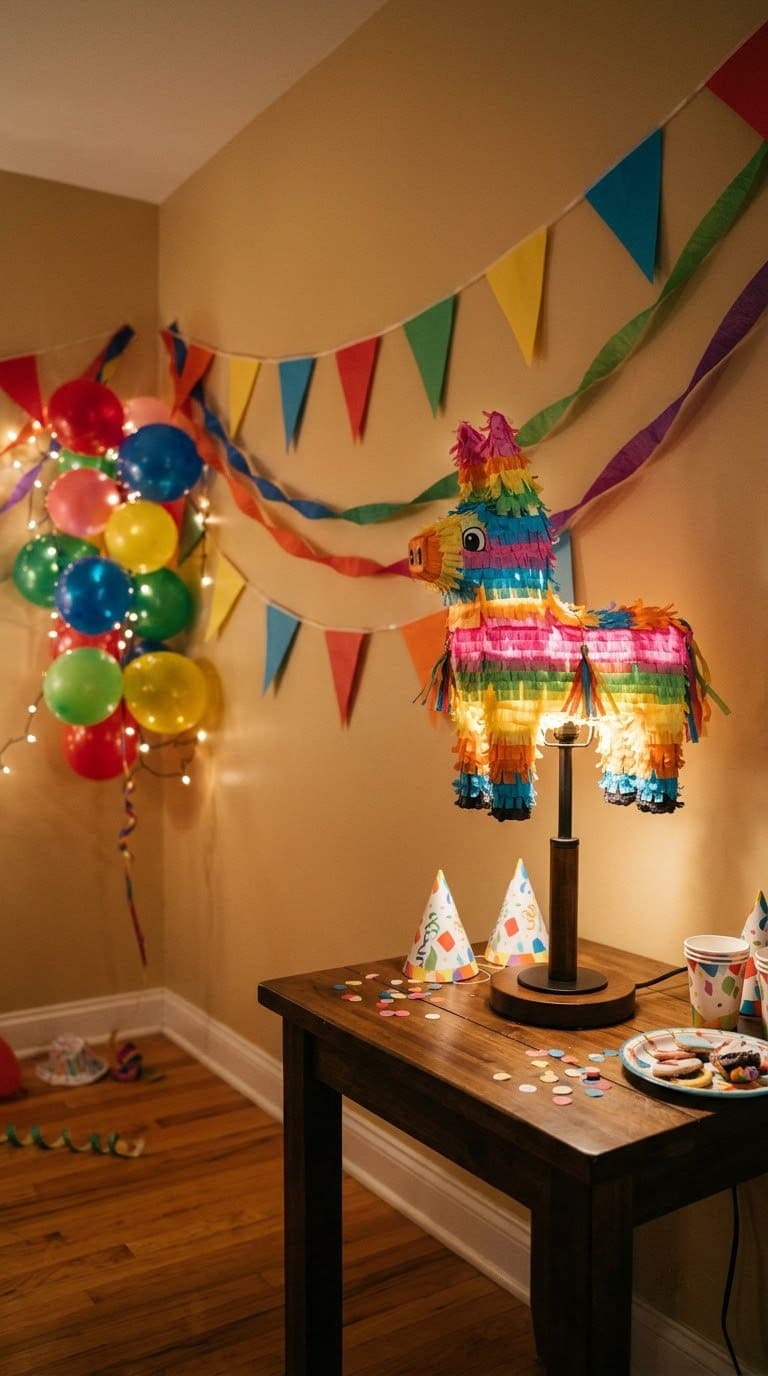
- Pick a piñata, or make one.
- Cut a small hole in the bottom.
- Fit it over a lamp with the shade removed.
- Use a low-temperature bulb.
Style tip: pick bright colors for a party corner.
Safety: never leave it on unattended, as Bob Vila says.
Which Old Ideas Did We Drop?
The old page showed lamps made of lace, paper, plastic bottles, cutlery, cups, milk cartons, plastic spoons and a cheese grater. We left them out. Paper, plastic and thin foil can get hot or melt near a bulb.
The CPSC report found bulb heat igniting nearby combustibles in 40 incidents. This is our own take on those ideas, since the sources didn’t test each one.
What Does a DIY Lamp Cost?
Costs vary by store. The sources didn’t list prices, so the ranges below are our own guess.
| Idea | Cost | Time |
|---|---|---|
| Bottle lamp | Low | 1 hour |
| Vase lamp | Low to mid | 2 hours |
| Wood slice lamp | Mid | A day |
| Bowl pendant | Low to mid | 1 hour |
| Tripod floor lamp | Mid | A weekend |
| Rope chandelier | Mid | A day |
Common Mistakes to Avoid
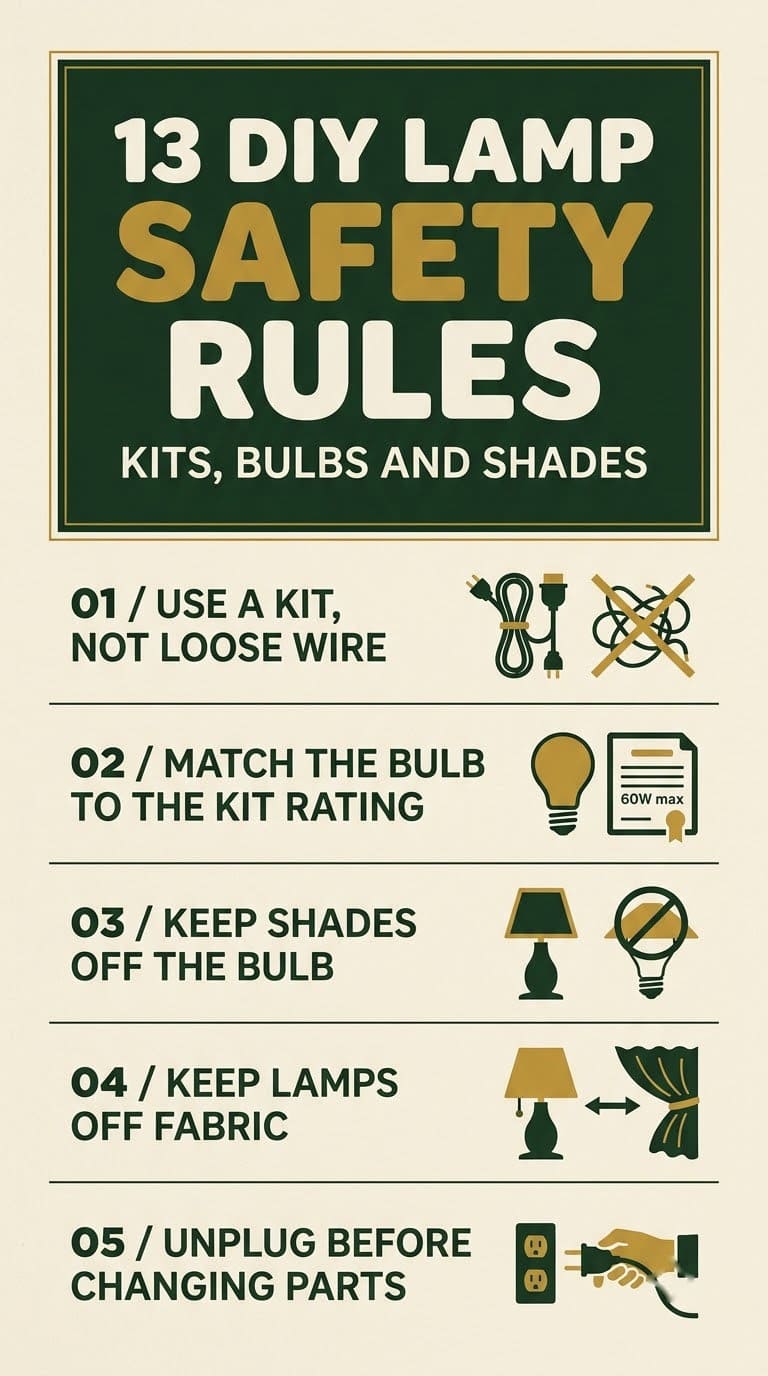
- Using loose wire. Use a kit, as the Lowe’s manual does.
- Using too big a bulb. That kit allows 60 watts, 13 CFL or 6 LED.
- Letting a shade touch the bulb. The CPSC report lists it as a cause.
- Putting a lamp against fabric. The Lowe’s kit says not to.
- Drilling glass with the wrong bit. Hunker says to use a glass bit.
- Skipping the unplug step. Unplug before you change parts.
Your Weekend Plan
Friday evening: Pick your base, and buy a kit. Check the bulb rating on the kit.
Saturday morning: Drill and prepare the base.
Saturday afternoon: Wire the kit, and test with the lamp off the shelf.
Sunday: Add the shade. Set the lamp away from curtains and bedding.
FAQ
What do I need to make a lamp?
A base, a lamp kit with a socket, cord and switch, a shade and a bulb. Apartment Therapy lists the basics.
What bulb should I use in a DIY lamp?
Follow the kit. One Lowe’s bottle lamp kit allows a 60-watt incandescent, a 13-watt CFL or a 6-watt LED.
Can I drill a glass vase?
Yes, with a glass bit. Hunker says to wear eye protection and gloves.
Is it safe to use paper or plastic as a lamp shade?
Keep them well away from the bulb. The CPSC report found 40 incidents of bulb heat igniting nearby combustibles.
Should I hire an electrician?
For wired fixtures, yes. The Lowe’s kit says to consult a qualified electrician before installation.
Related Posts
Never miss an update — choose FarmFoodFamily as your preferred source on Google.
How it works: Tap the button below to open Google's settings page, then check the box next to FarmFoodFamily.
Tap the checkbox to turn it blue — that's how you know it's set.