
20 Colorful DIY Painted Rock Ideas That Last Outdoors (and Where Not to Hide Them)
Painted rocks are cheap, quick garden art, as long as you pick paint made for outdoors, seal it, and keep your rocks out of parks.

Never miss an update — choose FarmFoodFamily as your preferred source on Google.
How it works: Tap the button below to open Google's settings page, then check the box next to FarmFoodFamily.
Tap the checkbox to turn it blue — that's how you know it's set.
Painted rocks are cheap, quick garden art, as long as you pick paint made for outdoors, seal it, and keep your rocks out of parks.
Products We Recommend
This post contains affiliate links. We may earn a commission on qualifying purchases at no extra cost to you.

100 PCS Smooth Natural River Rocks for Painting, 2.15 to 3.35 inch
Flat, smooth stones sized for painting
Shop Now
FolkArt Multi-Surface Satin Acrylic Paint, 16 oz, Titanium White
White base coat that works on many surfaces
Shop Now
Acrylic Paint Markers, 48 Colors Dual Tip
Fine and brush-tip paint pens for details and lettering (seal after painting)
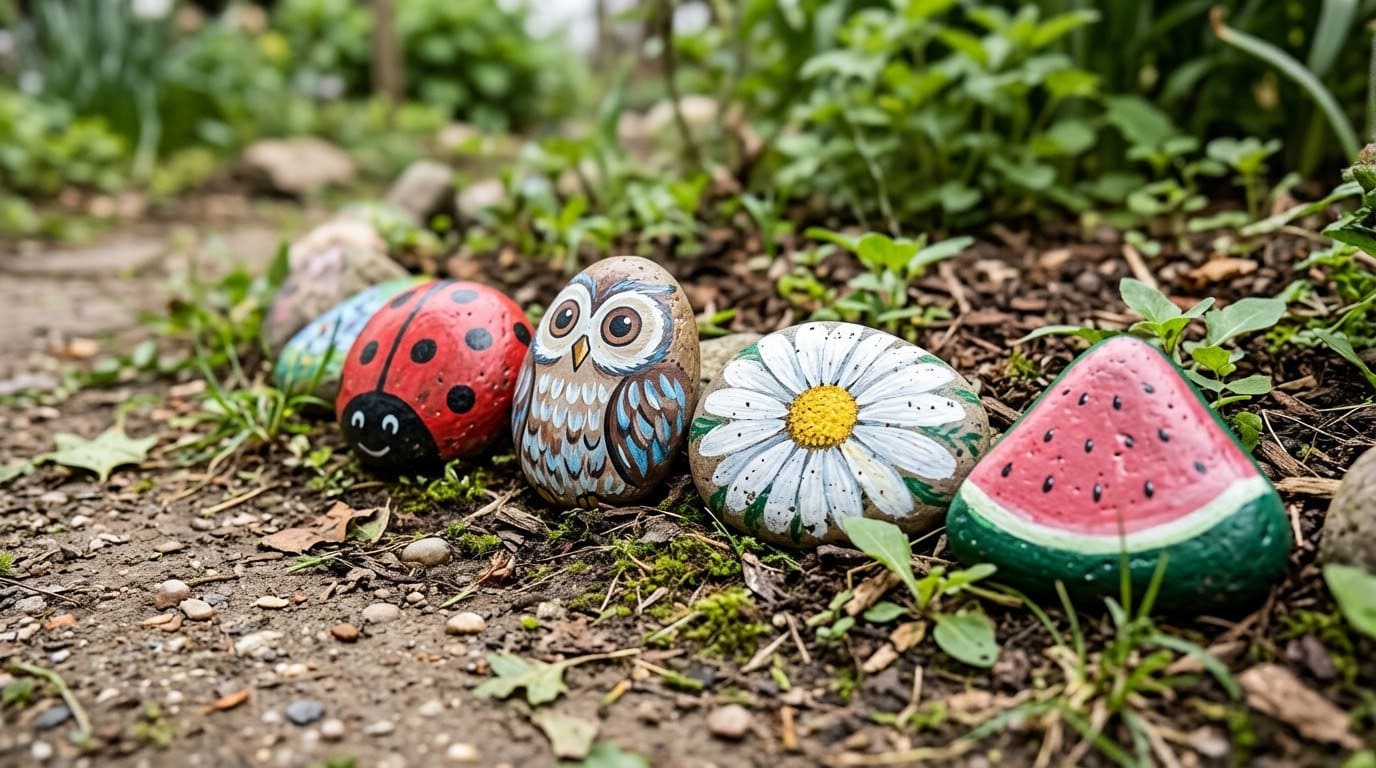
Shop NowA painted rock is the cheapest garden art there is. You need a smooth stone, a few paints, and an afternoon. A ladybug by the path or an owl in the ferns turns a bare corner into a small surprise.
Two things catch people out. The paint fades or flakes if you skip the right paint and sealer. And hiding your rocks in a park, which many people do for fun, is often not allowed. This guide gives you 20 ideas with the paint, the sealer, and the rules.
In this article
Answer 4 quick questions and get matched to the exact fix for your yard — drainage, budget, layout, or something else entirely.
Take the Free QuizWhat’s the Quick Answer for Painted Rocks That Last?
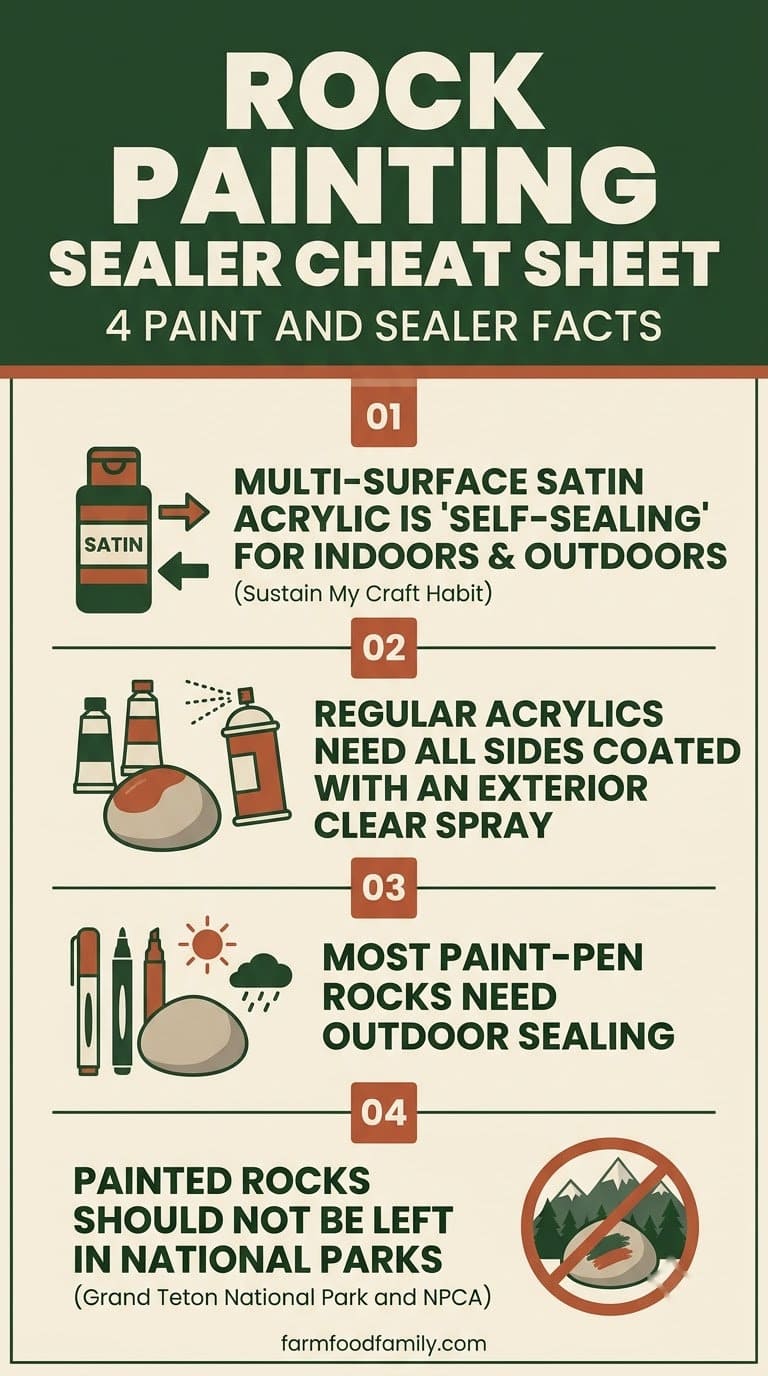
Use paint made for outdoor use, and seal it. The blog Sustain My Craft Habit calls DecoArt Americana Multi-Surface Satin a self-sealing indoor and outdoor paint. For regular acrylics, it says to coat every side of the rock with a durable exterior clear spray.
Seal paint pens too, since thin lines wear first. The same source says most paint-pen rocks need sealing for outdoors to keep their color.
Let the paint dry fully between coats and between colors. Rushing causes smears and a patchy seal. Painting rocks is a cheap, kid-friendly project, so the main goal is to make pieces that last a few seasons instead of a few weeks.
Keep your rocks at home. Grand Teton National Park asked visitors not to leave painted rocks in national parks, because they distract from an undisturbed experience.
Which Paint and Sealer Should You Use?
This table sums up what the sources say. The notes column is ours.


| Option | Outdoor use | Notes |
|---|---|---|
| Multi-surface satin acrylic (self-sealing) | Yes | Sustain My Craft Habit calls it self-sealing |
| Regular craft acrylic | Only with a sealer | Coat all sides with exterior clear spray |
| Artist-grade acrylic | Yes, sealed | Art Beat Box recommends it for focal colors |
| Student-grade paint | Not ideal | Art Beat Box links it to dull color |
| Paint pens | Only with a sealer | Most need outdoor sealing to keep color |
| Spray acrylic sealer | Yes | Art Beat Box recommends it, in thin coats |
| Mod Podge | Disputed | Art Beat Box suggests it for garden decor, a reader on Sustain My Craft Habit calls it glue, not an outdoor sealer |
Two of the sources disagree on Mod Podge, so we do not recommend it on its own. If you try it, test one rock through a wet season first.
Most yard problems trace back to one specific, fixable cause. Find yours in 4 quick questions.
Take the Free QuizBefore You Start: Rocks, Brushes, and Prep
Pick smooth stones. Run a finger across the surface to check that it is smooth enough to paint, a test Art Beat Box recommends. Sustain My Craft Habit uses rocks about the size of your hand. Its woodland animal tutorial prefers smooth, light-colored stones that are flat on one side.
Wash each rock thoroughly and let it dry completely. Paint does not work as well on a wet rock, per Art Beat Box. If paint will not stick, the same guide blames dirty, damp, or oily stones and suggests a white base coat.
Collect rocks from your own yard, or buy bags of smooth river stones from a craft or landscaping store. Do not take rocks from parks, streams, or beaches. The Leave No Trace principle asks visitors to leave natural objects as found.
Gather these tools:
- A flat brush for backgrounds and a fine round or liner brush for lines, details, and lettering.
- A dotting tool, or the back end of a brush. Different tool sizes make different dot sizes.
- A pencil, plus a white colored pencil or chalk for sketching on dark rocks.
- Paint pens if you like, and a spray sealer for the end.
Work on newspaper in a ventilated spot, and wear an apron. Sketch on paper first, or pencil the design on the rock, and keep an eraser handy.
Where Should You Not Leave Painted Rocks?
Hiding painted rocks is a popular hobby. It is also a rule problem in many parks.
In a 2018 statement, Grand Teton National Park said: “While it might seem like a cute and crafty idea, we ask that you do not leave in our National Parks.” It added that painted rocks distract from the experience of an undisturbed place.
Flat, smooth stones sized for painting
Shop NowThis post contains affiliate links. We may earn a commission on qualifying purchases at no extra cost to you.
Nicolas Brulliard of the National Parks Conservation Association reported that Catoctin Mountain Park staff said leaving painted rocks violated the park’s leave-no-trace policy. Rangers at Olympic, Devils Tower, and Vicksburg posted gentle warnings.
He also notes the rules that kindness rock groups set. Members use non-toxic sealants and get permission from local officials and business owners. They do not leave painted rocks in national parks.
The average homeowner spends $616/year on yard fixes that don't address the real problem. Find out what yours actually is — before you spend another dollar.
Take the Free QuizRules vary by place, and these reports date from 2017 and 2018. Check the current rules before you leave a rock anywhere, and keep them in your own garden when in doubt.
How Do You Paint a Rock Step by Step?
These steps combine the two craft guides we read. The layer timings come from Art Beat Box.
- Base coat. Paint the whole rock with white or light acrylic. Art Beat Box says this seals porous stone and makes colors on top look more vibrant. Very porous or uneven rocks may need sealing first.
- Dry. Let each layer dry fully. Art Beat Box says this takes usually 20 to 30 minutes, and that painting over wet paint causes muddying.
- Sketch. Draw the design lightly in pencil. Use white colored pencil on dark rocks.
- Build color in thin layers. Two thin coats beat one heavy one. Art Beat Box says a thick top layer can crack because it dries faster than the layer beneath.
- Add details. Use a fine brush or a paint pen for eyes, lines, and lettering. Sustain My Craft Habit makes daisy petals from short crossing lines and dabs yellow centers with the back of the brush.
- Cure. Wait before you seal. Art Beat Box says full cure takes 24 to 72 hours, and that sealing too early can trap moisture and cause cloudiness or peeling.
- Seal. Use a spray acrylic sealer, as in the care section below.
Pens need a little prep. Art Beat Box says to shake the pen with the cap on for 30 seconds. Then pump the tip on scrap paper until color flows steadily. Store pens tip down, and warm one in your hands in cold weather.
Blending needs speed. Art Beat Box says to work wet on wet while the paint is still wet, because acrylic sets within minutes.
Which Ideas Work Best for Kids?
Start with the simple shapes. Rainbow stripes, ladybugs, and the cartoon monster need only a few colors. They forgive wobbly lines, and a monster looks better when it is a little odd.
Let kids do the painting, and keep spray sealer for an adult in a ventilated place. NPCA reports that kindness rock groups ask for non-toxic sealants, so check the labels on every product you buy.


Cover the table, and use water-based paint so cleanup is easy. Let each child pick the final spot in your own garden.
20 DIY Painted Rock Ideas
Each idea lists the rock to choose, the steps, and a detail that makes it look good. Ideas 5, 8, and 10 follow a cited three-step method. The rest use the general method above, with our own design steps.
1. Mandala Dot Rock
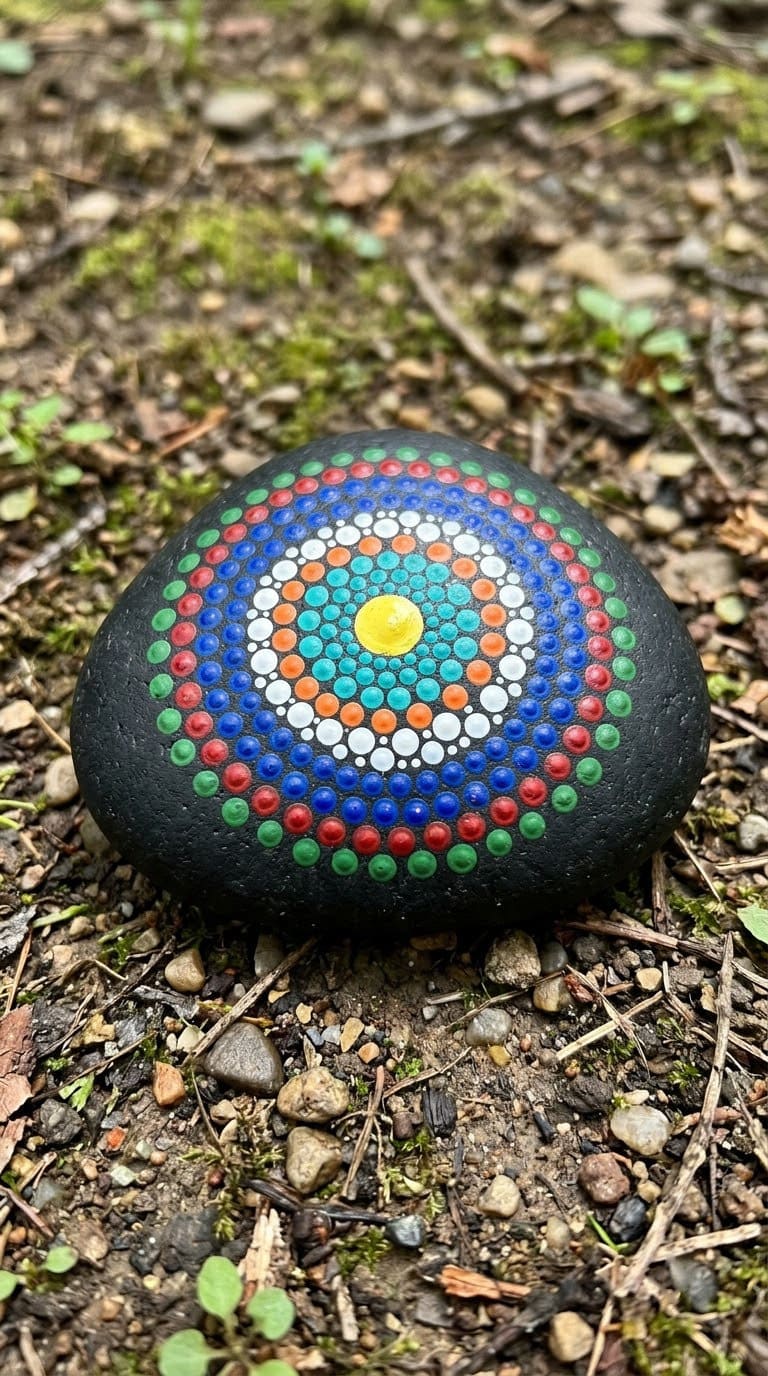
Rock: A round or oval stone with a flat top, about palm size.
Steps:
- Paint a dark base coat and let it dry fully.
- Mark the center with a white colored pencil.
- Press a dot in the center, then add a ring of dots around it.
- Add rings outward, letting each ring dry before the next.
Detail that helps: Dotting tools come in several sizes, and each makes a different dot. Use the smallest for the outer rings so the pattern feels finer. For a dot bigger than your tool, Art Beat Box says to dip the flat end of a Sharpie.
Seal and place: Seal all sides. Keep it on a bright patio table where the bright colors stand out.
Time and cost: about 45 minutes, very low cost.
2. Geometric Pattern Rock
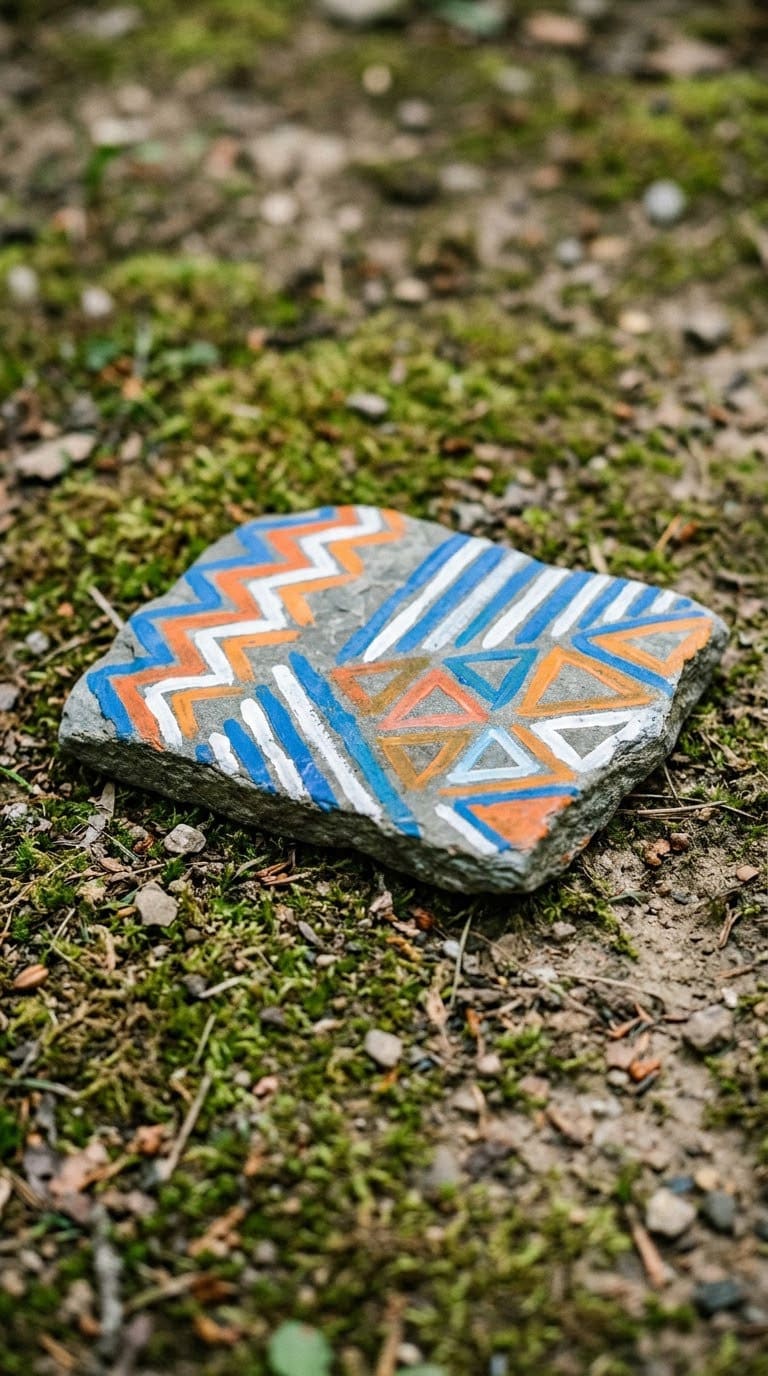
Rock: A flat stone with a smooth face.
Steps:
- Paint a white base coat. Let it dry.
- Mark triangles and stripes in pencil.
- Fill each shape with paint, one color at a time.
- Outline the shapes with a paint pen once all paint is dry.
Detail that helps: Use two or three colors for a crisp look. Painter’s tape gives clean edges, but peel it while the paint is slightly tacky so it does not lift dry paint.
Seal and place: Pen outlines wear first, so seal them well. Set it along a path edge.
Time and cost: about 40 minutes, very low cost.
3. Rainbow Stripe Rock
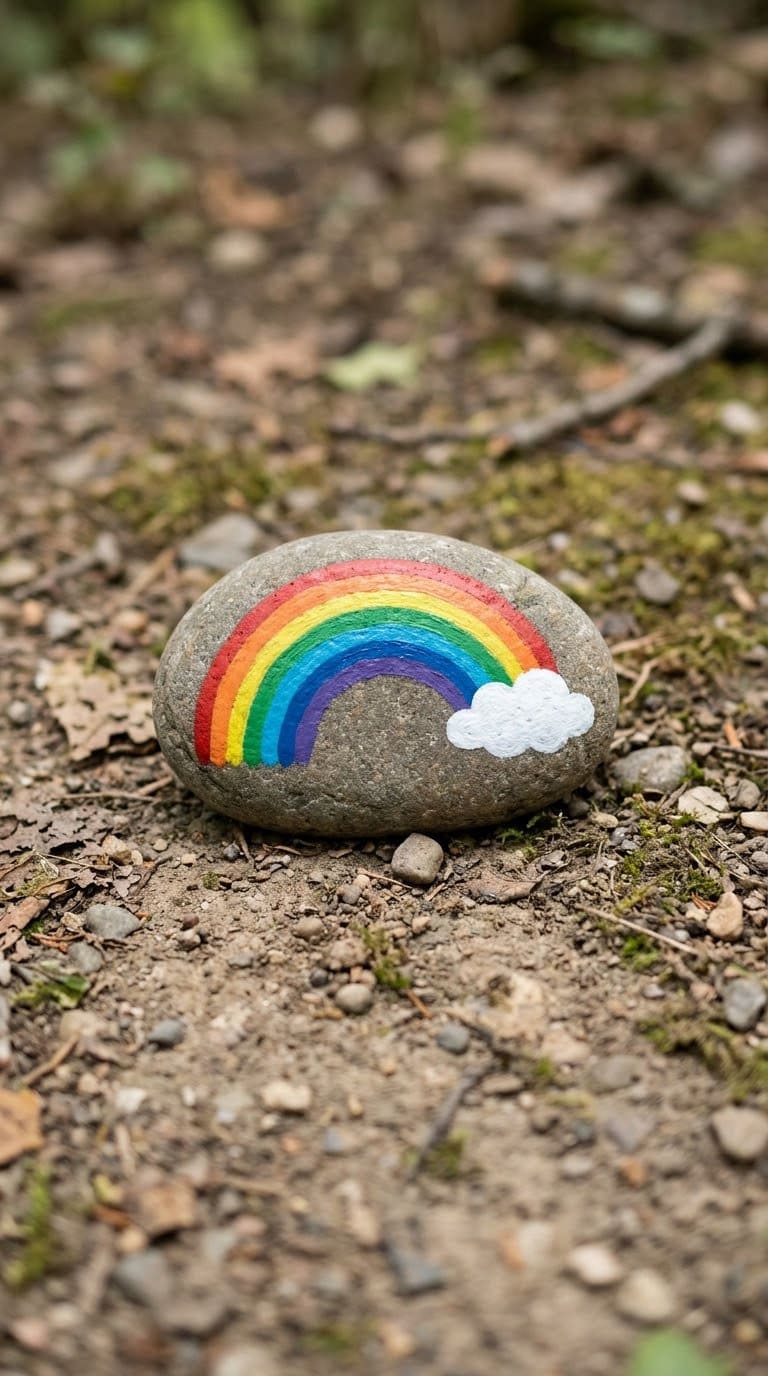
Rock: A smooth oval stone.
Steps:
- Paint a white base coat.
- Paint curved bands in rainbow order, starting with the lightest color.
- Let each band dry before the next, so colors do not blend into mud.
- Add a white cloud at each end.
Detail that helps: Art Beat Box says wet-on-wet blending needs speed, so if you want soft edges, paint two neighboring bands quickly. For crisp bands, wait the 20 to 30 minutes between them.
Seal and place: Seal all sides. Rainbows read well from a distance, so place it at the back of a bed.
Time and cost: about 50 minutes, very low cost.
4. Ladybug Rocks
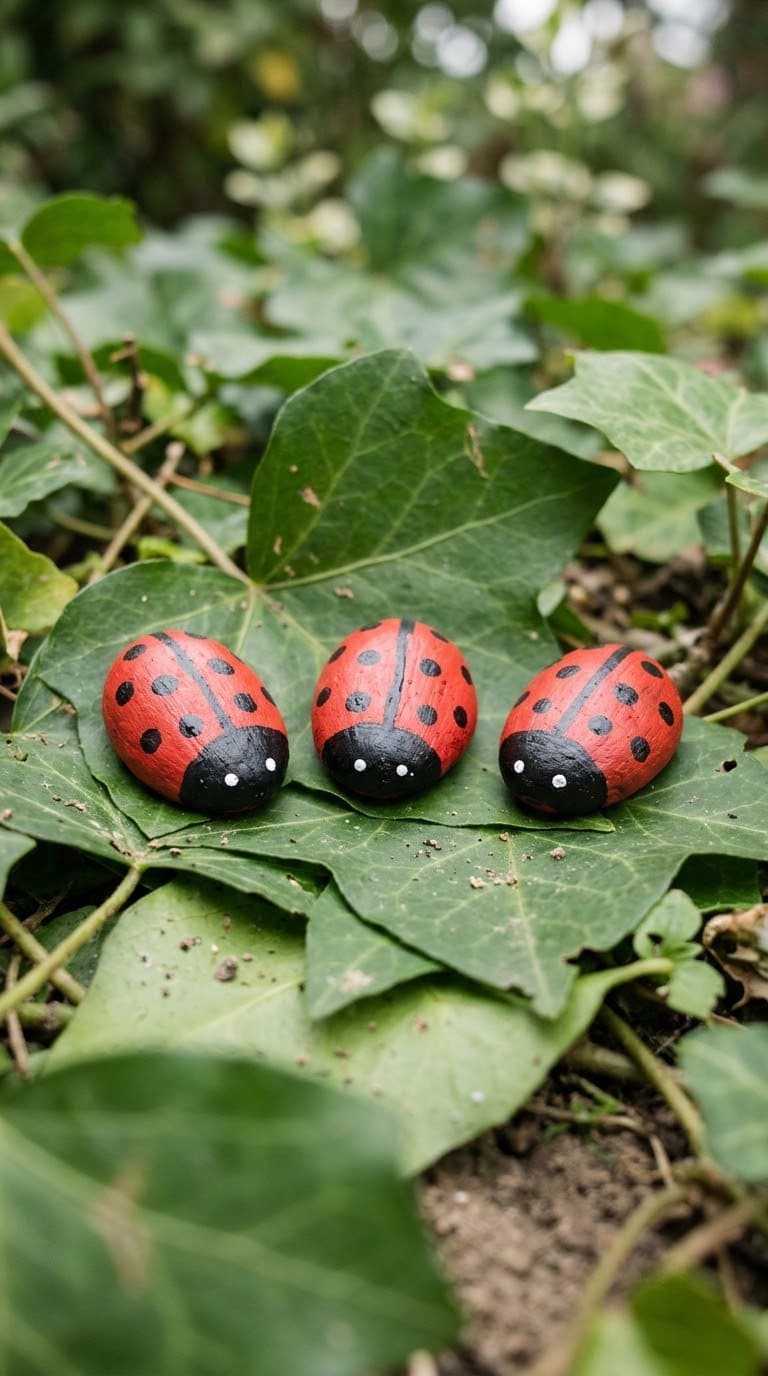
Rock: A small round stone, about the size of a golf ball to a plum.
Steps:
- Paint the stone red and let it dry. Add a second coat, since red can look thin.
- Paint a black head at one end.
- Paint a thin black line down the middle.
- Dot on black spots with a dotting tool.
- Add a tiny white highlight on each shell.
Detail that helps: Keep the spot sizes close but not identical. A white highlight dot makes the shell look glossy.
Seal and place: Seal with a clear spray. Tuck ladybugs among leaves, or use them as plant markers.
Time and cost: about 30 minutes for three, very low cost.
5. Owl Rocks
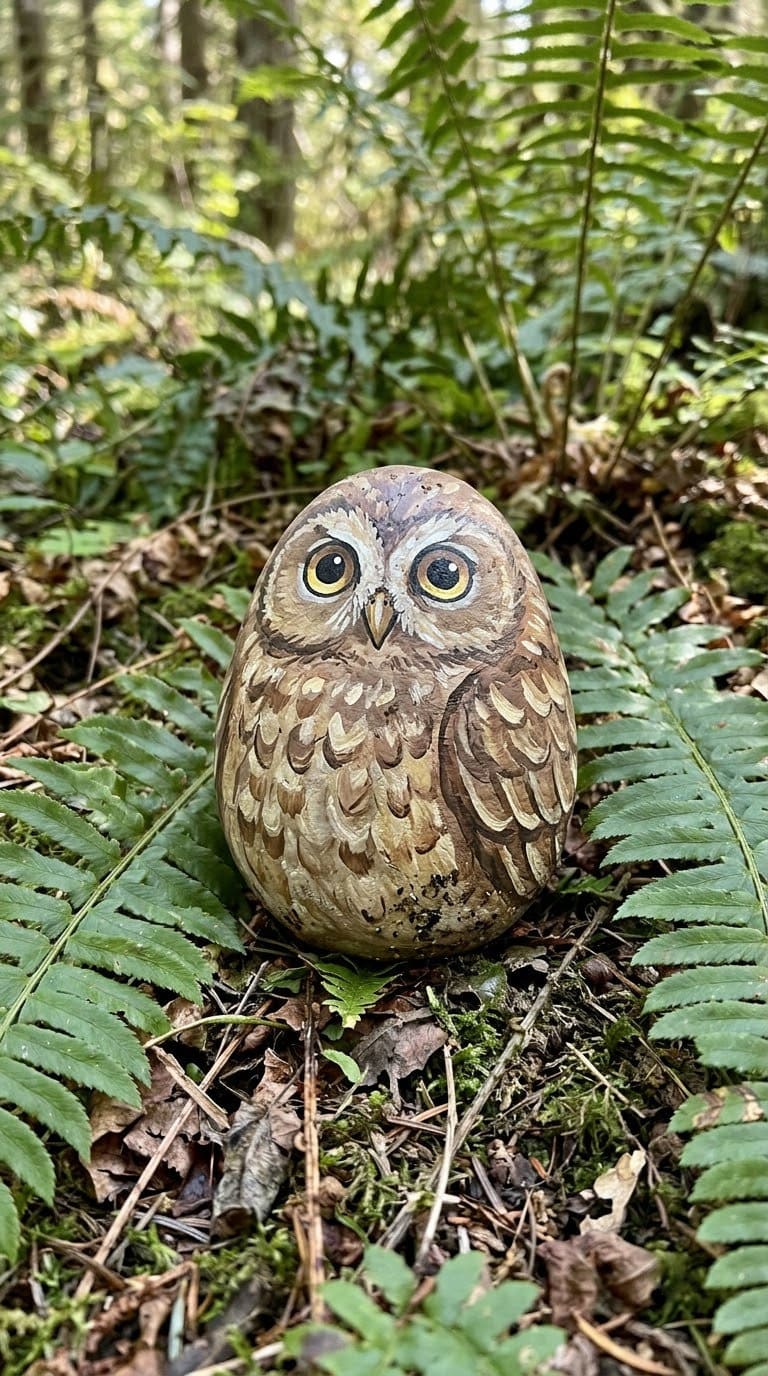
Rock: A smooth, light-colored, egg-shaped stone that is flat on one side.
Steps (from the Sustain My Craft Habit woodland tutorial):
- Paint a gray face in the middle with two side-by-side circles, and add small ears at the top.
- Paint two larger white circles for the eyes. Below them, add a small orange diamond for the beak.
- Paint small black circles for the pupils, and add white dots for accents.
Detail that helps: The tutorial says the paint must dry fully between each step, and that a blow dryer speeds things up. Use a fine-tip brush for the eyes.
Seal and place: The tutorial gives no sealing steps, so seal with an exterior clear spray. Set owls in a fern bed or on a stump. See other owl-style garden art in our garden art projects.
Time and cost: about 25 minutes, very low cost.
6. Hatching Chick Rock
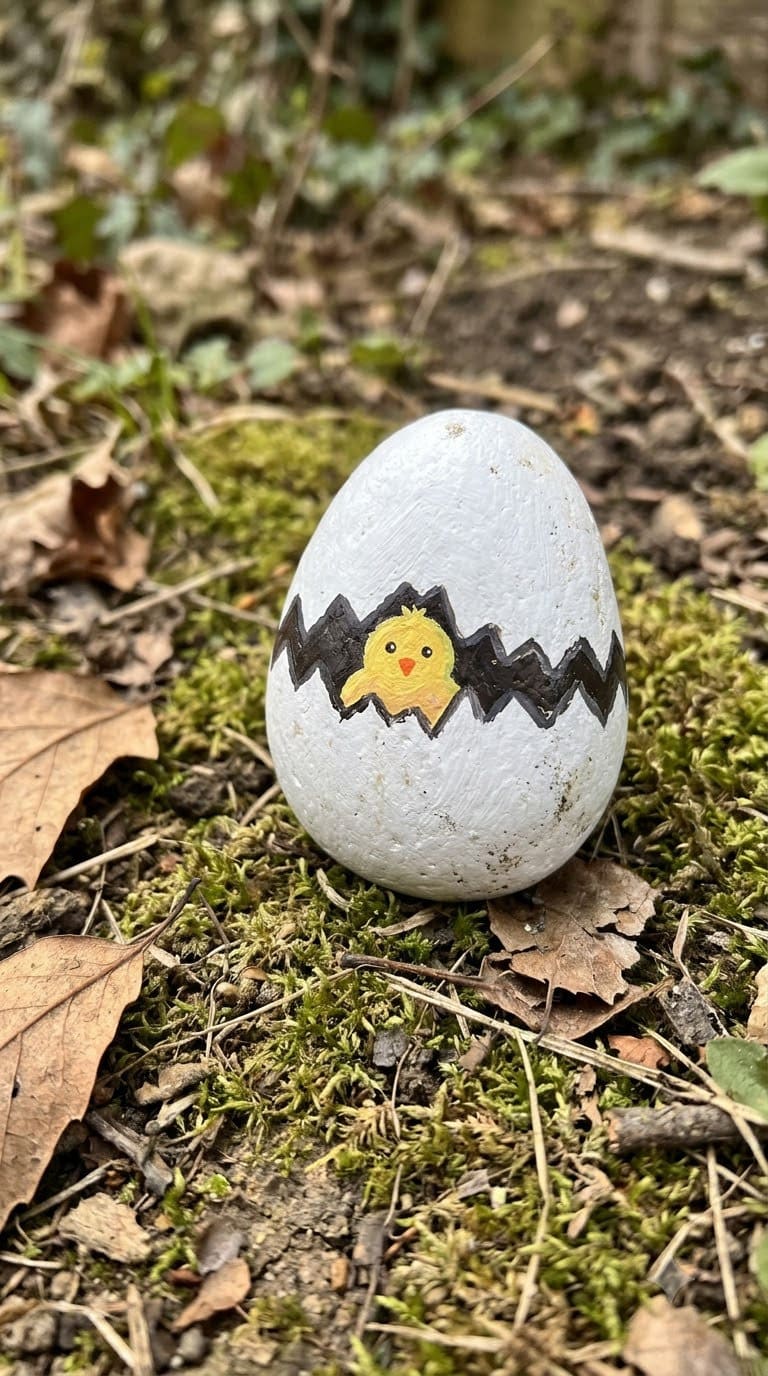
Rock: An egg-shaped stone, as smooth as you can find.
Steps:
- Paint the whole rock white as a base.
- Paint the lower half as a cracked shell, in cream or pale gray.
- Paint the upper half yellow, with a round chick head.
- Add a zigzag crack line between the two halves with a fine brush.
- Add two black eyes with white highlight dots, and a small orange beak.
Detail that helps: Yellow often needs two coats over white. The white highlight dot in each eye makes the chick look alive.
Seal and place: Seal all sides. A nest of straw or moss on a spring table makes a good display.
Time and cost: about 35 minutes, very low cost.
7. Hedgehog Rock
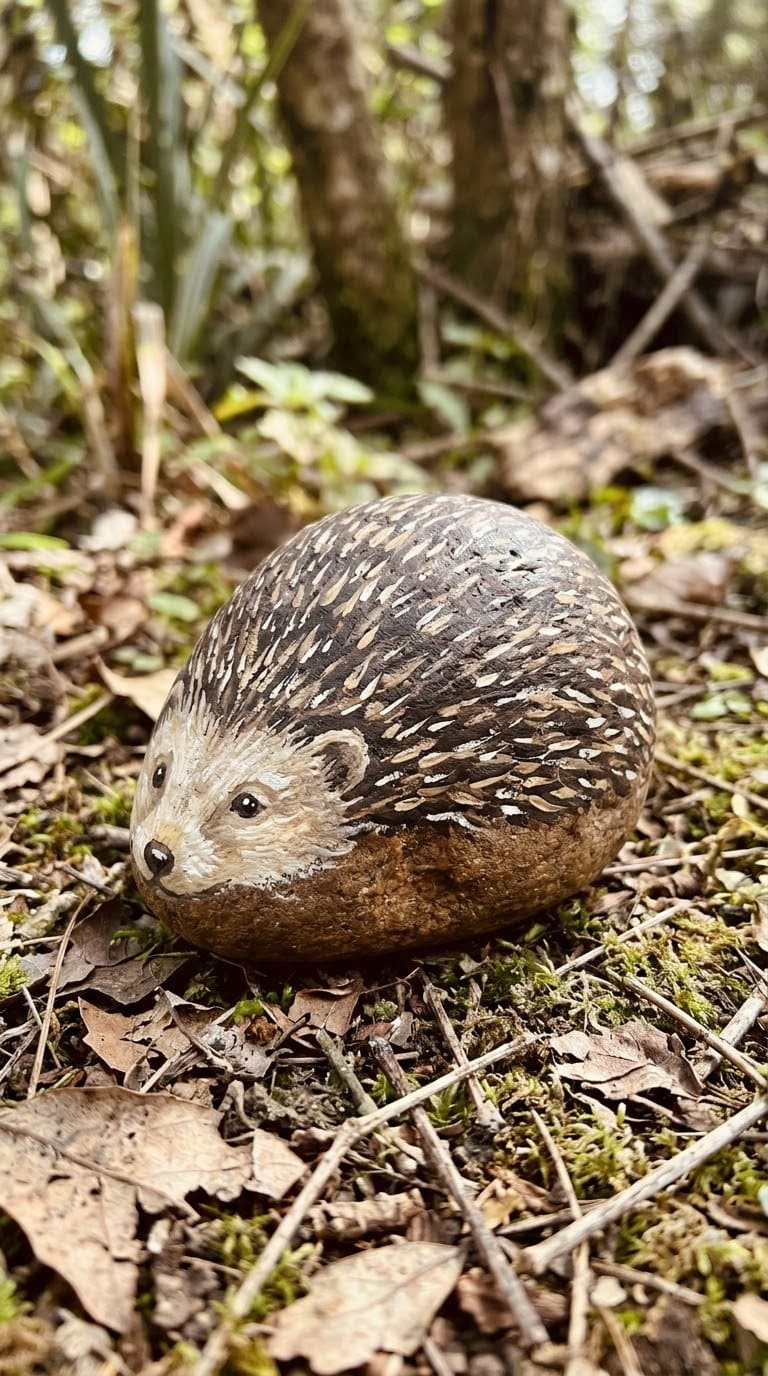
Rock: A rounded oval, wider at one end for the face.
Steps:
- Paint the whole rock with a dark brown base.
- Paint the face end a lighter tan, in a pointed shape.
- Using a fine brush, add short, spiky strokes across the back in a lighter brown.
- Add a small black nose and two dot eyes.
Detail that helps: Fur and spines look best when the strokes follow the direction of growth. Use a mid-tone first, then add darker and lighter strokes on top.
Seal and place: Spines are thin lines, so seal them well. Put it near a garden bed edge.
Time and cost: about 35 minutes, very low cost.
8. Panda Rock
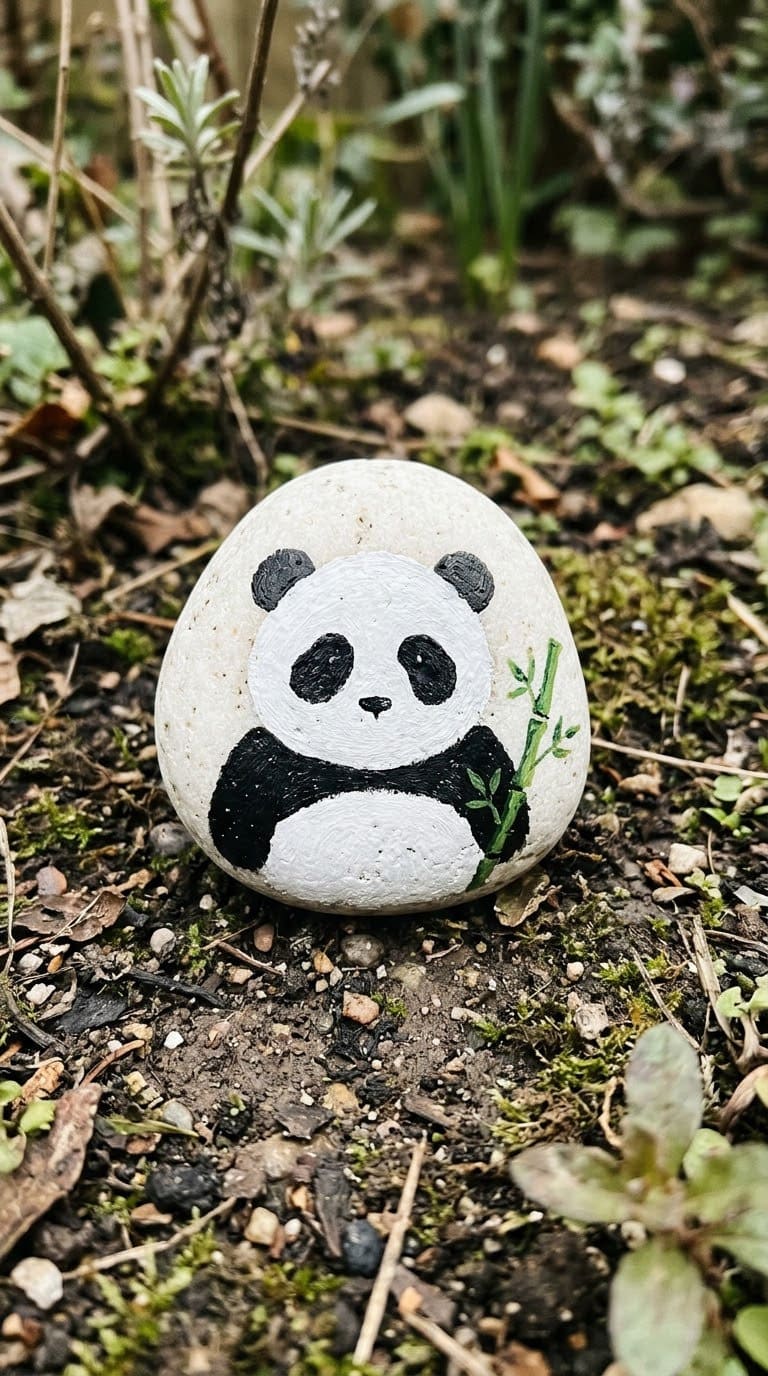
Rock: A smooth, light-colored oval stone. A bear-style face works for a panda.
Steps (adapting the bear rock from the Sustain My Craft Habit woodland tutorial):
- Paint the face as a large circle, and add two small circles at the top for ears. For a panda, use white instead of brown.
- Paint black ears, eye patches, and a nose.
- Paint black arms and legs.
- Add a small white dot in the center of each eye as a highlight.
- Paint a green bamboo stalk.
Detail that helps: White often needs two coats to cover the stone. Let the first coat dry fully. The tutorial uses a fine-tip brush or a paint pen for the black details.
Seal and place: Seal all sides. Put it near ferns or tall grasses.
Time and cost: about 40 minutes, very low cost.
9. Fish Rock
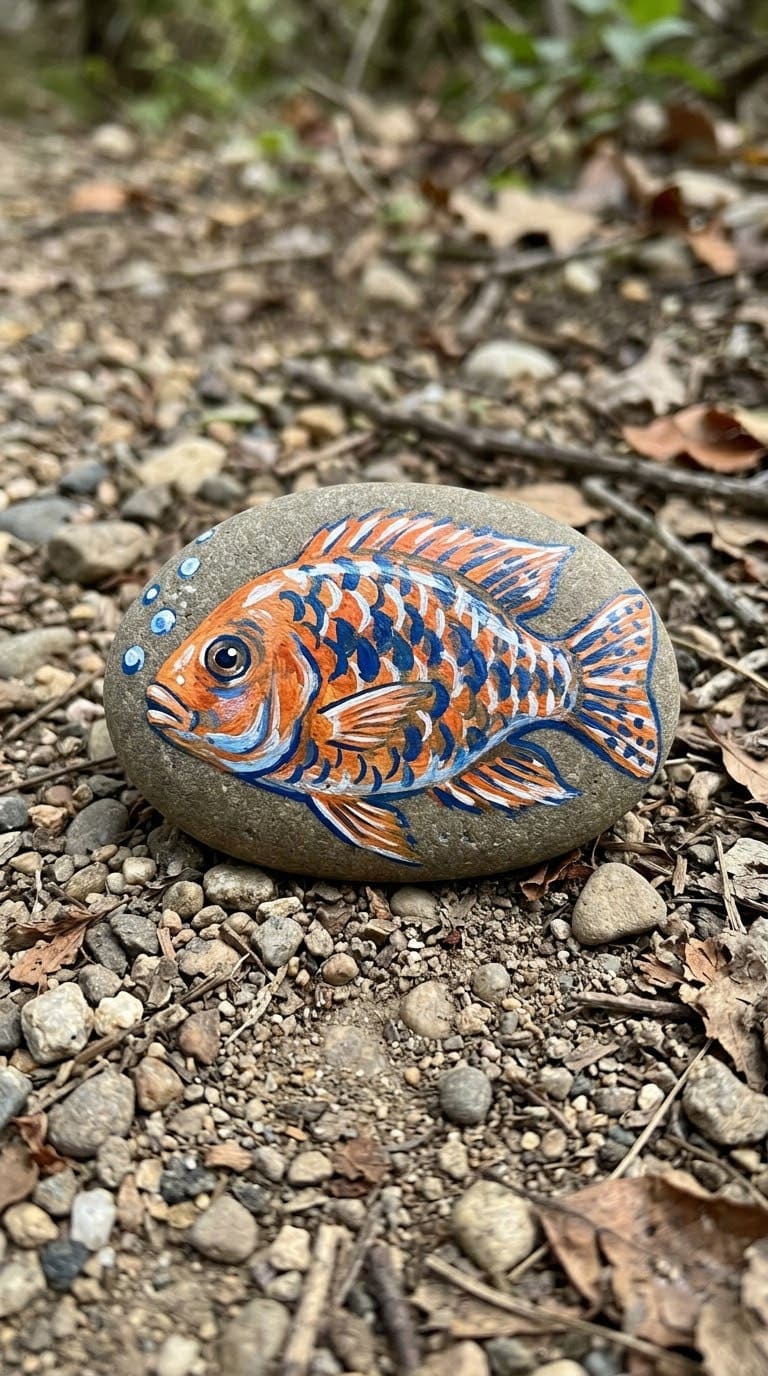
Rock: A flat oval stone for the body, and a small second stone for the tail.
Steps:
- Paint a base coat in orange or blue and let it dry.
- Sketch overlapping scale arcs with a pencil.
- Paint the arcs in a second color, working from the tail end toward the head.
- Add an eye with a white ring and a black center.
- Paint the tail on the second stone, and set it beside the body.
Detail that helps: Overlap each row so the scales look like a pattern. Add white bubbles with a dotting tool.
Seal and place: Seal all sides. Place the fish near a pond or a blue flower bed.
Time and cost: about 45 minutes, very low cost.
10. Frog Rock
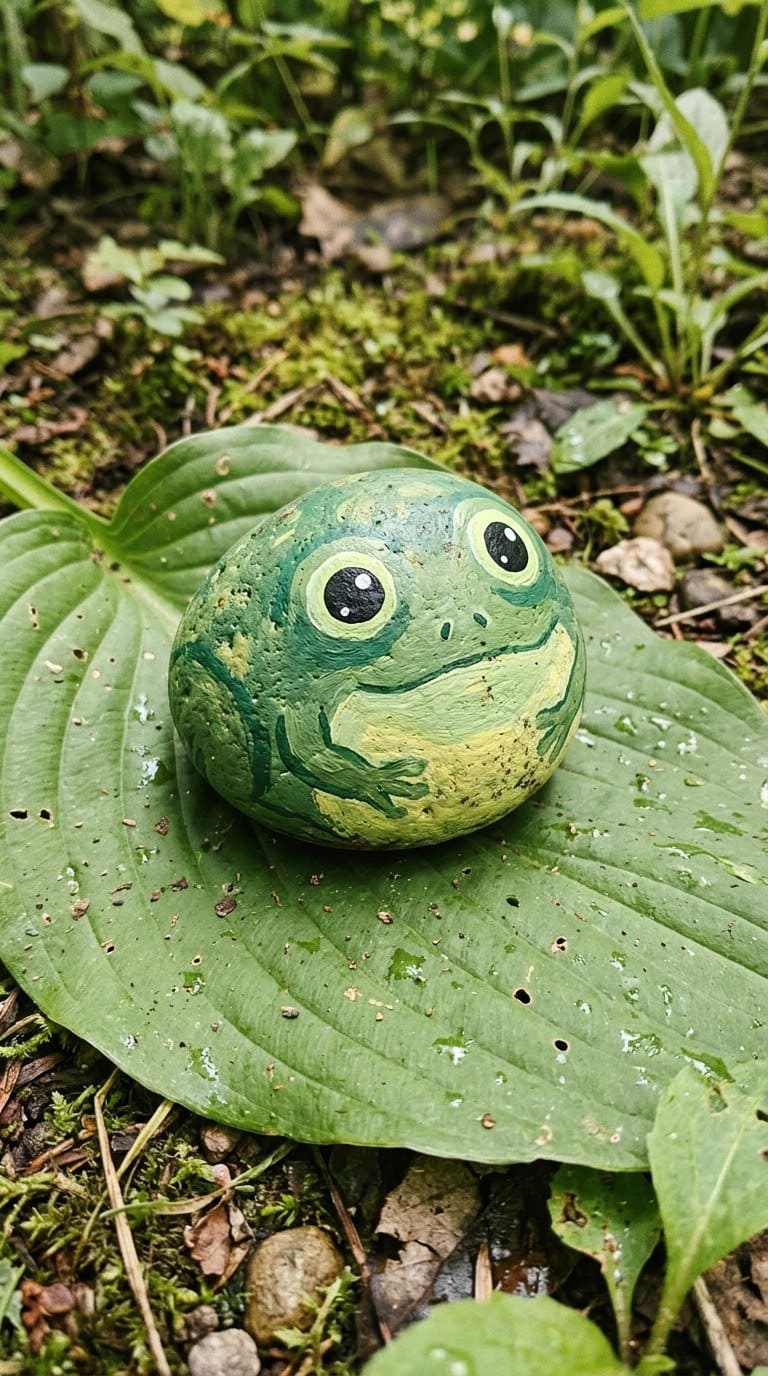
Rock: A rounded stone, flat on the bottom so it sits upright.
Steps (using the owl’s circle method):
- Paint the stone green with a flat brush. Let it dry.
- Add two circles for the eyes, high on top, in white.
- Paint black pupils and a white highlight dot in each.
- Paint a wide smile and two small nostrils with a fine brush.
- Paint a lighter green belly or spots.
Detail that helps: Use a fine-tip brush for the smile. Slightly uneven eyes give the frog character.
Seal and place: Seal all sides. Frogs look best in a small group by a water feature or in a shady bed.
Time and cost: about 30 minutes, very low cost.
11. Cat Rock
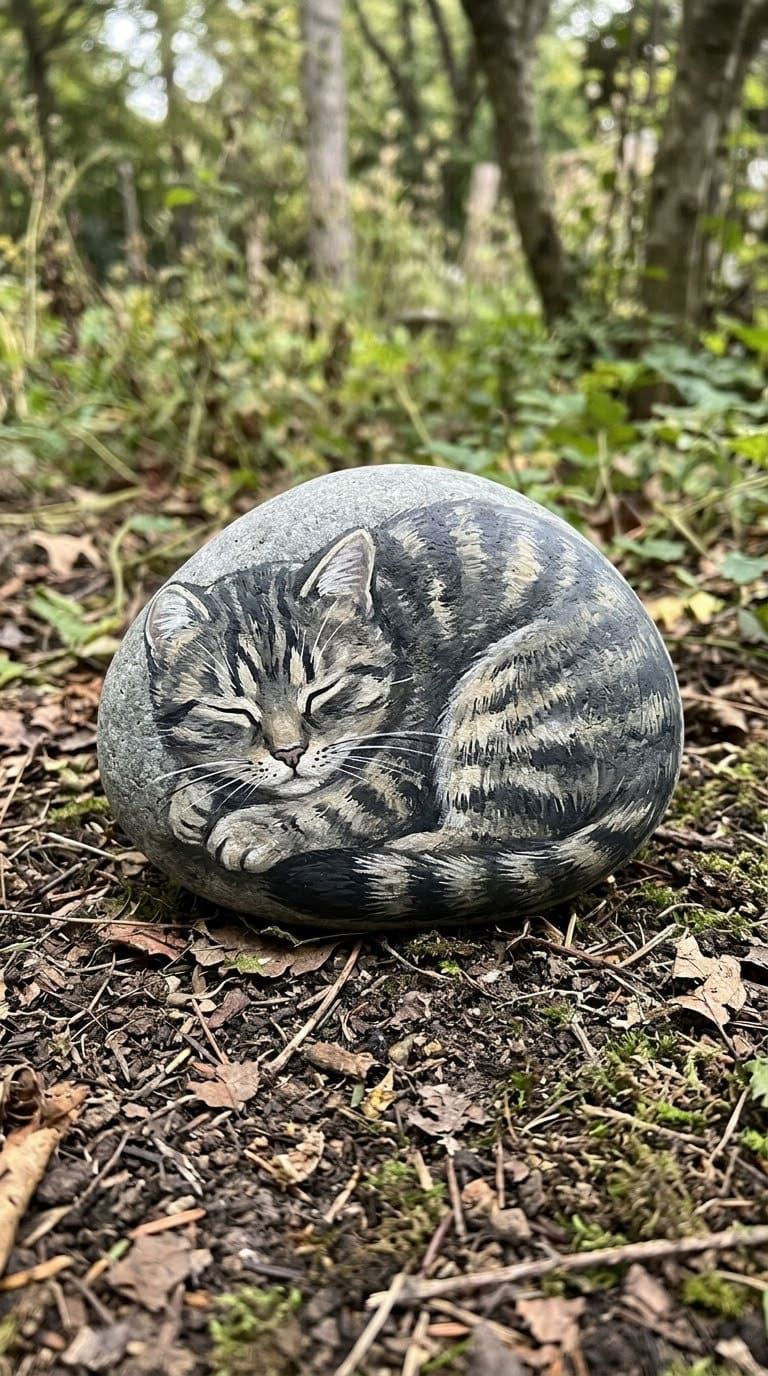
Rock: A smooth egg-shaped stone, flat on one side.
Steps:
- Paint the stone in your cat’s colors. A white base helps bright colors show.
- Paint two pointed ears at the top.
- Paint almond eyes and a small pink nose.
- Add whiskers with a thin white paint pen.
Detail that helps: Pens give control, but most paint-pen rocks need sealing outdoors, per Sustain My Craft Habit. Shake the pen for 30 seconds and prime the tip on scrap paper, as Art Beat Box advises.
Seal and place: Seal the whiskers well. They are the first lines to wear.
Time and cost: about 30 minutes, very low cost.
12. Watermelon Slice Rock
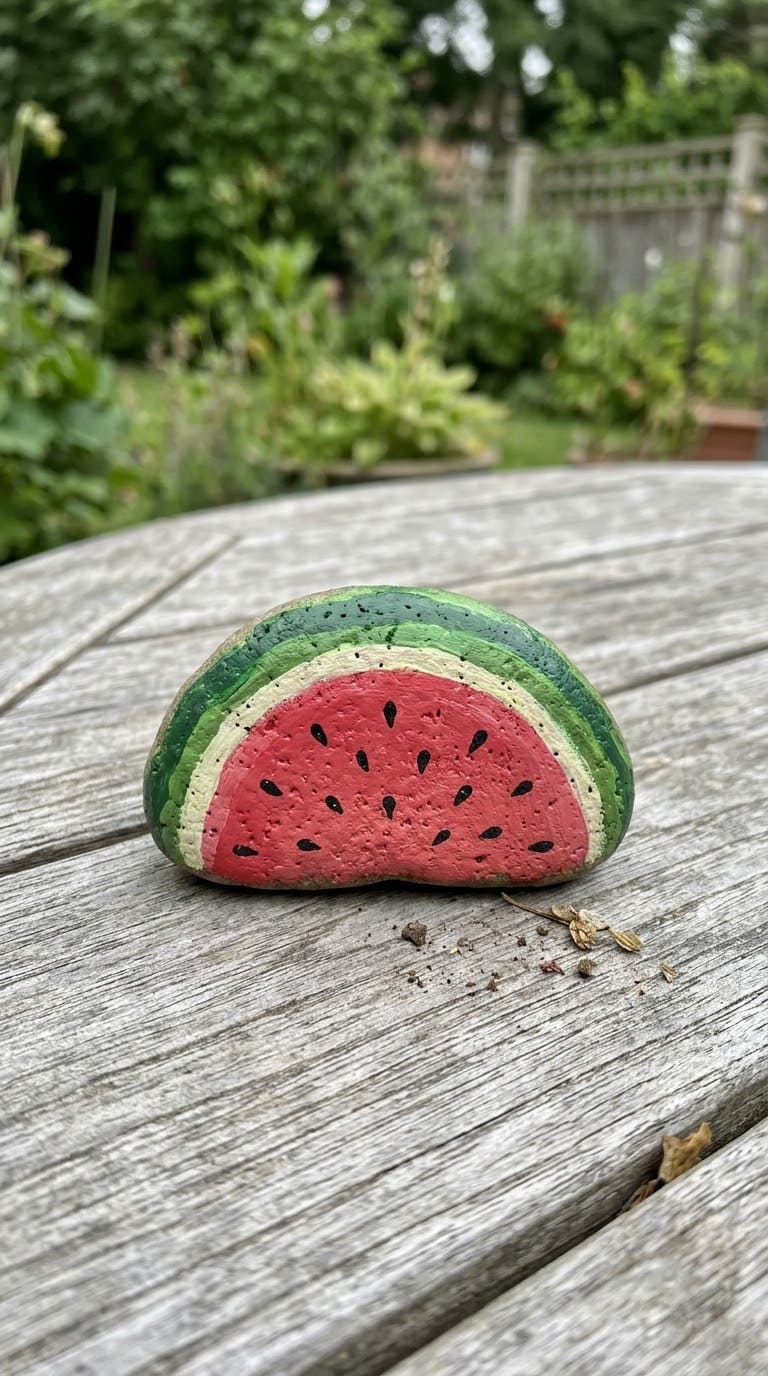
Rock: A half-round or flat semicircle stone.
Steps:
- Paint the whole rock white.
- Paint the curved edge dark green for the rind.
- Paint a thin white strip inside the rind.
- Fill the center with pink or red for the flesh.
- Dot black seeds on the flesh with a fine brush or dotting tool.
Detail that helps: Bright pink dries lighter, so add a second coat. Keep the seeds in neat rows or loose scatter, but not both.
Seal and place: Seal all sides. Display it with summer pots.
Time and cost: about 35 minutes, very low cost.
13. Ice Cream Cone Rock
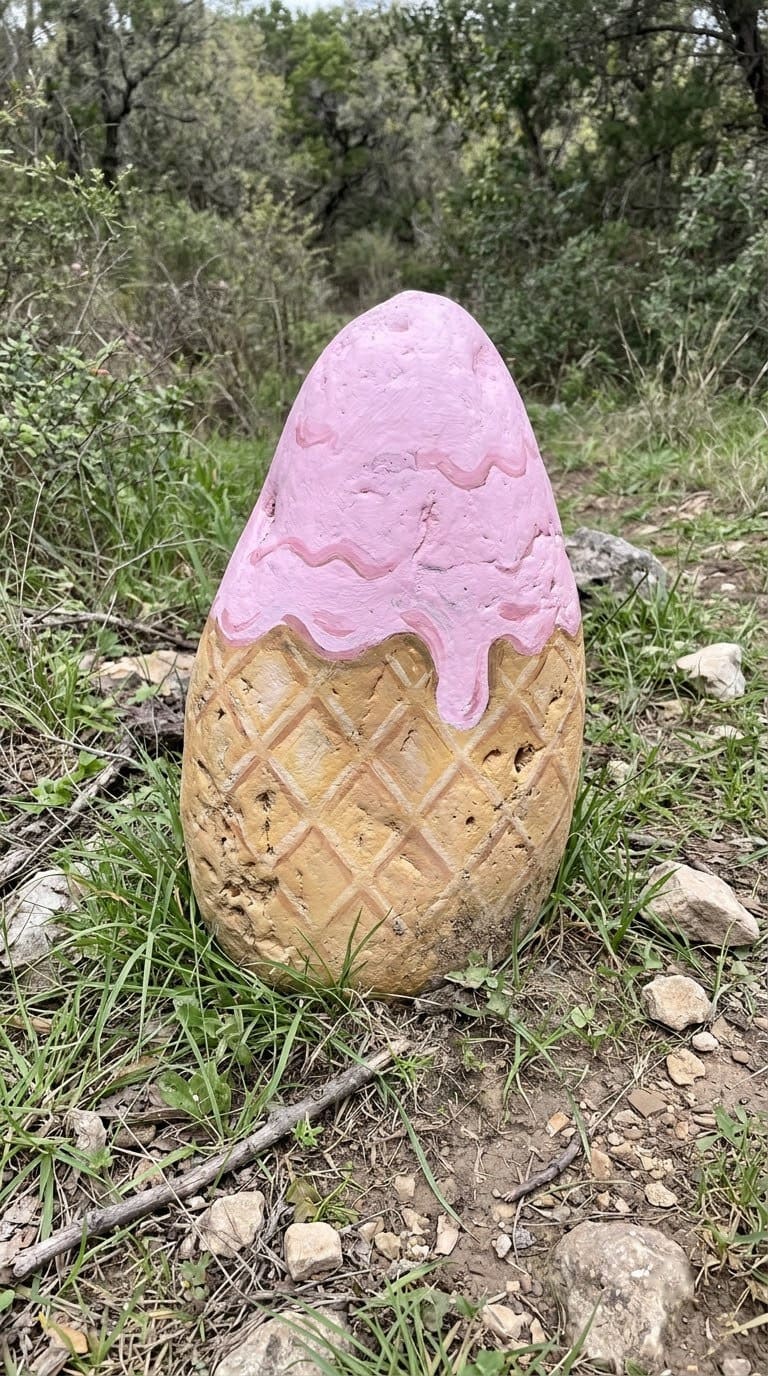
Rock: A pointed teardrop stone. The point becomes the cone tip.
Steps:
- Paint a white base coat.
- Paint the lower half tan for the cone.
- Paint a pink or cream scoop on the upper half, with a wavy edge.
- Draw a waffle grid in brown over the tan with a fine brush or pen.
- Add sprinkles with small dots.
Detail that helps: Let the tan dry before you draw the grid, or the lines will smear. A white highlight on the scoop makes it look creamy.
Seal and place: Seal all sides. Stand it upright in soil with the point down.
Time and cost: about 40 minutes, very low cost.
14. Cupcake Rock
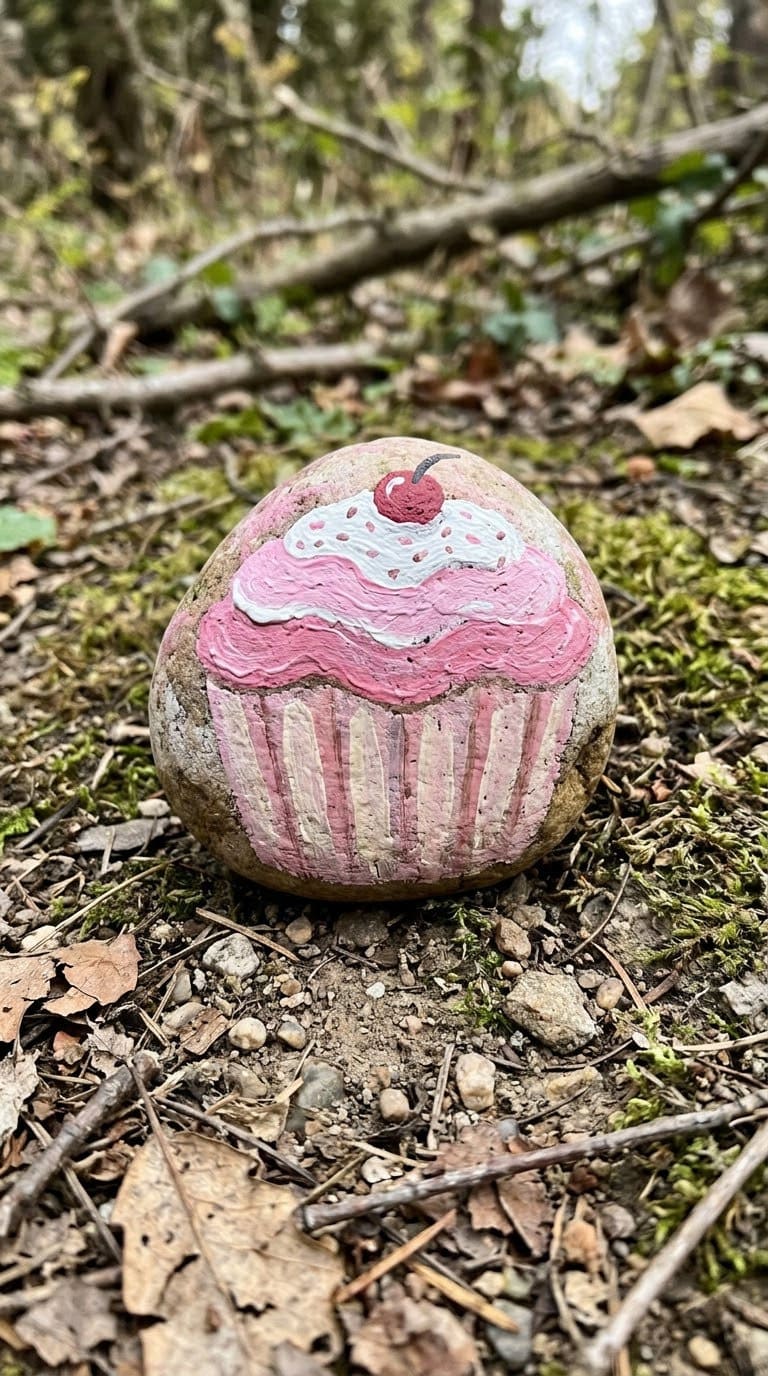
Rock: A rounded stone with a flat bottom.
Steps:
- Paint the lower third as a striped liner, using painter’s tape or a pencil guide.
- Paint the top as frosting in a swirl.
- Add a red cherry with a single dot.
- Add tiny sprinkles with a fine brush.
Detail that helps: Mix a little white into the frosting color for a soft pastel look. Add a tiny white highlight on the cherry.
Seal and place: Seal the glossy cherry. Pastel colors suit a tea table or a porch step.
Time and cost: about 40 minutes, very low cost.
15. Word Rocks
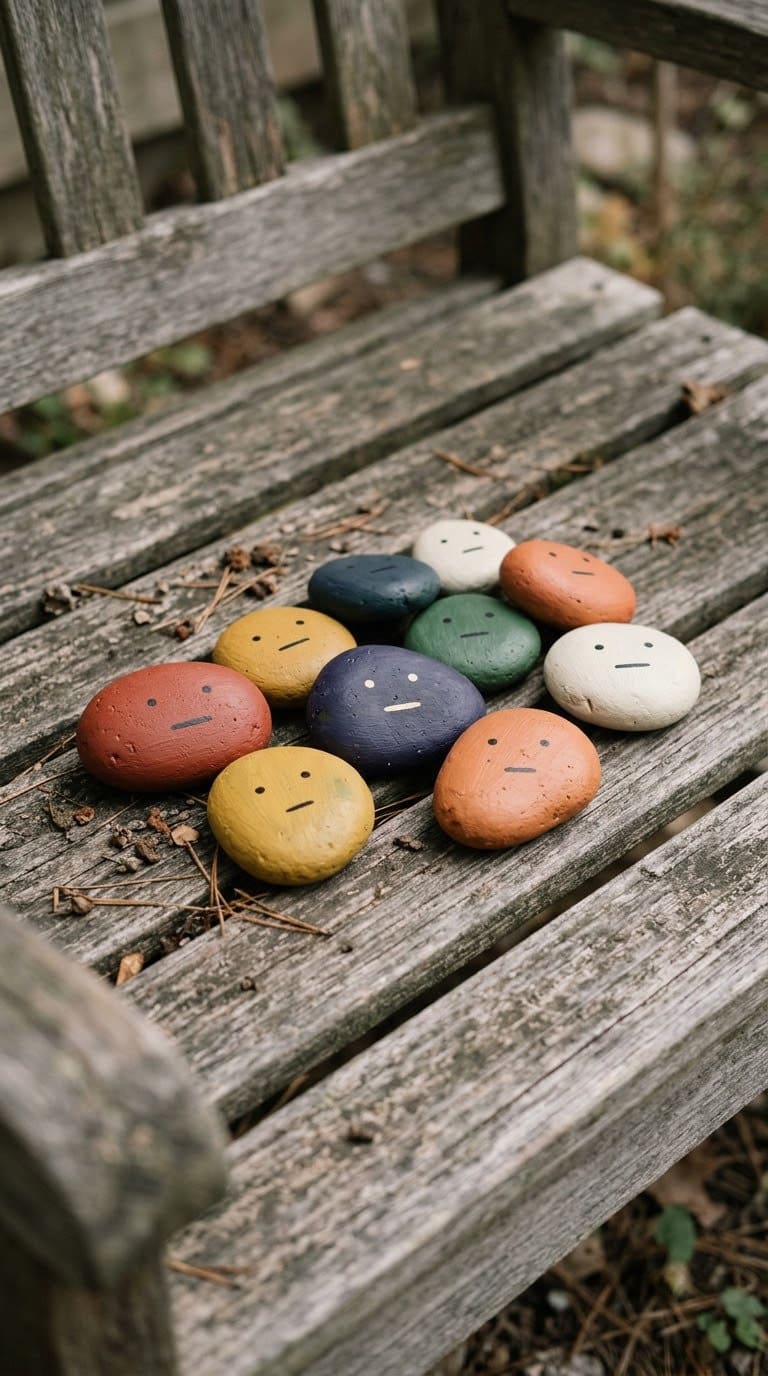
Rock: Flat stones with a smooth face.
Steps:
- Paint a solid background and let it dry.
- Sketch the word in pencil, or white colored pencil on dark backgrounds.
- Trace the letters with a fine liner brush or a paint pen.
- Go over the letters a second time if the color looks thin.
Detail that helps: Use a small, fine-tipped round or liner brush for lettering, per Art Beat Box. Keep words short, such as Hope, Love, or Joy.
Seal and place: Thin lines wear first, so seal the letters. Keep these in your own garden, not in a park.
Time and cost: about 30 minutes, very low cost.
16. Plant-Marker Rocks
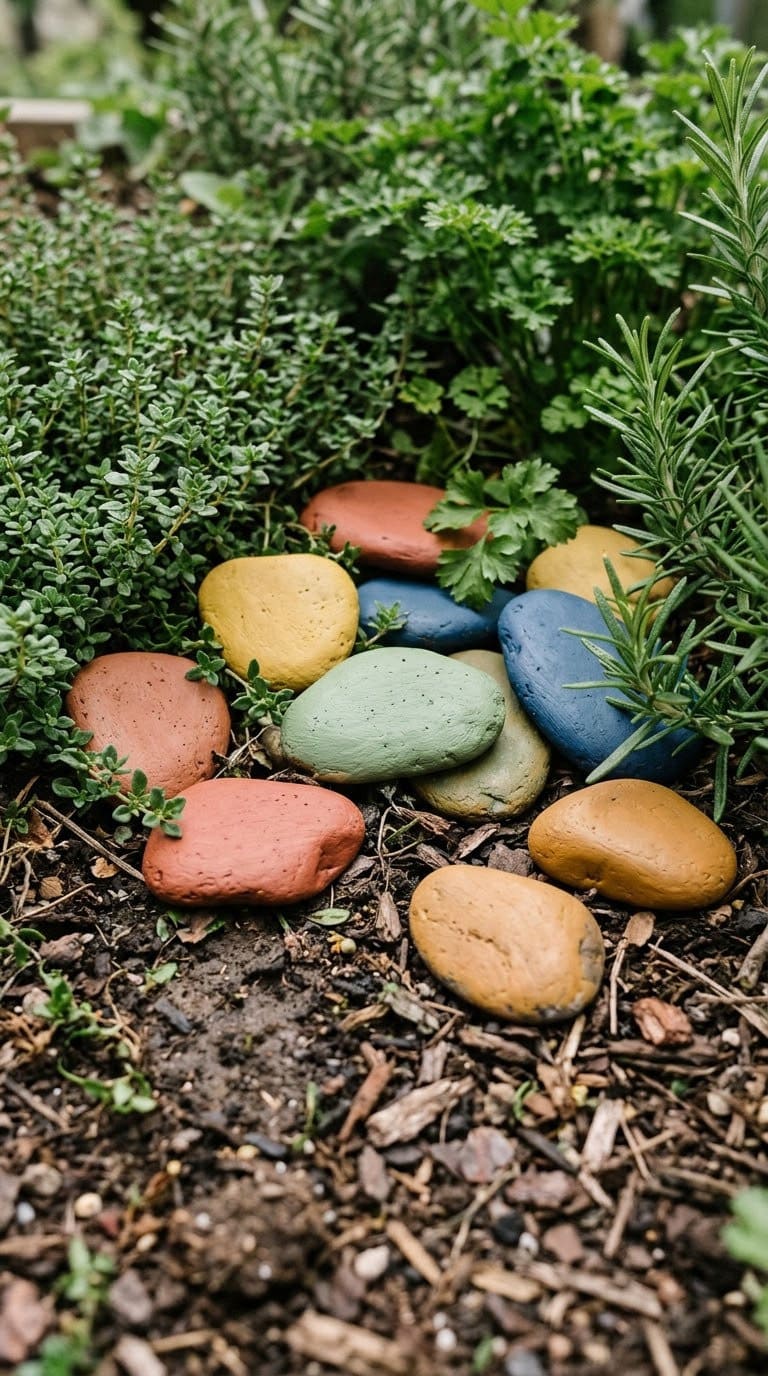
Rock: Small flat stones, about the size of your palm.
Steps:
- Paint a light background.
- Pencil the plant name and sketch a leaf.
- Paint the name in dark paint with a fine brush.
- Seal the stone.
Detail that helps: Paint on the flat side and set it at the base of the plant. Use large, clear letters so you can read them from standing height.
Seal and place: Use a clear spray over the name so rain does not wash it off. For more marker ideas, see our garden sign ideas.
Time and cost: about 20 minutes each, very low cost.
17. Vintage Camper Rock
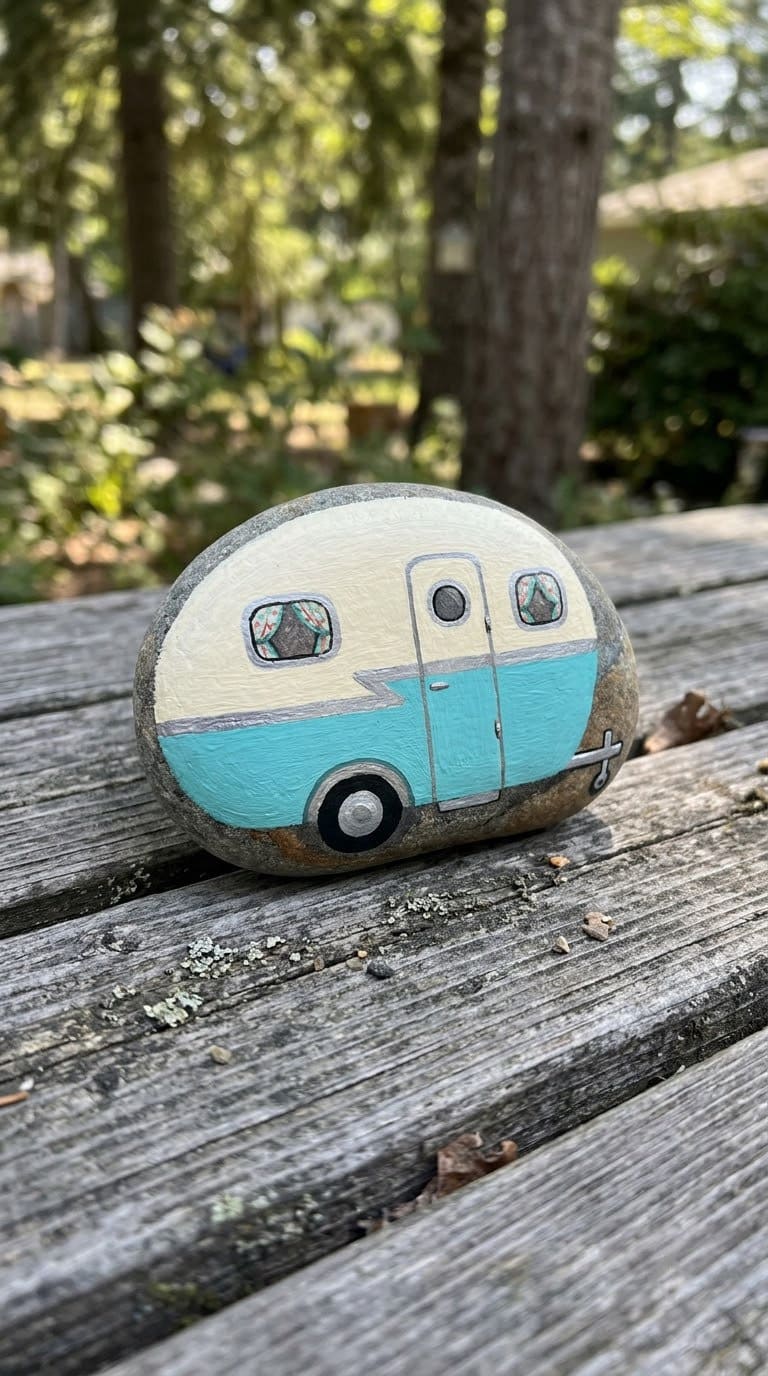
Rock: A flat oval stone.
Steps:
- Paint a cream base coat on the whole face.
- Add a turquoise stripe across the middle.
- Paint a small window and a door with a fine brush.
- Add two round wheels in black with a gray center.
- Add a thin line for the roof edge.
Detail that helps: Use pencil guides for straight lines. Keep the details simple so the shape reads as a camper from a few feet away.
Seal and place: Seal all sides. Place it near a pot of flowers like a tiny campsite.
Time and cost: about 45 minutes, very low cost.
18. Mermaid Rock
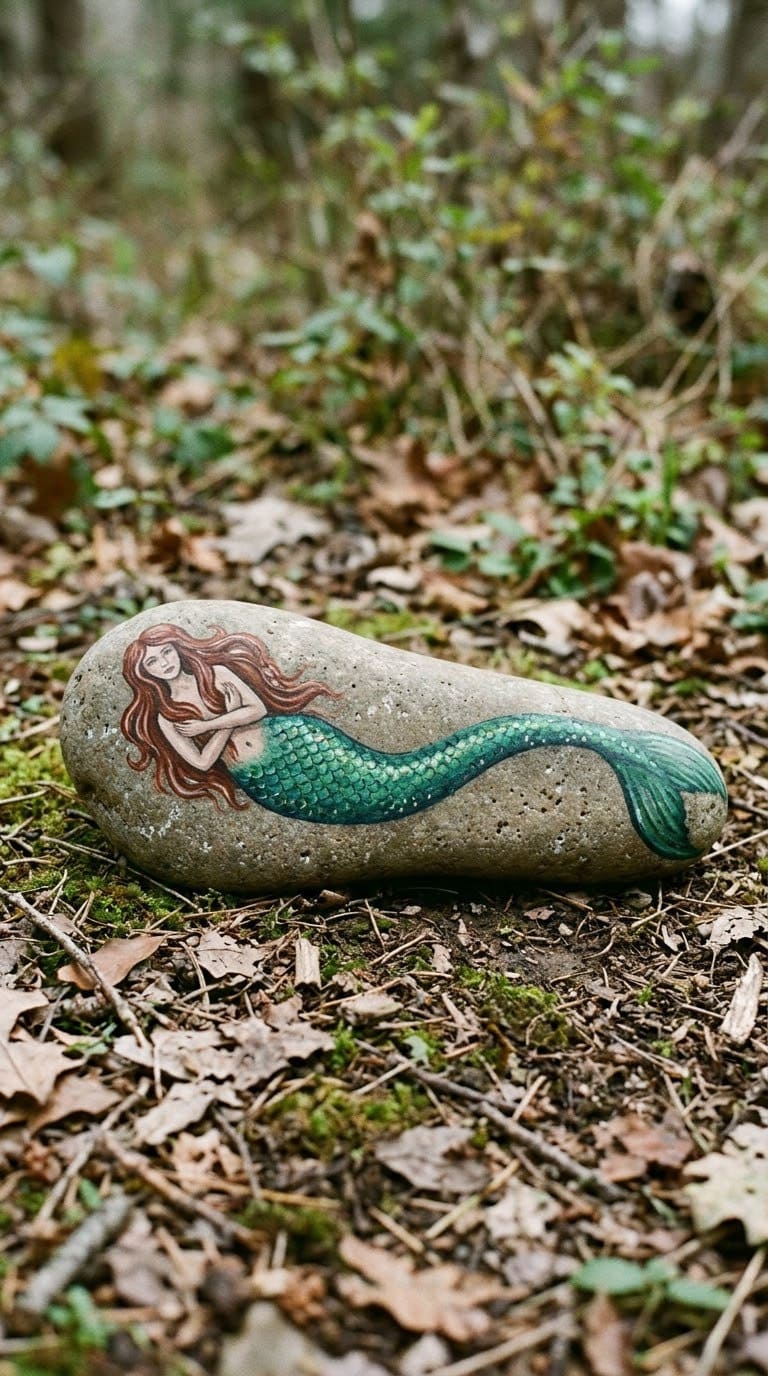
Rock: A long, smooth stone. A teardrop shape works.
Steps:
- Paint the tail end in green or blue.
- Paint scale arcs in a second color, overlapping.
- Paint a simple face and a skin tone on the other end.
- Paint long wavy hair that flows down the sides.
- Add shimmer with a thin line of metallic paint.
Detail that helps: Do not overload the face. Two dots and a small smile are enough.
Seal and place: Metallic paint needs a clear spray over it. Place it by a bird bath.
Time and cost: about 50 minutes, very low cost.
19. Pumpkin-Face Rocks
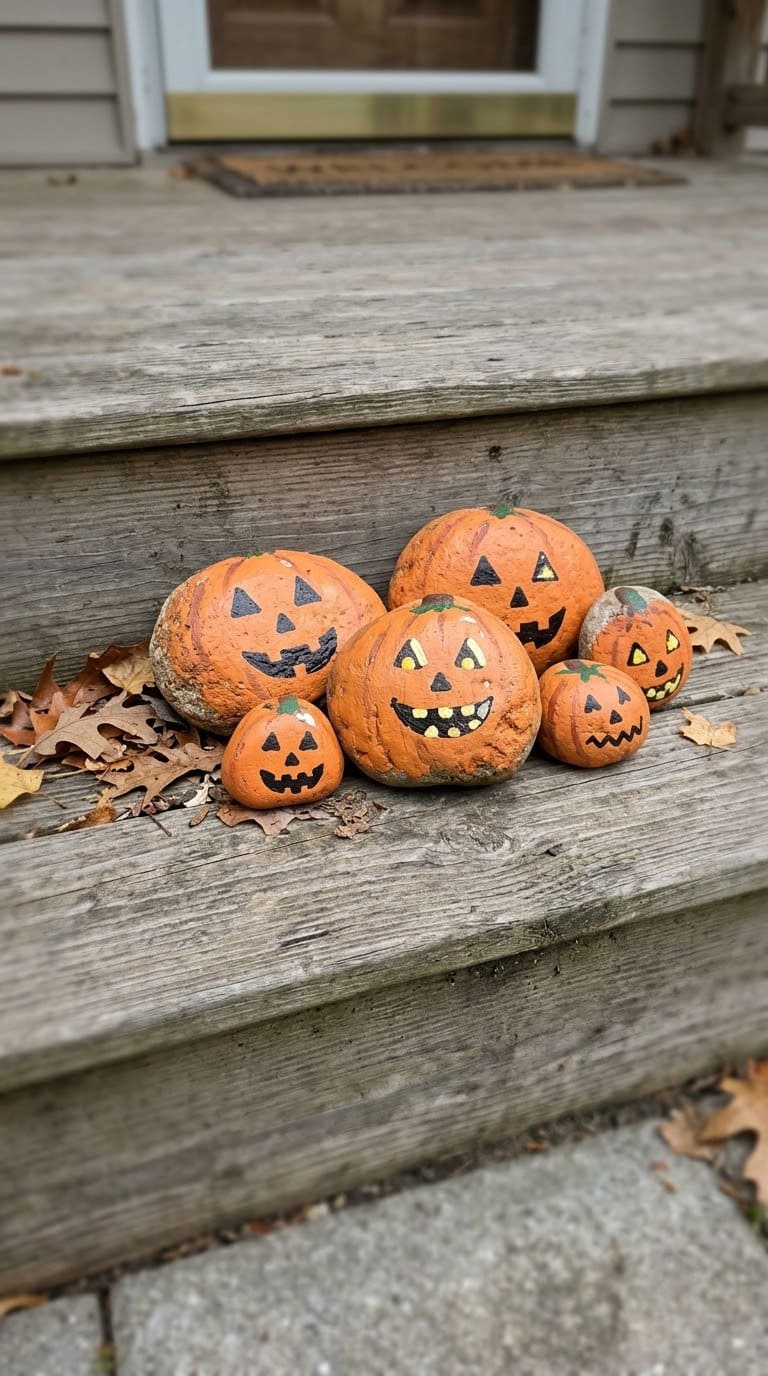
Rock: Rounded, slightly flat stones.
Steps:
- Paint a white base, then two coats of orange.
- Paint a green stem at the top.
- Add vertical curved lines for ridges, in a darker orange.
- Paint black triangle eyes and a jagged smile.
Detail that helps: Orange often needs a white base to look bright. Paint the face last so the black stays crisp.
Seal and place: Seal the black features. They make a no-mess fall display. Bring them in once the season ends. For more, see our Halloween rock painting ideas.
Time and cost: about 40 minutes for three, very low cost.
20. Cartoon Monster Eyes Rock
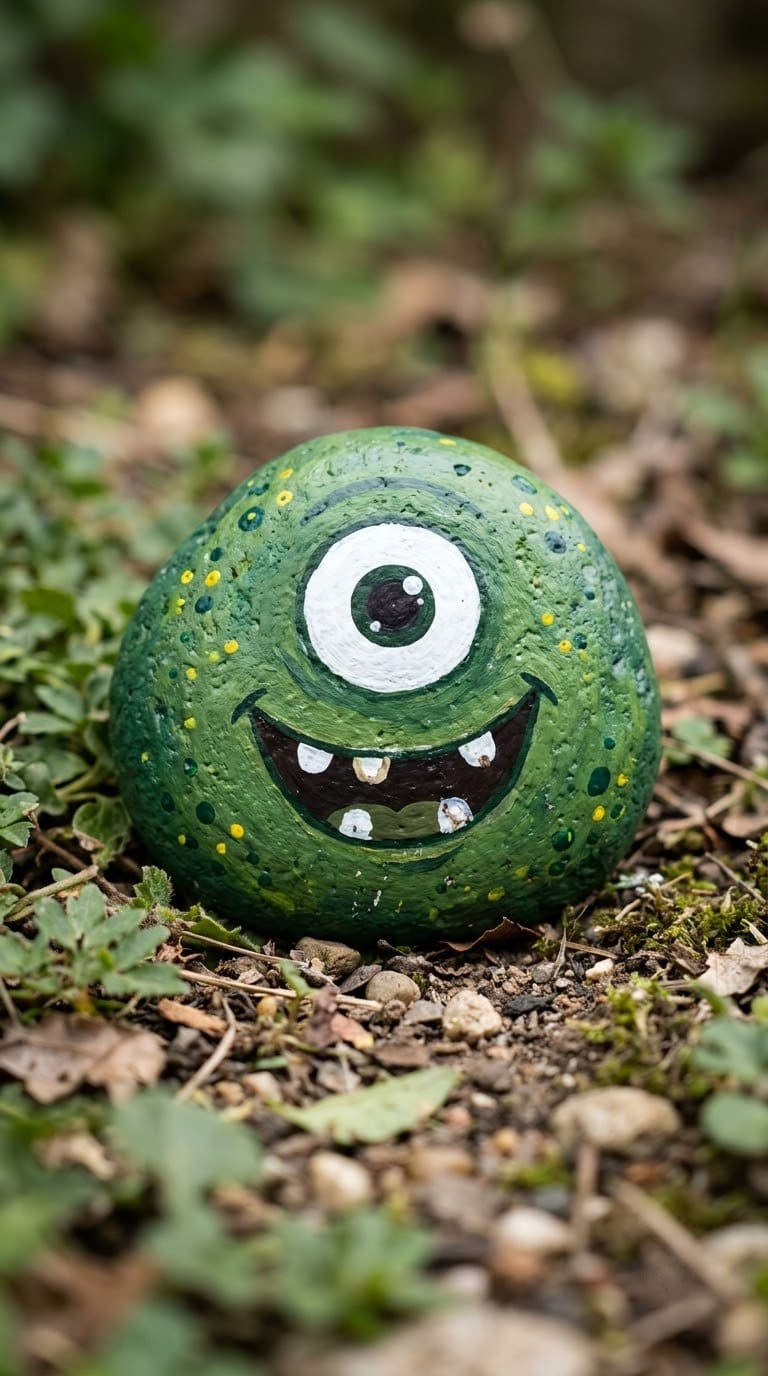
Rock: A round stone, as smooth as you can find.
Steps:
- Paint the stone a bright color, such as green or purple.
- Paint a large white circle for a single eye.
- Add a black pupil and a white highlight dot.
- Paint a wide smile and a few spots or horns.
Detail that helps: Invent your own friendly character instead of copying a cartoon. A little odd is better than perfect.
Seal and place: Seal the finished rock. Kids love this one, so let them choose the spot.
Time and cost: about 25 minutes, very low cost.
How Do You Seal and Care for Painted Rocks?
Seal after the full cure. Art Beat Box says a rock needs 24 to 72 hours to cure fully before you seal it. Sealing too early can trap moisture and cause cloudiness or peeling.
Pick the right day. Seal only on a completely dry rock, on a dry day when humidity is under 50%, per Art Beat Box. A sticky finish usually means the coats were too thick or the air was too damp.
Use thin coats. Spray several thin, even coats and wait 2 to 4 hours between them. The guide does not give a coat count, so follow the can label. Spray in a ventilated spot, away from wind.
Coat every side. Sustain My Craft Habit says to coat all sides of the rock with a durable exterior clear sealer, preferably a spray. Art Beat Box agrees that sealing only the painted side leaves the back and edges open to moisture.
Expect to redo it. Art Beat Box says outdoor sealant typically lasts 6 to 12 months. A reader in a rainy climate on the Sustain My Craft Habit page reported 3 to 4 coats of outdoor varnish, reapplied yearly. Paint-pen rocks may fade and chip even with several sealers.
Check your rocks each fall. Reseal chipped spots before winter. For rocks used as garden decor, see our painted garden decorations and rock garden ideas.
Common Mistakes to Avoid
Skipping the sealer is the first mistake. Sustain My Craft Habit says regular acrylics not made for outdoors need one.
Leaving rocks in parks is the second. Grand Teton National Park asks visitors not to leave painted rocks in national parks.
Rushing the coats is the third. The same blog says to let paint dry fully between coats and colors.
Sealing too early is the fourth. Art Beat Box says full cure takes 24 to 72 hours, and early sealing can trap moisture and cause cloudiness or peeling.
FAQ
What paint works best on rocks outdoors?
A multi-surface acrylic made for outdoor use, or regular acrylic sealed with an exterior clear spray, per Sustain My Craft Habit.
Do I need to seal painted rocks?
Yes, unless the paint is self-sealing. Paint-pen rocks need sealing too.
Can I hide painted rocks in a park?
Grand Teton National Park asks visitors not to leave painted rocks in national parks. Check the rules of any park before you leave one.
Can kids paint rocks?
Yes. Kindness rock groups ask for non-toxic sealants, per the National Parks Conservation Association. Check labels on paint and sealer.
What rocks should I use?
Smooth, hand-sized stones from your own yard or a store. Do not take rocks from parks.
Never miss an update — choose FarmFoodFamily as your preferred source on Google.
How it works: Tap the button below to open Google's settings page, then check the box next to FarmFoodFamily.
Tap the checkbox to turn it blue — that's how you know it's set.







Love your article on rock painting, especially helpful with temps upward of 108 here in SoCal coming this week.