How to Repair Laminate Flooring After Water Damage (6 Steps)

Water damage is a serious concern for homeowners, renters, businesses, and insurance companies. Whether it’s the result of a leaky roof or an overflowing toilet, water can cause major damage to your property in just one day. It’s important to know how to identify the warning signs so you can take action quickly if any are present in your home.
Today our main focus will be to guide you through the process of how to deal with laminate floor water damage and its consequences. We will go over some simple yet vital steps that need to be taken after laminate floor water damage has occurred.
Be aware that if at any point you feel like it might be too difficult to do on your own, it is always best to ask for professional help than to make a mistake that will cost even more to fix later on.
Laminate flooring is a relatively inexpensive and durable option for covering your floors. Although laminate flooring does not offer the same level of longevity as hardwood or vinyl, laminate flooring is typically very easy to maintain and clean.
One of the most common water-related problems that laminate flooring has to endure is water damage due to flooding from leaks in pipes, appliances, or plumbing fixtures.
Fortunately, laminating floors are much easier to repair than other types of wood or tile floors when they incur this type of damage. The following information will provide you with instructions on how to fix laminate floors after water damage occurs in your home!
Related: Comparison Guide To Vinyl vs. Laminate Flooring: Pros and Cons, Costs, Differences, Similarities

What happens when water comes into contact with laminate flooring?
All floorings that are applied or attached to a subfloor of any kind lose some degree of effectiveness over time. The main factors that determine how quickly water will affect the flooring’s durability are surface materials, thickness, design, and polish.
Laminate flooring gets its name because it’s laminated with three layers of different materials, usually consisting of paper, PVC, and another form of groundwood.
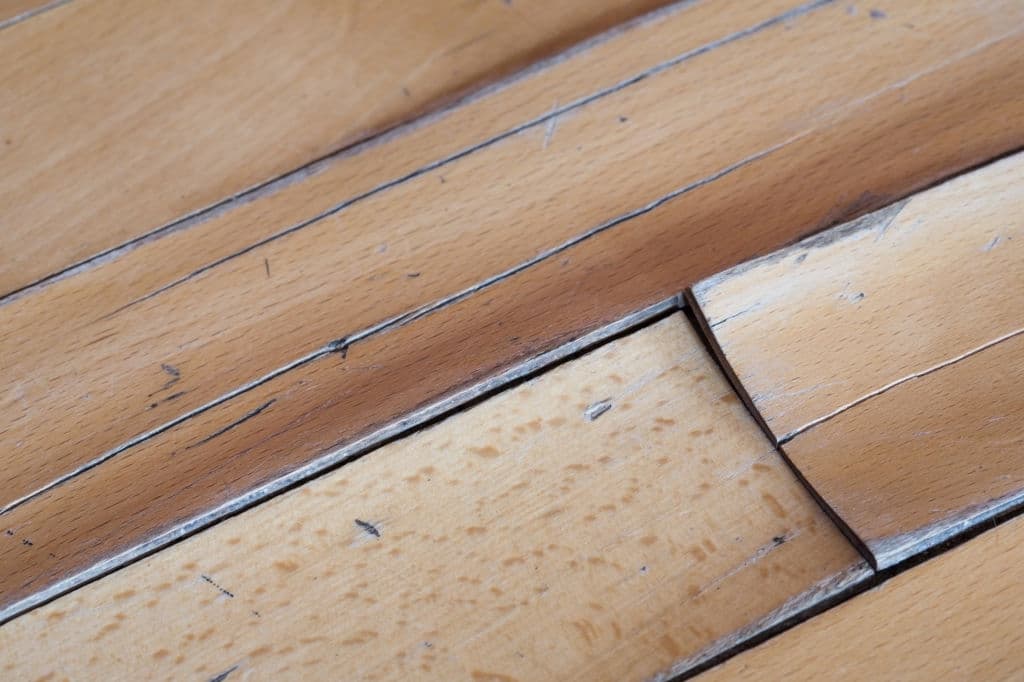
As these layers dry out in turn after being exposed to water, they can delaminate which means separate. It may even cause mildew to set in. When that happens (especially if the layer under which moisture has gathered is linoleum), there’s a chance that structural damage could occur like undoing seams or causing floor cracks.
Related: Basement Leaks Where The Wall Meets The Floor
Is water damage on top of laminate flooring?
If you notice standing water in your home, be aware that it is possible for the moisture to migrate into the laminate’s seams and cause wood-void expansion. This can lead to permanent damage if not taken care of quickly!
The edge areas of the floor will be more susceptible because they’re cut and exposed to potential risks such as spills or accidents in places that might not otherwise see much traffic. If you notice moisture at these high-risk locations thoroughly extract all traces immediately using a wet/dry vacuum!
Is water damage underneath laminate flooring?
When the water reaches under laminate flooring, the consequences can be dire. If there is a leak to your baseboards and you don’t take action immediately, it could lead not only to an unsightly appearance but also potentially expensive damage that will require professional intervention sooner rather than later!
In these situations, it is best to remove laminate planks as soon as possible, and deal with the source of the leak, so that it doesn’t spread further. After that, the repair process of the consequences left by laminate floor water damage can begin!
Steps to take when repairing laminate flooring after water damage:
Step 1: Find and fix the source of the water damage
Water damage can originate from many sources. When you notice water damage in your laminate floor, the first thing you should look at is the area around and beneath sinks, toilets, and anywhere else that absorbs large amounts of water.
On plastic floors with a textured pattern on them, look for places where there are raised ridges or cracks in the surface – these spots will be more difficult to clean than other areas and receive more water damage over time due to their design.
If you find any dripping fixtures or leaks in pipes that could be contributing to your problem, fix those leaks right away before they cause any further problems.
Some water stains are deep enough that moisture seeps into the subflooring beneath. This may be due to something as simple as a leaky faucet or an overflowing sink. Floor damage like this needs to be taken care of quickly – any structural problems can cause worse leaks and more expensive repairs in the future.
Step 2: Remove any standing water from the laminate flooring
Wet laminate floors should be dried as soon as possible to avoid water damage. Be careful when removing standing water from laminate flooring because damage can happen really easily if you’re not careful.
Balance a wet or damp towel on end and hold it over the puddle to soak up the water, then dry with a new dry towel. Avoid breaking any boards by lifting them.
If there’s heavy-duty flooding inside your home and you need to change out some carpets or floors, call in a professional for help, danger is imminent if you try to do this job yourself – they know how to remove water without causing damage and can get it done more quickly!
Step 3: Use a wet vacuum to remove any remaining moisture
Laminate flooring can be difficult to clean or replace after flooding, but there are workable solutions. Before using a wet vacuum, make sure the surface is dry and there is no excess standing water remaining.


Once the area is dry, you can use a wet vacuum to slowly remove all remaining excess liquid from laminate flooring with gentle strokes from the front of the machine toward you.
The clamps will help control both suction and agitation; they should be positioned approximately 10″ apart on center (for horizontal surfaces) with care taken not to apply them too tight against the laminates surface where they could cause ripping.
Step 4: Allow the area to dry completely before proceeding with repairs
It can seem painstakingly difficult to let enough time for a spot of the floor to have completely dried before proceeding with repairs. Unfortunately, this is standard protocol due to it being very tricky for water damaged floors to completely dry out mechanically.
This will only lead to further complications down the line in terms of increasing expenses due to mold build up and faster deterioration of the fixture, so allow plenty of time before jumping straight into any new fixes!
Step 5: Determine how much laminate needs repair and whether some part needs to be replaced
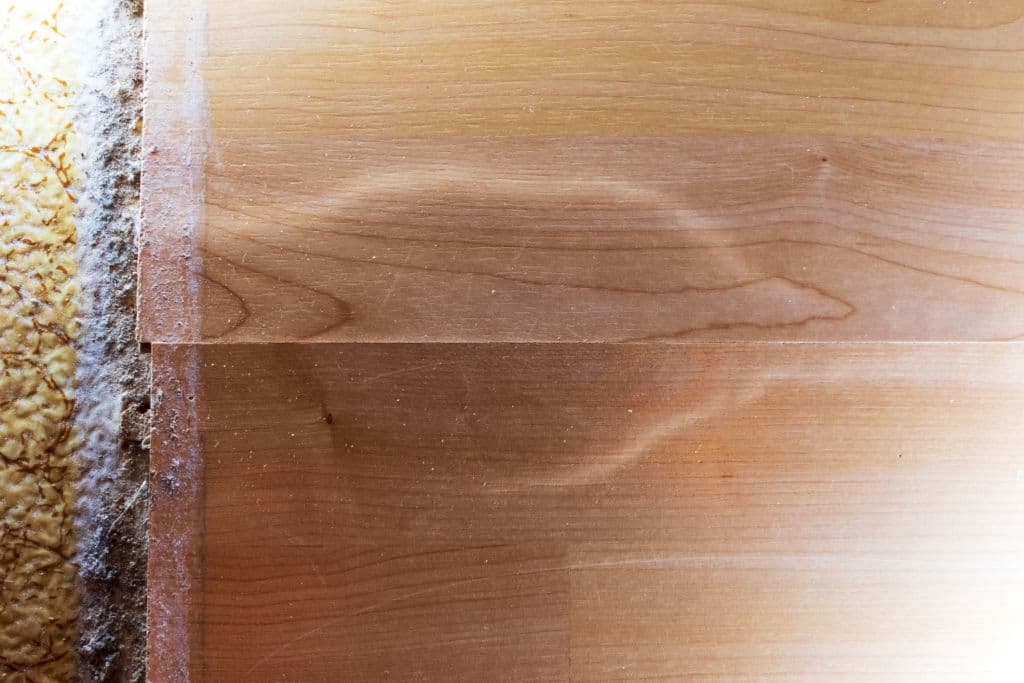
Inspect the surface of the laminate. Look for discoloration, low spots where water has pooled or that have been stained from spills or other events, and stained edges. If you are seeing any deterioration of the surface or evidence that the finish has worn away over time, then this probably means water damage.
If there are visible water stains or other signs that the laminate floor is deteriorating, then the area needs to be replaced. If just some darker patches are spotted, then it can be sanded down and laminate can be glued back down on top of it. This is a lot more economical than replacing an entire piece of flooring.
Related: How To Refinish Old Hardwood Floors Without Sanding
A) In case that the damage is not extensive and repair is enough these are the steps:
– Sand down damaged areas of the laminate flooring using an electric sander and 120-grit sandpaper
It’s important to first isolate the section of flooring that needs work so it doesn’t create a situation where you are sanding down adjacent pieces. Once identified, use an electric sander with 120-grit sandpaper to gently grind away the damaged areas.
If there are any discolorations or blemishes, use 220 grit sandpaper instead. Clean off the dust with a vacuum and finish up by cleaning up all removed debris before finally re-carpeting the area.
– Apply a new layer of varnish over the repaired areas if necessary
A thin coat of polyurethane is usually what you need for this! This will seal it against moisture and give your floors a smooth finish before you had them professionally refinished or restored.
Since protector coating products like this wear off eventually (within several months) we recommend that you follow with another protective application once every year for extended protection against scratches and dings.
– Cover all newly repaired areas with protective plastic sheeting for at least 24 hours after application of varnish
Be sure to cover the newly repaired area with a protective plastic sheet for at least 24 hours following the application of varnish. This way any part that gets scratched will be covered and there will not be any damage to the varnish before it dries out.
Ideally, you should cover it up for 48 hours but some people have been known to skip this important step so it’s best to add an extra day just in case.
Larger surfaces can use more time which is easy if you don’t mind an odd looking card table or other large surface taking up space while waiting for the coating to dry completely.
B) In case that damage is more serious and part of the laminate flooring needs to be replaced these are the steps:
– Remove the damaged planks
Water and moisture damage is the most common type of damage for laminate flooring. Even a relatively small amount can cause significant swelling and buckling, and the rate at which the damage progresses is dependent on how porous your individual plank has been made.
The more open pores it has, the faster water will be absorbed into them as well as spoil any underlying boards. You’ll want to remove all of those damaged planks as soon as possible before they cause more expensive problems with mold or bacteria growth.
– Clean the floor underneath the planks before replacing them
When a single section of laminate flooring is lifted, it can leave a gritty film of detritus that damages the adjacent pieces.
Laminate flooring pile provides a surface for small bits of debris to collect and settle before drying out. If these particles are not completely removed from beneath the lifted part, they welcome liquid from nearby spills or even moisture from recirculated air back up between the boards. So make sure to thoroughly clean the area before moving to the next step in order to prevent any future issues.
– Replace the damaged planks
After an area of the old floor had water damage, you should take care to protect against getting water on that part in the future. You do this by putting a good quality sealer down first before installing your laminate planks.
Make sure you have it evenly coated throughout the space, even if this involves doing smaller sections at a time since it will dry faster under lamps.
Once everything has dried, then wipe up any drips with clean cloths so there are no wet lines left before laying down your new flooring pieces according to direction.
Steps are important in all design decisions because they create spaces for occasions and transitions so the overall look is steady and cohesive rather than a random, thrown together assortment of pieces.
– Place a heavy object on top of the planks to help them set
You have several different options to weigh the planks down during the first week of installation. Some people use books, bricks, or furniture pieces.
While these are all common options for weighing down laminates, you also have the option of using leveling sandbags that are filled with sand or gravel. These can be found at most hardware stores.
Related: Hickory Flooring Reviews: Varieties, Best Brands, Pros and Cons
Step 6: If needed, contact a professional for help
Homeowners may be able to repair laminate flooring themselves, but they should first contact a professional for advice about their particular situation to confirm that this approach is advisable.
This is important if you have water damage that has caused rot, mold, or mildew to develop in the material. Call someone that specializes in restoration. They can take care of it with minimal interruption in your schedule and will treat your home with the utmost respect during the area removal process due to its sensitivity to damage.