
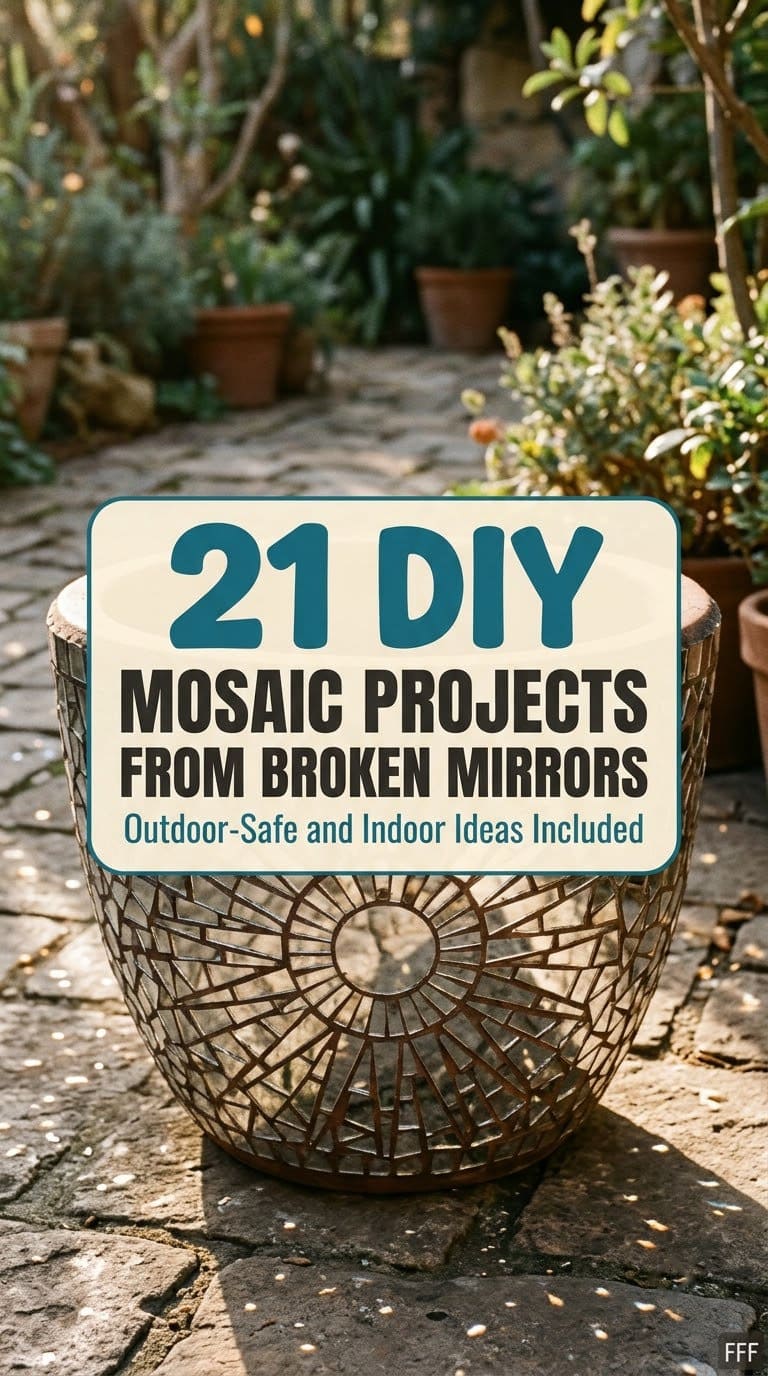
21 Creative Ways to Reuse Broken Mirror Ideas (Safe DIY Projects for Home and Garden)
Your broken mirror isn’t bad luck. It’s raw material for 21 surprisingly useful home and garden projects, from mosaic gazing balls to garden stepping stones.

Never miss an update — choose FarmFoodFamily as your preferred source on Google.
How it works: Tap the button below to open Google's settings page, then check the box next to FarmFoodFamily.
Tap the checkbox to turn it blue — that's how you know it's set.
Your broken mirror isn't bad luck. It's raw material for 21 surprisingly useful home and garden projects, from mosaic gazing balls to garden stepping stones.
Products We Recommend
This post contains affiliate links. We may earn a commission on qualifying purchases at no extra cost to you.

Weldbond Multi-Surface Glue 14.2 oz
Strong indoor mosaic adhesive, water cleanup, bonds mirror to wood and terracotta
Shop Now
Wheeled Glass Mosaic Nipper
Cuts mirror and glass pieces to shape cleanly with tungsten carbide wheels
Shop Now
Custom Building Products Polyblend Non-Sanded Grout 10 lb
Designed for gaps under 1/8 inch, the right choice for most mirror mosaic work
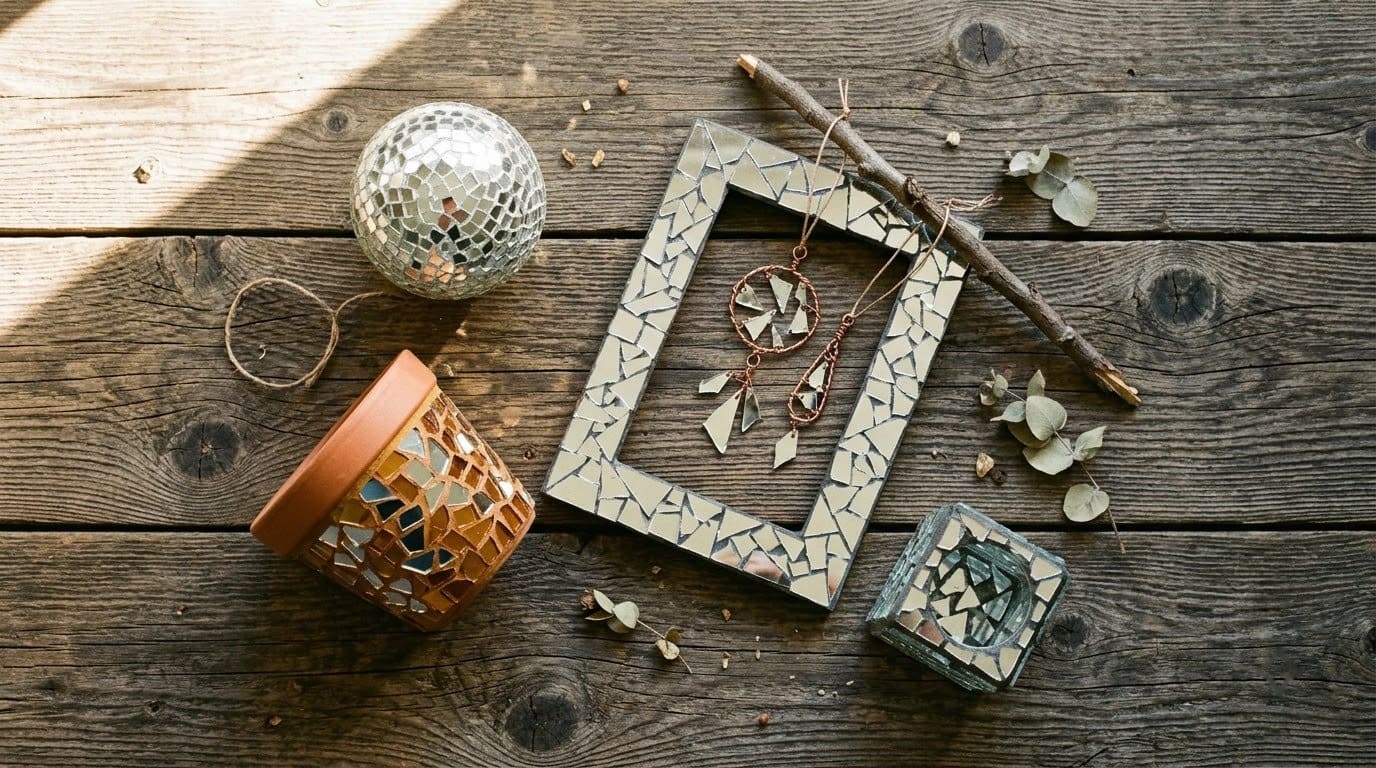
Shop NowA broken mirror can become almost anything. The most popular reuses fall into three categories: mosaic art (gluing pieces onto a base and grouting the gaps), garden decor (gazing balls, stepping stones, fairy pond inserts), and home accents (frames, trays, plant pots). Each project uses pieces in different sizes, so even the smallest shards have a purpose.
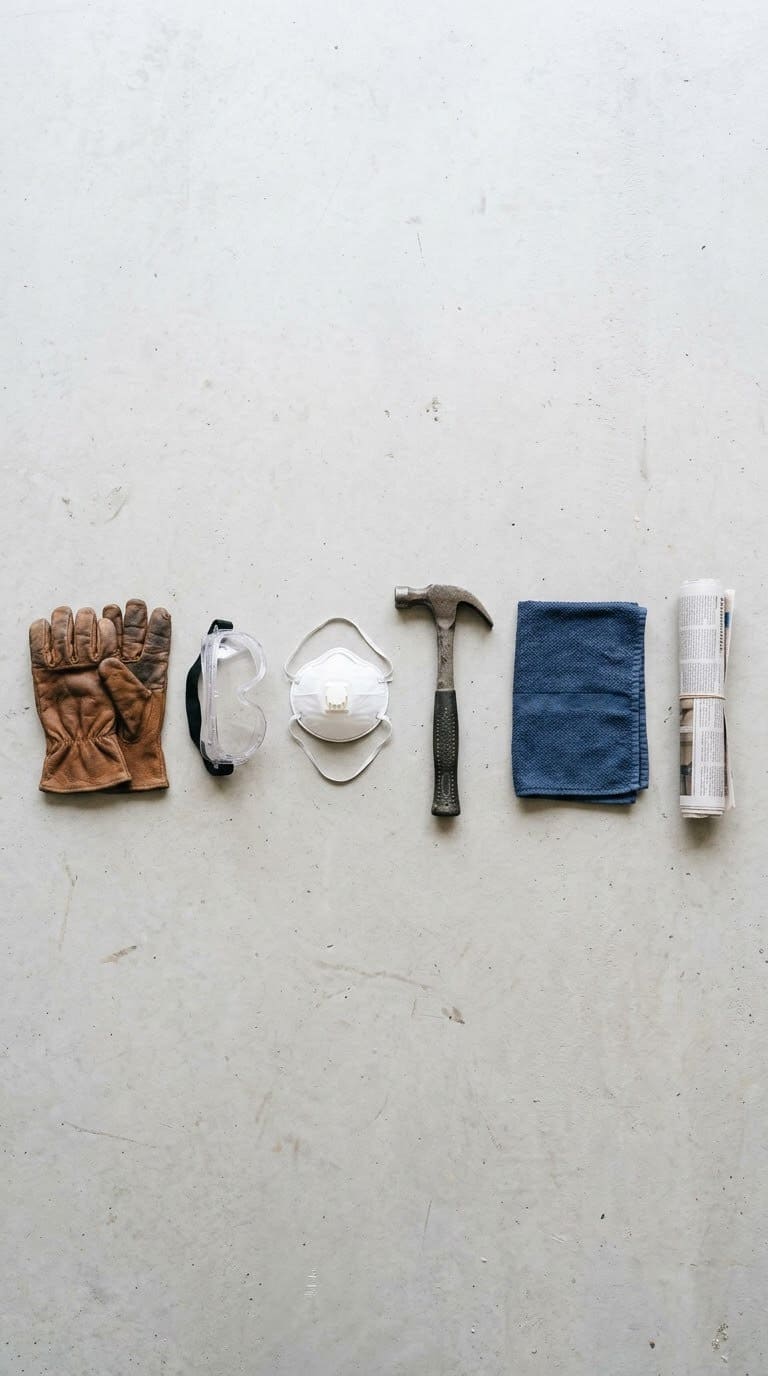
Before starting any project, put on heavy-duty gloves and safety goggles. Wrap the mirror in an old towel before breaking it deliberately with a hammer, and keep pets and children out of the workspace. The Pittsburgh Glass Center recommends working on a hard, easy-to-clean surface and wiping down with a damp paper towel after handling glass.
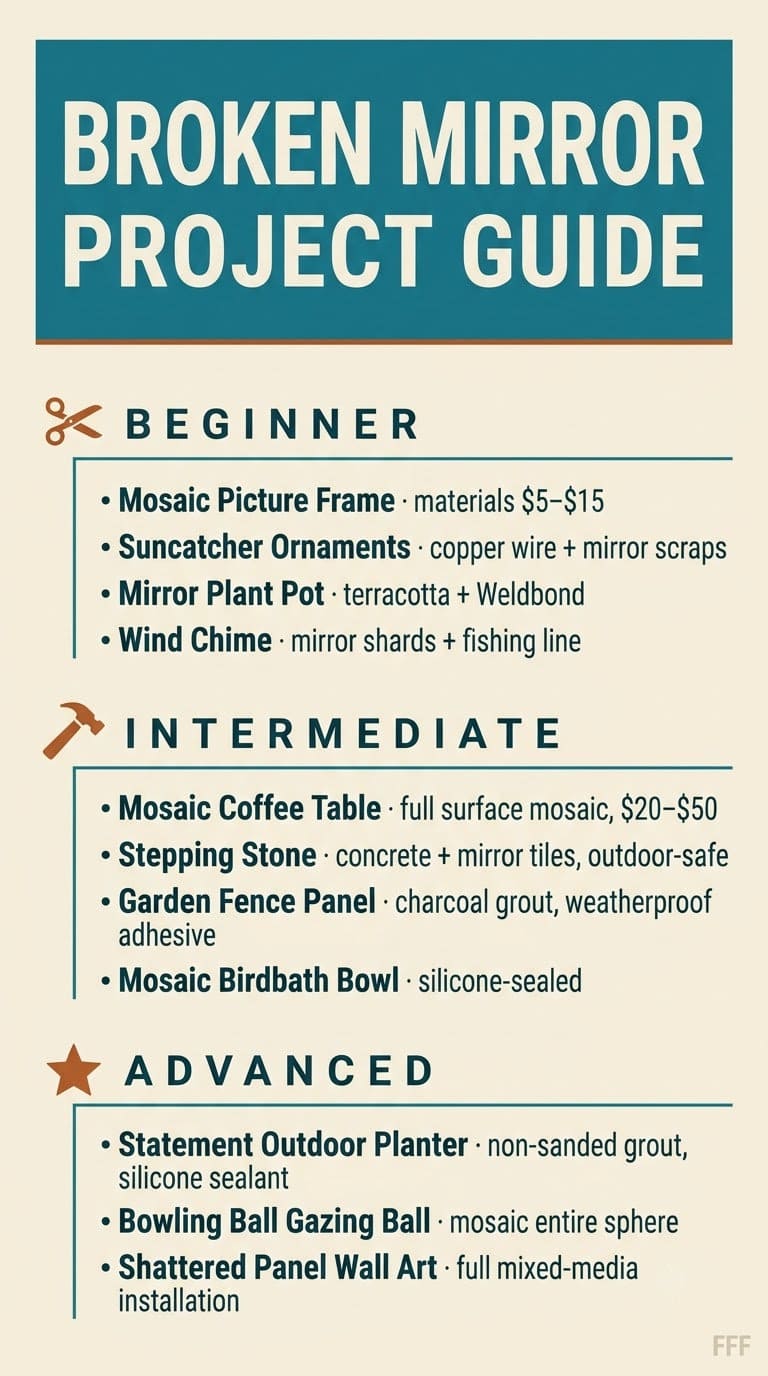
The 21 ideas below are sorted by difficulty level, from beginner (no cutting needed) to advanced (tile nippers and epoxy grout). Most cost under $30 in supplies.
Answer 4 quick questions and get matched to the exact fix for your yard — drainage, budget, layout, or something else entirely.
Take the Free QuizSafety First: How to Handle Broken Mirror Glass
Broken mirror glass has two hazards that window glass does not. The reflective backing creates fine silver particles when the glass is cut or sanded. The shards also splinter into curved, irregular shapes that are harder to spot on the floor than straight-edged glass.
Use heavy-duty work gloves, not rubber dish gloves, which can be punctured. Add safety goggles if you plan to use tile nippers or a hammer, since small pieces can fly. Wear an N95 or FFP2 respirator if you sand or cut pieces, because of fine mirror-backing dust.
To break a mirror deliberately, place it face-down on a hard surface on top of a folded old towel. Tap with a hammer through another folded towel placed on top. This gives you moderate-size pieces rather than a spray of splinters. Keep the whole workspace clear of pets and children until you have swept and damp-wiped the area.
For pieces too small to use in a project, wrap them in several sheets of newspaper, tape the bundle closed, and place it in a bag marked “broken glass” for regular trash. Do not put mirror pieces in a glass recycling bin: most recycling programs do not accept mirrors because the silvered coating contaminates the glass stream.

What You’ll Need
Most broken mirror projects share a short supply list. Gather these before you start:
Most yard problems trace back to one specific, fixable cause. Find yours in 4 quick questions.
Take the Free Quiz- Mirror pieces: from your broken mirror, or from thrift-store mirrors bought specifically to break
- Adhesive: Weldbond or PVA glue for indoor projects; polyurethane construction adhesive (Liquid Nails for Tile) for outdoor
- Grout: non-sanded grout for gaps under 1/8 inch; sanded grout for wider gaps; marine grout for anything outdoor or near water
- Grout sealer: required for all outdoor pieces to prevent freeze-thaw cracking
- Tile nippers (intermediate and advanced projects): for shaping mirror shards
- Craft foam ball or old bowling ball: for gazing ball projects
- Terracotta pots, wooden frames, trays: base surfaces for most beginner projects
21 Ways to Reuse Broken Mirror Pieces
Beginner Projects: No Cutting Needed
These eight projects use mirror pieces as-is, straight from the break. No tile nippers, no scoring tools.
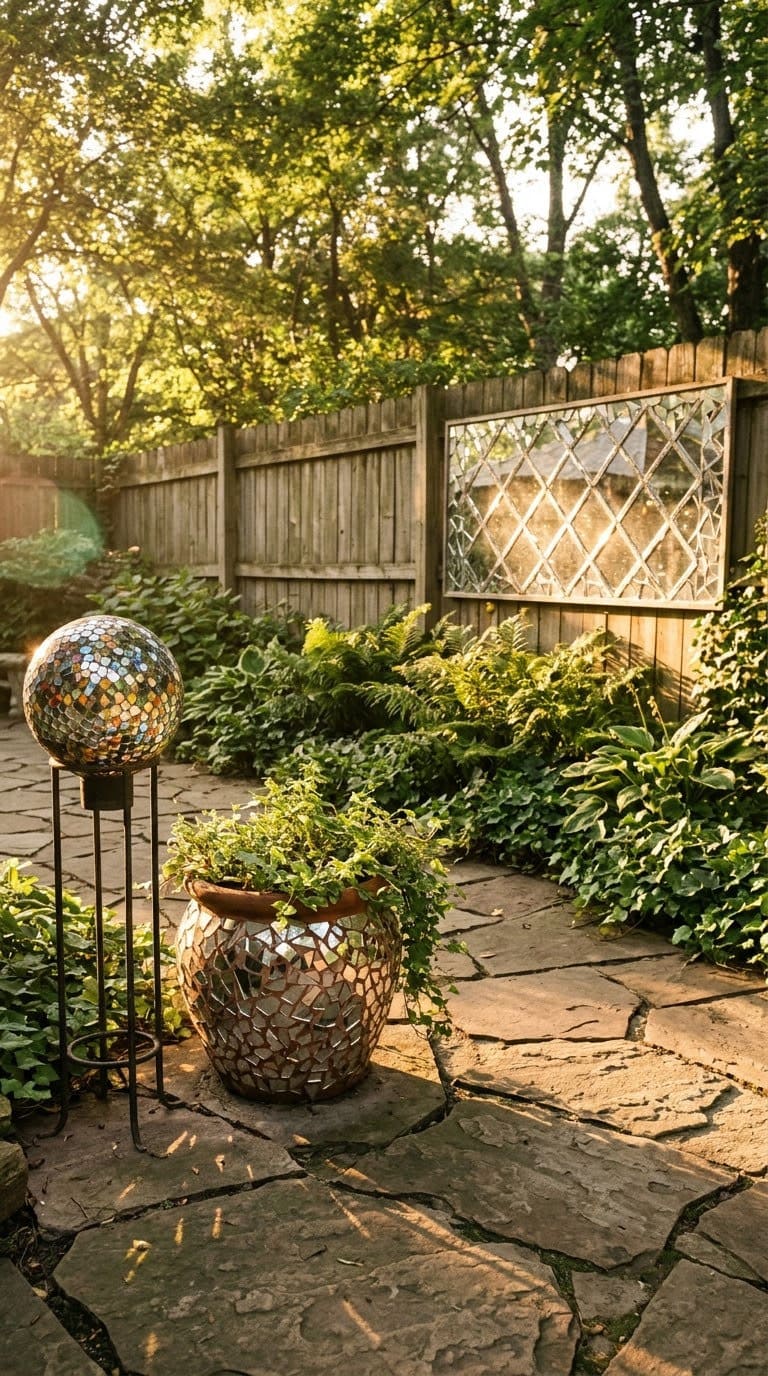
1. Mosaic Gazing Ball
A foam craft ball or a thrift-store bowling ball becomes a reflective garden feature. Apply outdoor-rated adhesive in small sections and press mirror pieces firmly into place, leaving consistent gaps for grouting later.
Once fully dried (24 hours), apply marine grout with a gloved hand, pressing it into the gaps. Wipe the surface clean before the grout sets completely, then seal with outdoor grout sealer after curing.
Materials cost: $8–$20 (foam ball or bowling ball, adhesive, marine grout, sealer)
Outdoor safe: Yes, with marine grout and grout sealer
2. Suncatcher Ornaments
Wrap the edge of each shard in copper foil tape (available at craft stores) to blunt the sharpness and give it a finished look.
Twist a small wire loop through a hole at the top (or tape the wire to the flat back of the piece) and hang in a sunny window or from a tree branch. These catch and scatter light beautifully when the sun hits them.
Strong indoor mosaic adhesive, water cleanup, bonds mirror to wood and terracotta
Shop NowThis post contains affiliate links. We may earn a commission on qualifying purchases at no extra cost to you.
Materials cost: Under $10 (copper foil tape, 26-gauge wire)
Outdoor safe: Yes
The average homeowner spends $616/year on yard fixes that don't address the real problem. Find out what yours actually is — before you spend another dollar.
Take the Free Quiz3. Mosaic Picture Frame
Plain wooden frames work best. Apply Weldbond adhesive to one section of the frame at a time, press mirror pieces firmly, and let dry completely before moving to the next section.
Once all pieces are set, mix non-sanded grout to a peanut butter consistency and work it into all the gaps with a gloved finger. Wipe clean with a damp sponge before it hardens, and buff the mirror surfaces with a dry cloth. This is one of the simplest ways to add a sparkly update to a plain DIY mirror frame or thrift-store find.
Materials cost: $5–$15 (frame if sourced secondhand, adhesive, non-sanded grout)
Outdoor safe: No (use indoors only)
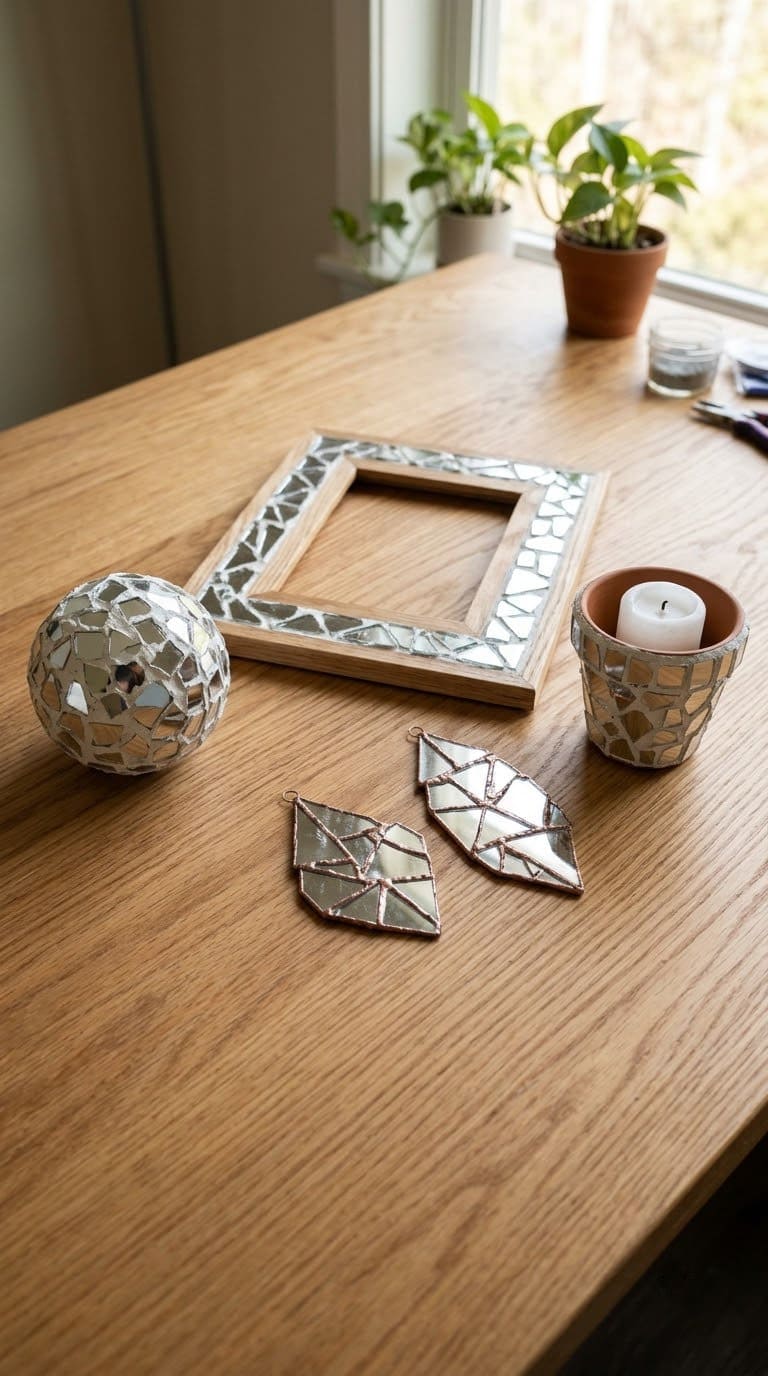
4. Mirror Mosaic Plant Pot
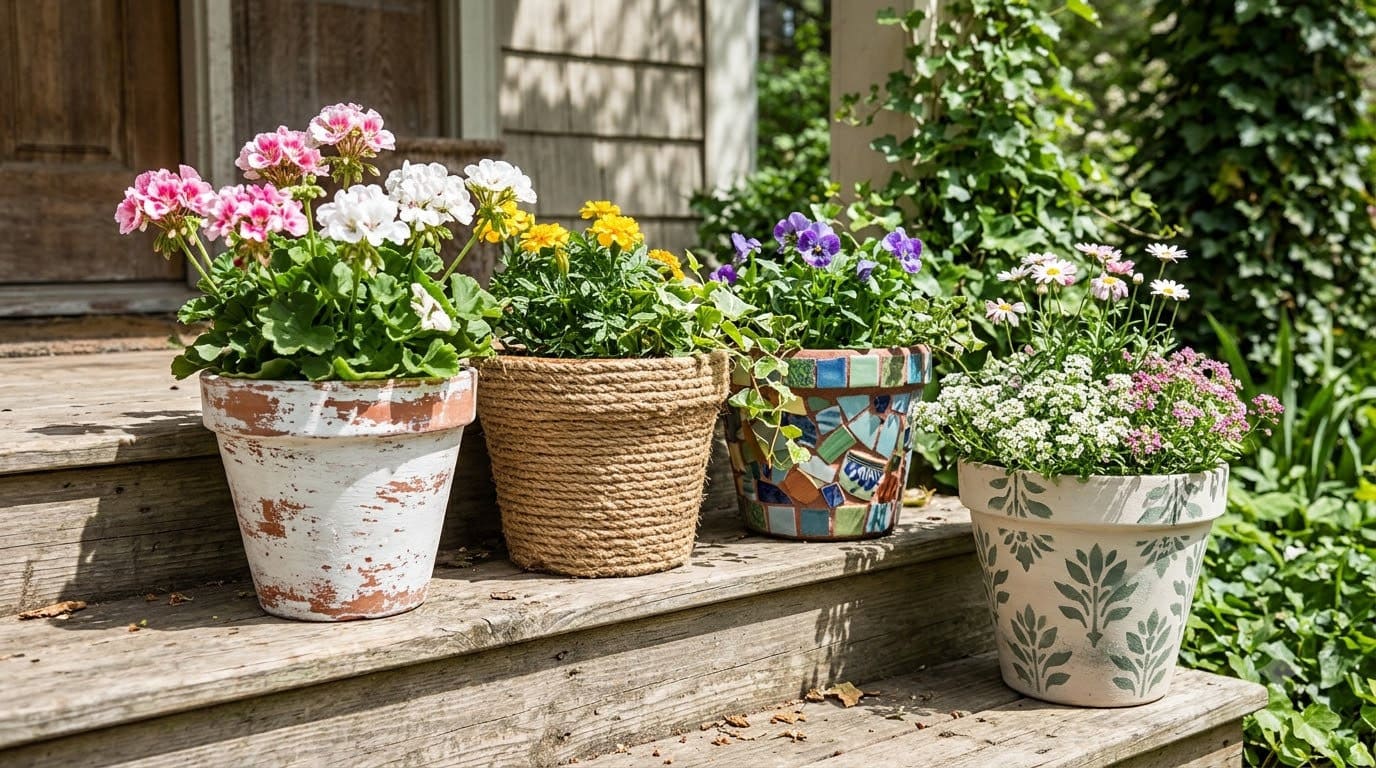
Terracotta is an ideal base for outdoor mirror mosaics because it is porous and holds adhesive well. Roughen the pot surface lightly with sandpaper, then apply pieces with outdoor polyurethane adhesive.
Use marine grout between pieces and seal the finished pot with grout sealer. The reflective surface catches sunlight and draws attention to whatever plant you put inside it.

Materials cost: $10–$20 (terracotta pot, outdoor adhesive, marine grout, sealer)
Outdoor safe: Yes, with marine grout and sealer
5. Garden Mirror Pond (Fairy Garden)
Press a flat, roughly oval mirror shard into the soil of a fairy garden or a miniature garden container. Surround it with small pebbles, moss patches, and tiny plant cuttings to suggest a pond or lake.
No adhesive is needed. The soil holds the piece in place. Replace it seasonally if it lifts out. This is one of the easiest uses for a single large shard.
Materials cost: Free (if using an existing shard)
Outdoor safe: Yes
6. Mirror Wind Chimes
Select three to five larger shards with relatively smooth edges. Wrap each edge in copper foil tape. Drill a small hole near the top of each piece using a diamond-tipped drill bit at low speed with a drop of water to cool the bit, or use copper tape loops instead.
Hang from a dowel rod or driftwood piece at varying lengths with fine wire. The pieces will catch the wind and scatter light, similar to traditional glass wind chimes.
Materials cost: $8–$15 (copper foil tape, wire, diamond drill bit if needed, dowel)
Outdoor safe: Yes
7. Decorative Mirror Tray
Fill a shallow wooden or metal tray with mirror pieces arranged in a pleasing pattern. Apply pieces with Weldbond, allow to dry, then grout with non-sanded grout. Wipe the mirror surfaces clean before the grout sets.
Seal with a clear polyurethane coat for a water-resistant finish. Use the finished tray on a coffee table, dresser, or bathroom counter. A mosaic tray is a natural complement to other living room mirror decorating ideas if you want a cohesive reflective look.
Materials cost: $10–$20 (tray if sourced secondhand, adhesive, grout, sealer)
Outdoor safe: No (use indoors)
8. Mosaic Candle Holder
Wrap a clean glass jar or votive holder with mirror pieces. Flat-backed pieces work best on a curved surface: use only small shards and press them with clear silicone adhesive for flexibility.
Leave the top section of the glass clear if using a real candle so heat is not trapped. Light from a tealight inside will scatter through the gaps and off the mirror surfaces in every direction.
Materials cost: Under $10 (glass jar, clear silicone adhesive)
Outdoor safe: No (use indoors)
Intermediate Projects: Some Technique Required
These eight projects involve grouting wider surfaces, using tile nippers to shape pieces, or working on a vertical surface. They take more time but are still achievable without professional tools.
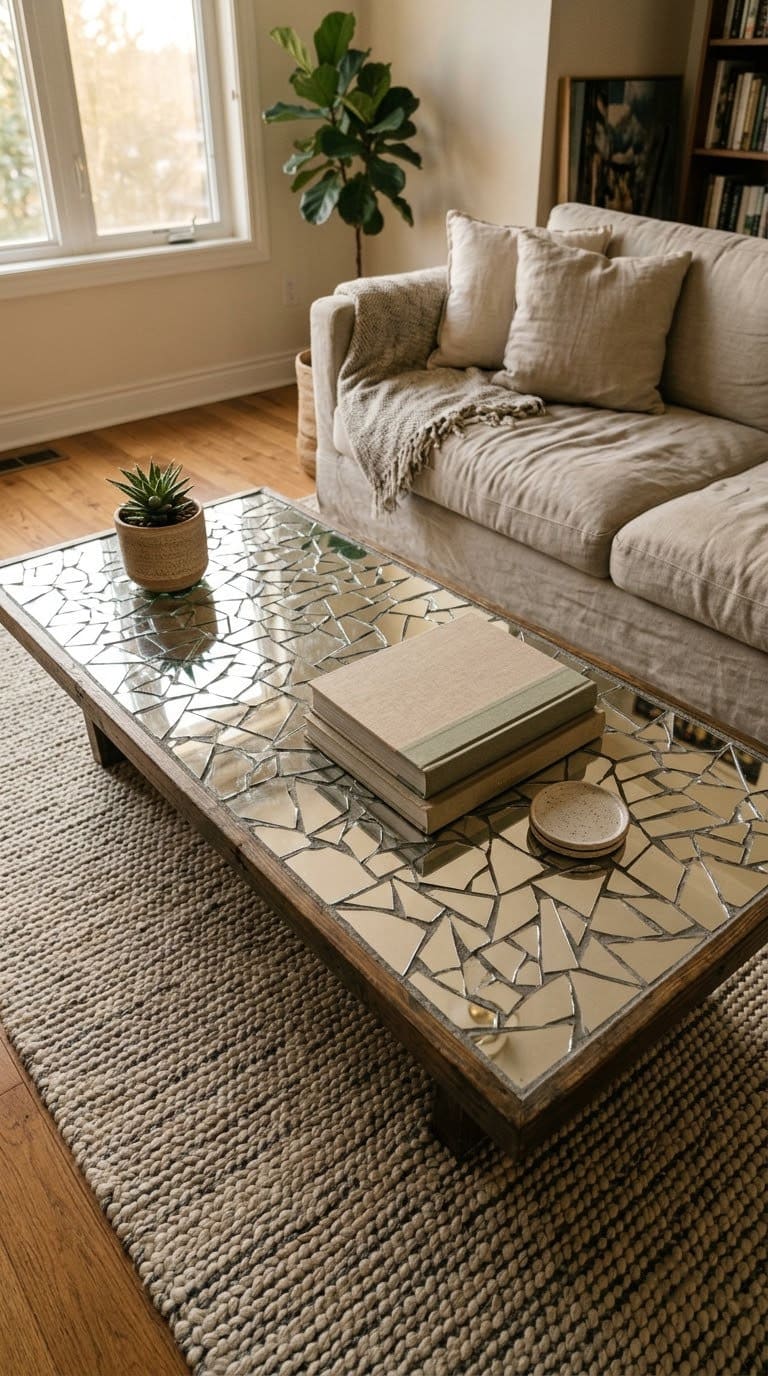
9. Mosaic Coffee Table
A thrift-store or flat-pack coffee table with an MDF or plywood top is the ideal base. Sand the surface lightly, then apply mirror pieces with Weldbond or mastic adhesive in sections.
Once fully cured, apply sanded grout (for the wider gaps typical of irregular mirror shapes) with a grout float and wipe clean. Apply two coats of grout sealer. The finished table has the look of a high-end mosaic piece at a fraction of the cost.
Materials cost: $20–$50 (table if thrifted, adhesive, sanded grout, sealer)
Outdoor safe: No (use indoors)
10. Mirror-Covered Dresser Drawers
Remove the drawer fronts and lay them flat. Apply mirror pieces with Mod Podge or Weldbond in a pattern: random, geometric, or gradient by size. Grout with non-sanded grout, wipe clean, and reinstall.
You may need to break extra mirrors to cover several drawers fully. The result gives an ordinary dresser a dramatically different look without replacing it.
Materials cost: $15–$35 (adhesive, grout, extra mirror if needed)
Outdoor safe: No
11. Mirror Mosaic Fence Panel
Choose a fence board section and apply mirror pieces in a pattern using outdoor polyurethane adhesive. For vertical surfaces, use a thicker adhesive (non-sag silicone or construction adhesive) to prevent pieces sliding before they cure. Once fully set, grout with marine grout and seal.
A mirror mosaic panel adds unexpected shimmer to a plain decorative fence and catches afternoon light beautifully. For a larger-scale outdoor art wall, see the garden wall ideas guide for placement and spacing.
Materials cost: $15–$30 (outdoor adhesive, marine grout, sealer)
Outdoor safe: Yes, with marine grout and sealer
12. Broken Mirror Wall Art Panel
Cut a piece of plywood to your desired size. Arrange mirror pieces in a pattern before gluing: geometric, circular, starburst, or purely random. Photograph the arrangement before you start gluing so you can reference it.
Apply Weldbond, press pieces firmly, let cure for 24 hours, then grout with non-sanded grout. Frame the panel or hang it unframed for a modern look. This is one of the most flexible approaches to living room mirror decorating if you want a custom art piece.
Materials cost: $15–$35 (plywood, adhesive, grout, optional frame)
Outdoor safe: No (use indoors)
13. Bathroom Accent Strip
A single row of mirror mosaic pieces along a backsplash or above a bathtub can change the feel of a whole bathroom without a full renovation. Use silicone adhesive rather than grout for wet areas.
Silicone is flexible, water-resistant, and easier to remove later. Apply pieces in a horizontal strip, press firmly, and let cure fully before any water exposure. Check the fit with the rest of your bathroom mirror ideas so the style stays cohesive.
Materials cost: $10–$25 (silicone adhesive, mirror pieces)
Outdoor safe: N/A (indoor wet-area project)
14. Mirror Mosaic Birdbath Bowl
Remove the bowl of an existing birdbath and work on it flat. Apply marine grout-compatible adhesive to sections and press mirror pieces. Once cured, apply marine grout and seal with outdoor grout sealer.
A mirrored birdbath bowl reflects the sky and catches attention from across the yard. The Pittsburgh Glass Center recommends marine-grade materials for any outdoor glass-mosaic project that will hold water.
Materials cost: $15–$30 (outdoor adhesive, marine grout, sealer)
Outdoor safe: Yes
15. Mosaic Garden Stepping Stones
Pour a concrete stepping stone mix into a round mold (a plastic pot saucer works) and press mirror pieces into the surface while the concrete is still wet. Work quickly: concrete begins to set within 20–30 minutes.
Press pieces deeply enough that they will not lift out when the stone is walked on. Once cured (24–48 hours), brush the surface clean. Add a line of these along a garden path for a sparkling whimsical garden effect.
Materials cost: $10–$20 (concrete mix, stepping stone mold)
Outdoor safe: Yes (concrete is weatherproof)
16. Stair Riser Accent
Apply mirror pieces to one or two stair risers (the vertical face of each step) with mastic tile adhesive. This works best on interior stairs with smooth painted risers. Grout with non-sanded grout, wipe clean, and apply grout sealer. Limit to one or two risers for an accent look.
Covering all risers on a full staircase is a larger advanced project. Note: mirror pieces on risers should not extend onto the tread surface, and local building codes may restrict reflective materials on stairways. Check before installing.
Materials cost: $15–$30 (mastic adhesive, non-sanded grout, sealer)
Outdoor safe: No (interior use only)
Advanced Projects: Tile Nippers, Epoxy Grout, and Outdoor Sealants
These five projects require shaping mirror pieces with tile nippers and working with epoxy grout, which requires faster application but gives a stronger, more polished result.
17. Full Mosaic Mirror Frame
Choose a large mirror with a wide wood or MDF frame, at least 2 inches wide. Plan a design on paper first. Use tile nippers to shape mirror pieces into triangles, squares, and curved forms that fit your pattern.
Apply pieces with Weldbond, let cure, then use epoxy grout for a durable, professional finish. Epoxy grout typically has a working time of 30 to 90 minutes; mix only a small batch at a time. Kelley Knickerbocker of the Society of American Mosaic Artists teaches that it requires precise mixing ratios and quick, methodical application to avoid waste.
Materials cost: $25–$60 (tile nippers, epoxy grout, adhesive)
Outdoor safe: No (indoors only for this frame style)
18. Full-Coverage Gazing Ball (Bowling Ball Base)
A bowling ball is heavier and more durable than a foam ball, making it suitable for permanent outdoor placement.
Roughen the surface with coarse sandpaper. Apply outdoor polyurethane adhesive in small sections, press mirror pieces tightly together for maximum coverage, and let cure for 48 hours.
Apply marine grout between all pieces and seal with two coats of exterior grout sealer. The finished ball acts as a garden focal point in any season.
Materials cost: $10–$25 (used bowling ball from thrift store, adhesive, marine grout, sealer)
Outdoor safe: Yes, fully sealed
19. Outdoor Mosaic Table
An outdoor mosaic table must be built with materials rated for freeze-thaw cycles and UV exposure. Use a metal or cement outdoor table base.
Apply pieces with marine-grade epoxy adhesive, let cure for 48 hours minimum, and grout with marine grout mixed to a slightly stiffer consistency to prevent sagging.
Apply three coats of UV-stable outdoor grout sealer, letting each coat cure before adding the next. According to Bostik’s DIY guide, outdoor mosaic surfaces should be re-sealed annually to prevent water ingress.
Materials cost: $30–$60 (marine epoxy adhesive, marine grout, UV sealant)
Outdoor safe: Yes, with annual re-sealing
20. Shattered Mirror Panel Art
This is a controlled art project: break a full mirror deliberately with a hammer (safety gear on, towel method above) and keep the large pieces in their approximate original positions, mounted on a plywood backing.
Apply each large piece with strong construction adhesive, leaving visible gaps between them to emphasize the shattered pattern. Once cured, pour a thin layer of clear casting resin over the entire surface to lock pieces in place and create a flush, safe surface.
Work in a well-ventilated space when using casting resin and wear an N95 respirator. Resin fumes are irritating and can be harmful in an enclosed area. Frame and hang.
Materials cost: $25–$50 (plywood, construction adhesive, casting resin, frame)
Outdoor safe: No (resin is UV-sensitive; use indoors only)
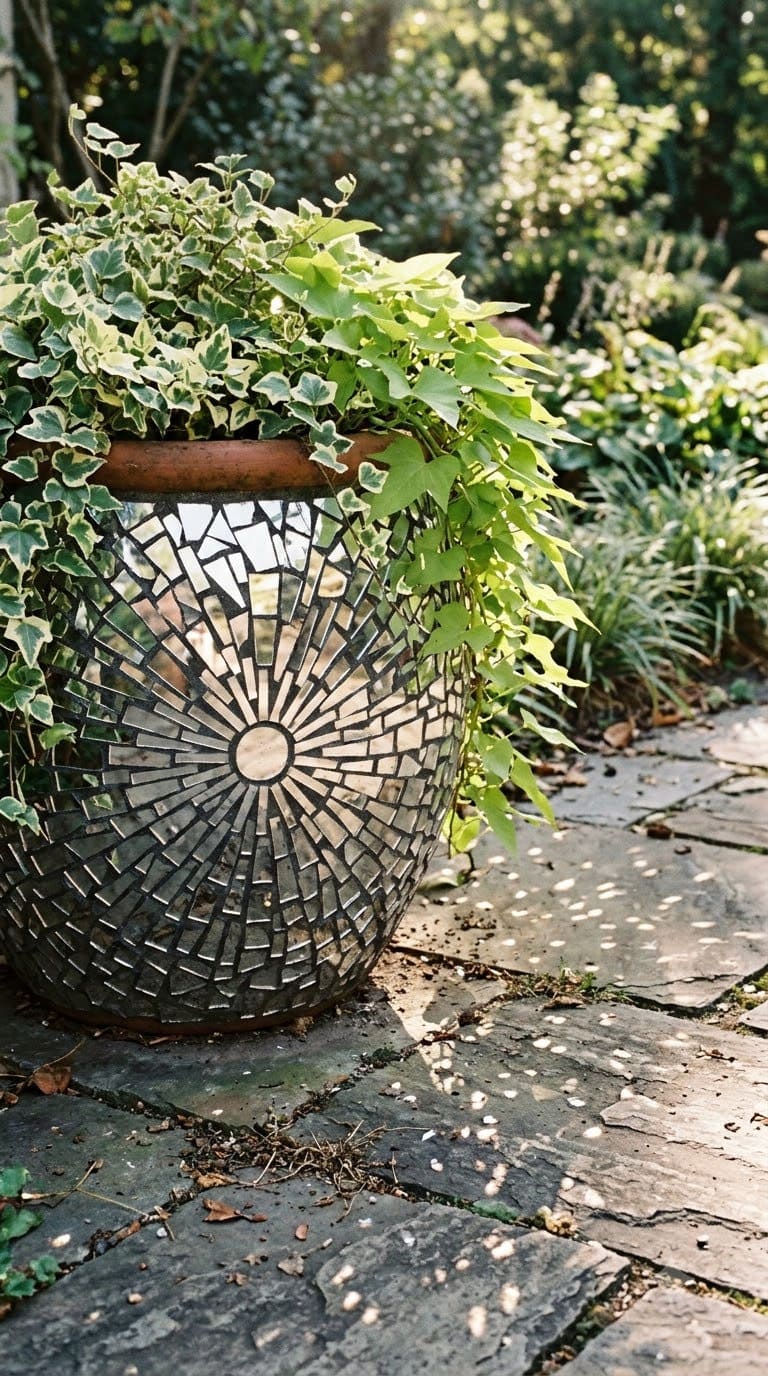
21. Mirror Mosaic Statement Planter
A large terracotta or concrete outdoor planter becomes a permanent garden feature when covered in a full mosaic. Plan an intricate design: concentric circles, a sunburst, or a repeating geometric.
Cut pieces to shape with tile nippers. Apply with marine-grade adhesive in sections, cure for 48 hours, grout with epoxy marine grout, and seal with three coats of UV-stable exterior sealant. This project takes a full weekend but produces something that will last years in the garden.
Materials cost: $30–$60 (large planter, adhesive, epoxy marine grout, sealant)
Outdoor safe: Yes, fully sealed
How to Choose the Right Adhesive and Grout
The biggest reason broken mirror mosaic projects fail outdoors is using the wrong adhesive or grout. This table shows which to use for each situation:
| Project Type | Adhesive | Grout | Sealer Needed? |
|---|---|---|---|
| Indoor frame, tray, pot | Weldbond or PVA glue | Non-sanded grout | No |
| Indoor tabletop, dresser | Weldbond or mastic adhesive | Non-sanded or sanded grout | Optional |
| Outdoor planted pot | Polyurethane construction adhesive | Marine grout | Yes |
| Outdoor stepping stone | Concrete (embedded) | N/A (concrete is the base) | No |
| Outdoor gazing ball | Marine-grade epoxy adhesive | Marine grout | Yes (2 coats) |
| Outdoor table | Marine-grade epoxy adhesive | Marine sanded grout | Yes (3 coats) |
| Wet-area bathroom accent | Silicone adhesive (no grout) | N/A (silicone only) | No |
Use non-sanded grout for gaps under 1/8 inch and sanded grout for wider gaps. For outdoor projects in freezing climates, marine grout’s added latex binder helps it withstand freeze-thaw cycles that crack standard grout.
Common Mistakes to Avoid
Using standard indoor adhesive outdoors. Weldbond and PVA are water-soluble until fully cured and remain somewhat soft when wet. Pieces bonded with these adhesives will lift off outdoor surfaces within one winter.
Skipping grout sealer. Unsealed outdoor grout absorbs moisture and cracks. Apply sealer within 72 hours of grouting and reapply annually for projects that sit in full weather.
Applying grout too thick. Thick grout covers the mirror’s reflective face and dulls the effect. Work grout into gaps with a gloved finger or small sponge, then wipe the mirror surface clean before the grout sets. This takes about 20–30 minutes with standard grout.
Skipping eye protection with tile nippers. Mirror shards cut by nippers fly off at speed. Always wear safety goggles, not just reading glasses, when using tile nippers.
Frequently Asked Questions
What can I do with broken mirror pieces?
The most common uses are mosaic art projects (frames, trays, tabletops, plant pots), garden decor (gazing balls, stepping stones, birdbath bowls), and decorative accents (suncatcher ornaments, wind chimes, candle holders). Almost any flat or curved surface can be covered with mirror mosaic using the right adhesive and grout.
Is it safe to use broken mirror pieces in DIY projects?
Yes, with proper protection. Wear heavy-duty work gloves and safety goggles at all times when handling broken mirror glass. If cutting with tile nippers, also wear an N95 or FFP2 respirator to avoid inhaling fine silver-backing dust. Keep pets and children out of the workspace until you have swept and damp-wiped all surfaces.
How do you keep broken mirror mosaic projects from falling apart outdoors?
Use marine-grade adhesive and marine grout for any outdoor project. Seal the grouted surface with an outdoor-rated grout sealer within 72 hours of grouting and reapply once a year. Projects that skip marine materials will fail within one or two freeze-thaw seasons.
What adhesive works best for broken mirror mosaic?
For indoor projects, Weldbond multi-surface adhesive is widely recommended by mosaic artists for its strong bond and easy cleanup. For outdoor projects, marine-grade epoxy adhesive or outdoor-rated polyurethane construction adhesive (such as Liquid Nails for Tile) are the correct choices. The Society of American Mosaic Artists maintains technique resources for members that cover adhesive selection by substrate and environment.
Can you put broken mirror pieces in the recycling bin?
No. Most municipal glass recycling programs do not accept mirrors. The silver-coating on the glass back contaminates the recycling stream and cannot be processed with standard window or container glass. Wrap unusable pieces in newspaper, tape the bundle closed, and place it in your regular trash with a “broken glass” label.
Conclusion
Broken mirrors have more uses than most people expect. From a beginner’s suncatcher ornament to an advanced outdoor mosaic statement planter, the 21 projects above cover every skill level and most rooms in the home plus the garden.
The key to lasting results is matching the adhesive and grout to the project environment. Indoor projects can use standard mosaic adhesives. Outdoor projects need marine-grade materials and sealed grout to survive weather. Every project benefits from working safely: gloves and goggles first, workspace swept clean when done.
Start with a mosaic picture frame or a small gazing ball to learn how grout behaves before tackling a full tabletop or outdoor planter. The technique is the same across all the projects; the scale is what changes.
Never miss an update — choose FarmFoodFamily as your preferred source on Google.
How it works: Tap the button below to open Google's settings page, then check the box next to FarmFoodFamily.
Tap the checkbox to turn it blue — that's how you know it's set.






An actual tutorial would be nice. I would like to use the idea of covering the chest drawers. But how do I do that and not cut myself to pieces when I open the drawers or brush up against it.