15 Amazing Halloween Lip Art Designs, From a Third Eye to Lips on Fire
You can turn your lips into a canvas with a liner, a thin brush and a steady hand, as long as you use lip-safe color and take it all off before bed.

Never miss an update — choose FarmFoodFamily as your preferred source on Google.
How it works: Tap the button below to open Google's settings page, then check the box next to FarmFoodFamily.
Tap the checkbox to turn it blue — that's how you know it's set.
You can turn your lips into a canvas with a liner, a thin brush and a steady hand, as long as you use lip-safe color and take it all off before bed.
Products We Recommend
This post contains affiliate links. We may earn a commission on qualifying purchases at no extra cost to you.

12-Piece Brown Tone Lip Liner Pencil Set, Assorted Colors
Liner pencils for outlines and fine lines. Keep them sharp, and use products made for lips.
Shop Now
Aquaphor Lip Repair Ointment, .35 fl. oz. Tube
A lip balm for the prep step. Apply it for a few minutes, then blot before the base color.
Shop Now
e.l.f. SKIN Holy Hydration! Makeup Melting Cleansing Balm, 2 oz
A cleansing balm to take off dark lip color the same night. Hold it on the lips, then wipe with a soft cloth.
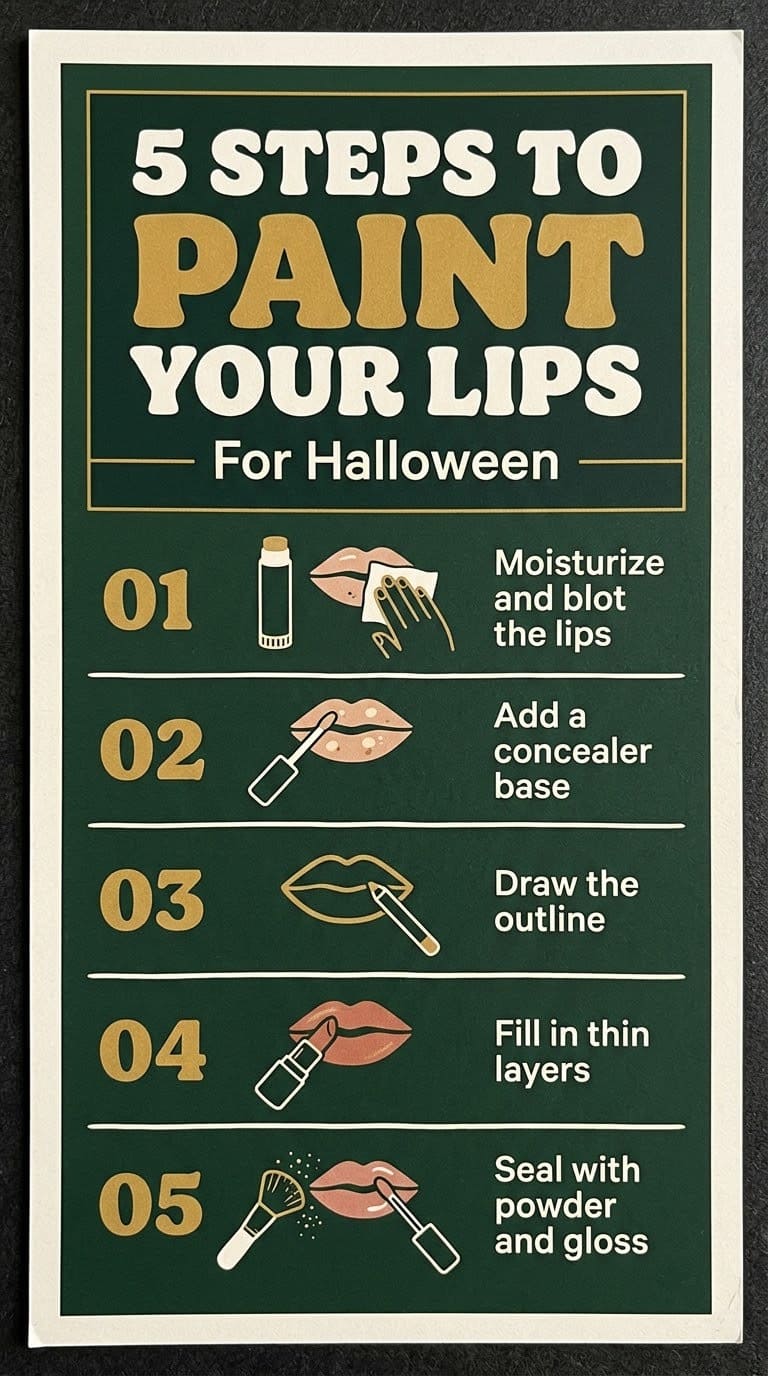
Shop NowHalloween lip art is easy if you work in layers. Start with a smooth, moisturized lip, then add a base color, then the detail with a thin brush or a liner pencil.
Seal the design with a light dusting of powder and a clear lip gloss. Most designs take 15 to 30 minutes, so you can finish before the party starts.
Color safety comes first. The FDA says face paints and other cosmetics must use color additives approved for cosmetic use, and approval covers how each color may be used. Test new products on your arm for a couple of days before you wear them.
This guide gives 15 designs sorted by skill, with the steps, a pairing, a watch-out and our verdict on each. It also covers tools, prep, safe removal and a plan for the night of the party.
What Is Wrong With a Plain List of Halloween Lip Designs?
Most lists show 15 photos from makeup artists and nothing else. They don’t tell you what to buy, how to prep the lips or how to take the color off.
We kept the best 15 designs and added the how-to. Each one has a short plan, a risk to avoid and our honest verdict. Then we added the tool list and the safety rules.
What Tools Do You Need?
You need a handful of cheap tools. Most are in a makeup bag already.


| Tool | Use it for | Skill level |
|---|---|---|
| Lip balm | Smooth base before color | Beginner |
| Concealer or foundation | A blank canvas that hides your natural lip color | Beginner |
| Lip liner pencils | Outlines and fine lines | Beginner |
| Thin detail brush | Small shapes, veins, drips | Intermediate |
| Cotton swabs | Fixing mistakes | Beginner |
| Translucent powder | Setting the base layer | Beginner |
| Clear lip gloss | Wet, shiny finish | Beginner |
Our rule: use products made for lips. Don’t use craft paint or marker on your mouth.
How Do You Prep and Seal Lips?
Good prep makes the design last. Apply lip balm for a few minutes, then blot it. Dab a thin layer of concealer over the whole lip.
Dust a little translucent powder over the concealer. Draw your outline with a liner pencil, then fill in with color. Seal with a thin layer of clear gloss, only on the parts that should shine.
Our rule: work in thin layers. Thick color cracks when you talk.
Easy Lip Art Designs
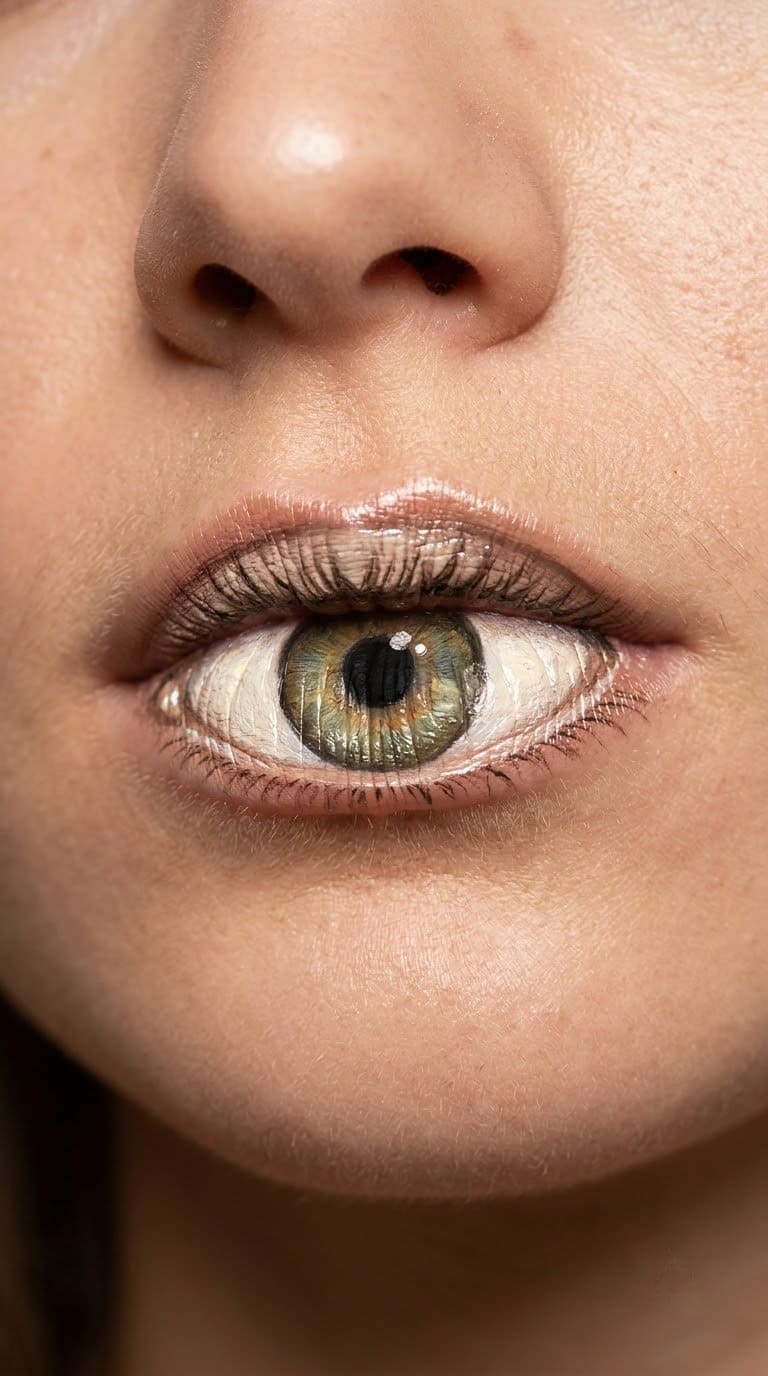
1. The Third Eye
Cover the lips with a skin-tone base. Draw a large eye shape across both lips with black liner. Fill the center with a white or colored iris and a black pupil.
Pair with: dark, smoky eye makeup around the eyes.
But watch out: the shape stretches when you talk. Draw it with your mouth slightly open and relaxed.
Our take: the most talked-about design on this list. It works best in photos.
Liner pencils for outlines and fine lines. Keep them sharp, and use products made for lips.
Shop NowThis post contains affiliate links. We may earn a commission on qualifying purchases at no extra cost to you.
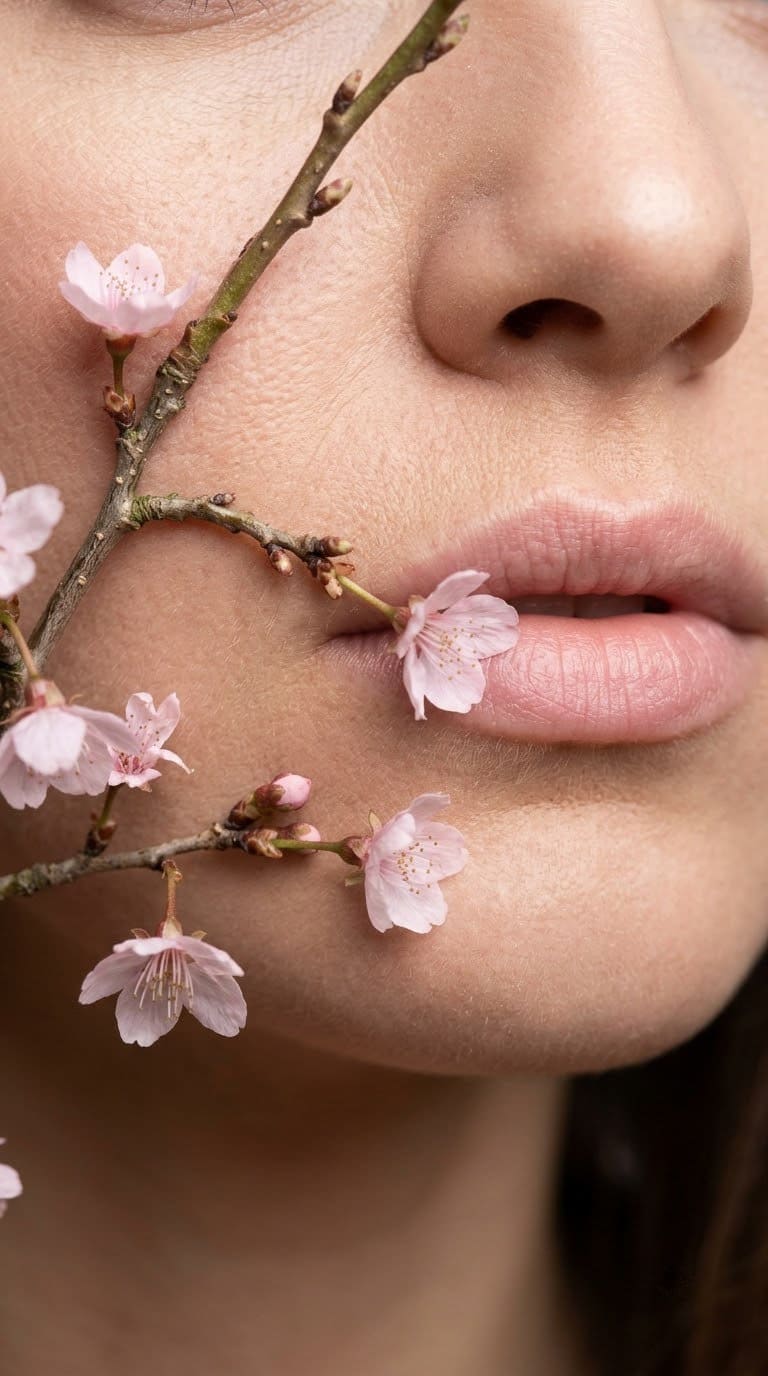
2. The Cherry Tree
Paint the lips pale pink as a base. Draw a thin brown branch across the upper lip with a detail brush. Dot pink and white blossoms along it.
Pair with: a floral crown or soft pink eyeshadow.
Watch out: tiny dots blur if the base is wet. Let each layer dry for a minute.
Our take: our softest look. It’s pretty rather than scary, which suits a fairy costume.
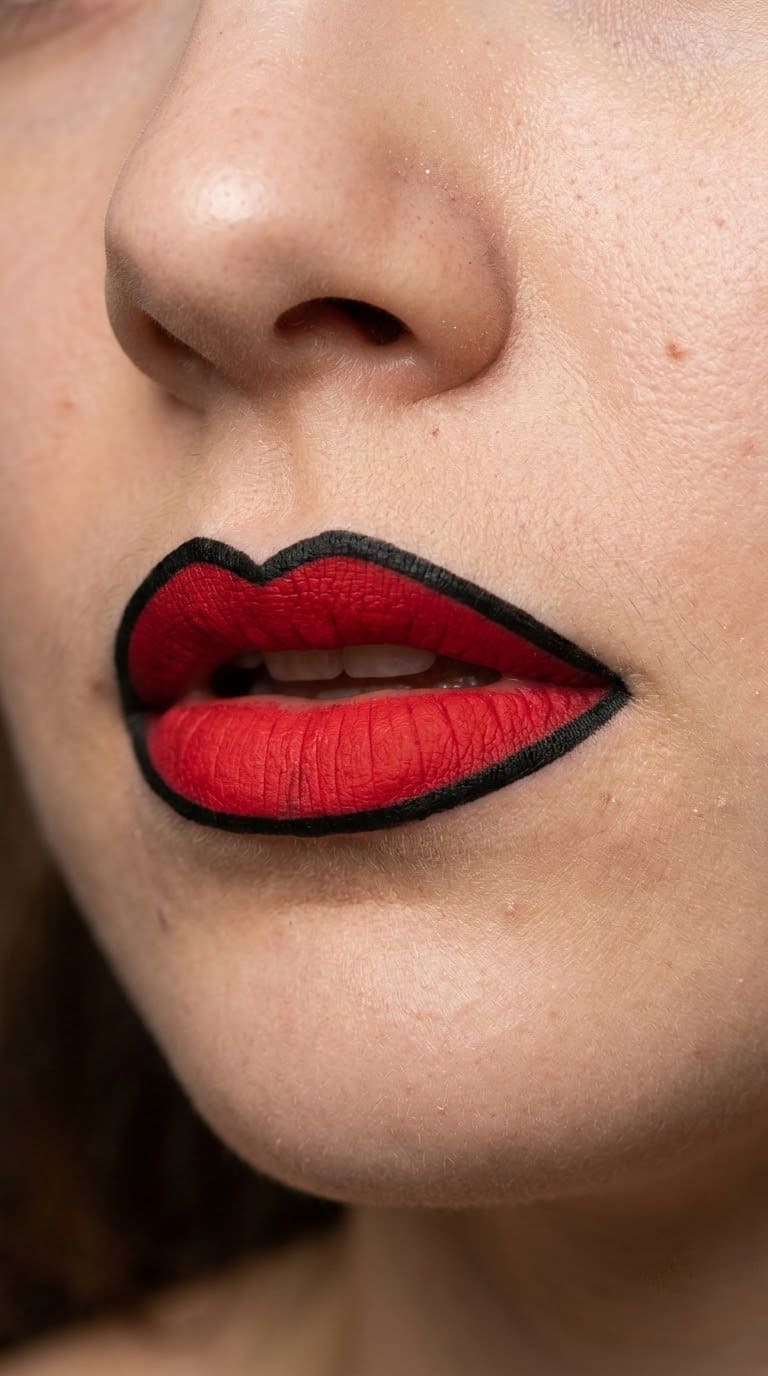
3. Cartoon Lips
Outline the lips with a thick black liner, like a comic book panel. Fill with a flat bright color. Add a white highlight dot and a small shine line.
Pair with: bold cat-eye liner and a pop of blush.
But watch out: thick lines look smudged on a dry lip. Moisturize first and blot.
Our take: the easiest design here. Pick red or yellow for a loud, fun look.

Intermediate Lip Art Designs
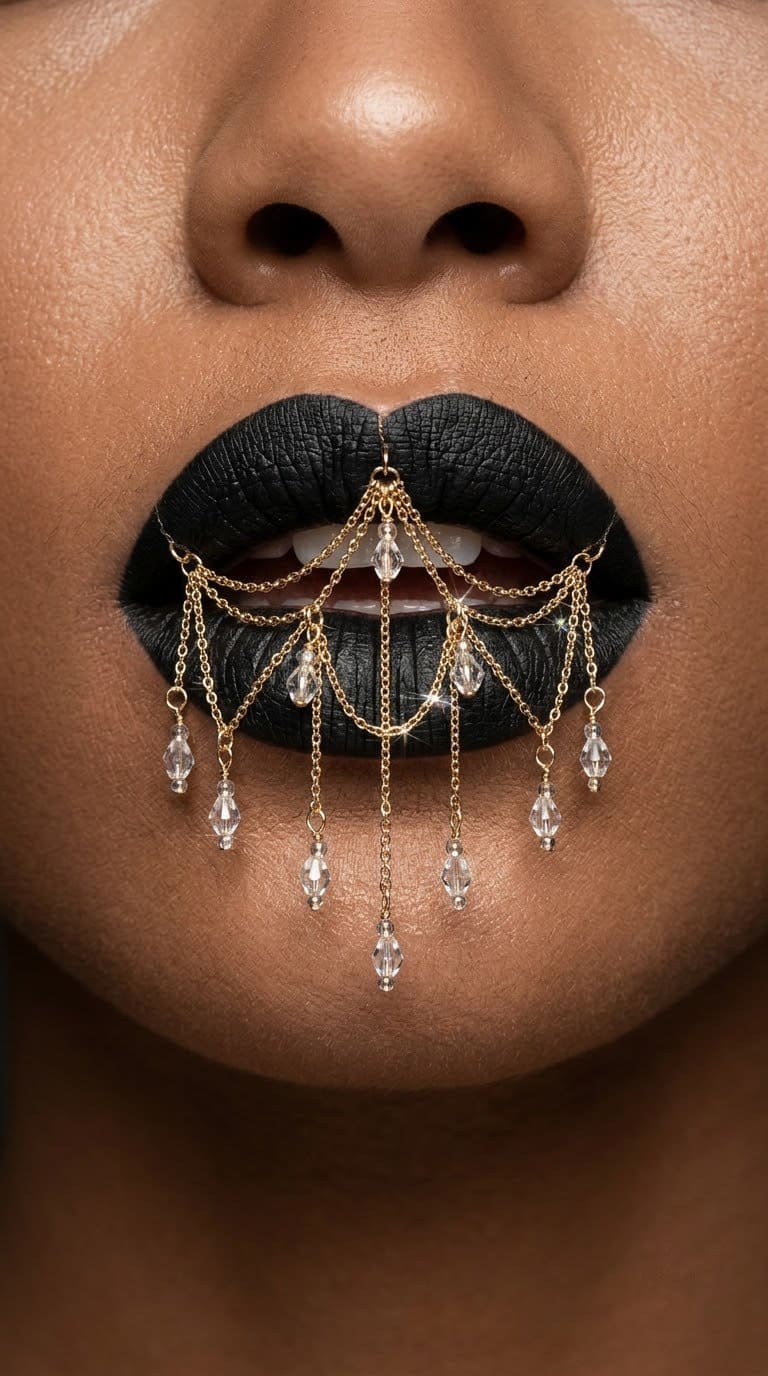
4. A 3D Chandelier
Fill the lips with black. Draw gold chains hanging down from the upper lip with a metallic liner. Add tiny crystal shapes at the ends with white and silver.
Pair with: a black lace costume.
Watch out: metallic color can feel heavy. Use thin lines and keep the drops small.
Our take: the most glamorous look. The black base makes the metal pop.
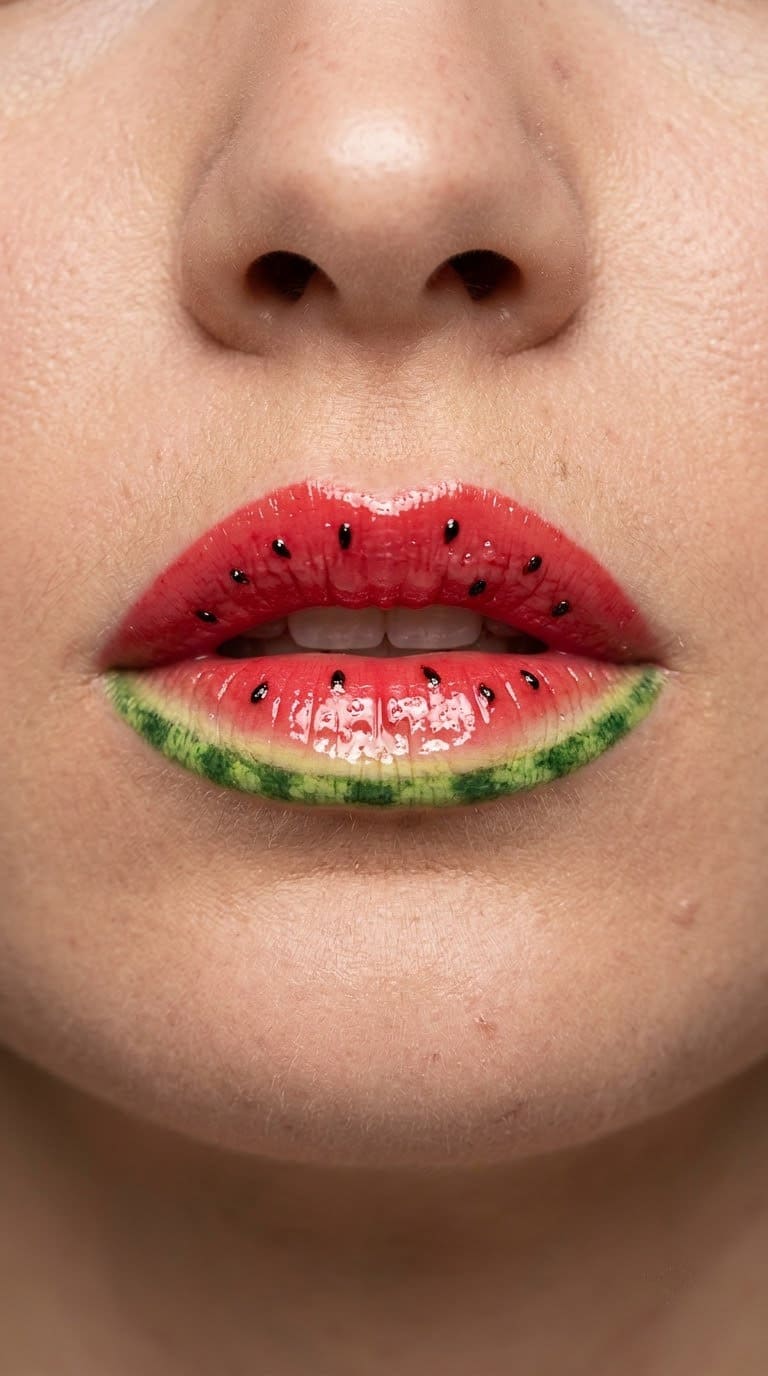
5. Sweet and Juicy Watermelon Lips
Paint the lower lip green with a pale rind line. Fill the upper lip with pink or red and dot black seeds. Add a bit of clear gloss for the juicy shine.
Pair with: a bright summer-style makeup look.
But watch out: seeds look like dirt if they’re too large. Use a tiny brush and keep them small.
Our take: a fun pick for a food costume. It’s cute, and it gets compliments.
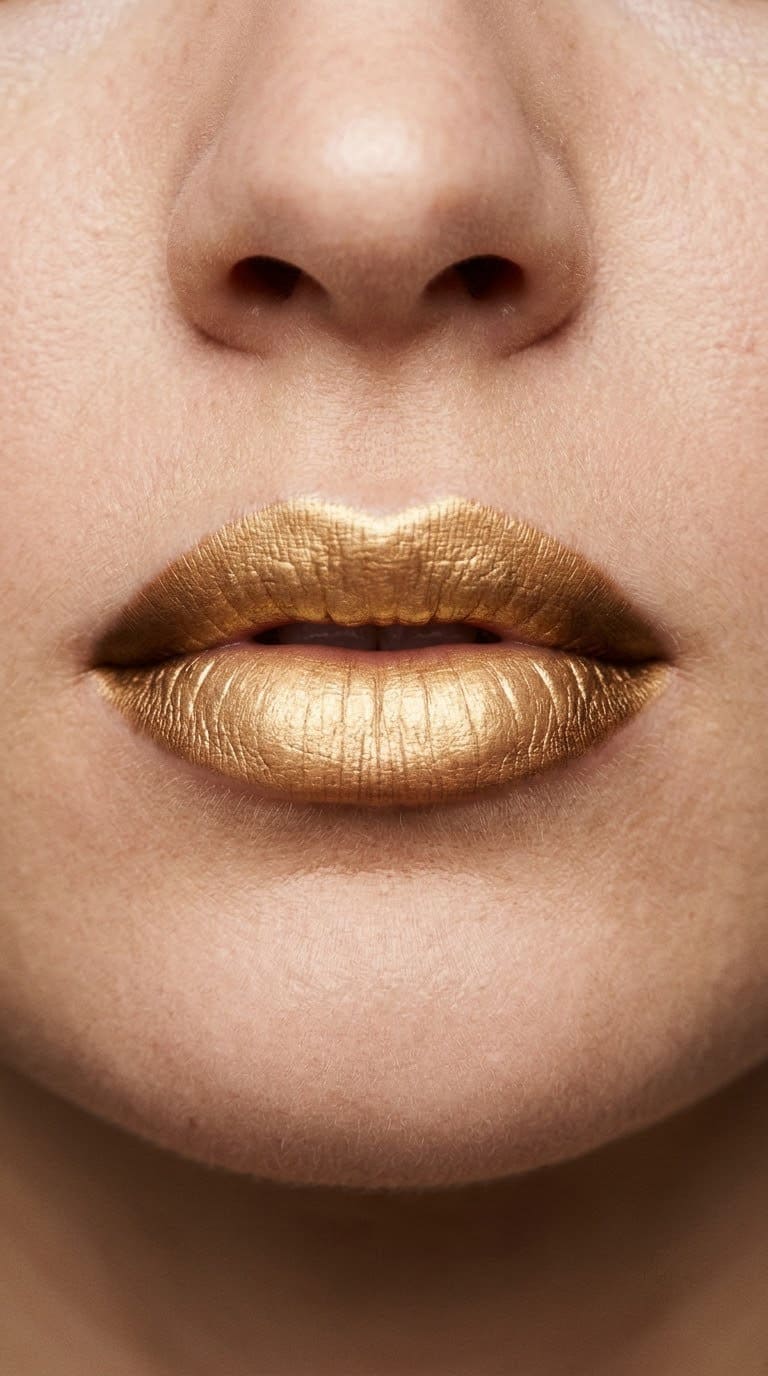
6. Lips of Gold
Cover the lips with a skin-tone base. Press gold pigment on top with a damp brush. Add a thin line of darker gold at the corners for depth.
Pair with: gold eyeshadow and a gold chain necklace.
Watch out: loose glitter can slip into the mouth. Use a lip-safe metallic product and seal it.
Our take: one of the quickest glam options. It suits a goddess or a statue costume.
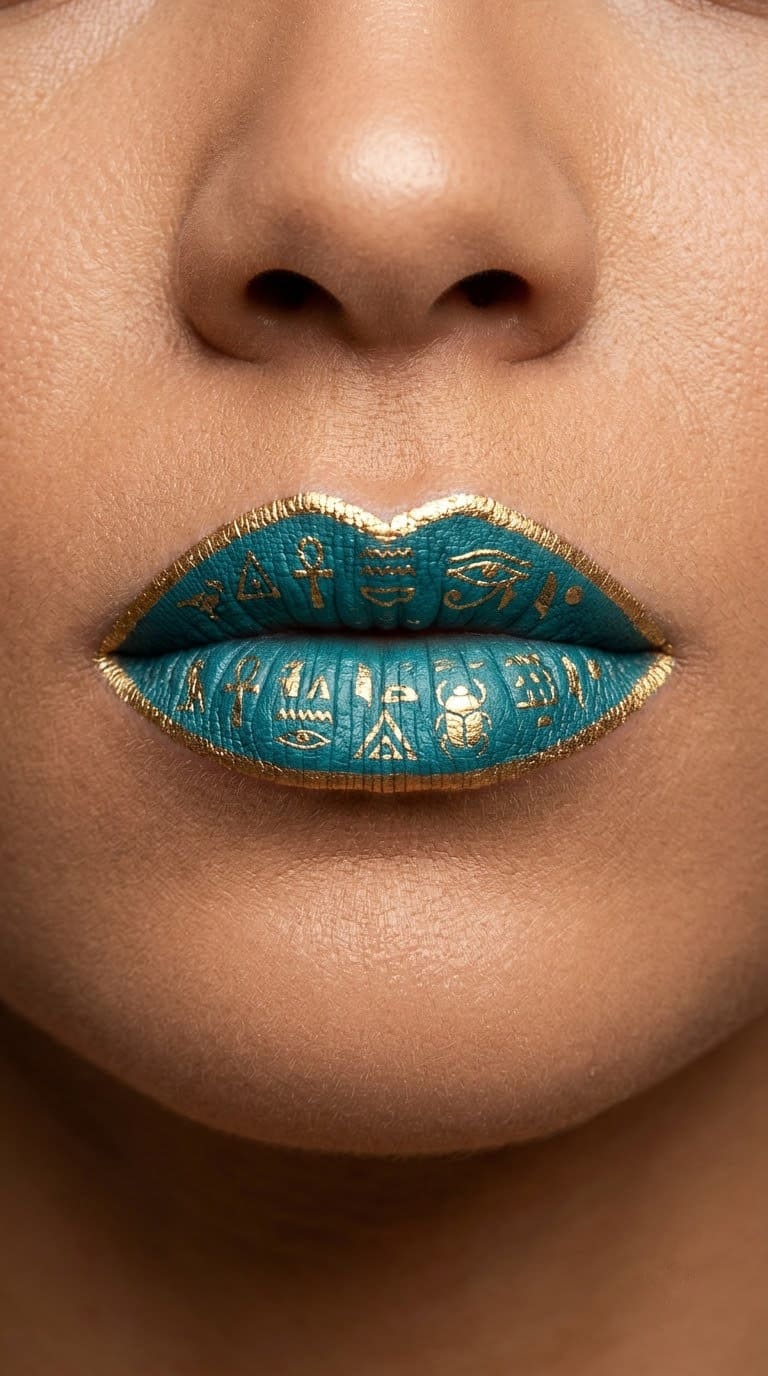
7. Egyptian Lips
Paint the lips deep turquoise or lapis blue. Draw gold hieroglyph shapes along the center with a thin brush. Outline the edges with a gold liner.
Pair with: a winged eyeliner and a gold collar.
But watch out: detail work needs a steady hand. Rest your elbow on a table.
Our take: it looks great with a pharaoh look. Pick three symbols and repeat them.
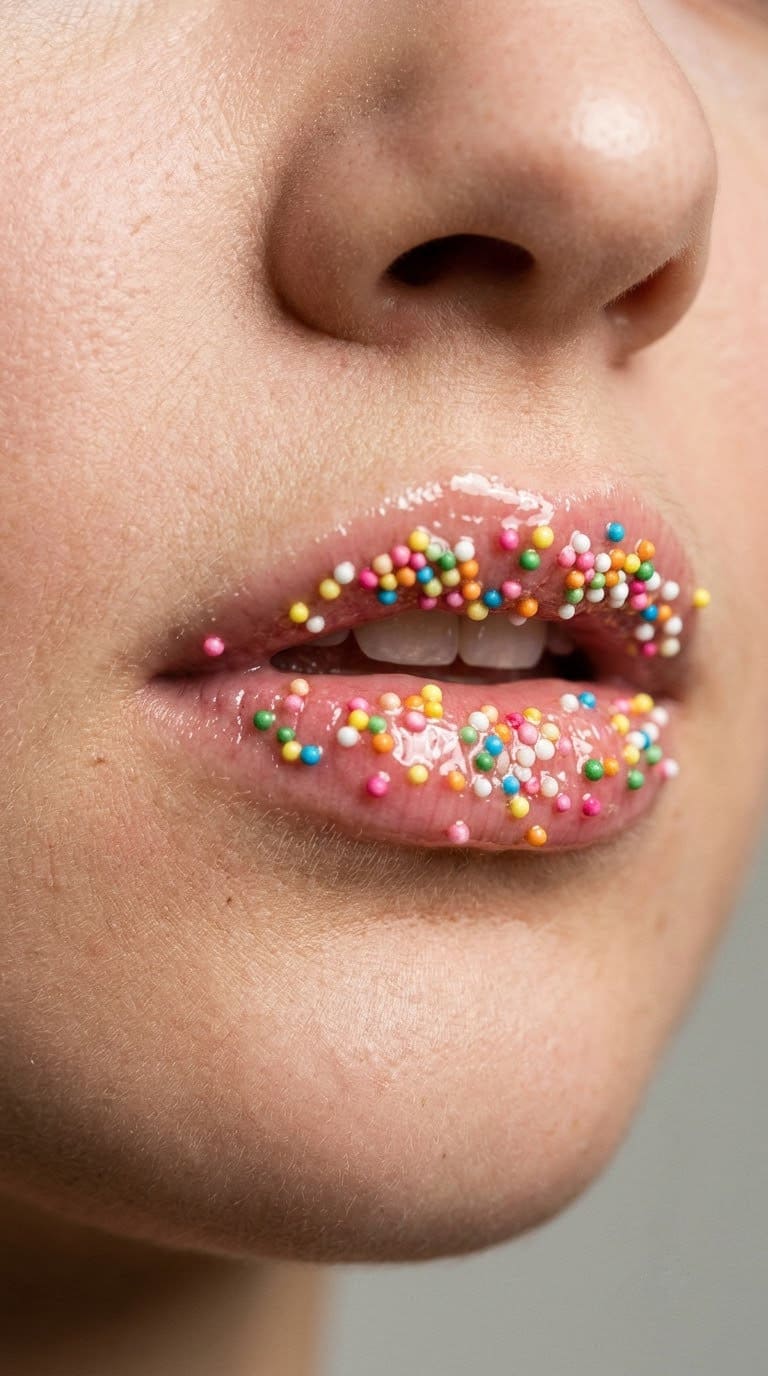
8. Lips of Sweet
Fill the lips with a candy color like pink or mint. Add tiny dots as sprinkles, using white, yellow and blue. Finish with a high shine gloss.
Pair with: pastel eyes and braids.
Watch out: sprinkles can smear on glossy color. Add the gloss last.
Our take: a cute look for a candy costume. It’s easy for beginners.
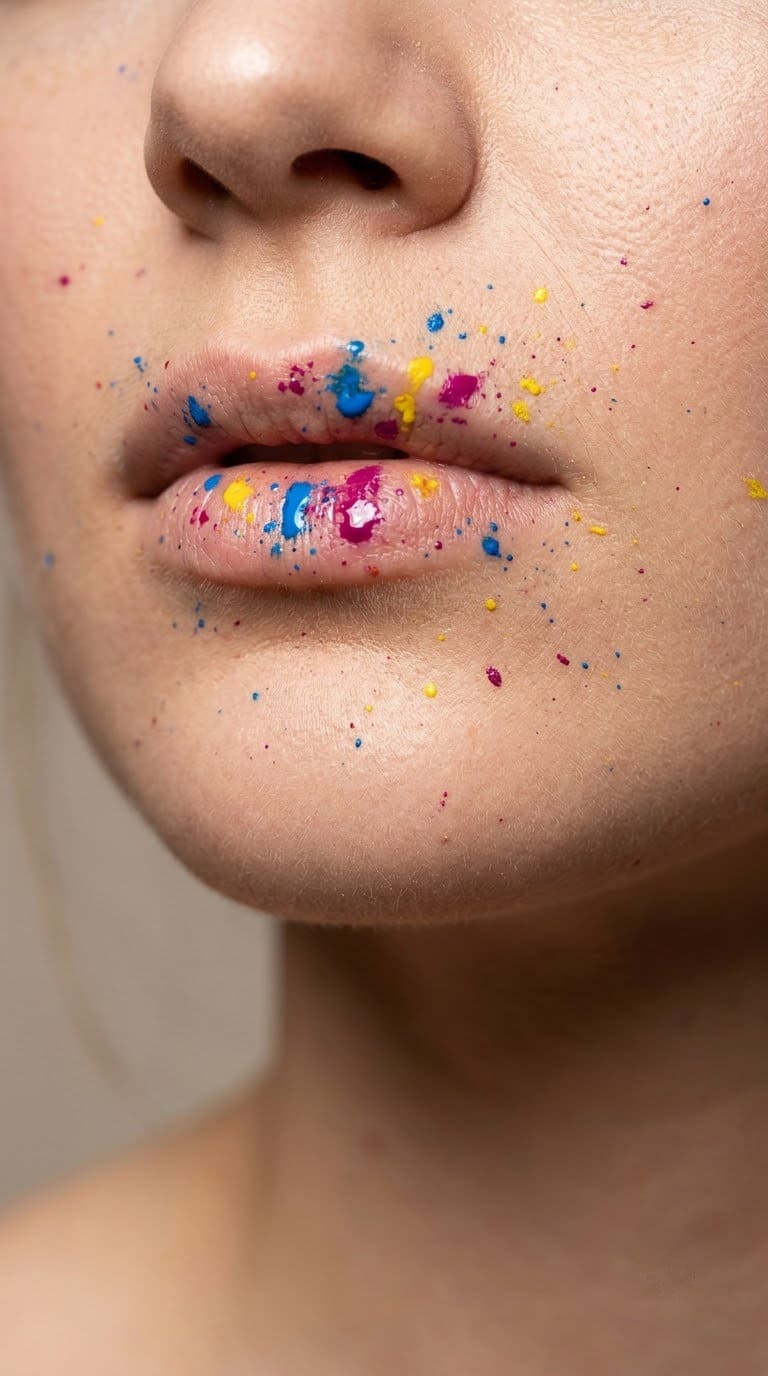
9. Paint Stain
Draw the lips in a plain nude, then dab bright color splashes over them. Use a sponge for soft edges and a brush for sharp drips. Add a few specks across the chin.
Pair with: a paint-splattered smock.
But watch out: color splashes near the mouth can end up inside it. Keep them on the outside edge.
Our take: our favorite for an artist costume. It looks messy on purpose.
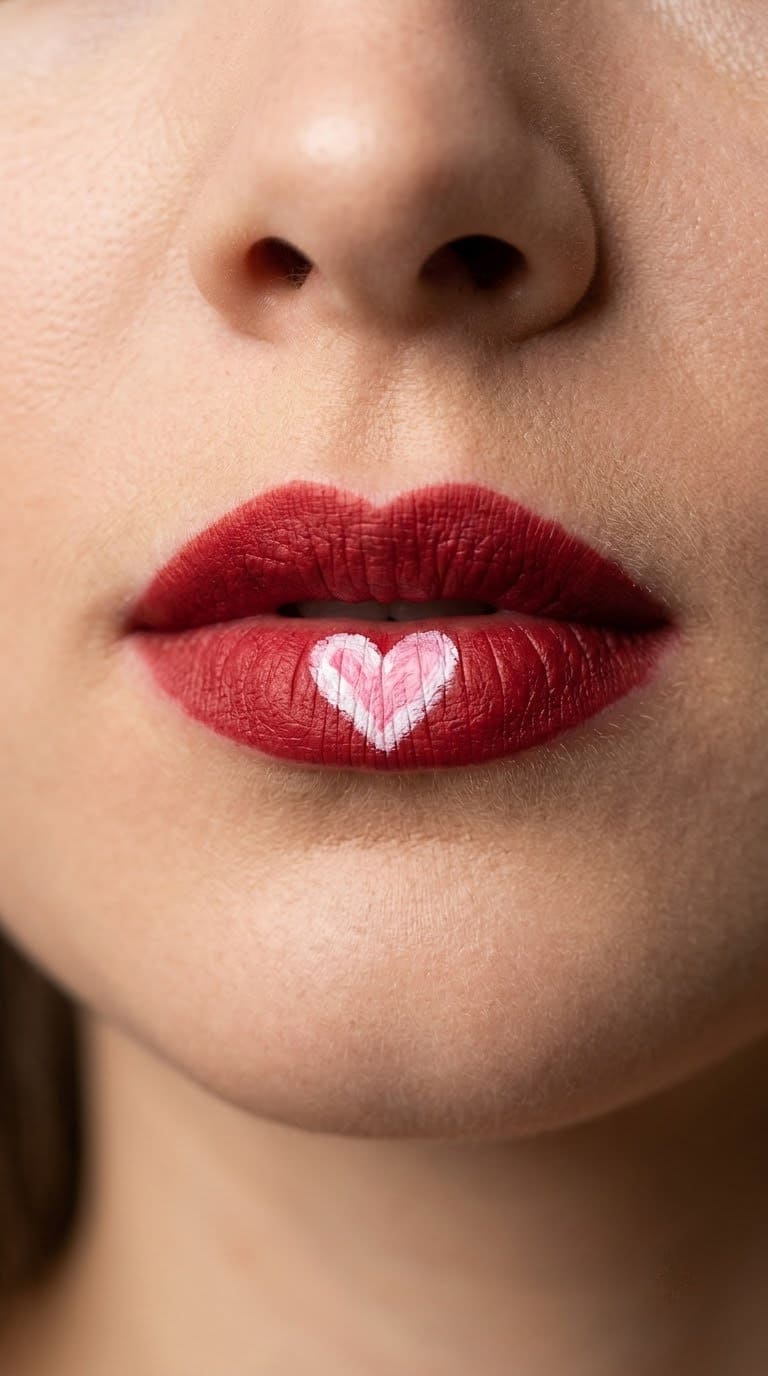
10. Lips of Heart
Paint the lips with a deep red base. Outline a small heart in the center with white liner. Fill the heart with a lighter pink.
Pair with: pale skin and soft curls.
Watch out: the heart must be centered. Mark the middle with a dot first.
Our take: a sweet pick for couples. It also works for a vampire in love.
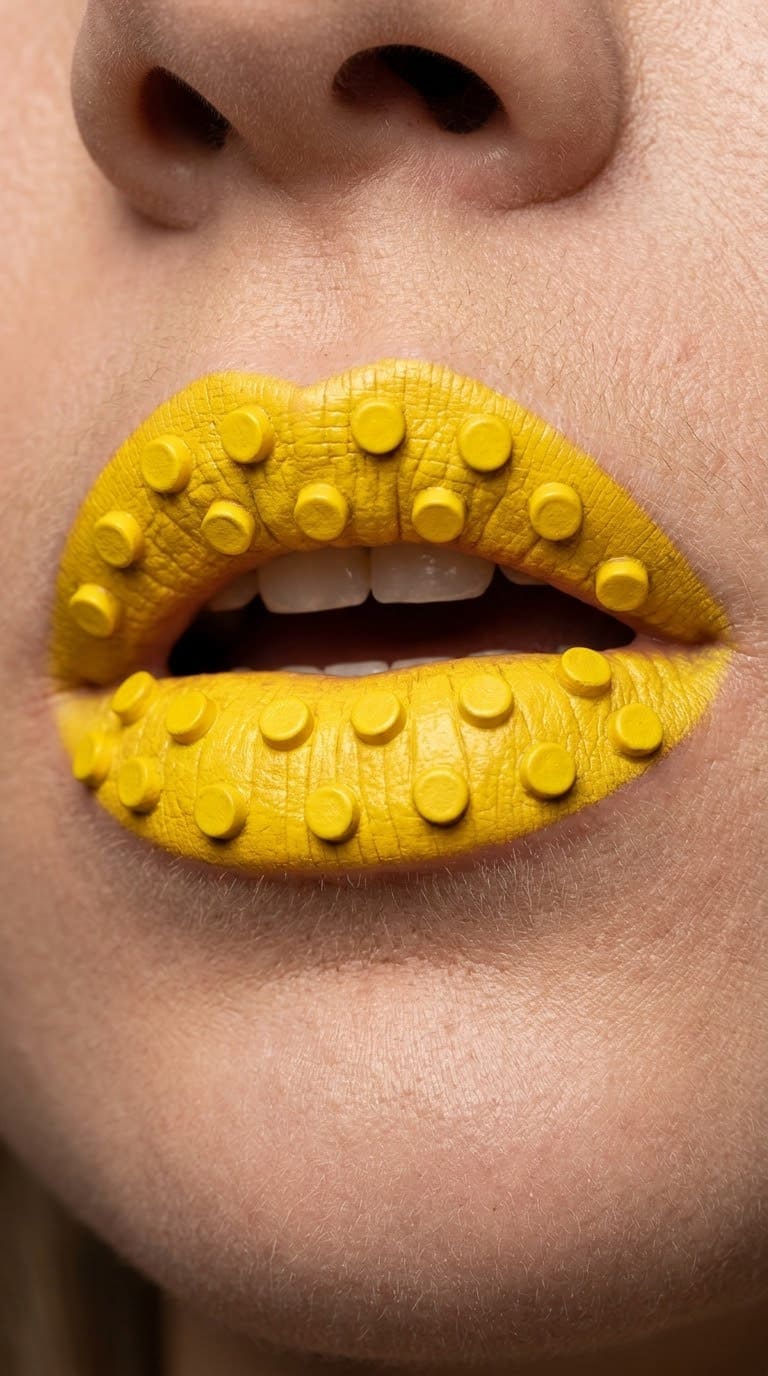
11. Lego Lips
Paint the lips in a bright block color like red or yellow. Draw tiny round studs along the upper lip with a lighter shade. Add a dark line below each stud for depth.
Pair with: a blocky costume or bright eyeshadow.
But watch out: round studs look flat without shade. Add a thin shadow on one side.
Our take: a clever idea for a toy theme. Kids love it.
Advanced Lip Art Designs
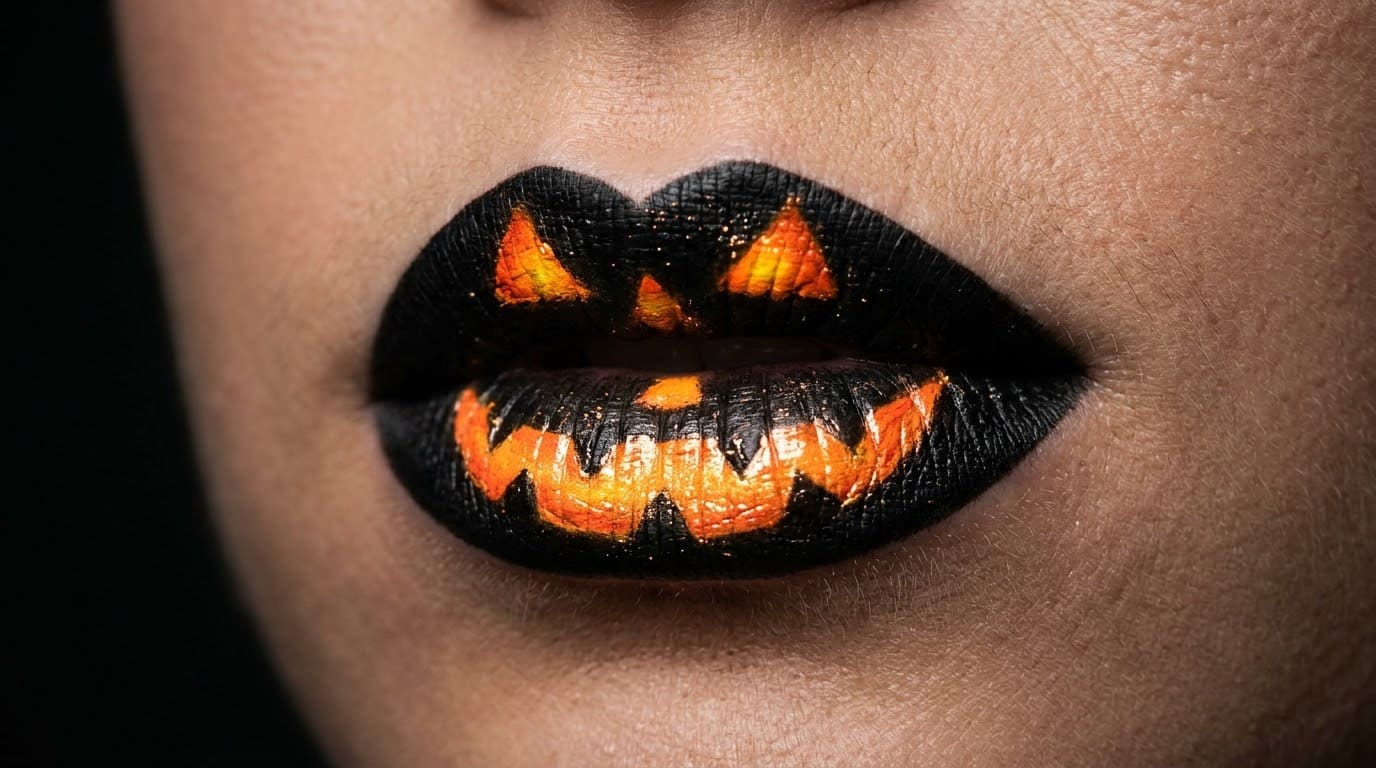
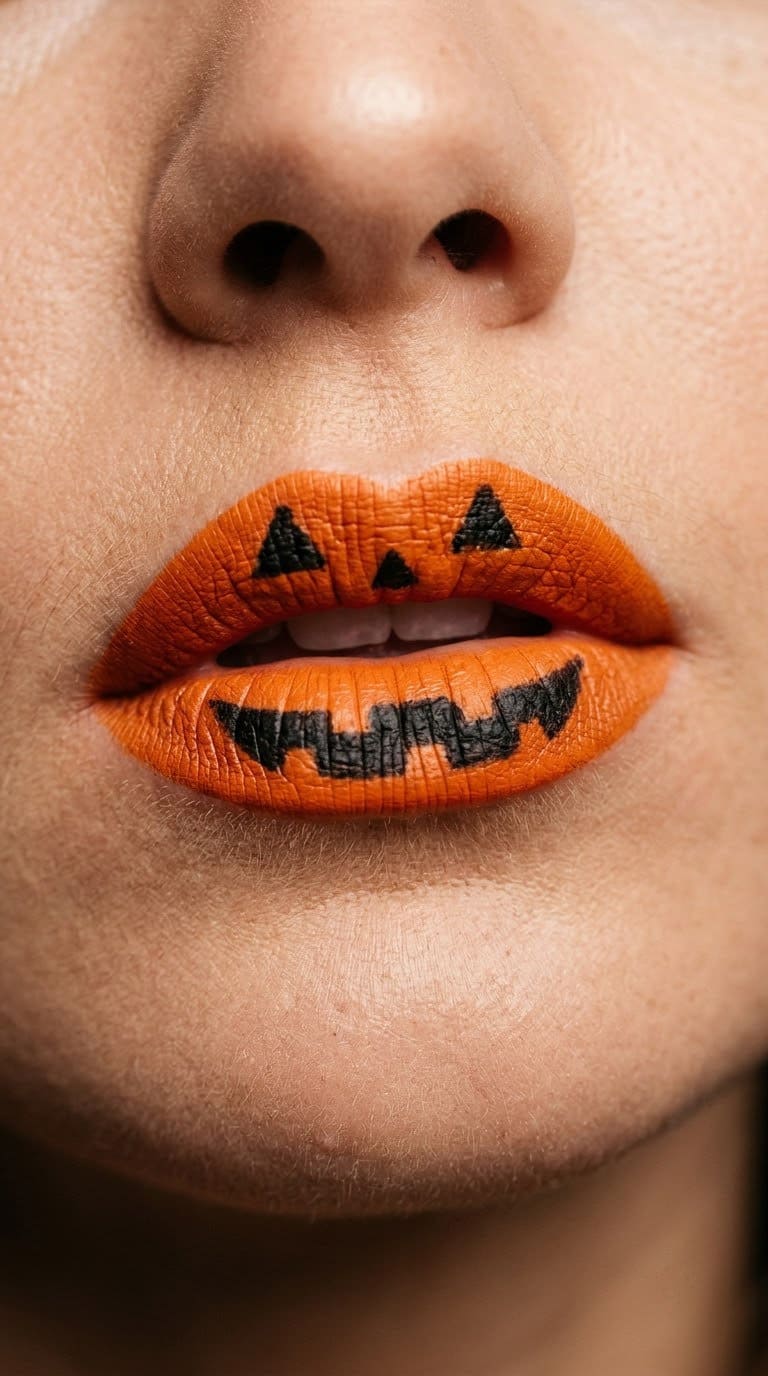
12. Pumpkin
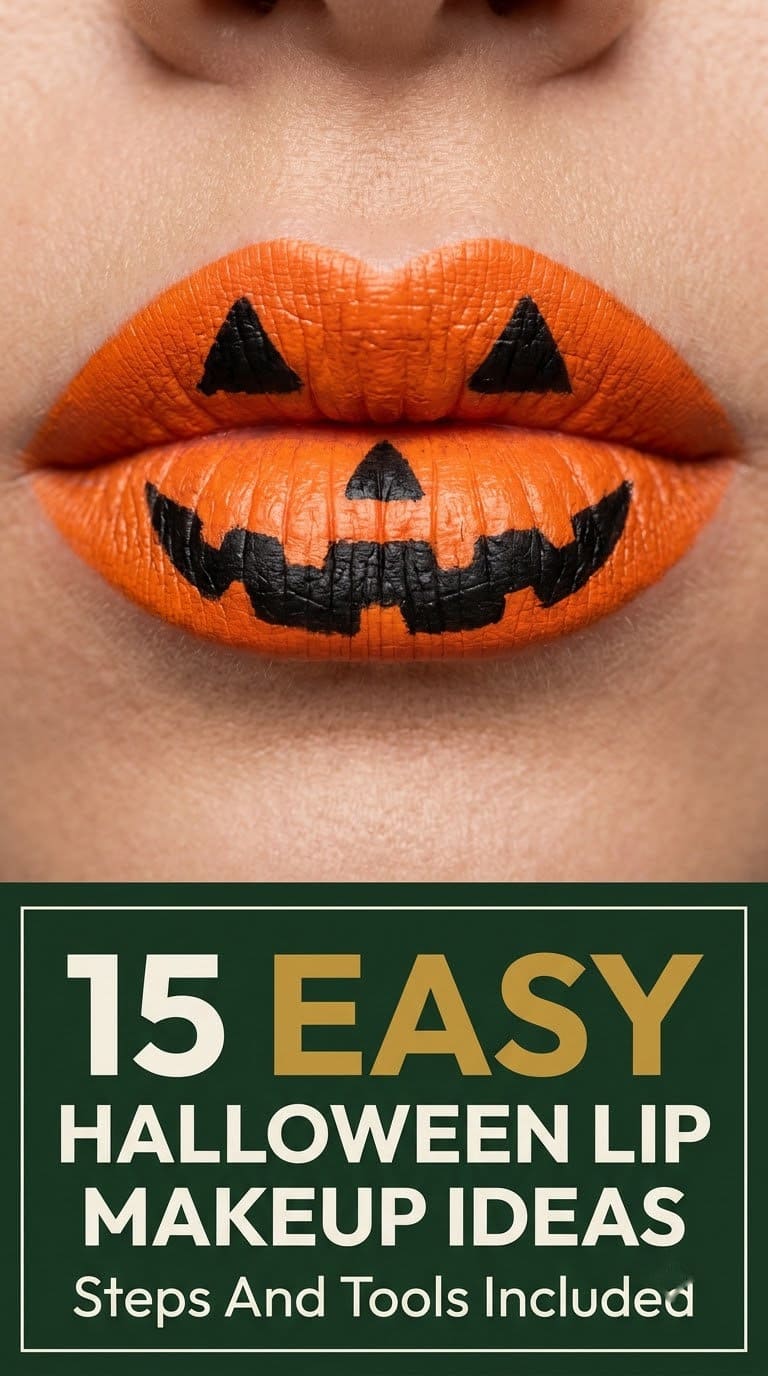
Paint the lips bright orange. Draw a jack-o’-lantern face with black liner. Use two triangle eyes above and a jagged mouth across the lips.
Pair with: a green stem on the chin, drawn with eyeliner.
Watch out: black on orange needs a sharp point. Keep your liner pencil sharp.
Our take: the most “Halloween” design here. It always gets a smile. For ideas to match, see our scariest Halloween makeup ideas.
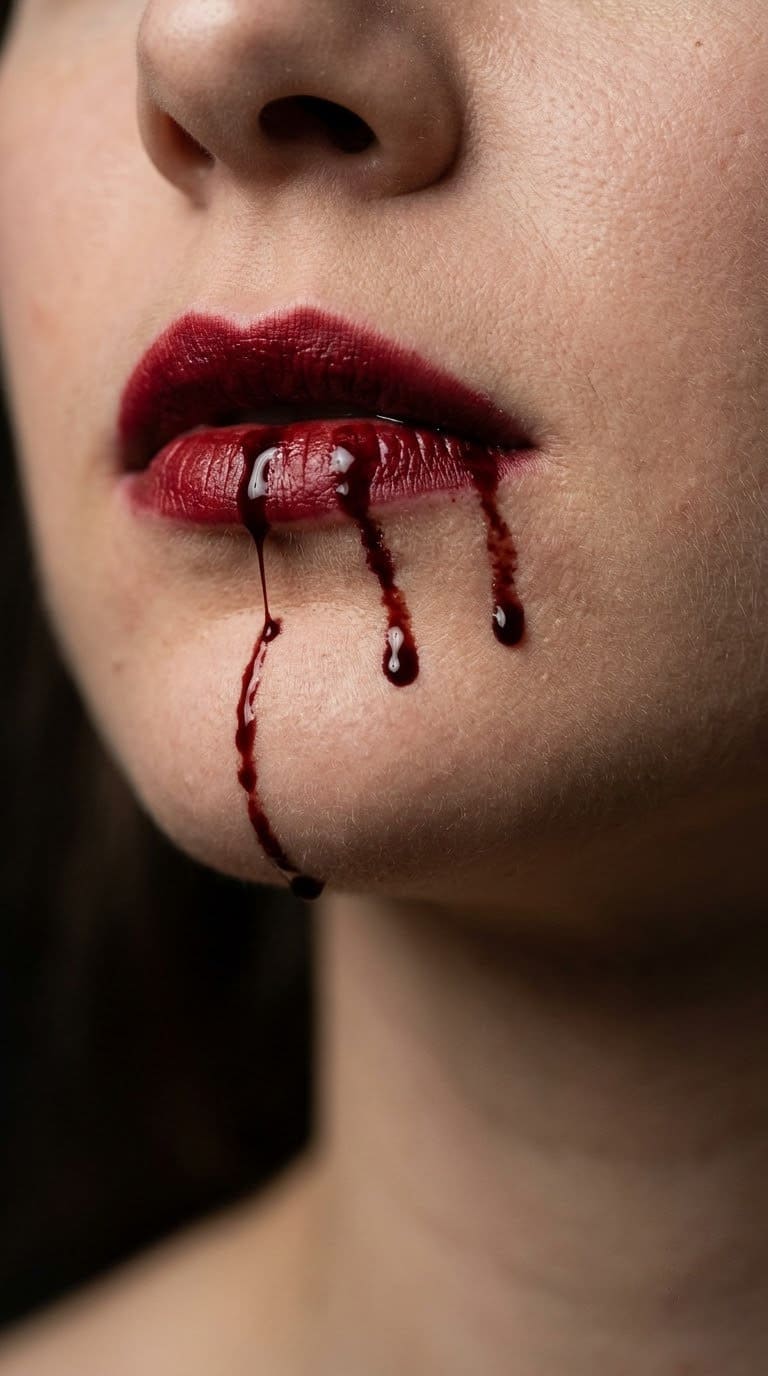
13. Drops of Blood
Paint the lips deep red and add a dark red outline. Pull thin drips down from the lower lip with a detail brush. Add a drop of clear gloss on each drip tip.
Pair with: a pale base and dark eyes.
But watch out: drips run if the base is wet. Wait for the red to set.
Our take: our top pick for vampire looks. Use a dark red, not a bright one, for a natural look.
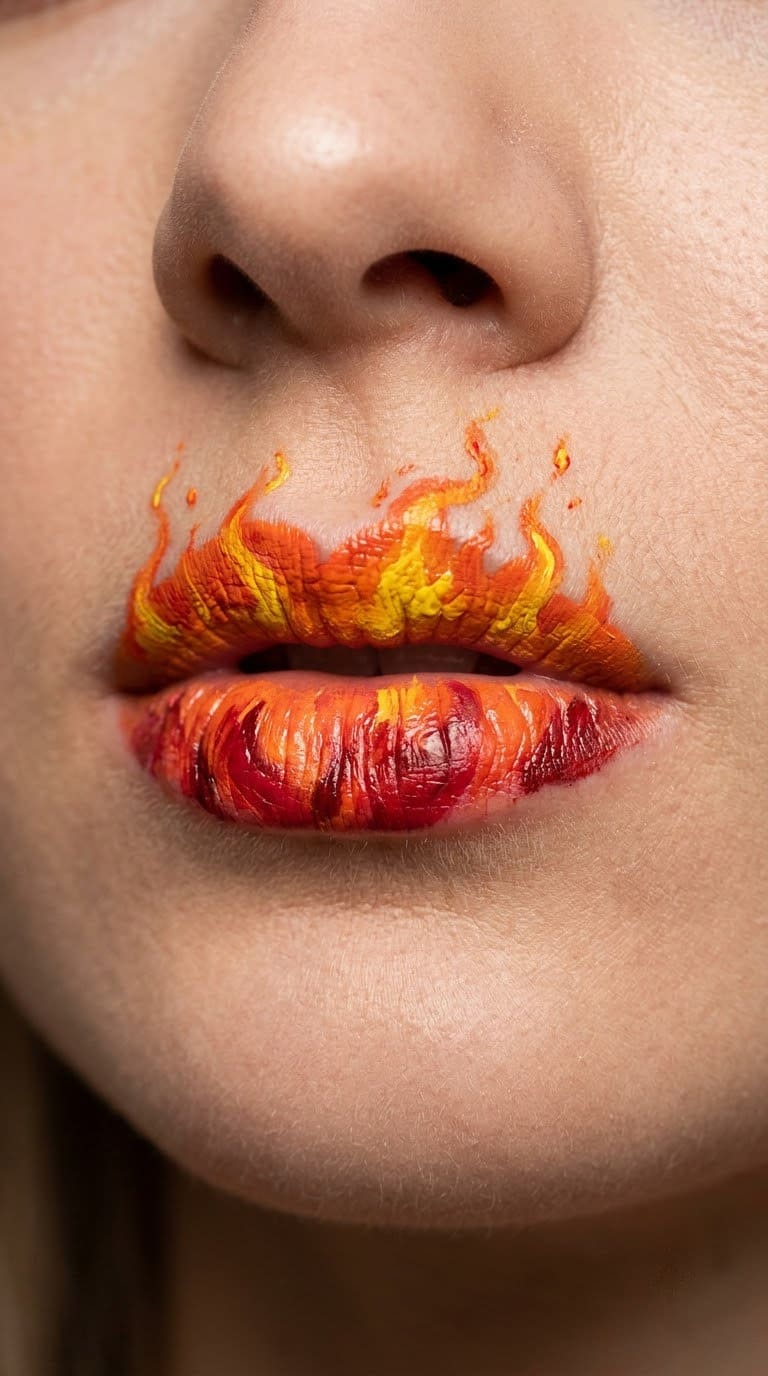
14. Lips on Fire
Use orange in the center, red in the middle and yellow at the edges. Blend with a small brush to make flames. Draw sharp tips that curl upward.
Pair with: a red and orange smoky eye.
Watch out: blended color turns muddy. Keep the colors in clean bands.
Our take: the most dramatic design. The flames look best in a dim room.
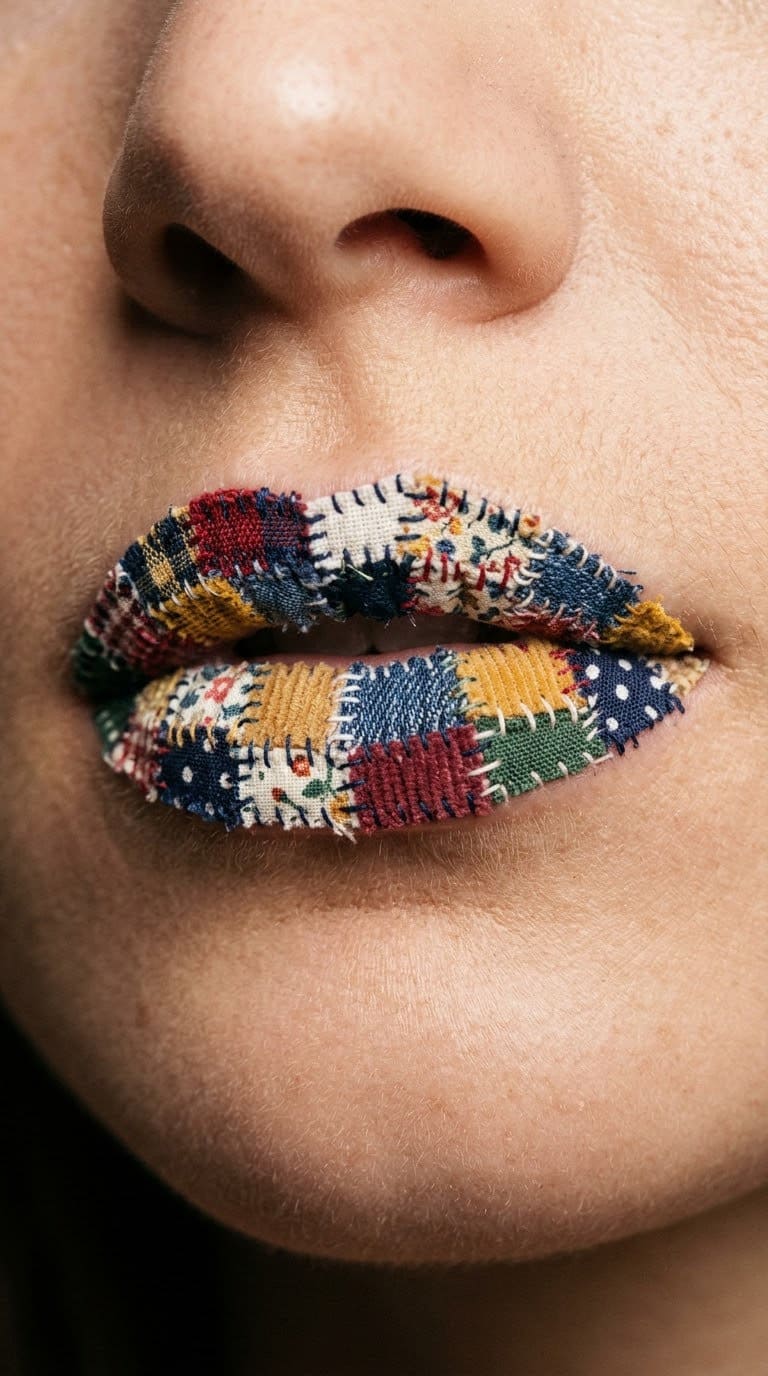
15. Lips With Patches
Paint the lips in a neutral tone. Draw small stitched squares like fabric patches in different colors. Add thin stitch lines with a dark liner.
Pair with: a ragdoll costume.
But watch out: small squares need a careful hand. Mark them with a pencil dot first.
Our take: a quirky pick for a doll or scarecrow. It’s easy to build one square at a time.
How Do You Keep Lip Art Safe?
Lips are not skin like the rest of your face. You eat, lick and talk, so color gets inside. Choose products made for lips.
Read the ingredient list for color names and compare them with the Summary of Color Additives on the same site. A color missing from the list suggests the product doesn’t meet legal requirements. Discard any product with a strong bad smell, because it may be contaminated.
Don’t share lip products or brushes. Wash your tools with soap and water before and after. If you get a rash, itching or swelling, stop and talk to a doctor.
Our rule: if you aren’t sure a color is safe for lips, don’t use it.
How Do You Remove Lip Art Safely?
Take it off the same night. Wipe the lips with a cleansing balm or a makeup remover. Use a soft cloth and don’t scrub.
Follow the label on the product. Don’t sleep in makeup. Finish with lip balm to calm the skin.
Our rule: soak a cotton pad in remover and hold it on the lips for ten seconds. This loosens dark color without rubbing.
What Is a Plan for the Party?
Pace the work so you aren’t rushing.
Plan:
- A few days before, test your products on your arm.
- The day before, practice your design on paper or your hand.
- On the night, moisturize and blot your lips.
- Add base, outline, detail and a light powder dusting.
- Seal with gloss, and take a photo before you leave.
What Will It Cost, and How Long Will It Take?
Prices vary by store and region, so use these tiers.
| Tier | What it covers | Typical time |
|---|---|---|
| Free to cheap | Makeup you own, a liner and a cotton swab | 15 to 30 minutes |
| One session | Lip-safe pigments, a detail brush, a set of liners | About an hour |
| Bigger project | A full costume makeup look, with eyes and face | A few hours |
Start with the cheap tier. For a full look, see our Halloween costumes for adults.
Common Mistakes to Avoid
Skipping the lip prep. Dry lips crack under color.
Using craft paint. Choose products made for lips.
Using a bright red for blood. Dark red looks more real.
Sharing lip products. Use your own, and clean your brushes.
Sleeping in the makeup. Take it off the same night.
FAQ
What makeup can I use on my lips for Halloween? Use lip-safe liners, lipsticks and pigments made for lips.
How do I make lip art last? Use a concealer base, a light powder and a thin layer of gloss.
How do I remove lip art? Use a cleansing balm and a soft cloth, then follow with lip balm.
Can I use face paint on my lips? Check the label. Use only products meant for lips.
What if I get a reaction? Stop, remove the product and see a doctor if it doesn’t clear up.
Related Posts
Never miss an update — choose FarmFoodFamily as your preferred source on Google.
How it works: Tap the button below to open Google's settings page, then check the box next to FarmFoodFamily.
Tap the checkbox to turn it blue — that's how you know it's set.