20 DIY Flower Pot Ideas to Paint, Wrap and Make, With Plain Steps
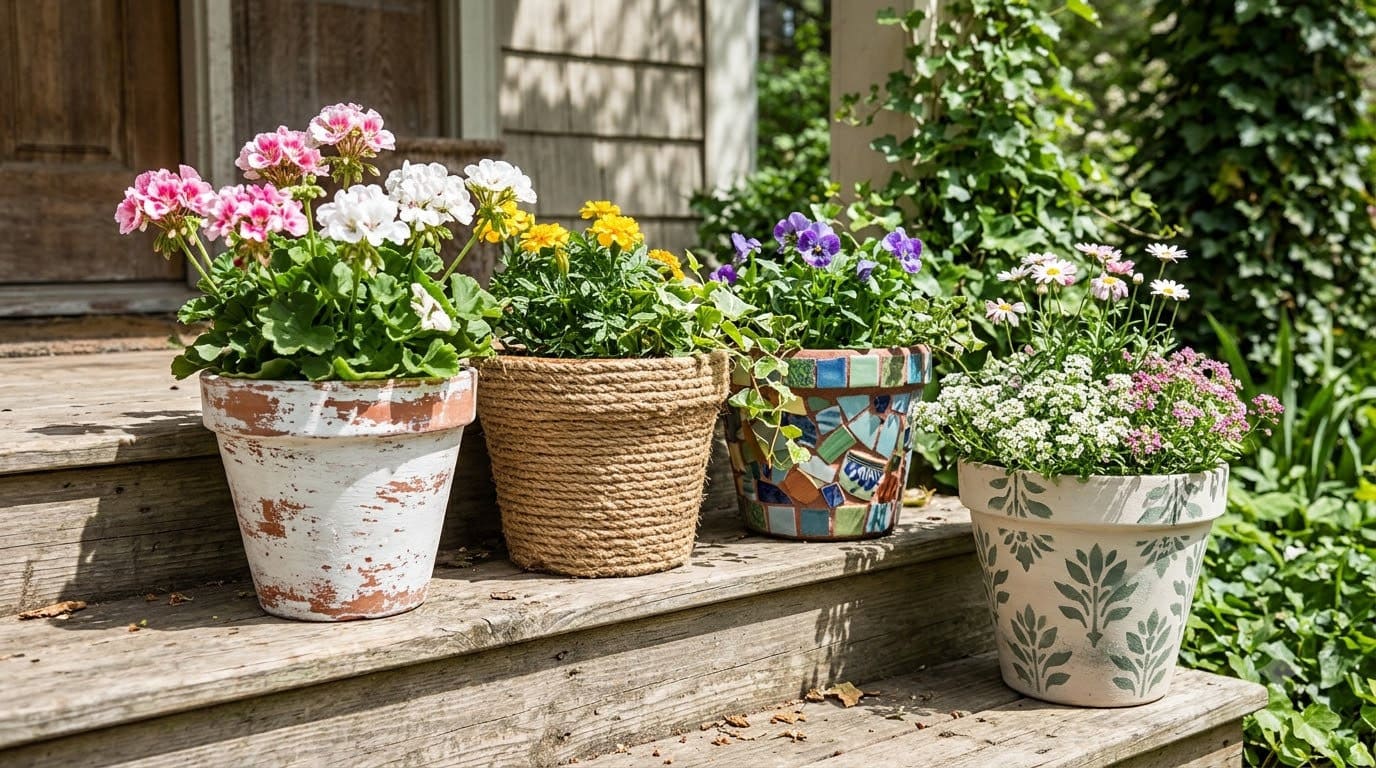
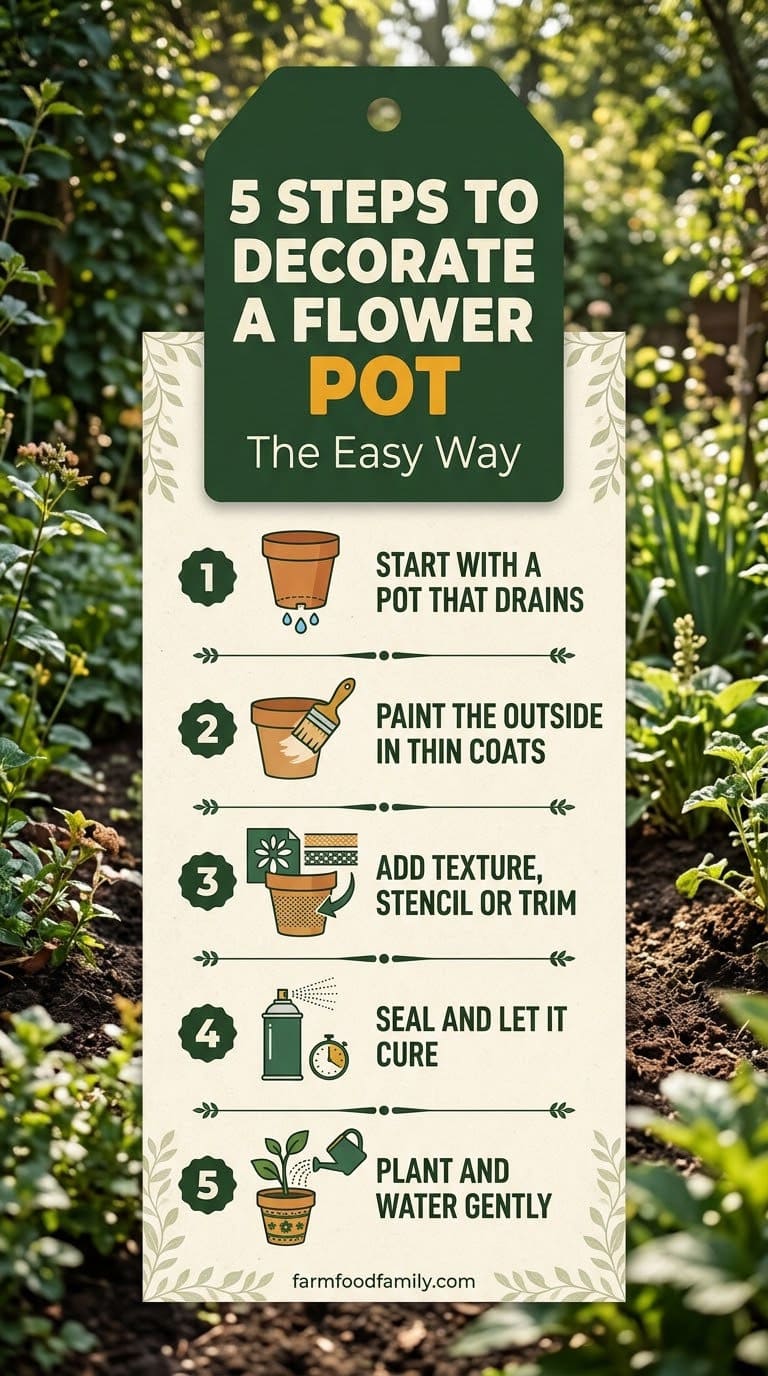
You can turn a plain pot into a gift or a garden feature with paint, rope or broken china, as long as the pot drains and the finish is sealed.

Never miss an update — choose FarmFoodFamily as your preferred source on Google.
How it works: Tap the button below to open Google's settings page, then check the box next to FarmFoodFamily.
Tap the checkbox to turn it blue — that's how you know it's set.
You can turn a plain pot into a gift or a garden feature with paint, rope or broken china, as long as the pot drains and the finish is sealed.
Products We Recommend
This post contains affiliate links. We may earn a commission on qualifying purchases at no extra cost to you.

Orceler 6 inch Terracotta & Clay Pots with Saucer, Pack of 4
Plain terra cotta pots with drainage holes and trays, ready to paint, wrap or stencil.
Shop Now
DecoArt Acrylic Patio Paint Fan Favorites Sampler Set, 2 Fl Oz (Pack of 18)
Outdoor acrylic paint for pots that sit in sun and rain. Test it on the bottom of a pot first.
Shop Now
Mod Podge Waterbase Sealer, Glue and Finish for Outdoor, 8 Ounce
An outdoor decoupage glue and sealer for napkin and photo pots. Apply thin coats and let it cure.
Shop NowA DIY flower pot starts with a pot that has a drainage hole, then adds paint, texture or a pattern. The easiest ideas use terra cotta, acrylic paint and a clear sealer. More advanced ideas add rope, mosaic tile, concrete or a mix of old objects.
Most projects take under an hour, and you can finish many of them with supplies you already own.
Choose the pot with care. The University of Maryland Extension says clay and concrete pots dry out faster than plastic, and every pot except a self-watering type needs drainage holes. OSHA says wet cement can cause burns because it is caustic.
Answer 4 quick questions and get matched to the exact fix for your yard — drainage, budget, layout, or something else entirely.
Take the Free QuizThis guide gives 20 pot projects with a list of supplies, steps, a watch-out and our verdict on each. It also covers sealing, paint choices for herb pots, cost tiers and common mistakes.
What Is Wrong With a Plain List of DIY Flower Pots?
Most lists show 80 photos with one line each. They don’t tell you what paint to use, how to stop it from peeling or what to do about a pot with no drainage hole.
We cut the list to 20 projects that work. Each one has plain steps and a note on sealing. Where a tutorial still loads we use its details, and where it doesn’t we give our own plan and say so.
What Supplies Do You Need?
Most pots need only a few supplies. Buy a few extra pots, so you can practice.


| Supply | Use it for | Tip |
|---|---|---|
| Terra cotta pots | The base for most projects | Soak new clay pots in water before painting |
| Acrylic craft paint | Color | Multisurface or outdoor paint lasts longer in rain |
| Clear sealer | Protecting the paint | Clay pot sealer or clear acrylic spray works |
| Stencils and stencil glue | Neat patterns | Keep the brush almost dry |
| Painter’s tape | Stripes and shapes | Peel it before the paint is fully dry |
| Hot glue gun | Rope and trim | Work in short runs |
One tutorial says to choose paint by location. Regular craft paint is fine under a roof, but sun and rain need multisurface or outdoor paint.
Most yard problems trace back to one specific, fixable cause. Find yours in 4 quick questions.
Take the Free QuizOur rule: test every paint and sealer on the bottom of a pot first.
How Do You Seal a Painted Pot?
Seal the outside so paint doesn’t peel. Let the paint dry fully first. Spray a clear acrylic sealer in light coats, and let each coat dry.
Water can seep through a painted clay pot and wreck the design. A reader of one tutorial reported that chalk-painted, primed pots were ruined by water after planting. The stencil tutorial seals the inside lightly with several thin coats and says this does not harm plants.
For herbs and vegetables, paint only the outside, and leave the inside bare. We could not find an extension source on food-safe pot paint, so ask your local extension office if you are unsure. Choose pot paint that says non-toxic on the label, and let it cure before you plant.
Our rule: paint the outside, seal it and let it cure for a few days before you add soil.
What About Drainage Holes?
Drainage keeps roots from rotting. Every container except a self-watering type needs holes or slits in the bottom, according to the same extension guide. Don’t add gravel, rocks or broken pot pieces to the bottom, because that won’t improve drainage.
If a pot has no holes, double-pot. Put your plant in a plastic nursery pot, and set it inside the decorative one. Empty any saucer after watering.
Plain terra cotta pots with drainage holes and trays, ready to paint, wrap or stencil.
Shop NowThis post contains affiliate links. We may earn a commission on qualifying purchases at no extra cost to you.
Our rule: if you can’t make a hole, don’t plant directly in the pot.
Paint and Pattern Ideas
1. A Whitewashed Terra Cotta Pot
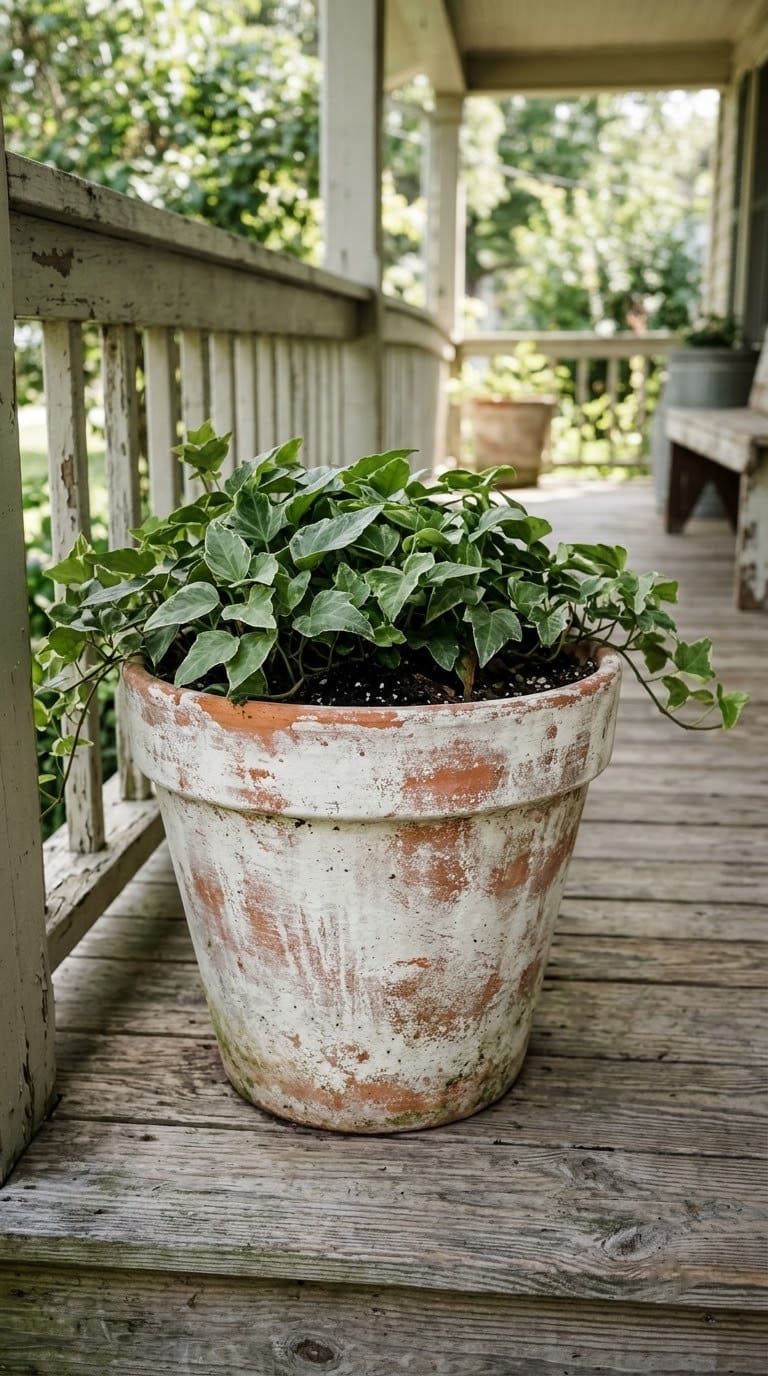
This is the fastest way to get an aged, farmhouse look. Tidbits blog thins white paint with water, dabs the brush on a paper towel, and streaks the paint on in small sections. The writer wipes each section with a paper towel to blend it.
The average homeowner spends $616/year on yard fixes that don't address the real problem. Find out what yours actually is — before you spend another dollar.
Take the Free QuizYou need:
- A terra cotta pot
- A bristle brush
- White acrylic or leftover wall paint
- Paper towels and a covered work surface
- Clear acrylic spray (optional)
Steps:
- Water the paint down until it runs a little.
- Dab the brush on paper towels until it is almost dry.
- Streak the paint onto a small section.
- Wipe the section quickly with a paper towel.
- Paint the inside only up to the soil line, if you want.
- Let it dry, then plant.
The whole job takes minutes. A little paint goes a long way, and light or heavy coats both look time-worn.
Watch out: leaks. The tutorial doesn’t seal the pot, and a reader reported water seeping through a chalk-painted pot and ruining it. Spray the inside with clear acrylic to be safe.
Our take: our top pick for beginners. It hides mistakes, because the look is meant to be uneven.
See the post at Tidbits.
2. Stenciled Pots
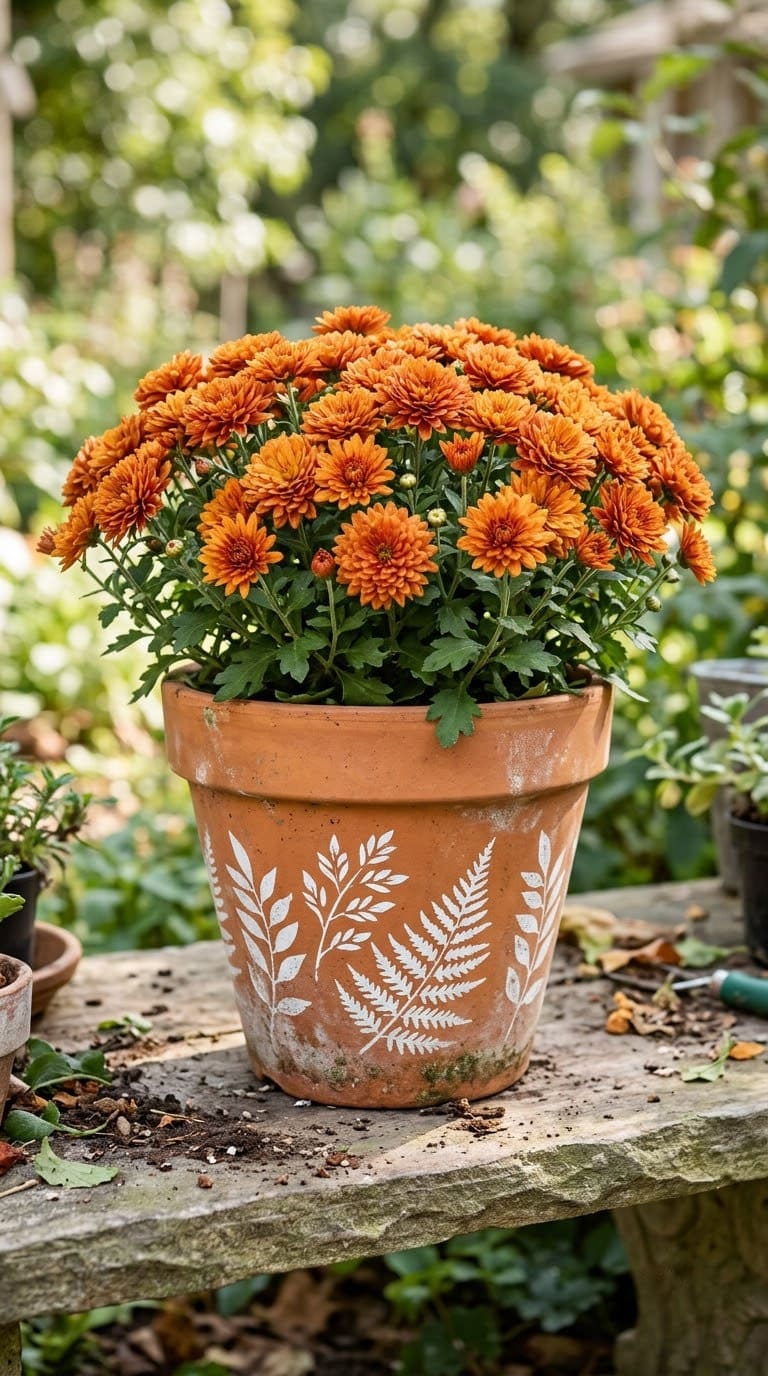
DIY Candy stencils fall mums on clay pots. Use a stencil, stencil glue and a stencil brush or foam brush. The label says to wait 10 minutes after gluing the stencil, but the writer painted after about one minute.
You need:
- Terra cotta pots
- Craft paint (multisurface or outdoor paint if the pot sits outside)
- A stencil, stencil glue and a stencil brush
- Clay pot sealer or acrylic sealer
- Sandpaper (optional)
Steps:
- Glue the stencil to the pot.
- Tap the paint on with a stencil brush, using very little.
- Remove the stencil carefully.
- Let each section dry before the next.
- Sand lightly for a weathered look, if you like.
- Seal the inside, then the outside, with light coats.
Watch out: globs. The writer says “globbing the paint on will be noticeable.” Use light taps and remove the stencil gently so it doesn’t smudge.
Our take: a clean, crisp look that anyone can do. White designs on dark pots show best.
See the post at DIY Candy.
3. Decoupaged Napkin Pots
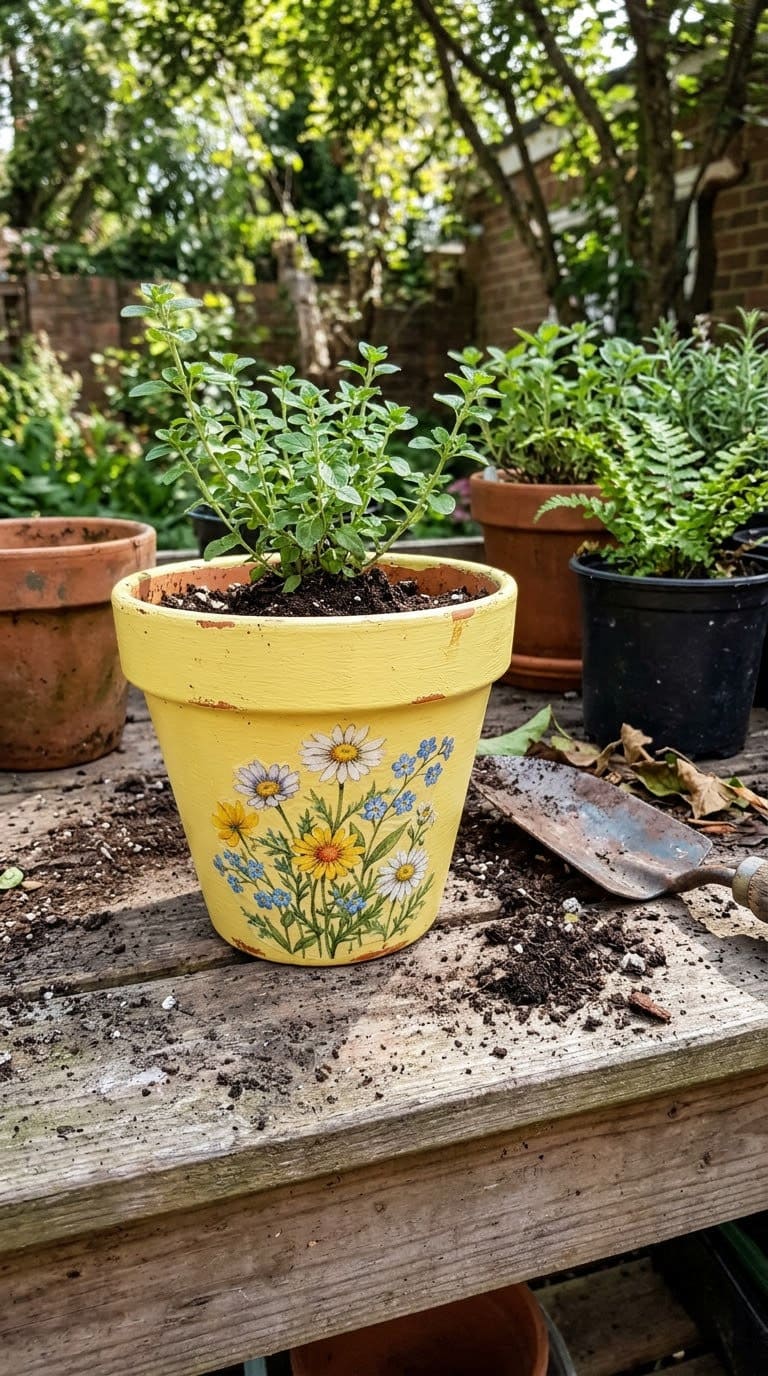
Place of My Taste calls this a 15-minute craft. Paint the pot, let it dry, cut flower shapes from a paper napkin and smooth them on with Mod Podge. Seal the whole pot with one more coat.
You need:
- Terra cotta pots and acrylic paint
- Paper napkins with patterns you can cut out
- Mod Podge and a brush
- Scissors
Steps:
- Paint the pots, and let them dry fully.
- Cut out flowers or shapes from the napkin.
- Brush Mod Podge on the pot where the shape goes.
- Smooth the napkin down.
- Brush a coat of Mod Podge over the top.
- Dry completely.
One napkin covered three pots. Use paper napkins, not cloth. The writer says the design looked the same after a few months of frequent watering.
Watch out: wrinkles. Smooth the napkin from the center outward with a damp finger.
Our take: a cute gift for a plant lover. Pick napkins with simple shapes.
See the post at Place of My Taste.
4. Geometric Painted Pots
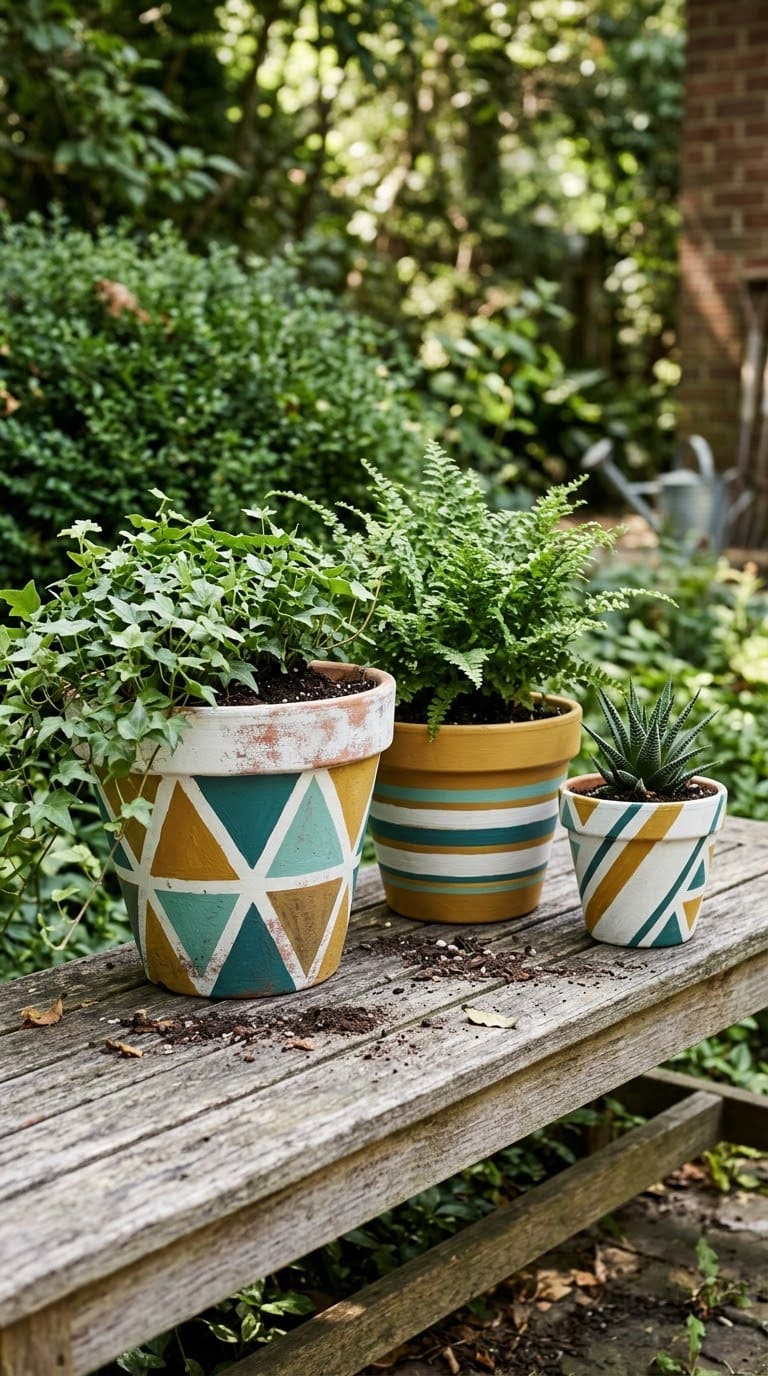
Hello Lidy paints pots in simple geometric shapes. Tape off triangles or stripes with masking tape, or paint freehand. Let the paint dry for about 24 hours before planting.
You need:
- Flower pots in a few sizes
- Paint in two or three colors
- Masking tape (optional)
- A flat brush
Steps:
- Clean the pot.
- Plan the design on paper.
- Tape off shapes.
- Paint the first color.
- Peel the tape when the paint is almost dry.
- Paint the next color, and let it dry for a day.
Watch out: paint bleeding under the tape. Press the tape edge down with a fingernail, and use thin coats.
Our take: a modern look in one afternoon. Use sets of three pots in different sizes.
See the post at Hello Lidy.
5. Marbled Terra Cotta
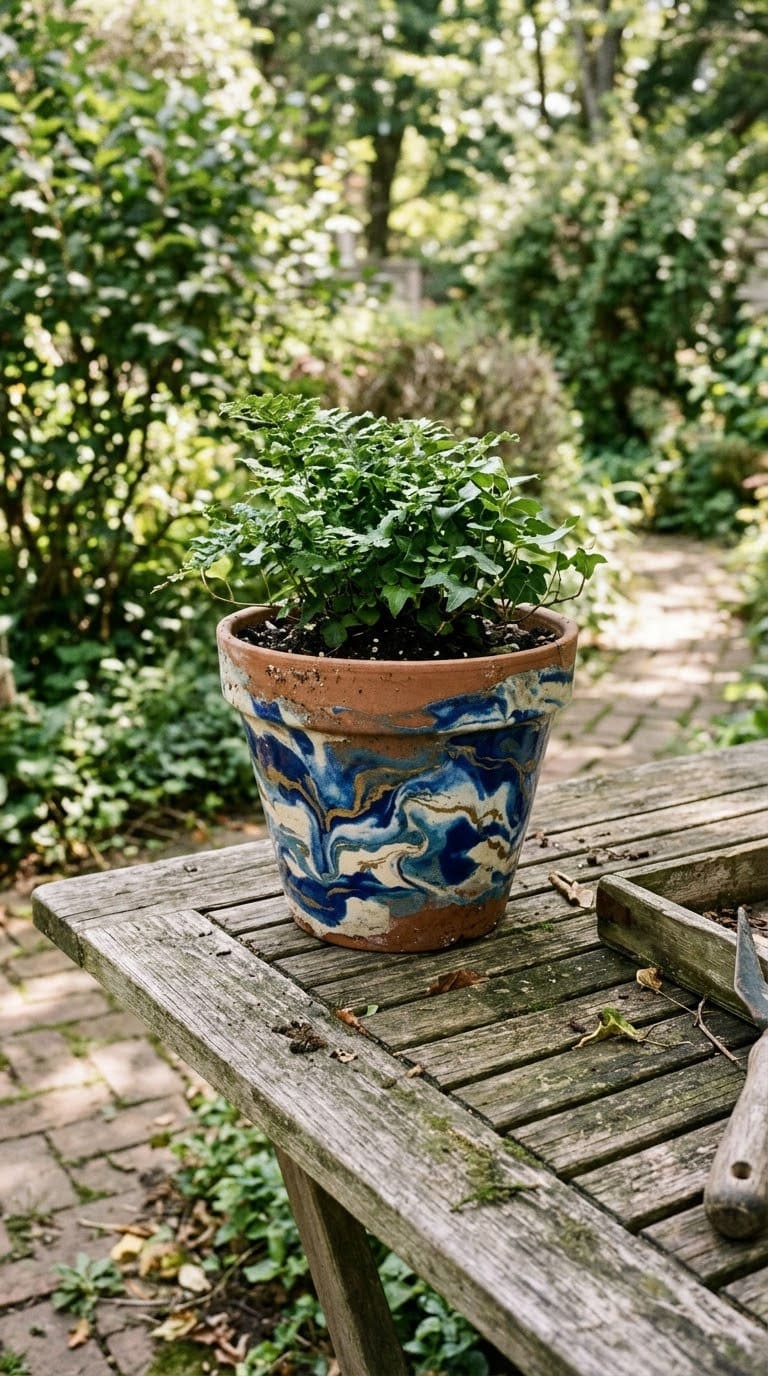
Swirl two or three paint colors for a stone look. Dip a cup of water, add paint drops, stir lightly with a stick and roll the pot through. This is our own plan, because the original tutorial’s site had a security error when we tried it.
You need (our plan):
- A terra cotta pot or a plastic pot
- Acrylic paint in two or three colors
- A bucket of water
- A stick or skewer
- Paper towels and gloves
Steps:
- Fill a bucket with a few inches of water.
- Drop in a few drops of paint, and swirl once.
- Dip the pot in and roll it, or dip a brush and dab.
- Let the pot dry upside down.
- Repeat if you want more color.
- Seal with a clear spray.
Watch out: too much stirring. Over-stirring turns the paint to mud. One swirl is enough.
Our take: a fun project for a party. Each pot looks different.
6. Drip Paint Pots
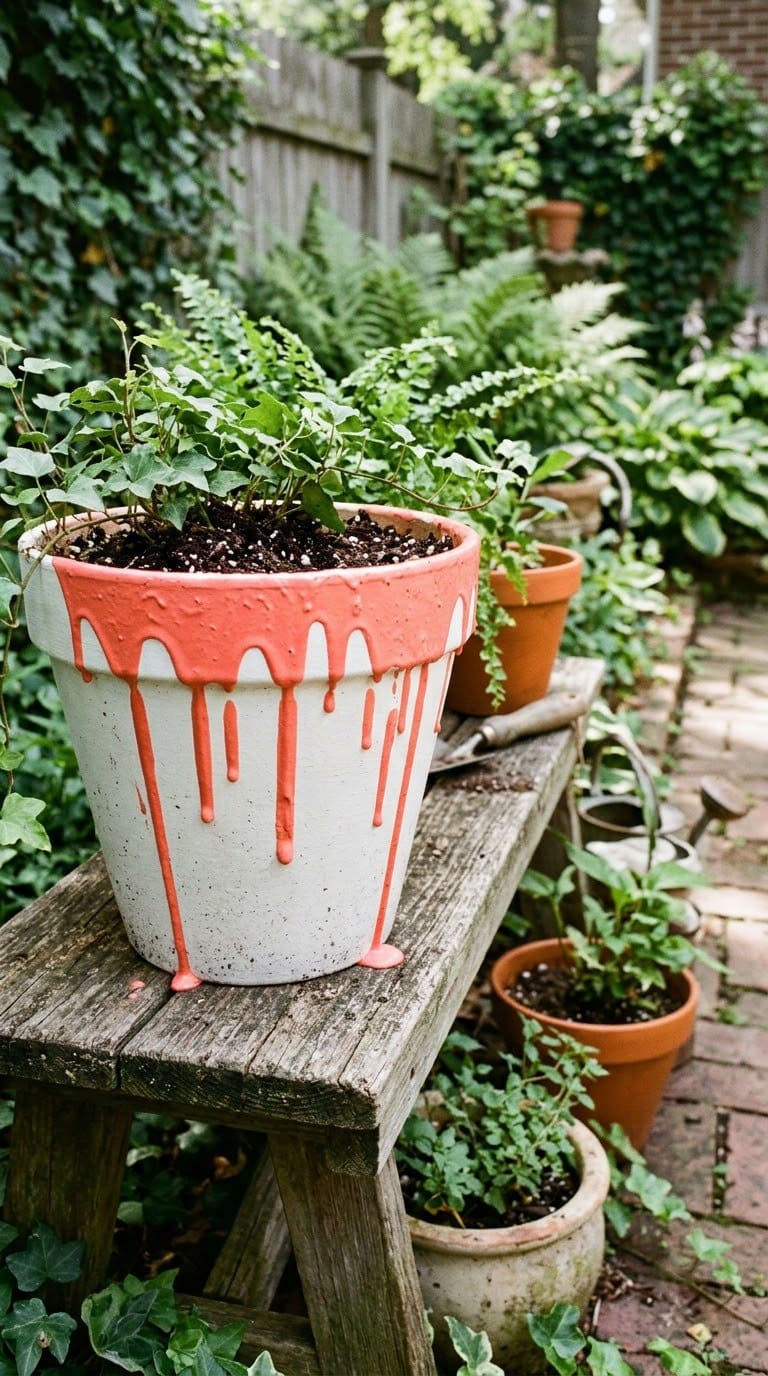
Paint the top rim of a pot in a bright color, and let the paint drip down the side. Thin the paint with a little water so it runs. This is our own plan, because the original tutorial’s web address now goes to an unrelated site.
You need (our plan):
- A terra cotta pot, plain or painted white
- Acrylic paint, thinned with water
- A foam brush
- A drop cloth
- Clear sealer
Steps:
- Paint the pot white and let it dry.
- Turn the pot upside down on a cup.
- Brush thinned color on the base.
- Tip the pot so the paint runs.
- Let it dry.
- Seal.
Watch out: drips that pool. Wipe the bottom edge with a paper towel as it dries.
Our take: a playful look for kids. It’s a good use of leftover paint.
Texture and Wrap Ideas
7. Rope-Wrapped Pots
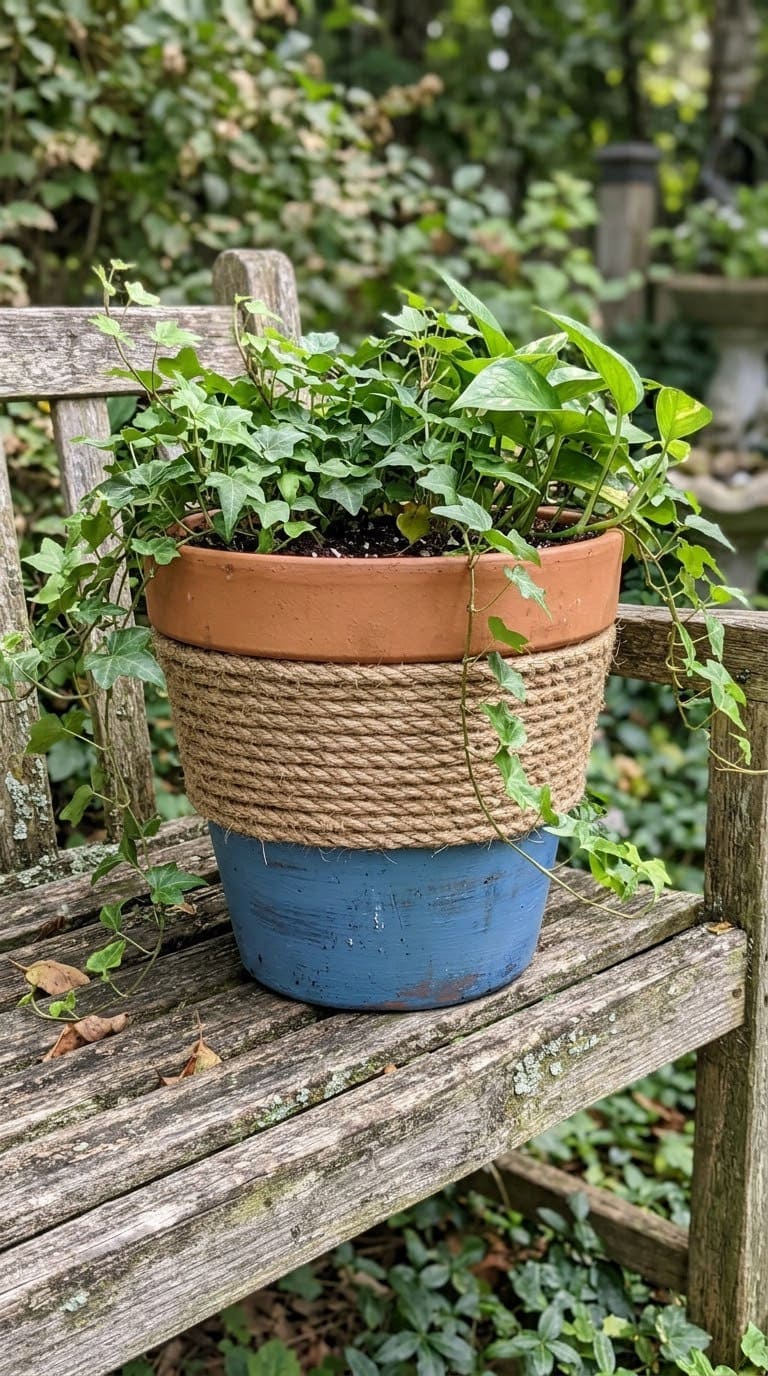
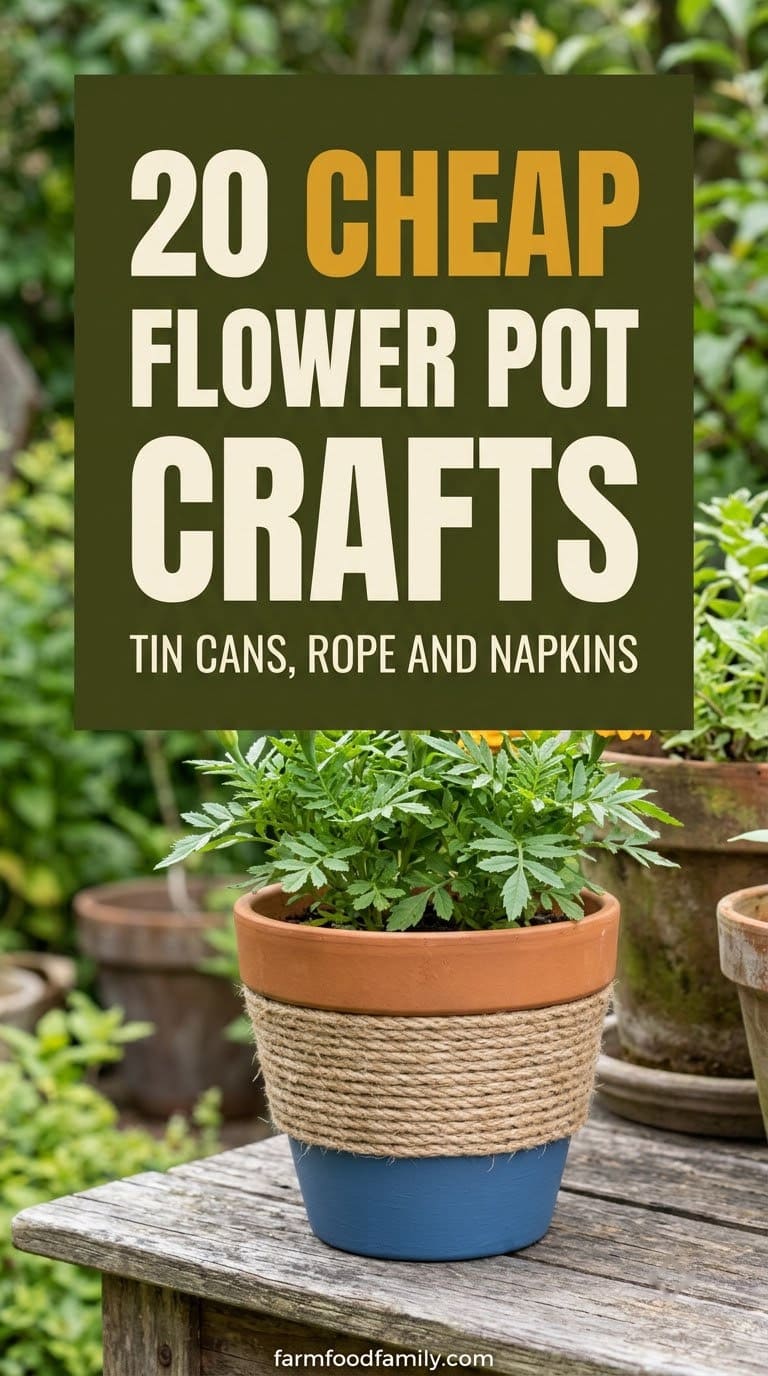
House by Hoff wraps terra cotta pots in rope. Start at the top, hot glue the rope and keep wrapping to the bottom.
Cut the rope and glue the end. Paint a touch of blue on the base with leftover latex paint.
You need:
- A terra cotta pot
- Rope (we suggest jute or cotton, about 3/8 inch)
- A hot glue gun
- Scissors
- Leftover paint and a brush
Steps:
- Glue the rope start at the rim.
- Wrap the rope around the pot, a few turns at a time.
- Glue as you go.
- Cut the rope at the bottom.
- Glue the end down.
- Paint the base for contrast.
The post doesn’t say whether the pots survive outdoors, and a question about drainage went unanswered. Keep the pot under cover, and make sure the hole stays open.
Watch out: rope soaks up water. Use it on a covered porch or indoors.
Our take: a quick way to make a basic pot look expensive. Use a color that matches your door.
See the post at House by Hoff.
8. A Rock-Covered Bucket
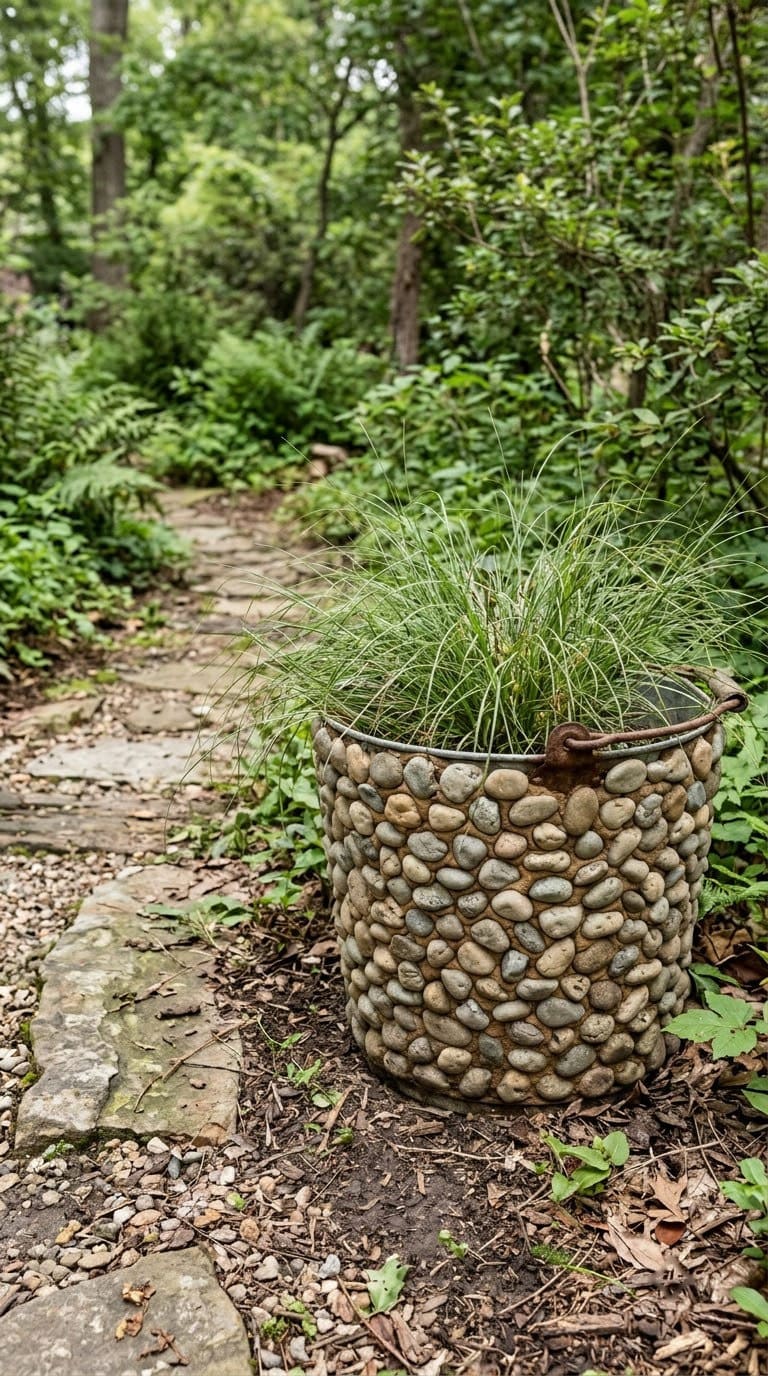
Centsational Style covers a metal bucket with river rock mesh tile. You need two 12-inch sheets of tile, thin set mortar and grout. If you plant in it, punch drainage holes with a hammer and a thick nail first.
You need:
- A strong metal bucket that holds its shape
- 2 sheets of river rock mesh tile
- Thin set mortar and grout
- A box cutter, putty knife and sponge
- A hammer and thick nail
Steps:
- Punch drainage holes in the bottom.
- Spread a thick layer of thin set on the outside.
- Cut the mesh tile and press it on.
- Let each section dry about an hour.
- Let the thin set dry for a full day.
- Grout, wipe with a sponge and let it cure.
Watch out: a flimsy bucket. A bucket that flexes will crack the mortar and grout. Thin set isn’t designed for metal either, so test it first.
Our take: a heavy, solid look. Use it as a garden focal point.
See the post at Centsational Style.
9. Broken China Mosaic Pots
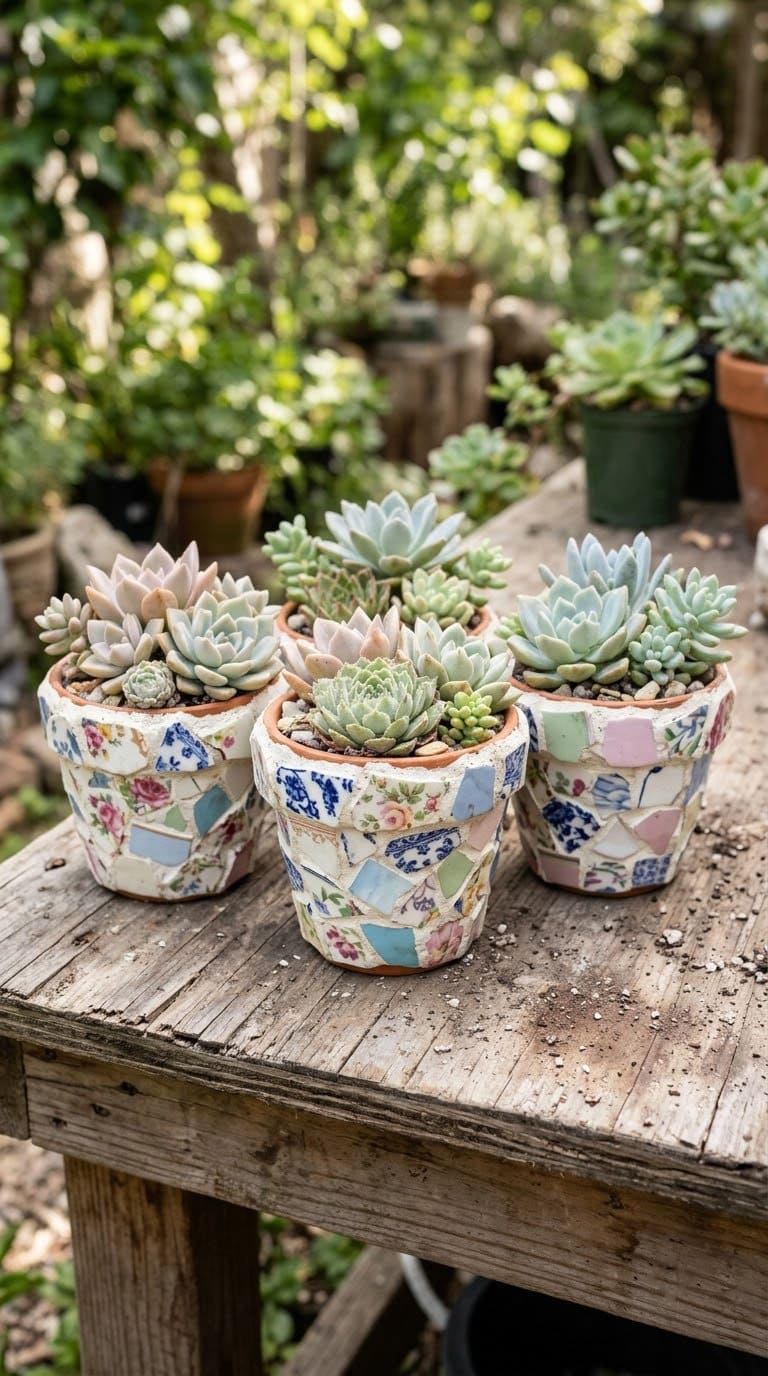
Kenarry covers three 4-inch terra cotta pots with broken china. You break 5 to 7 plates into tiles about 1/2 inch square. Then you glue them with permanent craft adhesive, leaving about 1/8 inch between tiles.
The grout is sanded white grout, mixed to a peanut-butter texture. Wipe the haze off after 30 minutes, and seal after 24 hours with grout sealer. The pots need about 90 to 100 tiles each.
You need:
- Terra cotta pots and white spray paint
- 5 to 7 old plates
- Tile nippers, gloves and safety glasses
- Permanent craft adhesive
- Sanded grout, a sponge and grout sealer
Steps:
- Break the plates inside a zipper bag.
- Nip the pieces into small tiles.
- Paint the pot white and let it dry.
- Glue the tiles on with small gaps.
- Spread grout, then wipe the haze off.
- Seal the grout after a day.
Watch out: sharp edges. Wear leather gloves and safety glasses when you cut and chisel. The sealer makes the mosaic water-resistant, but not waterproof.
Our take: the most beautiful idea on this list. Save it for a day with a lot of time.
See the post at Kenarry.
10. Concrete and Gold Pots
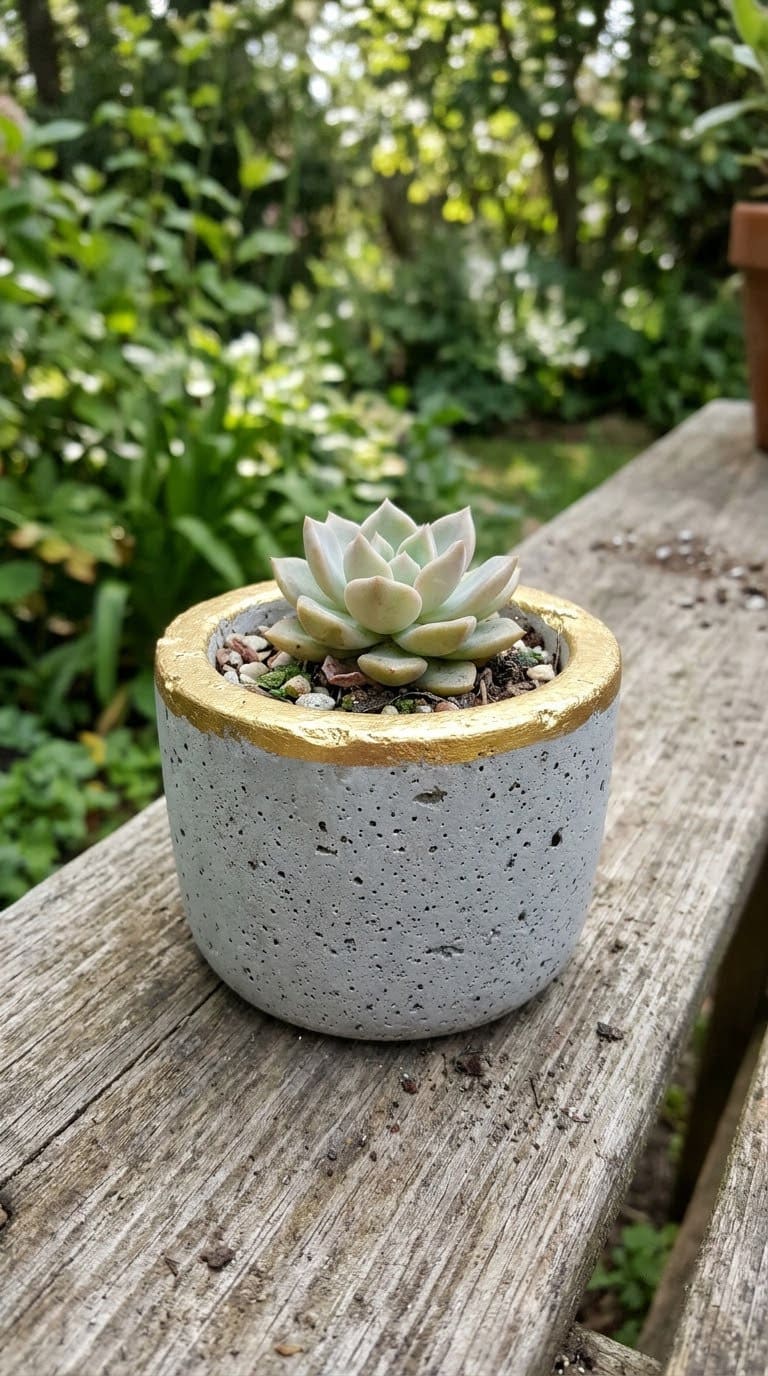
Make a small concrete pot with a bowl-in-bowl mold, then paint the rim gold. This is our own plan, because the original tutorial’s site was down when we checked. Use a mix made for small projects and follow the bag.
You need (our plan):
- Quick-set concrete or craft concrete mix
- Two plastic containers, one that fits inside the other
- Cooking spray
- Gold paint or leaf
- Gloves, a mask and eye protection
Steps:
- Spray the inside of the big container and the outside of the small one.
- Mix the concrete as the bag says.
- Pour it into the big container.
- Press the small container into the middle.
- Let it set, then pop the mold off.
- Paint the rim gold, and drill or leave a drainage hole.
Watch out: wet cement burns. That agency says wet cement is caustic, so wear gloves and wash your skin with water if it splashes. Mix outside, and wear a mask for the dust.
Our take: a modern, heavy pot. Make a drain hole by pressing a dowel into the base while it sets.
11. A Fabric or Denim Pot Cover
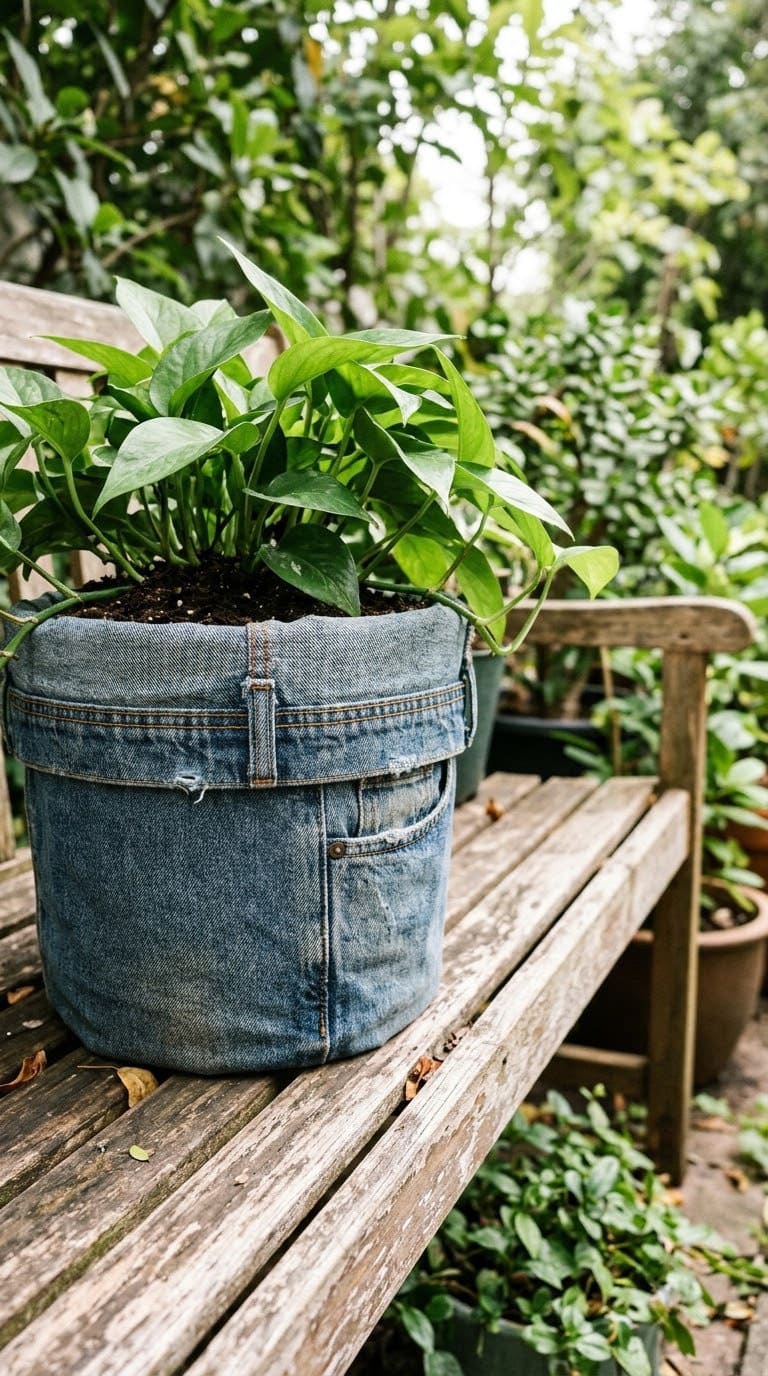
Hide a plain plastic pot inside a fabric sleeve. Cut a piece of denim or burlap to wrap around the pot, with a hem at the top. Glue or sew it into a tube, then roll the top down.
You need (our plan):
- Old jeans, burlap or a cotton fabric
- Fabric glue or a needle and thread
- A plastic pot with a drainage hole
- A saucer
Steps:
- Cut a rectangle that wraps around the pot and adds 3 inches in height.
- Hem one long edge.
- Glue or sew the sides into a tube.
- Slip the tube over the pot.
- Fold the top over.
- Place on a saucer.
Watch out: wet fabric. Take the cover off before you water, or it will stay damp and mildew.
Our take: a smart way to hide a nursery pot. Use jean pockets for a cute detail.
12. A Polka Dot Tiered Planter
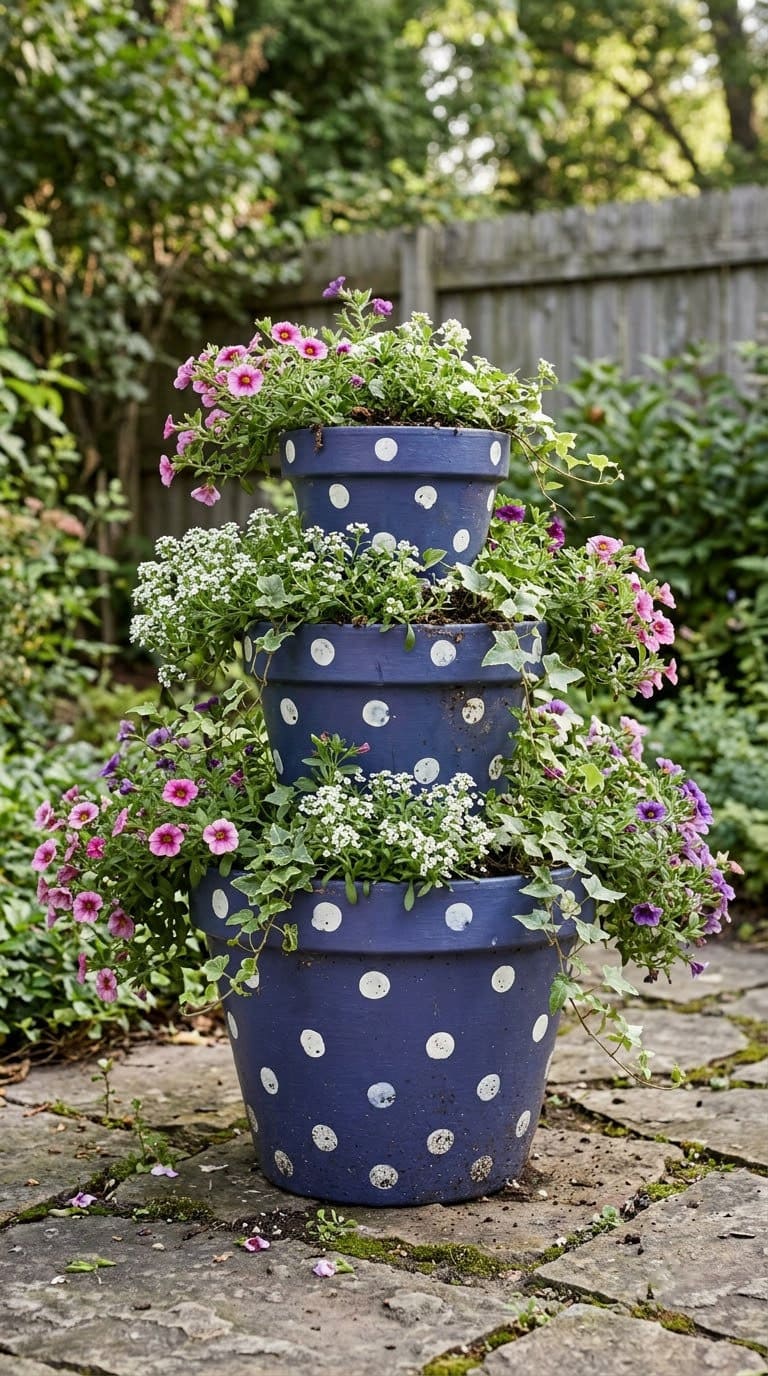
Stack three pots of different sizes and paint white dots on a bright base. Put the biggest pot at the bottom and the smallest on top. This is our own plan, because the original page returned a server error.
You need (our plan):
- Three pots in graduated sizes
- Paint in two colors
- A round sponge or a pencil eraser for dots
- Strong outdoor glue or a center rod
Steps:
- Paint the pots in a solid color.
- Let them dry.
- Dip an eraser in white paint.
- Stamp dots evenly.
- Stack the pots and mark where they meet.
- Glue them together, then plant the top.
Watch out: a tippy tower. Glue the pots or run a rod through the drainage holes.
Our take: a big look from small pots. Plant trailing flowers on the lowest tier.
Upcycled Pot Ideas
13. Painted Tin Can Planters
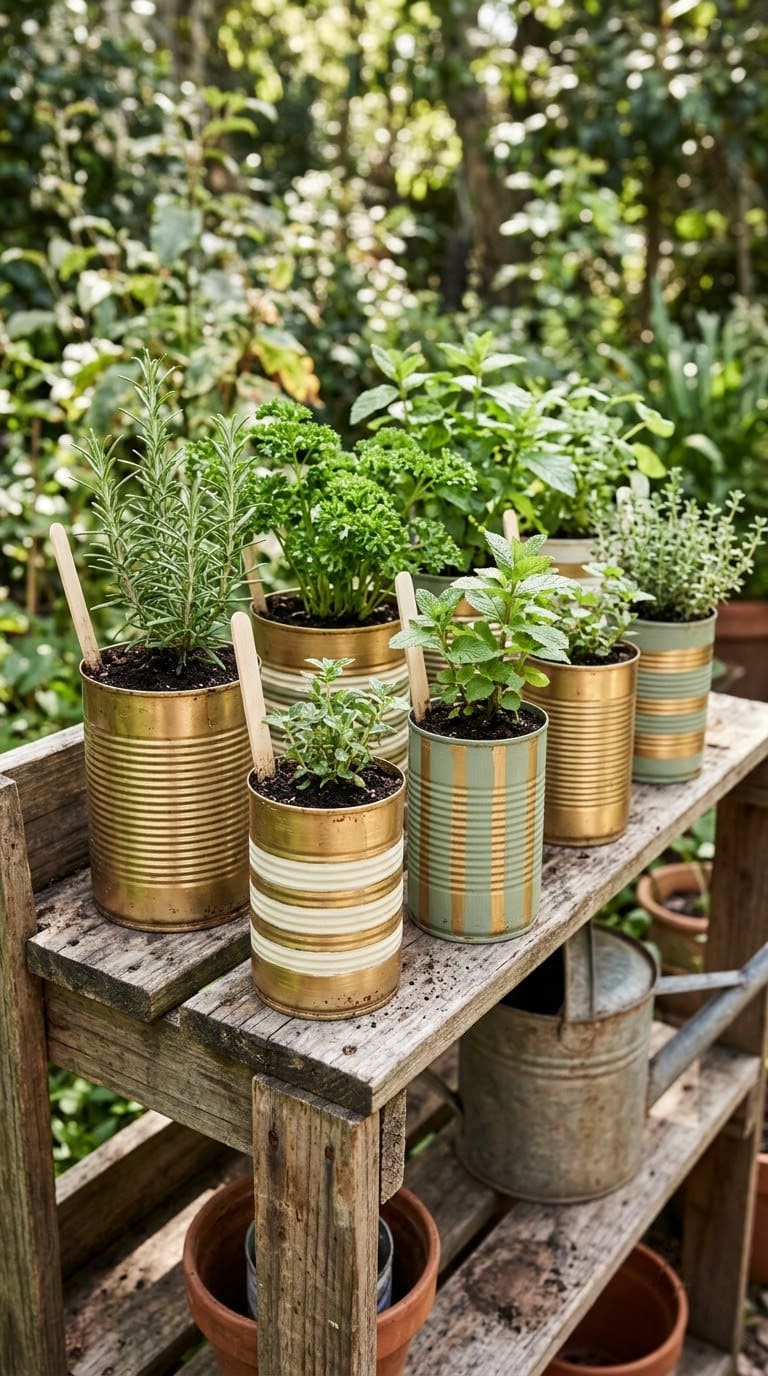
The Crafted Sparrow reuses gallon tin cans. Spray them gold, tape off stripes with painter’s tape, and brush on two or three coats of outdoor patio paint. Peel the tape before the paint is fully dry.
You need:
- Empty gallon-sized tin cans
- Gold spray paint
- Outdoor patio paint and foam brushes
- Painter’s tape
- A drill with a small bit
Steps:
- Clean and dry the can.
- Spray it gold and let it dry.
- Tape off the stripes.
- Brush on two or three coats of color.
- Peel the tape before the paint is fully dry.
- Drill drainage holes in the bottom.
Watch out: rust. Rust can form on the outside bottom of the can.
A plastic liner or a coffee filter over the holes helps. Priming is optional.
Our take: cheap and cheerful. The writer used paint she already had.
See the post at The Crafted Sparrow.
14. A Clothespin Planter
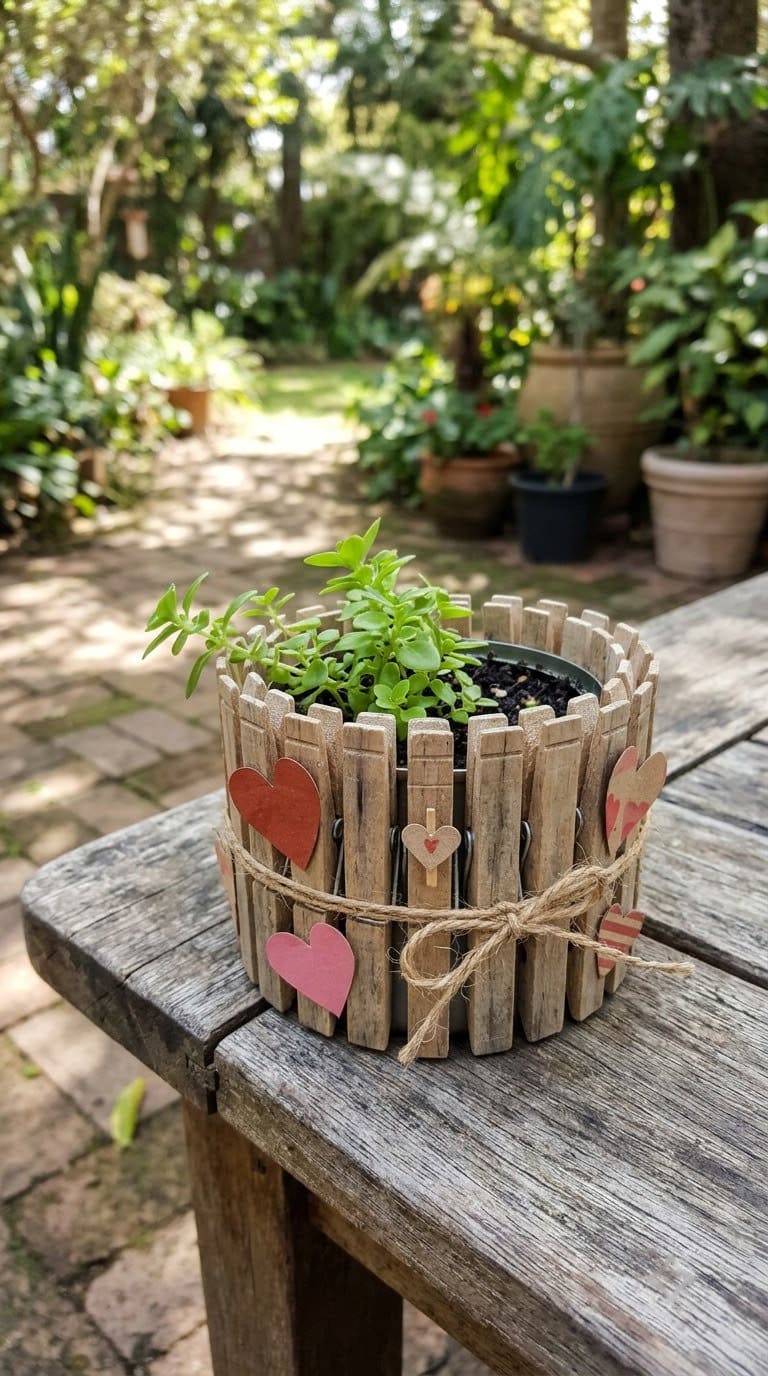
CFabbri Designs uses a tuna can, wooden clothespins and construction paper hearts. Clip clothespins around the rim of the can. Put a plant inside, and tuck paper hearts between the pins.
You need:
- A clean tuna can (the writer used 5 oz)
- Wooden clothespins
- Construction paper
- A small plant
Steps:
- Wash the can and remove the label.
- Clip clothespins all the way around the rim.
- Cut hearts from paper.
- Tuck the hearts between the pins.
- Add a small plant or a tea light.
- Set it on a saucer.
Watch out: drainage. A tuna can has no holes, so drill a few, or use a cup inside.
Our take: a perfect kids’ craft. It makes a sweet spring centerpiece.
See the post at CFabbri Designs.
15. Disco Ball Succulent Planters
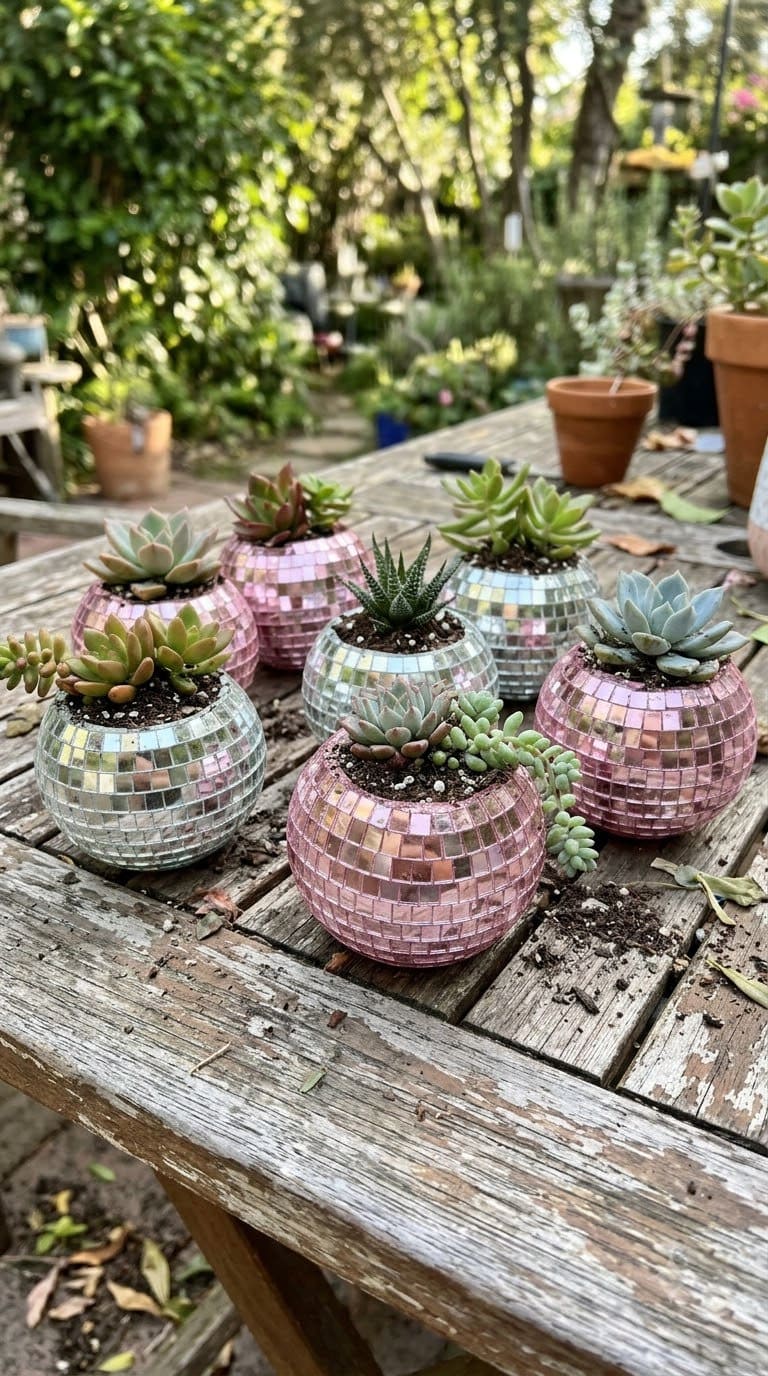
A Bubbly Life turns disco ball ornaments into planters. Pull the top off the ornament with a strong tug, then cut a hole with a craft knife. Trim the bottom if it tips.
The writer says it takes about 5 minutes. The small silver ball needed trimming at the bottom because the succulent made it tip over.
You need:
- Disco ball ornaments
- A craft knife
- Small succulents
- Cactus mix
Steps:
- Pull off the ornament cap.
- Cut a hole in the top with a craft knife.
- Trim the bottom so it sits flat.
- Fill with cactus mix.
- Plant a succulent.
- Water lightly.
Watch out: no drainage. But the post doesn’t mention it, so water with a spoon and use very little.
Our take: sparkly and fun for a party. It’s more of a short-term decoration than a long-term pot.
See the post at A Bubbly Life.
16. Newspaper Seed-Starter Pots
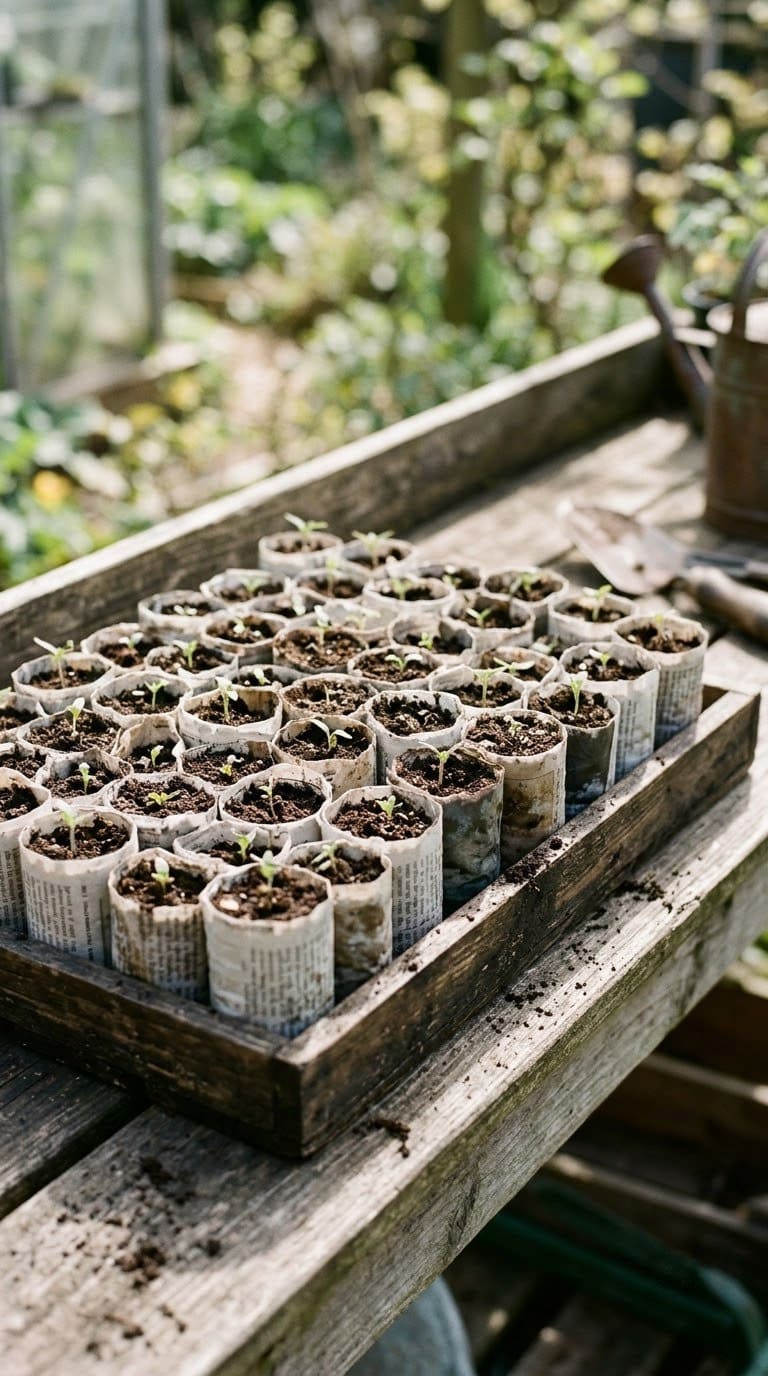
Roll newspaper around a jar to make a small pot. Fold the bottom, tape it and slip the jar out.
Fill with seed-starting mix, and plant the pot in the garden when the seedling is ready. This is our own plan, because the original page blocked us.
You need (our plan):
- Newspaper strips about 4 by 12 inches
- A small jar
- Tape
- Seed-starting mix and seeds
Steps:
- Wrap a strip around a jar.
- Fold the bottom edge in.
- Tape the bottom.
- Slide the jar out.
- Fill with mix.
- Plant seeds and set the pots in a tray.
Watch out: mold. Wet paper can grow mold. Keep the tray in good light and don’t overwater.
Our take: a free way to start seeds. Use black-and-white newsprint.
Gift and Keepsake Ideas
17. Sharpie Dot Name Pots
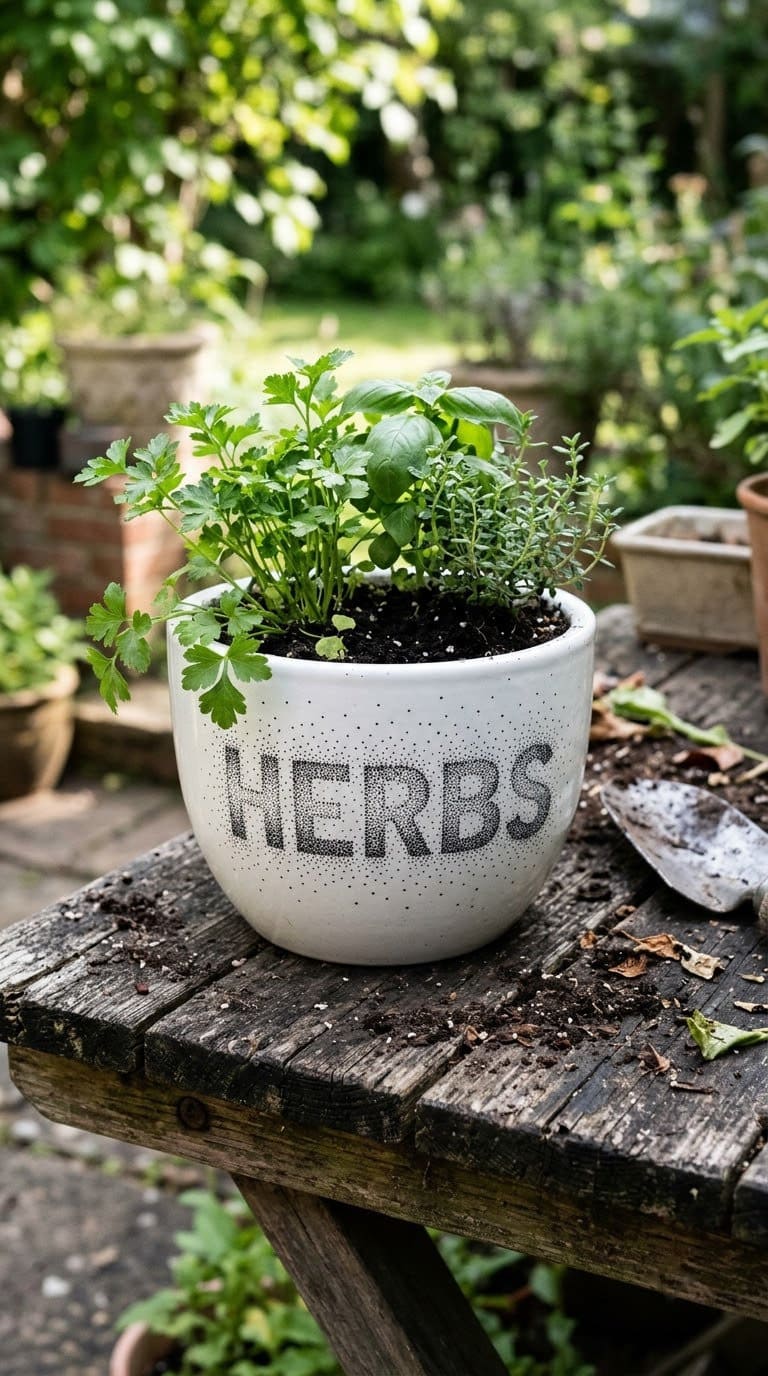
Cutesy Crafts spells a name with letter stickers and draws oil-based Sharpie dots around them. Fade the dots as they move away from the letters. Peel off the stickers once the ink dries.
You need:
- White ceramic pots
- Thick letter stickers
- Oil-based Sharpie markers
- Rubbing alcohol and cotton swabs (optional)
Steps:
- Stick the letters on the pot.
- Draw dots close to the letters.
- Space the dots out as you move away.
- Let the ink dry.
- Peel the stickers off.
- Wipe leaks with alcohol on a swab.
Spell herb names to make a small herb garden, as the writer suggests. She planted succulents in hers.
Watch out: ink leaking under the stickers. A swab with rubbing alcohol fixes it.
Our take: a lovely gift. Do the name in a color the person loves.
See the post at Cutesy Crafts.
18. A Chalkboard Flower Pot
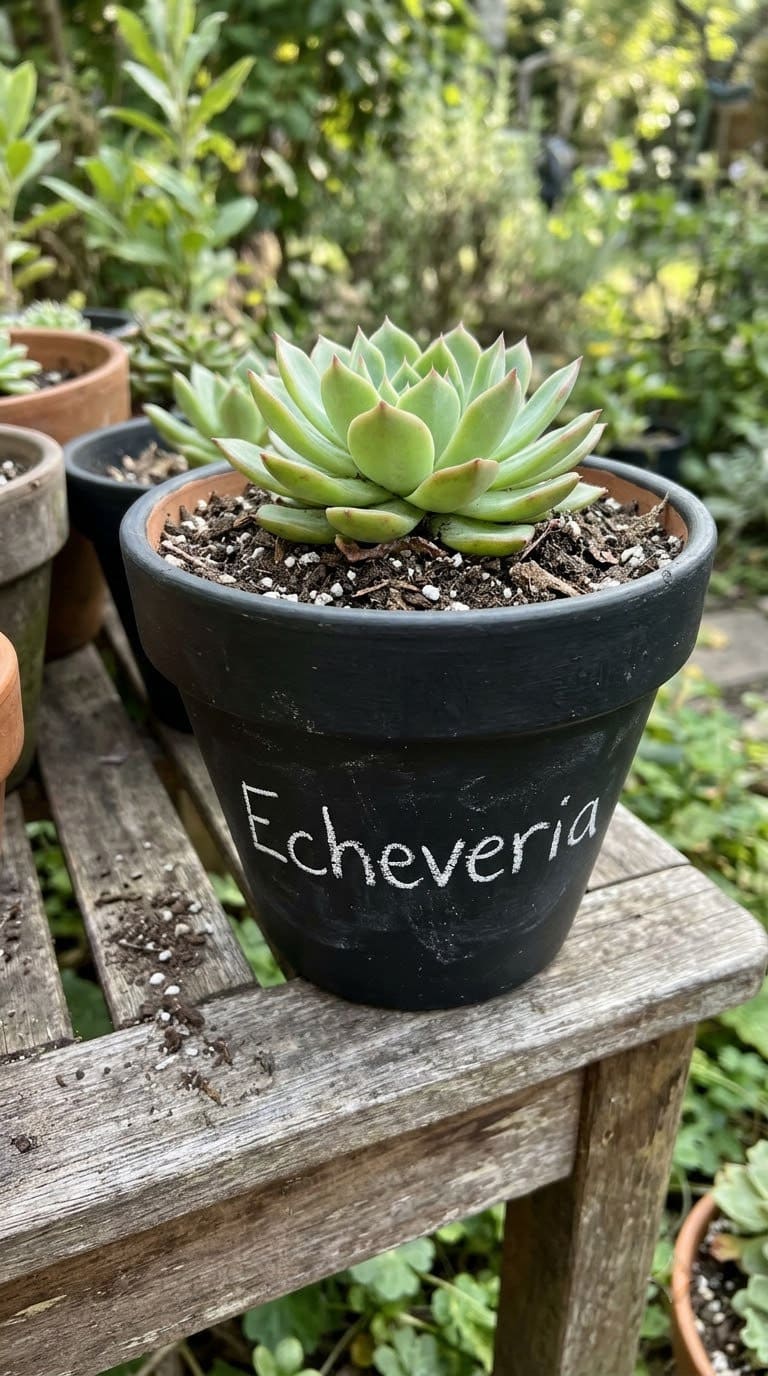
I Spy DIY paints a ceramic pot with chalkboard paint and plants succulents. You write the plant name or a message in chalk. The post says to water once a month.
You need:
- A ceramic pot
- Chalkboard paint
- A brush
- White chalk or a chalk marker
- Succulents
Steps:
- Wash the pot and let it dry.
- Brush on two coats of chalkboard paint.
- Dry as the can says.
- Rub chalk on the surface to season it.
- Write a message.
- Plant the succulent.
Watch out: smudges. Water carefully, because drips wipe the chalk off.
Our take: a smart gift for a teacher. The message changes in seconds. We could not find sealing advice in the post, so keep the pot under cover.
See the post at I Spy DIY.
19. A Mother’s Day Photo Flower Pot
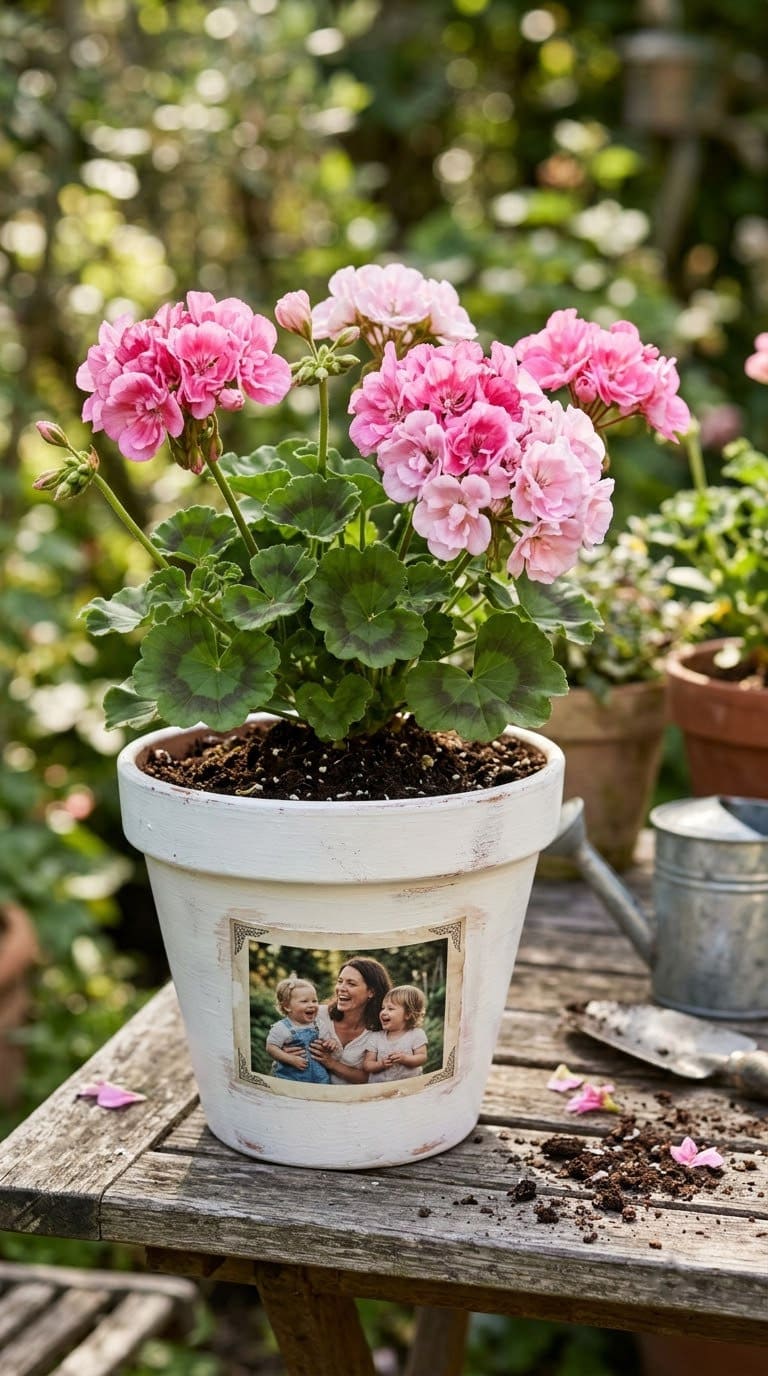
Print a small photo or a card, and attach it to a pot with decoupage glue. Add a coat of sealer over the top.
Plant a bright flower. This is our own plan, because the original page redirected.
You need (our plan):
- A white or painted pot
- A photo printed on regular paper
- Decoupage glue
- Clear sealer
- A seasonal flower
Steps:
- Trim the photo to a small square or circle.
- Brush decoupage glue on the pot.
- Press the photo on and smooth it.
- Brush a coat of glue over the photo.
- Let it dry.
- Seal and plant.
Watch out: ink runs. Print on a laser printer, or test a copy first, because inkjet ink can smear.
Our take: a heartfelt gift for Mother’s Day. Add a note inside the pot.
20. Refinished Old Pots With Rope and Filigree
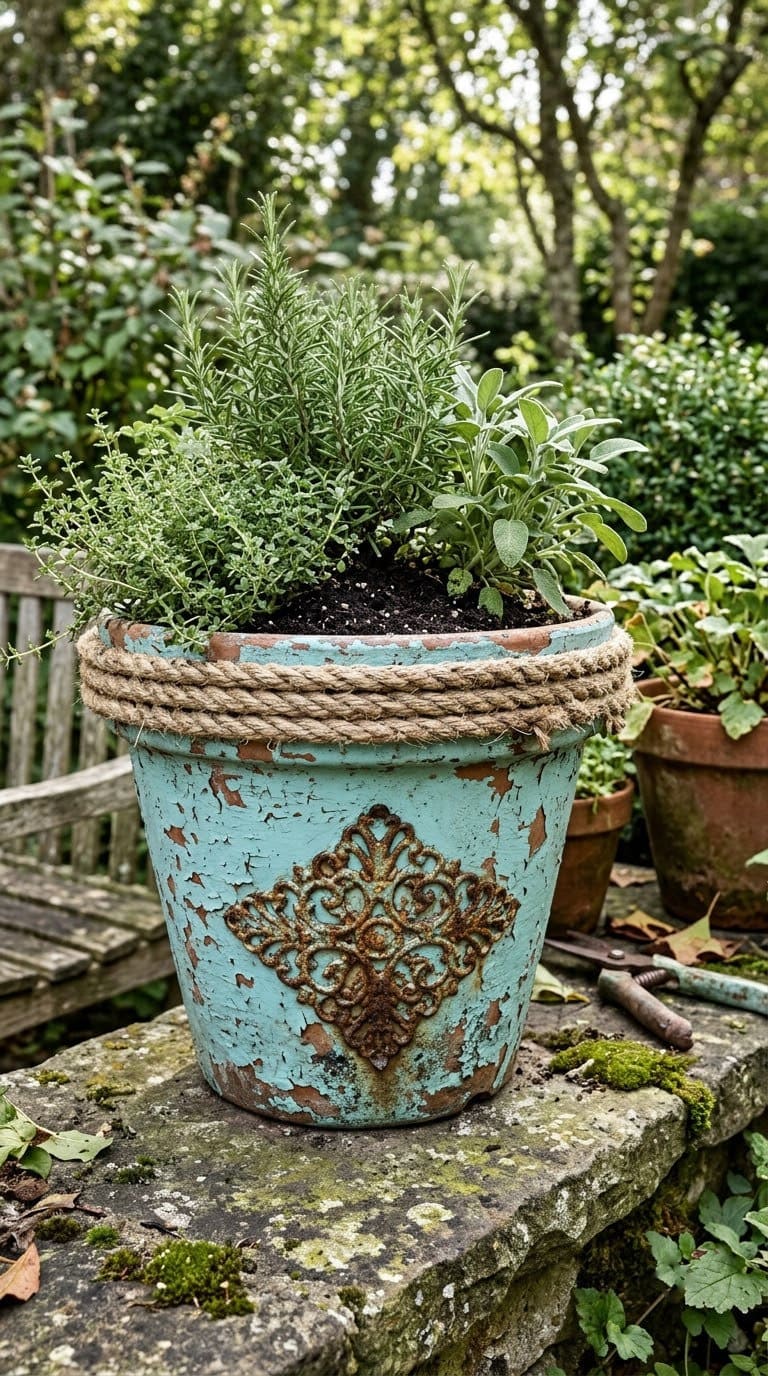
The Navage Patch refreshes old terra cotta and plastic pots with homemade chalk paint in aqua. She rubs off extra paint with a damp cloth for a worn look, then adds acrylic stencils, braided rope ribbon and metal filigrees. Two coats of protective top coat go on before she glues the metal on.
You need:
- Old pots, washed and dried
- Chalk paint or acrylic paint
- Rope ribbon and metal trim
- A protective top coat and a clear coat for the metal
- E6000 or hot glue
Steps:
- Wash the pot and let it dry.
- Brush on chalk paint, leaving some spots bare.
- Rub off extra paint with a damp cloth.
- Add a stencil or a pattern with acrylic paint.
- Seal with two coats.
- Glue on the trim.
Watch out: rust and wear. Metal can rust, so coat it.
Sandpaper wears through paint on plastic, so rub instead of sanding on ornate pots. A commenter notes that chalk paint without a protective coat may not hold up outdoors.
Our take: a great way to rescue ugly pots. Use packing peanuts for drainage in large pots.
See the post at The Navage Patch.
How Do You Pick Flowers for Decorated Pots?
Choose plants for the light, not the paint. A pot in full sun needs sun lovers such as geraniums, petunias and marigolds. A pot on a covered porch suits ferns, begonias and impatiens.
Match the size. A 4-inch pot suits a succulent or a few herbs.
A 10-inch pot fits a mixed arrangement. Group plants with the same light and water needs, and add one trailing plant.
Our rule: buy the plant first, then the pot. A big plant in a tiny pot will dry out in a day.
What Will It Cost, and How Long Will It Take?
Prices vary by store and region, so use these tiers.
| Tier | What it covers | Typical time |
|---|---|---|
| Free to cheap | Whitewashed pot, decoupage pot, tin can planter, clothespin planter | 15 minutes to an hour |
| One afternoon | Stenciled pots, geometric pots, rope pots, Sharpie dot pots | 1 to 3 hours with drying |
| Bigger project | Mosaic pots, rock-covered bucket, concrete pots | A day or two with curing |
Start with the cheap tier. For more simple ideas, see our guide to terracotta pot ideas.
Common Mistakes to Avoid
Skipping drainage holes. Roots rot in a pot that cannot drain.
Using indoor paint outdoors. Sun and rain need multisurface or outdoor paint.
Not sealing. Paint peels, and water can ruin the design.
Painting the inside of an herb pot. Paint the outside only for food plants.
Planting too soon. Let paint and sealer cure first.
FAQ
What can I use as a DIY flower pot? Terra cotta, tin cans, buckets and old teapots all work if they have drainage holes.
What paint is best for terra cotta pots? Acrylic craft paint works well. Use outdoor or multisurface paint for pots in the rain.
How do I stop paint from peeling on a flower pot? Seal the outside with a clear acrylic sealer, and let the paint dry first.
Can I paint a pot for herbs? Paint only the outside, and let it cure before you plant. Ask your local extension office if you are unsure.
Do decorated pots need drainage holes? Yes. Drill holes, or double-pot with a plastic nursery pot inside.
Related Posts
Never miss an update — choose FarmFoodFamily as your preferred source on Google.
How it works: Tap the button below to open Google's settings page, then check the box next to FarmFoodFamily.
Tap the checkbox to turn it blue — that's how you know it's set.