A Homeowners Guide To Replacing Roof Shingles
If you are a homeowner, then the odds are that you will need to replace your roof at some point. This is because shingles wear down over time and eventually need to be replaced. The process of replacing your roof can seem overwhelming; especially if it’s the first time you’re doing this type of project…

If you are a homeowner, then the odds are that you will need to replace your roof at some point. This is because shingles wear down over time and eventually need to be replaced.
The process of replacing your roof can seem overwhelming; especially if it’s the first time you’re doing this type of project on your home. That is why we have created this guide for homeowners who want to learn how they can do the job themselves!
Related: 13+ Different Types Of Roof Vents With Pictures
01. Get the Necessary Permits

Before embarking on your project, you will need to make sure that you have the necessary permits. Most municipalities require homeowners to have a permit before replacing roof shingles.
While some may allow you to do the work yourself without obtaining one, it is always best to get all necessary documentation first. If not, then there is a chance that you will be fined.
02. Prepare the Area
If you’re planning on doing the job yourself, then it’s a good idea to prepare the area before you begin.
This means removing anything that is currently shielding the roof and making sure that your ladder fits properly on the surface. The last thing anyone wants is shingles to fly off their roof while working and potentially hurt someone.

Related: 25+ Parts Of A Roof And Their Functions (Explained and Pictures)
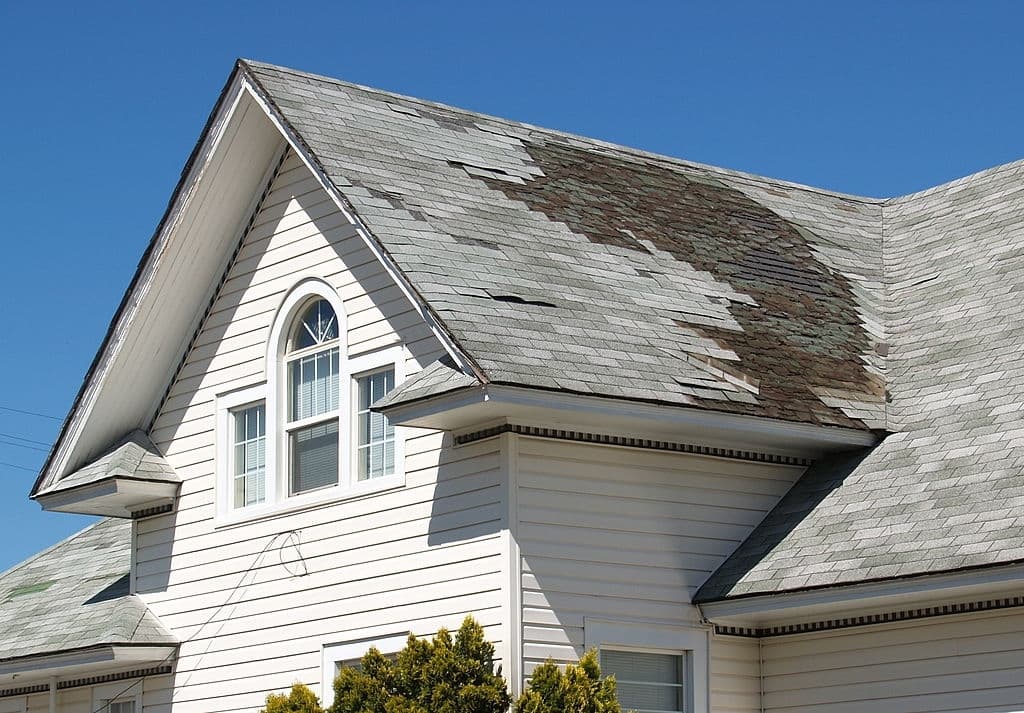
03. Examine the Shingles
Before you replace your roof shingles, it’s important to take the time to examine them first. Walk across your roof and make a note of any shingles that are missing or bent up.
This will help determine how many bundles of replacement shingles you are going to need. You should then check for any areas where there is an excessive amount of granules on the surface. If there are any, then your roof leaks and shingles may be replaced immediately.
04. Remove Old Roof Shingles
One of the first steps in replacing your roof is to remove all of the old shingles because they need to go first before installing the new ones. Don’t forget to remove your nails first, as these can puncture through the new shingles if they are not removed first.
If you’re worried that this will be too difficult, then it’s a good idea to take pictures of what the old shingles look like before removing them so you have an idea of what the surface of your roof should look like.
05. Safety First
Before installing any new shingles onto your roof, you must ensure that it is safe to do so. People often rush the job only to have an accident occur because they weren’t careful enough.
Ensure that your ladder is sturdy and fully extended before you begin working on the surface of the roof. Do not walk underneath even if your roof is divided into sections.
06. Hire a Certified Roof Installer

While you may think that you can install your roof shingles without professional installation, it’s always best to hire a certified roofer. Certified roofers companies such as Tucson Roofing have trained professionals who know exactly what steps are necessary to make the process go smoothly.
Most of all, they understand how to work safely on rooftops and ensure that everything is done correctly. While do-it-yourself guides are great, it’s always better to leave this job up to the professionals because you don’t want to place yourself at risk of an accident.
07. Install Ridge Caps
If you have a metal roof, we recommend installing ridge caps before you begin to install the new shingles.
This is because most modern metal roofs are not compatible with shingles and can end up causing leaks in your home over time if they aren’t used on top of them. The ridge cap will act as an additional barrier between all of your shingles and the rain, so this is always a good idea before you begin.
08. Install Underlayment
Before you install your new shingle, it’s important that you first install underlayment on top of the old roof surface.
If you’re unsure how to do this properly, then you should contact your local roofing professional to make sure that it’s done correctly. This is important because it acts as a barrier between the cold weather and your roof, preventing ice dams from forming in the winter.
09. Install New Roof Shingles
After removing all of the old shingles, it’s time to install the new ones. Start by installing your starter course and work your way up from there. The first row should be nailed down and then staggered with each successive row.
Your second course should be placed right on top of the first one, but make sure that you stagger it as well. For rows three through four, install them by nailing down two nails per shingle instead of one.
10. Get a Roofing Warranty
With the amount of money you spend on replacing your roof, you must get a warranty. This will protect both yourself and your investment because it prevents leaks from occurring just months after new shingles have been installed.


Depending on the company and how long you plan to stay in the house, this can be a huge deal-breaker when choosing a roofing shingle supplier.
When making the final decision to choose a roofing shingle, you need to keep in mind that cheap isn’t always better. While it’s true that all materials will come with a warranty, you’re going to get what you pay for.
It’s important that you choose a high-quality shingle that can withstand the elements of your climate; otherwise, this will lead to leaks over time. Don’t rush the process or make decisions on the spot if possible because it can save you more money in the long run.
Related: Would Your Home Insurance Cover Roof Leaks?
11. Cleanup
When all of your roofing shingles have been installed, it’s time to do the final cleanup. Sweep up any loose nails, dust, or dirt on your roof, and then enjoy your new shingles!
Conclusion
These are the main steps you will need to follow to replace your roof shingles. Replacing your roof can be stressful if you don’t have the proper tools or experience required. However, with our homeowner’s guide, we hope you can finish the job in a timely and safe manner!