Outside AC Unit Fan Not Running But Inside Is? | DIY Troubleshooting Guide
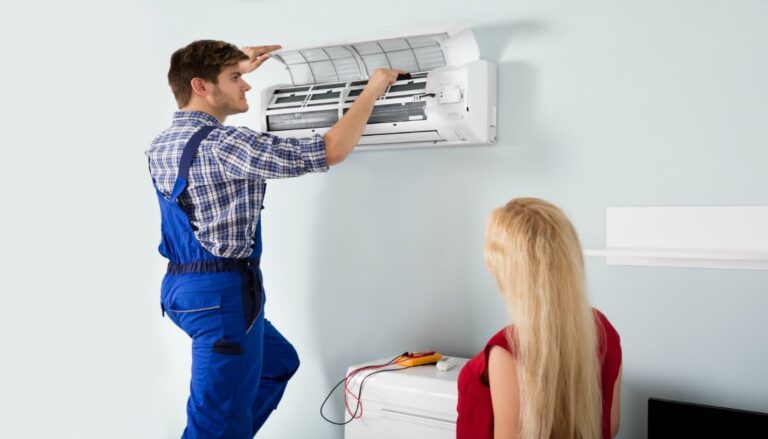
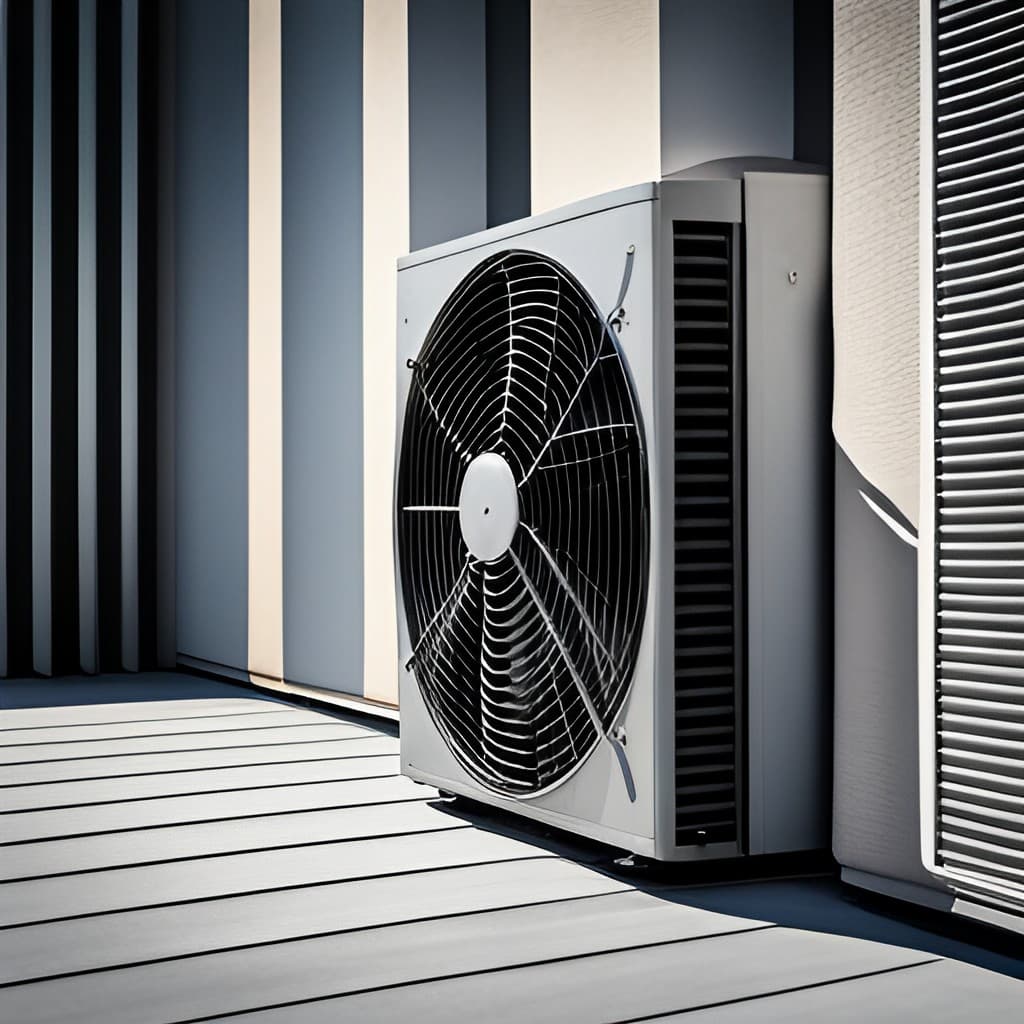
An outside AC unit fan plays a critical role in the cooling process of your home. It is responsible for blowing hot air outside and drawing cooler air inside, which helps maintain a comfortable temperature indoors.
When the outside AC unit fan is not running, it can lead to a host of problems such as reduced cooling efficiency, increased wear and tear on the system, and higher energy bills.
There are several common reasons why the outside AC unit fan may not be running while the inside unit is operational. Some of these reasons include a tripped breaker, a faulty capacitor, a damaged fan motor, or a blocked air filter.
It is essential to identify the root cause of the problem and address it promptly to avoid any further damage to your AC unit.
In this guide, we will discuss troubleshooting and resolving outside ac unit fan malfunction. We will explore the common causes of such malfunctions and provide steps to identify and resolve them.
We will also provide an overview of important safety precautions to take before working on the unit, in order to ensure the safety of yourself and your property.
By following this guide, you will be able to identify and resolve any issues with your outside AC unit fan quickly and easily.

Safety Precautions
When working on your outside AC unit fan, safety precautions should be taken to prevent any accidents or injuries. Here are some additional details and facts to keep in mind:
1. Disconnect power to the AC unit before working on it: This is a crucial safety measure that should not be overlooked. Make sure to turn off the power supply to the unit before beginning any work. This can typically be done by locating the circuit breaker or disconnect box near the unit and flipping the switch.
2. Wear proper safety gear, such as gloves and protective eyewear: Working on an AC unit can be dangerous, especially if you are not wearing the proper safety gear. Gloves and protective eyewear can help protect your hands and eyes from potential hazards such as sharp edges, debris, and electrical shock.
3. Never work alone; always have a partner: Having a partner present while working on your outside AC unit fan can provide an extra set of eyes and hands to help with the job. Additionally, if an accident were to occur, having someone else present can help ensure that prompt assistance is available.
Possible Causes for the Outside AC Unit Fan Not Running
Tripped Circuit Breaker
The circuit breaker is an essential component of your AC system as it helps protect the unit from potential electrical hazards. It acts as a safety device that automatically shuts off the power supply to the unit when it detects an overcurrent or short circuit. This prevents damage to the AC system and helps prevent electrical fires.
If your outside AC unit fan is not running, one of the first things to check is the circuit breaker. Here’s how to identify and reset a tripped circuit breaker:
1. Locate the circuit breaker box: This is typically located near the AC unit or inside your home.
2. Check the breaker position: Look for any breaker that is in the “off” position or is not fully in the “on” position. If you find one, this may be the cause of the problem.
3. Reset the breaker: To reset a tripped breaker, turn it off first, then turn it back on by flipping the switch to the “on” position.
4. Wait and check: Wait for a few minutes to see if the outside AC unit fan starts running again. If it does, then you have successfully resolved the issue. If not, then move on to the next possible cause.
Faulty Contactor
The contactor in an AC system is responsible for controlling the flow of electricity to various components of the unit, including the outside AC unit fan. When the thermostat signals the unit to turn on, the contactor receives the electrical signal and engages, allowing electricity to flow to the fan motor and compressor.
A faulty contactor can prevent the outside AC unit fan from running, even if the circuit breaker is not tripped. Some signs of a faulty contactor include:
1. The AC unit is not turning on at all, even though the inside unit is running.
2. The outside AC unit fan is not running, but other components such as the compressor are still functioning.
3. The contactor appears worn or damaged, with signs of corrosion or pitting on the contacts.
To diagnose a faulty contactor, here are some steps to follow:

1. Turn off power to the AC unit: As mentioned earlier, it is essential to turn off power to the unit before performing any work on it. This includes turning off the circuit breaker and disconnecting the power supply.
2. Locate the contactor: The contactor is typically located in a metal box near the outside AC unit. It is usually a black or gray box with several wires and connections.
3. Inspect the contacts: Check the contacts on the contactor for signs of wear, corrosion, or pitting. If the contacts appear damaged, the contactor may need to be replaced.
4. Test the contacts: Use a multimeter or voltage tester to test the contacts for continuity. If the contacts do not have continuity, this is a sign that the contactor is faulty and needs to be replaced.
Failed Capacitor
The capacitor in an AC system plays a vital role in providing the necessary electrical power to the fan motor. It acts as a reservoir for electrical energy, storing and releasing it as needed to ensure the fan motor has the required power to run. When the thermostat signals the unit to turn on, the capacitor sends an electrical charge to the fan motor, providing the initial energy boost needed to get the fan blades turning.
A failed capacitor can lead to the outside AC unit fan not running, even if the contactor and circuit breaker are functioning correctly. Some common symptoms of a failed capacitor include:
1. The outside AC unit fan is not running, but other components such as the compressor are still functioning.
2. The fan motor starts to turn but then stops abruptly.
3. The fan blades are turning slowly or not at all.
4. There is a humming sound coming from the outside AC unit.
To diagnose a failed capacitor, here are some steps to follow:
1. Turn off power to the AC unit: As always, it is critical to turn off power to the unit before performing any work on it. This includes turning off the circuit breaker and disconnecting the power supply.
2. Locate the capacitor: The capacitor is typically located near the fan motor. It is a small, cylindrical device with two or three sets of wires connected to it.
3. Inspect the capacitor: Check the capacitor for any signs of damage, such as bulging or leaking.
4. Test the capacitor: Use a multimeter to test the capacitor’s capacitance and resistance. If the readings are outside of the normal range, or the capacitor is not holding a charge, this is a sign that the capacitor has failed and needs to be replaced.
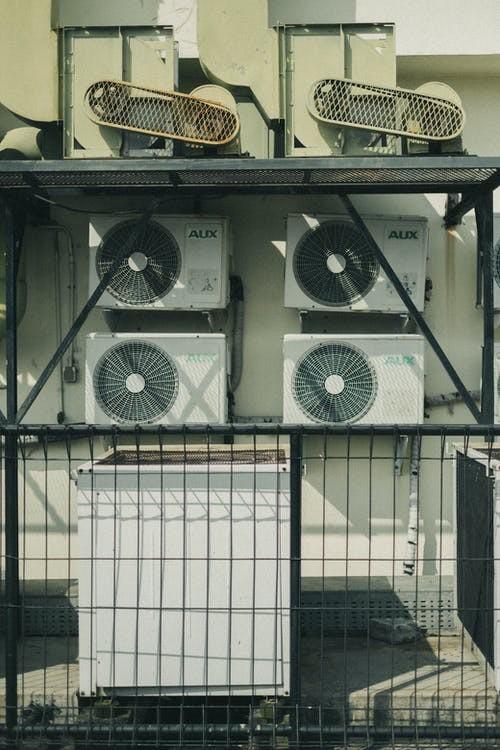
Damaged Fan Motor
The fan motor in an AC system plays a crucial role in the cooling process by drawing cool air into the unit and blowing hot air outside. It is responsible for maintaining the proper airflow necessary to keep your home at a comfortable temperature. If the fan motor is damaged, it can prevent the outside AC unit fan from running, leading to reduced cooling efficiency and increased wear and tear on the system.
Some common signs of a damaged fan motor include:
1. The outside AC unit fan is not running, but other components such as the compressor are still functioning.
2. There is a humming sound coming from the outside AC unit.
3. The fan blades are turning slowly or not at all.
4. The fan motor is making a squealing or grinding noise.
5. The fan motor is overheating.
Potential causes of a damaged fan motor include:
1. Lack of maintenance: Regular maintenance, including cleaning and lubricating the fan motor, can prevent damage and extend its lifespan.
2. Electrical issues: Electrical problems such as voltage spikes or insufficient power supply can damage the fan motor.
3. Overloading: Overloading the fan motor by running the unit too frequently or for too long can cause it to overheat and fail.
4. Age: The fan motor may naturally wear out over time, particularly if it is not properly maintained or exposed to harsh weather conditions.
If you suspect that your fan motor is damaged, it is important to contact a professional HVAC technician to diagnose and resolve the issue. Attempting to fix the fan motor yourself can be dangerous and may cause further damage to your AC unit. A trained professional can safely and efficiently identify the root cause of the problem and provide the necessary repairs or replacement.
Thermostat Issues
The thermostat in your home is responsible for communicating with your outside AC unit fan to ensure it runs when necessary to maintain a comfortable temperature inside. It sends a signal to the fan motor to turn on or off as needed, based on the temperature settings you have selected.
If your outside AC unit fan is not running, it is possible that there may be an issue with your thermostat. Here are some troubleshooting steps to identify and resolve thermostat-related problems:
1. Check the thermostat settings: Make sure that the temperature settings on your thermostat are accurately reflecting the desired temperature in your home. If the settings are incorrect, adjust them accordingly and see if this resolves the issue.
2. Replace the batteries: If your thermostat is battery-powered, check the battery levels and replace them if necessary. Low batteries can cause the thermostat to malfunction and prevent the outside AC unit fan from running.
3. Check the wiring: Make sure that the wiring between the thermostat and the outside AC unit fan is properly connected and not damaged. If there are any loose or damaged wires, this could be the cause of the problem.
4. Test the thermostat: Use a multimeter or voltage tester to test the thermostat for continuity. If the thermostat is not properly sending signals to the fan motor, this may be a sign that it needs to be replaced.
5. Call a professional: If you are unsure about any of these troubleshooting steps or do not feel comfortable performing them yourself, it is always best to call a professional HVAC technician. They can diagnose and resolve any issues with your thermostat or outside AC unit fan safely and efficiently.
It is important to note that thermostat-related problems are less common than other causes of outside AC unit fan malfunction. However, it is still important to check your thermostat settings and wiring to ensure they are functioning properly and not contributing to the issue.
By following these troubleshooting steps, you can identify and address any issues with your thermostat and ensure that your outside AC unit fan is running efficiently and effectively.
DIY Troubleshooting Steps
While it is always best to have a professional HVAC technician diagnose and resolve any issues with your outside AC unit fan, there are some basic troubleshooting steps that homeowners can take before calling in the experts.
However, it is important to assess the situation and determine if DIY troubleshooting is appropriate.
If you are unsure about any of the steps or do not feel comfortable performing them yourself, it is best to call a professional to avoid any potential safety hazards or further damage to your AC unit.
Here are some basic troubleshooting steps homeowners can take before calling a professional:
1. Check the air filter: A dirty or clogged air filter can prevent proper airflow and cause the outside AC unit fan to malfunction. Check the air filter and replace it if it appears dirty or clogged.
2. Clear debris around the unit: Debris such as grass, leaves, and dirt can accumulate around the outside AC unit, blocking the airflow and causing the fan to stop running. Carefully clear any debris around and inside the unit.
3. Clean the fan blades: Dirt and debris can also accumulate on the fan blades, causing them to become unbalanced and eventually stop spinning. Use a soft-bristled brush or cloth to gently clean the fan blades.
4. Test the circuit breaker: As mentioned earlier, a tripped circuit breaker can prevent the outside AC unit fan from running. Check the circuit breaker and reset it if necessary.
5. Test the capacitor: Using a multimeter, test the capacitor’s capacitance and resistance to determine if it is functioning correctly. If the readings are outside of the normal range, or the capacitor is not holding a charge, it may need to be replaced.
6. Check the contactor: Inspect the contactor for signs of wear, corrosion, or pitting. Test the contacts for continuity using a multimeter or voltage tester. If the contacts do not have continuity, the contactor may need to be replaced.
7. Check the thermostat settings: Make sure that the temperature settings on your thermostat accurately reflect the desired temperature in your home. If the settings are incorrect, adjust them accordingly and see if this resolves the issue.
By following these basic troubleshooting steps, homeowners can potentially identify and resolve issues with their outside AC unit fan. However, it is important to remember that attempting to fix the fan motor yourself can be dangerous and may cause further damage to your AC unit.
If you are unsure about any of these troubleshooting steps or do not feel comfortable performing them yourself, it is always best to call a professional HVAC technician.
When to Call a Professional
While some DIY troubleshooting may be appropriate for minor issues with your outside AC unit fan, there are some situations where it is necessary to call in the professionals. Here are some signs that you may need to hire a professional HVAC technician:
1. Electrical issues: If you suspect that the issue with your outside AC unit fan is caused by an electrical problem, it is best to call a professional. Electrical issues can be dangerous, and attempting to fix them yourself can lead to electrical shock or further damage to your AC unit.
2. Refrigerant leaks: If you suspect that your AC unit has a refrigerant leak, it is important to call a professional. Refrigerant leaks can be harmful to your health and the environment, and should only be handled by a trained technician.
3. Fan motor replacement: If you have determined that the fan motor is the cause of the issue, it is best to hire a professional to replace it. Fan motor replacement can be dangerous and requires specialized knowledge and tools.
4. Warranty coverage: If your AC unit is still under warranty, it is important to hire a professional to perform any repairs. Attempting to fix the unit yourself may void the warranty and lead to additional costs down the road.
The Benefits of Hiring a Professional for AC Repairs
1. Expertise and experience: Professional HVAC technicians have the training and experience to diagnose and repair issues with your AC unit quickly and efficiently. They can help identify the root cause of the problem and provide the necessary repairs or replacement.
2. Safety: Working on an AC unit can be dangerous, especially if you are not familiar with the system or safety protocols. Professional HVAC technicians have the necessary safety gear and training to work on your unit safely.
3. Cost-effective: While it may be tempting to attempt DIY repairs to save money, it can often end up costing more in the long run. A professional HVAC technician can help identify and resolve issues quickly and efficiently, potentially saving you money on repairs and energy bills.
4. Warranty protection: If your AC unit is still under warranty, hiring a professional to perform repairs can help protect your warranty coverage. Attempting to fix the unit yourself may void the warranty and lead to additional costs down the road.
Preventative Maintenance for Your AC System
As summer temperatures rise, it’s important to ensure that your AC system is in good working order. Regular preventative maintenance can go a long way in preventing issues and ensuring your system runs efficiently.
One of the most important reasons for regular AC maintenance is to prevent breakdowns. Over time, wear and tear can cause parts to malfunction, which can lead to costly repairs or even a complete system failure. By having your system inspected regularly, you can catch small issues before they become big problems.
Another benefit of regular maintenance is improved energy efficiency. When your system is running smoothly, it requires less energy to cool your home, which can lead to lower energy bills. This is important not only for your wallet, but also for the environment.
So, what can you do to maintain your AC system? Here are a few tips:
1. Clean your system regularly. This includes removing debris from around the outdoor unit, wiping down the indoor unit, and cleaning the air ducts.
2. Have your system inspected annually by a professional. They can spot issues that may not be visible to the untrained eye and make necessary repairs.
3. Replace your air filter regularly. A dirty filter can restrict airflow and cause your system to work harder than it needs to.
Conclusion
In conclusion, if you’re experiencing the issue of the outside AC unit fan not running while the inside unit is operational, it could be due to a few different causes, such as a faulty capacitor, a malfunctioning fan motor, or a tripped breaker. However, regular preventative maintenance can help prevent these issues from occurring in the first place.
It’s important to emphasize the importance of regular maintenance and professional assistance when needed. A trained technician can not only spot potential issues before they become major problems but can also ensure that your AC system is running as efficiently as possible.
As a homeowner, taking a proactive approach to maintaining your AC system can save you money in the long run and increase the longevity of your system. This includes simple tasks such as regularly cleaning your system and replacing the air filter, as well as scheduling annual inspections with a professional technician. By staying on top of your AC maintenance, you can ensure that your system is running smoothly all summer long.
FAQs
How often should I inspect my outside AC unit?
It is recommended to inspect your outside AC unit at least once a year, or more frequently if you notice any issues with its performance.
Can I replace the motor or capacitor myself, or should I call a professional?
If you are not comfortable with inspecting or repairing the unit yourself, then it is best to contact a professional HVAC technician who can safely replace any defective components.
What are some signs that my AC unit needs to be serviced?
Some signs that your AC unit needs to be serviced include strange noises, insufficient cooling or heating, and high energy bills.
How can I prevent future fan motor or blade issues in my outside AC unit?
To prevent future fan motor or blade issues in your outside AC unit, it is important to regularly inspect and maintain the system. Additionally, if any components such as the fan motor, capacitor and control board become worn or damaged, then it is best to replace them with high-quality products certified by your local HVAC authority.
Can a damaged outside AC unit fan affect my energy bill?
Yes, a damaged outside AC unit fan can affect your energy bill as the unit may not be running at its maximum efficiency due to the wear or damage on the components. To ensure optimal performance, it is important to regularly inspect and maintain the unit. If any components become worn or damaged, then they should be replaced with products certified by your local HVAC authority that can provide reliable performance for many years.