How to Identify and Repair Any Wall Texture (15 Types Explained)
Most wall texture guides start from the same assumption: you’re standing in an empty room, deciding what to apply. In practice, that’s rarely the situation. You bought a house with texture already on the walls and you don’t know what it’s called. You’re patching a hole and the repair looks wrong next to everything around…

Never miss an update — choose FarmFoodFamily as your preferred source on Google.
How it works: Tap the button below to open Google’s settings page, then check the box next to FarmFoodFamily.
Tap the checkbox to turn it blue — that’s how you know it’s set.
Most wall texture guides start from the same assumption: you’re standing in an empty room, deciding what to apply. In practice, that’s rarely the situation. You bought a house with texture already on the walls and you don’t know what it’s called.
You’re patching a hole and the repair looks wrong next to everything around it. You’re wondering, honestly, whether that bumpy ceiling is something you should be touching at all.
This guide covers all three. Fifteen real texture types, how to tell them apart when you’re standing in front of one, and what to actually do about repairing or matching texture that’s already there, since that turns out to be the harder problem for most homeowners.

How to Tell Which Wall Texture You Have
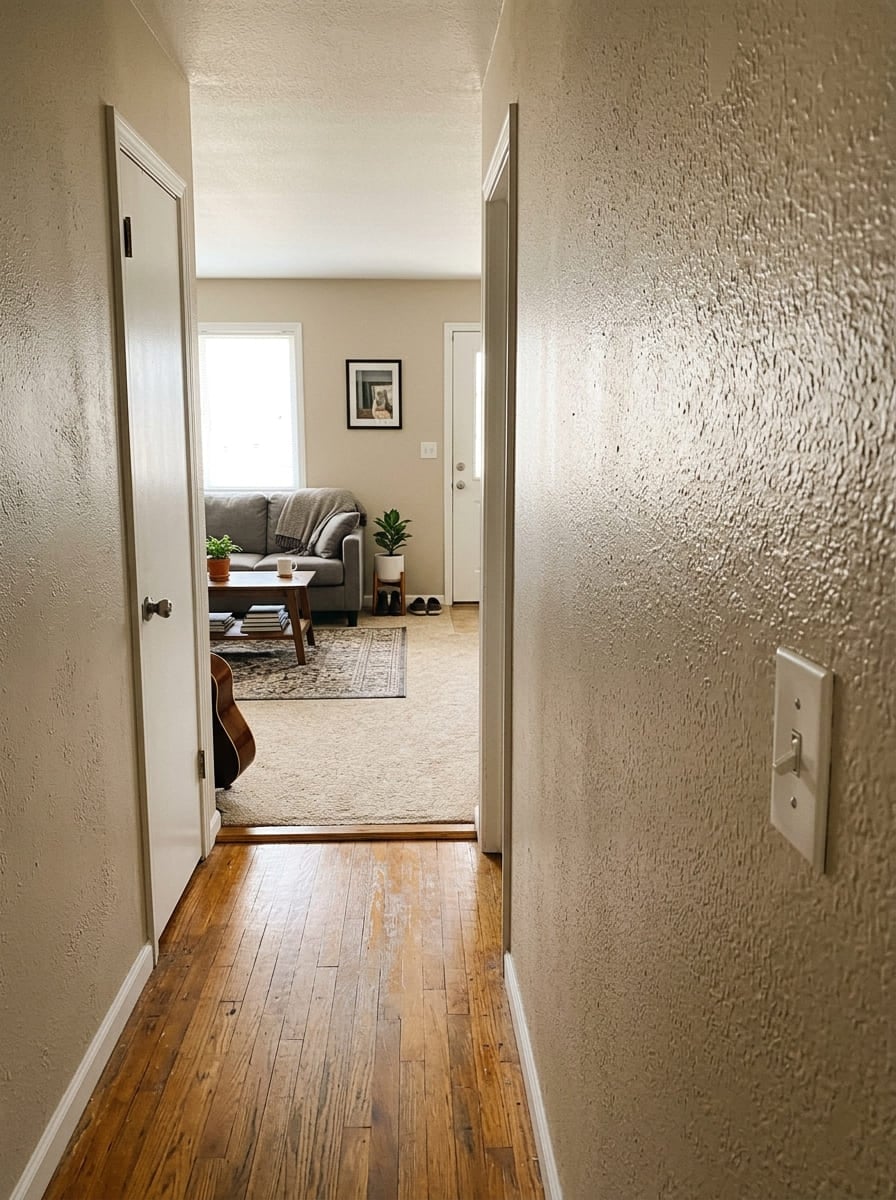
Ask a handful of homeowners to identify their own wall texture and you’ll get a lot of shrugging. On r/drywall and r/DIY, the single most common question isn’t “how do I apply texture,” it’s “is this orange peel or knockdown?” One contractor’s answer, from a thread with real votes behind it, cuts to the actual confusion: a lot of what looks like knockdown is orange peel that got knocked down after spraying. They’re not always two separate finishes. Sometimes one is just the other, flattened.
A few practical cues help more than staring at reference photos:


Run your hand across it. Sprayed textures (orange peel, popcorn, spray sand) feel bumpy but rounded, nothing sharp. Hand-troweled textures (skip trowel, Venetian plaster, Santa Fe) feel more like deliberate ridges and flat planes, because a tool shaped them after the material went on.
Look at the edges of the bumps. Flattened, slightly shiny high points usually mean a knockdown pass happened, someone dragged a trowel over wet texture to blunt the peaks. Uniform round bumps with no flat spots mean it was left as-sprayed.
Check where it is. Popcorn shows up almost exclusively on ceilings from the 1960s through the 1980s. Comb and crow’s feet patterns are almost always a deliberate hand finish, not something that happens by accident. If a texture looks intentional and patterned rather than random, it’s a stamped or brushed technique, not a sprayed one.
None of this needs to be perfect. The identification only matters enough to know what tools and materials you’re trying to match, which is the next real problem.
15 types of wall textures
You know the orange peel, the popcorn, and the slap brush but there is more to wall textures than these three. Wall textures are important in stylistically concealing wall impurities, cracks, and other imperfections.
If you are looking for other types of wall textures that you can explore for home improvement, here is a rundown that might come in handy.
1. Splatter knockdown
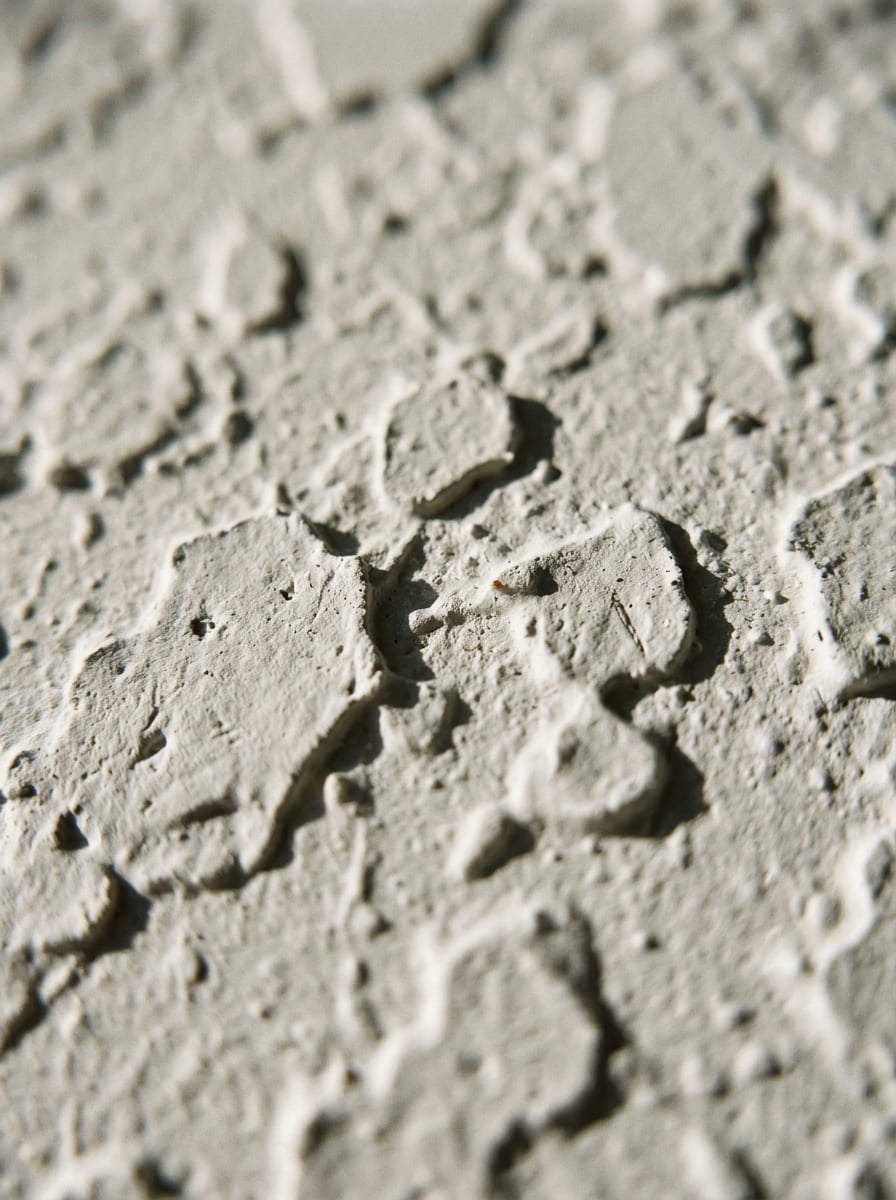
Two coats of primer first, then a sprayed splatter pattern, then a drywall knife knocks the high points flat before the material fully sets.
That knockdown pass is where most DIY attempts go wrong: too early and the texture smears, too late and the knife just skips over hardened peaks without flattening anything. It’s not a beginner project.
2. Comb
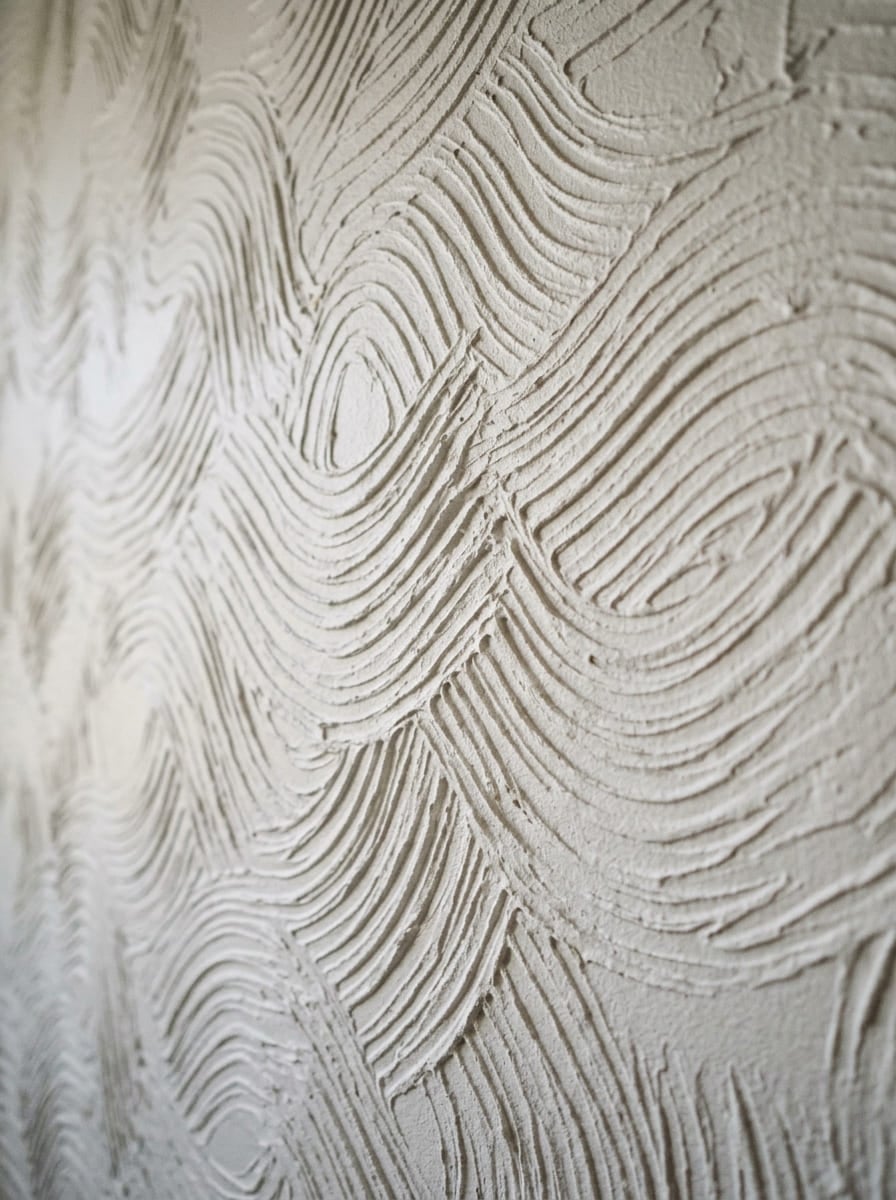
The most deliberately decorative texture on this list, and the one most likely to show up in a designer’s portfolio rather than a rental unit.
A single coat of primer, then a fork or a fine-toothed comb tool dragged in multi-angled lines across the wall while the material is still wet. The lines can run straight, arc, or crisscross depending on how much pattern the room can handle.
3. Popcorn
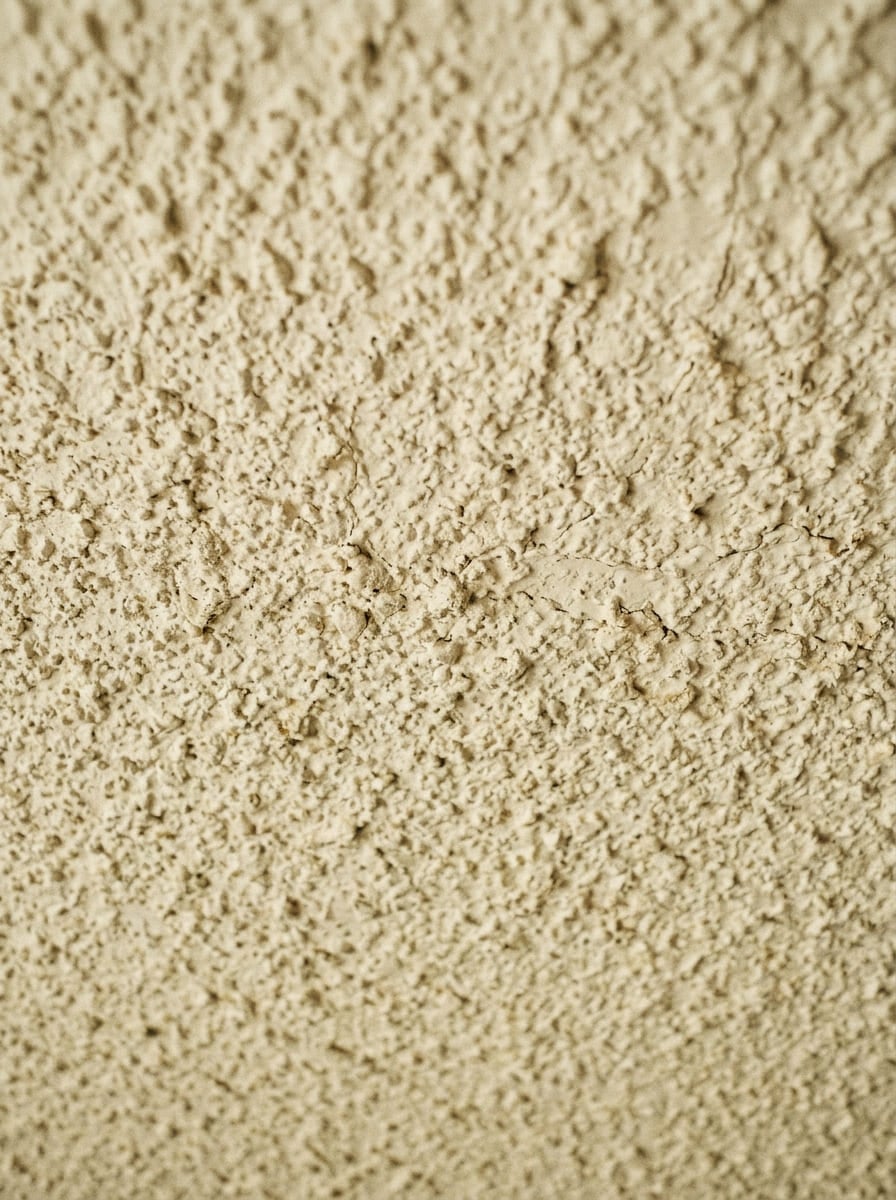
Popcorn is the texture most people can identify without thinking about it, mostly because it’s the one everyone’s parents or grandparents had on a ceiling.
It muffles sound and hides an uneven substrate well, which is exactly why it got sprayed onto so many ceilings between the 1960s and 1980s. It fell out of favor for reasons beyond looks, see the asbestos FAQ below before you consider scraping any popcorn ceiling that predates 1990.
4. Slap brush
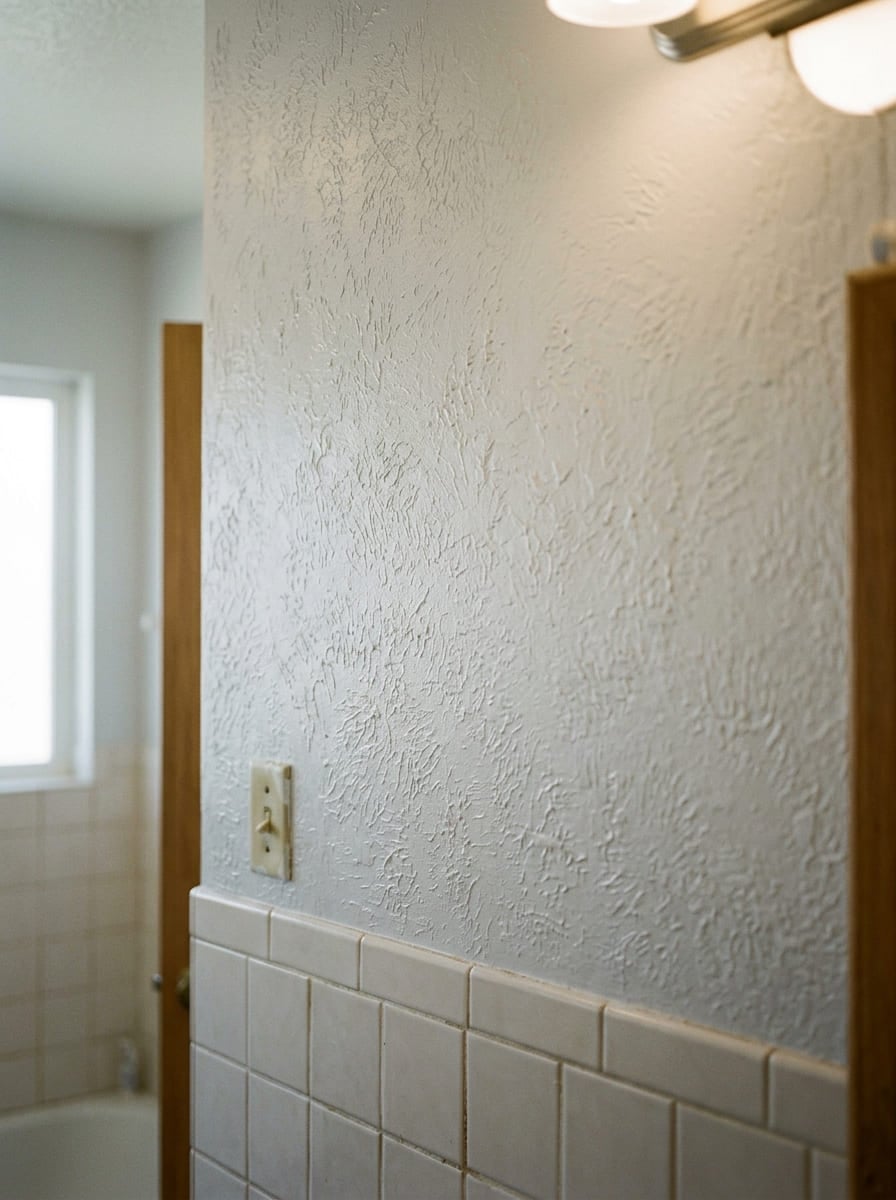
You’ll need a stomp brush or a panda-paw brush for this one. Mud gets rolled onto the wall first, then stamped repeatedly with the brush until the pattern reads the way you want.
It’s a common choice for bathrooms specifically because it hides the small defects that show up around plumbing cutouts and fixture mounts. Budget real dry time before painting, closer to a full day than a few hours; rushing this step is the most common reason slap brush jobs look patchy.
5. Santa Fe
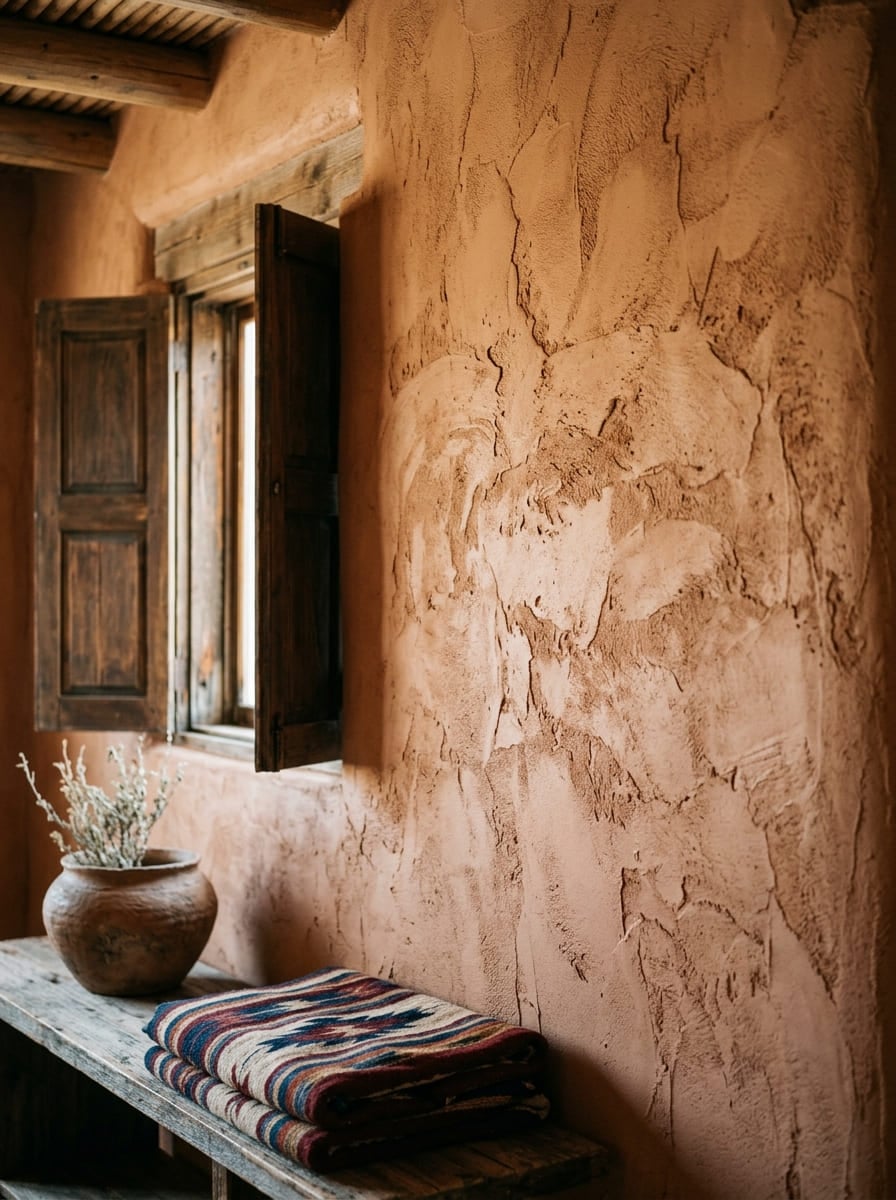
Two layers of drywall compound, one smoother than the other, with pattern built into the second coat using a wide drywall knife while it’s still workable.
It reads as regional and specific rather than generic, which is why it’s mostly reserved for patios, mudrooms, and southwestern-style interiors rather than a standard living room.
6. Orange peel
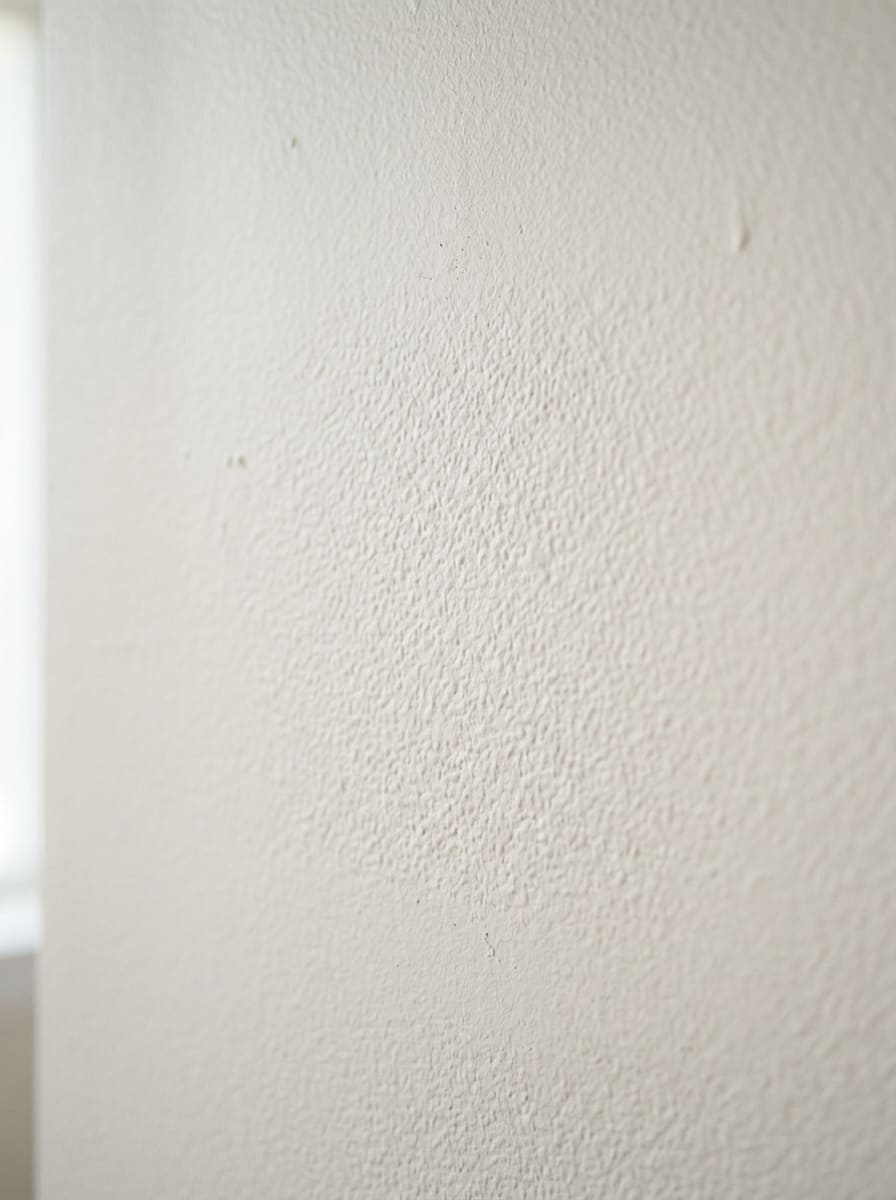
This is the one you’ve almost certainly touched without knowing its name. Primer down, texture sprayed on in a fine, consistent pattern, then a second round of primer once it dries.
The whole appeal is subtlety: it should read as a faint dimpled surface from across the room, not a statement finish. Overspray it, or spray it while the compound is too thick, and it starts drifting into knockdown territory instead.
7. Skip trowel
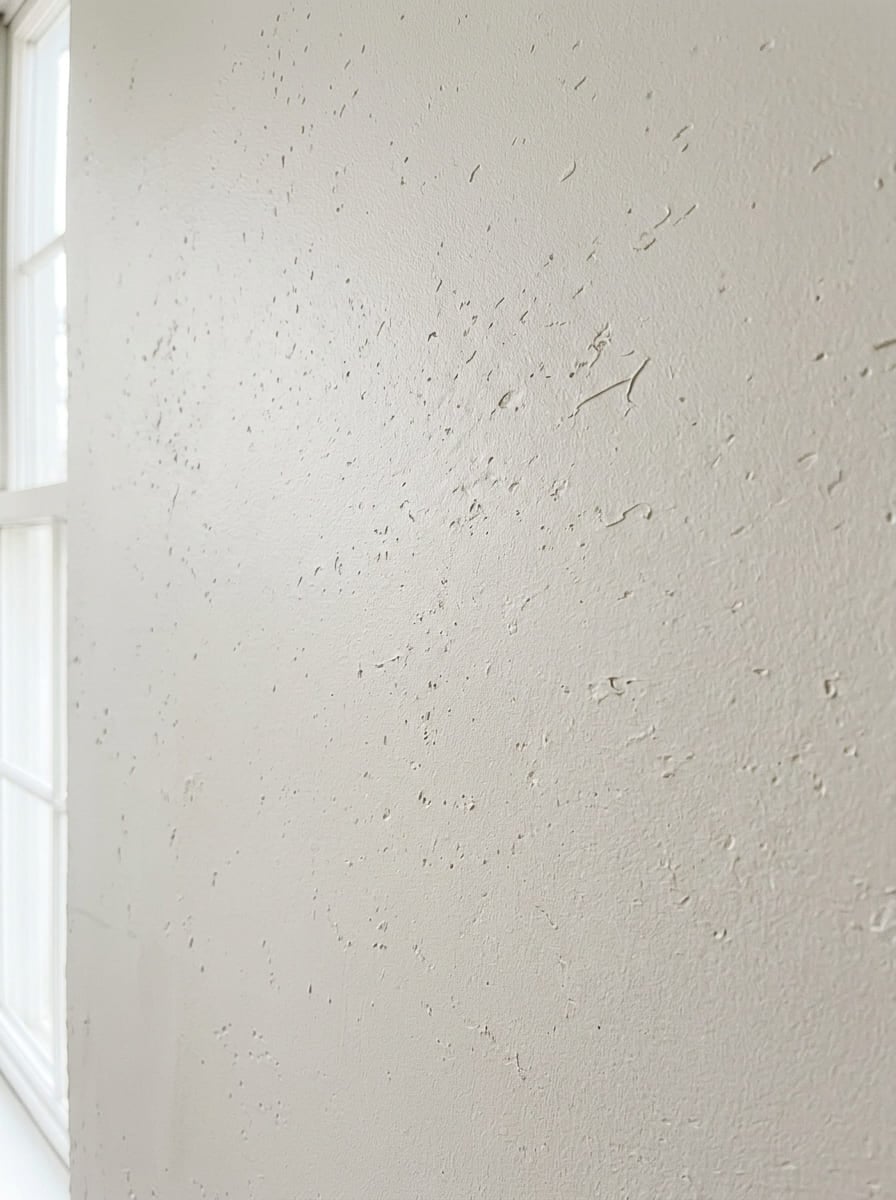
Named for the tools, a hawk and a trowel, used to roll thin, uneven layers of compound across the wall in overlapping passes. It’s a common bedroom choice because it softens light without the heavier look of a full knockdown. Skip trowel work rewards patience: rushed passes leave visible seams where one layer of mud stops and the next starts.
8. Hand-applied
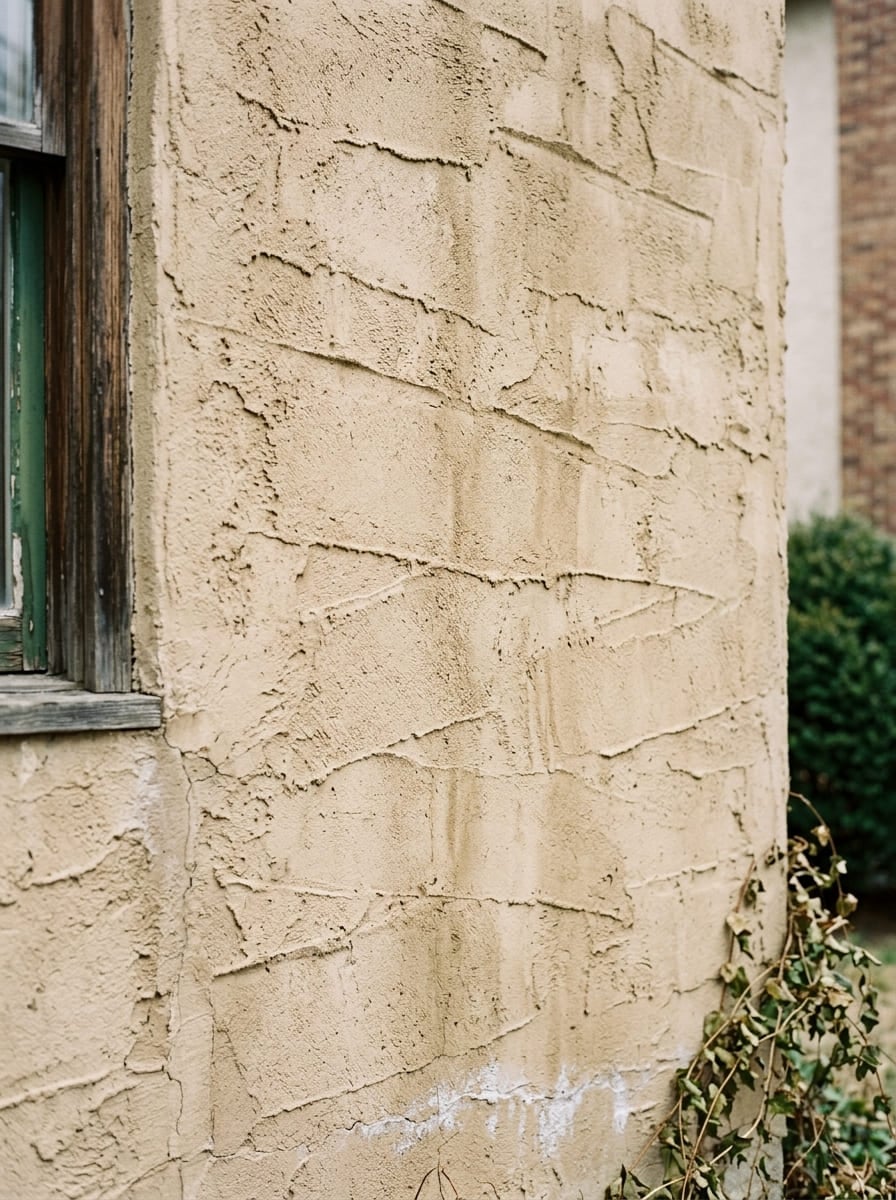
Sometimes the tool is just your hand. A fine brush and sprayer still do most of the setup work, but the final ragged, irregular lines come from someone literally dragging compound across the surface by hand.
That irregularity is the point: it hides imperfections better than almost any other technique, which is why it shows up most often on exterior walls, mudrooms, and garages where perfection was never the goal.
9. Sand swirl
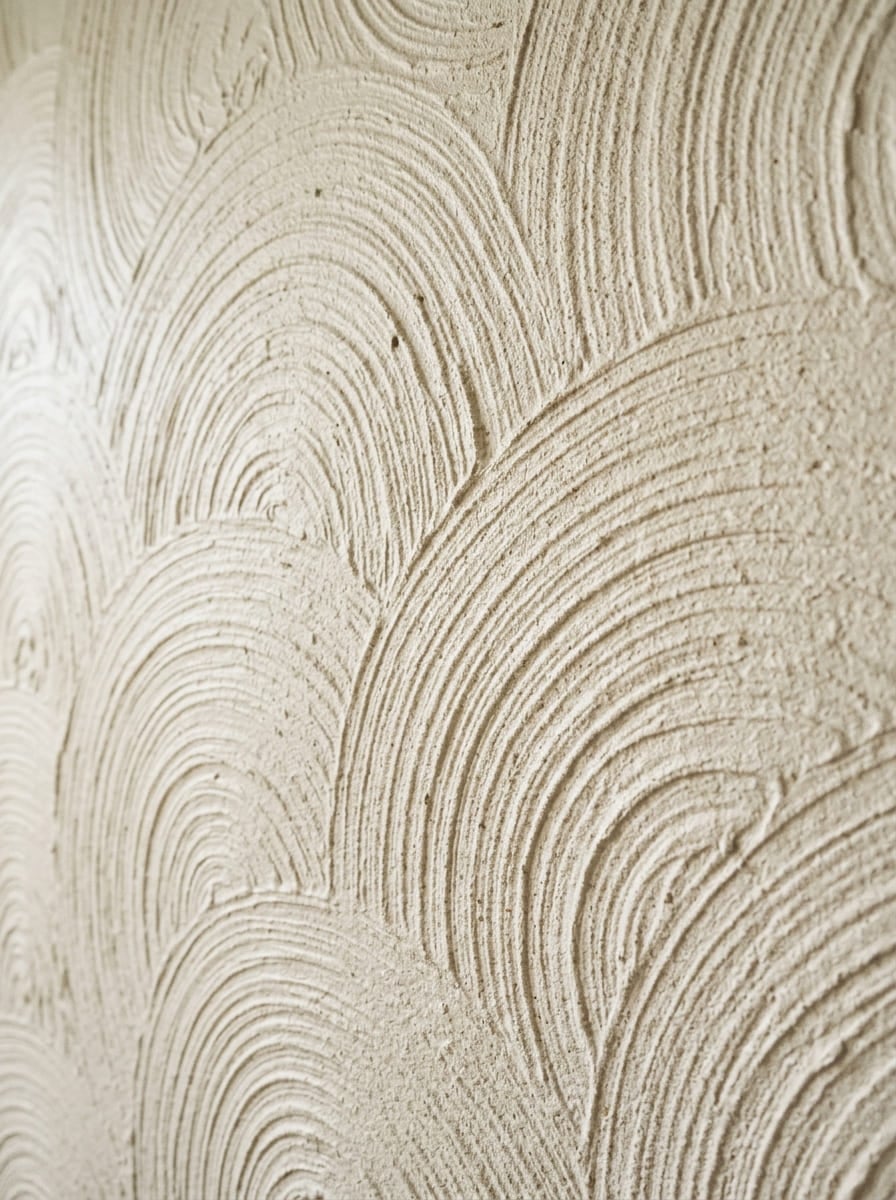
A hybrid of the sand-spray technique and the comb method, made with a stiff bristle brush pulled through wet compound in swirling or rainbow-shaped passes. It’s not a first-timer’s texture.
Getting the swirls consistent across a full wall takes practice, and the difference between “intentional” and “sloppy” is smaller than it looks in photos. Done well, it holds up on exterior walls and kids’ rooms, where a bumpier, more forgiving finish is actually an advantage.
10. Rosebud
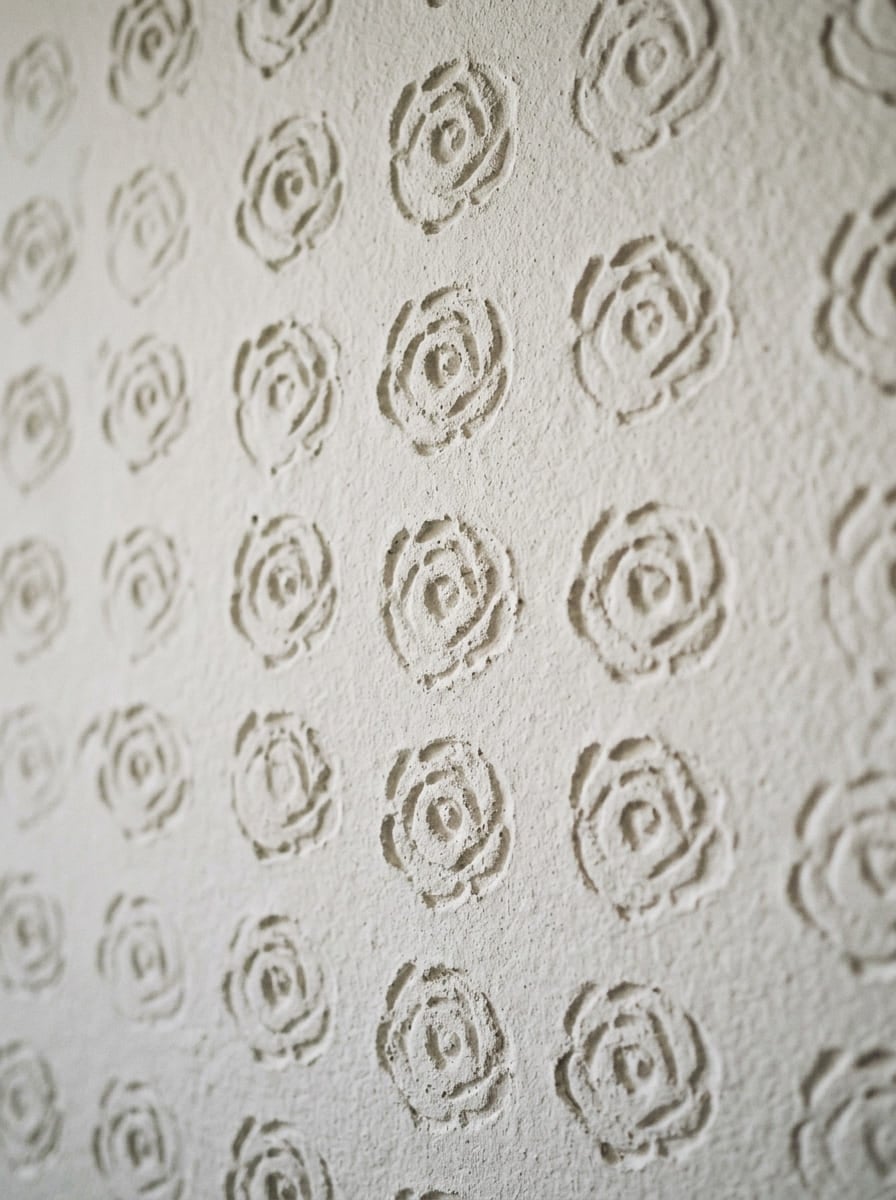
Stomped rather than swirled, with a rosebud-shaped stamp pressed into an already-knockdown-smoothed surface to leave a repeating petal-and-center pattern.
Getting the rosebuds aligned across a full wall is the hard part, and it’s worth practicing on a scrap piece of drywall first before committing to a visible surface. Exterior walls are the most forgiving place to try it, since small variations blend into the texture rather than standing out.
11. Crow’s feet
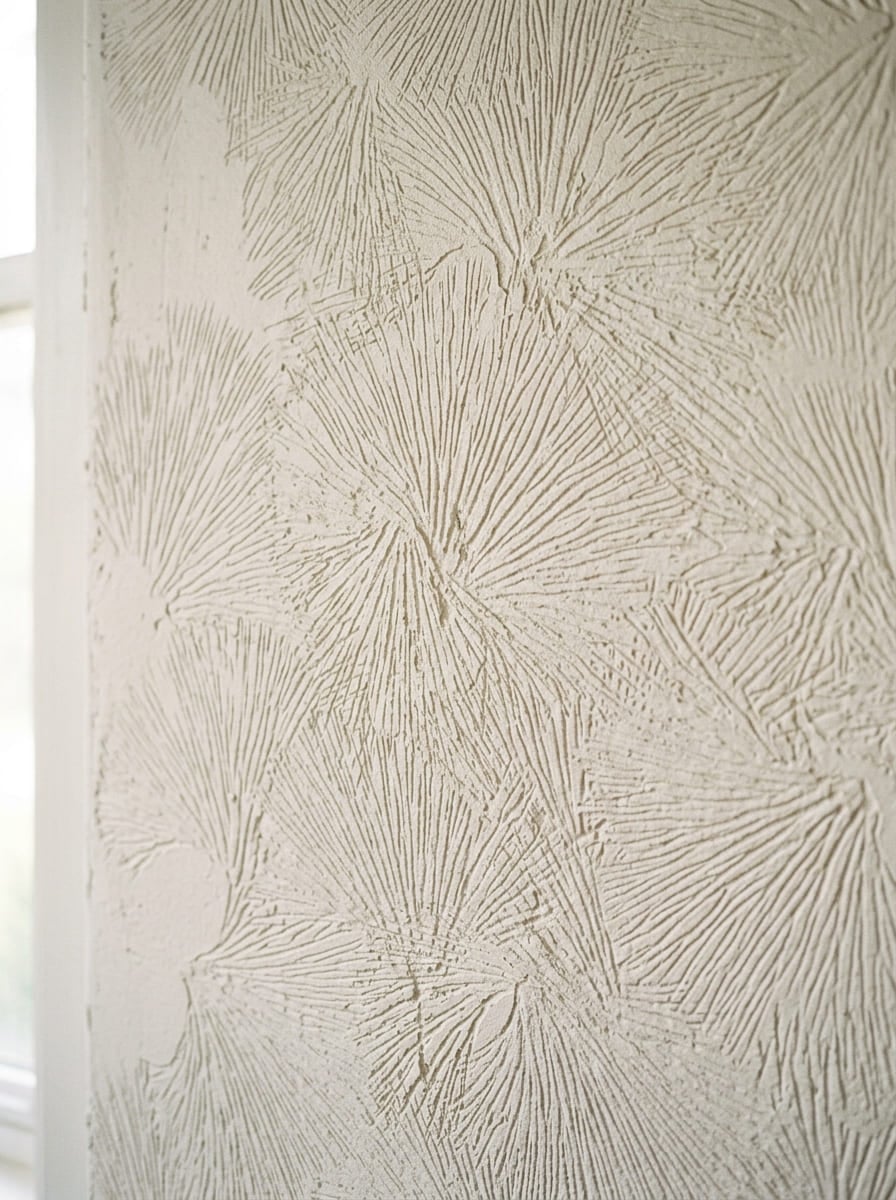
Wet mud goes on with a stiff brush or roller, then a pole gets twisted firmly left to right while dragging the tool up and down. The name comes from the resulting pattern, thin, branching lines that fan out like the corner of an eye. It’s messy work, cover the floors and furniture, and it needs to happen fast before dust starts settling into the wet mud. Living rooms and studies are the usual home for this one.
12. Knockdown
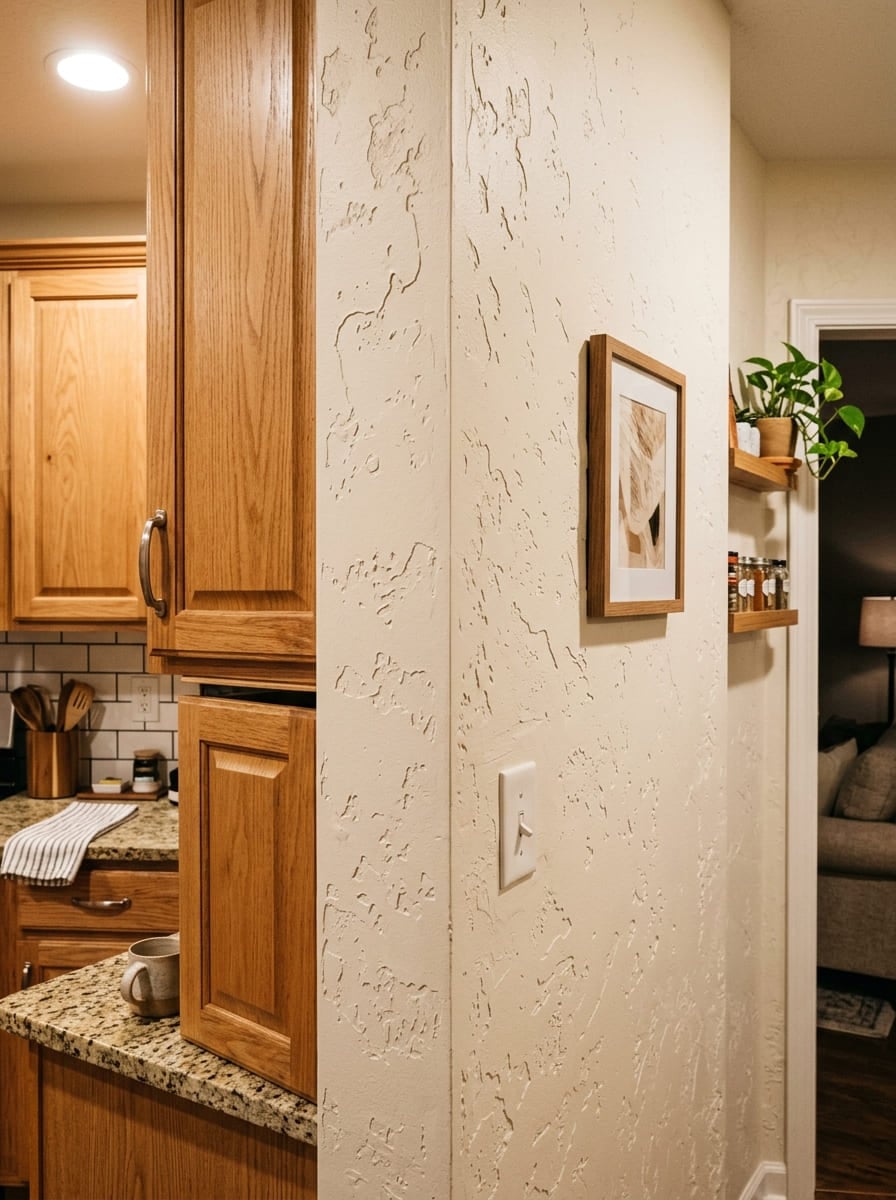
Arguably the most common professional texture in stucco-style homes, and one of the more forgiving finishes to apply. Spray it the same way you’d spray orange peel, then run a drywall knife over it before it fully dries to flatten the peaks. A trowel smooths the surrounding surface afterward for a more finished look. Kitchens, dining rooms, and living rooms are the usual spots.
13. Stomp knockdown
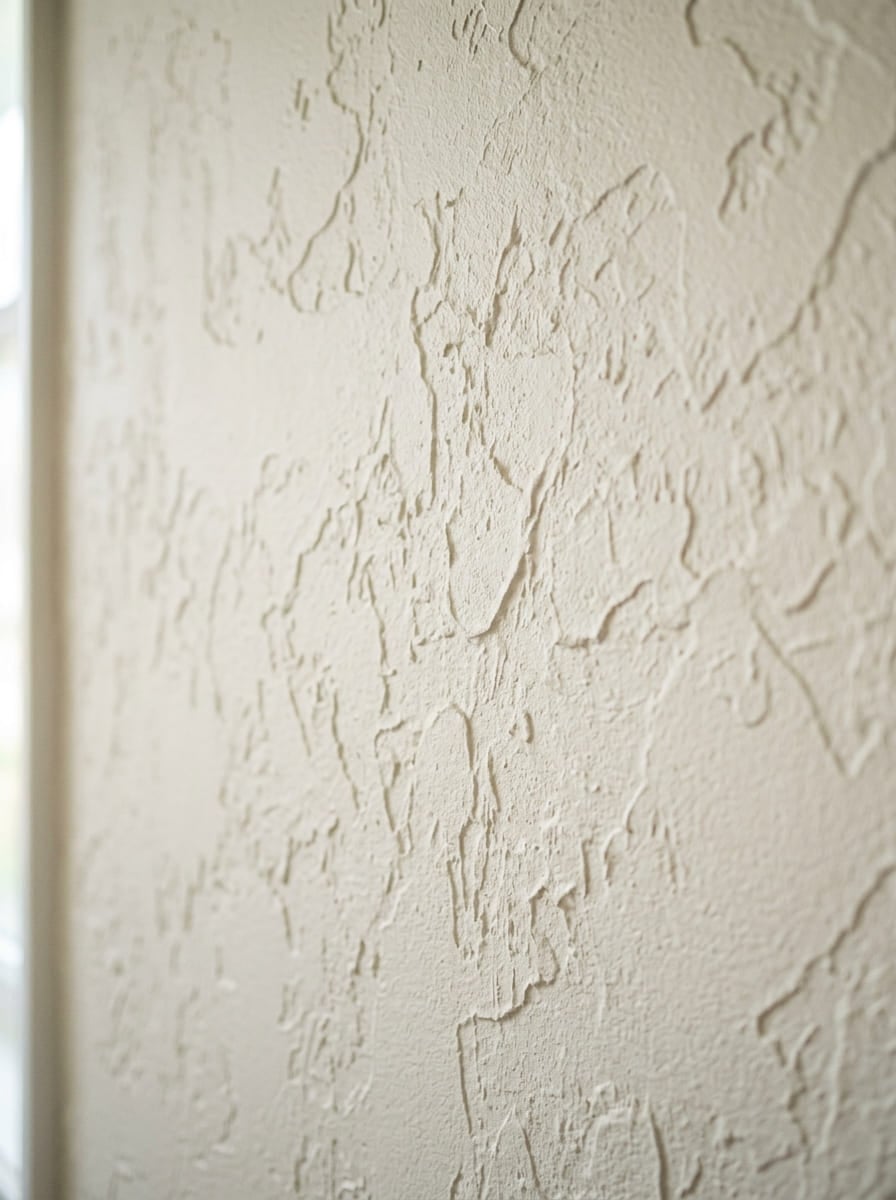
A variant of standard knockdown, but the flattening tool changes: instead of a drywall knife, a paint roller and stomp brush press directly into mud applied straight to the drywall. Compound mud is the standard material here, chosen specifically because it holds up under the stomping step without crumbling.
14. Venetian plaster
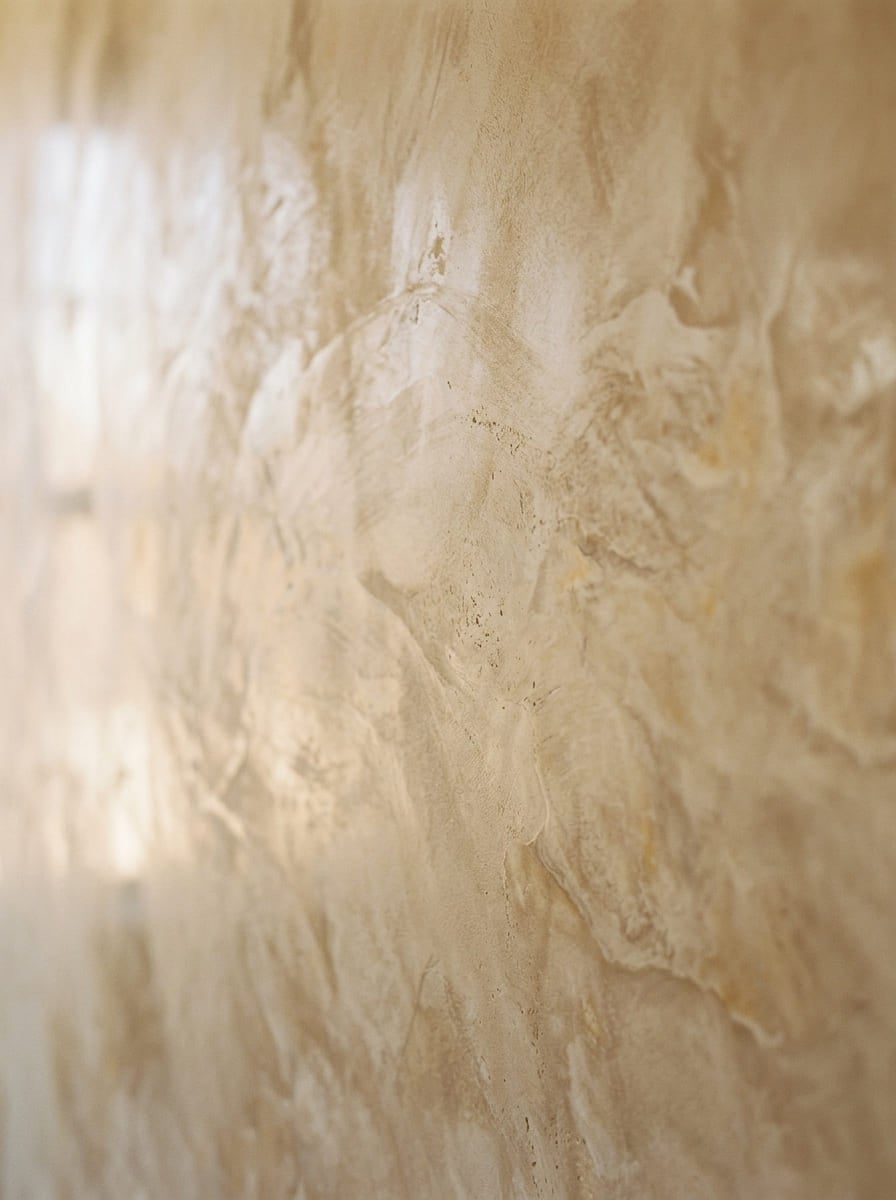
One of the oldest wall-finishing techniques still in regular use, with roots going back centuries and a look that mimics polished raw concrete or marble.
The finish comes from marble dust blended with compound mud or putty, applied in thin layers and buffed to a soft sheen after drying. Plan for real drying time between coats, several hours at minimum, since rushing the second layer is the fastest way to ruin the polish.
15. Spray sand
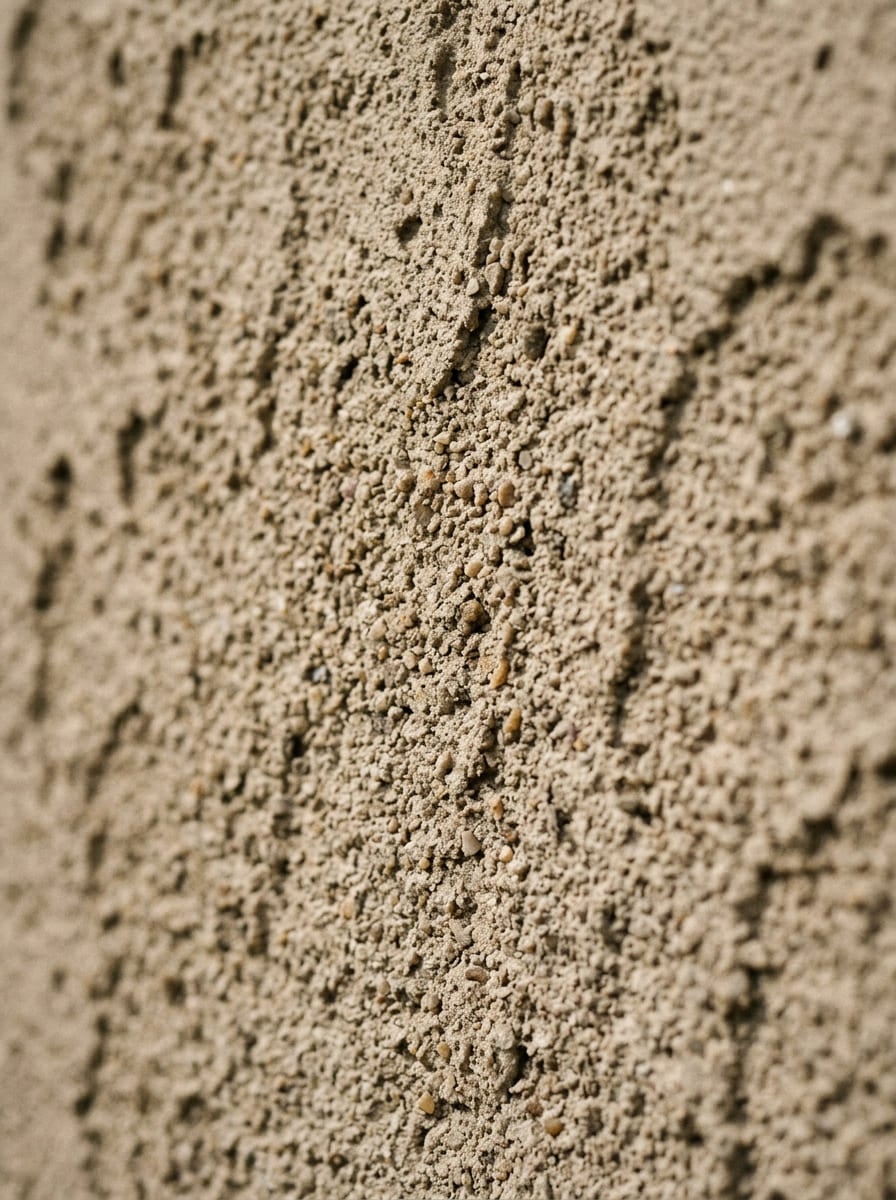
Visually close to orange peel but built from a different mixture: primer, water, and a bag of actual sand, left to sit overnight before application.
Stir it well before spraying, since sand settles fast and an uneven mix shows up immediately on the wall. The upside is durability. Spray sand holds up to cracking better than most other sprayed finishes, and it’s a strong match for stucco exteriors.
How to Repair and Match Existing Wall Texture
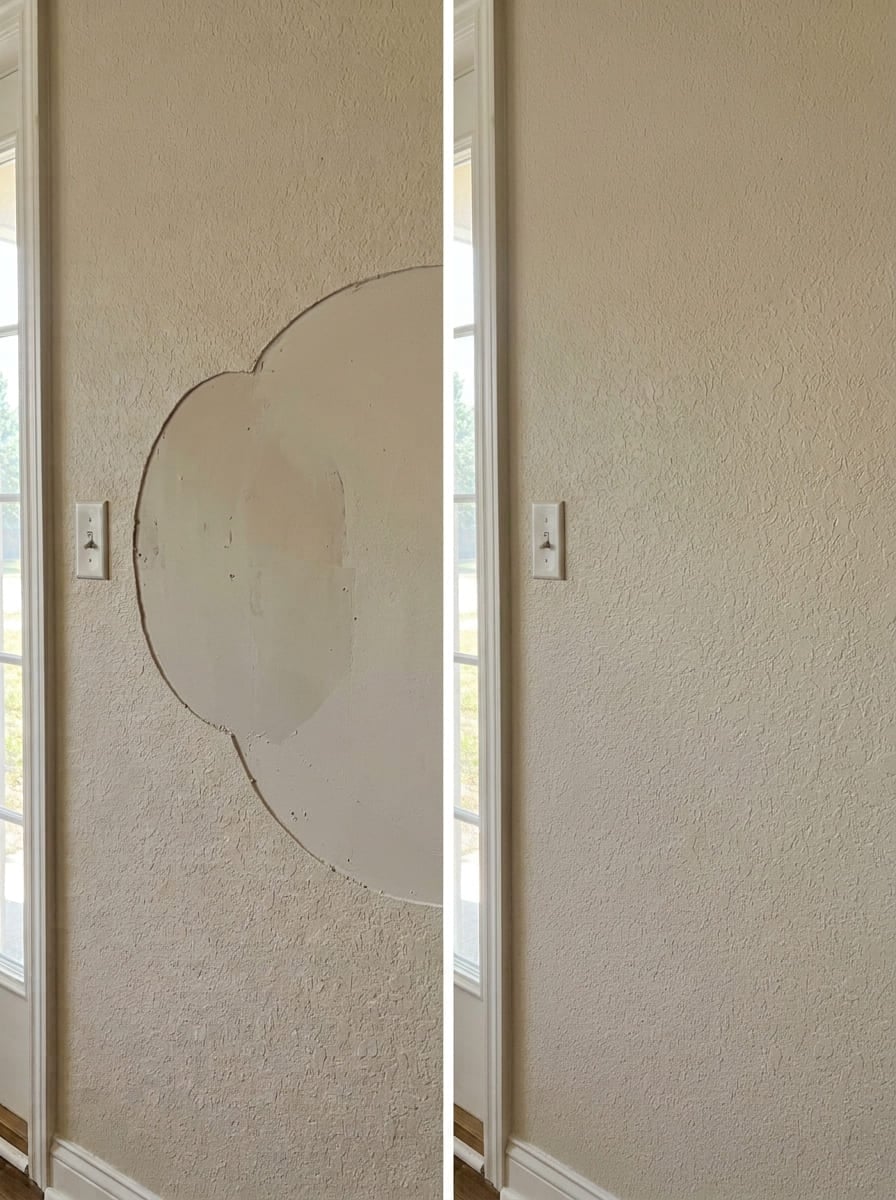
This is the part almost every other wall texture guide skips, and it’s the part homeowners actually search for most. A drywall patch is easy. Making that patch disappear into forty-year-old texture around it is the real problem, and it’s a bigger, more common headache than picking a texture to apply from scratch.
The core issue, according to a 292-upvote thread on r/howto, is that canned spray texture almost always reads as “too much” next to older, subtler original texture. New cans spray a heavier, more uniform pattern than decades-old hand-mixed compound ever produced.
A few fixes that come up repeatedly across r/Housepainting101, r/Renovations, and r/drywall threads:
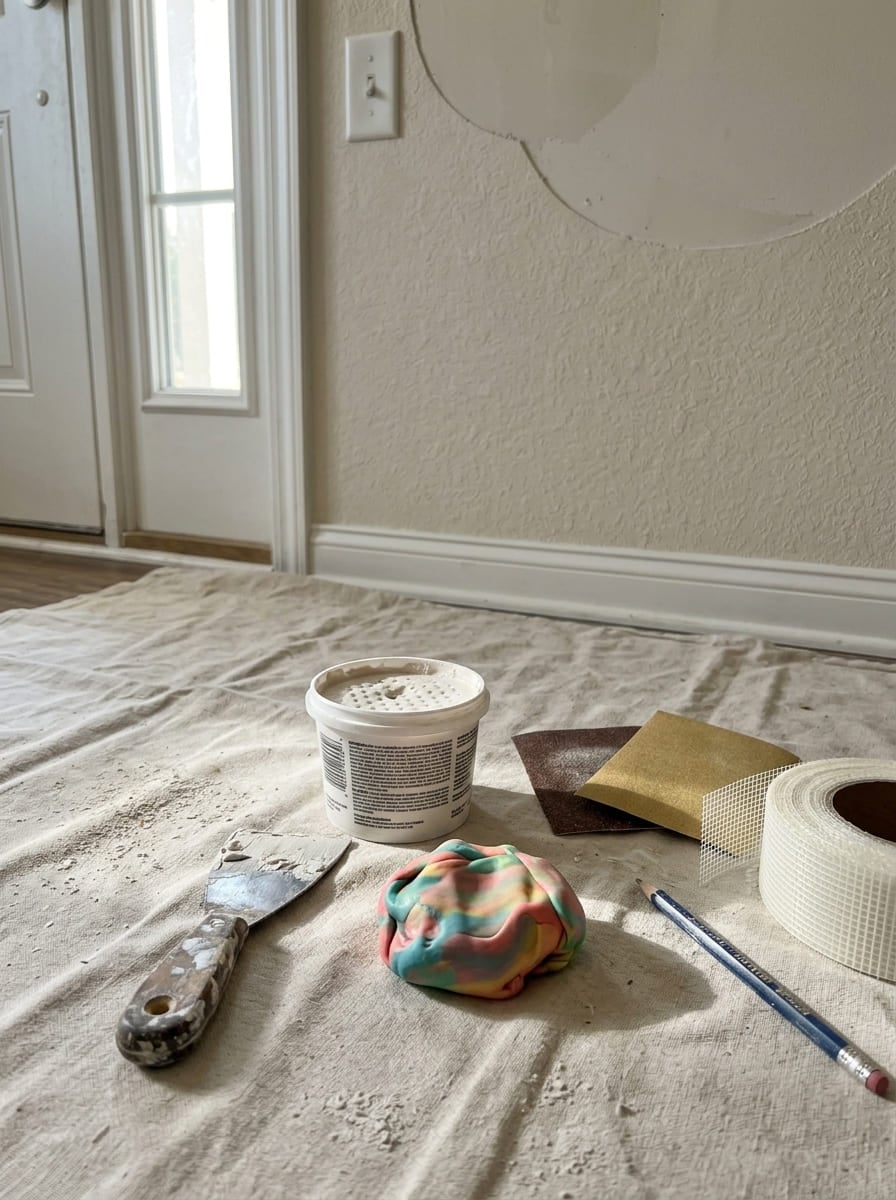
The texture-transfer trick.
Press a piece of silly putty firmly against an undamaged section of texture nearby, lift it off, and it holds a mirror impression of the pattern. Press that same putty onto the wet patch compound to transfer the texture directly, rather than trying to recreate it freehand. It’s an odd tool for drywall repair, but it works because it copies the actual pattern instead of approximating it.
Match the roller nap to the original texture depth.
A thicker nap picks up more compound and lays down a heavier texture; a thinner one gets closer to subtle, older finishes. If the wall’s texture barely reads from across the room, a heavy canned spray texture is the wrong tool no matter how carefully it’s applied.
Redo the whole wall when you can, not just the patch.
Spot repairs are the fastest way to end up with a visible blotch, even with a perfect texture match, because paint sheen and slight color variation give the patch away regardless. If the damaged area is small and central to the wall, it’s often faster in the long run to retexture the full wall or panel than to fight a spot match forever.
Wall Texture FAQs
What is wall texture?
Wall texture sits between paint and drywall compound in thickness, applied over a primed surface to create small shadows and dimension rather than a flat plane. Orange peel remains the most common starting point for homeowners because it’s the least demanding to apply evenly, but the range of available finishes has grown considerably since it was the default option.
How much does it cost to texture walls?
The number depends heavily on which technique you’re paying for, not just square footage. Sprayed textures like orange peel and knockdown run $0.80 to $1.50 per square foot including labor and materials, according to Angi’s 2026 pricing data. Hand-applied textures cost more, $1.50 to $2.00 per square foot, because they take more skill and time. Skip trowel lands around $1.25 to $2.00 per square foot. If you’re removing old texture and starting fresh rather than texturing bare drywall, HomeGuide’s 2026 data puts retexturing at $1.80 to $3.80 per square foot. Most contractors also carry a flat minimum charge around $100 regardless of job size, per Homewyse.
What is the point of textured walls?
Concealing drywall seams, dents, and minor imperfections is the practical reason texture exists at all. It also changes how a wall reflects light, adding depth that flat paint can’t produce on its own. That’s part of why texture has moved from a purely functional fix to a design choice in its own right: Justin Orton, ASID, NCIDQ, principal designer at Of Origin Design Studios in Nashville, points to “a clear shift away from overly polished and overly styled interiors and toward spaces that feel grounded and tactile” as one of the driving forces behind renewed interest in textured, tactile wall finishes going into 2026.
Does drywall need texture?
Not always. Basements and garages, which see less traffic and scrutiny, can stay smooth without much downside. Living rooms, kitchens, and bedrooms are a different story: texture is one of several ways to dress up drywall in those higher-visibility spaces, alongside wallpaper, faux finishing, or simply a good paint job.
Related: Alternatives to drywall
Could my textured walls contain asbestos?
If your home was built before roughly 1980, this is worth taking seriously rather than assuming it doesn’t apply to you. The EPA banned spray-applied asbestos-containing surfacing material used for fireproofing and insulating in 1973, and extended that ban to spray-applied surfacing materials generally in 1978. Homes built before that period commonly turn up asbestos-containing texture material when tested, and popcorn ceilings carry the highest risk of any texture type on this list, since asbestos was a common binder and fire retardant in spray-texture products well into the late 1970s.
Sanding or scraping old texture without testing it first is the actual danger, not the intact texture sitting undisturbed on a wall or ceiling. Disturbing asbestos-containing material releases fibers into the air, and it’s not something you can identify by eye. The only reliable way to know is lab testing: hire a professional to collect a sample for polarized light microscopy analysis rather than attempting DIY test kits or guessing based on age alone, a practice the EPA outlines in its guidance on asbestos exposure. Even non-asbestos drywall dust carries its own real risk for anyone doing heavy sanding: NIOSH found drywall sanders exposed to as much as 10 times the OSHA permissible dust limit in workplace testing, which is a good reason to wear a proper respirator and use wet-sanding or vacuum-sanding tools for any texture removal, asbestos or not.
Conclusion
Fifteen wall textures cover a wide range of looks, from the subtle dimpling of orange peel to the polished depth of Venetian plaster, and most homes end up with more than one of them depending on the room and the era it was finished. But the harder, more common problem isn’t choosing a new texture. It’s figuring out what’s already on your walls and getting a repair to disappear into it, which is exactly the part standard texture guides tend to skip.
If you’re dealing with an older home, check the age of your texture before you sand or scrape anything, and don’t guess. A lab test is inexpensive relative to the risk of getting it wrong.
Related:
Never miss an update — choose FarmFoodFamily as your preferred source on Google.
How it works: Tap the button below to open Google's settings page, then check the box next to FarmFoodFamily.
Tap the checkbox to turn it blue — that's how you know it's set.