21 Creative Food Art Projects for Kids (Fruits, Vegetables and Pantry Staples)
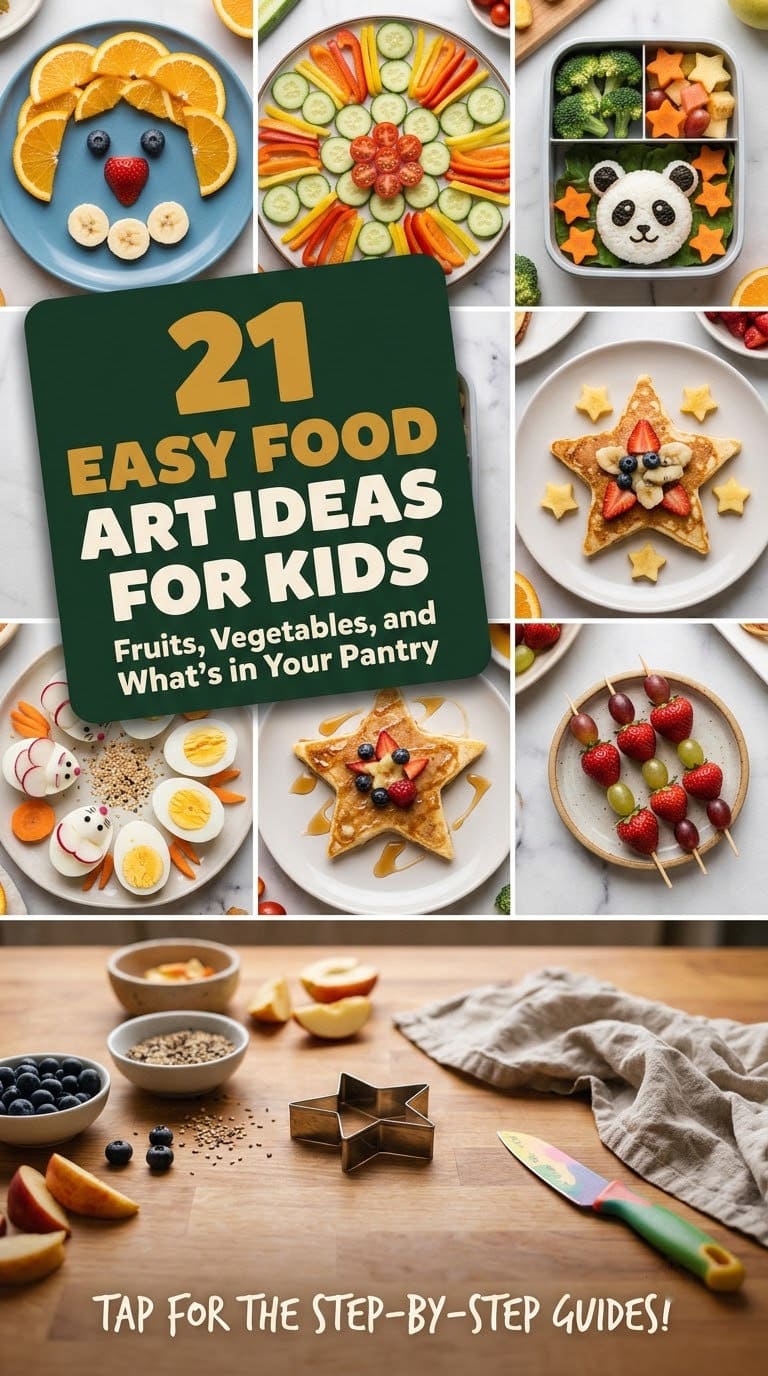
From fruit face plates to bento box storytelling, these food art projects for kids turn snack time into creative play, organized by age, with mess level and allergy notes for every idea.

Never miss an update — choose FarmFoodFamily as your preferred source on Google.
How it works: Tap the button below to open Google's settings page, then check the box next to FarmFoodFamily.
Tap the checkbox to turn it blue — that's how you know it's set.
From fruit face plates to bento box storytelling, these food art projects for kids turn snack time into creative play, organized by age, with mess level and allergy notes for every idea.
Products We Recommend
This post contains affiliate links. We may earn a commission on qualifying purchases at no extra cost to you.

Wilton FoodWriter Fine-Tip Edible Color Markers, 5-Piece
Food-safe markers for drawing on hard-boiled eggs, bananas, white chocolate, and cookies. A must-have for egg animals and any project requiring fine detail on food surfaces.
Shop Now
OXO Good Grips Double-Sided Cookie & Biscuit Cutters
Stainless steel double-sided cutters in five sizes from 1 to 3 inches, for stamping shapes into cheese, bread, watermelon, and soft fruit. Both flat and scalloped edges included.
Shop Now
Wilton Mini Squeeze Bottles, 6 oz (2-pack)
Essential for pancake art and piping yogurt paint. Wide tip for batter, narrow tip for detail work. Food-safe plastic, dishwasher safe.
Shop NowFood art projects use edible ingredients as creative materials. Children arrange fruits, vegetables, pantry staples, and sweets into pictures, sculptures, and patterns. The result gets eaten (or at least appreciated) instead of stored.
Research from De Montfort University found that children who played with fruits and vegetables during a creative activity tried significantly more of those foods than children in a control group. A 2019 trial summarized by Contemporary Pediatrics also found that sensory play with unfamiliar vegetables increased willingness to taste them in preschoolers.
Most projects need no special supplies. A few call for toothpicks, food-safe markers, or a squeeze bottle.
Answer 4 quick questions and get matched to the exact fix for your yard — drainage, budget, layout, or something else entirely.
Take the Free QuizProjects for children under four should use soft ingredients, require no cutting, and stick to two or three components. Older children can tackle produce printmaking, bento storytelling, and edible clay sculpting.
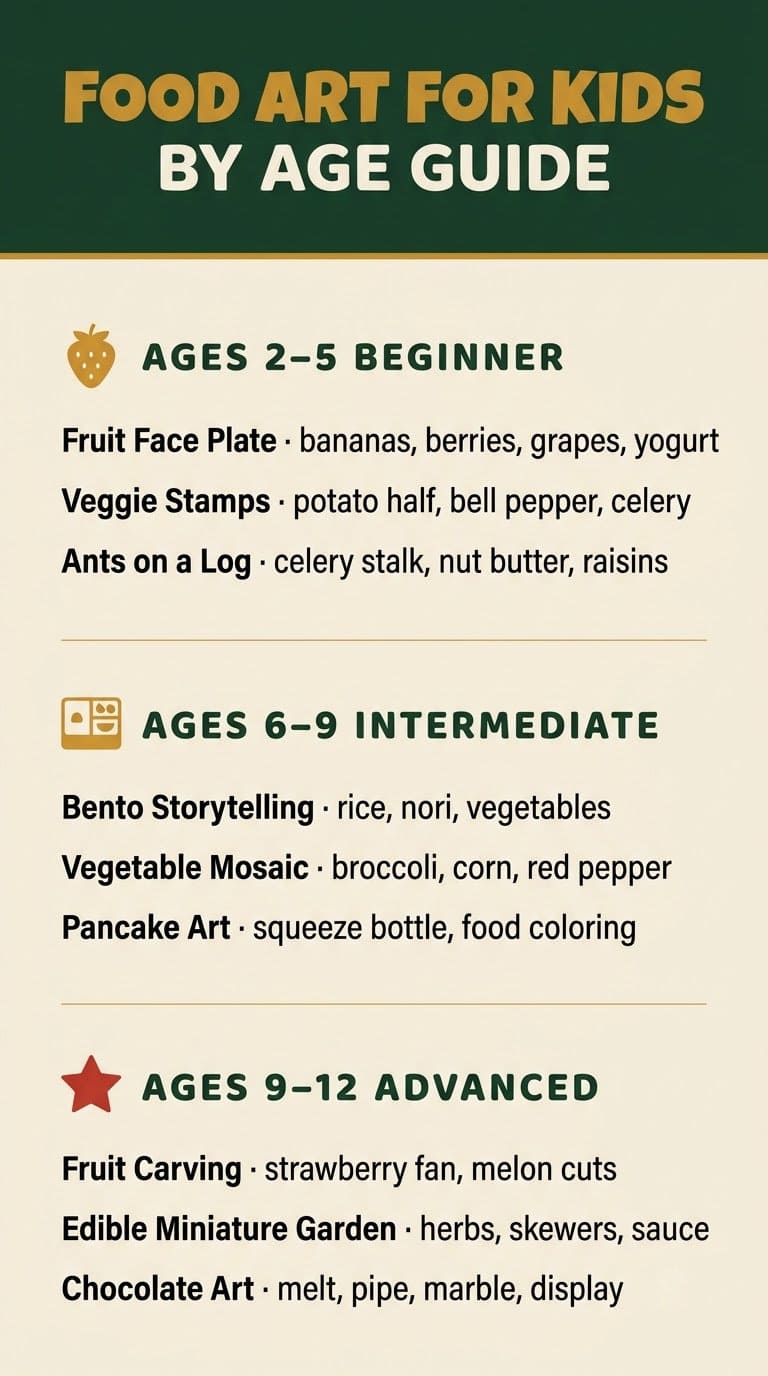
This guide organizes 21 ideas by age group and includes mess level, main materials, and allergy notes for each project.
Why Food Art Works (And What the Research Shows)
Store-bought craft kits get used once. Food art can happen any morning with whatever is already in the refrigerator.
The bigger benefit is nutritional. When children handle food in a low-pressure creative setting, they become more comfortable with unfamiliar textures and colors. That comfort often translates into more willingness to taste. The De Montfort University research found this effect consistently across fruit and vegetable groups.


Danish artist Adam Hillman has taken this concept to a professional level. He arranges hundreds of food items (gummy candies, cereal pieces, and fruit slices) by color and shape into elaborate mosaic artworks. His work shows what is possible when food becomes a creative medium, and it serves as the original inspiration for this article.
Most yard problems trace back to one specific, fixable cause. Find yours in 4 quick questions.
Take the Free QuizYour children do not need to match Hillman’s precision. The creative process matters more than the finished product.
Before You Start: Supplies, Surfaces, and Safety
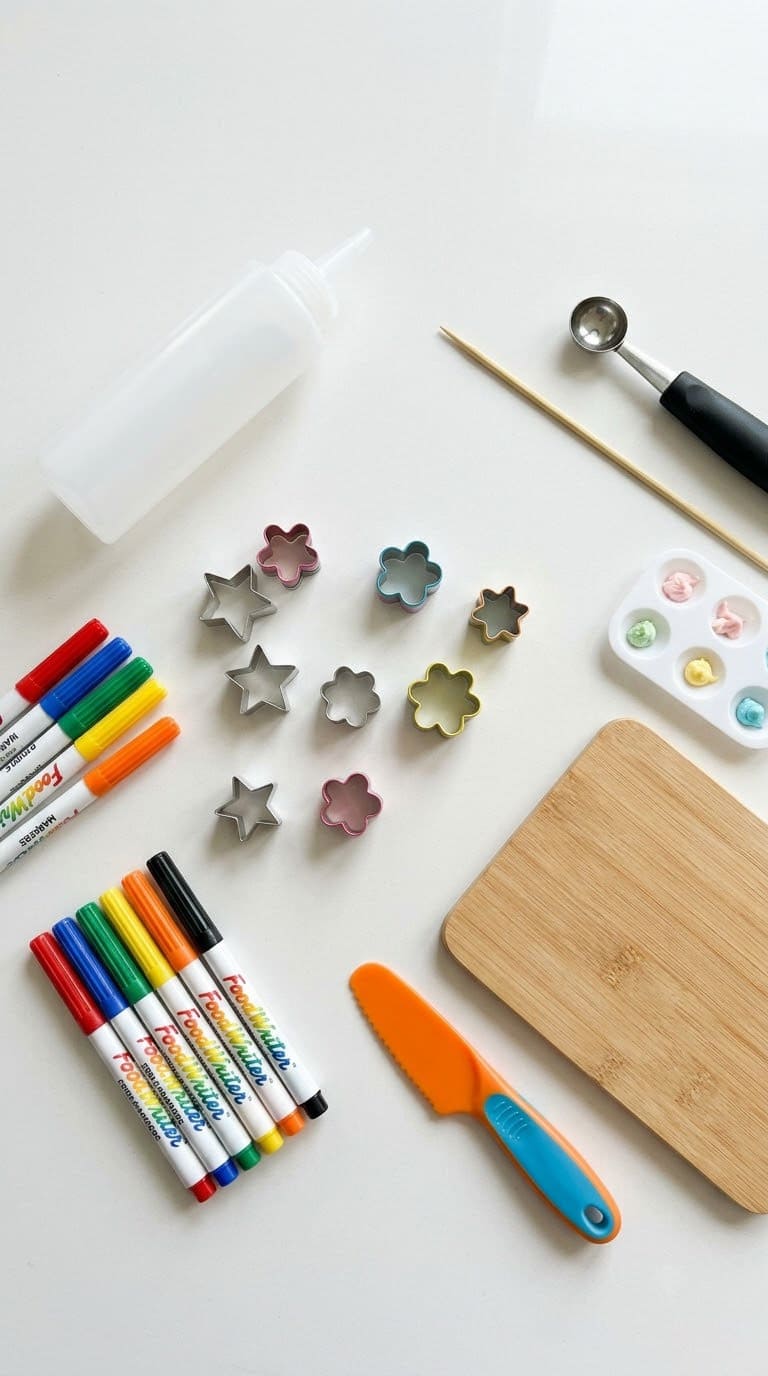
A few supplies make food art easier and safer:
Food-safe markers (such as Wilton FoodWriter pens) let children draw directly on hard-boiled eggs, bananas, and white chocolate. They cost around $8 for a multipack.
Toothpicks and bamboo skewers connect fruit, vegetable pieces, and marshmallows. Always supervise children under six with these. Use blunt-ended picks where possible.
Small cookie cutters stamp shapes into cheese slices, bread, and watermelon. A six-piece set runs under $5.
Squeeze bottles pipe pancake batter, yogurt, and icing with control. A basic kitchen squeeze bottle costs $2–$4.
Best surfaces: Use paper plates for single-session projects. Parchment paper works well for chocolate and melted-ingredient projects that need to set.
Food-safe markers for drawing on hard-boiled eggs, bananas, white chocolate, and cookies. A must-have for egg animals and any project requiring fine detail on food surfaces.
Shop NowThis post contains affiliate links. We may earn a commission on qualifying purchases at no extra cost to you.
Food safety note: Projects using hard-boiled eggs, cream cheese, or yogurt should be eaten within two hours if left at room temperature. Refrigerate unfinished projects immediately.
Allergy note: Several ideas below use peanut butter, tree nuts, eggs, dairy, or wheat. Check with all participants before starting. Ingredient substitutions are noted where relevant.
The average homeowner spends $616/year on yard fixes that don't address the real problem. Find out what yours actually is — before you spend another dollar.
Take the Free Quiz21 Food Art Projects for Kids
Here is a quick overview of the three age groups covered in this guide:
| Age Group | Skill Level | Typical Mess | Supervision | # of Projects |
|---|---|---|---|---|
| Ages 2–5 | Beginner | Low–Medium | Full adult required | 8 ideas |
| Ages 6–9 | Intermediate | Medium | Adult nearby | 8 ideas |
| Ages 9–12 | Advanced | Medium–High | Adult supervises cutting/heat | 5 ideas |
Beginner Projects (Ages 2 to 5)
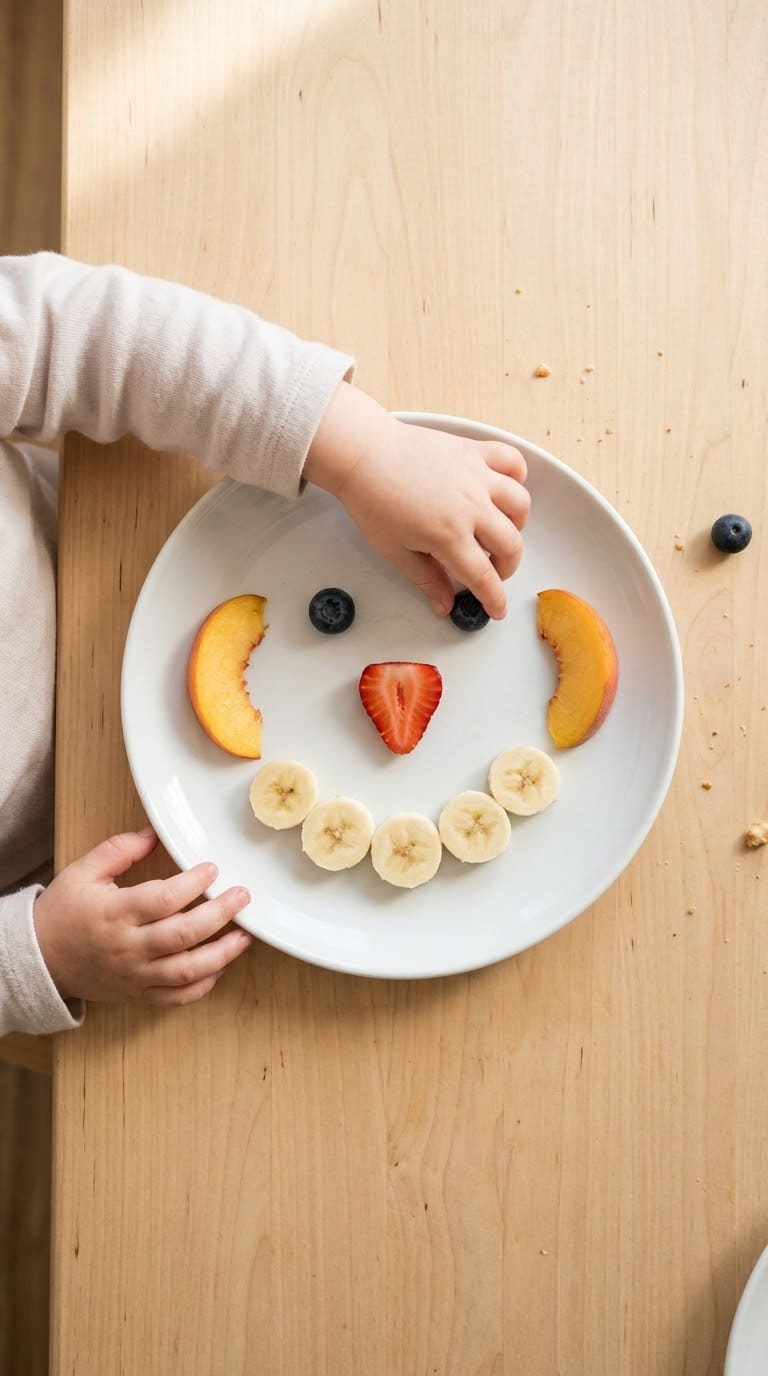
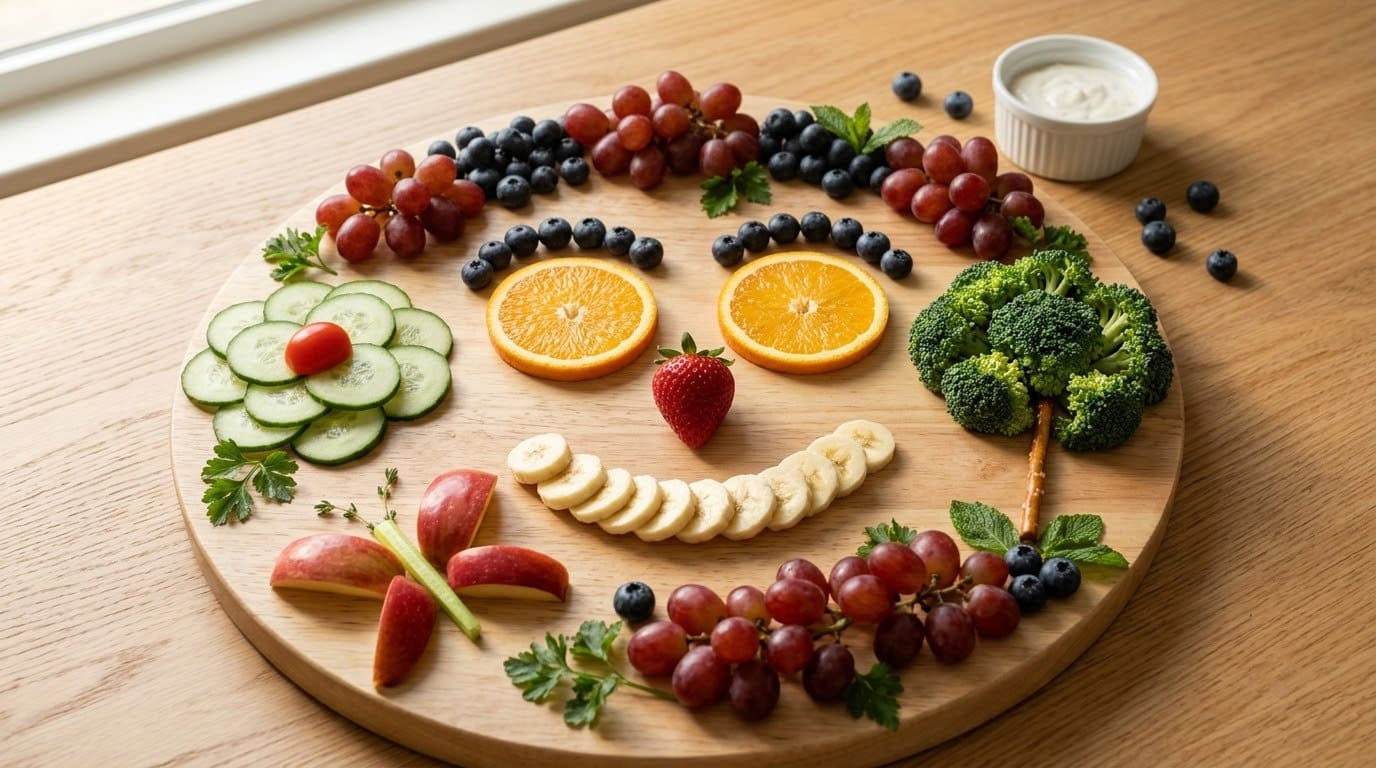
1. Fruit Face Plate
Materials: Banana slices, blueberries, strawberry slices, grapes, yogurt Mess level: Low Cost: Under $2 Allergy notes: Dairy (if using yogurt); easily avoided with a dry plate
Arrange banana slices in a circle for a face outline. Use blueberries for eyes, a strawberry slice for a mouth, and a grape for the nose. Let your child choose the expression.
This is the classic starting point for food art. Toddlers as young as two can place items independently. No cutting required for the child.
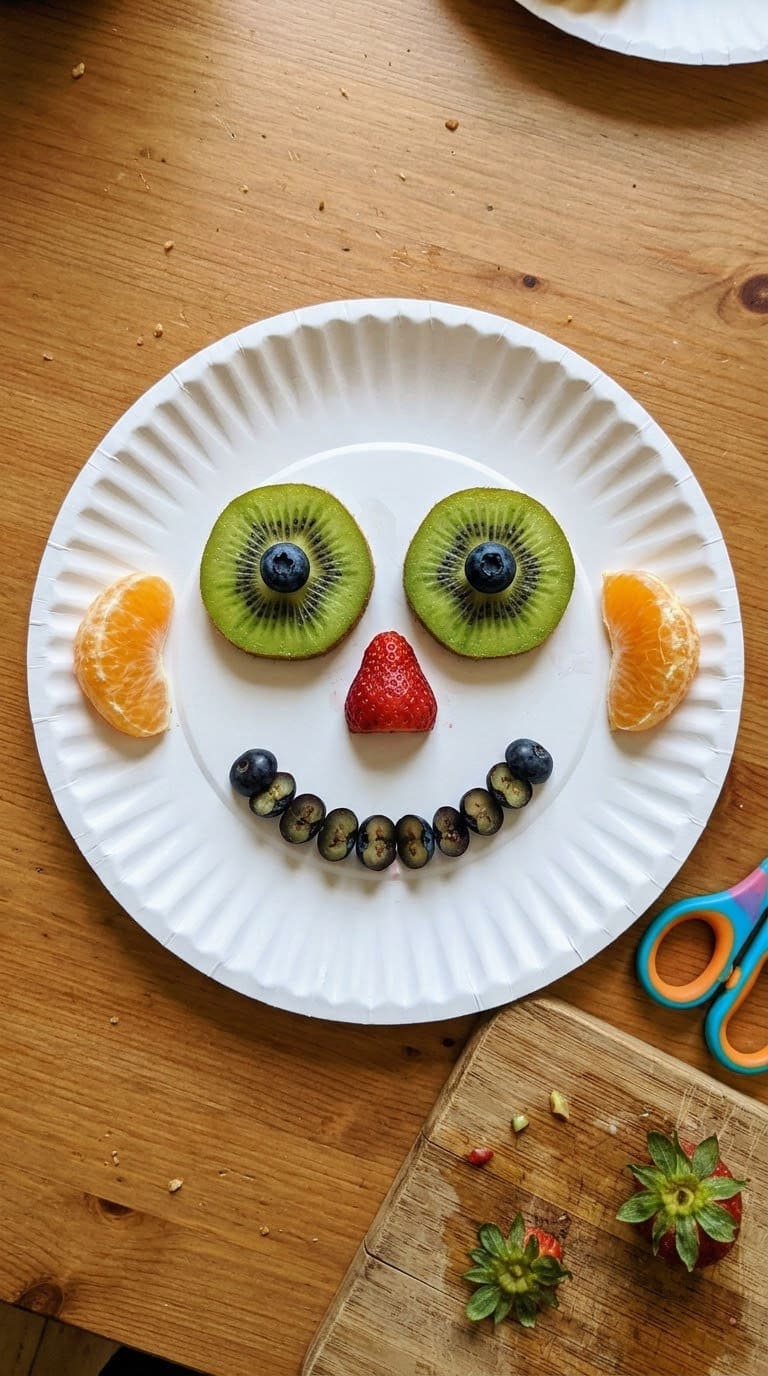
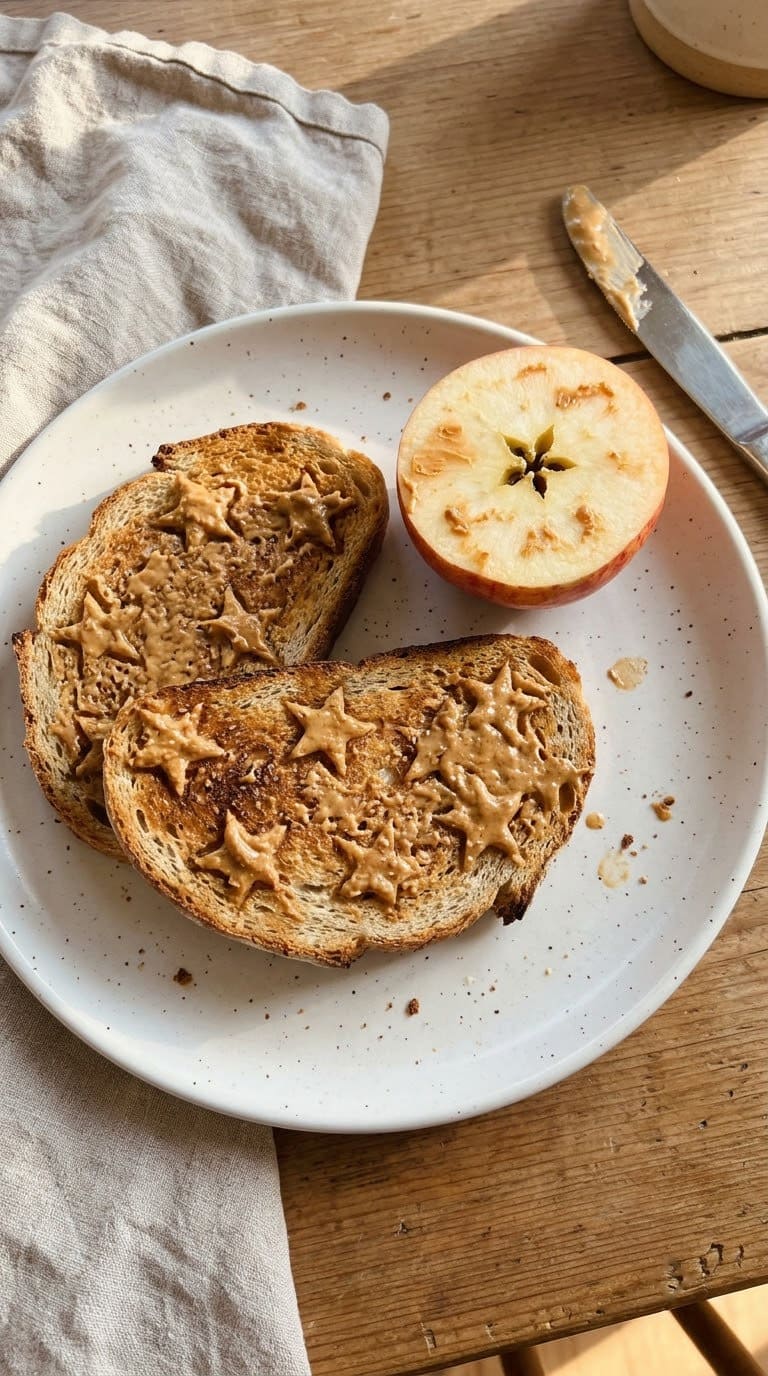
2. Apple Stamp Painting on Toast
Materials: One apple (Fuji or Honeycrisp), peanut butter or cream cheese, toast or rice cake Mess level: Low–Medium Cost: Under $3 Allergy notes: Peanut butter (use sunflower seed butter or cream cheese instead); wheat (use rice cakes for gluten-free)
Cut an apple crosswise through the center to reveal the star shape inside. Press the cut side into peanut butter or cream cheese and stamp it onto toast. Firm apple varieties produce a cleaner print than soft ones.

An adult handles the knife cut. The child does all the stamping.
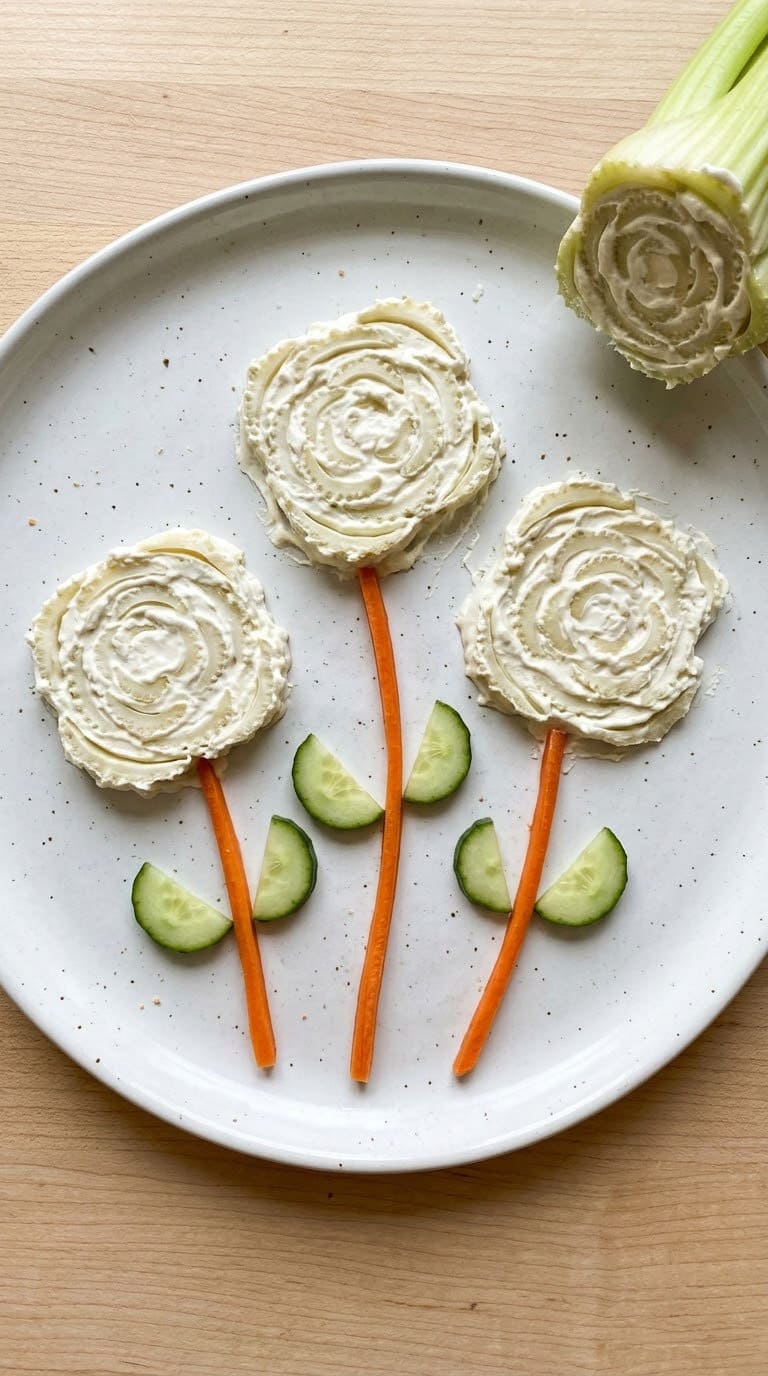
3. Celery Stalk Roses
Materials: Celery bunch, hummus or cream cheese, carrot sticks, cucumber slices Mess level: Low Cost: Under $2 Allergy notes: Dairy (if using cream cheese); soy (check hummus labels)
Cut three to four celery stalks at the base and look at the cross-section: it resembles a rose. Press the cut end into hummus on a plate to “stamp” a flower. Use carrot sticks as stems and cucumber rounds as leaves.
No artistic skill required. Even two-year-olds can press the celery and make the print.
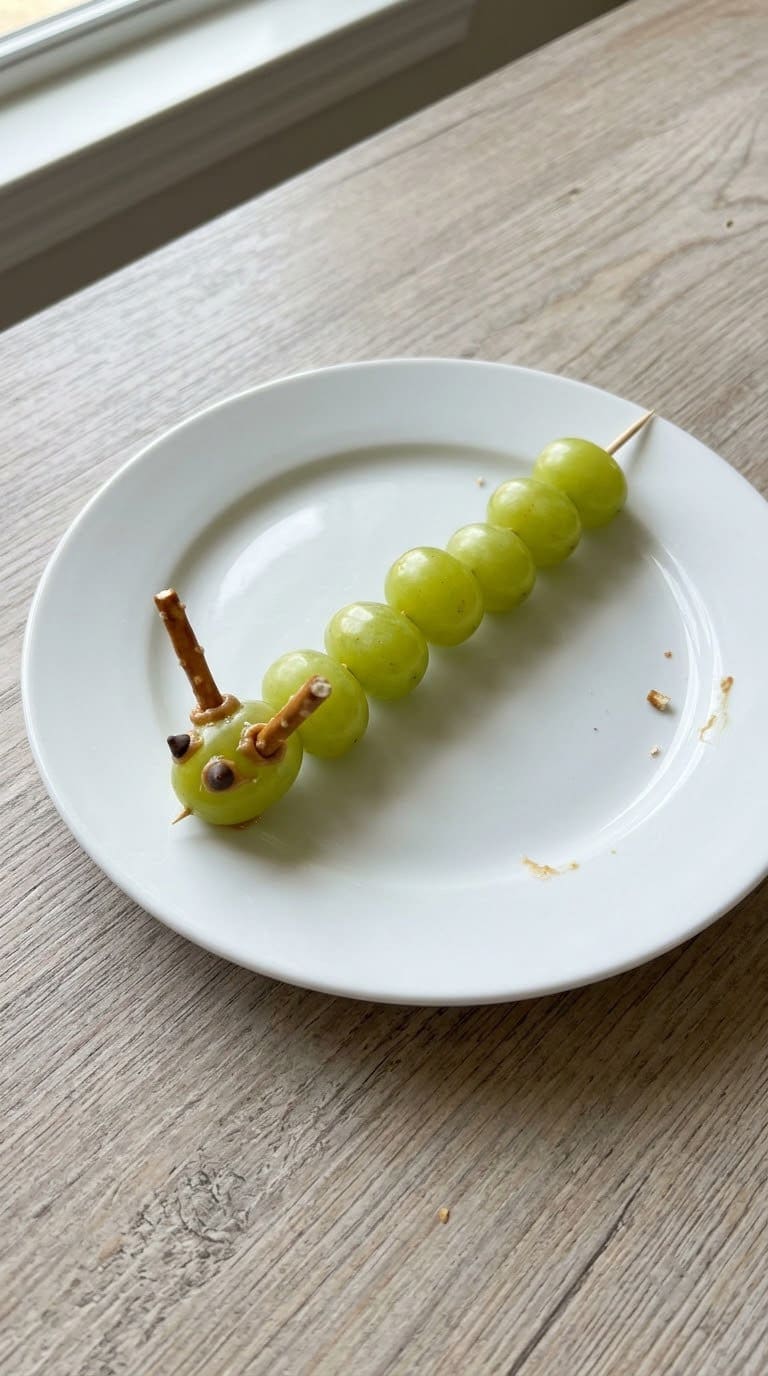
4. Grape Caterpillar
Materials: Green grapes, toothpicks, pretzel sticks, mini chocolate chips (optional) Mess level: Low Cost: Under $2 Allergy notes: Wheat (pretzels; use sunflower seeds for antennae instead); chocolate chips (use raisins instead); choking risk for children under three; supervise closely with toothpicks and small pieces
Thread five to seven green grapes onto a toothpick in a row. Push two short pretzel pieces into the front grape for antennae. Add two mini chocolate chips on the front grape as eyes using a small dab of peanut butter as adhesive.
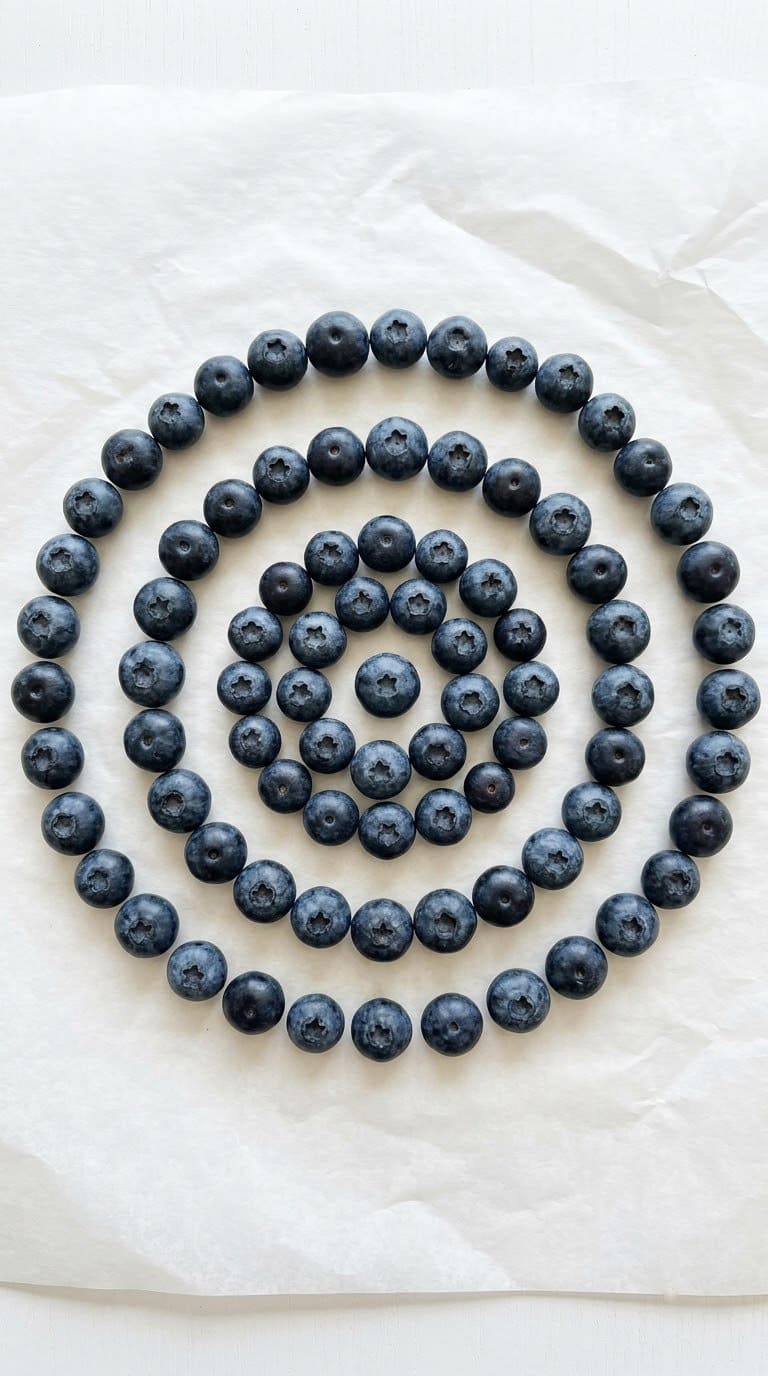
5. Blueberry Dot Art
Materials: Blueberries, parchment paper, fingers Mess level: Low Cost: Under $2 Allergy notes: None common
Press blueberries onto parchment paper in dot patterns. Make concentric circles, a simple flower shape, or an outline of an animal. This is a clean, low-commitment project for the youngest children.
The blueberries can be eaten at the end. Clean-up is a quick wipe.
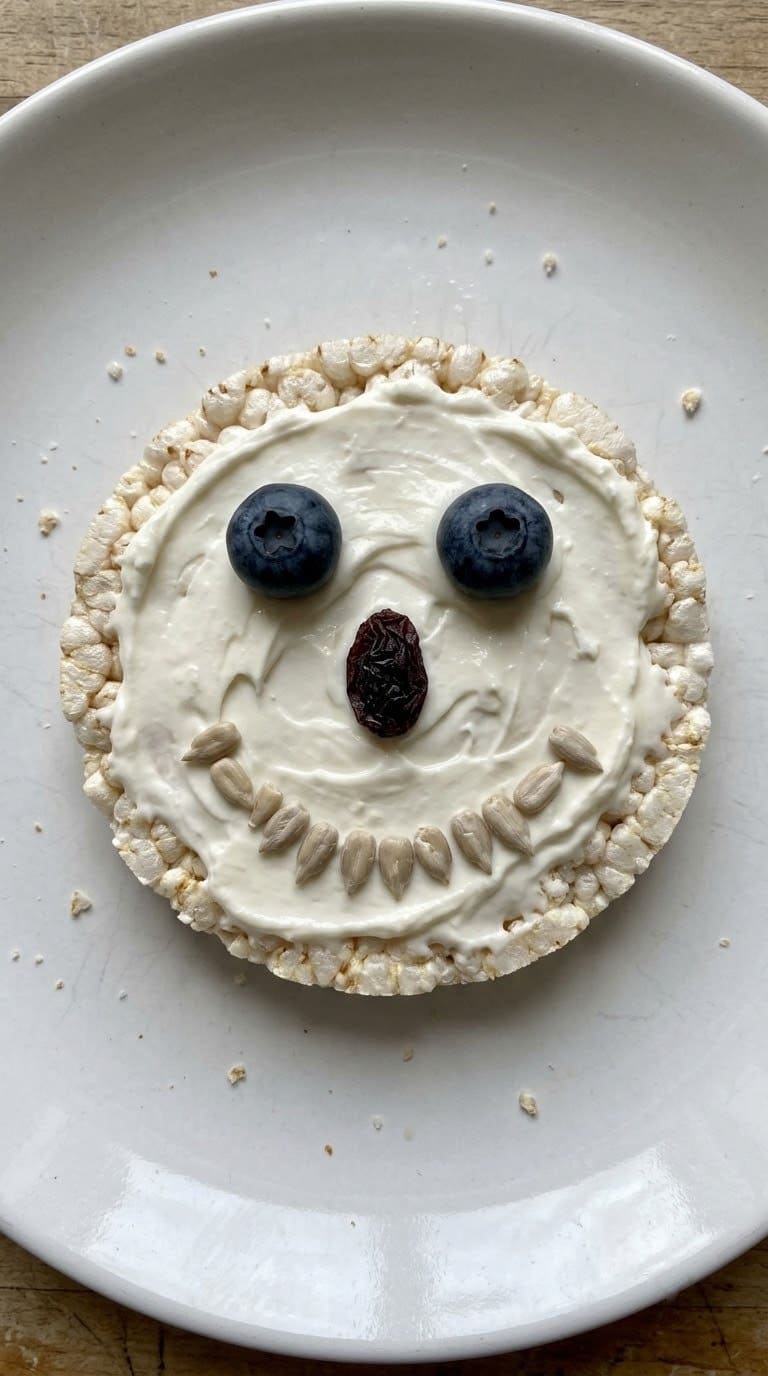
6. Cracker Canvas
Materials: Rice crackers or graham crackers, cream cheese or peanut butter, blueberries, raisins, sunflower seeds Mess level: Low Cost: Under $3 Allergy notes: Wheat (use rice crackers); peanuts; dairy
Spread a thin layer of cream cheese or nut butter on a cracker as the “canvas.” Let your child press blueberries, raisins, and seeds into the spread to make a face, an animal, or a pattern. The spread acts as edible glue.
This project works well as a first food art experience. The cracker keeps the design stable enough for a short display before eating.
7. Banana Sushi Rolls
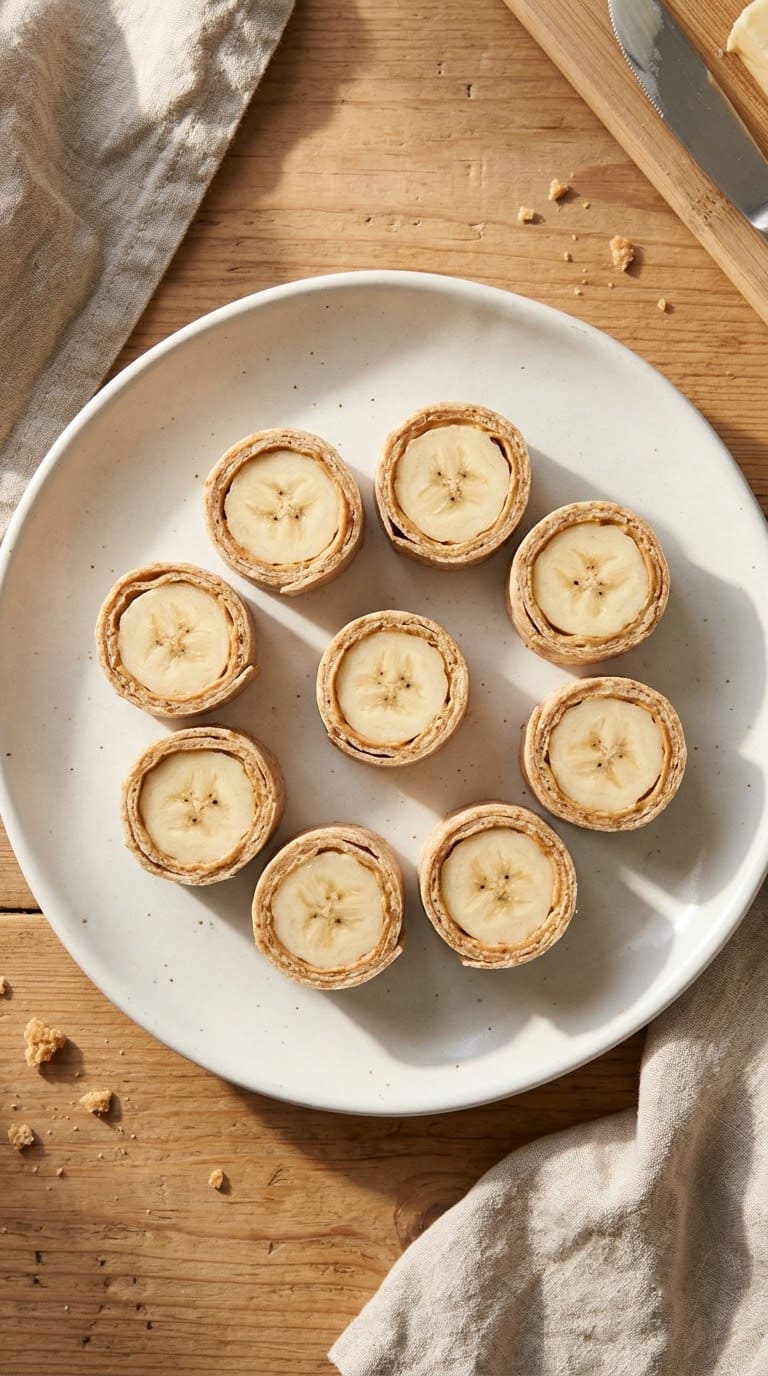
Materials: Whole-wheat tortilla, nut butter or seed butter, one ripe banana Mess level: Low–Medium Cost: Under $2 Allergy notes: Wheat (tortilla; use a corn tortilla); peanuts or tree nuts (use sunflower seed butter)
Spread a thin layer of nut butter across the tortilla. Place the banana at one edge and roll the tortilla tightly around it. Slice into rounds. Each piece looks like a sushi roll.
An adult does the slicing. Children can do the spreading and rolling. This also works as a snack project that doubles as a math lesson (counting the rounds).
8. Vegetable Rainbow on a Tray
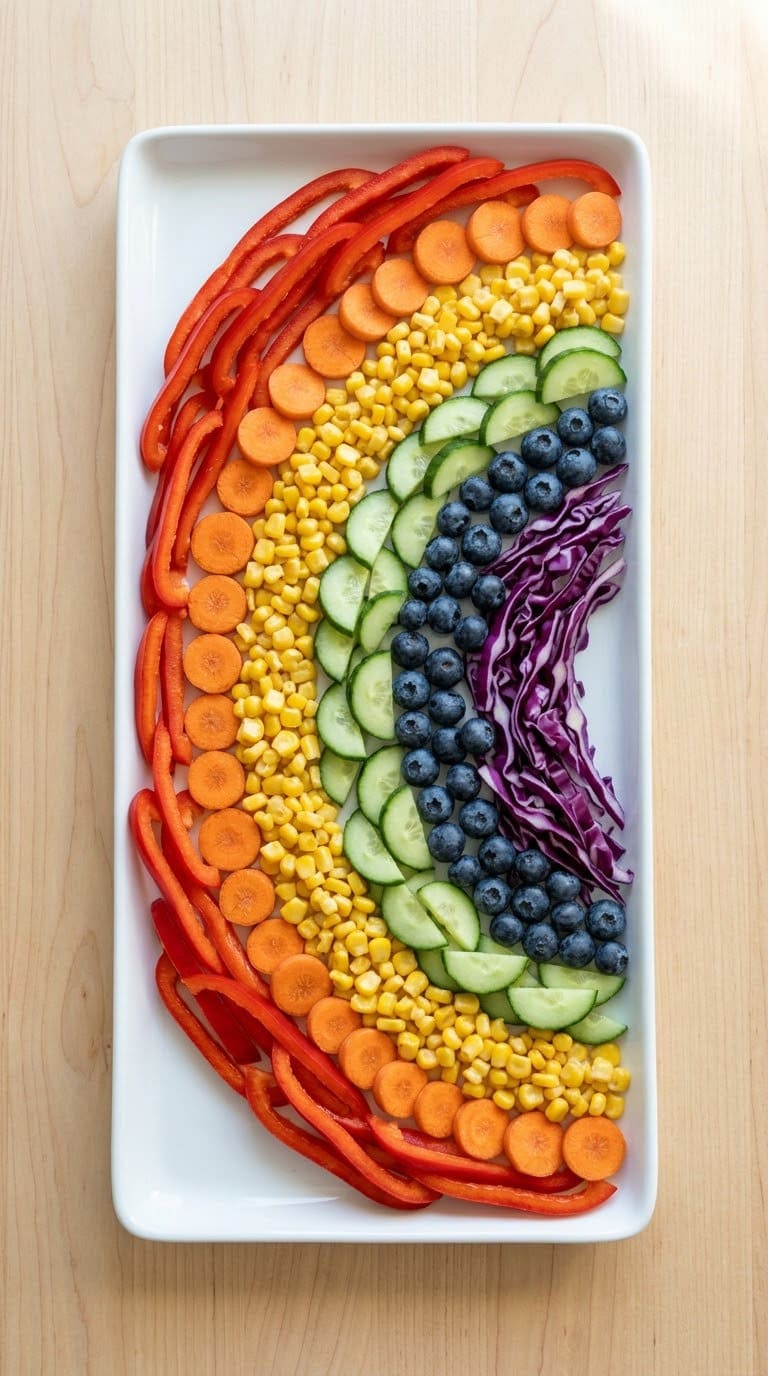
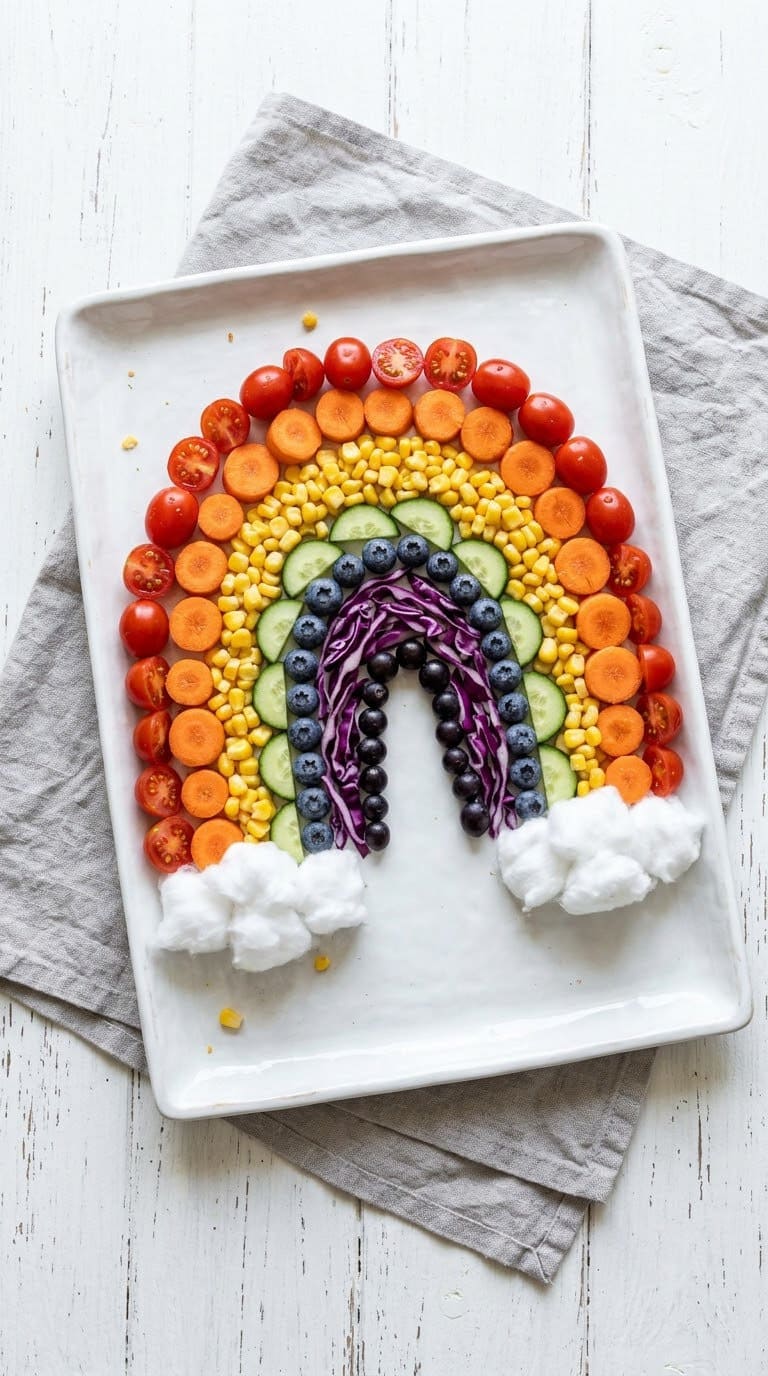
Materials: Assorted vegetables and fruits sorted by color: red peppers, orange carrots, yellow corn, green cucumber slices, blueberries, purple grapes Mess level: Low Cost: $3–$5 Allergy notes: None common
Arrange the produce in color-order rainbow arcs on a long tray or platter. This is as much about the sorting exercise as the finished display. Children learn color sequencing and produce variety at the same time.
This is an excellent project to use up produce that needs to be eaten within a day or two. Fresh herbs add color variety and an interesting texture. A simple herb garden gives you a steady supply of small leaves for food art year-round.
Intermediate Projects (Ages 6 to 9)
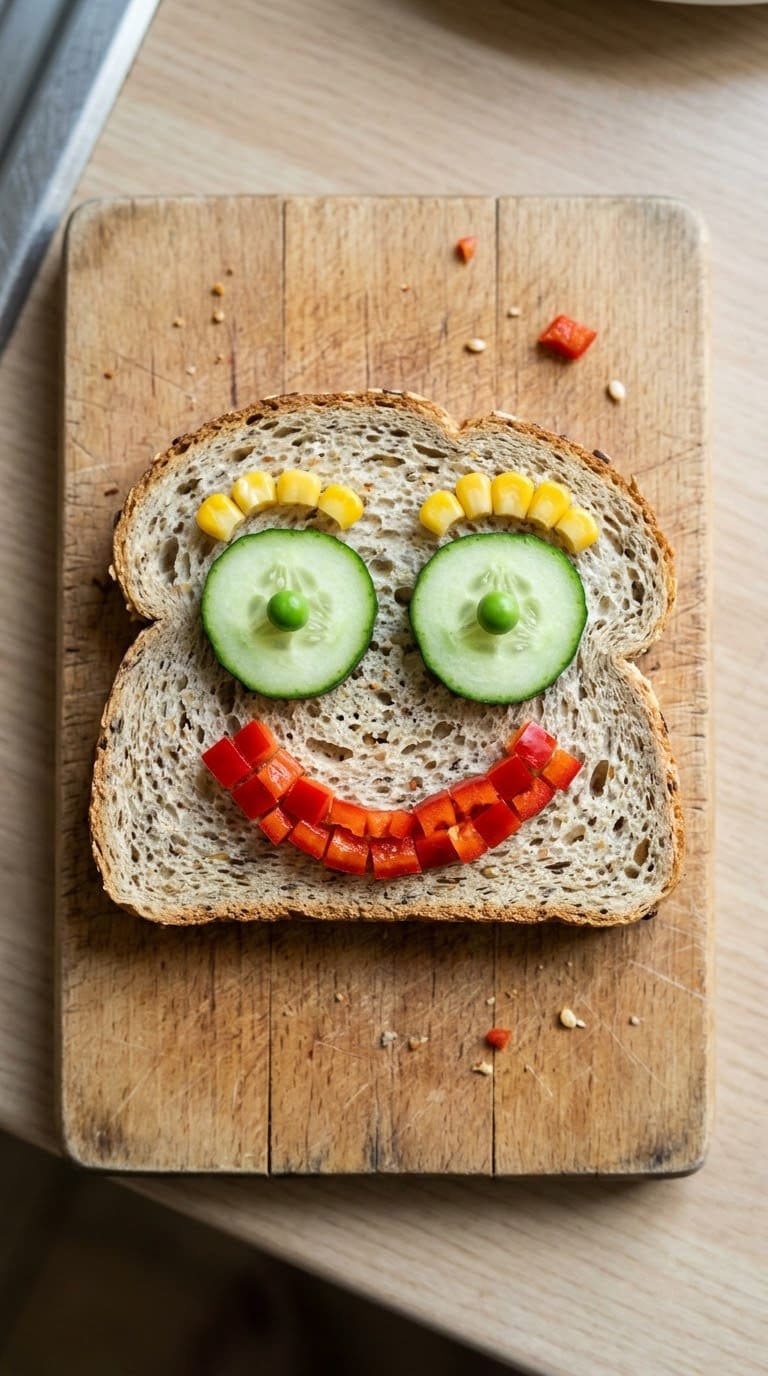
9. Vegetable Mosaic Portrait
Materials: Bread or rice cake, cream cheese, diced vegetables (red pepper, cucumber, corn, peas) Mess level: Medium Cost: $3–$5 Allergy notes: Dairy (use hummus instead of cream cheese); wheat (use rice cake)
Spread cream cheese on a slice of bread as a base. Using diced vegetables and whole peas or corn kernels, build a face or simple landscape. Pieces press into the cream cheese and hold without any glue.
This takes 20 to 40 minutes and rewards patience. The end result photographs well before eating.
10. Watermelon Pizza
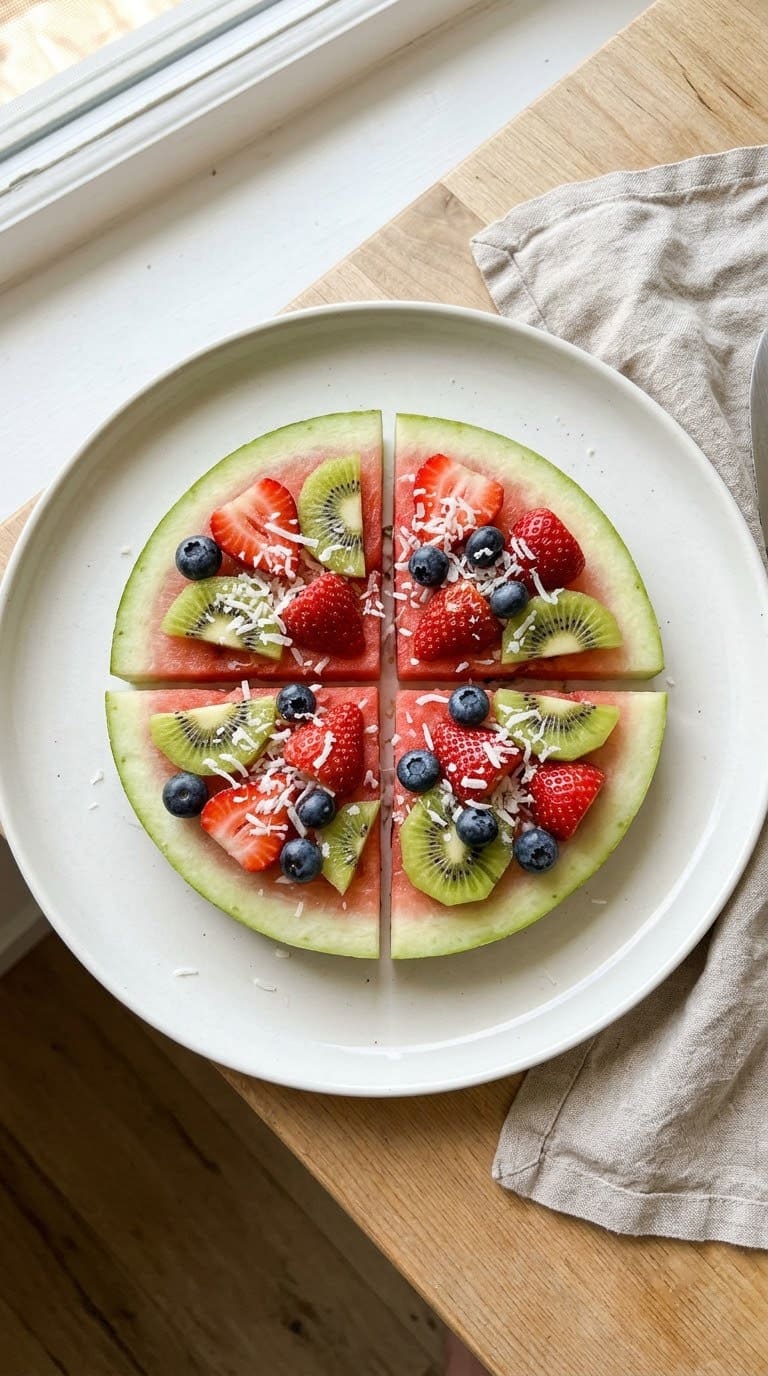
Materials: One round watermelon slice (1 inch thick), small fruit for toppings, shredded coconut Mess level: Medium Cost: $4–$8 Allergy notes: Tree nuts (coconut; skip or use granola instead)
Use a large round watermelon slice as the pizza base. Add kiwi slices, halved strawberries, and blueberries as toppings. Sprinkle shredded coconut as the cheese. Slice into wedges to serve.
An adult cuts the watermelon. Children arrange the fruit toppings. This works well as a party activity or summer gathering project.
11. Sandwich Stained Glass
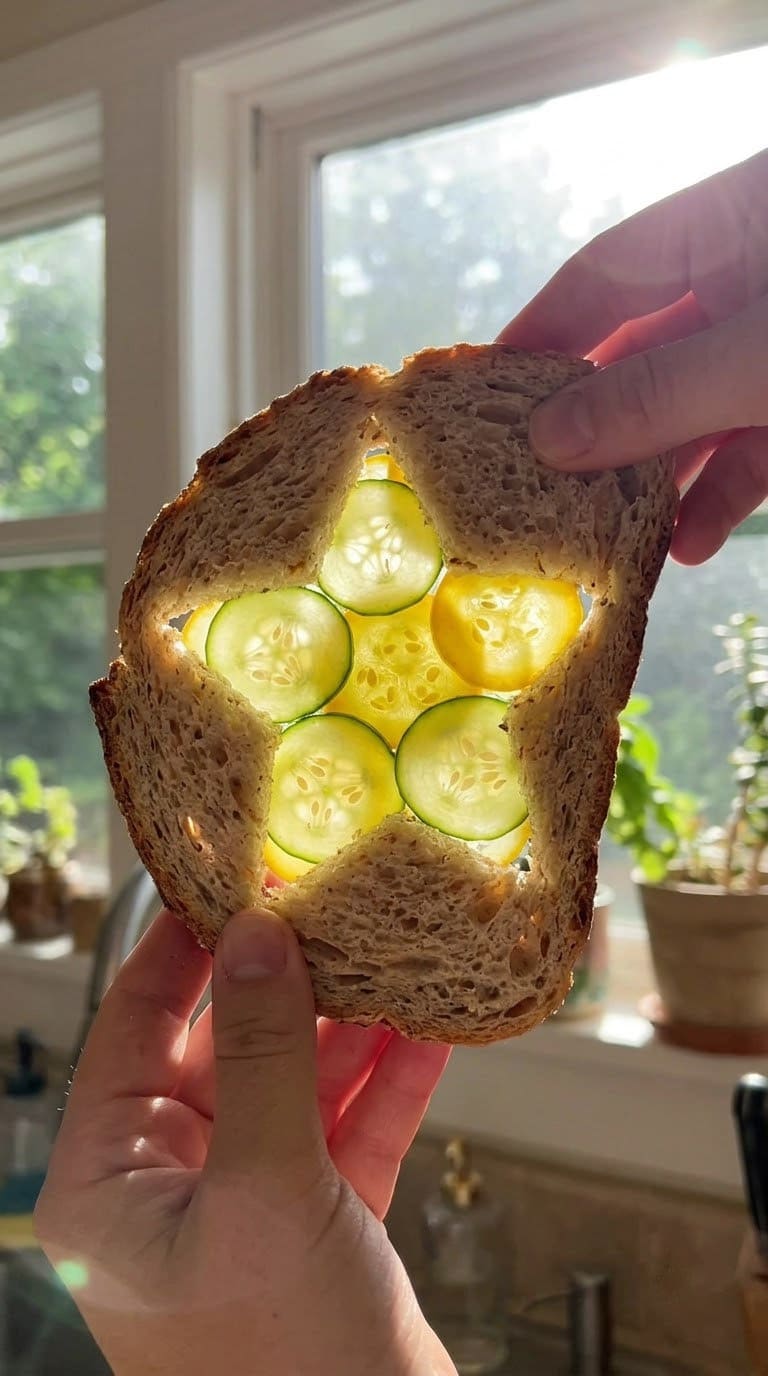
Materials: Two slices of soft bread, small cookie cutters, thinly sliced cucumber, red pepper, and yellow squash Mess level: Medium Cost: Under $3 Allergy notes: Wheat (no easy substitution for this project)
Cut a shape (star, heart, circle) out of the center of one bread slice using a cookie cutter. Lay thin, translucent vegetable slices over the cutout to fill the opening. Place the uncut slice underneath. Hold the sandwich up to a window to see the light come through.
Children can choose the shape and arrange the vegetable pieces. The effect is striking and worth photographing first.
12. Hard-Boiled Egg Animals
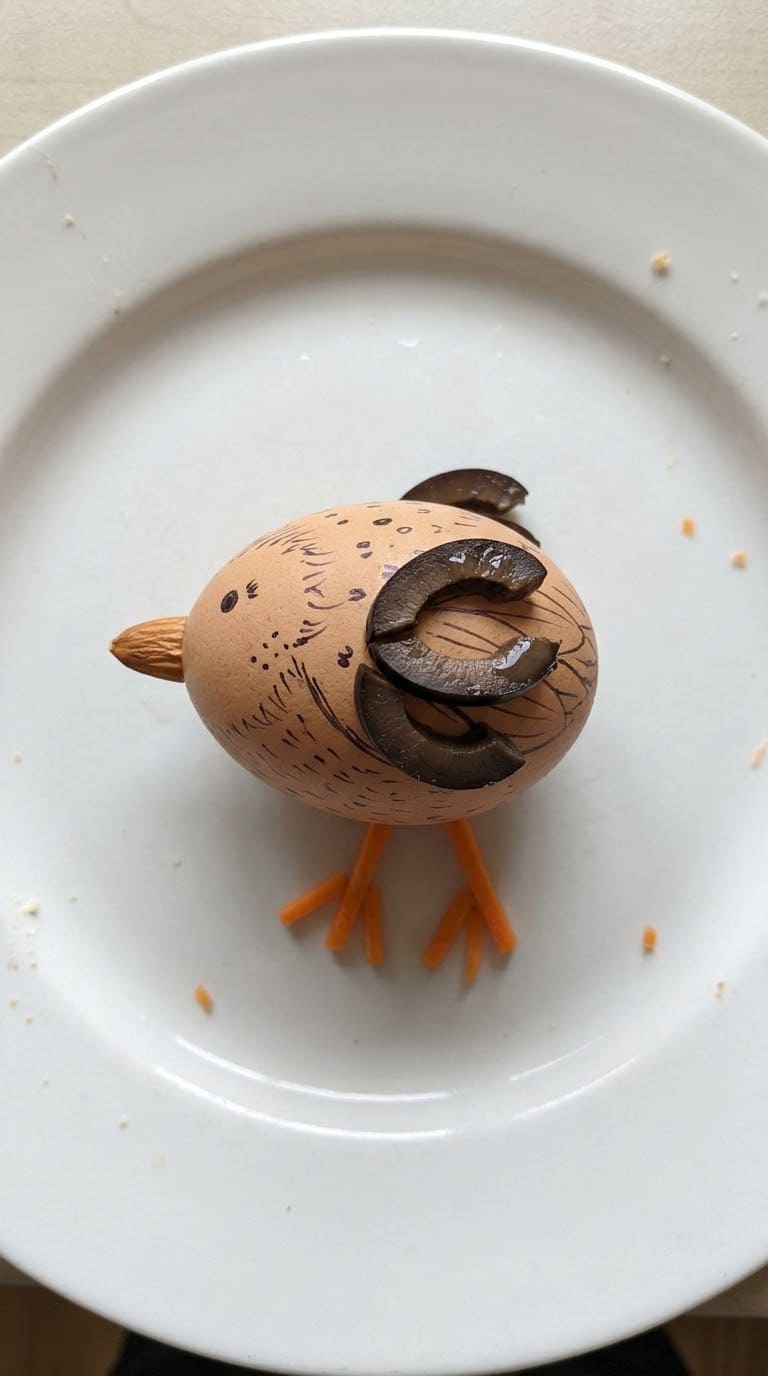
Materials: Hard-boiled eggs, food-safe markers, sliced olives, carrot slivers, almond slices, string cheese strips Mess level: Low–Medium Cost: $3–$5 Allergy notes: Eggs; tree nuts (almonds; use sunflower seeds instead); dairy (string cheese; omit or use cucumber strips)
Peel a hard-boiled egg. Use food-safe markers to draw a face. Add olive slices for ears, carrot slivers for legs, and almond slices for wings depending on the animal. A visual reference helps: show your child a photo of the animal before they start.
This project rewards attention to detail and works best for ages seven and up. A younger child can do the marker drawing while an adult handles the small accessory pieces.
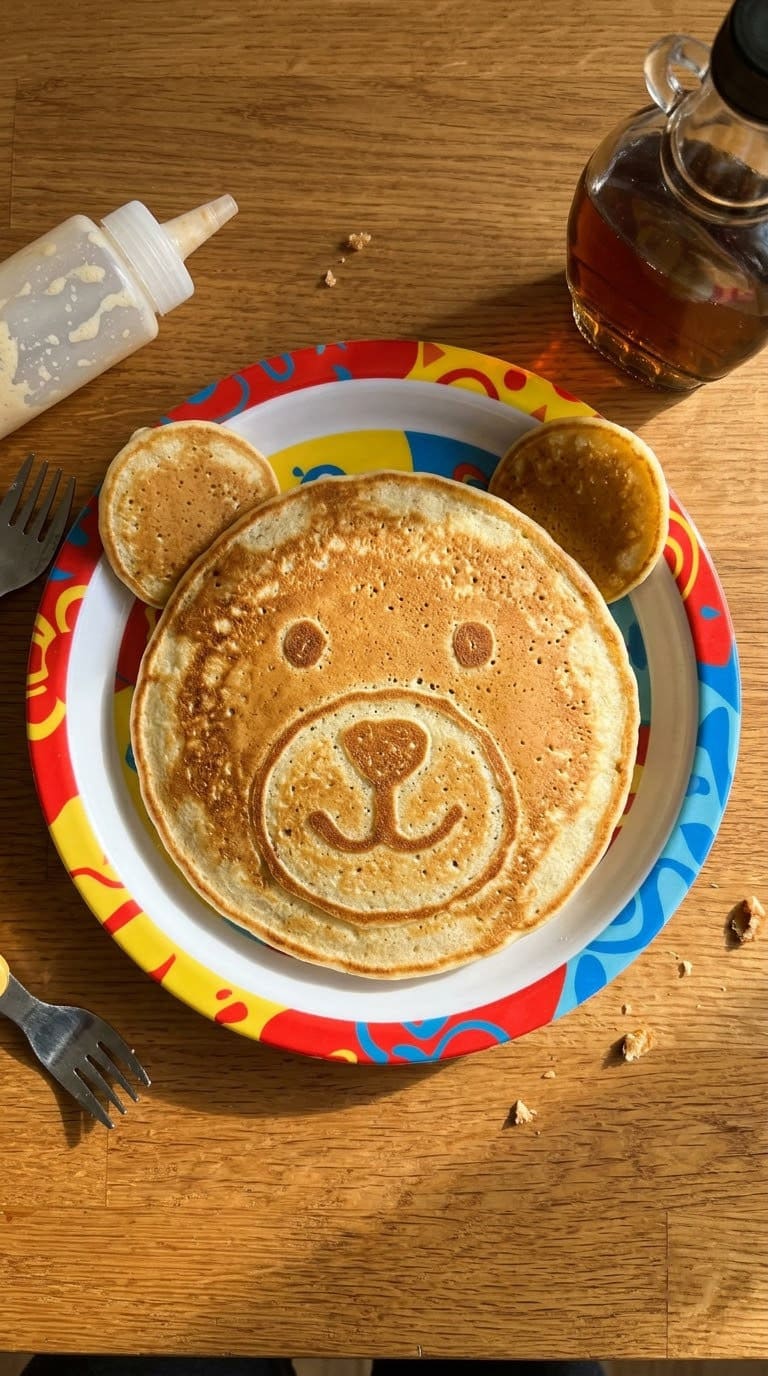
13. Pancake Art
Materials: Pancake batter, squeeze bottle, griddle or non-stick pan, butter Mess level: High Cost: Under $3 Allergy notes: Wheat; eggs; dairy; all can be substituted with a gluten-free or plant-based pancake mix
Pour batter into a squeeze bottle. On a lightly greased griddle over low heat, squeeze the batter into a simple shape: a heart, a star, a letter initial. After 30 seconds, pour a thin layer of plain batter on top to fill the shape. Flip and cook through.
Expect several failed attempts on the first session. Low heat is the key: it gives you time to draw before the batter sets. An adult manages the heat; older children can control the squeeze bottle.
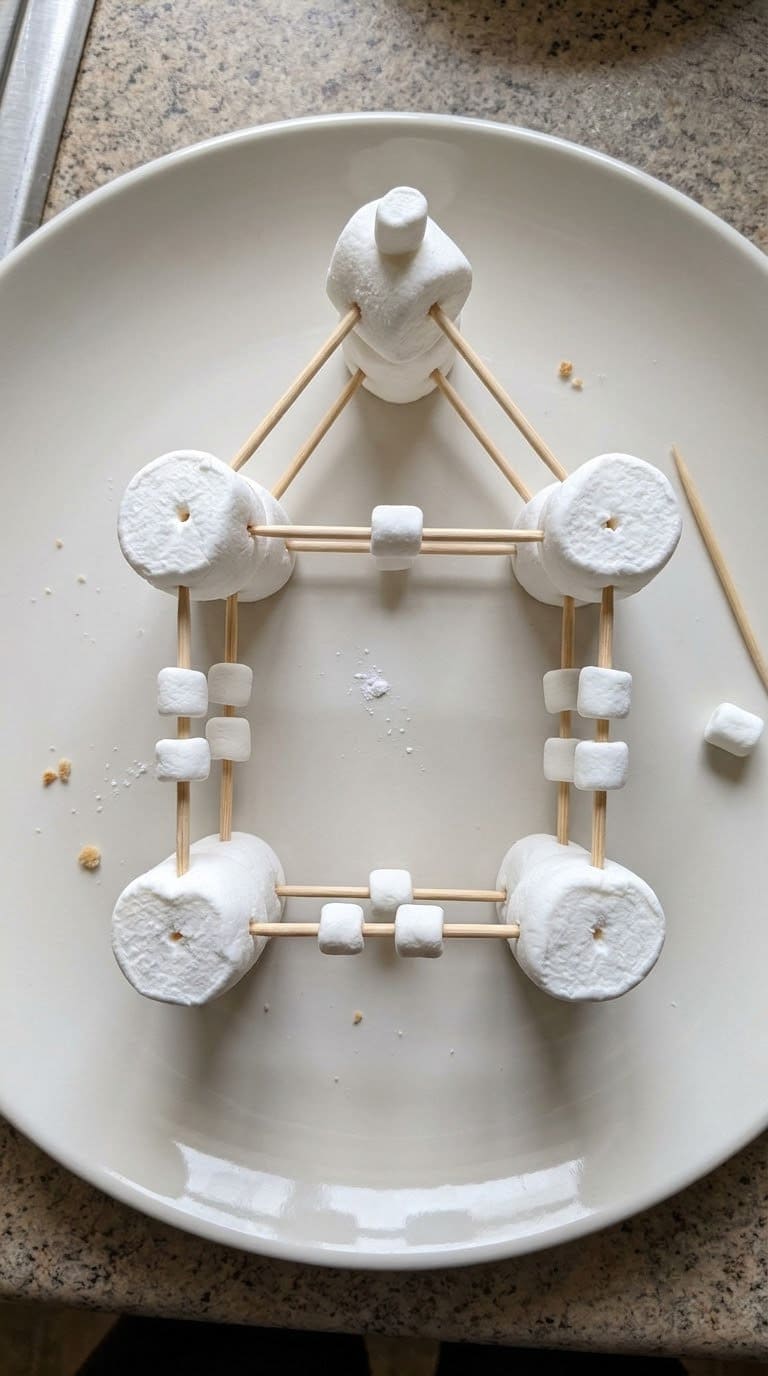
14. Marshmallow Architecture
Materials: Large and mini marshmallows, toothpicks Mess level: Low Cost: $2–$4 Allergy notes: Gelatin (not vegan); supervise toothpick use for younger children
Connect marshmallows with toothpicks to build a robot, an animal, or a tower. This is the food equivalent of building with magnetic tiles. Pairing with yogurt paint (see project 16) lets children add color to the structure.
Larger marshmallows make joints; smaller ones make details. Ask your child to build a specific thing or let them design freely.
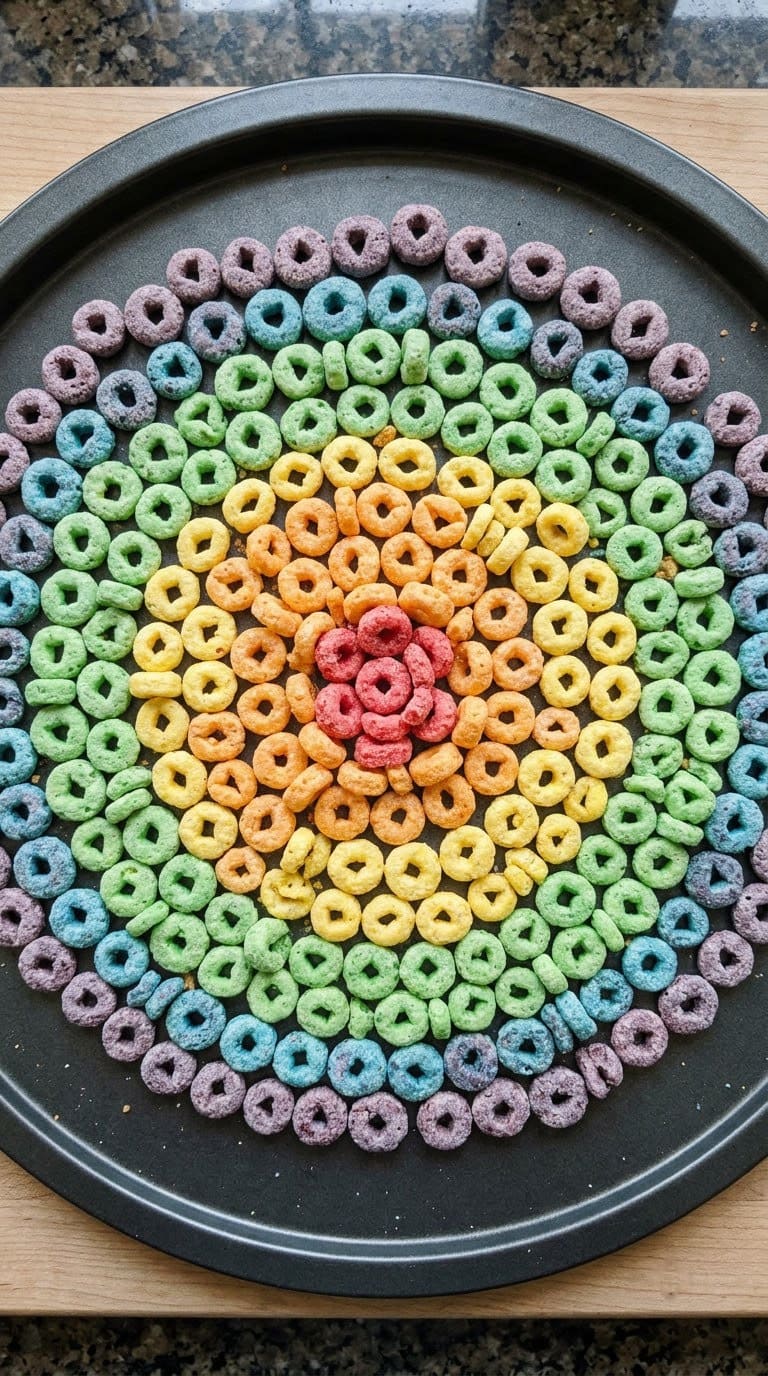
15. Cereal Color Mandala (Adam Hillman style)
Materials: Assorted colorful cereals (Froot Loops, Cocoa Puffs, Lucky Charms), a plate or dark tray Mess level: Low–Medium Cost: $3–$5 Allergy notes: Wheat; tree nuts in some cereals; check labels
Sort the cereal pieces by color into small bowls first. Then arrange them in concentric circles on a plate or dark tray, one color ring at a time. Start with the outer ring and work inward.
This mirrors how artist Adam Hillman arranges hundreds of food items by color to create his large-scale mosaic artworks. Even a small plate version takes 15 to 20 minutes and produces a genuinely impressive result. For more garden-themed art projects, see our garden art DIY projects guide.
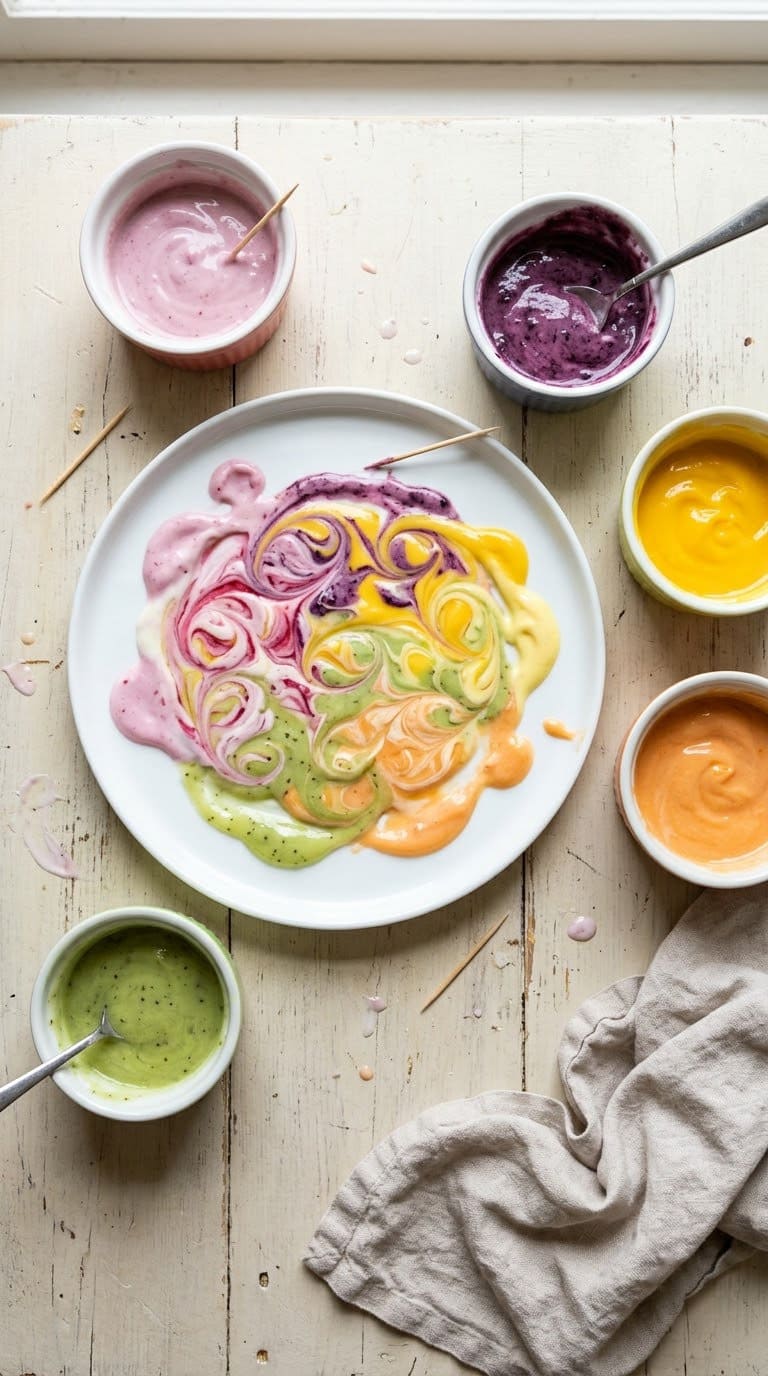
16. Yogurt Paint Swirl Art
Materials: Plain yogurt, food coloring or pureed berries, paper plates or clean white chocolate as canvas Mess level: Medium Cost: Under $3 Allergy notes: Dairy (use coconut yogurt as a substitute)
Divide plain yogurt into several small bowls. Add different food coloring to each. Use a spoon or pastry brush to paint on a paper plate, the surface of a white chocolate bar, or directly onto a piece of fruit. The yogurt paint dries slightly and can be eaten.
This is a completely edible version of finger painting. Layer colors for a swirl effect. Refrigerate any painted chocolate for 10 minutes to set the design.
Advanced Projects (Ages 9 to 12)
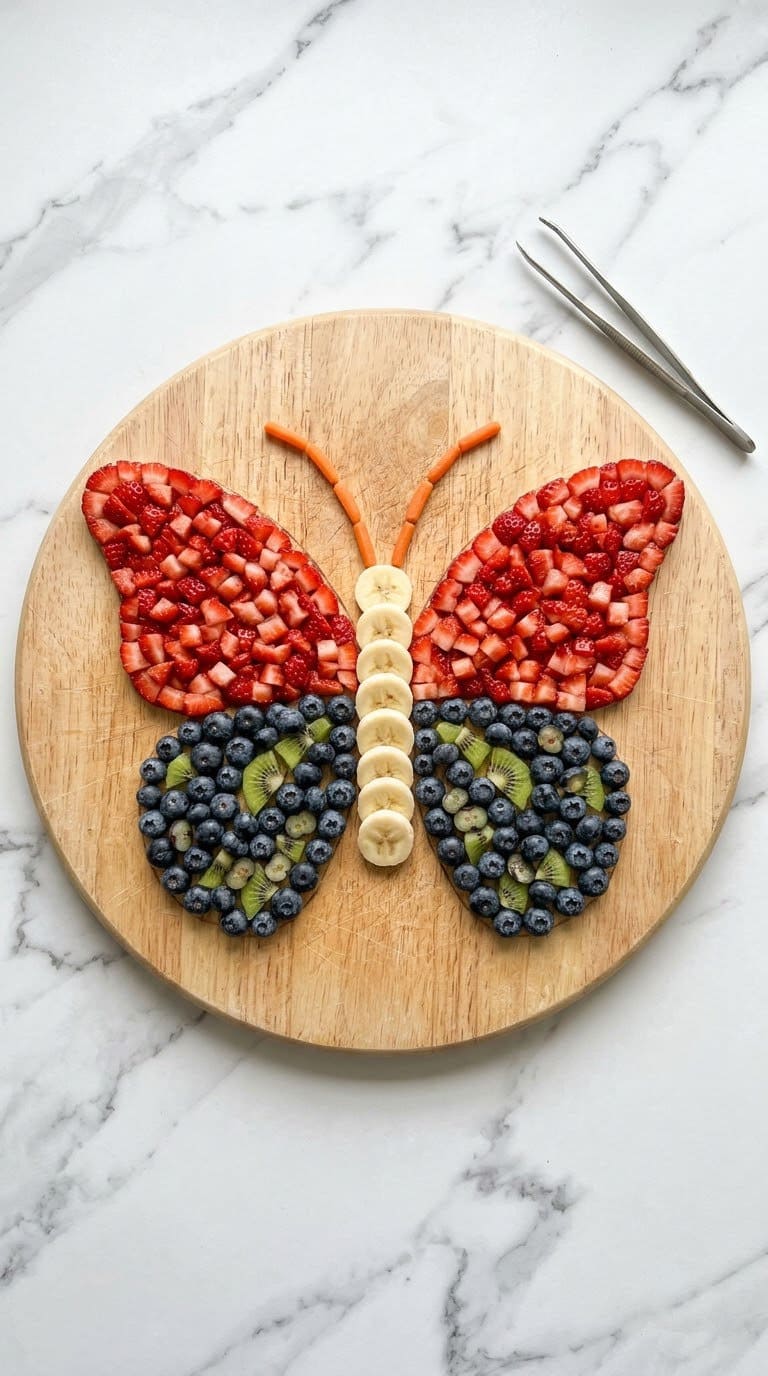
17. Bento Box Storytelling Scene
Materials: Divided bento box, cooked rice, nori seaweed sheets, small scissors, cucumber, carrot, cherry tomatoes Mess level: Medium Cost: $5–$10 Allergy notes: Soy (nori); gluten (check teriyaki sauces or added flavors)
Pack cooked rice into a section of the bento box. Using kitchen scissors, cut nori into simple character shapes: a face, a tree, animals. Press them onto the rice. Fill surrounding sections with cucumber coins, carrot sticks, and cherry tomatoes.
Give your child a story prompt rather than free choice. (“Build a jungle scene.” “Pack the characters from your favorite book.”) A story constraint produces more interesting results than an open-ended brief.
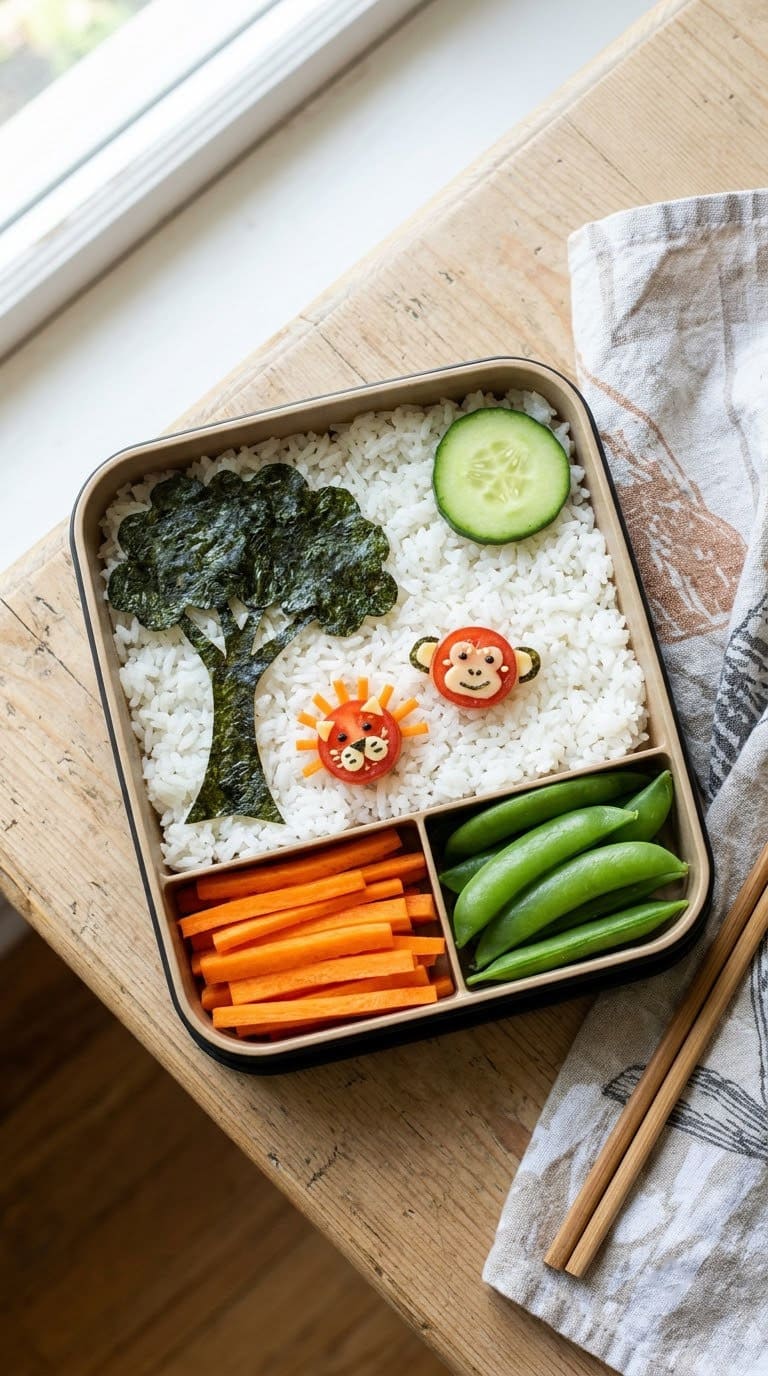
18. Fruit Carving Basics
Materials: Melon baller, paring knife (adult use), strawberries and melon Mess level: Medium Cost: $5–$8 Allergy notes: None common
For a strawberry fan: hold a strawberry by the stem, make four parallel cuts toward the tip (not through), and gently press the sections apart to fan. For a melon bowl: halve a small melon, scoop the flesh with a melon baller, and use the hollowed shell as a bowl for the balls.
An adult supervises or handles the knife for all cuts. Children ten and up can attempt the strawberry fan with a small paring knife under close supervision. Practice on a few before attempting one for display.
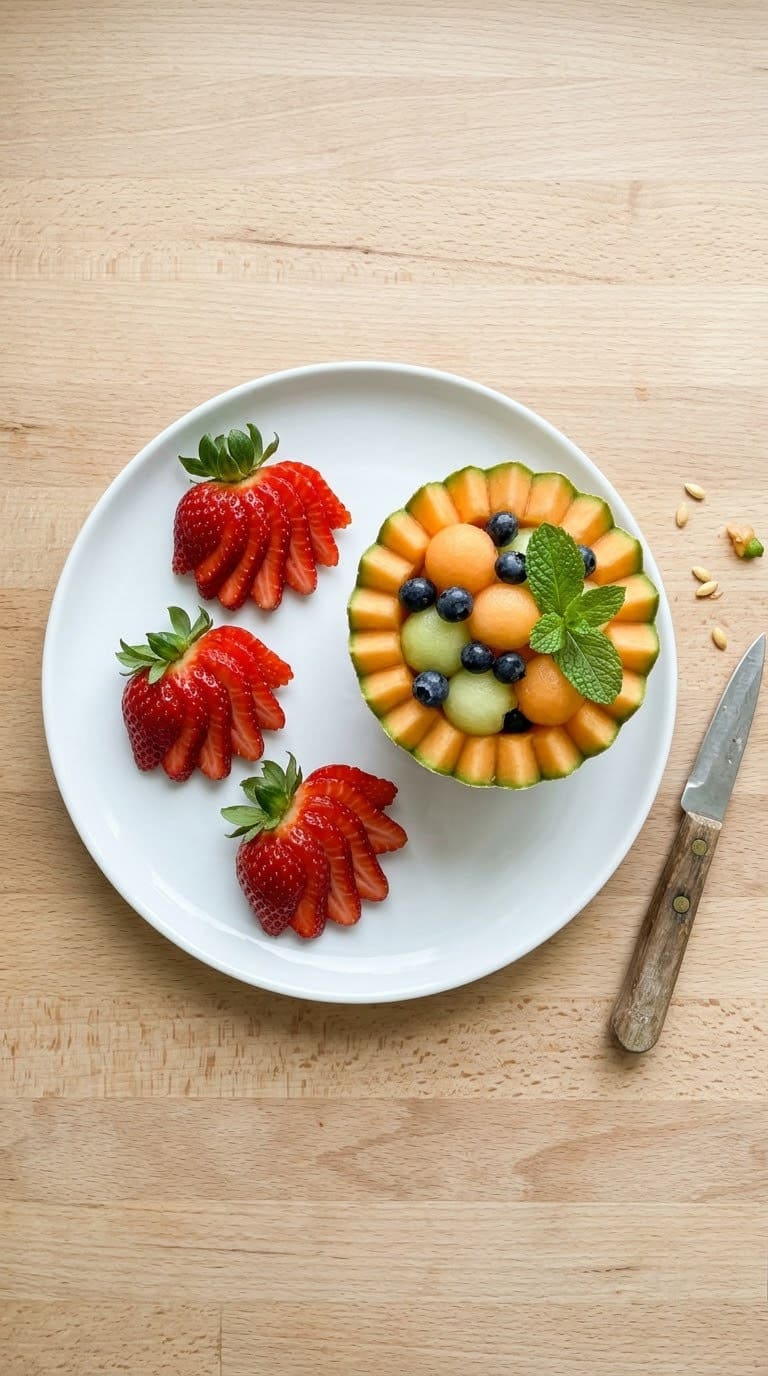
19. Chocolate Bark Mosaic
Materials: 4 oz dark chocolate chips, parchment paper, dried cranberries, shelled pistachios, sea salt, mini marshmallows Mess level: Low–Medium (stovetop melt requires adult) Cost: $5–$10 Allergy notes: Tree nuts (pistachios; use pumpkin seeds instead); dairy (check chocolate labels); choking risk for very young children from whole nuts
Melt dark chocolate chips in a microwave in 30-second intervals until smooth. Pour onto parchment paper in a rough rectangle. Before it sets, scatter cranberries, pistachios, and mini marshmallows over the surface in a mosaic pattern. Sprinkle with sea salt. Refrigerate for 20 minutes until firm. Snap into pieces.
An adult handles the melted chocolate. Children design the topping arrangement. The finished bark makes an excellent edible gift.
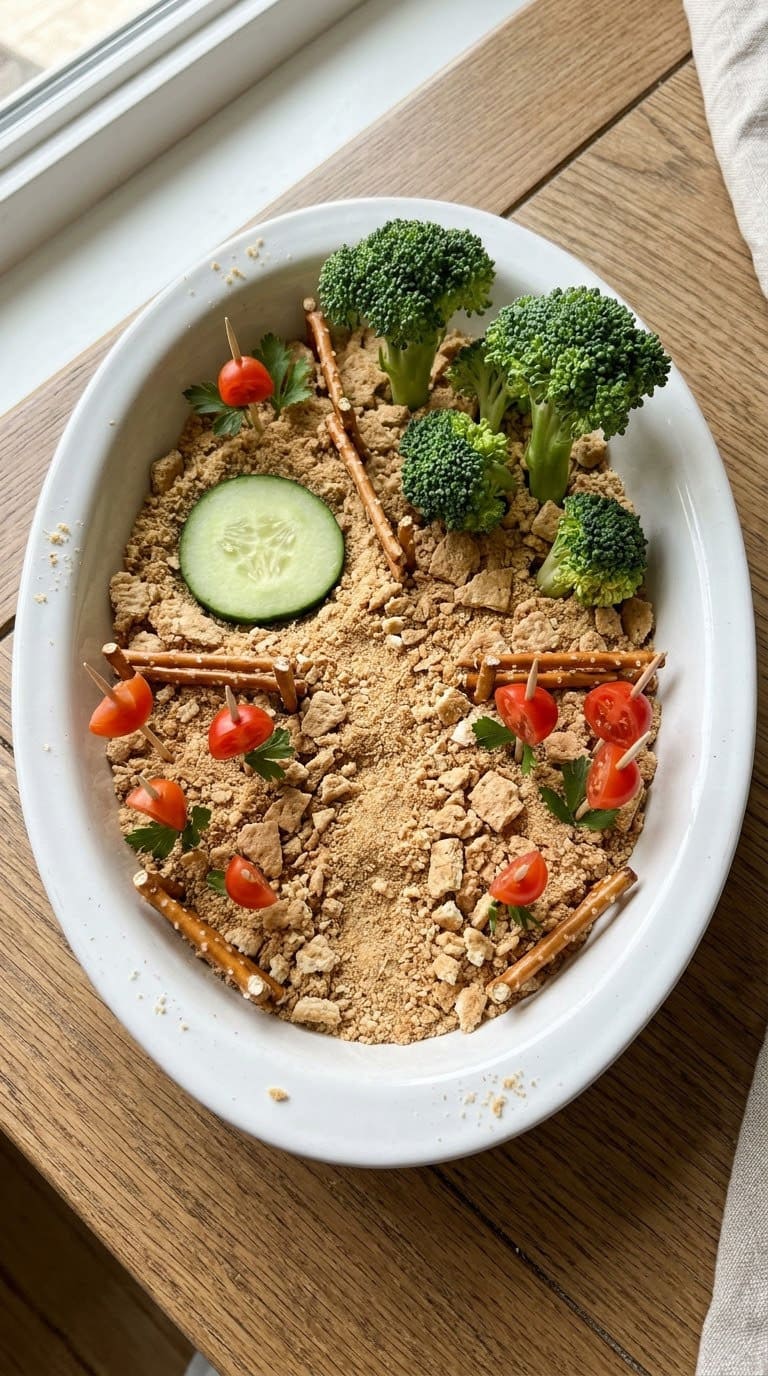
20. Edible Miniature Garden
Materials: Shallow dish or bowl, crushed graham crackers or hummus (soil), broccoli florets (trees), carrot sticks (fence posts or stumps), cucumber slices (pond), pretzel sticks (fences) Mess level: Medium Cost: $4–$7 Allergy notes: Wheat (crackers and pretzels; use rice cracker crumbs); peanuts (if using peanut butter as adhesive)
Cover the base of a shallow dish with crushed graham crackers or hummus as soil. Plant broccoli florets as trees. Lay a cucumber slice flat as a pond. Fence the garden with pretzel sticks pushed into the soil layer.
This project pairs well with a real outdoor garden. Children who grow their own vegetables are more likely to try eating them. A raised vegetable garden gives them produce they can harvest and use directly in food art projects.
For an outdoor version of the edible garden concept with non-food plants and decor, explore our guide to DIY fairy garden ideas.
21. Edible Clay Sculpture
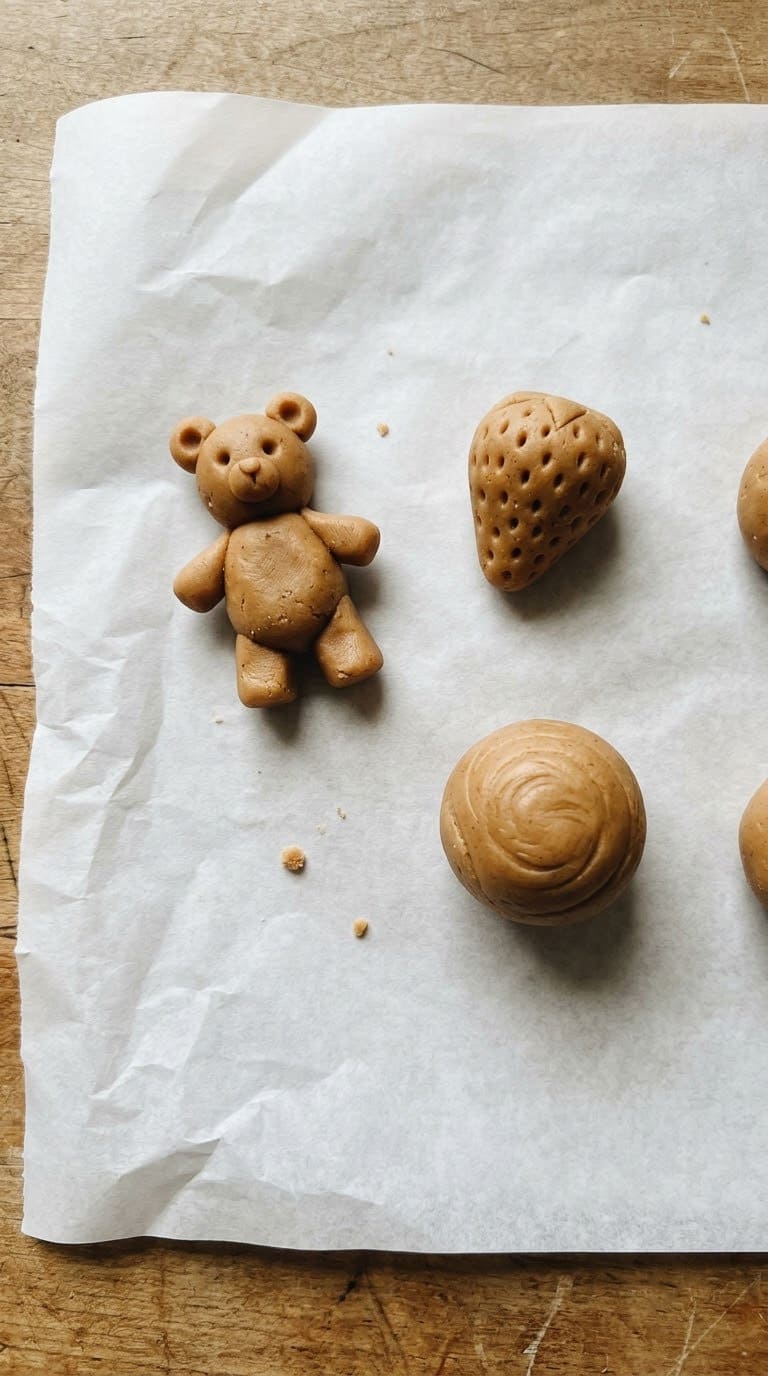
Materials: 1/2 cup peanut butter (or sunflower seed butter), 1/2 cup powdered milk (or powdered coconut milk), 1–2 tbsp honey Mess level: Medium Cost: Under $3 Allergy notes: Peanuts (use sunflower seed butter); dairy (use powdered coconut milk); not suitable for very young children who may put too much in their mouth at once
Mix the ingredients in a bowl until a pliable, non-sticky dough forms. If it is too sticky, add more powdered milk. If too stiff, add a few drops of honey. Sculpt the dough into animals, fruits, or abstract shapes.
The dough holds its shape for 20–30 minutes before softening from the warmth of the hands. This is the closest food art gets to traditional clay work. For more kitchen-inspired creative activities for kids, see our no-bake recipes for kids guide.
Mess Management: Tips That Actually Work
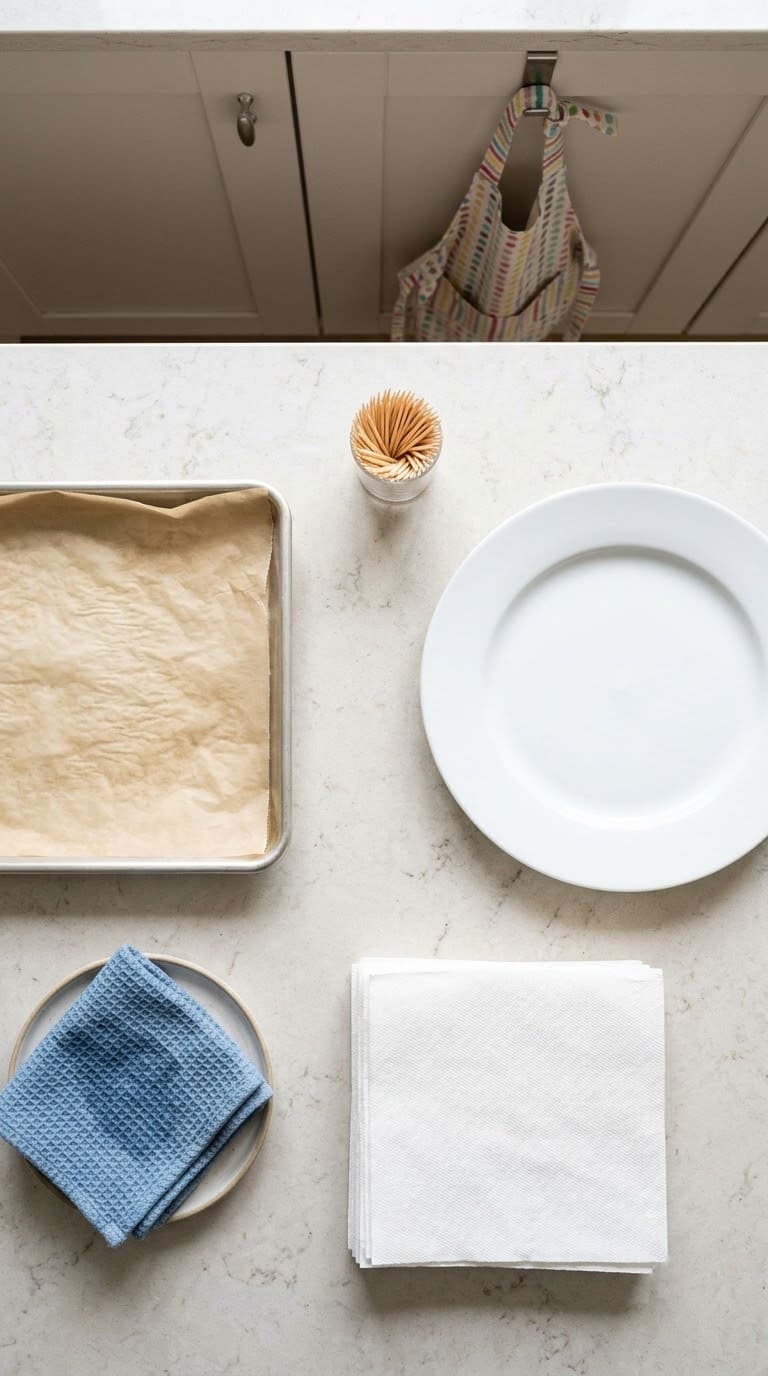
Line the work surface with a silicone mat or a vinyl tablecloth before you start. It wipes clean in under a minute. Skip paper towels as a surface covering: they tear, stick to fruit, and make more mess.
Give each child their own tray. When all materials sit in one tray, the project stays contained and cleanup is a single lift.
Set a rule before starting: food stays on the tray. Older children can enforce this themselves. For toddlers, sit next to them rather than across the table.
Keep a damp cloth within arm’s reach. A quick wipe during the project prevents sticky hands from spreading residue to every other surface.
Food Art for Groups and Parties
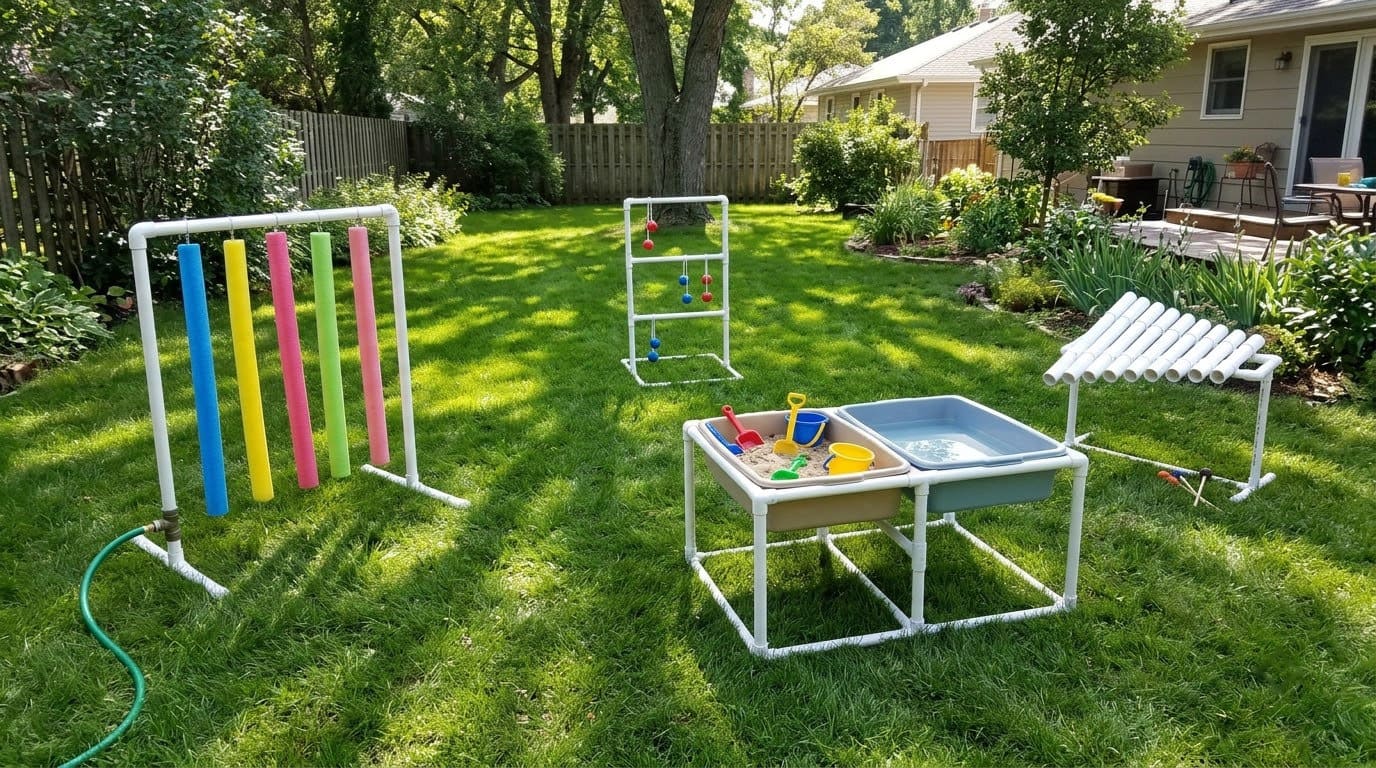
Food art makes a great outdoor activity too. For more ideas to keep kids busy outside, see our backyard playground ideas guide.
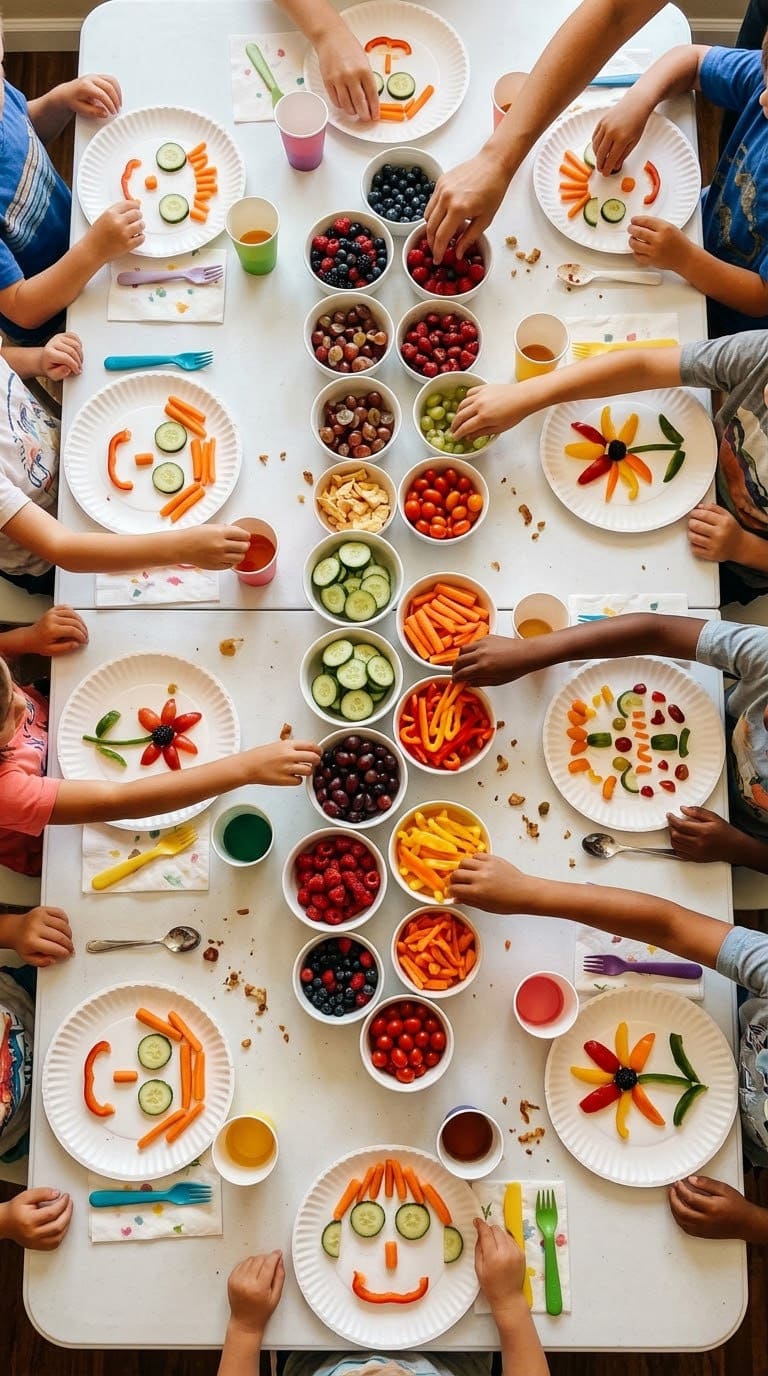
The easiest party project is the fruit face plate (idea 1). Pre-arrange the ingredients in small bowls and let each child assemble their own. Total setup time is five minutes. Cost per child is under $1.
For older groups, the cereal mandala (idea 15) works as a collaborative activity. Use a large dark tray. Each child adds a ring of color. The finished product is a group artwork.
For classroom use, vegetable mosaic portraits (idea 9) scale well. A rice cake base holds up better than bread when being transported to desks.
Common Mistakes to Avoid
Choosing too many ingredients. Three to four ingredients is enough for most projects. More choices overwhelm younger children and create more mess without a better result.
Using overripe fruit for structured projects. Soft, overripe bananas are fine for eating but fall apart when used as building materials. Use firm produce for anything requiring structure. Save overripe fruit for yogurt paint or blueberry dot art.
Skipping the allergy check. Food art often involves peanut butter, tree nuts, eggs, and dairy. Always confirm with all participants, especially in group settings.
Expecting a long display time. Food art wilts and moves. Photograph it quickly after completion, then eat it. Do not expect it to last like a paper craft.
Frequently Asked Questions
What is food art for kids?
Food art for kids uses edible ingredients as creative materials. Children arrange, stamp, sculpt, and paint with fruits, vegetables, pantry staples, and sweets to make pictures and sculptures that get eaten after the activity.
Does food art actually help kids eat more vegetables?
Research suggests it helps increase willingness to try new foods, though it does not guarantee a lasting preference. De Montfort University found that children who engaged creatively with fruits and vegetables tried significantly more than a control group. A 2019 sensory play trial found increased willingness to taste unfamiliar vegetables after hands-on engagement. Repeated exposure matters most: one session helps, but regular food play sessions have a cumulative effect.
What age is food art suitable for?
Food art can start as early as 18 months with simple dot-pressing using soft foods under full adult supervision. Projects in this guide are grouped starting at age two. Children under three should only handle soft, finger-sized pieces that pose no choking risk. The most complex projects (fruit carving, chocolate bark) are suited to ages 9 and up with adult supervision.
Is food art wasteful?
It does not have to be. Most projects in this guide use small portions and all ingredients are eaten at the end. The vegetable rainbow tray is a good way to use produce that is about to go off.
What supplies do I need for food art with kids?
Most projects need only what is already in your kitchen. Optional extras include food-safe markers ($8), small cookie cutters ($5 for a set), and a squeeze bottle ($2–$4). A toothpick cup and a silicone mat round out the kit.
Conclusion
Food art projects for kids do not require a special occasion or a trip to the craft store. They start with whatever is in the refrigerator and on the pantry shelf.
The youngest children can press a blueberry onto parchment. A nine-year-old can build a detailed edible miniature garden. The range of what is possible with edible materials is wider than most families realize.
Start with one beginner project this week. Let your child choose the expression on their fruit face plate. Let them pick the colors for the marshmallow architecture. The ownership makes them more likely to eat the result and more likely to ask for the next session.
Never miss an update — choose FarmFoodFamily as your preferred source on Google.
How it works: Tap the button below to open Google's settings page, then check the box next to FarmFoodFamily.
Tap the checkbox to turn it blue — that's how you know it's set.