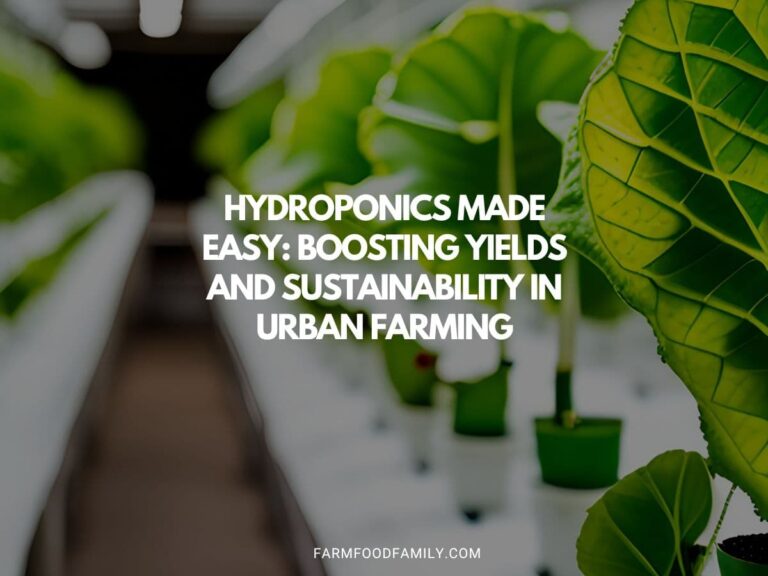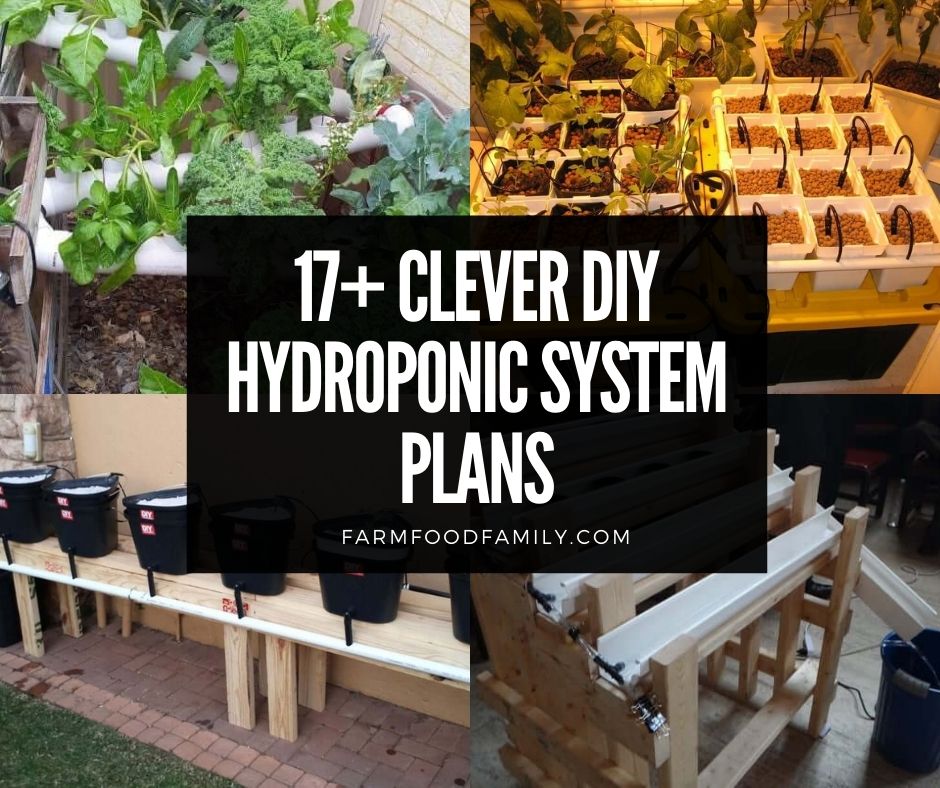
17+ Easy DIY Hydroponic Plans
Raised beds and in-ground gardens aren’t the only way to grow your own food. DIY hydroponics is a great way to grow vegetables, herbs, and even flowers– no matter where you live.
Hydroponics allows you to grow indoors, in a small or large space. That means you can grow all year round in a climate-controlled environment.
You won’t have the pest pressure conventional gardeners deal with every growing season. There won’t be any weeds to pull or soil to till, either.
DIY hydroponics doesn’t require a lot of experience, just some inventiveness and creativity. Hydroponics is extremely flexible. You can adapt the system to suit your space and needs if you build it yourself.
In this article, we’ll introduce you to the basics of hydroponics and offer tips for setting up your first system. We’ve also included a variety of homemade hydroponics plans that are easy to build, whether you’re a beginner or an expert.
A Brief Introduction to Hydroponics for Beginners
Hydroponics is an innovative gardening method that allows you to grow plants without soil. In a hydroponics system, the plants are fed an oxygenated nutrient solution.
This type of feeding is more efficient and effective for the plants. It allows them to absorb nutrients more easily. Therefore, they tend to be healthier and more productive.
While you can buy a ready-made hydroponics system, they’re often very expensive and a bit intimidating. Creating your own system is much more affordable. And, since you built it yourself, you’ll know exactly how everything works.
The Advantages of Growing with Hydroponics
One of the best things about growing with hydroponics is that it improves the growth and yield of your crops.
In general, hydroponic plants mature 25 percent faster than plants grown in soil. They also yield 30% more. That’s because the plants don’t have to search for nutrients by growing extensive root systems.
Here are some other advantages you’re sure to appreciate:
- No hoeing or cultivating.
- No hauling in massive amounts of compost and other soil amendments.
- Easier on your back.
- Very few or no pesticides are required.
- More production in small spaces.
- Continue growing in very cold or very hot weather if your system is indoors.
- No soil-borne illnesses or contamination.
- Cost-effective.
- Conserves natural resources.
- Systems can be placed indoors or out.
Advancements in agriculture due to AI (artificial intelligence), indoor farming, and hydroponics show great promise for solving the world’s food sustainability problem. In fact, forward-thinking urban farmers are using AI and hydroponics to provide locally grown food in urban areas all over the world.
Many of these concepts can be incorporated into homemade hydroponics systems. The use of grow lights, ventilation, timers, and temperature control allows home growers to create ideal growing conditions for their plants. That means you can grow more food in a small space, just like a commercial hydroponic grower.
How to Set Up Your DIY Hydroponics System
Now, let’s dive into how to set up your homemade hydroponics system step-by-step.
1. Choose the right location.
Consider the location of your hydroponics system carefully. It will be difficult to move once it’s filled with water and plants.
Greenhouses, patios, decks, basements, spare bedrooms, and even large walk-in closets can all work. Larger systems can also be constructed in garages, storage units, or even warehouses.
The ground must be level to allow nutrient solution to be distributed evenly to the plants.
Indoor systems require grow lights and good ventilation. Outdoor systems require careful observation of water levels. Either way, you should have access to water and electricity nearby.
2. Assemble your hydroponic system.
You will find a variety of easy hydroponics setups below. Choose one that will work well in the location you’ve chosen. Be sure it will accommodate the number of plants and types of plants you want to grow.
If you want to grow tall or vining plants, you’ll need some type of trellis or fence for them to climb on. Go ahead and install it now, before you add water and plants to your system.
3. Add water and nutrients to your system.
Mix your nutrient solution according to the manufacturer’s instructions.
Fill the reservoir with the solution to the appropriate level. Turn on the pump if you have one and run the system for at least 30 minutes.
Now, turn the pump off. Check carefully for any leaks or other issues and address them before you begin adding plants.
4. Add your growing medium and plants.
Your growing media can be:
- Clay pellets
- Perlite
- Gravel
- Coco coir
Rinse the dirt from the roots of your seedlings before planting them in your mesh cups. To plant, simply place the seedling in the cup and add a growing medium around it to keep it upright.
Be sure the plant cup is touching your nutrient solution so the roots can reach it.
You can also plant seeds directly in your cups if desired. You may need to water them from the top until they develop a root system that’s long enough to reach the nutrient solution.
5. Turn the system on.
Check the level of your solution to ensure that it’s not too high or low after adding the plants and growing medium.
Now turn on the pump. Observe the system carefully over the next hour or so to ensure that there aren’t any issues.
6. Monitor your system daily.
Continue to check water levels and add nutrients as needed every morning and evening.
You should also monitor your plants daily. You will need to stay on top of trellising and staking because the plants will grow very fast. Check for signs of pests and disease each day and address them as they come up.
You should also check the pH and adjust as needed about once per week.
17 DIY Hydroponics Plans Anyone Can Build
Ok, let’s dive into some easy homemade hydroponic systems that can be adapted to a variety of spaces.
1. The Kratky Method
The Kratky method is incredibly easy to set up and maintain. It’s a passive system, which means there are no pumps to worry about. It’s a great option for beginners because it’s so simple.
Here’s what you’ll need to set up a Kratky hydroponic system:
- 5-gallon buckets or plastic totes
- Whatever growing media you prefer
- Nutrients and a pH test kit
- Net pots
To create your system, simply cut holes for your net pots in the lids of your buckets or totes. You want the pot to rest inside the hole but not fall through.
A five-gallon bucket will accommodate one large plant, such as a tomato. For small plants, like lettuce or spinach, you can grow four plants in each bucket.
Fill the bucket with your solution and add your plants. That’s it! All you have to do now is monitor your plants, nutrient levels, and pH regularly.
Over time, the nutrition solution evaporates, allowing the roots to have access to oxygen. The only time you’ll need to add solution is if the roots can no longer reach it.
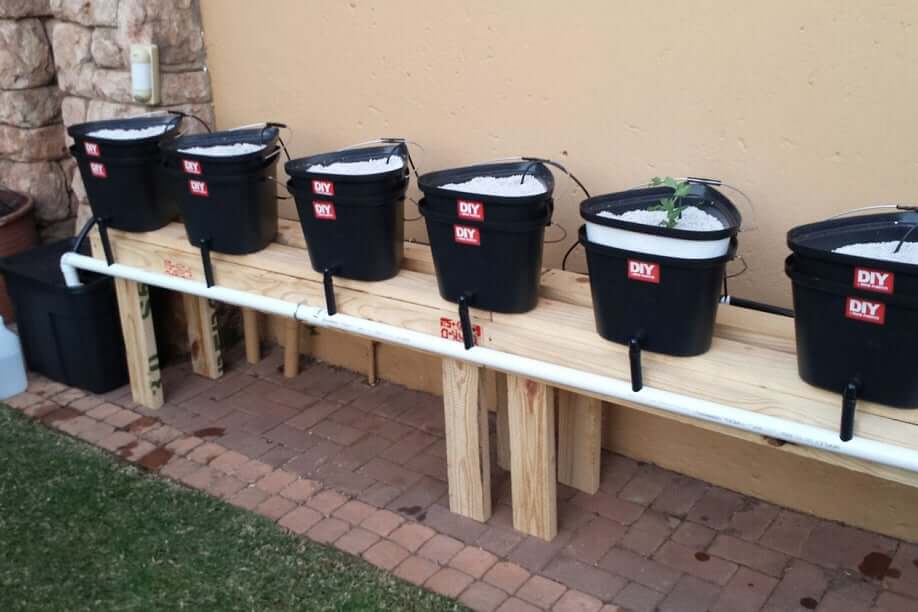
2. Simple Bucket Hydroponics Setup
This is another simple homemade hydroponic system for anyone who doesn’t want to worry about electricity or a pump.
Once again, you’ll need a 5-gallon bucket, your growing media, nutrient solution, and a pH test kit.
In this system, you need a growing media that has wicking action to move the solution up to the plants. Perlite and coco coir are great choices.
To build the system, drill about six holes in the side of your bucket about two inches from the bottom. The holes should be about ½” in diameter.
Add your growing media to the bucket and add your plant. Add your pH balanced nutrient solution, one gallon at a time, until it just barely overflows from the holes. The solution will be absorbed by the media until it reaches the plant’s roots.
That’s all there is to it! To maintain your system, add pH balanced nutrient solution to the reservoir as needed. If the weather is windy or hot, you will need to add solution more frequently.
It’s easiest to mix your solution as you need it. If you decide to make it in large batches, you will need to aerate it with some type of aquarium pump to keep it from going stagnant.
3. Automated Bucket Hydroponics Setup
If you prefer, you can turn your simple bucket setup into an automated system.
You will need a separate reservoir for your nutrient solution. It can be anything from another bucket to a large water tank. The larger your system, the larger your water tank will need to be.
Fill your water tank with nutrient solution, test the pH, and adjust as needed.
Then, attach a drip line with an outlet for each bucket to a submersible pump placed inside the reservoir. The drip line should drip nutrient solution at the base of each plant.
Connect the pump to a timer and plug it in. Set the timer to come on for one minute, twice a day. Watch your system closely, especially for the first week or so, and adjust the timer as needed.
4. Tabletop Hydroponics Setup
Here’s a cheap and easy hydroponics setup that’s perfect for a tabletop or desk. It’s ideal for something like an herb or lettuce plant. Be sure to set up the system in a sunny window or add a grow light.
You will need:
- A large coffee can or a ½ gallon bucket with a lid
- A two-inch net cup
- An aquarium pump, tubing, a bubbler stone
- Your growing media and nutrient solution.
Start by cutting a hole in the lid of your container for your net pot. Be sure it fits snuggly but can still reach the nutrient solution.
Add a small hole in the side of the lid for the tubing. Insert the tubing, attach the stone, and put the lid on. Push the tubing down until it reaches the bottom of the bucket and attach the other end to your pump.
Fill the bucket with nutrient solution. Add your net pot, growing medium, and plant. Turn on the pump and you’re done!
To maintain your system, monitor the level of your nutrient solution and add more as needed.
5. Mason Jar Hydroponics Setup
Here’s another low maintenance, easy to build setup that doesn’t require a pump or electricity. You don’t need any special tools or experience either.
This setup works well for small plants, such as herbs and lettuces. All you need is a quart-sized, narrow-mouthed mason jar, a net cup that sets inside the ring of your jar without falling in, and your nutrient solution.
To build your system, simply fill the jar with nutrient solution, set your net cup inside the ring, and put the ring on the jar. Add your plant and growing medium and you’re done!
6. Aquarium Hydroponics Raft
This system is great for beginners or a cool project for the kids. This system can grow small plants like lettuces, spinach, herbs, or even a few bush beans.
You will need a fish tank for this project. The larger your fish tank is, the more plants it can hold. You will also need a piece of foam to float on top of the tank to make a raft to hold your net baskets and plants.
The system can be passive, like the Kratky method above, or you can add an aquarium pump and bubbler if desired, as explained in the desktop system.
To set up the system, cut your foam raft to size and add holes for your net pots. Fill the aquarium with nutrient solution. Set your net pots in the holes, add growing medium and plants.
7. PVC Hydroponic System
This PVC Hydroponic System does require a little work to build. But it’s not difficult as long as you have some basic power tool experience. It’s a self-contained system that works very well outdoors on a patio. But it will work indoors too, and you can make it as large or small as you like.
First, you will need to build a wooden A-frame stand to hold 4-inch PVC pipes. Cap the ends of your pipes, and then use a hole saw to make holes in the PVC for your net cups.
Add a water reservoir, pump with a timer, and tubing to keep your system topped off. You will also need an overflow pipe to take the extra solution back to the reservoir.
Fill the system with nutrient solution, add your net cups, growing medium, and plants. To maintain, simply add more nutrient solution to your reservoir as needed.
8. Hydroponic Grow Box
The Hydroponic Grow Box is a flexible system that can be made from a plastic storage bin of any size, as long as it has a lid. If you use smaller bins, you’ll be able to move them around if needed.
The system uses a submersible pump, irrigation sprinkler heads, and a submersible pump to deliver the nutrient solution to the plants.
You will need to cut holes in the lid of your bin to fit your net cups. Here’s how to build your own Hydroponic Grow Box.
9. Hydroponic Window Farm
This vertical Hydroponic Window Farm can be used to create privacy and shade in a sunny window. The plants will get the natural light from outside and you’ll have a beautiful and fascinating display.
The system uses recycled soda bottles to hold the plants. The bottles are hung vertically in the window using chains.
A system of tubing connected to a submersible pump moves nutrient solution from the reservoir to the plants. And, an overflow tube takes excess solution back to the reservoir.
You could easily adapt and scale this system to hang off your porch or carport roof, as long as the plants would receive enough sunlight. Get all the details for building your own Hydroponic Window Farm here.
10. Hydroponic Rain Tower Garden
Here’s another easy DIY Vertical Hydroponics Plan that’s easy to build. It is created using a hollow vinyl fence post set inside a five-gallon bucket.
To build the system, you will need to create evenly spaced hole recesses for the net cups using PVC.
A submersible pump placed inside the bucket is used to pump nutrient solution to the top of the tower. The solution will trickle down the inside of the tower and back into the bucket.
Here’s how to make your own Rain Tower Garden.
11. DIY Dutch Bucket Hydroponics System
Dutch Bucket Systems are extremely versatile. They can be automated, or you can top off the system manually throughout the day to keep your system simple.
You will need two five-gallon buckets for each Dutch Bucket you want to make. The nutrient solution is added to the top bucket where the plant grows and the excess flows down into the lower bucket.
If you decide to automate your system, you will need tubing, a pump, some PVC, and a timer.
Large plants like tomatoes should be given an entire bucket, or you can put four smaller plants in a bucket. The system can easily be adapted to suit a variety of indoor and outdoor spaces, as long as the ground is level.
Here are step by step instructions for building your own Dutch Bucket System.
12. DIY Drip Hydroponic System
A Drip Hydroponic system utilizes a nutrient reservoir that’s placed under a system of square plastic pots or buckets with holes drilled in the bottom.
The solution is pumped up to the plants through drip line tubing. It trickles down through the growing media, back into the reservoir. As the water trickles down, it draws much-needed oxygen to the roots of your plants.
The pump should be on a timer that runs for 15 minutes out of every hour during the day, then two times during the night.
This system could easily be adapted to suit a variety of locations, both indoors and out. It would also accommodate a wide variety of large and small plants.
Monitoring this system closely is key because the drip tubing can clog easily. Your plants wouldn’t get watered, and that could become catastrophic very quickly on a hot day.
Here are the step by step instruction for building a Drip Hydroponics System.
13. Easy Ebb and Flow Hydroponics Setup
Ebb and Flow systems are very popular in hydroponics because they’re easy to set up and maintain.
Pots are placed inside of a container and flooded with two inches of nutrient solution every hour using a submersible pump set inside the reservoir. This system waters the plants from the bottom up.
After the container is flooded, the solution drains back down into the reservoir. If you place your reservoir underneath your container, you can simply drill a hole for the water to drain back out slowly.
You will need to be sure that your reservoir is large enough to hold all of the nutrients needed to flood the container, plus enough extra to keep your pump from running dry.
14. Stackable Hydroponics Towers
Stackable Hydroponics Towers are a great solution for those who want to grow a lot of plants in a small space.
The pots are placed on a center pole and watered with drip tubing. The tricky part of this system is regulating the water flow to the plants on the lower levels.
Learn how to build your own Stackable Hydroponics Tower here.
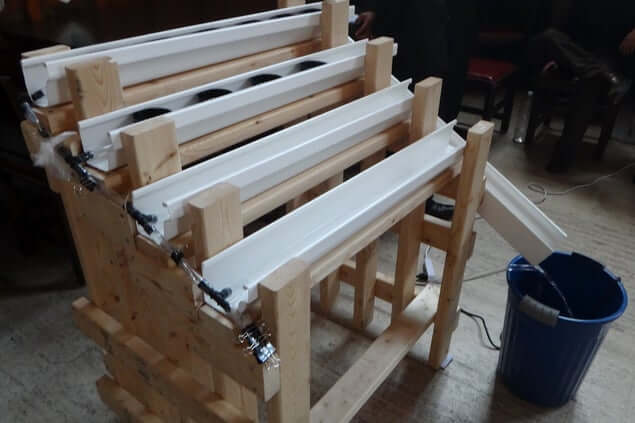
15. DIY Zig Zag Hydroponics Plan
In this Zig Zag Hydroponics system, water flows continuously to the plants through four-inch PVC pipes.
The pipes are installed in a zig-zag pattern on a wooden frame. The pipe should be installed so that it slopes gradually, allowing nutrient solution to drain back into the reservoir. A submersible pump placed inside the reservoir pumps water to the top and feeds the system.
Holes are drilled in the PVC to accommodate net pots or cups. Here’s everything you need to know to build your own Zig Zag Hydroponics system.
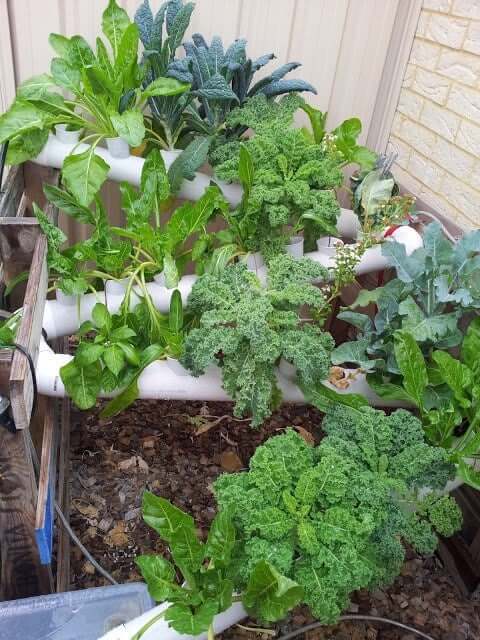
16. Vertical Gutter Garden
The materials required to build a Vertical Gutter Garden are very affordable, but you will need some basic carpentry skills.
The system requires a stand with rain gutters placed on steps. One end of each gutter is capped, while the other end drains into another gutter that returns nutrient solution back to the reservoir.
A drip line powered by a submersible pump delivers the solution to the closed end of each gutter. The net pots are placed inside the gutters and fed by the solution as it trickles to the open end.
You can see the plans for a Vertical Gutter Garden right here.
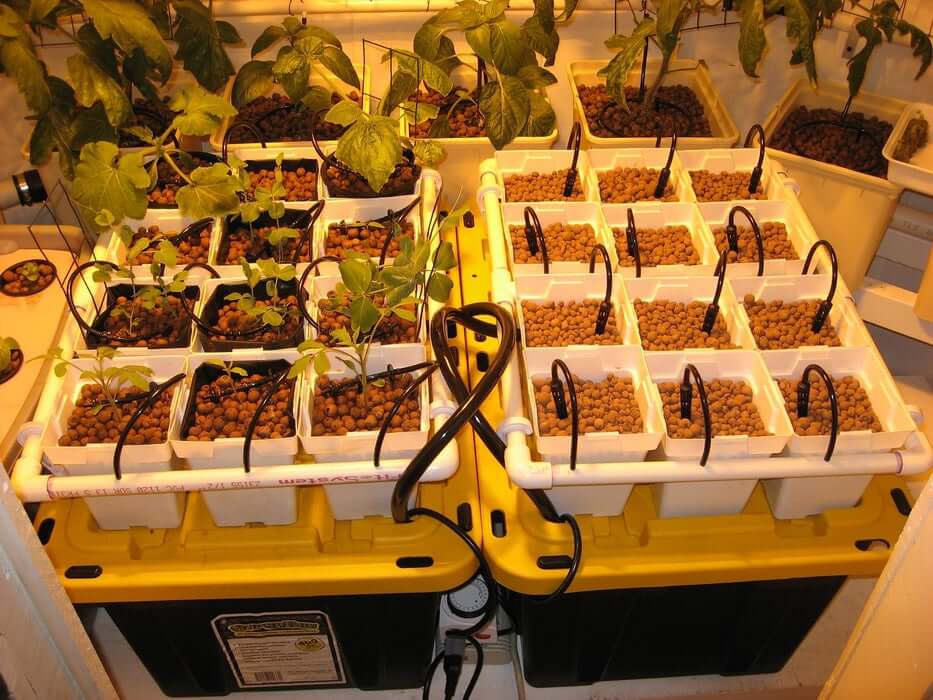
17. Deep Water Culture Hydroponics
If you’re looking to grow large plants like tomatoes, Deep Water Culture is an excellent system to consider.
This system is easy to construct. You will need a deep, opaque plastic storage tote with a lid for each box you want to create. Holes are cut into the top of the box to accommodate net pots or cups.
The tote is filled with solution and a simple bubbler attached to an air hose oxygenates the nutrient solution.
Depending on the size of your tote and plants, each box can accommodate two to eight plants.
Wrapping Things Up
Hydroponics is the future of food sustainability. It allows you to grow a lot of food in a small space, no matter what your climate is like.
It’s also eco-friendly because it requires less water usage and fewer pesticides. And, it’s cheaper to maintain and requires less labor than traditional gardens, while providing better growth and yield.
We hope this roundup of DIY hydroponics plans gave you some great ideas. Use them as inspiration to design your own system to suit your needs and growing space.