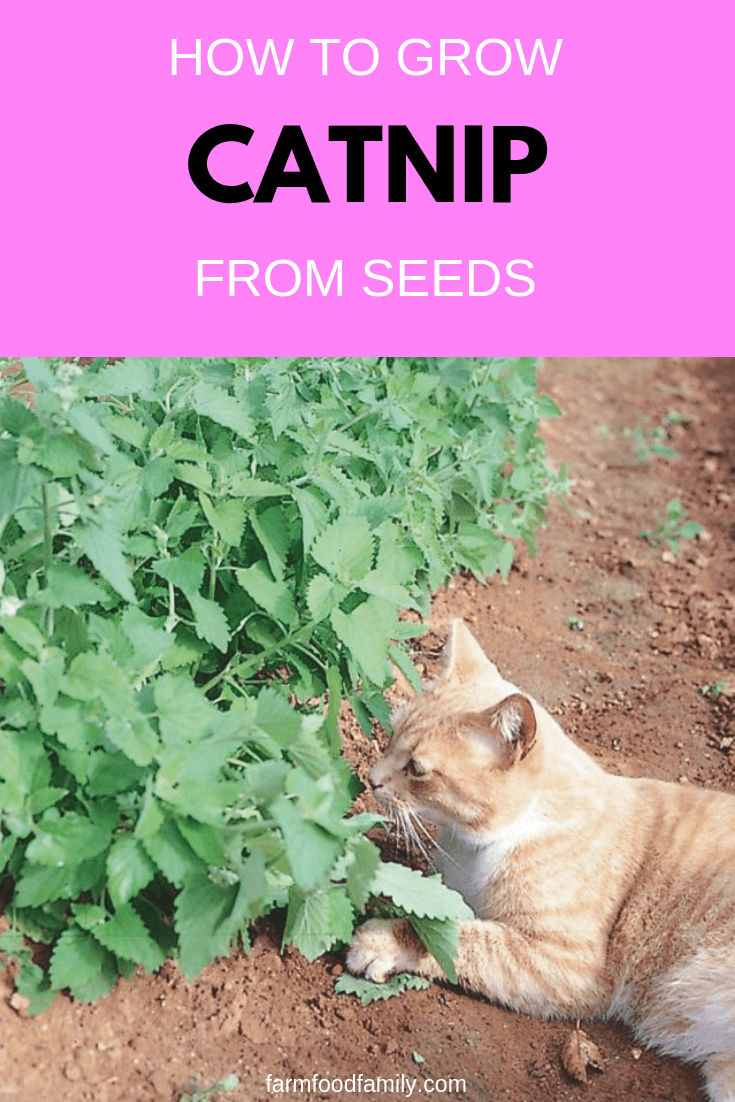
How to Grow and Care for Catnip from Seeds
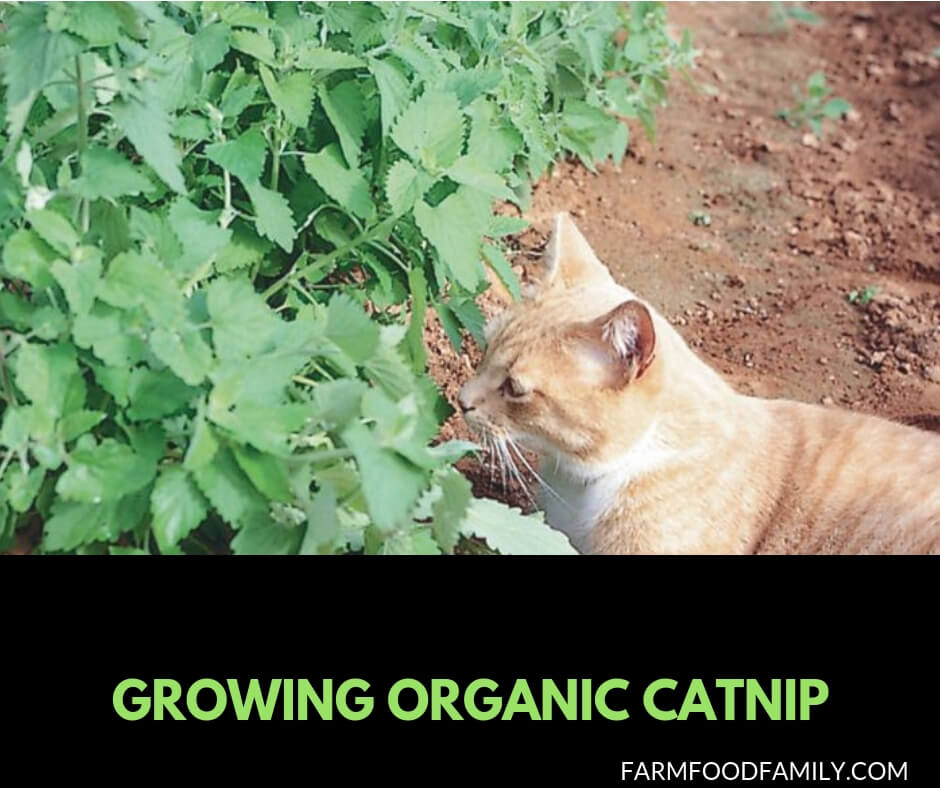
Have you ever wondered why catnip drives cats wild with joy? This plant, a true favorite among feline friends, holds a special place in the hearts of cat owners.
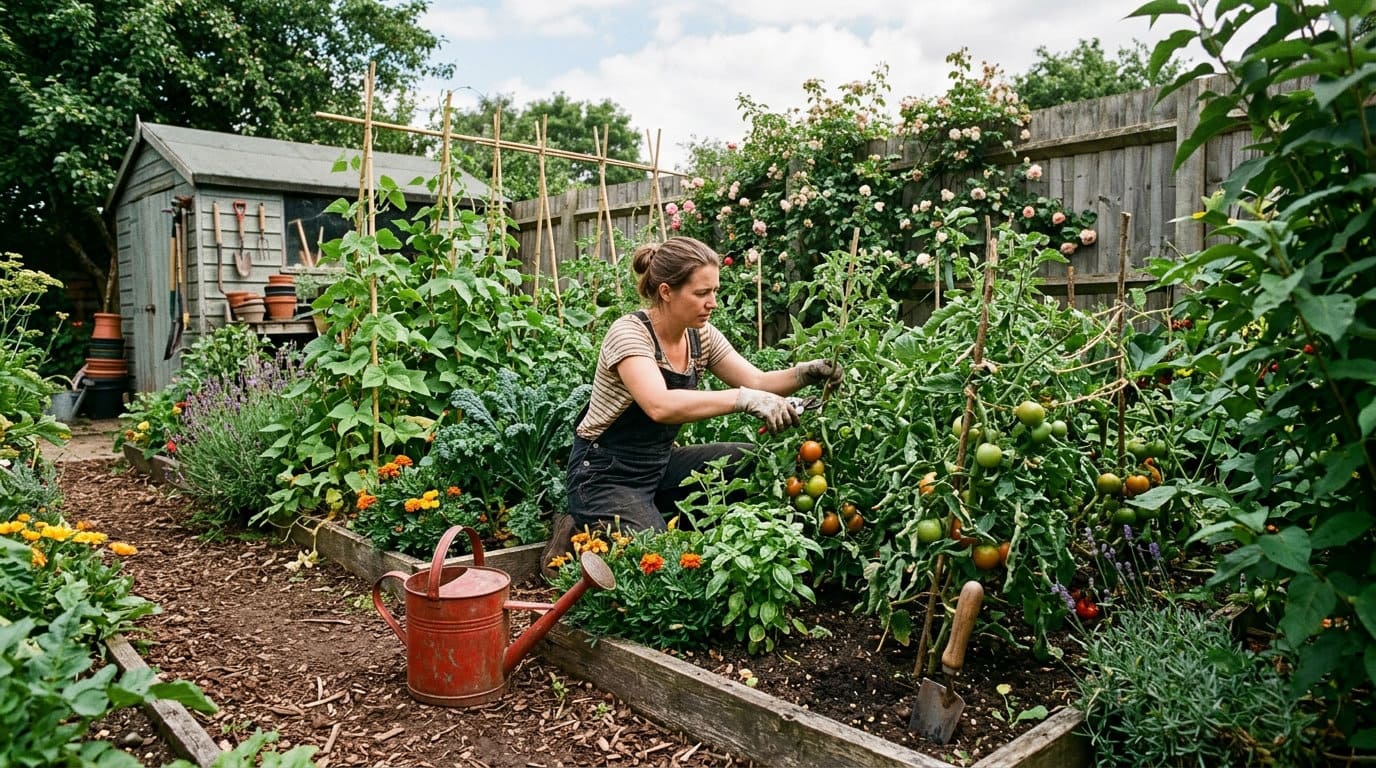
Growing catnip at home from seeds isn’t just a fun project; it’s a practical way to ensure your furry pals always have access to their favorite treat.
Growing catnip from seeds is more than just a gardening task; it’s a journey towards creating endless moments of joy for your cats.
By choosing to grow catnip from seeds at home, you not only get to witness the wonder of this plant’s growth cycle but also enjoy the benefits of having a fresh, potent supply on hand. This means happier cats and, ultimately, happier cat owners.
Understanding Catnip
Catnip, known scientifically as Nepeta cataria, is a plant that belongs to the mint family. It’s famous for its ability to attract cats and make them exhibit playful behaviors. This plant is not only easy on the eyes with its soft, green leaves and delicate flowers but also serves as a natural and safe stimulant for your feline friends.
Description of Catnip
Nepeta cataria stands out with its unique features. It grows up to three feet tall, sporting heart-shaped leaves and spikes of white or lavender flowers. These characteristics make catnip not just a plant for cats to enjoy but also a pleasant addition to your garden. Its aroma, which cats find irresistible, comes from the oil found in the leaves.
Types of Catnip and Best Varieties for Seeds
Not all catnip is the same. There are several types, each with its own qualities. When planning to grow catnip from seeds, knowing which variety to choose can make a big difference in your gardening success.

Here’s a simple table to help you decide:
| Type | Characteristics | Best for Seeds? |
|---|---|---|
| Nepeta cataria | Traditional catnip, potent aroma | Yes |
| Nepeta mussinii | Smaller leaves, less potent | Sometimes |
| Nepeta faassenii | Decorative, low-growing | No |
For those looking to grow catnip from seeds, Nepeta cataria is often the top choice. It not only grows well from seeds but also produces the strong aroma that cats love. On the other hand, Nepeta faassenii is more of a ground cover and less appealing to cats, making it a less ideal choice for seed growers.
Choosing the right type of catnip to grow from seeds is crucial. You want to ensure your cats get the most joy out of it, and Nepeta cataria promises just that. With its ease of growth and high appeal to cats, it stands as the best option for home gardeners looking to add a touch of joy to their and their pets’ lives.
How Does Catnip Work?
The smell of catnip is what works its magic on cats. When a cat rubs against the plant, the leaves become bruised and broken. This releases a chemical called Nepetalactone, which is similar to a cat pheromone. Some cats ignore catnip, while others lick it, sniff it, or roll in it.
Why Grow Catnip?
Like any herb, the fresh or home-dried plant is a luxury not to be missed. Catnip stalks are fairly easy to grow and can be harvested and dried when they are about a foot tall, providing a steady source of catnip throughout the winter.
In some climates, catnip is hardy and maintains its leaves throughout the winter. Dry it and place it in toys as a Christmas gift for a favorite cat! Of course, homegrown catnip can also be organic and pesticide-free.
Getting Started

Starting your catnip journey requires some basic tools and materials. This guide will help you gather what you need and choose the right soil and containers, ensuring your catnip seeds have the best start possible.
Tools and Materials Needed for Growing Catnip from Seeds
Before diving into planting, let’s look at what you’ll need. The list is simple, and you might already have some of these items at home.
| Item | Purpose | Notes |
|---|---|---|
| Seeds | Starting point | Choose Nepeta cataria for best results |
| Soil | Medium for growth | Well-draining and fertile |
| Containers | Housing for plants | With drainage holes |
| Watering can | For watering | Gentle shower type preferred |
| Labels | Keep track | Write down planting dates |
Having the right tools and materials is crucial. Starting with high-quality seeds sets the stage for healthy plant growth. The soil needs to be well-draining yet fertile to support your catnip as it grows.
Containers should have drainage holes to prevent water from sitting at the bottom, which could harm the roots. Regular watering is key, but doing so gently ensures the seeds don’t get washed away. Lastly, labels might seem minor, but they’re incredibly helpful for tracking your plants’ progress.
Choosing the Right Type of Soil and Containers for Planting
The choice of soil and containers can significantly affect your catnip’s growth. Let’s break down what you need to know.
Soil
For catnip, the soil should be well-draining yet retain enough moisture to keep the plants hydrated. A mix of garden soil, compost, and perlite creates an ideal environment for catnip seeds to thrive. This blend ensures nutrients are plentiful, and the drainage is just right.
Containers
When it comes to containers, options abound. However, the key feature to look for is drainage holes. Whether you choose terracotta pots, plastic planters, or recycled containers, ensure they allow excess water to escape. Size-wise, starting with smaller containers is fine, but be prepared to transplant your catnip as it grows.
Choosing the right soil and containers doesn’t have to be complicated. A simple, well-draining soil mix and any container with proper drainage will do the trick. This setup ensures your catnip seeds have the perfect home to sprout and grow, leading to lush, aromatic plants that your cats will adore.
Planting the Seeds

Successfully growing catnip starts with the careful planting of seeds. This section will guide you through sowing catnip seeds effectively, ensuring they have the best start.
Step-by-step Guide on Sowing Catnip Seeds
Planting catnip seeds is a straightforward process. Here’s how to do it right:

- Prepare Your Soil: Use a well-draining soil mix in your chosen container. Make sure the soil is moist but not waterlogged.
- Sow the Seeds: Sprinkle the catnip seeds lightly over the surface of the soil.
- Cover the Seeds: Gently press the seeds into the soil without burying them too deeply. A light covering of soil is all that is needed.
- Water Gently: Use a spray bottle or a watering can with a gentle shower setting to moisten the soil, being careful not to displace the seeds.
Preparing the Soil
Before planting, getting your soil right is crucial. A mixture of potting soil, compost, and a bit of sand or perlite ensures good drainage and a healthy start for your seeds.
Planting Depth and Spacing
When it comes to planting depth and spacing, catnip seeds need a light touch:
| Aspect | Detail | Importance |
|---|---|---|
| Depth | Just below the surface | Ensures proper germination |
| Spacing | Scatter seeds lightly | Prevents overcrowding |
Ideal Conditions for Germination
For catnip seeds to sprout, they need the right environment:
| Condition | Ideal Setting | Why It Matters |
|---|---|---|
| Temperature | 70°F (21°C) | Warmth encourages germination |
| Light | Bright, indirect light | Supports early growth |
| Moisture | Consistently moist soil | Prevents seeds from drying out |
Ensuring these conditions can lead to successful germination and a strong start for your catnip plants. Keep the soil moist, but be wary of overwatering. A balance of moisture, warmth, and light will coax the seeds into sprouting, setting the stage for healthy growth. By following these steps, you’re on your way to growing a lush catnip garden that your feline friends will love.
Caring for Your Catnip Seedlings
After your catnip seeds have sprouted, the next crucial phase is ensuring your seedlings grow healthy and strong. This involves proper watering, ensuring they receive the right amount of light, and knowing when and how to fertilize.
Watering: How Much and How Often
Watering your catnip seedlings properly is key to their growth. They require a consistent moisture level without becoming waterlogged.
| Frequency | Amount | Indicator |
|---|---|---|
| Regularly | Moderate | Soil feels dry to the touch |
It’s important to check the soil moisture daily. If the top layer of the soil feels dry, it’s time to water. However, avoid over-watering as standing water can lead to root rot, which is detrimental to your seedlings.
Light Requirements: Finding the Right Spot for Your Catnip Plants
Light plays a significant role in the health of your catnip plants.
| Light Condition | Location | Effect on Plant |
|---|---|---|
| Bright, indirect light | Near a window | Promotes strong growth |
Finding a spot that receives bright, indirect light for most of the day is ideal. Direct sunlight, especially in the hotter parts of the day, can be too intense for young plants. If natural light is limited, consider using grow lights placed a few inches above the plants.
Fertilization: When and What Type of Fertilizer to Use
Fertilizing your catnip seedlings can give them the extra nutrients they need to thrive.
| Timing | Fertilizer Type | Reason |
|---|---|---|
| After 4-6 weeks | Balanced, liquid fertilizer | Supports healthy growth |
Wait until your catnip seedlings have established themselves before fertilizing. A balanced, liquid fertilizer diluted to half strength is suitable for young plants. Fertilizing too early or with too strong a solution can harm delicate seedlings.
Caring for catnip seedlings involves a balance of proper watering, sufficient light, and timely fertilization. By monitoring and adjusting these elements, you ensure your catnip plants grow robustly, ready to delight your feline friends.
Keep an eye on the moisture level of the soil, provide plenty of light, and fertilize at the right time with the correct product to support the healthy growth of your catnip.
Transplanting
When your catnip seedlings have grown strong enough, moving them to their final home is the next step. This could be in an outdoor garden bed or a larger pot for indoor growth. Knowing when and how to transplant is key to ensuring your catnip thrives in its new location.
When and How to Transplant Catnip Seedlings
Transplanting should occur when seedlings have developed several sets of true leaves and are strong enough to handle the move.
| Timing | Seedling Stage | Action |
|---|---|---|
| 4-6 weeks after sprouting | Several sets of true leaves | Ready to transplant |
Gently remove the seedling from its current container, being careful not to damage the roots. Make a hole in the new location that’s big enough to accommodate the root ball, place the seedling in, and gently cover with soil. Water thoroughly after transplanting to help establish roots in the new location.
Transplanting to Outdoor Garden Beds
Moving your catnip to an outdoor garden allows it to grow freely and benefit from natural elements.
| Preparation | Location | Consideration |
|---|---|---|
| Well-draining soil | Sunny spot | Protection from intense midday sun |
Choose a spot that receives ample sunlight but is protected from the harshest midday rays. Ensure the soil is well-draining to prevent water from pooling around the roots. Space plants about 18-24 inches apart to give them room to spread.
Transplanting to Larger Pots for Indoor Growth
For those keeping catnip indoors, transitioning to a larger pot is necessary for continued growth.
| Pot Size | Soil Type | Location |
|---|---|---|
| One size larger | Well-draining potting mix | Bright, indirect light |
Select a pot that’s one size larger than the current one to give the roots room to grow. Use a well-draining potting mix and place the pot in an area that receives bright, indirect light. This will support the plant’s growth indoors.
Transplanting catnip, whether to an outdoor garden or a larger indoor pot, requires careful handling and consideration of the plant’s needs. By choosing the right time, preparing the new location properly, and ensuring the soil and light conditions are optimal, your catnip will continue to grow healthy and strong, ready to provide enjoyment for you and your cats.
Ongoing Care and Maintenance
Keeping your catnip plants healthy and vibrant requires ongoing care and attention. This includes regular pruning and harvesting to encourage growth, as well as vigilant pest and disease management to keep common issues at bay.
Pruning and Harvesting: How to Encourage Growth and Maximize Yield
Pruning and harvesting not only help to maintain the shape and health of your catnip plants but also stimulate new growth, ensuring a continuous supply.
| Activity | Frequency | Method |
|---|---|---|
| Pruning | As needed | Remove top third of the plant |
| Harvesting | Before flowering | Cut leaves and stems |
To encourage bushier growth, prune your catnip by cutting back the top third of the plant. This can be done several times throughout the growing season. For harvesting, the best time is just before the plant flowers, when the oils (and thus the aroma) are most potent. Use scissors or garden shears to cut the leaves and stems, leaving the lower two-thirds of the plant intact to recover and regrow.
Pest and Disease Management: Common Issues and How to Deal with Them
Even with the best care, catnip plants can encounter pests and diseases. Early detection and proper management are crucial.
| Issue | Signs | Solution |
|---|---|---|
| Aphids | Small, green insects on leaves | Spray with water or use insecticidal soap |
| Spider mites | Fine webs on plants, yellowing leaves | Increase humidity, use miticide |
| Fungal diseases | Spots on leaves, wilted stems | Improve air circulation, remove affected parts |
Aphids and spider mites are common pests that can be managed with water sprays or specific insecticides. Fungal diseases require good air circulation and proper watering techniques to prevent. Removing affected plant parts can also help stop the spread of disease.
Caring for your catnip involves regular pruning and harvesting to promote healthy growth and yield. Additionally, being proactive in managing pests and diseases will help ensure your plants remain healthy and productive. By following these care tips, you can enjoy a thriving catnip garden that brings joy to both you and your feline friends.
Enjoying Your Catnip
Once your catnip has grown, it’s time to enjoy the fruits of your labor. Whether you prefer to use it fresh or dried, catnip can provide endless fun for your cats. Here’s how to make the most of your harvest and ensure it remains potent for as long as possible.
Tips on How to Use Fresh or Dried Catnip for Your Cats
Catnip can be enjoyed by cats in various forms. Here’s how to use it:
| Form | Usage | Effect on Cats |
|---|---|---|
| Fresh | Directly from the plant | Immediate enjoyment, strong reaction |
| Dried | Sprinkled on toys or scratching posts | Long-lasting, can be stored |
Fresh catnip can be given directly to your cats by allowing them to nibble on the leaves or stems. This method provides the most potent effect. Alternatively, drying the catnip allows for extended use. Sprinkle dried catnip on your cat’s favorite toys or scratching posts to encourage play and exercise.
Storing Catnip: Best Practices for Drying and Storage to Maintain Potency
Properly drying and storing your catnip ensures it stays potent for your cats to enjoy.
| Method | Process | Storage |
|---|---|---|
| Drying | Hang upside down in a dark, dry place | Airtight container |
| Storing | After fully dried | Cool, dark place |
To dry catnip, hang the stems upside down in a dark, dry area until the leaves crumble easily. Once dried, store the catnip in an airtight container to preserve its aroma and potency. Keep this container in a cool, dark place to prevent degradation of the essential oils.
Enjoying your catnip comes down to preference and how you choose to use it with your cats. Whether fresh or dried, catnip can provide your feline friends with hours of fun and stimulation. By following these tips for use and storage, you can ensure that your catnip remains a beloved treat for your cats for months to come.
Troubleshooting Common Issues
Growing catnip from seeds can sometimes present challenges. Whether you’re facing poor germination rates, dealing with leggy seedlings, or combating diseases and pests, there are strategies to help overcome these common problems and ensure your catnip thrives.
Addressing Common Problems When Growing Catnip from Seeds
Understanding and addressing common issues early can lead to a successful catnip harvest.
Poor Germination Rates
| Problem | Cause | Solution |
|---|---|---|
| Poor germination | Old or improperly stored seeds | Use fresh seeds and test germination before planting |
If you’re experiencing low germination rates, the quality of your seeds may be the issue. Ensure you’re using fresh seeds and store them in a cool, dry place before planting. Testing a few seeds for germination can also help gauge their viability.
Leggy Seedlings
| Issue | Cause | Fix |
|---|---|---|
| Leggy seedlings | Insufficient light | Provide more direct light or use a grow light |
Leggy seedlings often result from inadequate light, causing them to stretch toward the nearest light source. To prevent this, ensure your seedlings receive plenty of direct sunlight or consider using a grow light to provide consistent, adequate light levels.
Diseases and Pests
| Challenge | Common Signs | Management Strategy |
|---|---|---|
| Diseases and pests | Discolored leaves, slow growth | Improve air circulation, use organic pest control |
Diseases and pests can hinder the growth of your catnip. Improving air circulation around your plants can help prevent fungal diseases, while organic pest control methods can effectively manage pests without harming your catnip or cats.
Addressing these common issues promptly can help ensure your catnip grows healthy and strong. By using fresh seeds, providing adequate light, and managing diseases and pests with care, you can enjoy a bountiful catnip harvest that your feline friends will love.
Conclusion
Throughout this article, we’ve journeyed through the essentials of How to Grow Catnip from Seeds, covering everything from selecting the right seeds and preparing the soil to the ongoing care and troubleshooting of common issues. We’ve highlighted the importance of choosing the appropriate type and variety of catnip for optimal growth, the significance of maintaining proper watering, light, and fertilization practices, and the benefits of regular pruning and harvesting to ensure your catnip remains healthy and vibrant.
Growing catnip from seeds can be a highly rewarding project, not only for the joy it brings to our feline companions but also for the satisfaction it offers to us as gardeners. The process of nurturing these plants from tiny seeds to lush, aromatic foliage that cats adore is a unique gardening adventure that combines the pleasure of horticulture with the delight of pet ownership.
We encourage you to embark on this rewarding journey of growing catnip from seeds. With patience, care, and attention to the needs of your plants, you’ll find that this endeavor can add a new and exciting dimension to your gardening experience. The joy of watching your cats bask in the bliss that catnip brings is truly unmatched. So, gather your seeds, prepare your soil, and get ready to grow a garden that will bring endless happiness to you and your furry friends.
Additional Resources
To further enhance your journey in growing catnip from seeds and ensure you have access to the best quality seeds, here are some recommendations and resources that will be invaluable.
Recommended Reading
For those looking to dive deeper into the world of gardening and specifically into growing catnip, here are some books and guides that come highly recommended:
- “The Complete Guide to Growing and Using Herbs“ – This comprehensive guide covers a wide range of herbs, including catnip, providing detailed information on cultivation, care, and usage.
- “Herbs for Pets: The Natural Way to Enhance Your Pet’s Life“ – A book that offers insight into how herbs, like catnip, can be used to improve the health and happiness of your pets.
These books offer a wealth of knowledge, not only on growing catnip but on a wide array of gardening topics and how they relate to both human and pet well-being.
Sources for High-Quality Catnip Seeds
Finding high-quality catnip seeds is crucial for a successful gardening project. Here are some reputable online stores where you can find seeds:
- Burpee (www.burpee.com) – A well-known supplier of high-quality seeds, including a variety of catnip seeds.
- Seed Savers Exchange (www.seedsavers.org) – A non-profit organization dedicated to saving and sharing heirloom seeds, including catnip.
- Johnny’s Selected Seeds (www.johnnyseeds.com) – Offers a wide selection of seeds for herbs and vegetables, including organic catnip seeds.
These sources are renowned for their quality and variety, ensuring that you start your catnip growing journey on the right foot.