20 Stunning Plastic Flower Pot Makeover Ideas (With Paint, Rope, and Clean-Up Tips)
A plastic pot can look like ceramic or stone with the right paint and trim, as long as you prep the surface and drain it properly.

Never miss an update — choose FarmFoodFamily as your preferred source on Google.
How it works: Tap the button below to open Google's settings page, then check the box next to FarmFoodFamily.
Tap the checkbox to turn it blue — that's how you know it's set.
A plastic pot can look like ceramic or stone with the right paint and trim, as long as you prep the surface and drain it properly.
Products We Recommend
This post contains affiliate links. We may earn a commission on qualifying purchases at no extra cost to you.

Pottiffe 8 Inch White Plastic Flower Pots with Drainage Holes and Saucers, 4 Pack
Opaque white pots with drainage holes, a good blank for paint and rope
Shop Now

Rust-Oleum Painter's Touch Acrylic Latex Paint, Gloss Apple Red
Brush-on paint for stripes and patterns; check the label for plastic
Shop NowPlastic flower pots are cheap, light, and everywhere. They are also plain. A little paint, rope, or tile turns a dull nursery pot into a statement piece for a few dollars.
Plain plastic does not take decoration easily, and old pots can carry disease. This guide gives you 20 makeover ideas with the prep, drainage, and clean-up steps that most lists skip.
In this article
Answer 4 quick questions and get matched to the exact fix for your yard — drainage, budget, layout, or something else entirely.
Take the Free QuizWhat’s the Quick Answer for Plastic Pot Makeovers?
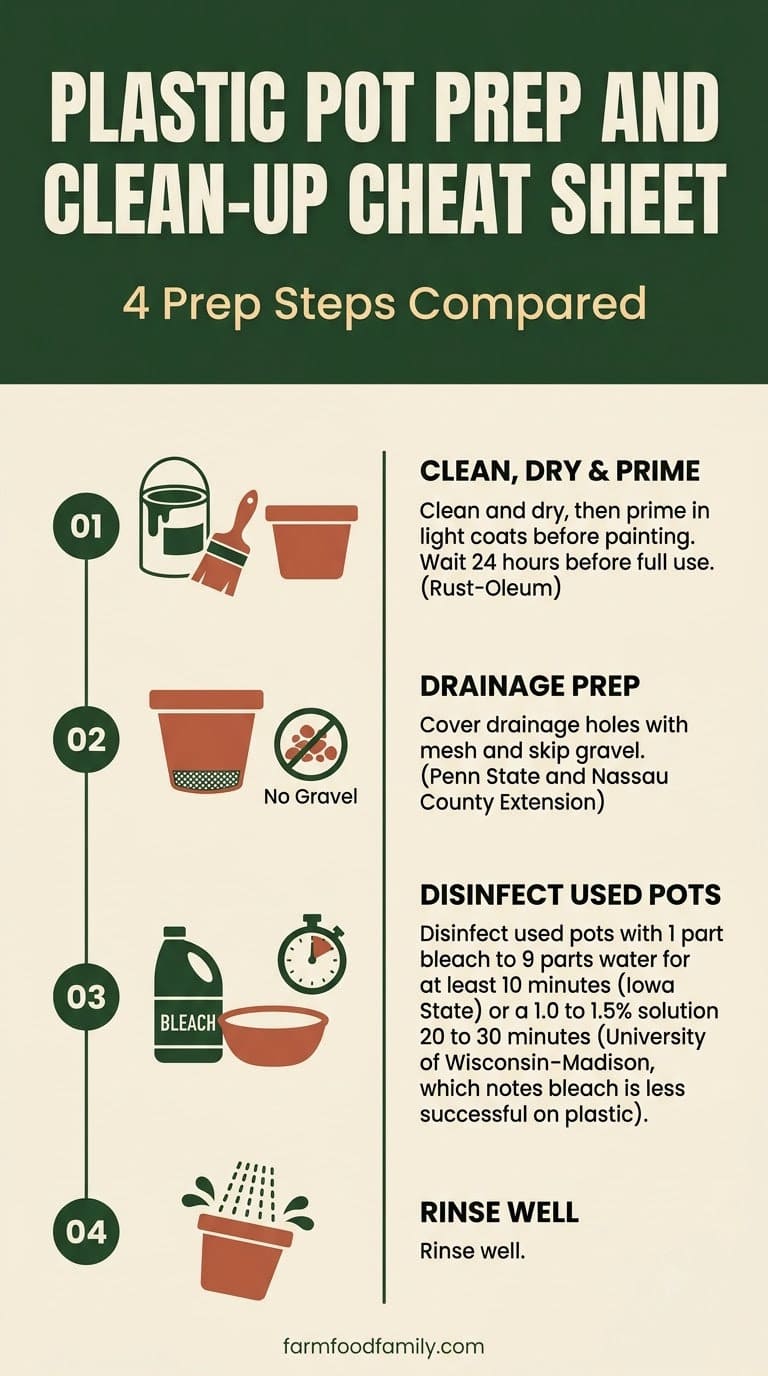
Prep the surface first. Rust-Oleum’s planter tutorial says to clean and dry each pot, tape off any areas you do not want painted, and prime in light coats. Then paint, and wait 24 hours before full use.
Drain every pot. Cornell Cooperative Extension of Nassau County says containers must have drainage holes, and it advises screening over the holes. Penn State Extension adds that a layer of gravel at the bottom slows drainage, so use mesh instead.
Clean used pots before you reuse them. Iowa State University Extension says to wash with soapy water. Then soak the pot in one part bleach to nine parts water for at least 10 minutes.
Use decoration that suits the spot. Rope and shells are fine under a porch roof but may suffer in rain. Pick one makeover method per pot, and the set will look planned instead of busy.
Which Makeover Method Fits Your Pot?
This table is our own planning guide. The prep order comes from Rust-Oleum. The decoration notes are general practice.


| Method | Indoors | Covered porch | Open outdoors | Difficulty |
|---|---|---|---|---|
| Paint made for plastic | Yes | Yes | Yes, with a topcoat | Easy |
| Rope or twine | Yes | Yes | Short life | Easy |
| Seashells | Yes | Yes | Can pop off | Medium |
| Broken tile mosaic | Yes | Yes | Needs sealed grout | Hard |
| Decals | Yes | Yes | Fade in sun | Easy |
| Sand-texture paint | Yes | Yes | Yes | Easy |
Most yard problems trace back to one specific, fixable cause. Find yours in 4 quick questions.
Take the Free QuizBefore You Start: Prep, Drainage, and Mix
Wash and dry the pot. Remove labels and stickers, and scrub off any residue. Leave the pot fully dry before you paint or glue.
Check the drainage. The Nassau County guide says to drill four to six holes if a container has none, and not to drill ceramic. A plastic pot is easy to drill. See our guide on how to drill through plastic.
Cover each hole with window screening or a coffee filter, per Nassau County, so the mix stays in. Skip gravel at the bottom.
Fill with a lightweight potting mix, not garden soil. Nassau County says garden soil is unsuitable for containers. Leave an inch or two below the rim.
How Do You Clean and Disinfect a Used Pot?
Used pots can carry disease, and a quick wash at the end of each season prevents the spread from one planting to the next. The University of Wisconsin-Madison Plant Disease Diagnostics Clinic says pots can carry damping-off and root-rot pathogens, and that insect pests can travel on them too.
The two extension sources differ on the method. This table shows both.
| Source | Bleach strength | Soak time | Plastic note |
|---|---|---|---|
| Iowa State Extension | 1 part bleach to 9 parts water | At least 10 minutes | Plastic is non-porous and easier to clean |
| University of Wisconsin-Madison clinic | 1.0 to 1.5% sodium hypochlorite | 20 to 30 minutes | Bleach is less successful on plastic than on clay |
Iowa State says to add bleach to water, never water to bleach, and to use the solution within two hours. It also offers wiping with undiluted 70% isopropyl alcohol for a single container.
Opaque white pots with drainage holes, a good blank for paint and rope
Shop NowThis post contains affiliate links. We may earn a commission on qualifying purchases at no extra cost to you.
Rinse thoroughly after any bleach. Wisconsin warns that bleach residue can be toxic to new plants.
20 Plastic Flower Pot Makeover Ideas
1. Stripe Pot
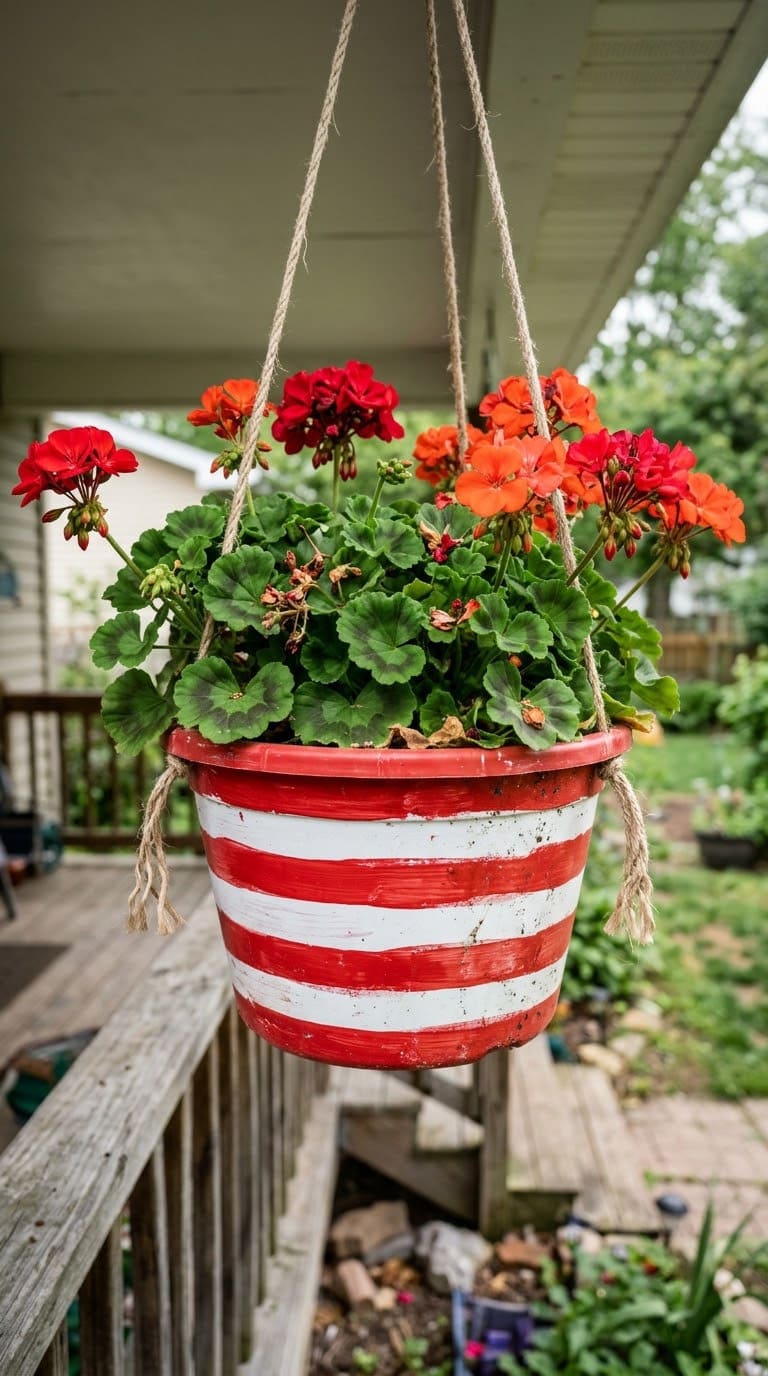
Tape off horizontal stripes with painter’s tape. Paint a base color and let it dry, then paint the second color between the tape lines. Peel the tape while the paint is slightly tacky.
The average homeowner spends $616/year on yard fixes that don't address the real problem. Find out what yours actually is — before you spend another dollar.
Take the Free QuizUse thin coats of paint made for plastic. Seal with a clear topcoat if the pot stays outside.
Cost tier: very low.
2. Flower-Motif Pot
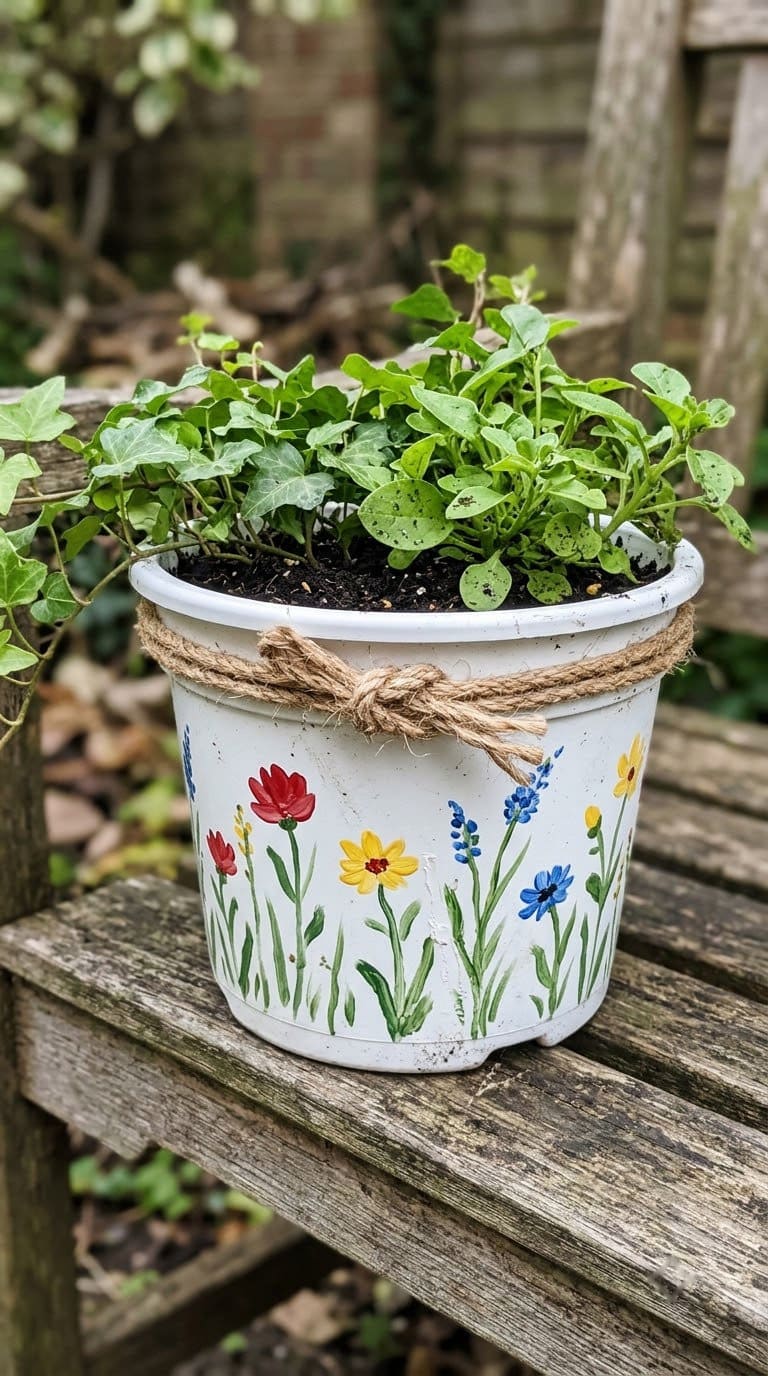
Paint a white base, then add flower heads and stems with small brushes. Keep the shapes simple. Use acrylic paint made for plastic.
Group it with plain pots so the design stands out. A single patterned pot among solid colors acts as a focal point, and it lets the eye rest between busy designs. For other painted ideas, see our painted garden decorations.
Cost tier: very low.
3. Geometric Pot
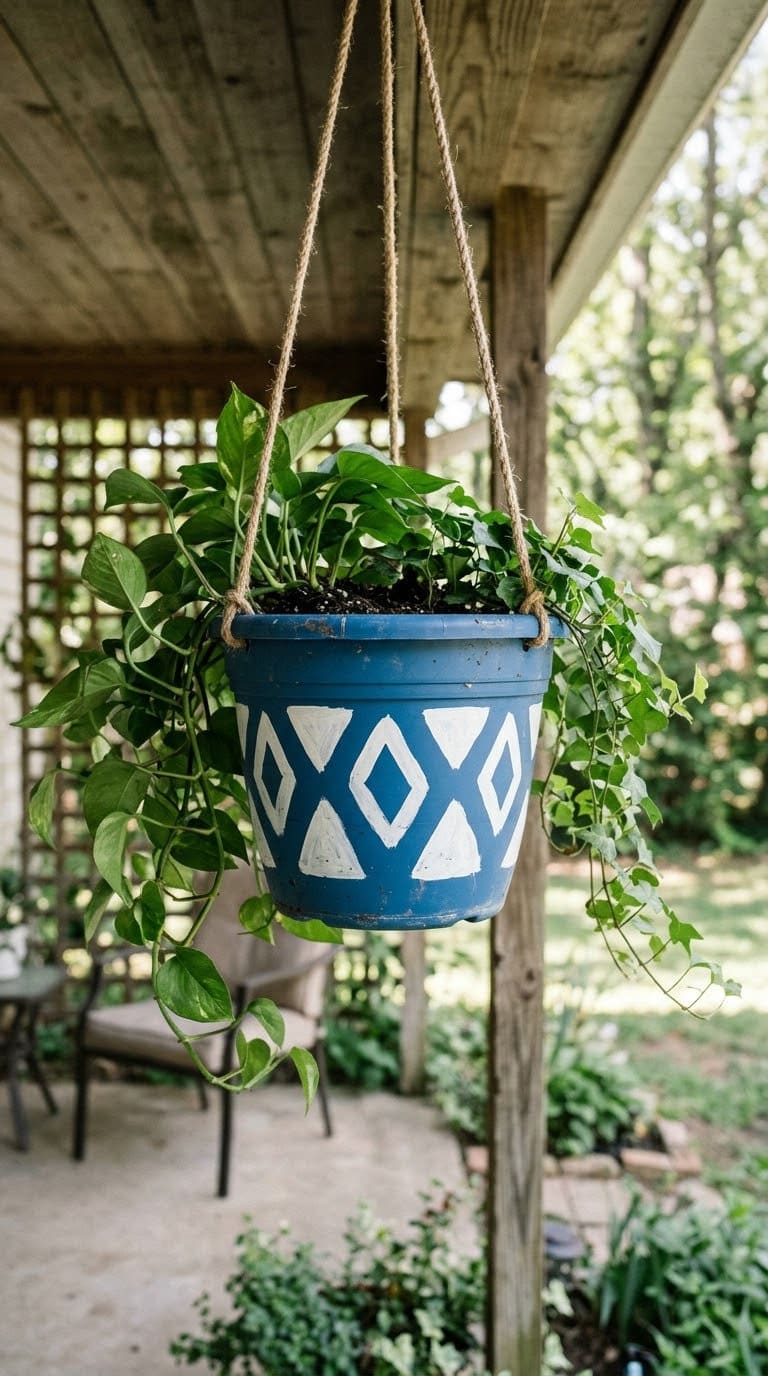
Use painter’s tape to mark triangles and diamonds. Paint inside the shapes in a contrasting color. Pull the tape while the paint is tacky.


Two colors look sharper than four. Our geometric planter ideas cover more patterns.
Cost tier: very low.
4. Zebra-Stripe Pot
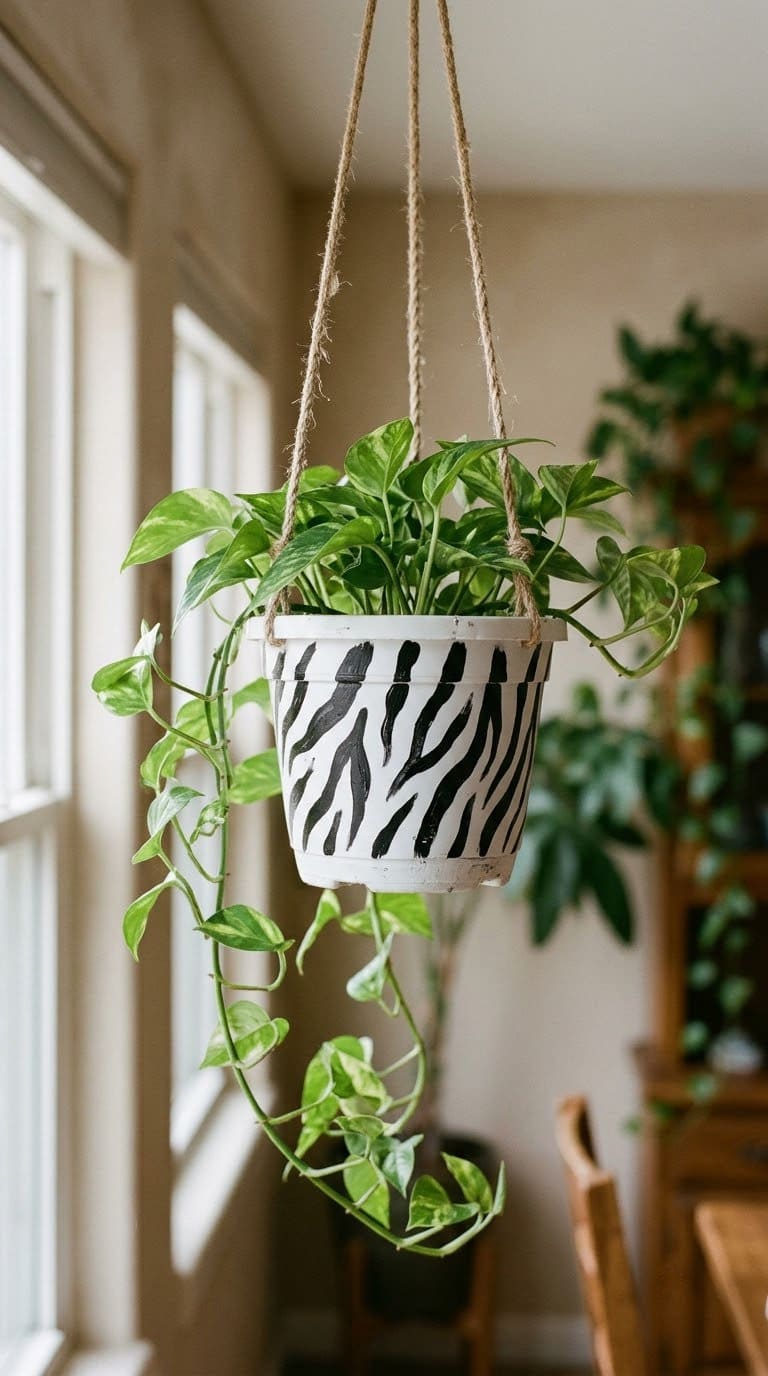
Paint a white base, then add curved black stripes with a flat brush. Vary the width of each stripe. Let the base dry fully first.
Black on white reads from far away. Keep it to one pot as an accent.
Cost tier: very low.
5. Cow-Spot Pot
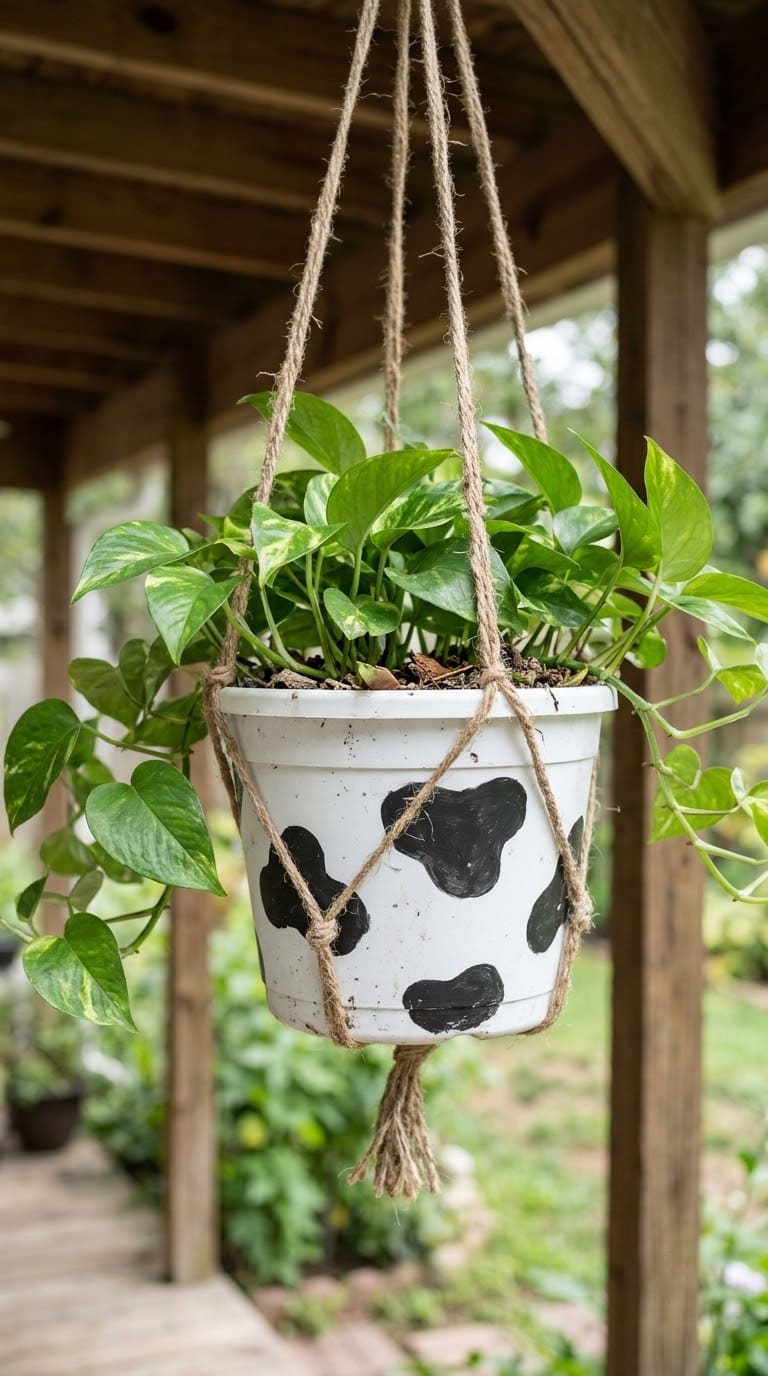
Paint a white base and add irregular black patches with a sponge. Dab, do not brush, for a soft edge.
It suits a farmhouse porch or a kids’ garden. Seal the black paint.
Cost tier: very low.
6. Leopard-Spot Pot
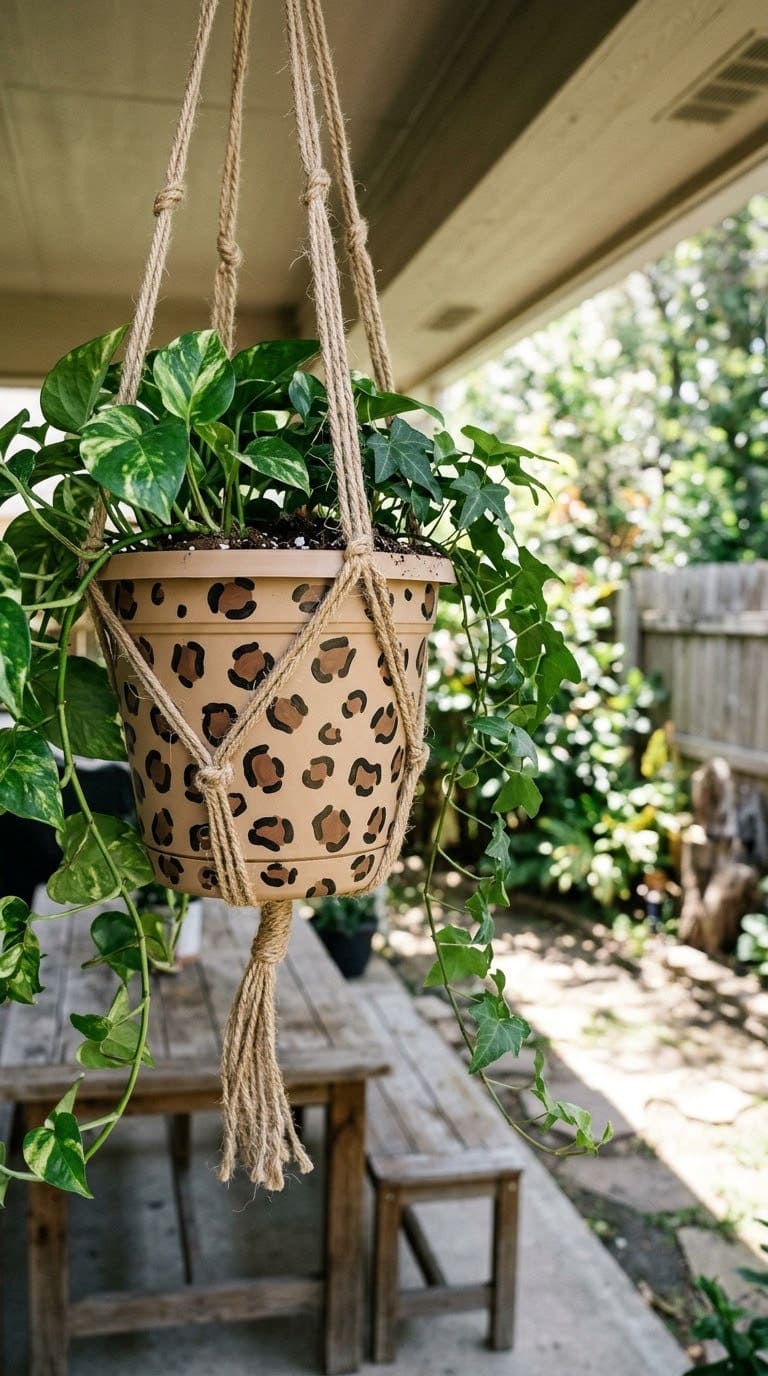
Paint a tan base. Add brown spots and trace dark crescents around them. Use a small round brush.
Pair it with large green leaves. Seal for outdoor use.
Cost tier: very low.
7. Ladybug Pot
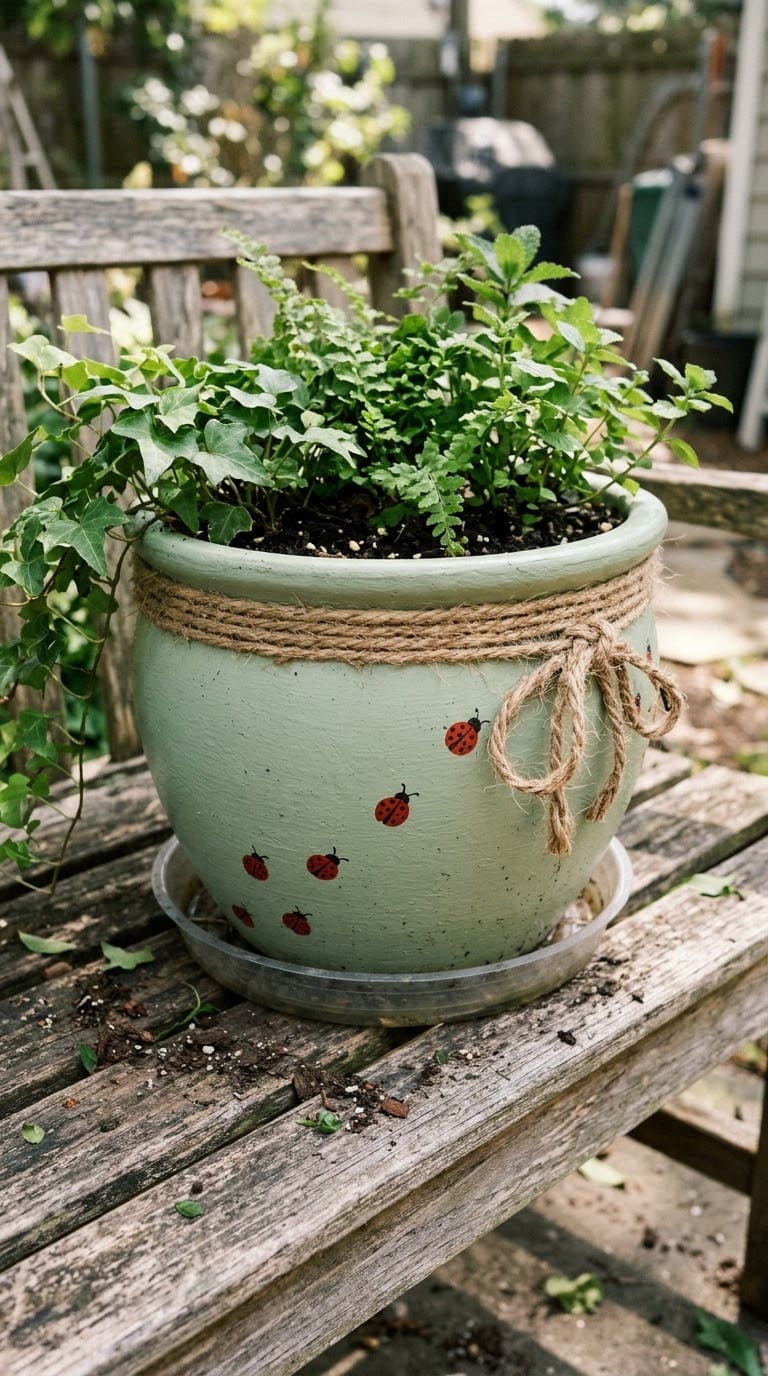
Paint a light base and add small red ladybugs with black spots. Use a fine brush for the details. Kids can help.
Place it among herbs. Seal the red paint, since red fades fast.
Cost tier: very low.
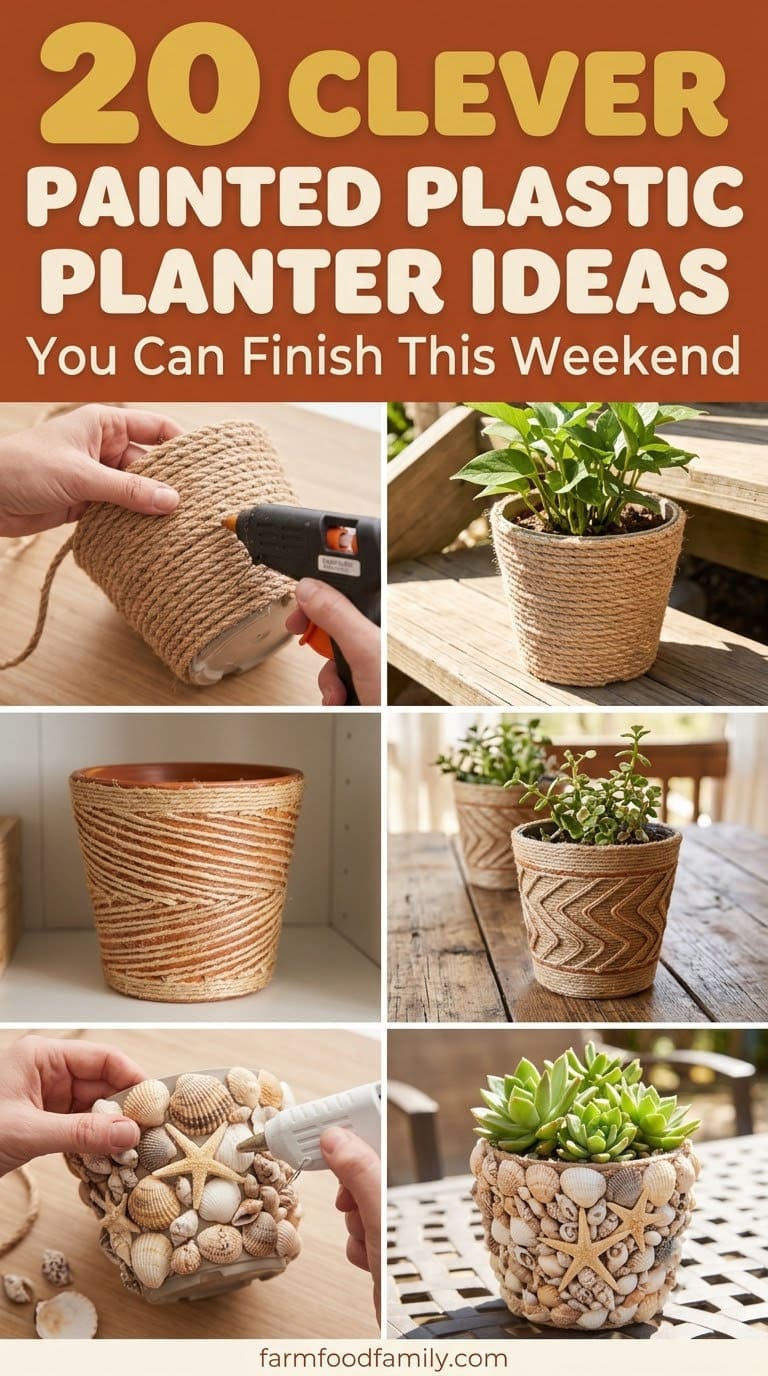
8. Rope-Wrapped Pot
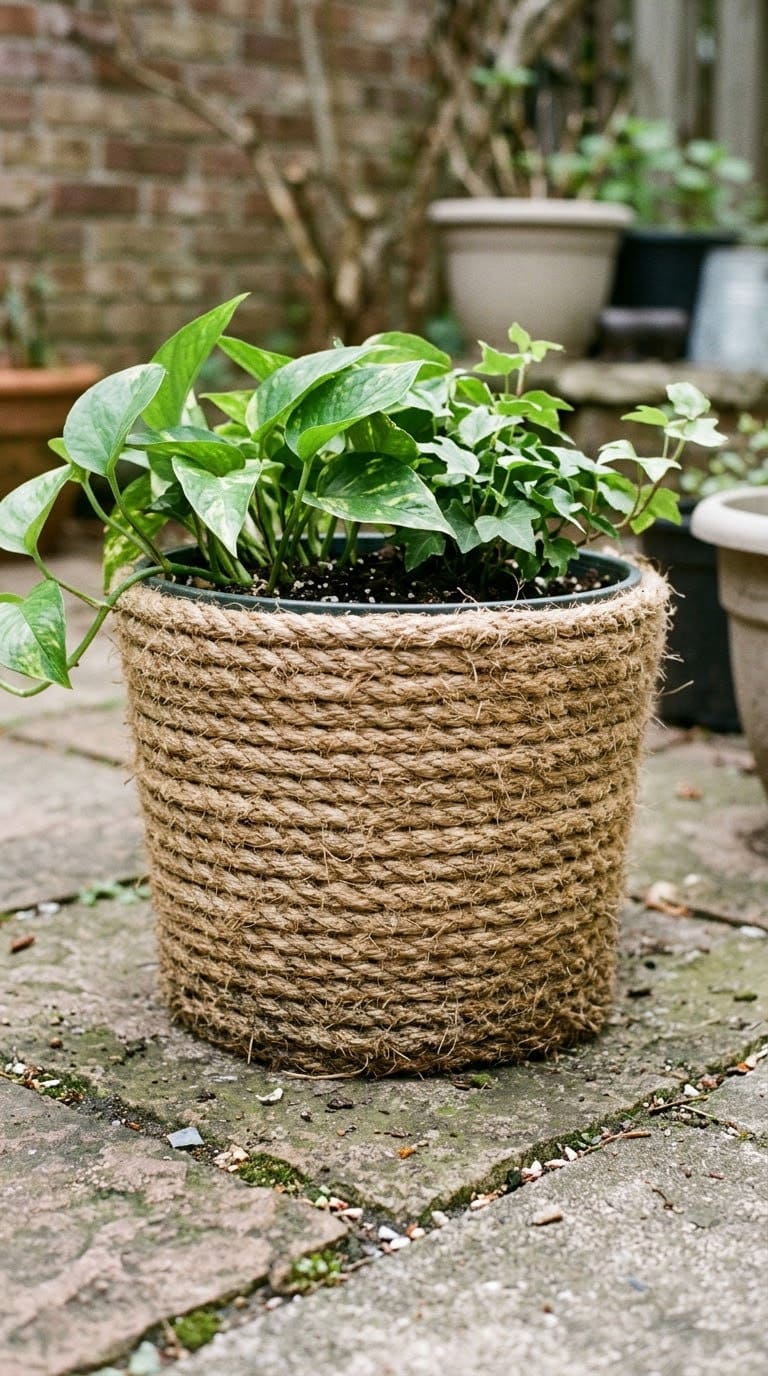
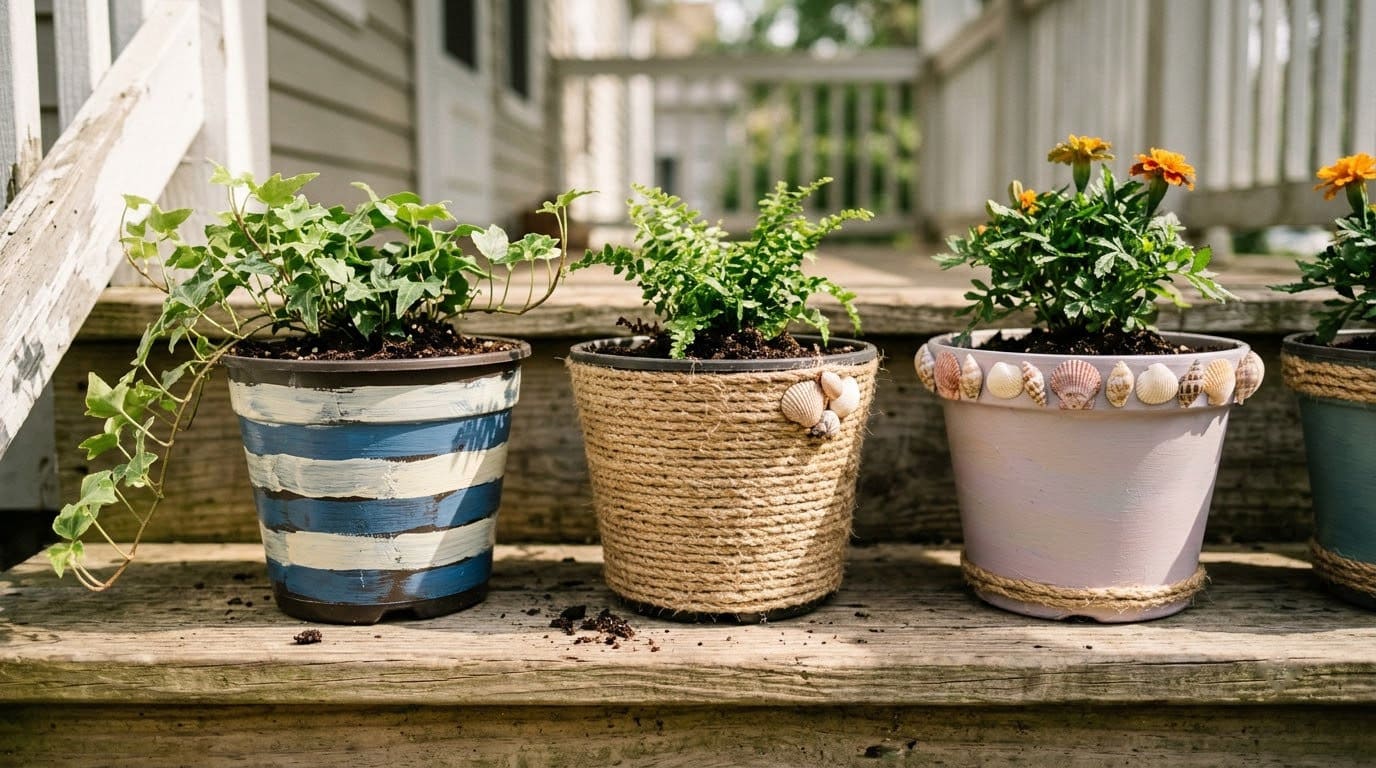
Glue the end of the rope at the base, and wrap upward in snug rows. Use hot glue or a strong craft glue every few turns. Trim the tail and glue it flat.
Rope can rot in rain, so use it under cover or choose a synthetic rope. Keep it away from the drainage holes.
Cost tier: low.
9. Twine-Pattern Pot
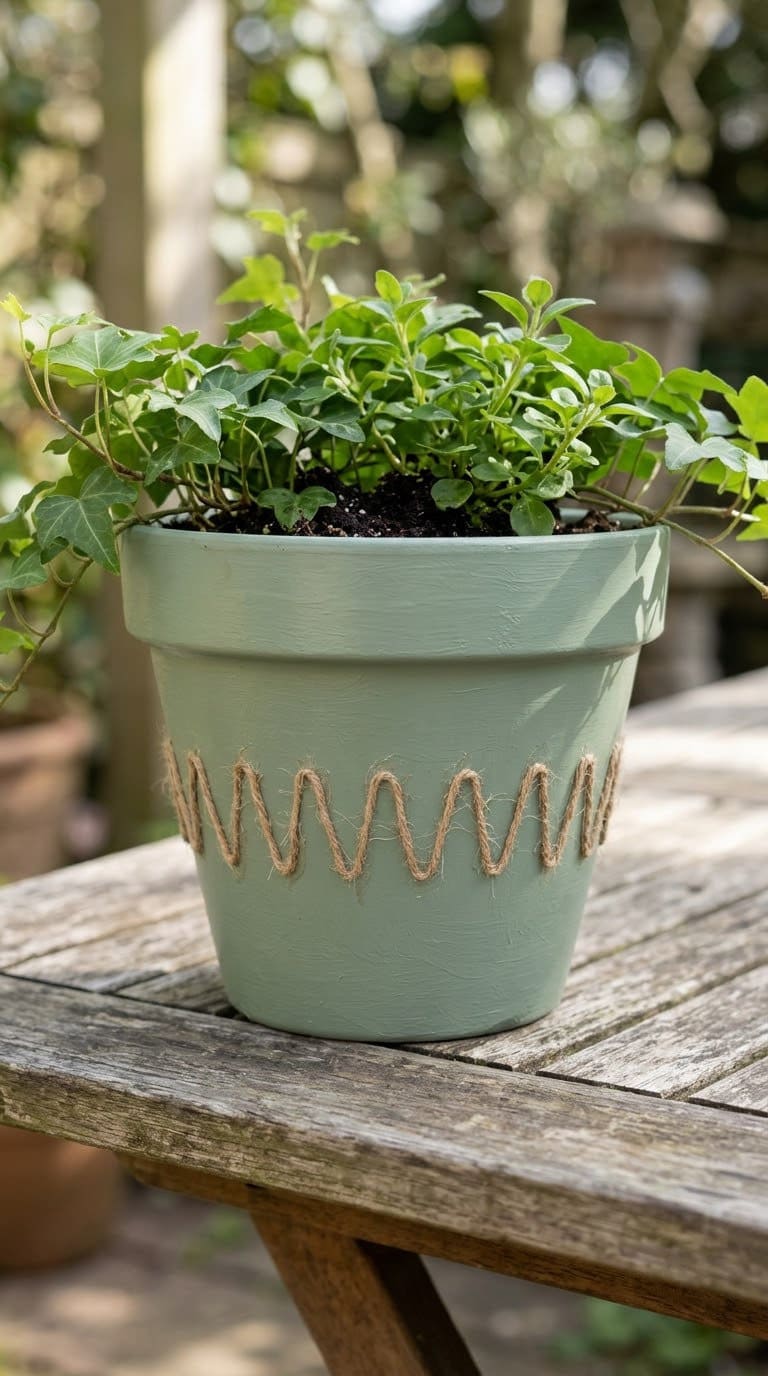
Paint a base color. Glue thin twine into zigzags or diamonds on top. Press each line down as you glue.
Seal the twine with a clear spray. Use it indoors or on a covered porch.
Cost tier: very low.
10. Rope-on-Rope Pot
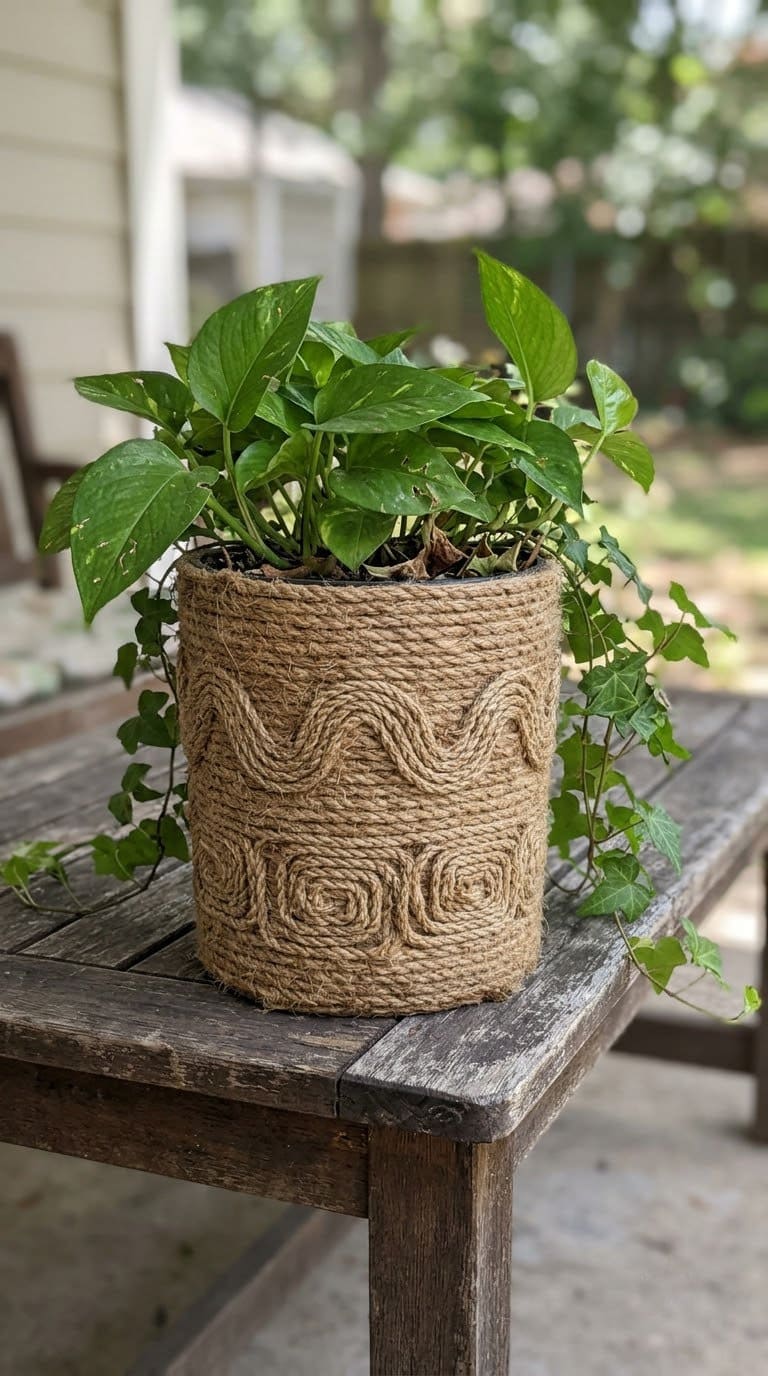
Wrap thick rope around the pot, then glue a thin braided rope pattern over it. The layers add texture.
Plan the pattern with chalk first. This one works best under a porch roof.
Cost tier: low.
11. Painted-Rope Pot
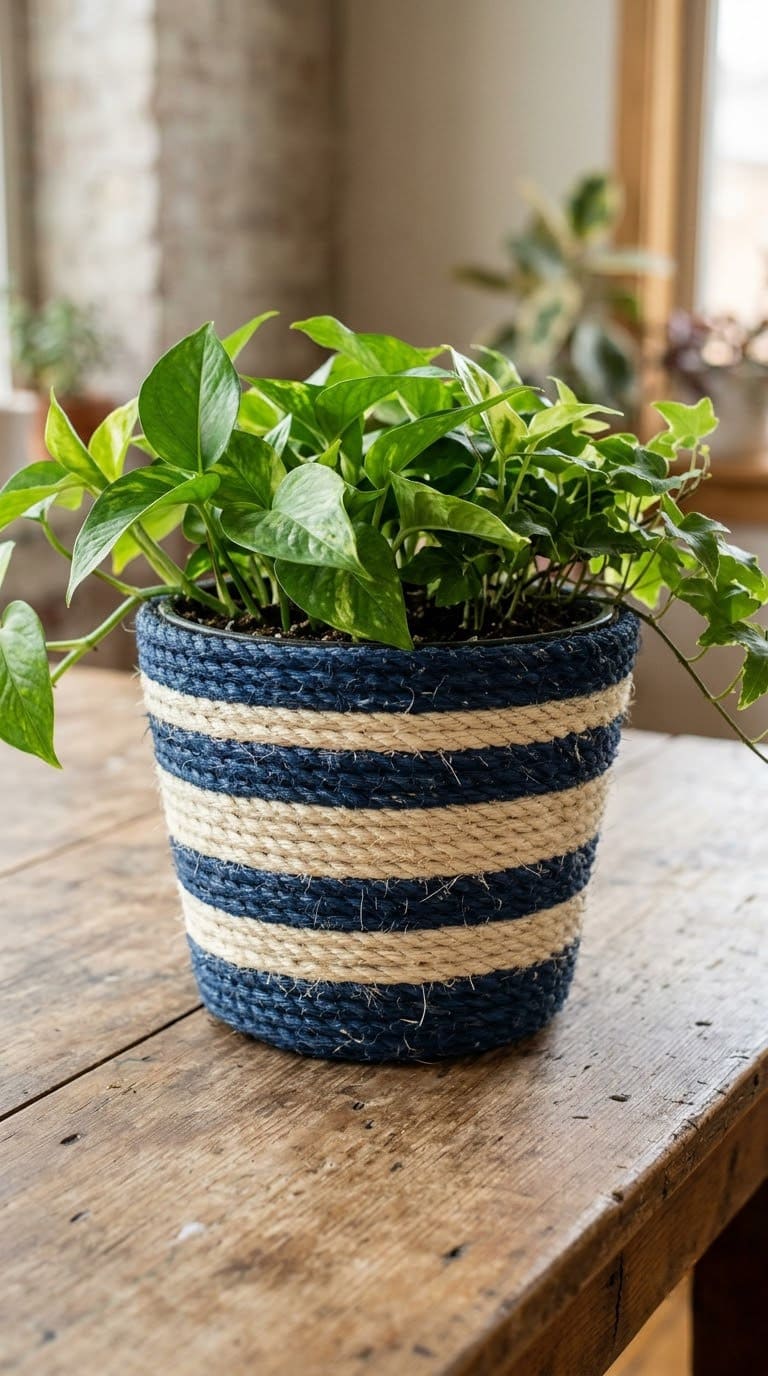
Wrap rope around the pot, then paint it in bands of color. Paint before you glue if it is easier. Let it dry.
Choose two colors. Seal the paint to protect it from rain.
Cost tier: low.
12. Shell Pot
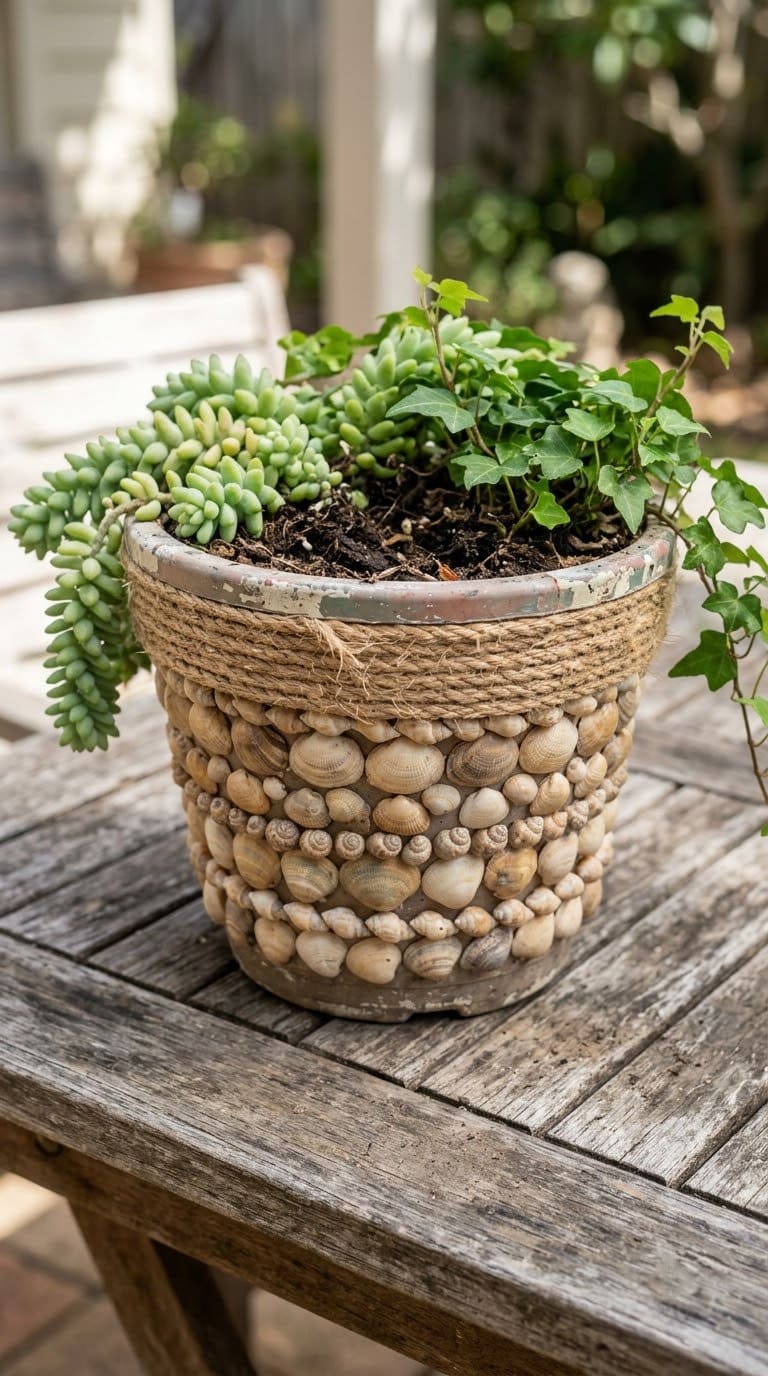
Glue small seashells in rows with strong adhesive, starting at the base. Avoid the grip area near the rim. You can paint the shells or leave them natural.
Shells can pop off in freezing weather. Use this on a covered porch or indoors.
Cost tier: low.
13. Sand-Texture Stone-Look Pot
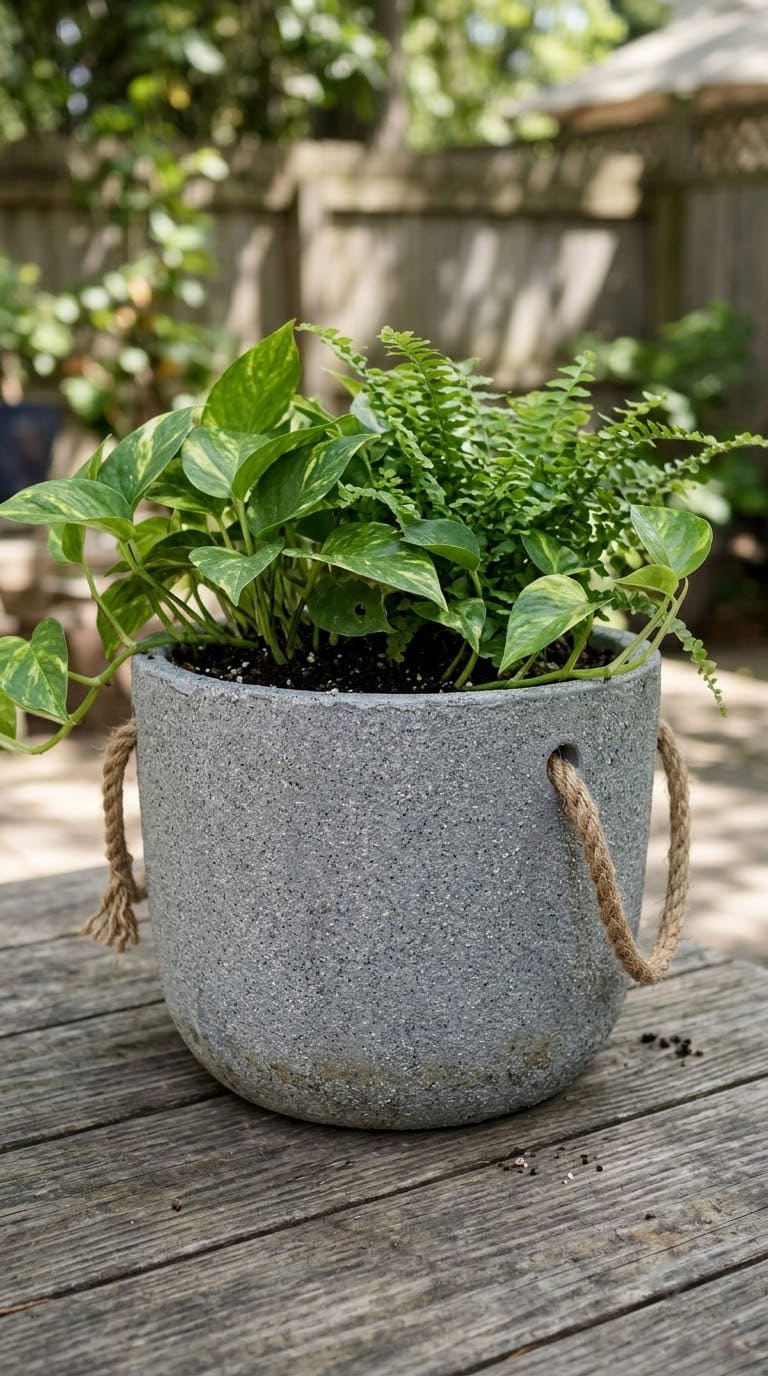
Brush on glue in sections and sprinkle fine sand while it is wet. Let it dry, then paint it gray or tan. The finish looks like stone.
Add two thin coats of paint. Dust off loose sand before painting.
Cost tier: low.
14. Broken-Tile Mosaic Pot
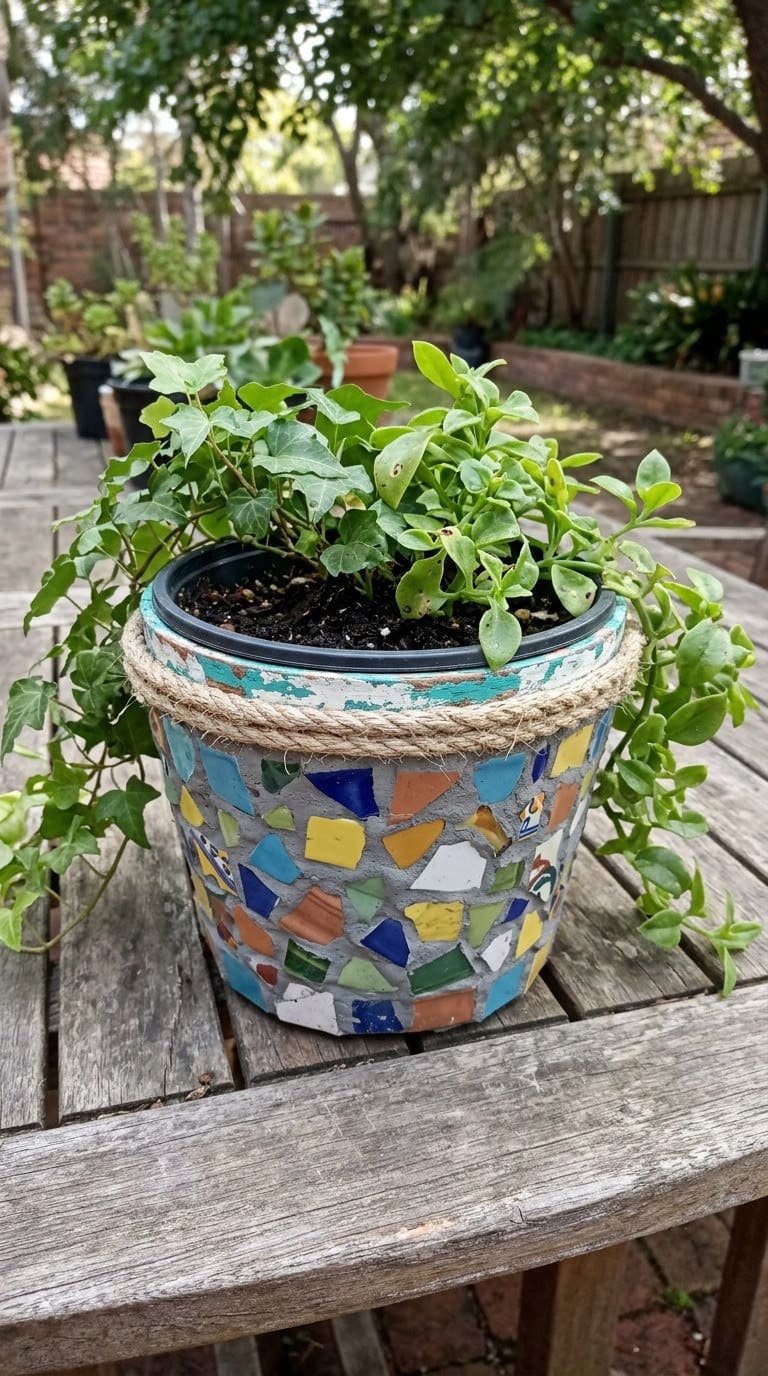
Glue broken tile pieces in a pattern, and grout the gaps. Wear gloves and eye protection when you break tile. Seal the grout.
Plastic flexes, so keep pieces small. See our mosaic guide for adhesive and sealing steps.
Cost tier: medium.
15. Decal Pot
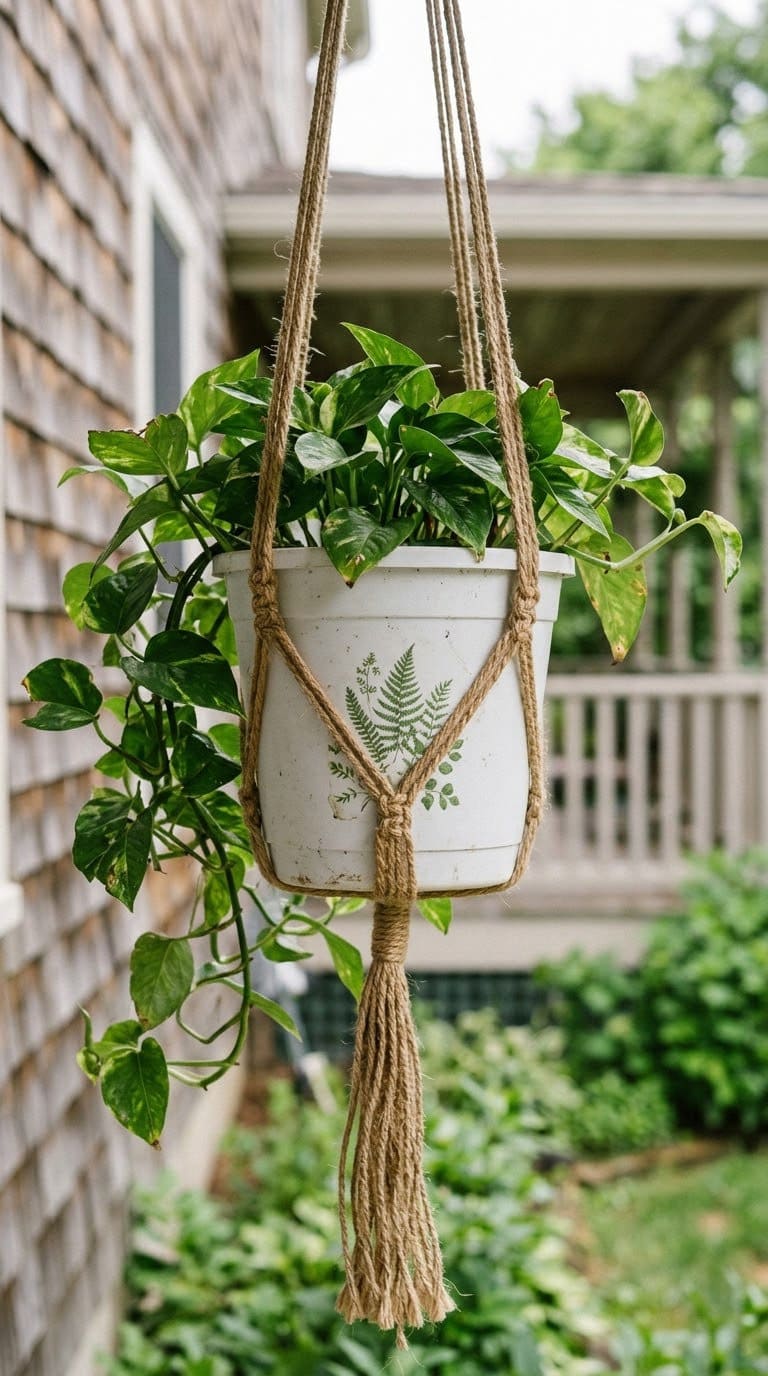
Decals are a no-paint option. Clean and dry the pot, apply the decal, and smooth out bubbles with a card. Choose decals rated for outdoor use.
Sun can fade decals over time. Keep them in light shade.
Cost tier: low.
16. Ombre Pot
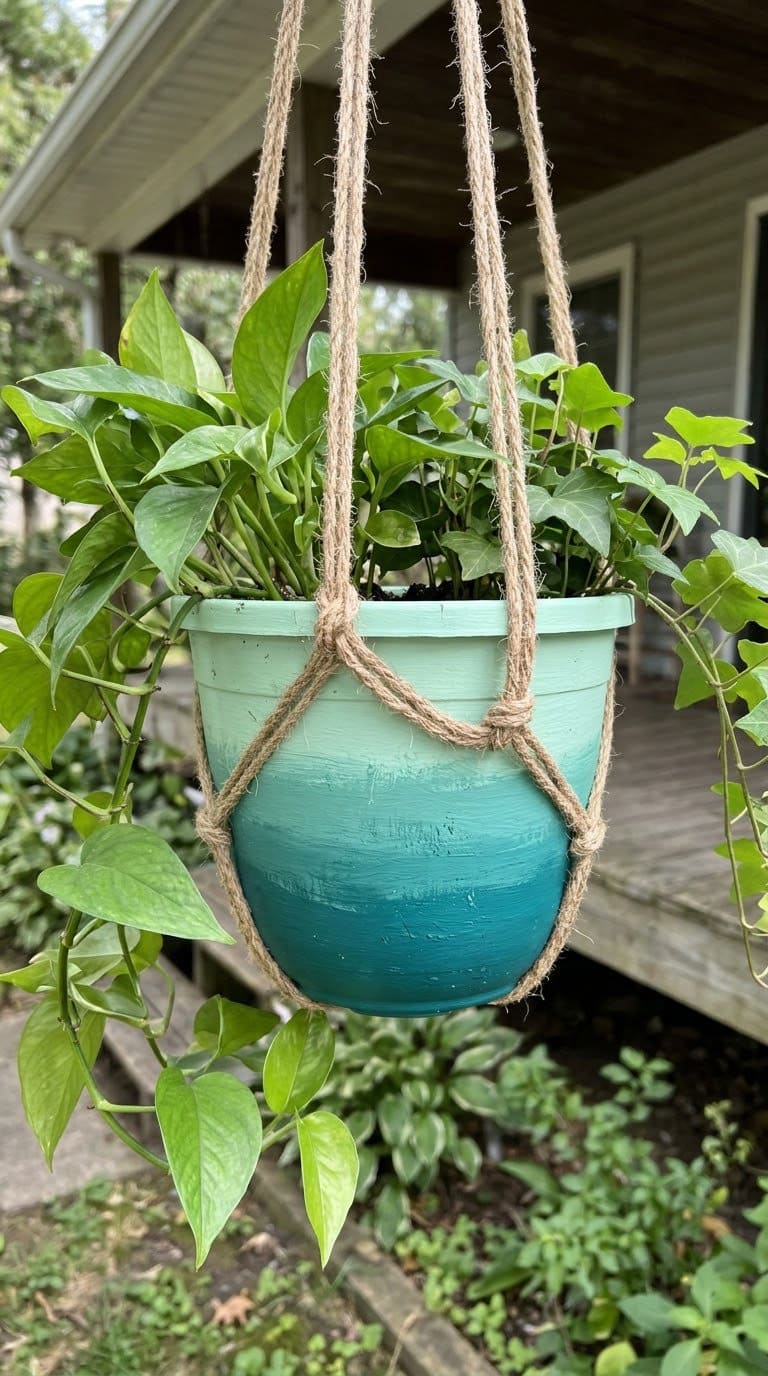
Paint a dark color at the base, and blend upward into a lighter color while wet. Use a dry brush or sponge to soften the line.
Work fast, since plastic paint dries quickly. Practice on a spare pot.
Cost tier: low.
17. Metallic Copper-Look Pot
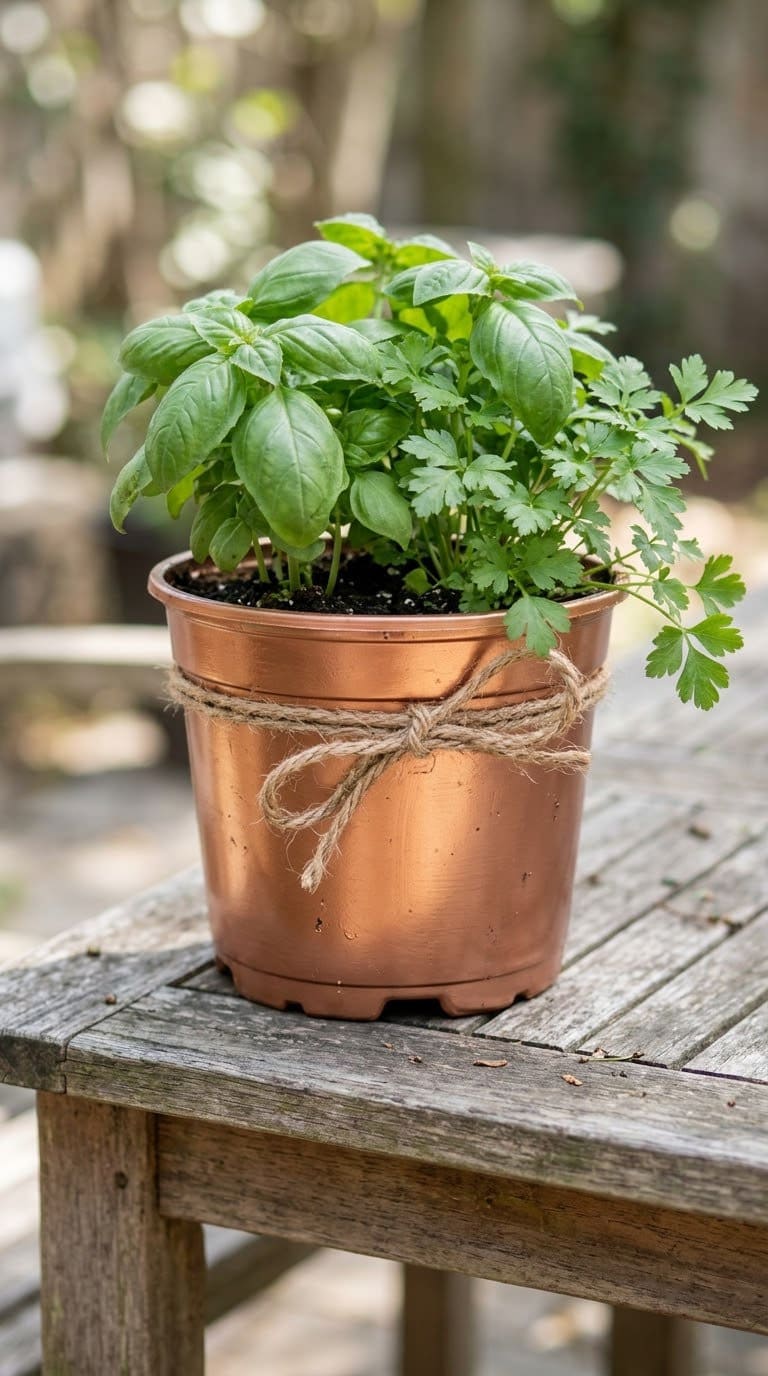
Use metallic paint made for plastic to mimic copper. Add two thin coats and a clear topcoat. The finish suggests metal at a fraction of the cost.
Do not use it for edible plants unless you check the paint label for the inside surface. Keep paint off the inside.
Cost tier: low.
18. Chalkboard-Label Pot
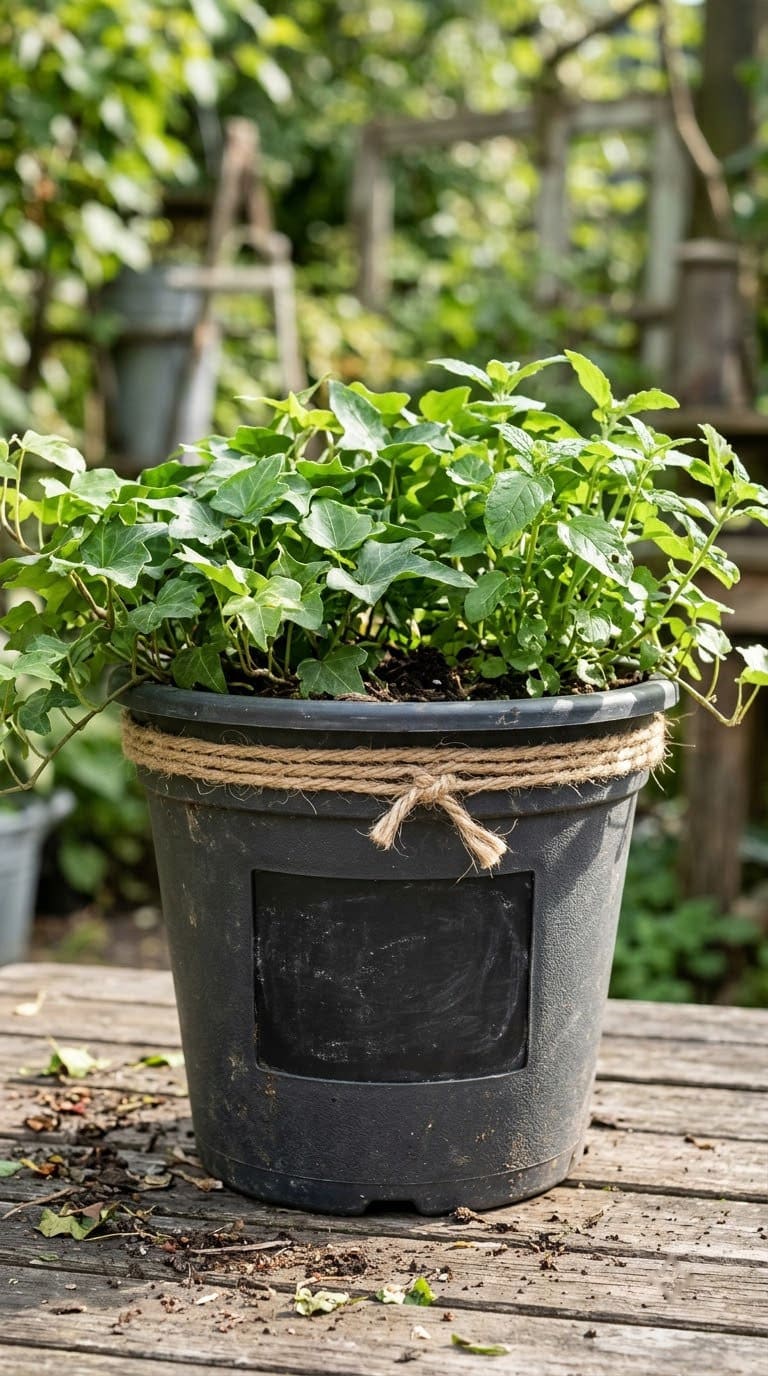
Paint a rectangle with chalkboard paint, and frame it with tape. Write the plant name in chalk.
Chalk washes off in rain, so use it indoors or under cover. See our container herb garden guide.
Cost tier: very low.
19. Hanging Rope-Hanger Pot
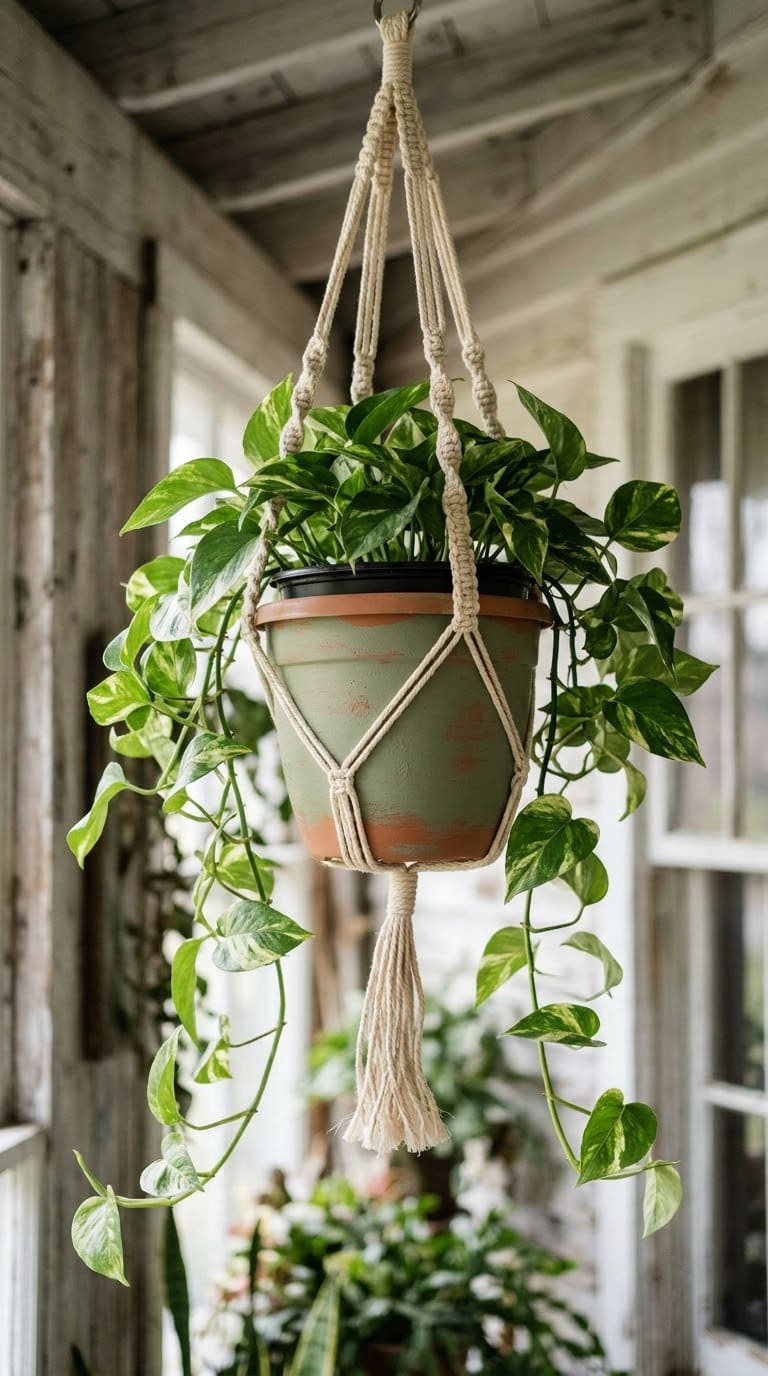
Drill three holes near the rim and thread rope through them. Knot the rope at the top for a hanger. Check the weight of the filled pot.
Plastic pots are light, which suits hanging. Add a saucer or drip tray for indoor use.
Cost tier: low.
20. Stacked Pot Tower
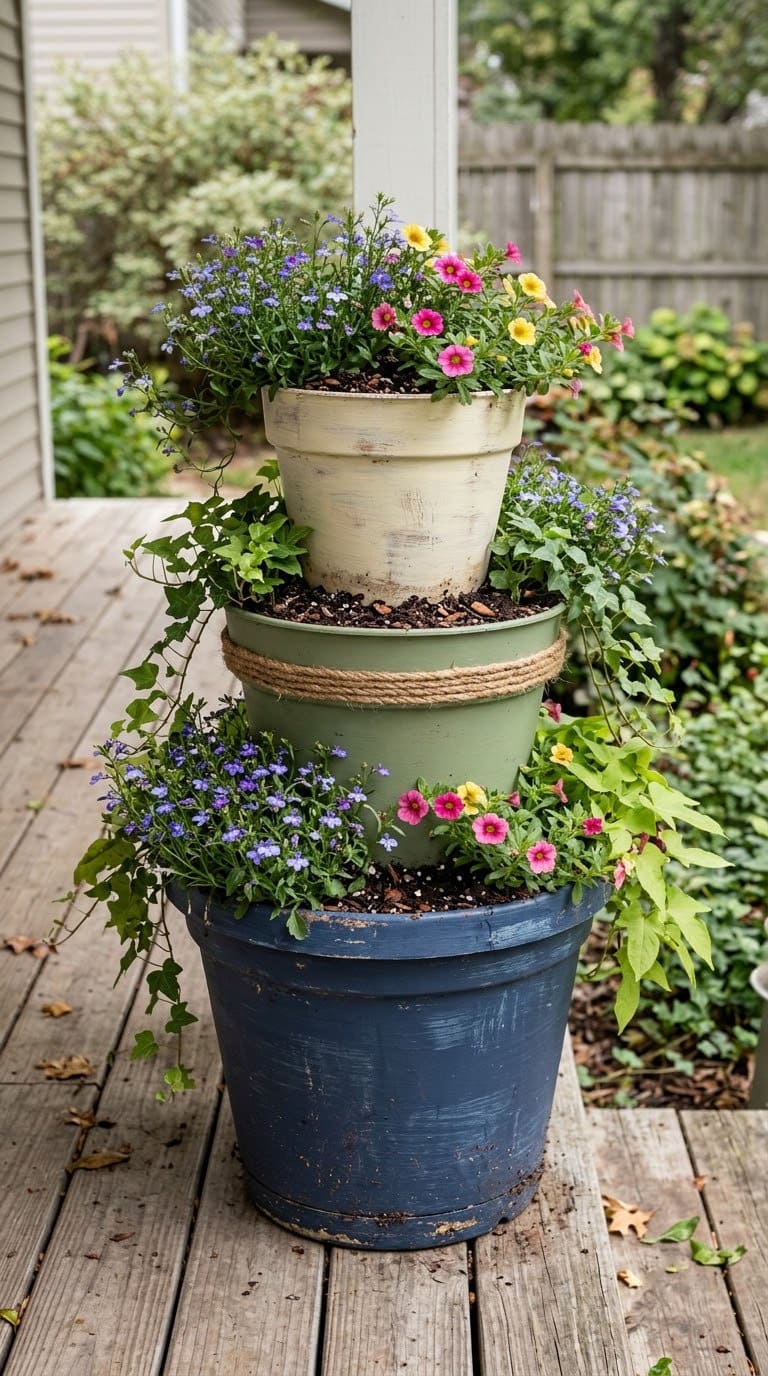
Stack pots in a tower, and paint each one in a related color. Drill drainage holes in each pot. See our flower tower ideas.
Use a wide, heavy pot at the base. Plastic pots are light and tip easily.
Cost tier: low.
How Do You Plant in a Makeover Pot?
Plant after the paint and glue have fully cured. Rust-Oleum says to wait 24 hours before full use, and glued rope or shells need time to set too.
Follow the Nassau County steps. Place window screening or a coffee filter over the whole bottom of the pot. Fill with a lightweight potting mix, and press firmly around the plant to remove air pockets. Keep the crown of the plant at the surface, and leave an inch or two of space at the top.
Water until the water runs out of the drainage holes. This settles the mix and checks that the holes work. Nassau County also notes that larger containers mean less watering, so a big pot is easier to keep alive than a small one.
Never add the new plant to a pot you have not cleaned. See the clean-up section above.
How Do You Choose Plastic Pots to Decorate?
Choose a pot with a smooth, matte surface. Glossy plastic is harder to paint and glue. Pick opaque pots, not clear ones, since the decoration needs a solid base. Buy several of the same style so a group looks matched.
Plastic costs less and weighs less than clay, which makes it easy to move and to hang. The same lightness means a tall plant can tip a small pot, so choose a wide, stable base for big plants.
Look at the drainage holes before you buy. Pots with large holes drain well, and pots with none can be drilled. Avoid pots that are cracked or brittle from sun, because they can break when filled.
How Do You Group Pots for the Best Look?
Put tall pots at the back and short ones in front. Keep the colors in the same family so the group feels planned. Use odd numbers, such as three or five.
Mix finishes. Pair a painted pot with a rope pot and a plain pot. For front entries, see our front door flower pot ideas.
Vary the plants too. Put a tall plant in the center of a large pot and bushier plants around it.
Common Mistakes to Avoid
Putting gravel in the bottom is the first mistake. Penn State says it slows drainage and wastes space. Use mesh over the holes.
Reusing dirty pots is the second. The Wisconsin clinic says pots can carry root-rot and damping-off pathogens.
Skipping the rinse is the third. Wisconsin warns that bleach residue can harm new plants.
FAQ
How do I paint a plastic pot so the paint sticks?
Clean and dry it, prime in light coats, then paint, per Rust-Oleum. [EDITOR NOTE: Sanding, alcohol degreasing, and paint-for-plastic labels are general practice, not from a source we could read.]
Should I put gravel in the bottom of a pot?
No. Penn State Extension says it slows drainage. Cover the holes with mesh or screen instead.
How do I clean a used plastic pot?
Wash with soapy water, then soak in one part bleach to nine parts water for at least 10 minutes, per Iowa State Extension. Rinse well.
How long before I can use a painted pot?
Rust-Oleum’s planter tutorial says to wait 24 hours after painting before full use.
What potting mix should I use?
A lightweight potting mix, not garden soil, per Nassau County Extension.
Never miss an update — choose FarmFoodFamily as your preferred source on Google.
How it works: Tap the button below to open Google's settings page, then check the box next to FarmFoodFamily.
Tap the checkbox to turn it blue — that's how you know it's set.