
Are you tired of the relentless sun turning your outdoor haven into a no-go zone? The heat can be unbearable, and without proper protection, your dream of relaxing or entertaining outside quickly fades. But fret not!
Sun Shade Ideas are your ticket to reclaiming your space. With the right setup, you can shield yourself from the harsh rays and create a cool, comfortable area for you and your loved ones to enjoy.
Whether you seek a quick, cost-effective fix or a more permanent solution, a range of do-it-yourself options awaits. These ideas not only provide relief from the sun but also add a dash of style to your outdoors.
Get ready to transform your patio, deck, or garden into a chic, shaded retreat where you can unwind or host gatherings without the sun beating down on you.
Assessing Your Space
Before diving into the construction of your sun shade, it’s crucial to understand the dynamics of your outdoor area. This initial step ensures that the shade you create is both effective and appropriate for your specific needs.
Understanding Sun Patterns and Shade Needs
Every outdoor space is unique, with its own pattern of sunlight and shade throughout the day. To start, observe how the sun moves across your space. Do you need shade for the scorching afternoon sun, or is it the morning rays that are too intense?
Perhaps you’re looking for a solution that offers flexibility throughout the day. By understanding these patterns, you can determine the best location and design for your sun shade that will provide optimal comfort.
Measuring the Area for Proper Coverage
Once you have a grasp on where and when the sun hits your space, the next step is to measure the area you want to cover.
Accurate measurements are key to ensuring that your shade structure is neither too small, leaving you squinting in the sunlight, nor too large, making the space feel closed in.
Use a simple tape measure to get the length and width of the area, and consider any unique shapes or angles that may require a custom solution.
Table: Area Measurement Guide
| Step | Description | Tools Needed |
|---|---|---|
| 1. Identify | Choose the area you want to cover. | None |
| 2. Measure | Record the length and width of the space. | Tape measure |
| 3. Note | Write down any irregular shapes. | Notepad, Pencil |
Considering Materials Based on Weather Conditions and Durability
The choice of materials for your sun shade is not to be overlooked. You want something that stands up to the elements, whether it’s intense sun, heavy rain, or strong winds.
Materials like canvas, polyester, and high-density polyethylene offer different levels of durability, cost, and ease of maintenance.
Consider also the aesthetic you wish to achieve—do you prefer the natural look of bamboo or the sleekness of a sailcloth? Your local climate and the permanence of the structure will guide your selection to ensure your sun shade remains a lasting feature of your outdoor space.
Table: Material Selection Guide
| Material | Weather Resistance | Maintenance Level |
|---|---|---|
| Canvas | Moderate | High |
| Polyester | High | Moderate |
| Polyethylene | Very High | Low |
| Bamboo | Moderate | Moderate |
By thoroughly assessing your space, you lay the groundwork for a successful DIY sun shade project. With a clear understanding of sun patterns, precise measurements, and a thoughtful choice of materials, you’re well on your way to creating a shaded oasis that is both practical and pleasing to the eye.
Simple and Budget-Friendly DIY Sun Shades
Creating a sun shade does not have to be expensive or complicated. With some basic materials and a bit of elbow grease, you can put together a functional and attractive sun shade that won’t break the bank.
1. Colorful Canvas Canopies
Canvas canopies are a popular choice for DIY sun shades due to their affordability and ease of installation. They bring a vibrant and cheerful look to any outdoor space while providing much-needed relief from the sun.
Materials Needed
To begin, you’ll need to gather the necessary materials to construct your canvas canopy. The essentials include a durable canvas fabric, ropes or cables for securing the canopy, and sturdy anchor points such as poles or existing structures.
Table: Canvas Canopy Materials
| Material | Quantity | Purpose |
|---|---|---|
| Canvas fabric | 1 | To provide shade |
| Rope or cable | 4 | To secure the canopy corners |
| Anchor points | 4 | To attach the ropes or cables |
Step-by-Step Instructions
With your materials at hand, follow these steps to assemble your canvas canopy:
- Anchor Point Setup: Secure the anchor points where the corners of the canopy will be attached. If you’re using poles, ensure they are firmly planted in the ground.
- Prepare the Canvas: Lay out the canvas fabric and attach ropes or cables to each corner.
- Attach the Canopy: Raise the canvas by tying the ropes or cables to the anchor points. Adjust the tension to create a taut, smooth surface.
- Safety Check: Double-check all knots and fixtures to ensure they are secure and can withstand wind or rain.
Tips for Maintenance
To keep your canvas canopy looking great and functioning well, regular maintenance is essential. Clean the fabric with mild soap and water to remove dirt and debris.
Inspect the ropes and anchor points periodically for signs of wear and tear, and replace them as needed. During severe weather, consider taking down the canopy to prevent damage. With proper care, your canvas canopy will serve as a delightful sun shade for many seasons.
By following these guidelines, you can create a Colorful Canvas Canopy that not only adds a splash of color to your outdoor area but also provides a cost-effective solution to your sun shade needs.
2. Bohemian Chic Drop Cloth Curtains
For those who adore a laid-back, artistic vibe, Bohemian Chic Drop Cloth Curtains are an excellent choice. Not only do they provide a relaxed aesthetic, but they also offer a practical solution for sun protection.
Selecting the Right Cloth
The foundation of your Bohemian curtains is the drop cloth itself. You want a fabric that is both sturdy and has a pleasing texture. It should withstand outdoor conditions and provide enough opacity to block out the sun effectively.
Table: Drop Cloth Selection Guide
| Quality | Description | Consideration |
|---|---|---|
| Durability | Can handle outdoor elements | Look for heavy-duty materials |
| Texture | Adds to the Bohemian feel | Prefer natural, rough textures |
| Opacity | Blocks sufficient sunlight | Ensure it’s thick enough |
Installation Guide
Once you have your cloths ready, you’ll move on to the installation process. This involves setting up a hanging system that is both secure and easy to use.
Table: Installation Steps
| Step | Action | Tip |
|---|---|---|
| 1. Secure Rods | Place rods or pipes above your windows | Ensure they are firmly attached |
| 2. Prep Cloth | Add grommets or ties to the cloth | This helps hang the cloth evenly |
| 3. Hang Cloth | Drape the cloth over the rods | Adjust for the best coverage |
Styling Suggestions
To fully embrace the Bohemian style, consider adding unique touches to your curtains. You can use tiebacks made from natural materials like jute or leather for an earthy look. Introduce plants or hanging lanterns nearby to complement the Bohemian theme.
Table: Styling Tips
| Element | Idea | Effect |
|---|---|---|
| Tiebacks | Use natural fibers | Enhances the Boho aesthetic |
| Accessories | Add plants or decorative items | Creates a cozy, inviting space |
| Lighting | Incorporate soft, warm lights | Adds ambiance during the evening |
By carefully selecting the right drop cloth and following these installation and styling tips, you can create a Bohemian Chic space that not only shades from the sun but also serves as a stylish retreat. The relaxed charm of drop cloth curtains will transform your outdoor area into a trendy and inviting space where you can enjoy the fresh air without the glare of the sun.
3. PVC Pipe and Fabric Sail
Creating a PVC Pipe and Fabric Sail is a resourceful way to craft a sun shade that is both durable and modern. The combination of PVC pipes and fabric can be tailored to fit any outdoor space, providing a sleek look and effective sun protection.
Designing the Structure
The first step in this DIY project is to design the structure that will support your fabric sail. You need to consider the size and shape of the area you want to cover, as well as the angle of the sun. The design should include a sturdy frame made from PVC pipes, which will hold the fabric taut and in place.
Table: Structure Design Considerations
| Factor | Detail | Importance |
|---|---|---|
| Area Coverage | Determine the dimensions of the space | Ensures the sail fits the area |
| Sun Angle | Consider the sun’s path | Maximizes shade efficiency |
| Support Points | Plan where the structure will be anchored | Provides stability to the sail |
Cutting and Assembling PVC Pipes
With your design in hand, the next step is to cut the PVC pipes to the correct lengths and assemble the frame. This will require a saw for cutting and PVC connectors to join the pipes at the right angles.
Table: PVC Cutting and Assembly Guide
| Process | Tool Needed | Tip |
|---|---|---|
| Cutting | Saw or PVC cutter | Measure twice, cut once |
| Assembling | PVC connectors and adhesive | Dry fit before gluing |
| Reinforcing | Optional metal rods or additional bracing | For larger structures |
Attaching the Fabric and Securing the Sail
Once the frame is assembled, you can attach the fabric sail. The fabric should be durable, such as a heavy-duty polyester or canvas, and it should be cut slightly smaller than the frame to allow for tensioning.
Table: Fabric Attachment and Sail Securing
| Step | Action | Tip |
|---|---|---|
| 1. Draping | Lay the fabric over the frame | Center the fabric for even tension |
| 2. Attaching | Use zip ties or rope to secure the fabric | Pull tight to avoid sagging |
| 3. Anchoring | Anchor the frame to the ground or walls | Check the stability of the sail |
By designing a solid structure, cutting and assembling the PVC pipes with precision, and carefully attaching and securing the fabric, you can create a PVC Pipe and Fabric Sail that not only looks impressive but also stands up to the elements.
This sun shade will be a functional and stylish addition to your outdoor living space, providing a cool area to relax on sunny days.
Natural Sun Shade Solutions
1. Planting a Living Canopy
For those who prefer an eco-friendly approach, a Living Canopy made from plants and vines can be a beautiful and sustainable way to create shade. This natural solution not only cools your space but also enhances the environment with greenery.
Choosing Fast-Growing Vines and Plants
Selecting the right type of plants is crucial for a successful living canopy. Fast-growing vines are ideal as they quickly provide coverage. Look for species that thrive in your local climate and can grow robustly with minimal care.
Table: Plant Selection for Living Canopy
| Plant Type | Growth Rate | Climate Suitability |
|---|---|---|
| Wisteria | Fast | Temperate |
| Ivy | Moderate to Fast | Varied |
| Morning Glory | Fast | Warm |
| Grape Vine | Moderate | Temperate to Warm |
Building a Support Structure
To guide the growth of your vines and ensure they cover the desired area, a support structure is necessary. This can be made from materials such as wood, metal, or even existing fences.
Table: Support Structure Guide
| Component | Function | Material Options |
|---|---|---|
| Posts | To anchor the structure | Wood, Metal |
| Trellis or Lattice | For vines to climb on | Wood, Plastic, Metal |
| Wiring or Netting | Additional support for plant growth | Metal wire, Nylon netting |
Care and Pruning Tips
Regular care and pruning not only maintain the health of your plants but also the shape and effectiveness of your canopy. Water the plants as needed, and prune them to encourage upward and outward growth, ensuring maximum shade.
Table: Care and Pruning Tips
| Task | Purpose | Frequency |
|---|---|---|
| Watering | Keep plants healthy | As needed, depending on climate |
| Pruning | Shape the canopy and promote growth | Seasonally or as needed |
| Checking Supports | Ensure structure integrity | Annually or after severe weather |
A living canopy is a delightful way to blend form and function in your outdoor space. By choosing the right plants, building a sturdy support structure, and providing regular care and pruning, you can enjoy a lush, leafy retreat that offers respite from the sun’s rays. This natural shade solution not only cools your area but also contributes to local biodiversity and air quality.
2. Creating a Bamboo Shade Screen
A bamboo shade screen is an aesthetically pleasing and environmentally sustainable option for those looking to add a touch of natural elegance to their outdoor space. Bamboo is known for its strength, durability, and rapid growth, making it an ideal material for a DIY sun shade.
Sourcing Bamboo Poles or Fencing
The first step in creating your bamboo shade screen is to source the materials. Bamboo poles can be purchased from garden centers, home improvement stores, or specialized bamboo suppliers. Choose poles that are straight, without cracks, and of similar thickness for a uniform look.
Table: Bamboo Sourcing Guide
| Source | Type of Bamboo | Considerations |
|---|---|---|
| Garden Centers | Poles and Fencing | Check for quality and size |
| Home Improvement Stores | Poles and Fencing | Compare prices and availability |
| Specialized Suppliers | Custom Sizes and Varieties | Higher quality options available |
Construction Techniques
Constructing a bamboo shade screen involves cutting the bamboo to size and securing it together to create a panel or a series of panels. You can use horizontal or vertical bamboo slats, depending on the design you prefer. To hold the structure together, use durable twine, wire, or even metal brackets for a sturdier build.
Table: Bamboo Construction Techniques
| Technique | Application | Tools Needed |
|---|---|---|
| Measuring and Cutting | Ensure all pieces fit together | Saw, Measuring Tape |
| Binding Together | Secure bamboo slats in place | Twine, Wire, or Metal Brackets |
| Erecting the Screen | Stand the screen up in the desired location | Supports or Anchors |
Integrating with the Landscape
To make your bamboo shade screen a cohesive part of your outdoor space, consider how it will integrate with the surrounding landscape. You can position it to complement existing garden features, use it as a backdrop for plants, or even incorporate it as part of a garden path or seating area.
Table: Landscape Integration Ideas
| Integration Method | Description | Benefits |
|---|---|---|
| Backdrop for Plants | Place behind a garden bed | Enhances the visual depth |
| Garden Path Feature | Use alongside a pathway | Adds structure to garden design |
| Seating Area Divider | Create a private nook | Provides shade and privacy |
Creating a bamboo shade screen is not only a functional addition to your outdoor space but also a statement piece that reflects a commitment to natural materials and sustainable living. With careful sourcing, precise construction, and thoughtful integration into your landscape, your bamboo shade screen will serve as a charming and effective barrier against the sun’s rays.
Upcycled and Eco-Friendly Options
Incorporating upcycled materials into your outdoor shade solutions is a creative and environmentally conscious choice.
1. Repurposing Old Sails and Tarps
Repurposing old sails and tarps not only gives them a new life but also adds a unique and personal touch to your outdoor space.
Finding Materials
The first step in this eco-friendly project is to find old sails or tarps that can be repurposed. These can often be found at boatyards, second-hand stores, or through online marketplaces. When selecting materials, ensure they are still in good condition and free from irreparable damage.
Table: Material Sourcing Guide
| Source | Material Type | Quality Check |
|---|---|---|
| Boatyards | Old Sails | Look for durable, weather-resistant fabric |
| Second-hand Stores | Tarps | Check for tears or weak spots |
| Online Marketplaces | Both | Confirm size and material integrity |
Customizing and Sewing
Once you have sourced your materials, the next step is to customize and sew them to fit your space. This might involve cutting the sail or tarp to size and reinforcing the edges for added strength. If sewing is required, use a heavy-duty thread and a sewing machine capable of handling thick materials.
Table: Customization and Sewing Steps
| Process | Tool Needed | Tip |
|---|---|---|
| Measuring | Tape Measure | Accurate measurements are crucial |
| Cutting | Scissors or Rotary Cutter | Use sharp tools for a clean cut |
| Sewing | Heavy-duty Sewing Machine | Use a needle designed for thick fabrics |
Rigging and Installation Advice
To rig and install your repurposed sail or tarp, you will need a secure attachment system. This could include ropes, eyelets, or even a pulley system for larger pieces. It’s essential to ensure that your installation is secure and able to withstand weather conditions.
Table: Rigging and Installation Tips
| Component | Function | Consideration |
|---|---|---|
| Eyelets | To create strong attachment points | Space evenly for balanced tension |
| Ropes | For securing the shade to anchor points | Choose weather-resistant materials |
| Pulleys | To make larger shades adjustable | Install at strong, stable points |
By repurposing old sails and tarps, you can create a unique and sustainable sun shade that reflects your commitment to eco-friendly practices. With careful material selection, customization to suit your needs, and secure rigging, your upcycled sun shade will provide a functional and stylish addition to your outdoor living area.
2. Recycled Pallet Wood Pergola
Transforming recycled pallet wood into a pergola is an eco-friendly approach to crafting a robust and rustic sun shade structure. Pallets are often readily available and can be repurposed to create a charming feature in your garden or patio area.
Dismantling and Preparing Pallets
The initial phase involves breaking down and preparing the pallets for construction. You’ll need to carefully dismantle the pallets to preserve the integrity of the wood. Once dismantled, sanding the wood is crucial to prevent splinters and to give a smooth finish.
Table: Pallet Preparation Guide
| Task | Tool Needed | Purpose |
|---|---|---|
| Dismantling | Crowbar, Hammer | To separate the wood planks |
| Sanding | Sandpaper or Power Sander | To smooth out rough surfaces |
| Inspecting | None | To check for and remove nails |
Building the Pergola Frame
With the pallet wood prepped, constructing the frame is the next step. This involves creating a stable base, erecting vertical posts, and attaching horizontal beams to form the top of the pergola. It’s important to ensure all parts are securely connected and that the structure is level.
Table: Pergola Frame Construction
| Component | Action | Tip |
|---|---|---|
| Base | Lay out the base structure | Ensure it’s square and level |
| Posts | Secure the vertical elements | Use sturdy hardware for attachment |
| Beams | Attach the top beams to the posts | Check for even spacing and alignment |
Adding a Fabric Top or Climbing Plants
To provide shade, you can add a fabric top to your pergola or encourage climbing plants to grow over it. If opting for fabric, choose a durable outdoor material that can be secured to the top beams. For a greener option, select fast-growing vines that will weave through the structure over time.
Table: Shade Options for Pergola
| Option | Installation | Maintenance |
|---|---|---|
| Fabric Top | Attach with screws or ties | Periodically check for wear and tear |
| Climbing Plants | Plant at the base of the pergola | Water and prune as needed |
Creating a pergola from recycled pallet wood is a rewarding project that not only upcycles materials but also enhances your outdoor space with a functional and attractive structure. Whether you choose a fabric cover or natural greenery to provide shade, your pallet wood pergola will serve as a testament to sustainable living and DIY ingenuity.
Retractable and Adjustable Shade Designs
1. DIY Retractable Awning
A DIY Retractable Awning is a versatile solution for controlling the amount of sun or shade on your patio or deck. It allows you to adjust the coverage based on the weather, offering flexibility and convenience.
Mechanism and Materials
To create a retractable awning, you need to understand the mechanism that allows it to open and close smoothly. The materials required for this include a strong fabric suitable for outdoor use, a sturdy frame, and a retractable system that can be manual or motorized.
Table: Retractable Awning Materials
| Component | Material Options | Purpose |
|---|---|---|
| Fabric | Polyester, Acrylic, or Canvas | Provides shade and weather resistance |
| Frame | Aluminum or Steel | Supports the fabric |
| Retractable System | Manual crank or Motorized unit | Allows the awning to retract |
Building the Retractable System
The construction of the retractable system involves assembling the frame, attaching the fabric, and installing the mechanism for retraction. For a manual system, a hand crank can be used, while a motorized system will require electrical components and controls.
Table: Building the Retractable System
| Step | Action | Tip |
|---|---|---|
| Frame Assembly | Put together the metal frame | Ensure all connections are tight |
| Fabric Attachment | Secure the fabric to the frame | Stretch fabric to avoid sagging |
| Mechanism Installation | Install the crank or motor | Follow manufacturer’s instructions for safety |
Safety and Wind Considerations
When installing a retractable awning, it’s important to consider safety and the impact of wind. The awning should be securely mounted to the side of a structure, and the retraction mechanism must be robust enough to withstand wind gusts.
Table: Safety and Wind Tips
| Consideration | Safety Measure | Wind Measure |
|---|---|---|
| Mounting | Use heavy-duty brackets and bolts | Check the awning’s wind rating |
| Operation | Ensure smooth retraction and extension | Retract the awning in high winds |
| Maintenance | Regularly inspect for wear and damage | Adjust tension to prevent flapping |
A DIY Retractable Awning is an effective way to enhance your outdoor living space with the option to enjoy the sun or shade as desired. By carefully selecting materials, constructing a reliable retractable system, and taking safety and wind into account, you can create a safe and enjoyable addition to your home.
2. Adjustable Shade Panels
Adjustable Shade Panels offer a customizable shading solution that allows you to alter the amount of sunlight filtering into your outdoor space. These panels can be adjusted to accommodate changing sun positions and preferences for sunlight exposure.
Constructing the Frame
The initial step in crafting adjustable shade panels is to construct a sturdy frame that can support the panels. The frame should be designed to fit the specific area where the shade will be utilized and must be robust enough to hold the panels securely.
Table: Frame Construction Guide
| Component | Material Options | Purpose |
|---|---|---|
| Vertical Posts | Wood, Metal | To hold the frame upright |
| Horizontal Beams | Wood, Metal | To support the shade panels |
| Brackets | Metal | To connect beams and posts |
Creating the Shade Panels
After the frame is in place, the next step is to create the shade panels themselves. These can be made from various materials such as outdoor fabric, lattice wood, or even metal sheets with cut-out patterns for a decorative touch.
Table: Shade Panel Creation
| Material | Tool Needed | Tip |
|---|---|---|
| Outdoor Fabric | Sewing Machine, Grommets | Hem edges for durability |
| Lattice Wood | Saw, Nails or Screws | Pre-treat wood for weather resistance |
| Metal Sheets | Metal Cutter, Drill | Smooth edges to prevent injury |
Installation and Adjustment Features
The final step is to install the shade panels onto the frame and incorporate features that allow for easy adjustment. This could include tracks, hinges, or ropes that let you slide, fold, or roll the panels to change the shading.
Table: Installation and Adjustment
| Feature | Function | Mechanism |
|---|---|---|
| Tracks | To slide panels back and forth | Install along the frame edges |
| Hinges | To fold panels as needed | Attach between panels and frame |
| Ropes or Pulleys | To raise or lower panels | Secure to the top of the panels |
Adjustable Shade Panels provide a flexible and efficient way to manage sunlight in your outdoor area. By constructing a solid frame, creating durable shade panels, and implementing a reliable adjustment system, you can enjoy a comfortable and adaptable outdoor environment that caters to your shading needs throughout the day.
Decorative Touches and Enhancements
Enhancing your outdoor space with decorative touches can transform it into a cozy and inviting retreat. From lighting that creates a warm evening ambiance to art that adds personality, these enhancements are the perfect finishing touches.
Adding Lighting for Evening Ambiance
Strategically placed lighting can extend the usability of your outdoor space into the evening hours, providing a soft glow that enhances the atmosphere.
Table: Lighting Options
| Type of Lighting | Placement Idea | Effect |
|---|---|---|
| String Lights | Overhead or around the perimeter | Creates a festive mood |
| Solar Path Lights | Along walkways or garden paths | Adds safety and visual interest |
| Lanterns | On tables or hanging from structures | Offers a warm, localized light |
Incorporating Outdoor Art and Wind Chimes
Outdoor art and wind chimes serve as visual and auditory elements that personalize your space. Art can range from sculptures to wall hangings, while wind chimes add a melodic backdrop to the outdoor setting.
Table: Art and Wind Chime Ideas
| Decor Item | Suggestion | Benefit |
|---|---|---|
| Sculptures | Place within plant beds or on pedestals | Acts as a focal point |
| Wall Art | Hang on exterior walls or fences | Enlivens blank spaces |
| Wind Chimes | Suspend from branches or beams | Provides soothing sounds |
Using Outdoor Rugs and Cushions for Comfort
Outdoor rugs and cushions are not only practical but also contribute to the overall comfort and aesthetic of your outdoor space. They add color, texture, and a sense of luxury.
Table: Comfort Enhancements
| Comfort Item | Function | Consideration |
|---|---|---|
| Rugs | Defines seating areas and adds warmth | Choose weather-resistant materials |
| Cushions | Provides comfort on seating | Select durable, washable fabrics |
By incorporating these decorative touches and enhancements, you can create an outdoor space that is not only functional during the day but also enjoyable in the evening. Lighting sets the mood, art and wind chimes add character, and rugs and cushions increase comfort, making your outdoor area a true extension of your home’s living space.
25 Amazing DIY Backyard Sun Shade Ideas


Source: sunset.com
DIY Backyard Shade

Source: awninglux.com

Source: bobvila.com

Source: instructables.com


Source: thekreativelife.com
Source: refinery29.com
Climbing plants over a pergola


Source: lauratrevey.com

Source: thriftyandchic.com

Source: marthastewart.com

Source: anythingpretty.com

Source: housetweaking.com

Source: sailrite.com

Source: vtwonen.nl

Source: jandbmarvin.wordpress.com

Source: allyou.com

Source: ebay.com

Source: abeautifulmess.com

Source: zodirowe.blogspot.com

Source: twoboysonegirlandacrazymom.com

Source: remodelaholic.com

Source: blog.homedepot.com

Source: apartmenttherapy.com

Project Details: Pinterest

via Pinterest

via Pinterest
DIY Patio Canopy
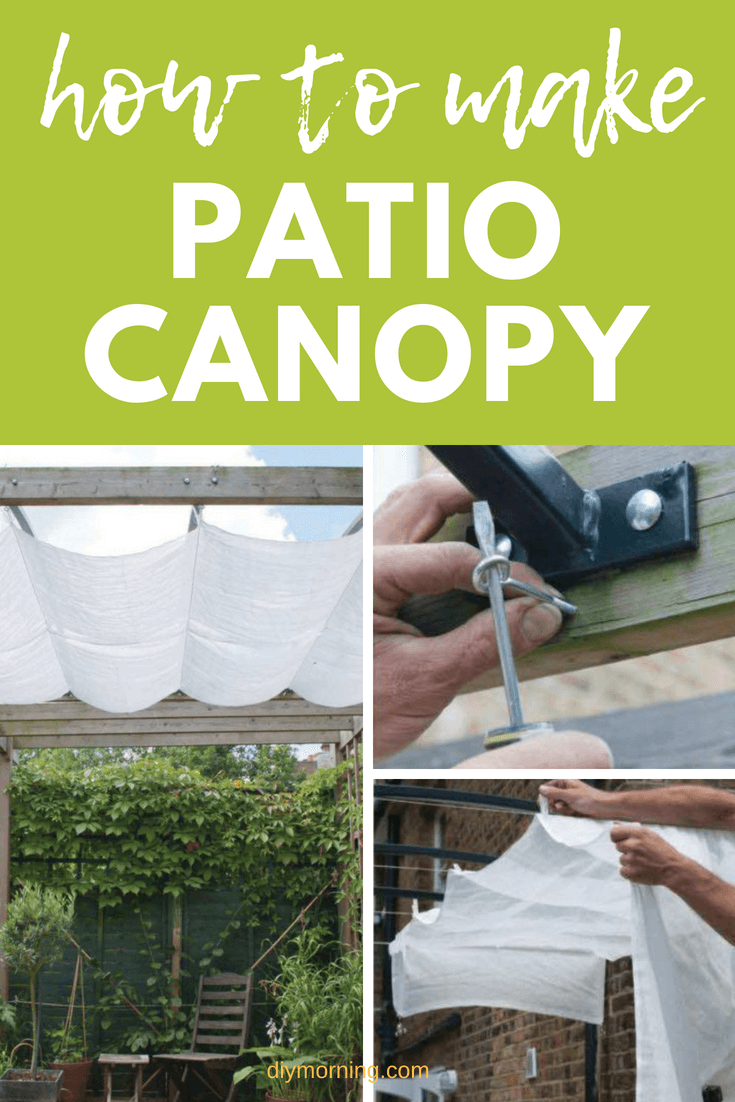
Source: diymorning
Lattice Panels


Green screen

Shade sail canopy

DIY Trampoline Fort

Maintenance and Care
Proper maintenance and care of your outdoor shades are essential to extend their lifespan and keep them looking their best. Here’s how to clean and store your shades, repair any damage, and protect them from mold and UV degradation.
Cleaning and Storing Shades for the Off-Season
When the outdoor season comes to an end, it’s important to clean your shades before storing them to prevent dirt and debris from causing long-term damage.
Table: Cleaning and Storing Guide
| Task | Method | Storage Tip |
|---|---|---|
| Cleaning | Use mild soap and water | Allow to dry completely |
| Folding | Roll or fold without creasing | Avoid tight folds that can wear |
| Storing | Place in a cool, dry area | Use breathable storage containers |
Repairing Wear and Tear
Regular inspections can help you spot and repair wear and tear before it becomes a more significant issue. Simple repairs can often be done at home with basic tools and materials.
Table: Repair Guide
| Damage Type | Repair Method | Material Needed |
|---|---|---|
| Small Holes or Tears | Sew or patch the area | Fabric patches, sewing kit |
| Fraying Edges | Reinforce with additional stitching | Heavy-duty thread |
| Loose Fittings | Tighten or replace hardware | Appropriate replacement parts |
Protecting Against Mold and UV Damage
Mold and UV radiation can cause serious damage to outdoor shades, so it’s crucial to take preventative measures to protect them.
Table: Protection Measures
| Issue | Prevention Strategy | Product to Use |
|---|---|---|
| Mold | Keep shades dry and clean | Mold-resistant spray |
| UV Damage | Use UV protectant sprays | UV fabric protectant |
Maintaining your outdoor shades involves regular cleaning, timely repairs, and protection from environmental factors. By following these maintenance and care tips, you can ensure that your shades remain in excellent condition, ready to enhance your outdoor space for many seasons to come.
Conclusion
In conclusion, taking the time to maintain and care for your outdoor shades is crucial for their longevity and performance.
Whether you’re cleaning and storing them for the off-season, addressing wear and tear, or protecting them from mold and UV damage, each step is important to keep your shades in top condition.
Regular maintenance not only preserves the functionality and beauty of your outdoor space but also ensures that your investment in shade solutions remains valuable for years to come.
By being proactive and attentive to the care of your shades, you can enjoy a comfortable and inviting outdoor environment season after season.