
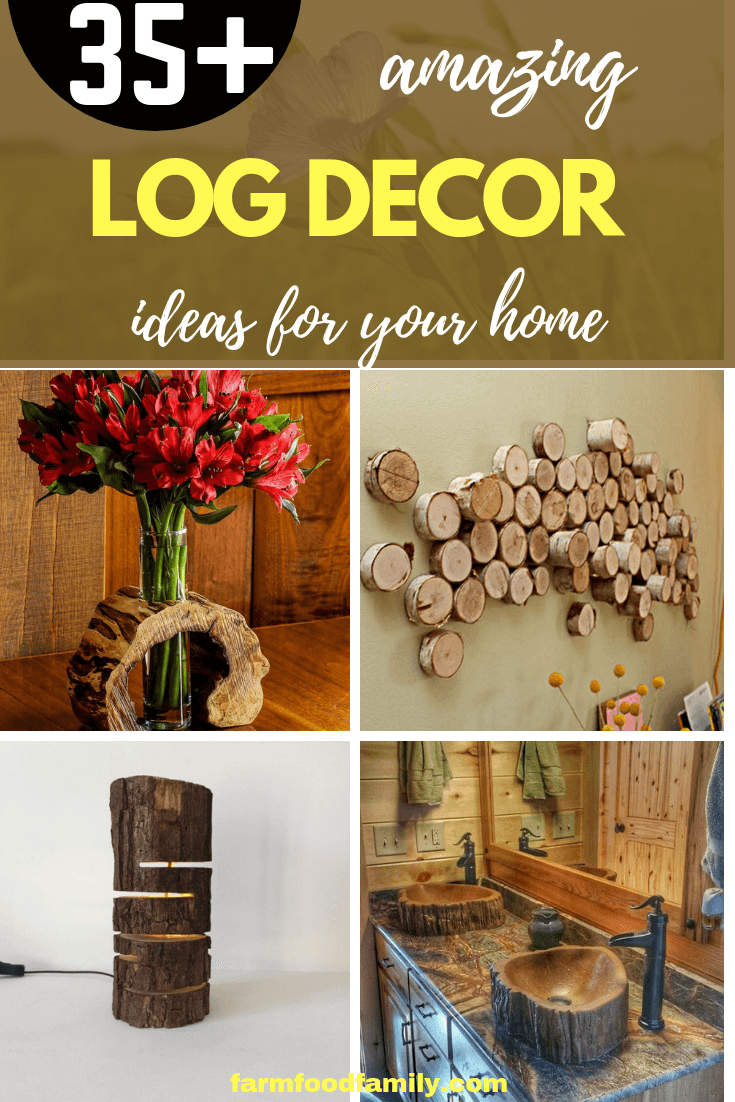
Transform Your Space: 34+ Unique DIY Tree Log Decor Ideas
Are you tired of the same old decor options that everyone else seems to have? You’re not alone. Many people are turning to natural materials to bring a unique and earthy feel to their homes.
Enter the world of Tree Log Decor Ideas. This concept isn’t just about adding a touch of nature to your living space; it’s about transforming ordinary wood into extraordinary pieces of art.
The beauty of using tree logs lies in their sustainability, offering an eco-friendly alternative to mass-produced items. Not only does this approach save money, but it also allows for a high degree of personalization. Every log has its own story, texture, and shape, making each project a one-of-a-kind creation.
Whether you’re a seasoned DIY enthusiast or a beginner looking to try your hand at something new, tree log decor projects offer a satisfying way to enhance your home’s aesthetic while respecting the environment.
Preparing Your Materials
Before you dive into the exciting world of DIY Tree Log Decor Ideas, getting your materials ready is key. This means finding the right logs and preparing them for your projects. Let’s break down how you can do this responsibly and effectively.
How to Source Tree Logs Responsibly
First things first, you need logs. But not just any logs. It’s important to get them in a way that doesn’t hurt our planet. Here are some tips:
- Ask Around: Often, people cut down trees in yards or local areas and might be happy to give you some logs for free.
- Reclaimed Wood: Look for places that sell wood that’s been saved from old buildings or furniture. It’s a great way to reuse.
- Forestry Services: Sometimes, local forestry services have programs for removing trees, where you can get logs legally and safely.
Remember, taking wood without asking can be illegal and harmful to nature. Always make sure you have permission.


Basic Preparation of Logs for DIY Projects
Got your logs? Great! Now, let’s get them ready for your projects. Here’s a simple guide to clean, sand, and treat your logs:
| Step | What You Need | What To Do |
|---|---|---|
| Cleaning | Soft brush, damp cloth | Gently brush off dirt and debris. Use the cloth to wipe down the log. Let it dry completely. |
| Sanding | Sandpaper (various grits) | Start with coarse sandpaper and work up to finer grits to smooth the surface. |
| Treating | Wood sealer or varnish | Apply a coat to protect the log. This step is optional but recommended for indoor use. |
Cleaning makes sure your logs are free of dirt that can mess with your project. Sanding is all about making the surface smooth and safe to touch. And treating? That’s to keep the wood looking good for a long time.
Remember, every log is unique. Some might need more sanding, especially if they’re rough or have bark. And if you’re keeping the bark on for that rustic look, be gentle when cleaning to avoid damage.
DIY Tree Log Decor Ideas
Transforming tree logs into decor can make your space feel more connected to nature. Let’s dive into how you can create Rustic Log Candle Holders, a project that’s both simple and striking.
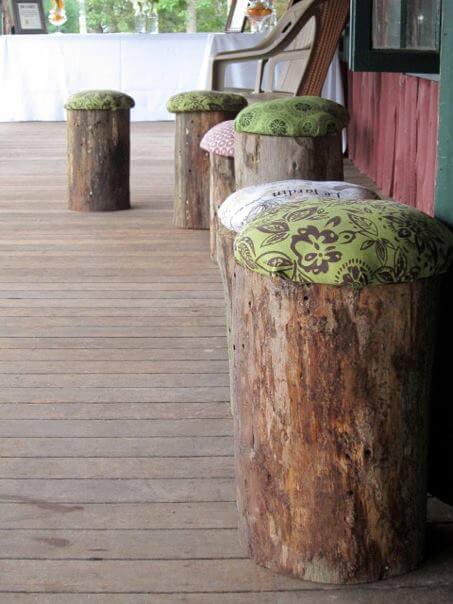
Idea #1: Rustic Log Candle Holders
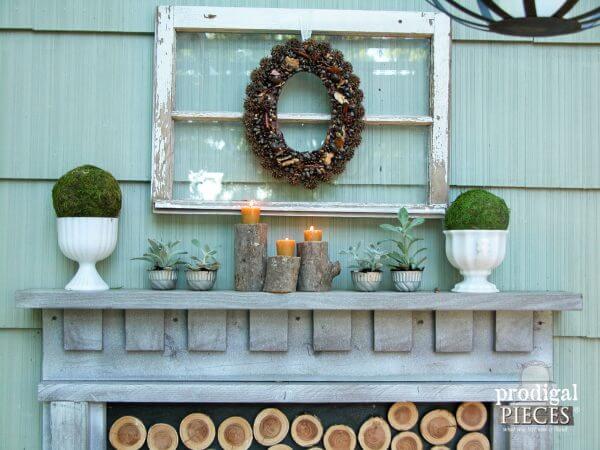
Candle holders made from logs offer a warm, natural look perfect for any home. Here’s how to make them, along with tips to keep things safe and add a personal touch.
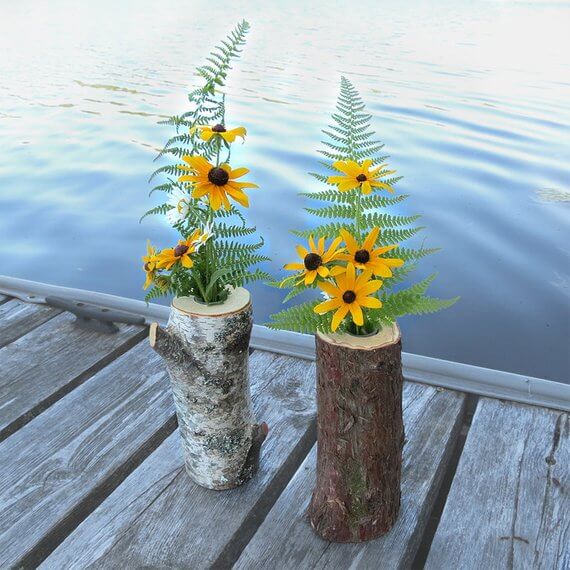
Step-by-step Guide to Creating Candle Holders from Small Logs
- Choose Your Log: Find a small log that sits flat on a surface. It should be dry and free of pests.
- Measure and Mark: Decide how tall you want your candle holder to be. Mark a line around the log at this height.
- Cut the Log: Using a saw, carefully cut along the marked line. Always wear safety gear like gloves and goggles.
- Hollow Out a Space for the Candle: Use a drill with a large bit to create a hole at the top of the log. The hole should be slightly larger than the candle you plan to use.
- Sand and Finish: Sand the log smoothly, especially around the top and the cut edges. You can finish the log with a natural oil or leave it raw for a more rustic look.
| Step | Tools Needed | Details |
|---|---|---|
| Cutting | Saw, safety gear | Ensure the log is stable on a flat surface to avoid slips. |
| Hollowing | Drill, large drill bit | Drill straight down to avoid uneven holes. |
| Finishing | Sandpaper, oil (optional) | Sanding makes the log smooth; oil can enhance its natural color. |
Safety Tips and Creative Variations
Safety First: Always prioritize safety when using tools. Keep your workspace clean and well-lit, and never rush the process.
Creative Touches:
- Handles: For larger candle holders, adding a handle can make them easier to move. Use a sturdy rope or metal handle secured with screws.
- Decorative Carvings: Personalize your candle holders with carvings. Simple designs or initials can add a personal touch.
Lighting Safely: Always place candles in secure positions where the flame won’t reach the wood. Consider using LED candles for a worry-free glow.
Creating Rustic Log Candle Holders is not just about crafting something beautiful; it’s about bringing a piece of the outside world into your home. With these simple steps, you can create something unique that adds warmth and charm to any room. Remember, the beauty of DIY projects lies in making something your own, so feel free to adapt these instructions to suit your style and needs.
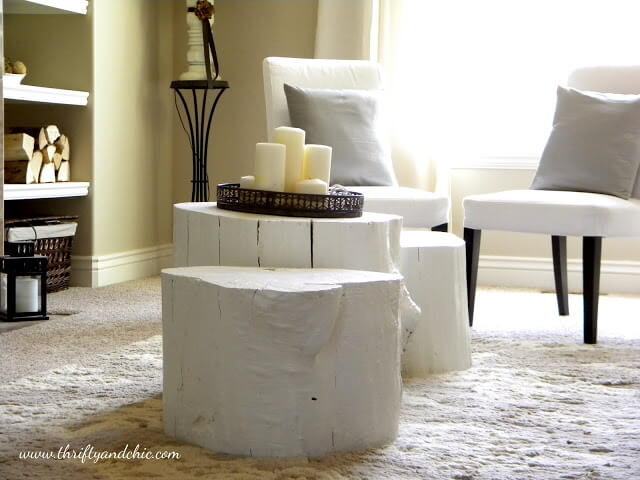
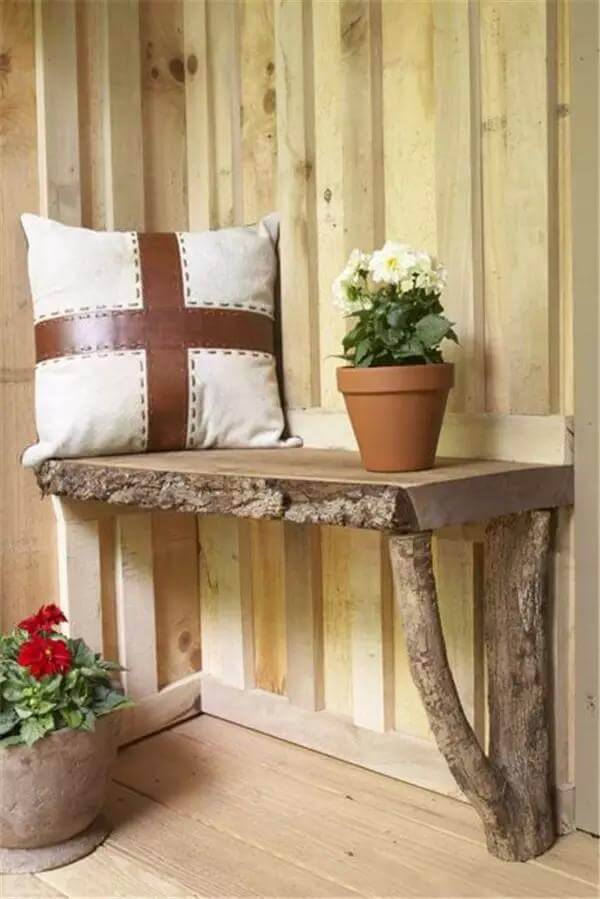
Idea #2: Natural Log Side Table

Creating a Natural Log Side Table is a great way to add a unique and rustic touch to your living space. This project is surprisingly simple but can dramatically impact any room’s aesthetic. Let’s walk through the steps to create this piece and explore how to style it to fit various decor themes.
Instructions for Making a Simple Side Table Using a Large Log
- Select Your Log: Look for a large, sturdy log. The log should be dry and free from pests. The height can vary depending on your preference, but it should be level to avoid wobbling.
- Prepare the Log: Clean the log thoroughly, removing any dirt or loose bark. For a smoother finish, sand the entire surface, paying extra attention to the top and bottom.
- Apply Finish (Optional): Depending on the look you’re going for, you can apply a finish to your log. Options include:
- Sealing with a clear wood sealer to protect the wood and bring out its natural beauty.
- Staining to change the color of the wood to better match your decor.
- Leaving it natural for a more rustic and untouched look.
| Step | Materials Needed | Process |
|---|---|---|
| Preparing | Sandpaper, brush | Sand until smooth, brush off dust. |
| Finishing | Wood sealer/stain | Apply evenly, let dry. |
Discussion of Different Styling Options to Match Various Decor Themes
The beauty of a Natural Log Side Table is its versatility. Here’s how you can style it to complement different themes:
- Modern Minimalist: Keep the table bare with a smooth finish. The natural wood adds warmth to a minimalist setting without overwhelming it.
- Bohemian Chic: Pair your log table with colorful, patterned textiles. A vibrant rug or throw can make the table pop.
- Rustic Farmhouse: Embrace the table’s natural imperfections. Leave the bark on or choose a rougher finish to enhance the farmhouse vibe.
- Scandinavian: Apply a light stain or white wash to the table to align with the clean, airy feel characteristic of Scandinavian design.
Each styling option allows the Natural Log Side Table to shine in its own way. Whether you prefer a more polished look or want to celebrate the raw beauty of nature, this project can be tailored to fit your personal aesthetic.
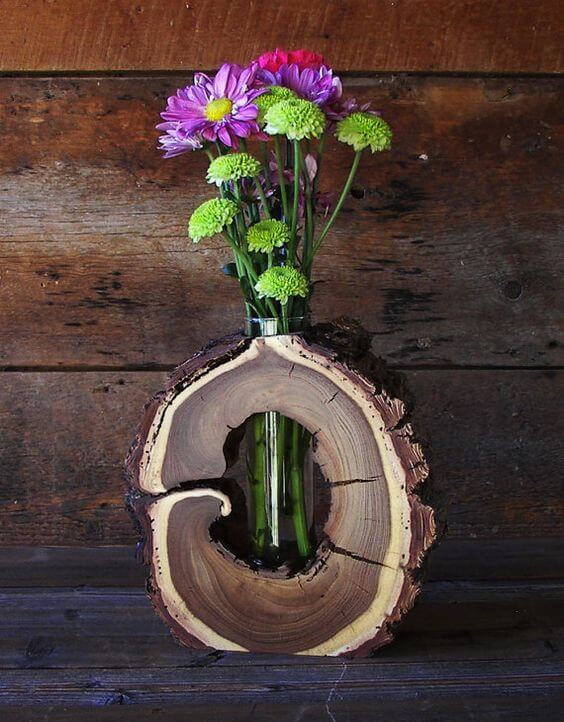
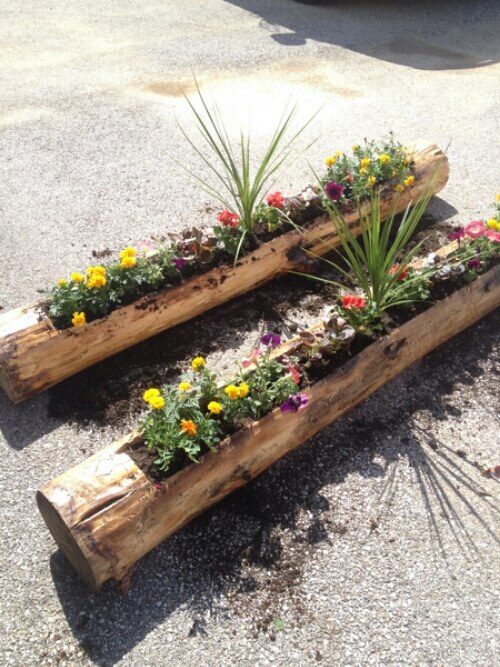
Idea #3: Log Planter for Succulents
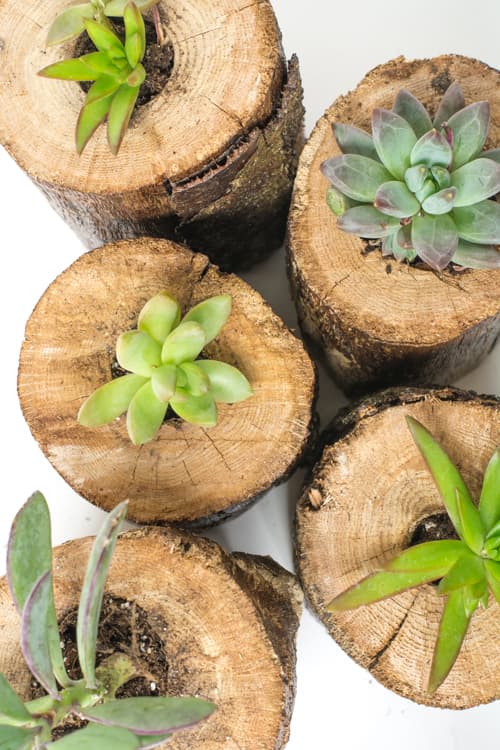
Turning a log into a Planter for Succulents is not only a creative way to display these resilient plants but also adds a natural, earthy element to your home or garden. This section will guide you through hollowing out a log and offer tips on arranging and caring for succulents.
Guide on Hollowing Out a Log to Create a Unique Planter
- Choosing the Right Log: Select a log that fits the space you plan to decorate. It should be dry to prevent rot and have a diameter wide enough to accommodate the succulents.
- Hollowing Out the Log: Use a chisel and hammer or a drill with a large bit to carefully remove the center of the log. Work slowly to avoid splitting the wood. The depth should be sufficient to hold soil and plants.
- Preparing the Planter: Once hollowed, drill a few small drainage holes in the bottom to prevent water from pooling. If desired, apply a protective wood sealant on the inside to help prevent decay.
| Step | Tools Needed | Details |
|---|---|---|
| Choosing | — | Ensure the log is dry and of appropriate size. |
| Hollowing | Chisel and hammer or drill | Remove the center, being careful to keep the walls intact. |
| Preparing | Drill, sealant (optional) | Add drainage holes; apply sealant to extend life. |
Suggestions for Succulent Arrangements and Care Tips
Arranging Your Succulents:


- Variety is Key: Mix different types and sizes of succulents for a visually interesting display. Consider height, color, and texture.
- Planning: Arrange the succulents on top of the soil before planting to get an idea of the final look.
- Spacing: Leave some space between plants to allow for growth.
Caring for Your Succulent Planter:
- Light: Succulents love light. Place your log planter in a bright area but away from direct, harsh sunlight.
- Watering: Water when the soil is completely dry. Be cautious of overwatering, as succulents prefer drier conditions.
- Soil: Use soil meant for succulents or cacti. This ensures proper drainage and nutrients.
Creating a Log Planter for Succulents combines the rustic charm of wood with the simple beauty of succulents. This project not only recycles a natural resource but also offers a unique way to display plants. Whether placed indoors or out, a succulent log planter brings a touch of nature’s serenity to your space.
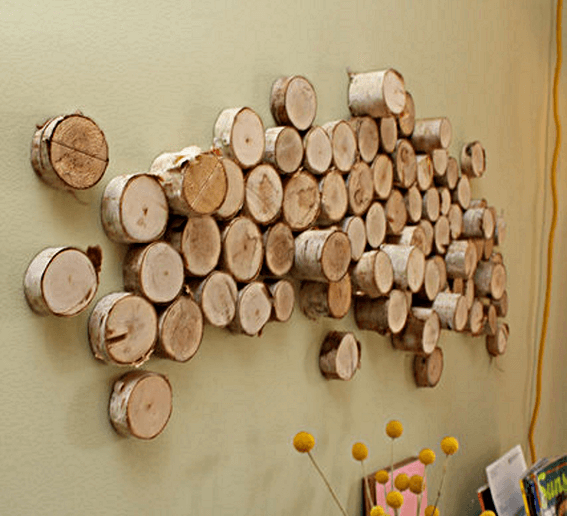
Idea #4: Wall-Mounted Log Slice Art
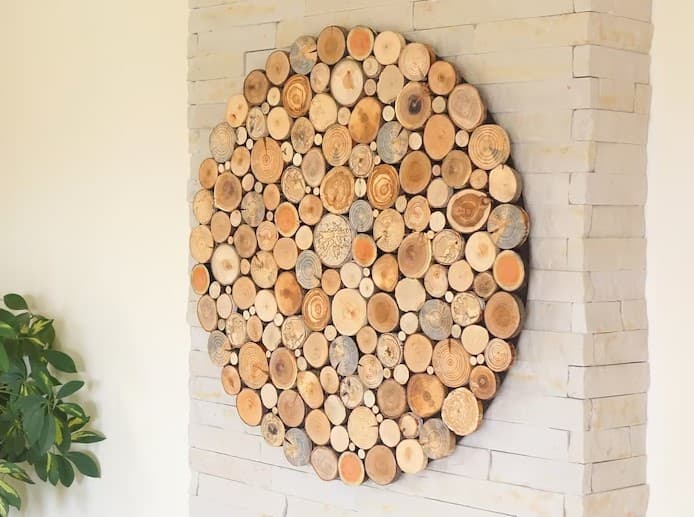
Wall-Mounted Log Slice Art offers a unique way to bring the beauty of nature into your home. This project involves cutting log slices and turning them into pieces of art that can be displayed on your walls. Whether you prefer a natural look, a painted design, or intricate wood burning, there’s a style for everyone.
How to Cut and Prepare Log Slices for Wall Art
- Selecting Logs: Choose logs of varying diameters for an assorted look. Ensure the logs are dry to prevent shrinking or cracking after cutting.
- Cutting the Slices: Using a saw, cut slices from the logs. Aim for a thickness of about 1 to 2 inches. Wear safety gear to protect yourself during this process.
- Preparing the Slices: Sand both sides of each slice until smooth. You might want to apply a sealant to protect the wood and bring out its natural colors.
| Step | Tools Needed | Details |
|---|---|---|
| Selecting | — | Dry logs of different sizes for variety. |
| Cutting | Saw, safety gear | Cut 1 to 2-inch thick slices, safely. |
| Preparing | Sandpaper, sealant (optional) | Sand smoothly; apply sealant to protect. |
Ideas for Painting, Wood Burning, or Leaving Natural for a Minimalist Look
Styling Your Log Slices:
- Painting: Choose acrylic or oil paints to add vibrant colors or designs to your slices. Abstract patterns or nature-inspired scenes can transform the wood into a stunning piece of art.
- Wood Burning: For those who enjoy detailed work, wood burning allows you to etch designs directly into the wood. This technique gives the slices a rustic, personalized feel.
- Natural Minimalist: Sometimes, less is more. Leaving the log slice in its natural state, perhaps with just a coat of sealant to enhance its beauty, can create a minimalist look that highlights the organic patterns of the wood.
Creating Wall-Mounted Log Slice Art is a rewarding way to decorate your space with natural elements. Each approach, whether painted, burned, or left untouched, allows you to express your creativity while celebrating the inherent beauty of wood. This project not only adds a touch of warmth to your home but also provides a satisfying way to engage in the art of DIY.
Idea #5: Tree Log Bookshelf

Creating a Tree Log Bookshelf is a fantastic way to add a natural and rustic element to your reading space. This project involves using sections of logs either in a vertical or horizontal arrangement to craft a bookshelf.
Below, you’ll find steps to create this unique piece, along with customization options to make sure it fits perfectly in your designated area.
Detailed Steps for Creating a Vertical or Horizontal Bookshelf from Log Sections
- Selecting Your Logs: Choose logs that are straight and have a diameter wide enough to support books. The logs should be dry to ensure they don’t shrink or crack over time.
- Cutting the Logs: Decide on the length of your bookshelf. For a vertical shelf, you’ll cut shorter sections. For a horizontal one, longer sections will be needed. Use a saw to cut the logs to your desired lengths.
- Preparing the Log Sections: Sand the cut ends of each log section until smooth. This will prevent snagging and ensure a clean, polished look.
- Assembling the Bookshelf: Arrange the log sections according to your design. For stability, you may choose to attach the sections to each other or to a backing board.
- Finishing Touches: Apply a wood sealant to protect the logs and bring out their natural beauty. This step is optional but recommended.
| Step | Tools Needed | Details |
|---|---|---|
| Selecting | — | Ensure logs are straight and dry. |
| Cutting | Saw | Cut according to the intended shelf design. |
| Preparing | Sandpaper | Sand for a smooth finish. |
| Assembling | Drill, screws (optional) | Securely assemble the sections. |
| Finishing | Wood sealant | Protect and enhance the wood. |
Customization Options for Size and Shape to Fit Specific Spaces
Size and Shape:
- Adaptable Length: Tailor the length of your log sections to fit the space where the bookshelf will be placed. Longer sections for wider walls, or shorter ones for compact areas.
- Design Configuration: Depending on your preference and available space, arrange the log sections vertically for a tower-like shelf or horizontally for a traditional bookshelf look.
Customization Tips:
- Shelf Spacing: Adjust the distance between the log sections based on the height of the items you plan to store, allowing flexibility for both books and decorative items.
- Personal Touches: Consider adding metal brackets for a modern twist or painting the ends of the logs for a pop of color.
Creating a Tree Log Bookshelf not only provides a functional storage solution but also serves as a statement piece in your home. By following these steps and considering customization options, you can design a bookshelf that not only holds your favorite reads but also showcases your personal style and love for nature.
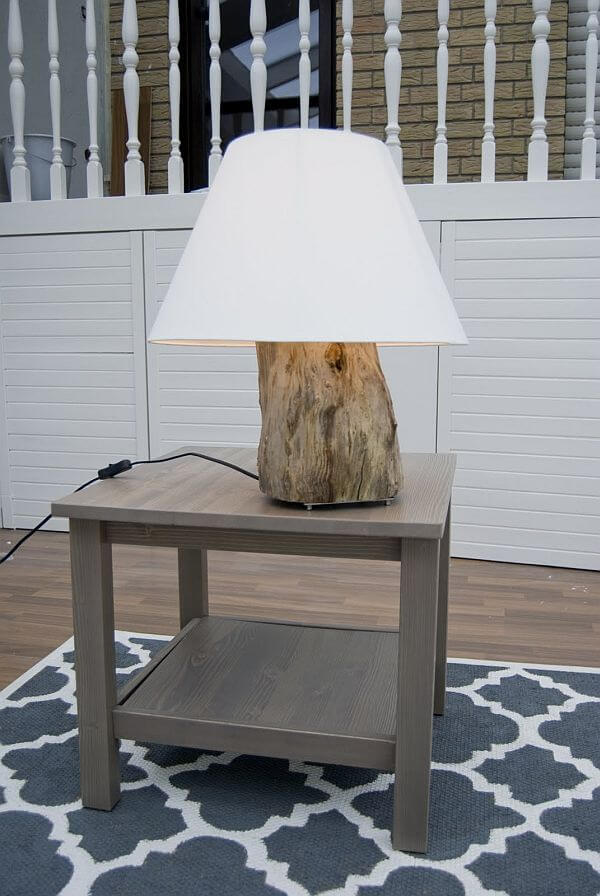
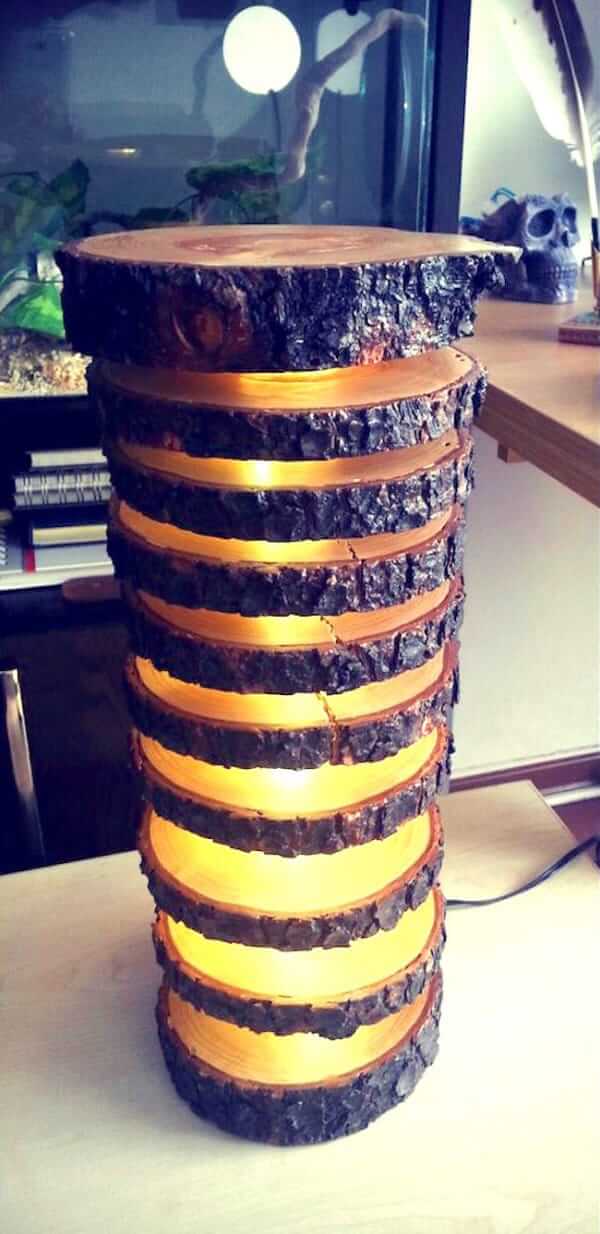
1. Wood Log Lamp

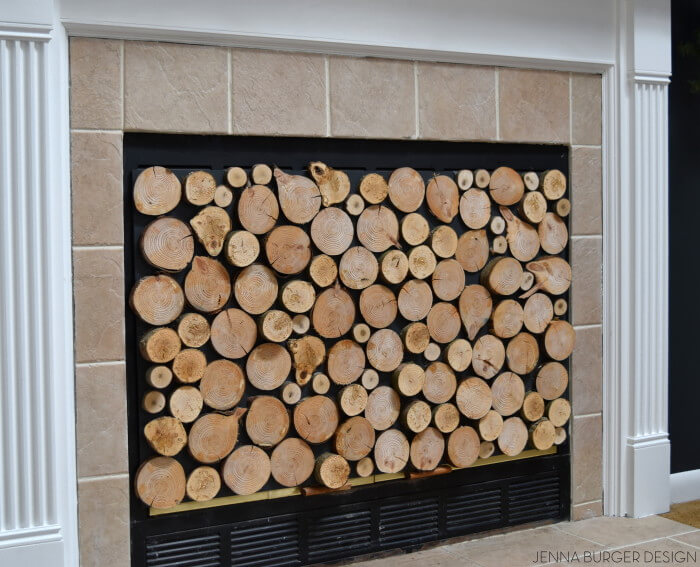
2. FAUX Stacked Log Fireplace Screen
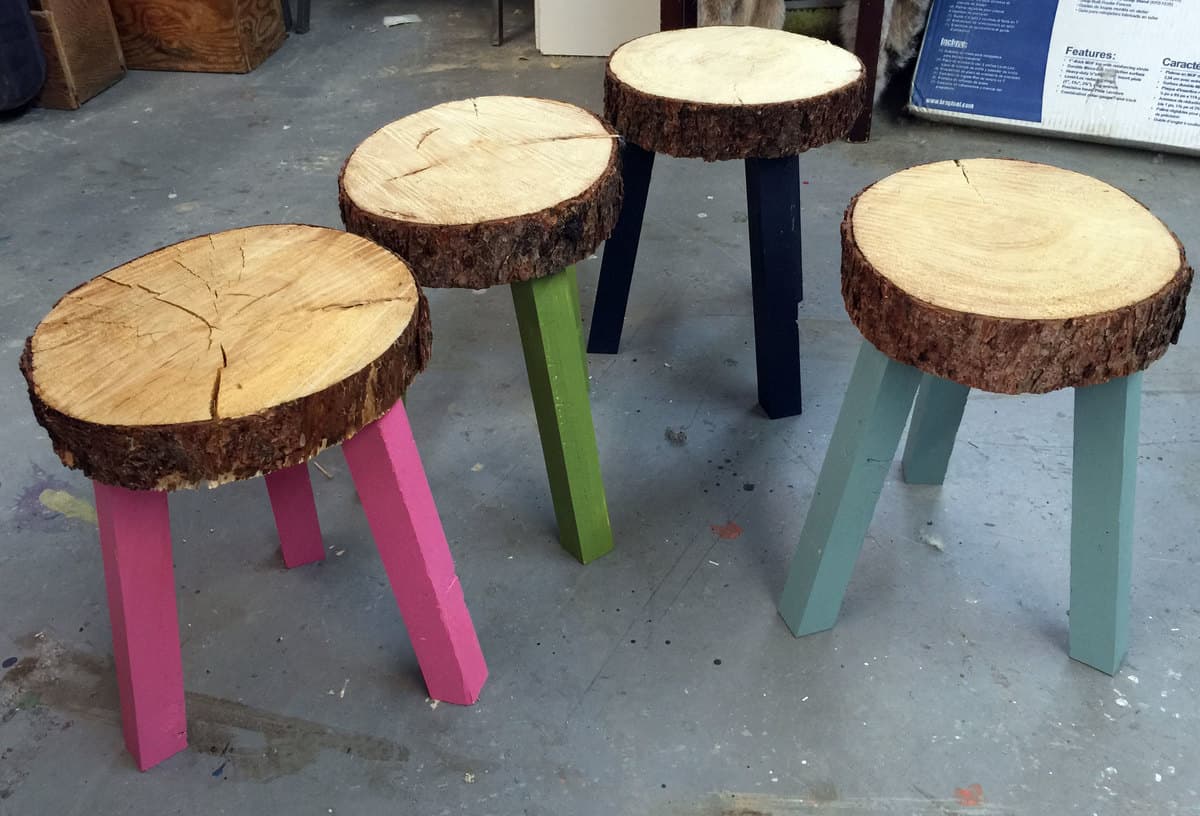
3. DIY Wood Log Stools
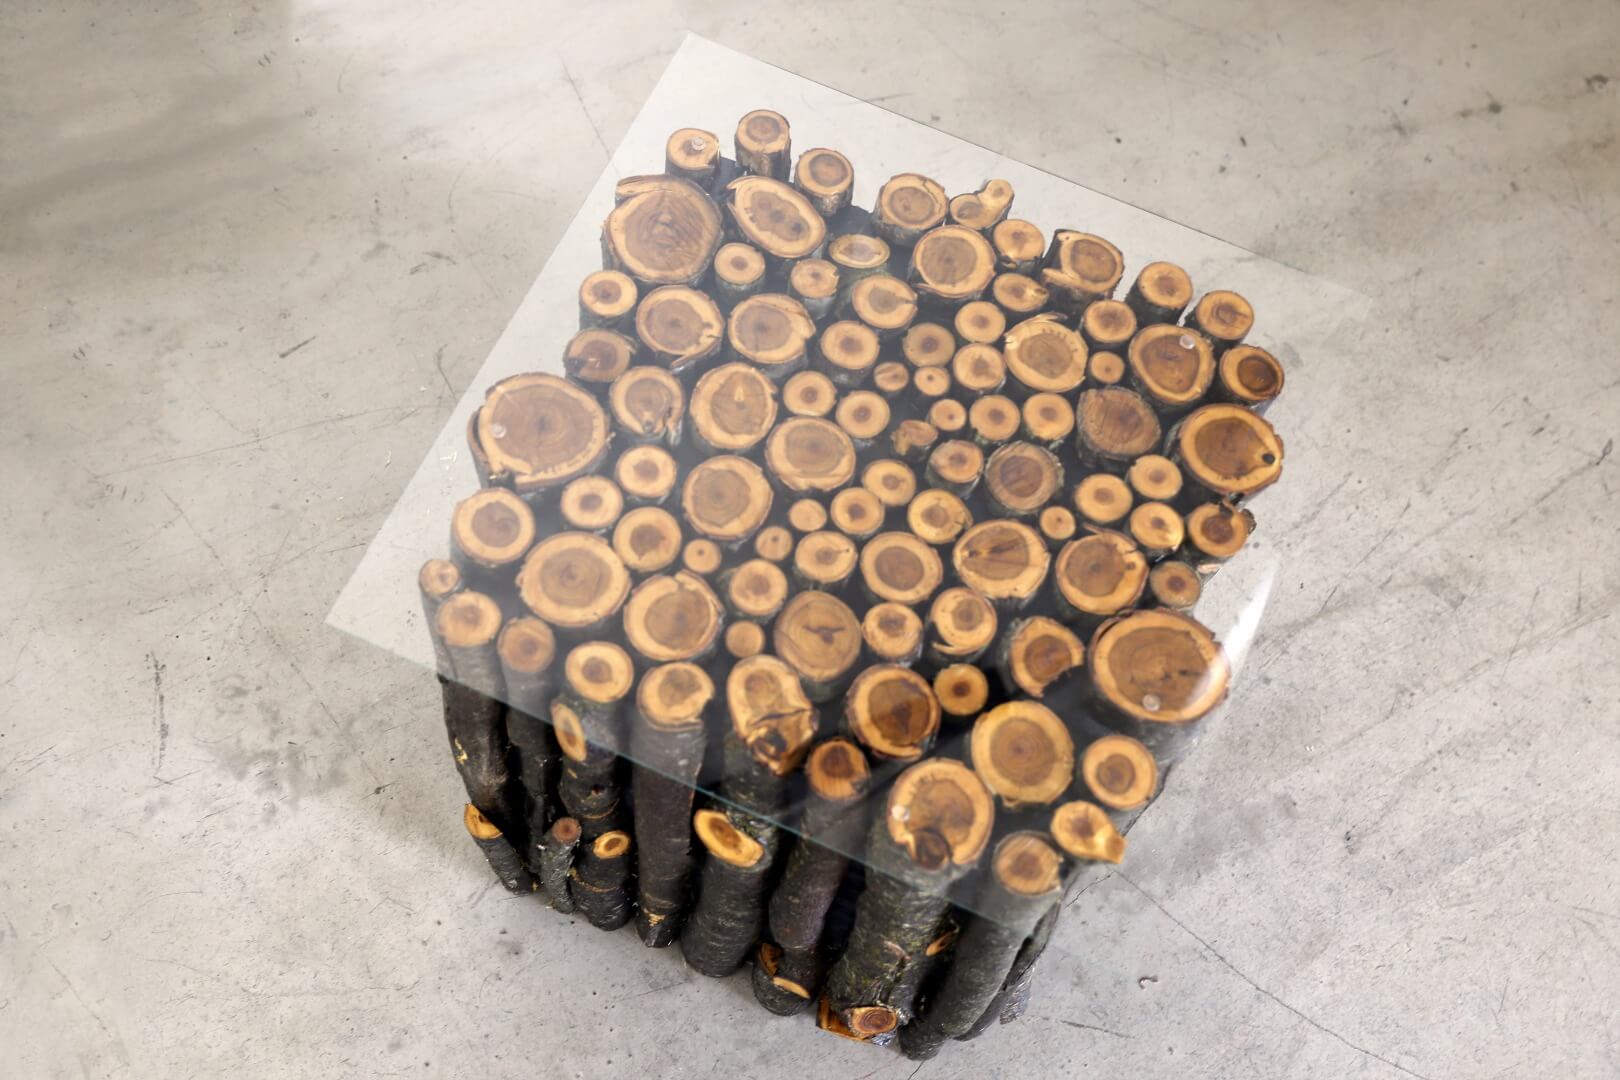
4. Wood Log Coffee Table
5. Wood Slice Stool
6. Wine Bottle Holder

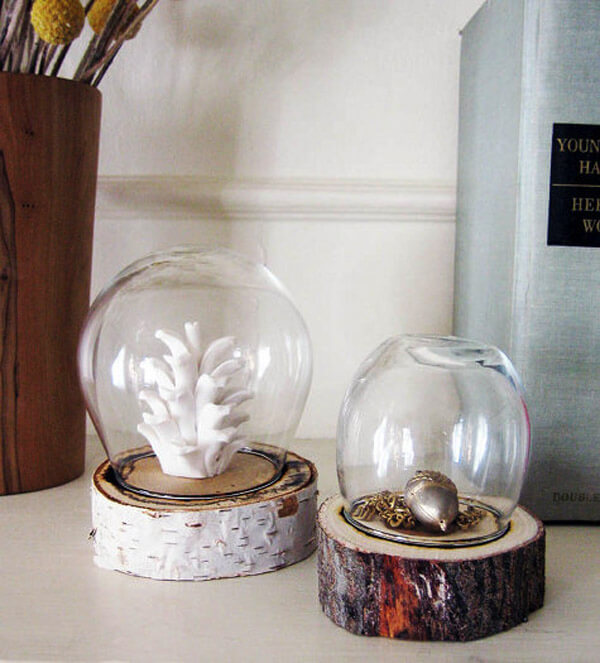
7. DIY Log Dome Display Jar
8. DIY Wood Slice Clock

9. Circular Mirror With Wood Slices All Around

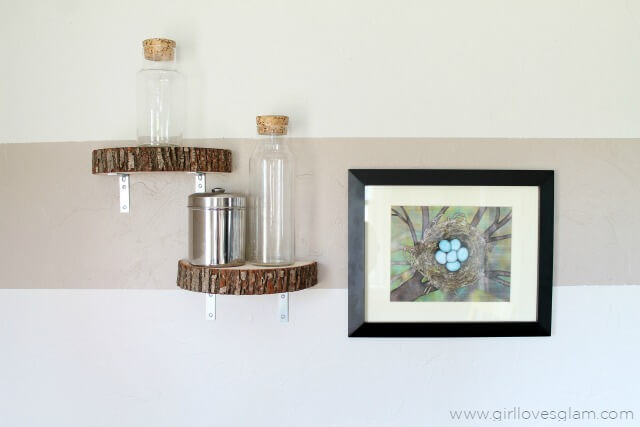
10. Wood Slide Shelf
11. Turn Logs into Affordable Wall Art
12. Wood Log Table
13. Floating Birch Cupcake Stand

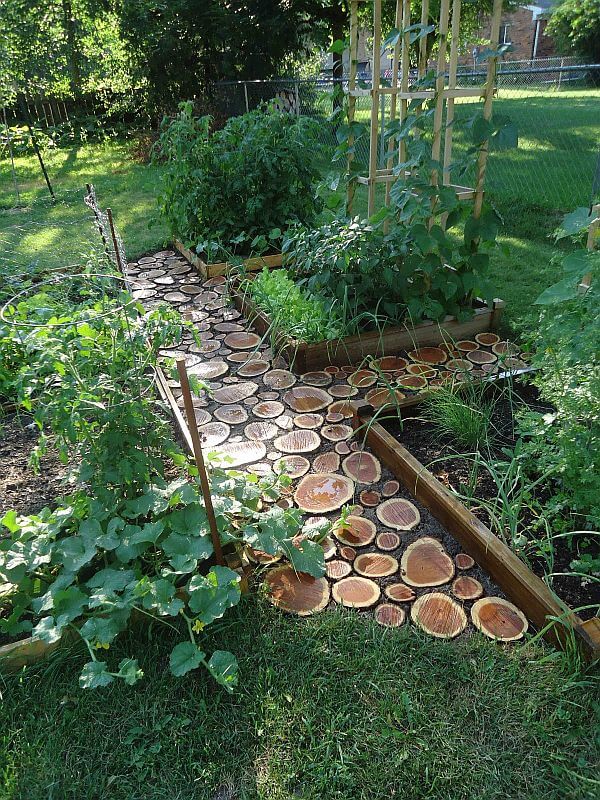
14. Garden Path
15. Wooden Lamp
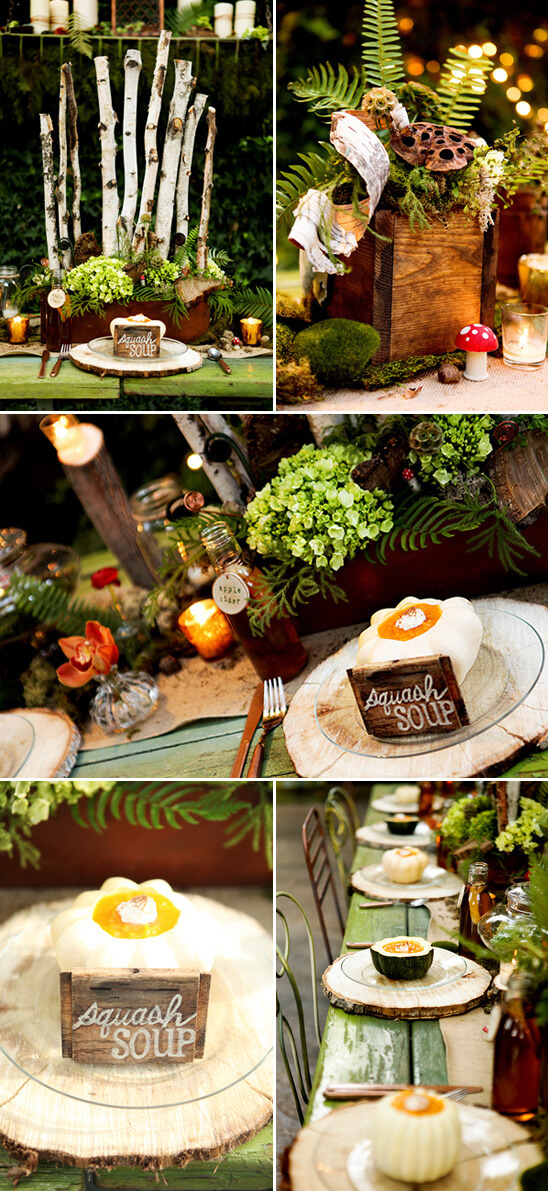
16. Woodland wedding
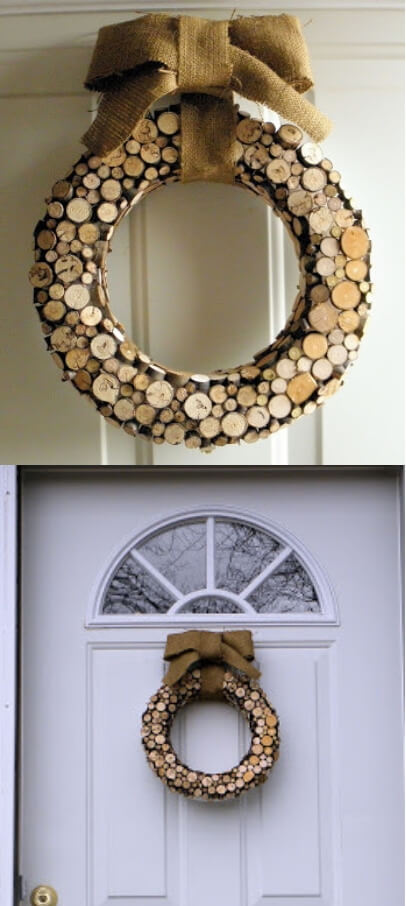
17. Inspired Christmas Wreath
18. Key holder

19. Kitchen Island

20. Wooden Headboard

21. DIY for summer night

22. Cedar Wood Log Shelf

23. Wine rack

24. Wooden Bench
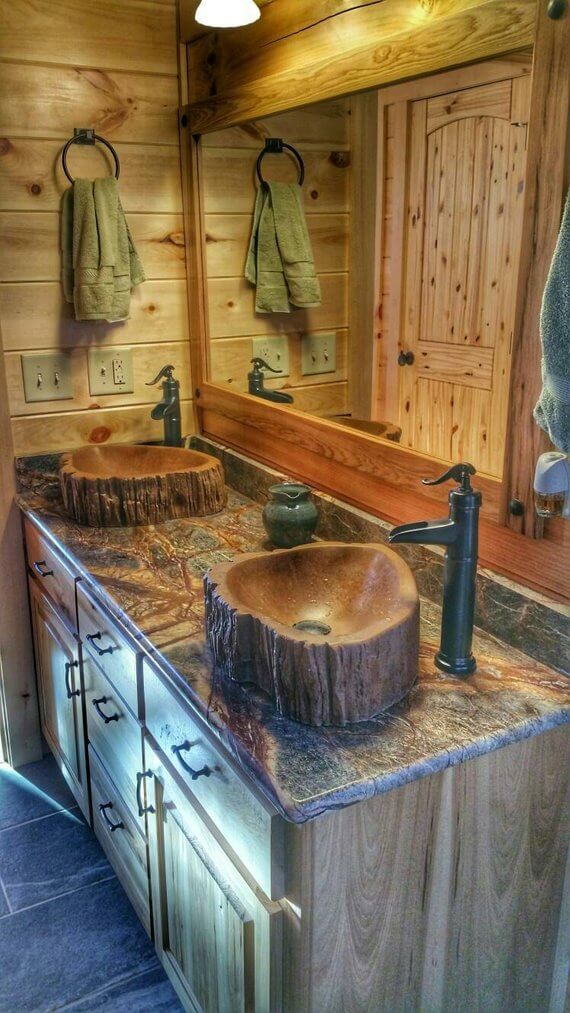
25. Wood log sink tree
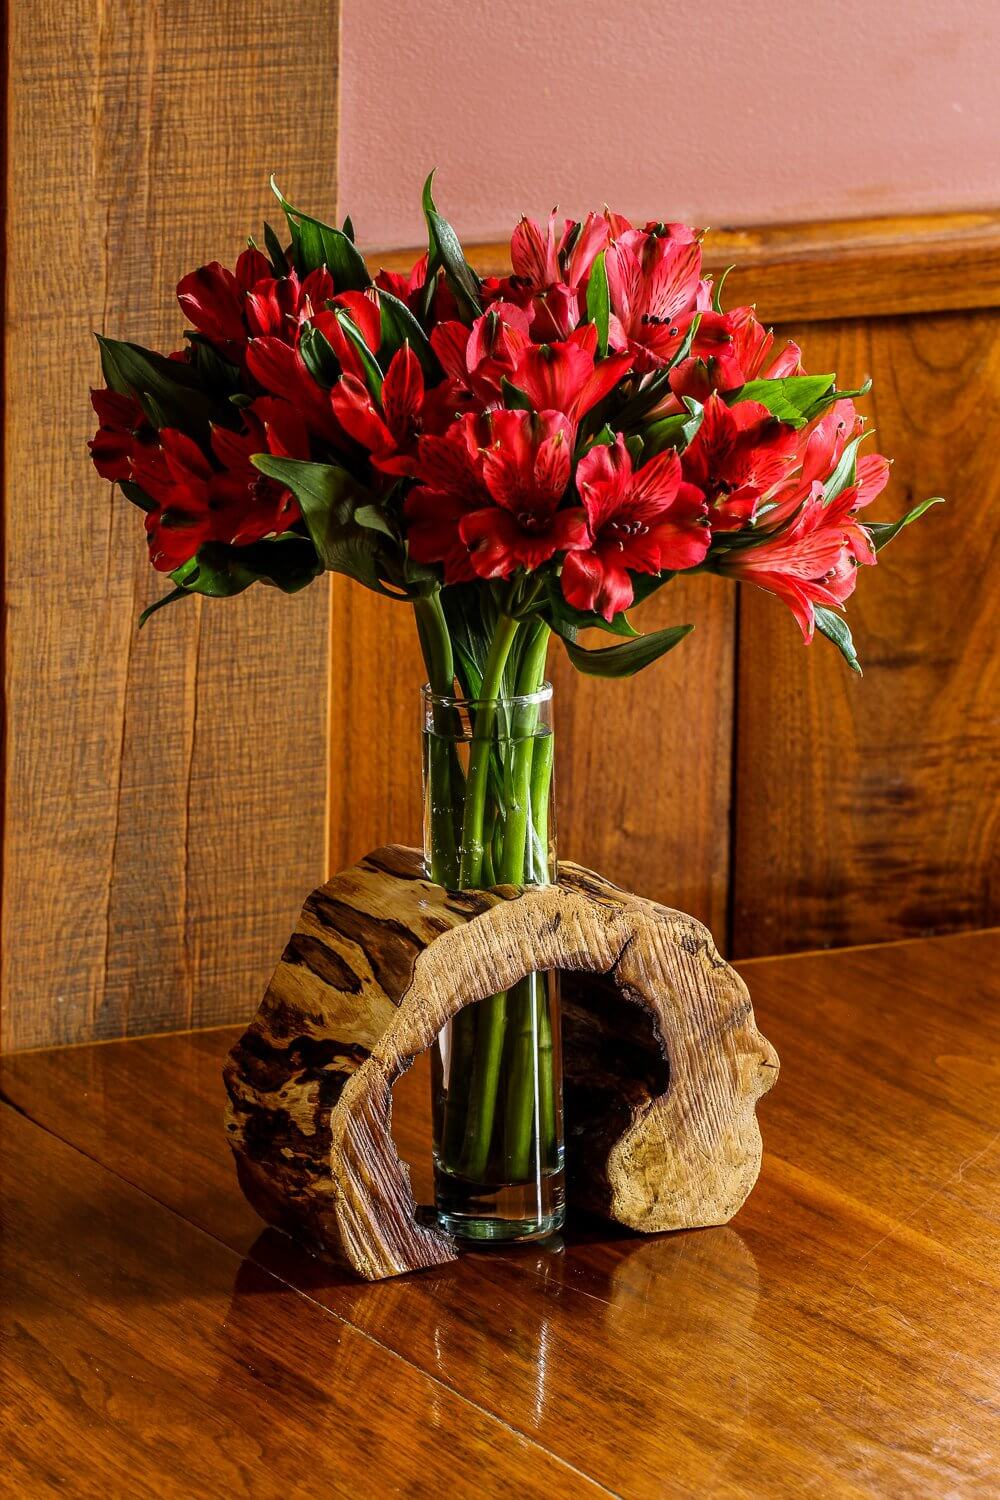
26. Flower vase
27. Wood log lamp
28. DIY Log planters
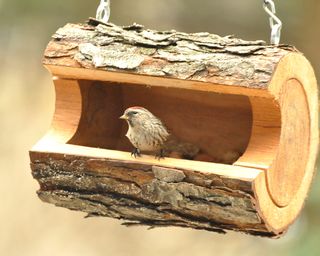
29. Bird feeder
30. Natural Branch Coasters

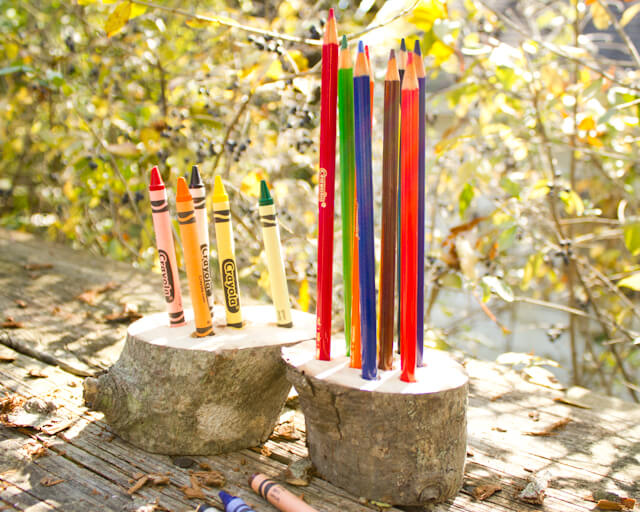
31. Crayon holder
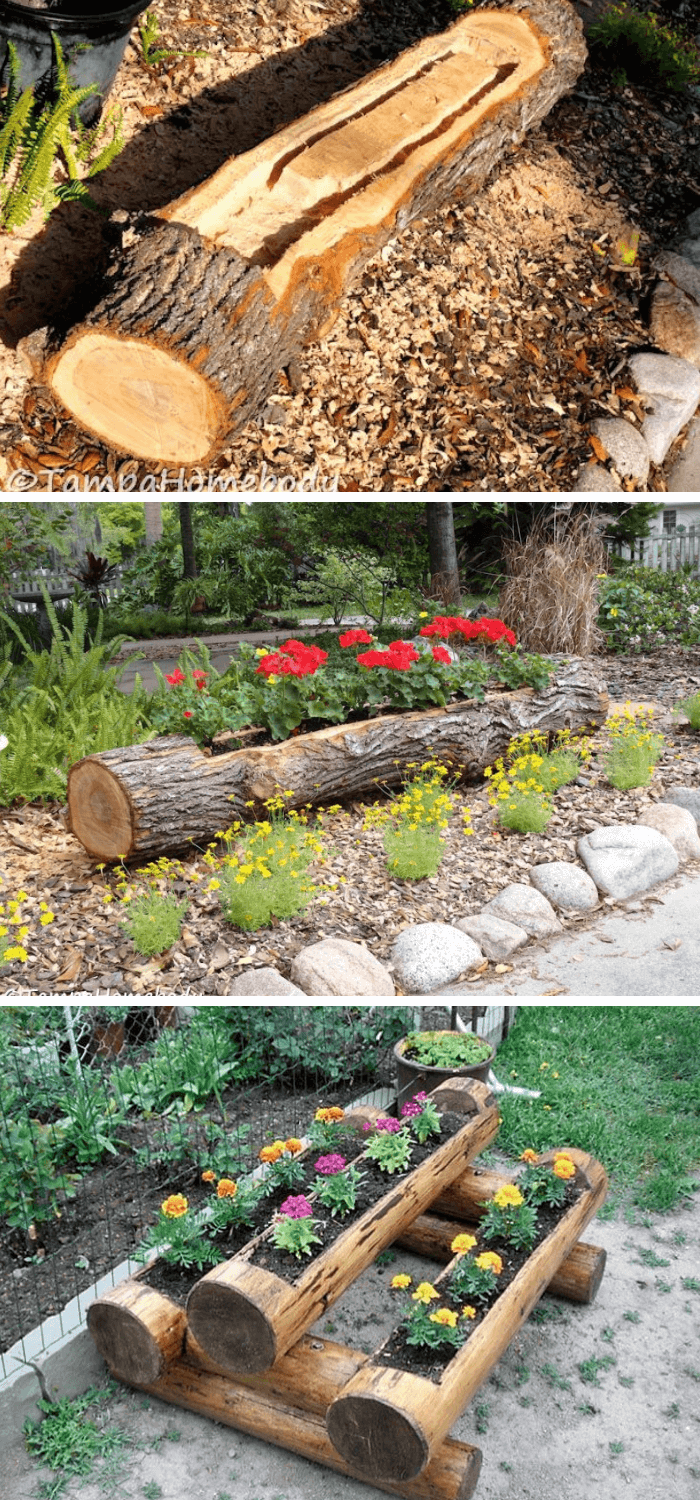
32. Tree Log Planter
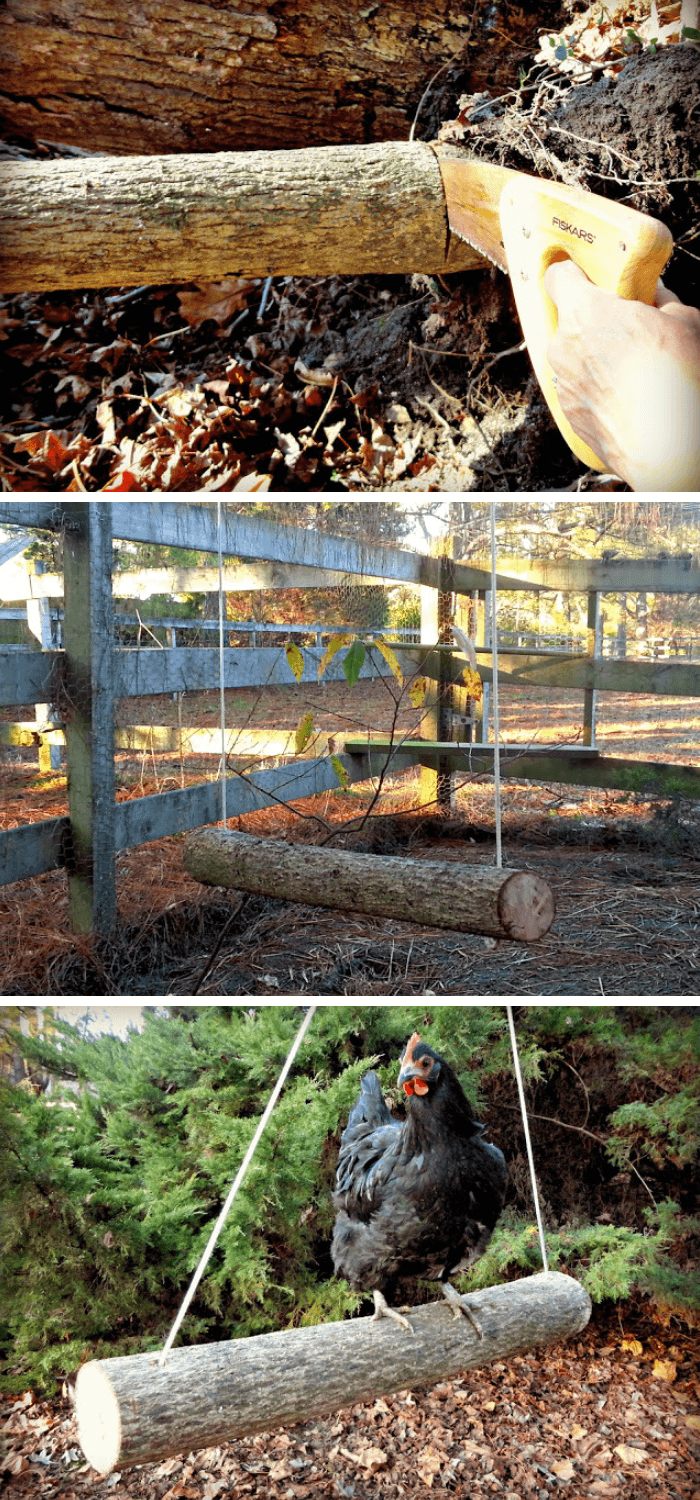
33. DIY Log Swing for Chickens
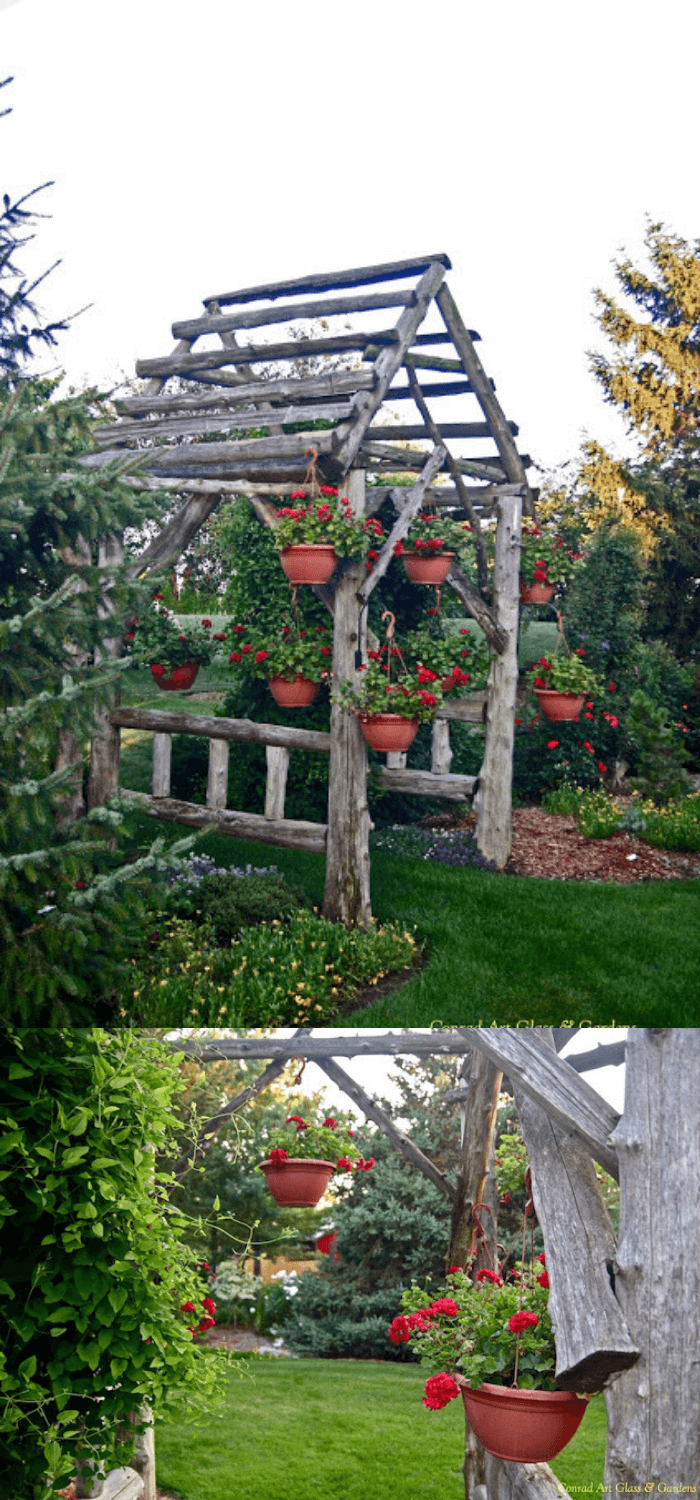
34. Wooden Logs Arbor
Finishing Touches and Maintenance
After you’ve put in the effort to create your DIY Tree Log Decor, it’s important to know how to seal and protect it, as well as maintain its beauty over time. Let’s dive into some recommendations for keeping your log decor in top condition.
Recommendations for Sealing and Protecting Log Decor
Sealing your log decor is crucial for preserving its natural beauty and ensuring its longevity. Here’s how to do it:
- Choose the Right Sealant: Pick a sealant suitable for the type of wood and the location of your decor (indoors or outdoors). Options include polyurethane, varnish, or beeswax for a more natural finish.
- Apply the Sealant Correctly: Always follow the instructions on the sealant product. Typically, you’ll apply with a brush or cloth, let it soak in, then wipe off any excess. Multiple coats may be necessary for the best protection.
- Allow Proper Drying Time: Be patient and allow the sealant to dry completely before using the decor item. This ensures maximum protection and a smooth finish.
| Action | Materials Needed | Details |
|---|---|---|
| Choosing Sealant | Sealant (polyurethane, varnish, beeswax) | Consider the decor’s location and wood type. |
| Applying Sealant | Brush or cloth | Follow product instructions for best results. |
| Drying | — | Allow ample time for the sealant to fully dry. |
Tips for Maintaining and Refreshing Your Log Decor Over Time
Maintaining your log decor helps it stay looking beautiful for years to come. Here’s what you can do:
- Regular Dusting: Use a soft cloth or brush to remove dust. This prevents buildup that can dull the wood’s appearance.
- Avoid Excessive Moisture: Keep log decor away from very damp environments unless it’s specifically treated for outdoor use. Excessive moisture can lead to wood swelling or rot.
- Refresh the Sealant as Needed: Over time, the sealant can wear off, especially for items used frequently or kept outdoors. Reapplying a coat of sealant can rejuvenate the piece.
- Repair Minor Damage Promptly: Small scratches or chips can often be fixed with a bit of sandpaper and touch-up sealant. Addressing these issues quickly prevents them from worsening.
| Maintenance Task | Tools Needed | Purpose |
|---|---|---|
| Dusting | Soft cloth or brush | Prevents dust buildup. |
| Protecting from Moisture | — | Avoids wood damage. |
| Refreshing Sealant | Sealant, brush or cloth | Maintains protection and appearance. |
| Repairing Damage | Sandpaper, sealant | Fixes minor issues before they worsen. |
Inspiration Gallery
After diving into the world of DIY Tree Log Decor Ideas, you now have the tools and knowledge to start your own projects. But before you begin, let’s take a moment to draw inspiration from others who have embarked on this creative journey.
A Collection of Photos Showcasing Finished Projects and Variations
Visualizing the end result can sometimes be the biggest push towards starting a new project. Here’s a table highlighting different types of log decor items, showcasing the range of possibilities that tree logs offer:
| Project Type | Description | Visual Appeal |
|---|---|---|
| Rustic Log Candle Holders | Small logs turned into candle holders | Adds a cozy, warm touch to any room |
| Natural Log Side Table | A large log used as a side table | Brings a sturdy, earthy element to living spaces |
| Log Planter for Succulents | Hollowed-out log serving as a planter | Offers a unique twist on greenery display |
| Wall-Mounted Log Slice Art | Slices of log decorated or left natural, mounted on walls | Creates a striking visual focal point |
| Tree Log Bookshelf | Log sections arranged to hold books | Integrates nature into your reading nook |
Encouragement for Readers to Experiment and Personalize Their Creations
The beauty of DIY Tree Log Decor lies not just in the finished product but in the process of creating something that reflects your personal style and vision. Here are a few thoughts to inspire you as you begin:
- There’s No Right or Wrong: Your project is about expressing yourself. Whether it’s a bold statement piece or a subtle addition to your decor, what matters most is that it speaks to you.
- Experiment with Finishes and Styles: Don’t be afraid to try different techniques, whether it’s staining, painting, or carving. Each attempt is a learning experience that brings you closer to mastering the craft.
- Make It Your Own: Incorporate elements that reflect your personality or memories. This could be a specific color scheme, patterns, or even incorporating other materials like metal or fabric.
Creating DIY Tree Log Decor is more than just making something functional; it’s about crafting pieces that have a story, that add warmth and texture to your home, and that ultimately bring you joy. Let this inspiration gallery be the starting point of your creative adventure.
Conclusion
We’ve journeyed through the realm of DIY Tree Log Decor, uncovering the boundless creative possibilities that lie within the simple, yet profound medium of tree logs. From rustic candle holders and natural side tables to inventive planters, wall art, and bookshelves, we’ve seen how logs can transform into functional, beautiful pieces that enhance any space.
This exploration into DIY Tree Log Decor is more than just a guide to crafting; it’s an invitation to bring the essence of nature into your home. Each project offers a chance to not only create something unique but to also connect with the natural world in a deep and meaningful way. The act of transforming a piece of wood into a piece of art or furniture is a powerful reminder of the beauty that surrounds us and the creativity that lies within us.
As we conclude, let the ideas and projects we’ve discussed serve as a starting point for your own creative journey. Embrace the challenge, enjoy the process, and take pride in the knowledge that you are creating something truly special. Whether you’re a seasoned DIY enthusiast or someone looking to try something new, there’s no better time than now to start a project that brings a piece of the outdoors, indoors.
So, pick up a log, grab your tools, and let your creativity flow. The world of DIY Tree Log Decor is vast and full of potential, waiting for you to leave your mark. Remember, every slice of wood has a story to tell, and with your touch, it can become a cherished part of your home. Let’s embrace the beauty of nature, one DIY project at a time.
FAQs on DIY Tree Log Decor
Where can I find tree logs for my DIY projects?
Tree logs can be sourced from a variety of places. Look for local tree removal services, which often have logs available. Ask friends or family members who may have recently removed trees from their property. Check community forums or online marketplaces for people giving away logs. Remember, always ensure you have permission to take logs from any location.
How do I prepare a log for a DIY decor project?
Preparing a log involves a few key steps. First, clean the log with a brush to remove any dirt or debris. If the bark will be removed for your project, do so carefully. Sand the wood to smooth out rough edges and surfaces. Finally, treat the wood with a sealant or finish if desired to protect it and enhance its natural beauty.
Are there any special tools required for working with logs?
Some basic tools you might need include a saw for cutting, sandpaper for smoothing, a drill if you’re creating holes or hollows, and a chisel for more detailed work. Safety equipment such as gloves and goggles are also important. The specific tools required will depend on the project you’re undertaking.
How do I prevent my log decor from cracking or splitting?
To minimize cracking or splitting, it’s important to start with dry wood, as moisture is a common cause of these issues. Applying a sealant can also help by locking in the wood’s current moisture level and providing a barrier to external changes. Finally, avoid placing log decor near heat sources or in direct sunlight, which can exacerbate cracking and splitting.
Can tree log decor be used outdoors?
Yes, tree log decor can be used outdoors, but it requires proper preparation to withstand the elements. Ensure the wood is sealed with an outdoor-grade finish that protects against moisture, UV rays, and temperature changes. Regular maintenance, such as reapplying the sealant and checking for signs of wear, will help extend the life of your outdoor log decor.