10 Genius DIY Geometric Planter Ideas You Can Build This Weekend
Geometric planters look like store-bought design pieces for a fraction of the cost, as long as you get the bevel angles, drainage holes and cure time right.

Never miss an update — choose FarmFoodFamily as your preferred source on Google.
How it works: Tap the button below to open Google's settings page, then check the box next to FarmFoodFamily.
Tap the checkbox to turn it blue — that's how you know it's set.
Geometric planters look like store-bought design pieces for a fraction of the cost, as long as you get the bevel angles, drainage holes and cure time right.
Products We Recommend
This post contains affiliate links. We may earn a commission on qualifying purchases at no extra cost to you.

SHALL 12-Inch Steel Bar Clamps, 4-Pack
Quick-release clamps that hold glued hexagon and triangle joints tight while they dry.
Shop Now
Quikrete Concrete Mix, 10 lb Bag
A small bag is enough for a few cardboard-mold planters. Screen out large aggregate for thin walls and follow the bag's mixing proportions.
Shop Now
3-Inch Plastic Nursery Pots With Drainage Holes, 50 Pack
Drop-in pots for planters that can't take a drain hole, so you can lift each plant out to water.
Shop NowYou’ve seen the faceted planters in design shops. Sharp edges, clean angles, a price tag that makes you wince.
The good news is that most of them are simple shapes repeated. A hexagon is six identical boards.
A triangle is three. But once you know the bevel angle and how to make a drain hole, the rest is patience.
Answer 4 quick questions and get matched to the exact fix for your yard — drainage, budget, layout, or something else entirely.
Take the Free QuizThis guide covers 10 builds with real dimensions, tools and finishing steps. It also covers the three mistakes that ruin most first attempts: no drainage, concrete that isn’t cured, and boards cut at the wrong angle.
Quick Answer
For most people, a wood hexagon or a concrete prism is the fastest path. Pick the material first, because it decides your tools, your budget and where the planter can live.
Every sound geometric planter follows the same rules. Cut the angle to match the number of sides, which is 180 divided by the sides. Leave a drain hole or drop in a nursery pot that has one.
Seal or soak concrete so it stops leaching alkalinity into the soil. Fill with potting mix, not garden soil, because garden soil packs down and holds water. Size the planter to the pot you plan to use and add about an inch of clearance, so the plant is never a tight squeeze.

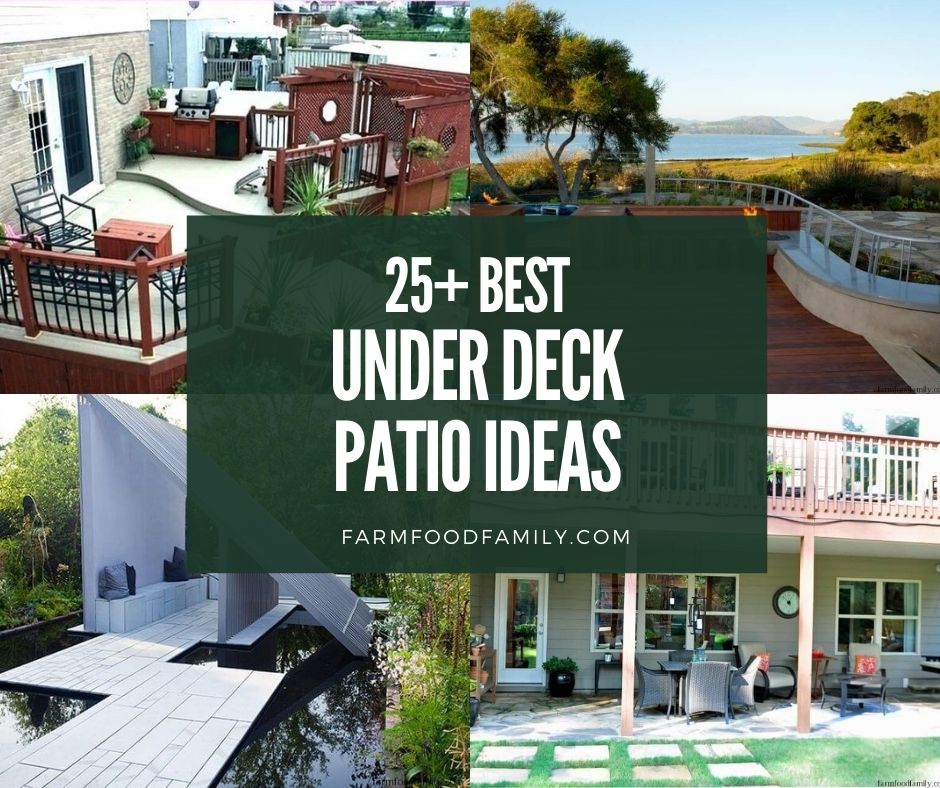
Painted terracotta and scrap-wood triangles cost the least. Stacked hexagons and honeycomb walls cost the most, since they need many boards.
Most yard problems trace back to one specific, fixable cause. Find yours in 4 quick questions.
Take the Free QuizWhich Material Should You Choose?
Start with where the planter will sit and how much you want to spend. This table sums up the tradeoffs.
| Material | Best for | Skill level | Main catch |
|---|---|---|---|
| Wood (cedar or pine) | Patio, porch, indoor shelf | Beginner with a miter saw | Needs a finish or liner outdoors |
| Concrete in cardboard molds | Wall planters, succulents | Beginner, but messy | Needs days to cure |
| Concrete in rigid molds | Heavy statement pieces | Intermediate | Heavy, needs a sealed or soaked interior |
| Wire, brass or straws | Hanging displays | Beginner | Holds a small pot only |
| Painted terracotta | Quick color hit | Easiest | Paint can flake outdoors without sealer |
Before You Build: Three Rules That Apply to Every Idea
These come first because they decide whether the plant lives. Skip them and even a perfect shape ends up with a rotting root ball.
Rule 1: Always plan for drainage
University of Illinois Extension says containers with drainage holes are best for most plants, and plants in pots without holes face a greater risk of root rot. That’s the whole reason we build a hole into every design below.
If you fall in love with a shape that can’t have a hole, treat it as a cachepot. Keep the plant in a plastic nursery pot and lift it out to water. Our guide to planting succulents in containers that have no holes explains the workaround step by step.
Rule 2: Use potting mix, not garden soil
The same Illinois Extension page says garden soil isn’t recommended because it can harbor disease and insect organisms. Use a bagged potting mix that drains well.
For cacti and succulents, pick a gritty mix. Not sure how much sun they need on your shelf? Succulent garden ideas on the site cover light and plant picks.
Rule 3: Match the bevel to the number of sides
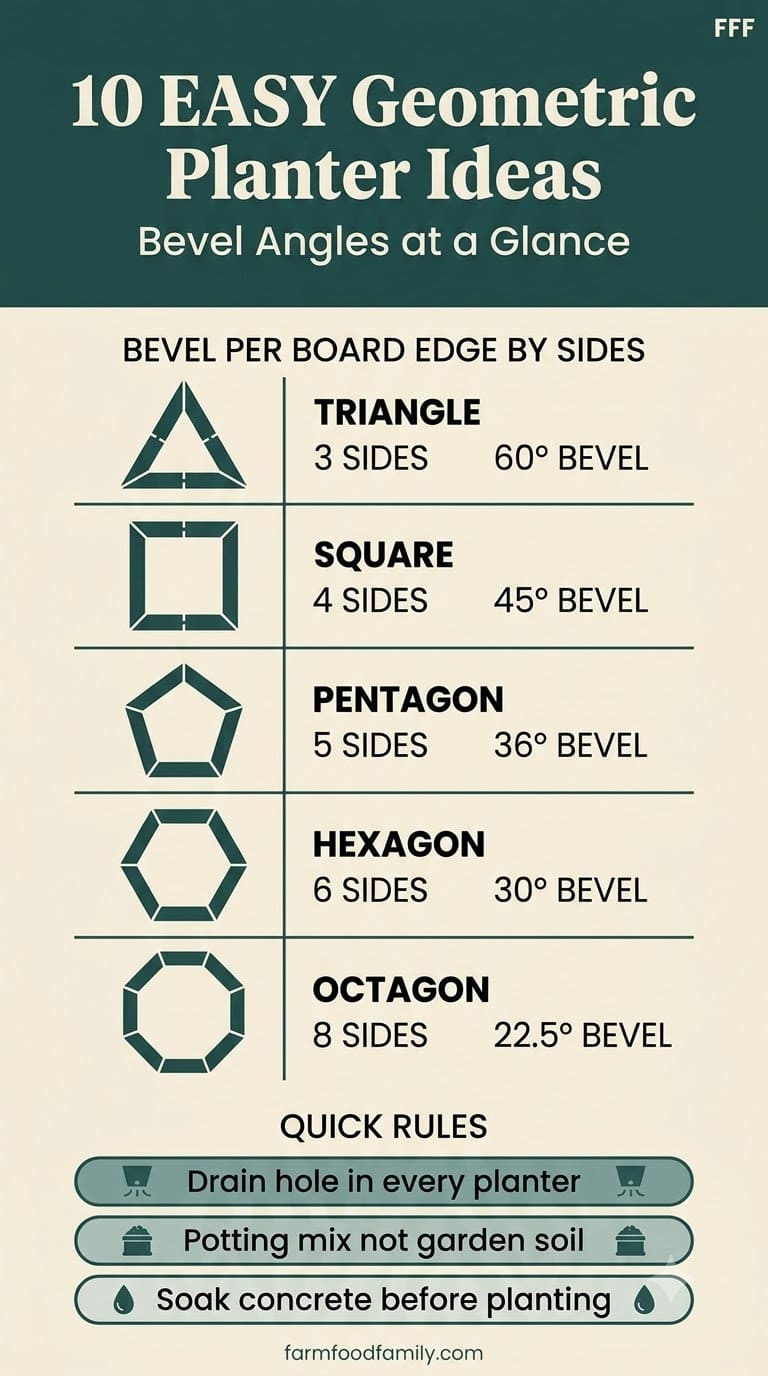
If you cut boards for a closed shape, divide 180 by the number of sides to get the bevel. The hexagon is the one to remember, at 30 degrees. It’s what This Old House editor Jenn Largesse uses on her six-sided planters.
Quick-release clamps that hold glued hexagon and triangle joints tight while they dry.
Shop NowThis post contains affiliate links. We may earn a commission on qualifying purchases at no extra cost to you.
| Shape | Sides | Bevel per board edge |
|---|---|---|
| Triangle | 3 | 60 degrees |
| Square | 4 | 45 degrees |
| Pentagon | 5 | 36 degrees |
| Hexagon | 6 | 30 degrees |
| Octagon | 8 | 22.5 degrees |
Largesse’s tip is to set the saw slightly high if it has play, because a sharper bevel gives a tighter outside joint. She also compares every new piece to the first cut, not the last, so errors don’t pile up.
The 10 Best DIY Geometric Planter Ideas
1. The Classic Wood Hexagon
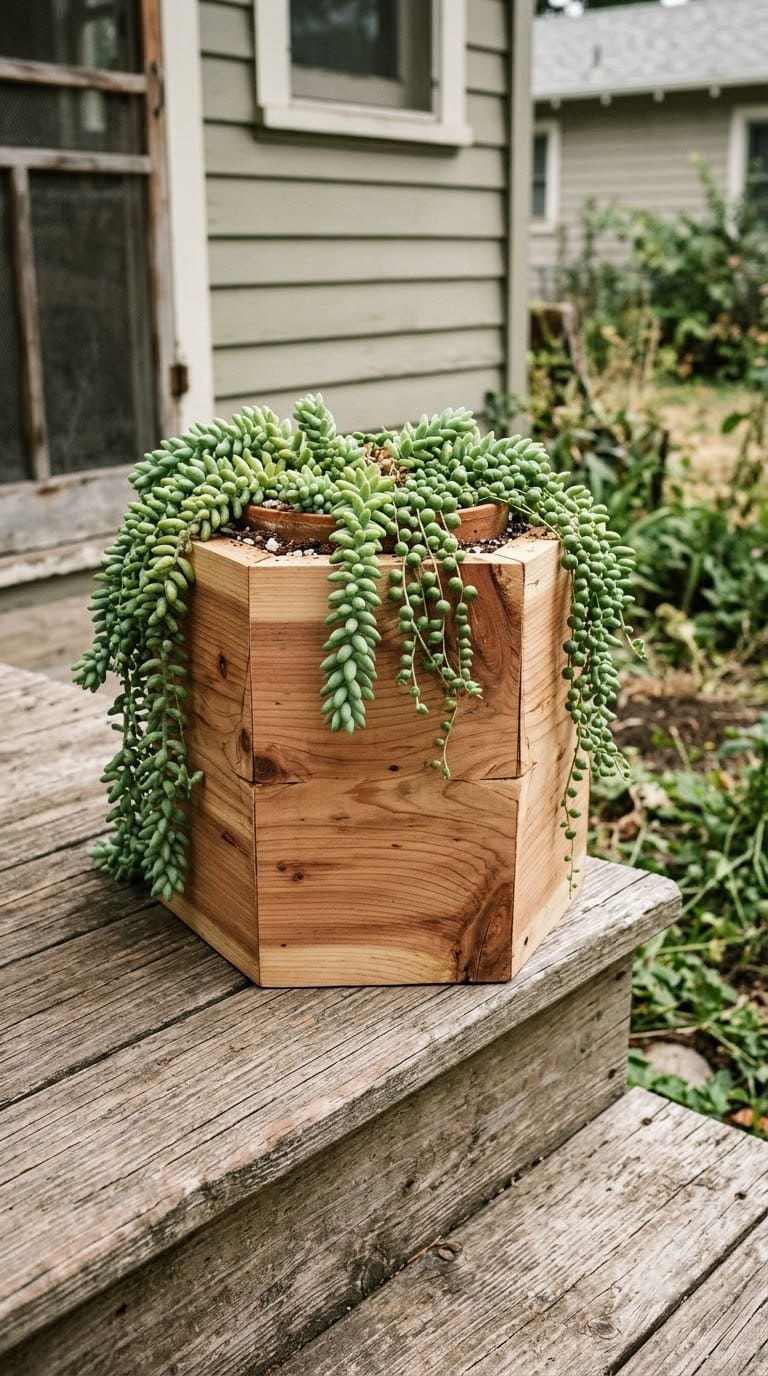
This is the best first project. You need six identical boards, a saw that bevels, glue and a pair of clamps.
The average homeowner spends $616/year on yard fixes that don't address the real problem. Find out what yours actually is — before you spend another dollar.
Take the Free QuizStart with a 1×8 board. The Just Measuring Up hexagon planter cuts six identical segments from a 6-foot 1×8, bevels each edge at 30 degrees, glues and clamps two pieces at a time, then holds each joint with two finishing nails. It finishes with a 1/4-inch plywood base traced from the closed hexagon.
Our sizing tip: the distance across two flat sides of a hexagon is about 1.73 times one side’s length. So if your pot is 6 inches across, make the inside edge of each board at least 3.5 inches, then add clearance. Drill three or four 1/2-inch holes in the plywood base before you glue it on.
For outdoor use, line the inside with landscape fabric or a plastic liner, or keep the plant in its nursery pot. Pairs well with idea 8 for a stacked patio display.
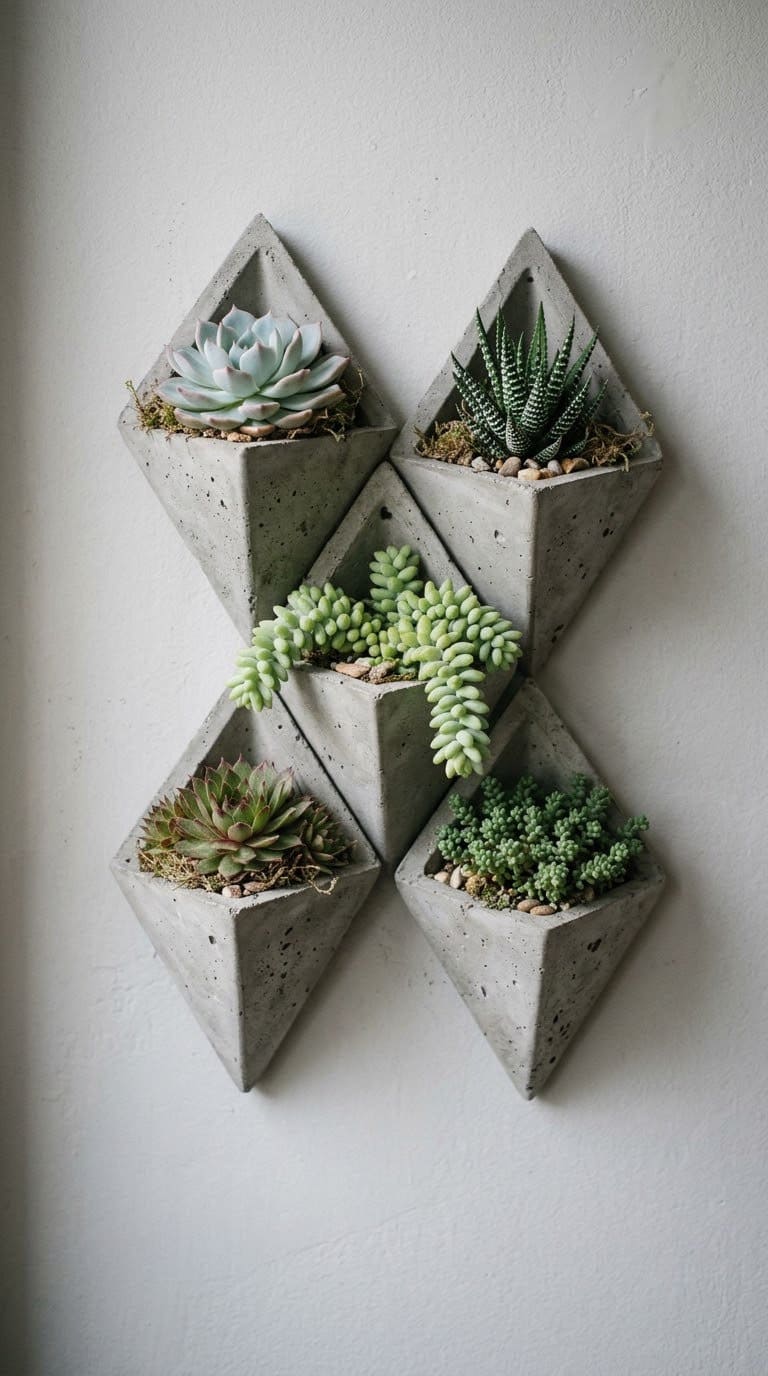
2. Concrete Triangle Wall Planters in Cardboard Molds
This is the cheapest concrete project because the mold is cardboard. It’s also the one most beginners can finish with no special tools.
The A Piece of Rainbow modular planters by designer Ananda use pourable concrete mix such as Quikrete 3000 lb. She screens the large aggregate out with a nursery pot, keeps the small stuff for strength and mixes with the bag’s proportions. Each planter takes roughly 1.5 to 2 cups of concrete.
For the drain holes, she glues folded 3/8-inch cardboard strips to the inside bottom of the outer mold. Those strips become the drainage and hanging openings. Leave the planters in the molds for at least three days, misting daily under plastic.

Then demold, soak for a day and let dry. Give planted succulents a couple of weeks to root before you hang or stack them, and use one or two nails or screws per planter. Pairs well with idea 6 if you want a mixed wood and concrete wall.
3. The Nested-Container Concrete Cube
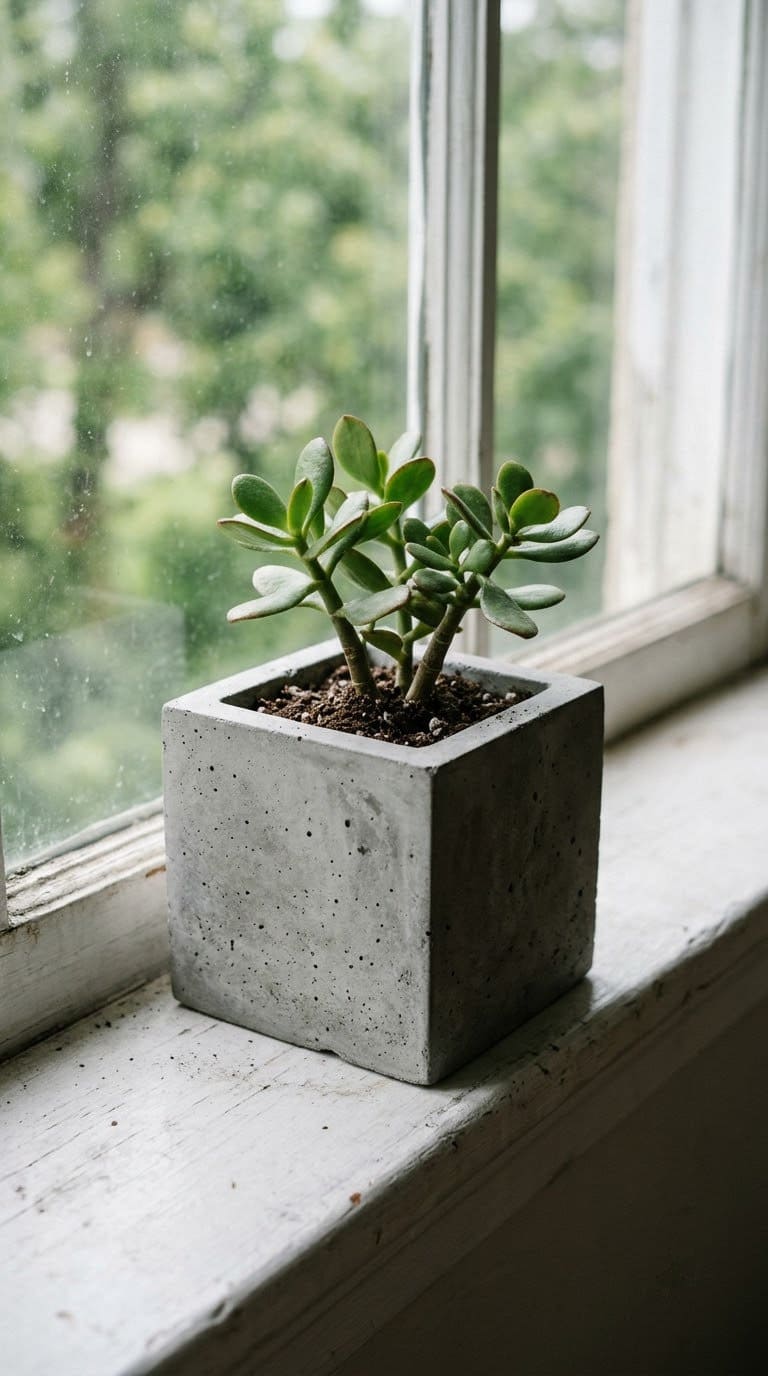
This works like the cardboard version, but uses two plastic containers that fit one inside the other. It makes a sturdier, heavier planter.
The gap between the two containers is your wall. A good target is about 1/2 inch, which is our own rule of thumb rather than a sourced figure. Walls much thinner than that crack more easily.
Spray the inside of the outer container and the outside of the inner one with cooking spray so they release. Pour in the mix, tap the sides to release air bubbles and weigh the inner container down so it doesn’t float up. Wiggle in a short length of dowel or a halved cork at the bottom to leave a drain hole.
Wait several days before demolding. Sand the rim lightly, then soak the finished cube before planting.
4. Straw-and-Wire Hanging Himmeli
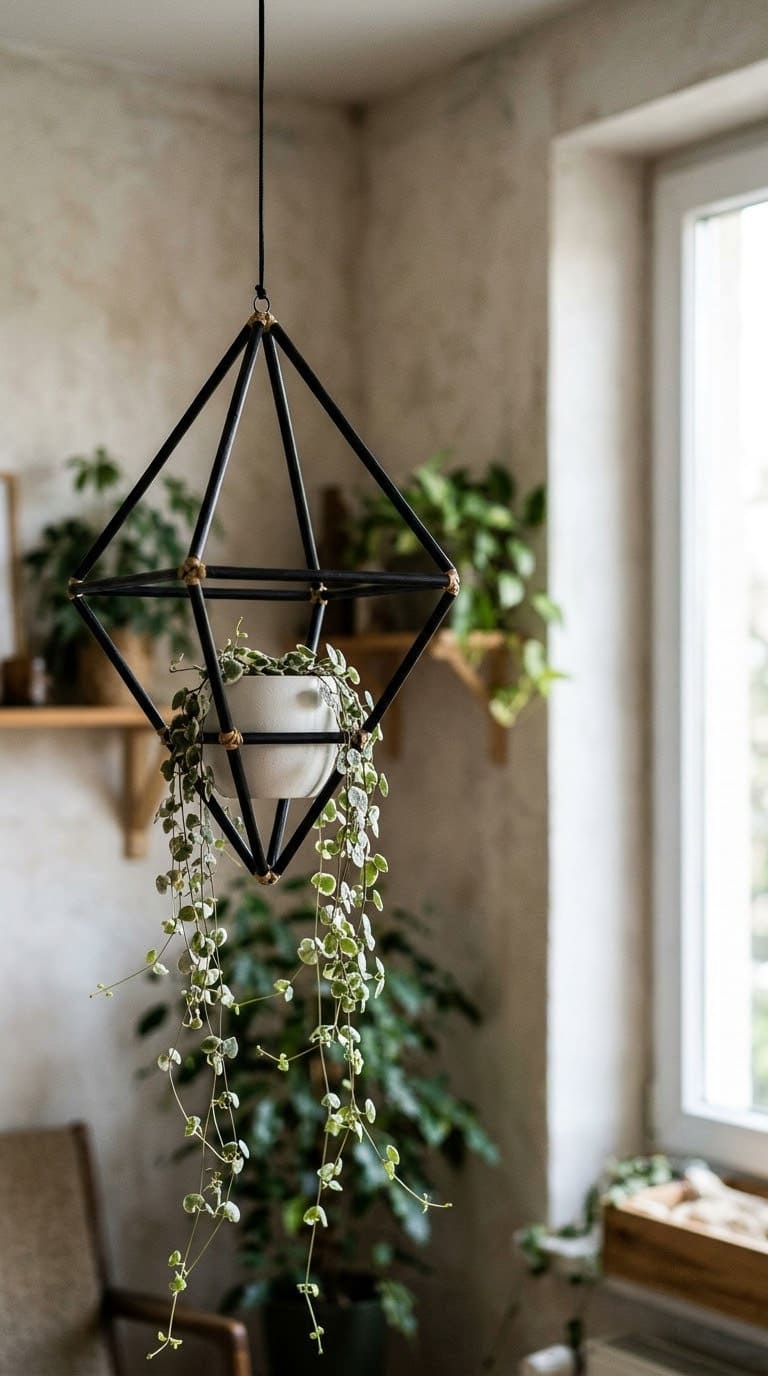
A himmeli is a hanging frame of straight pieces joined at corners. It’s the lightest, cheapest geometric project here.
Thread plastic drinking straws onto garden wire. Bend the wire into pentagons and join them into a sphere or cluster.
One popular version is spray painted afterward. The frame doesn’t hold soil. It cradles a small plastic nursery pot or a rooted cutting in a glass jar.
Keep the load small. Think a 3 to 4 inch pot, not a 6 inch one. Check the wire knots each season, because straws and thin wire don’t age as well as metal in full sun.
5. Brass Tube Hanging Planter
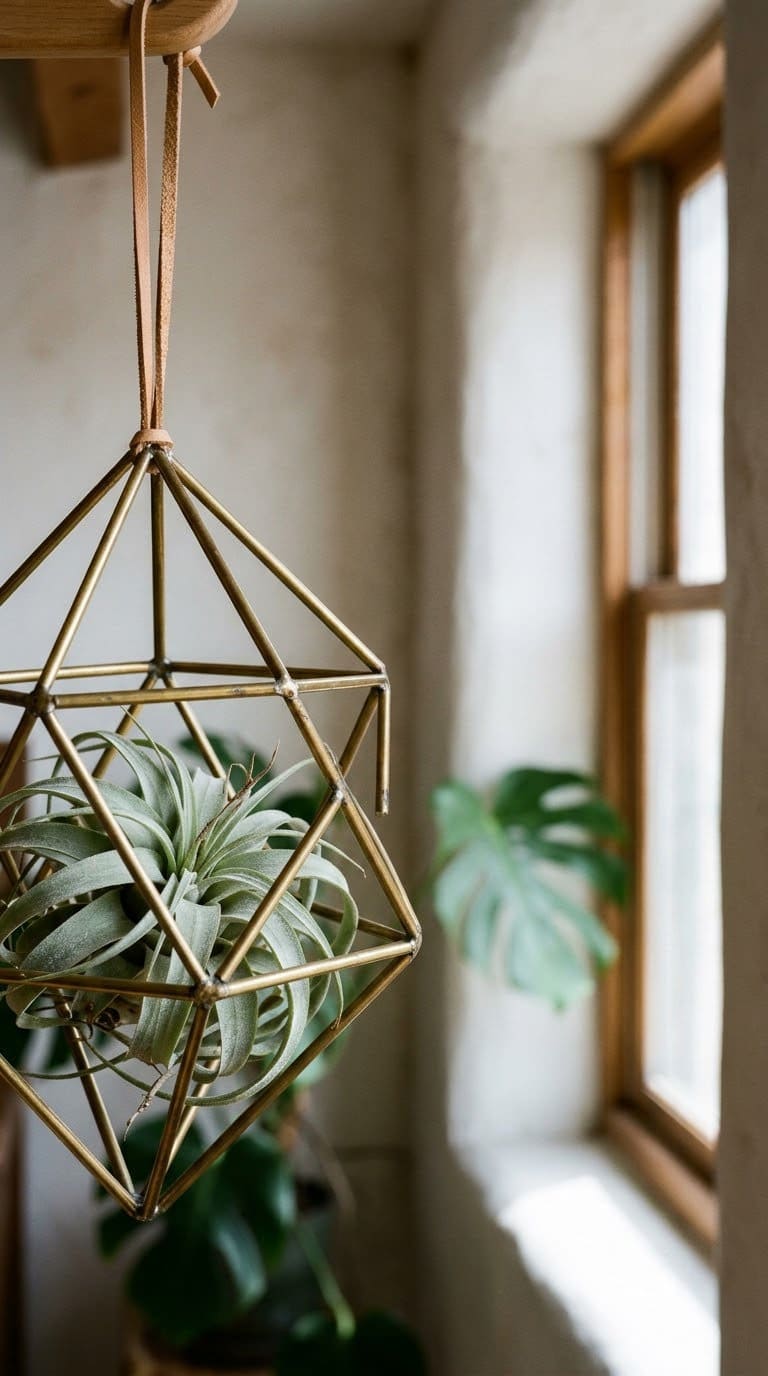
This is the premium version of idea 4. Brass tubing looks like metal sculpture and lasts for years.
One popular brass tutorial builds a three-dimensional triangle frame from brass tubing and floral wire. It’s finished with a leather cord and a small bowl. A tubing cutter gives clean ends, and a drill with a small bit helps if you want to thread the wire through.
Buy a bit more tubing than you think you need. Cutting mistakes add up fast on a small frame.
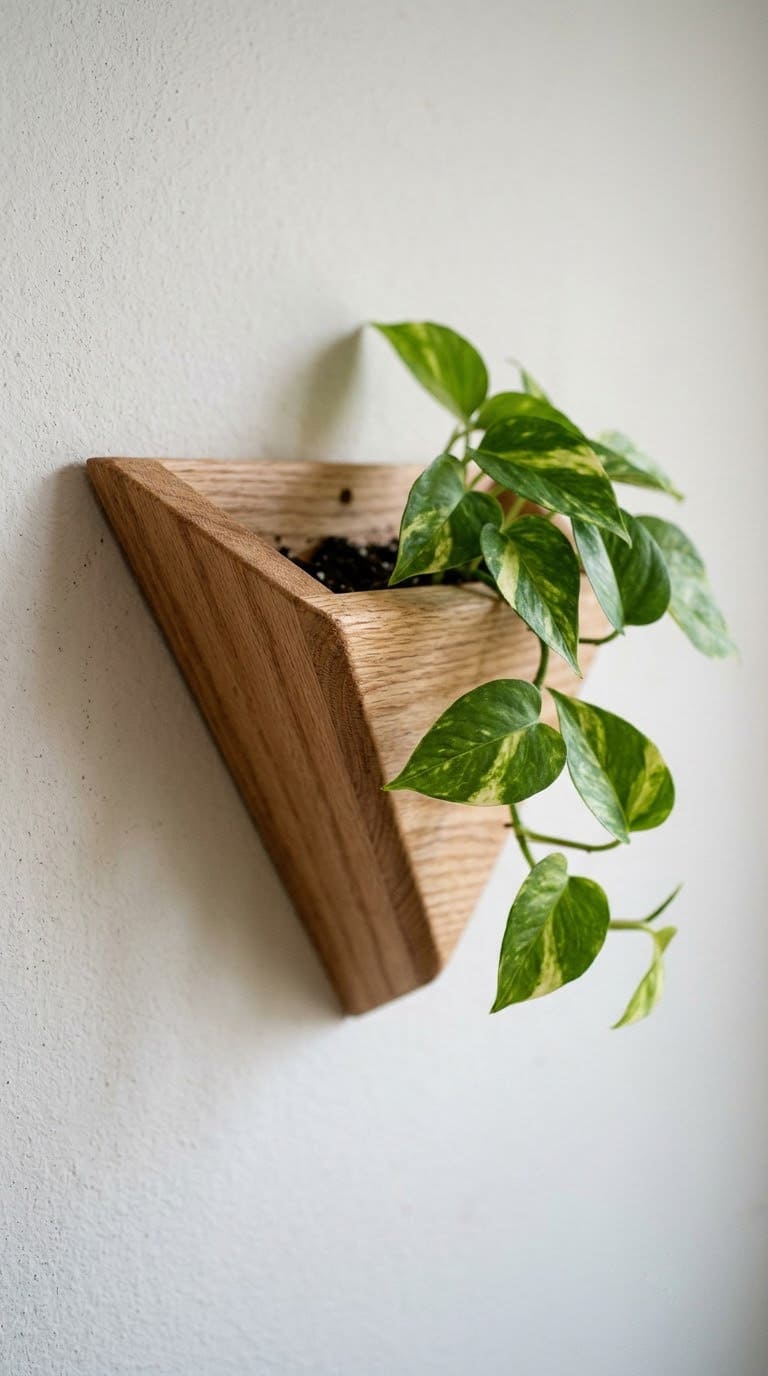
6. Scrap-Wood Triangle Wall Planter
If you’ve got offcuts, this is the free project. Triangles hold better than squares on a wall.
One DIY blogger builds a small triangle wall planter from scrap canvas-frame wood and chose the triangle over a square to limit sagging. Keep it small, about the size of a mug, and mount it into a stud or use a heavy-duty anchor.
Sand the inside before assembly, because you can’t reach it afterward. That tip comes straight from the This Old House build, and it applies here too.
7. Color-Block Painted Terracotta
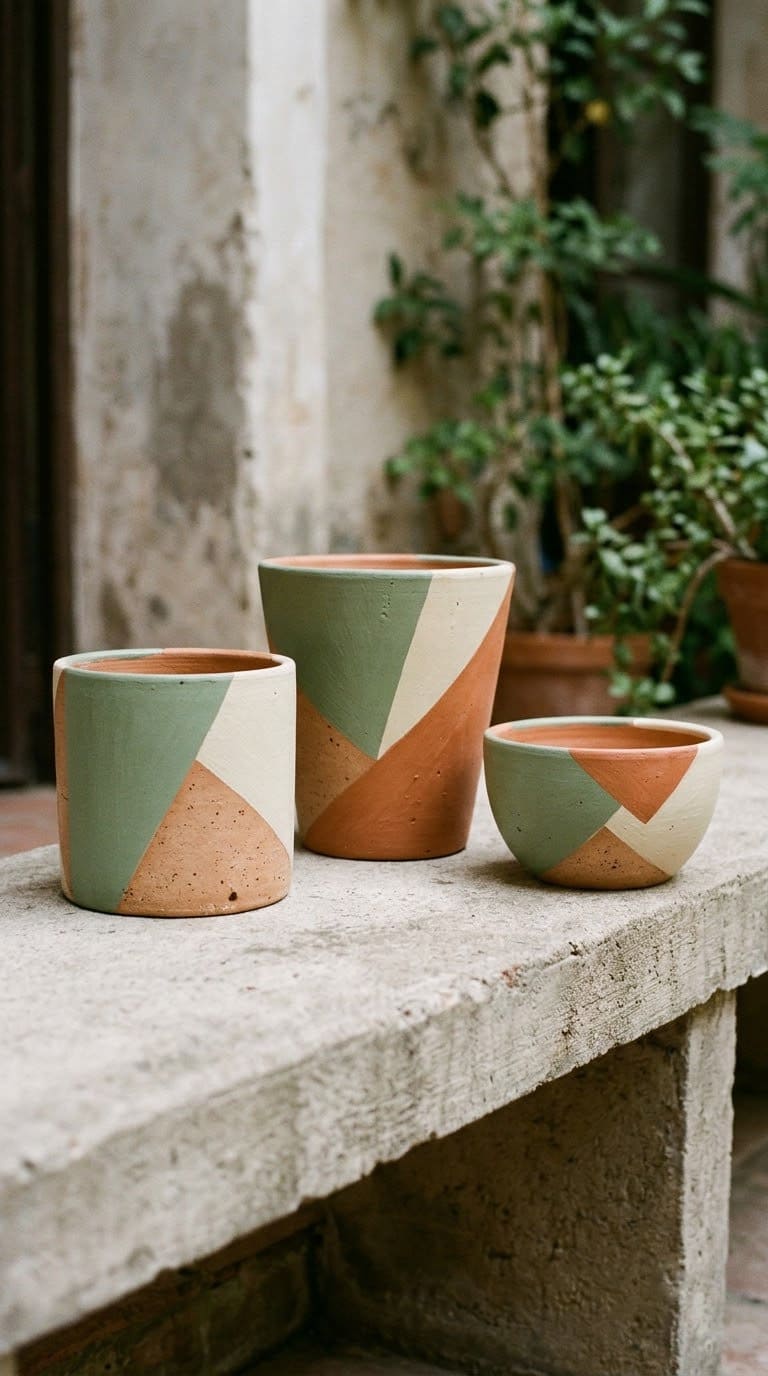
This is the easiest upgrade. You make a plain clay pot look geometric with tape and paint.
Press painter’s tape in angled lines across the pot, then paint the exposed section in a bold color. Pull the tape while the paint is still slightly tacky for a crisp line. Seal outdoors, since unsealed paint flakes where terracotta absorbs water.
Skip the inside of the pot. Paint there blocks the clay from breathing. See more ways to dress up a cheap pot in our low-budget DIY garden pot ideas.
8. Three-Tier Hexagon Stack
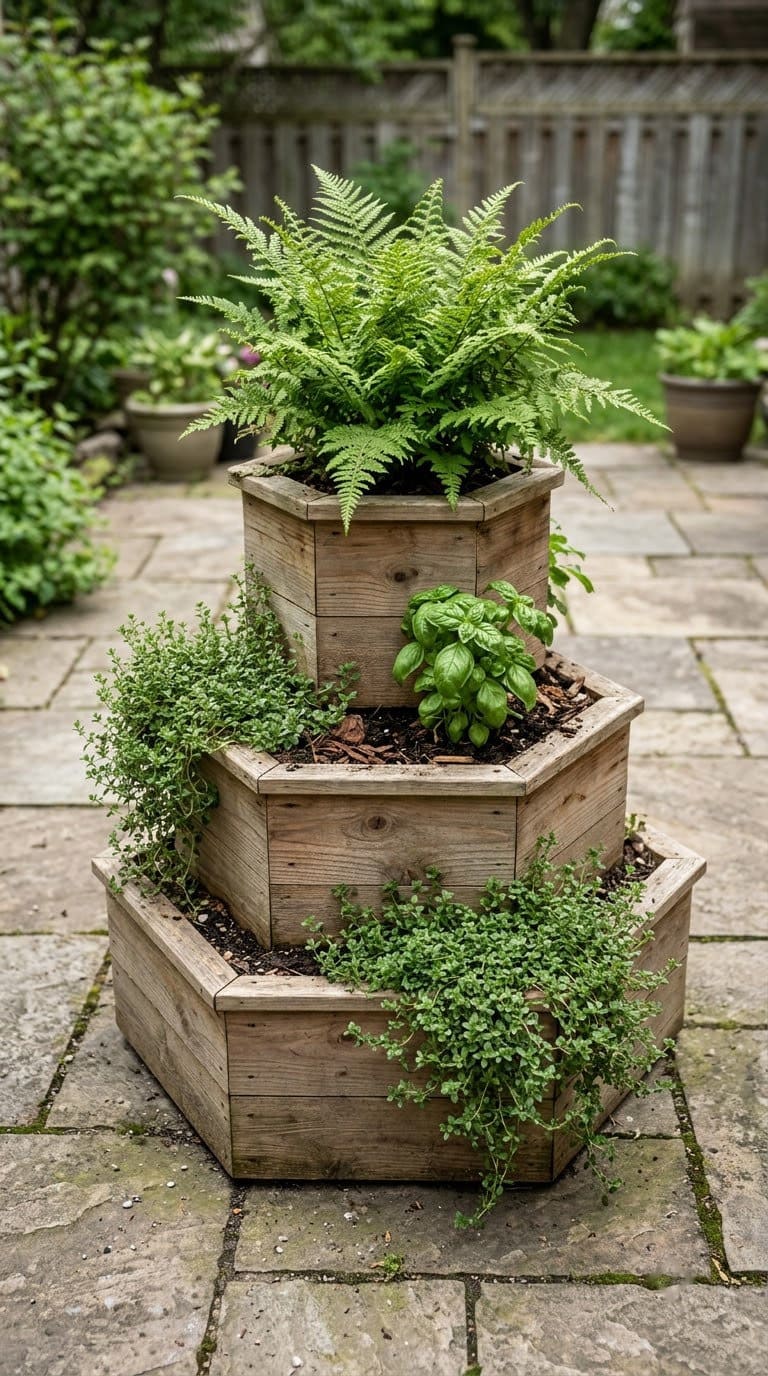
Stacking is where hexagons shine. Three boxes in graduated sizes make a patio centerpiece.
Build the three hexagons from idea 1, each about 2 inches larger across than the next. Stack them offset so each tier shows a ledge for plants. Use a bit of exterior construction adhesive to hold them in place, and keep the top tier lightest.
Plant trailing varieties on the lower ledge so they spill down. Put an herb on the top tier. For container herbs that suit it, see growing culinary herbs in pots.
9. The Angled-Front Herb Trough
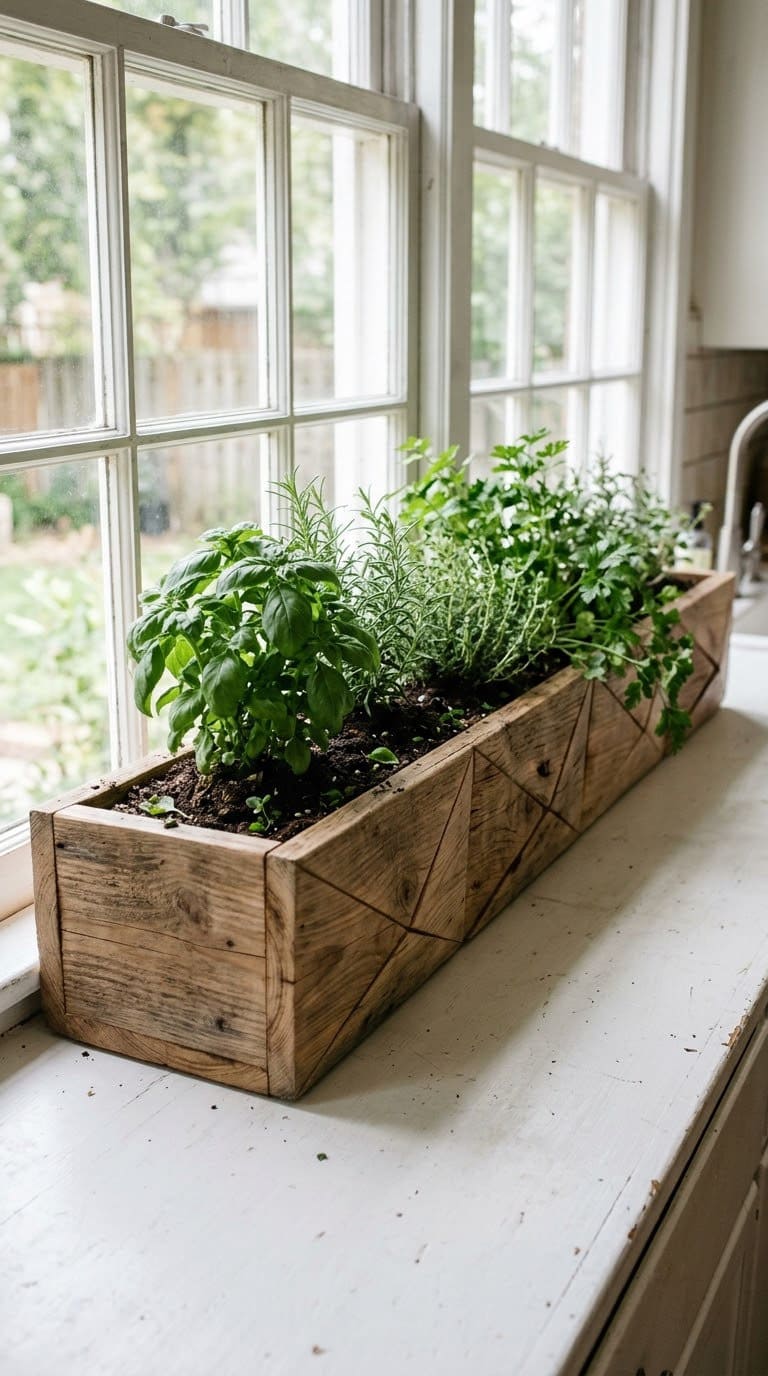
A long trough with a faceted front suits a windowsill or railing. It gives you more soil than a single prism.
Build a plain box with a bottom and ends. Then cut the front panel as two boards beveled to meet at an angle, so the face looks folded. Keep the depth at 6 to 8 inches, which is our guideline for most herbs.
Drill drain holes every few inches and set the trough on small feet so air can move under it. Don’t pack the bottom with gravel. A common container rule says a gravel layer just shortens usable root space.
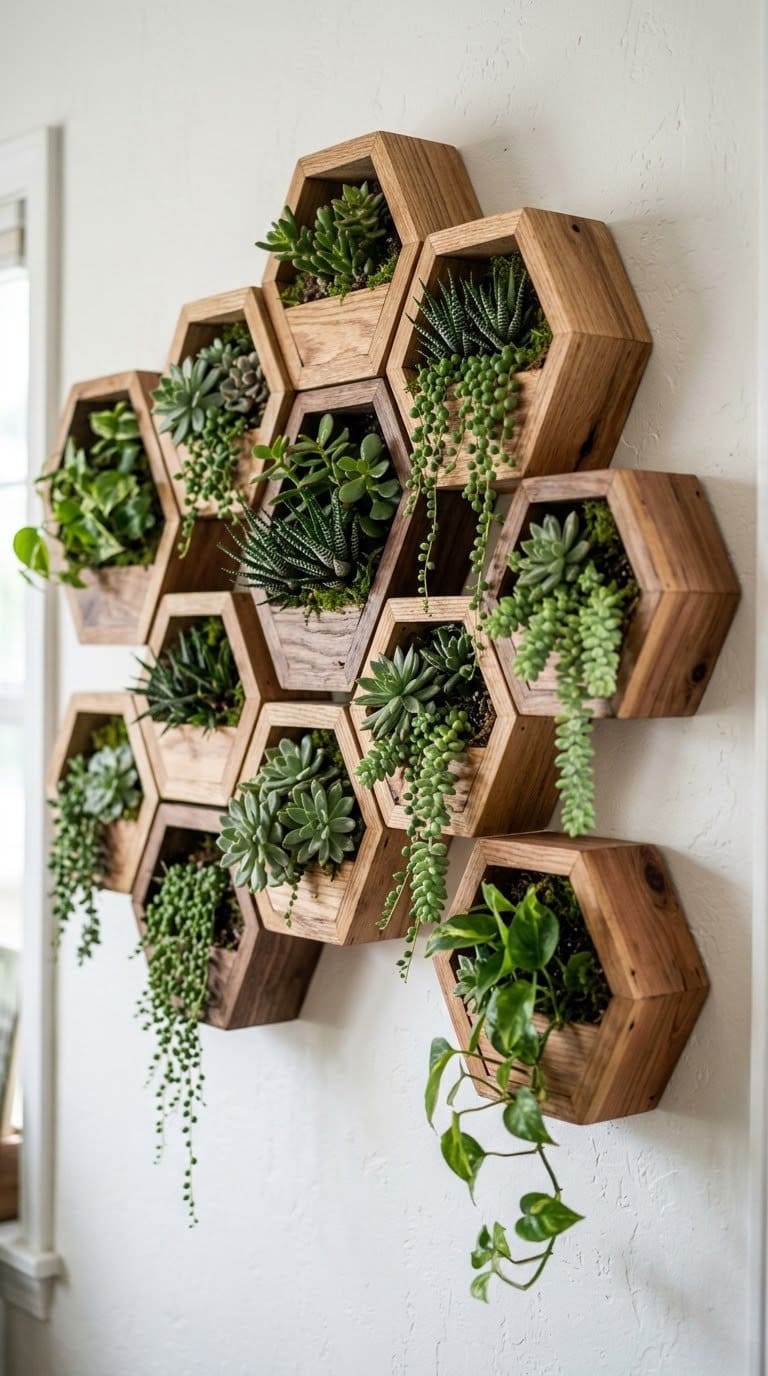
10. Hexagon Honeycomb Wall
This is the show-off project. You build a dozen small hexagons and group them like a honeycomb.
Because every hexagon shares the same 30 degree bevel, you can batch cut. Set the stop block once and run the whole stack. Check each piece against the first, as Largesse recommends.
Mount each planter separately into studs or anchors rather than screwing them to one another. Wall weight adds up fast once soil is wet. Mix wood and concrete pieces from idea 2 for contrast.
Common Mistakes to Avoid
Most first builds fail in the same few places.
Concrete you plant in too soon. Fresh concrete is highly alkaline, which is why Ananda soaks her finished planters before planting. Skipping the soak can leave plants struggling.
Wet cement on bare skin. A CDC case report describes a concrete worker whose boots let cement soak through, causing second-degree burns above the glove line. For small DIY pours, wear snug gloves that cover your forearms and keep a hose nearby.
Dust. Wear a dust mask when you mix and sand. Fine cement dust is not something to breathe.
A saw set one degree off. A small bevel error multiplies across six joints and opens a visible gap on the last seam. Dry-fit with tape before you glue anything.
Oversized pots. The same extension page warns against overpotting. A plant in a pot that’s too big sits in wet soil for days.
How Much Does Each Project Cost?
Costs vary by region and supplier, so use these as relative tiers rather than prices.
| Project | Budget tier | Why |
|---|---|---|
| Painted terracotta (7) | Lowest | One pot, tape, paint |
| Scrap-wood triangle (6) | Lowest | Offcuts you already own |
| Straw-and-wire himmeli (4) | Low | Straws, wire, spray paint |
| Cardboard-mold concrete (2) | Low | Bag of concrete plus cardboard |
| Nested-container cube (3) | Low to mid | Containers plus more concrete |
| Wood hexagon (1) | Mid | Lumber plus a saw with bevel |
| Brass hanging frame (5) | Mid | Metal tubing costs more |
| Tier stack (8) and honeycomb (10) | Mid to high | Many boards, hardware |
What Plants Work Best in Geometric Planters?
Pick plants that look good against hard edges and suit the container’s size. Small, structured plants do best.
Succulents and air plants suit tiny prisms. Trailing plants like pothos soften a rigid shape on a wall. For more on trailing types, see our guide to trailing and hanging succulents.
Herbs fit the trough and the tier stack. Keep fast growers in bigger planters. A small prism fills with roots quickly.
FAQ
Do geometric planters need drainage holes?
Yes, in almost every case. Illinois Extension says containers with drainage holes are best for most plants. If a planter can’t have a hole, keep the plant in a nursery pot and lift it out to water.
Is concrete safe for plants?
It can be once it’s fully cured and soaked. Fresh concrete is highly alkaline, so give it the soak step before planting.
What bevel angle makes a hexagon?
Thirty degrees on each board edge. Divide 180 by the number of sides for any other shape.
Can I leave wood planters outside?
Yes, with a finish or a liner. Line the inside with landscape fabric, keep the plant in a nursery pot and raise the base off the ground so it can dry.
How long should concrete cure before I plant?
The cardboard-mold method above leaves the pieces in the mold for at least three days, then soaks them a day. Plan on a week total before the first plant goes in.
Related Posts
Never miss an update — choose FarmFoodFamily as your preferred source on Google.
How it works: Tap the button below to open Google's settings page, then check the box next to FarmFoodFamily.
Tap the checkbox to turn it blue — that's how you know it's set.