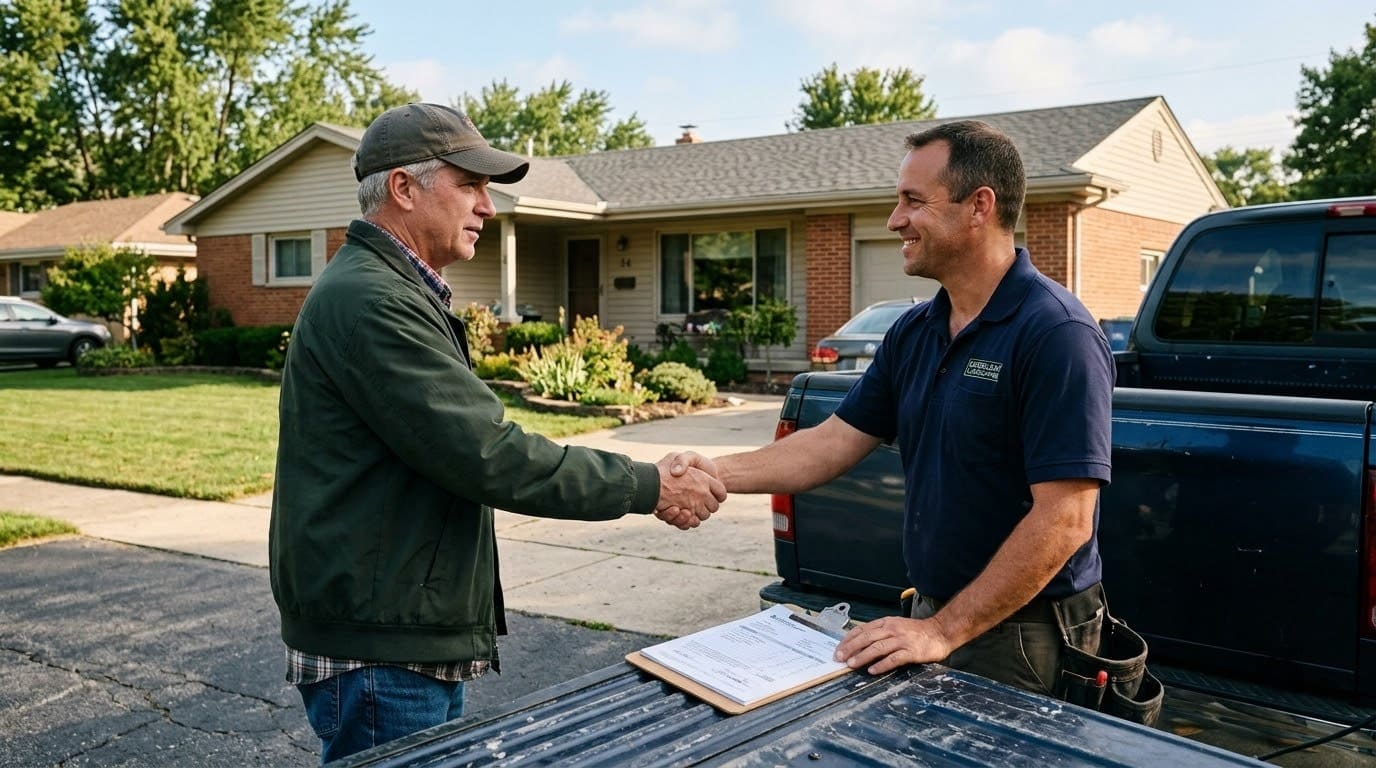
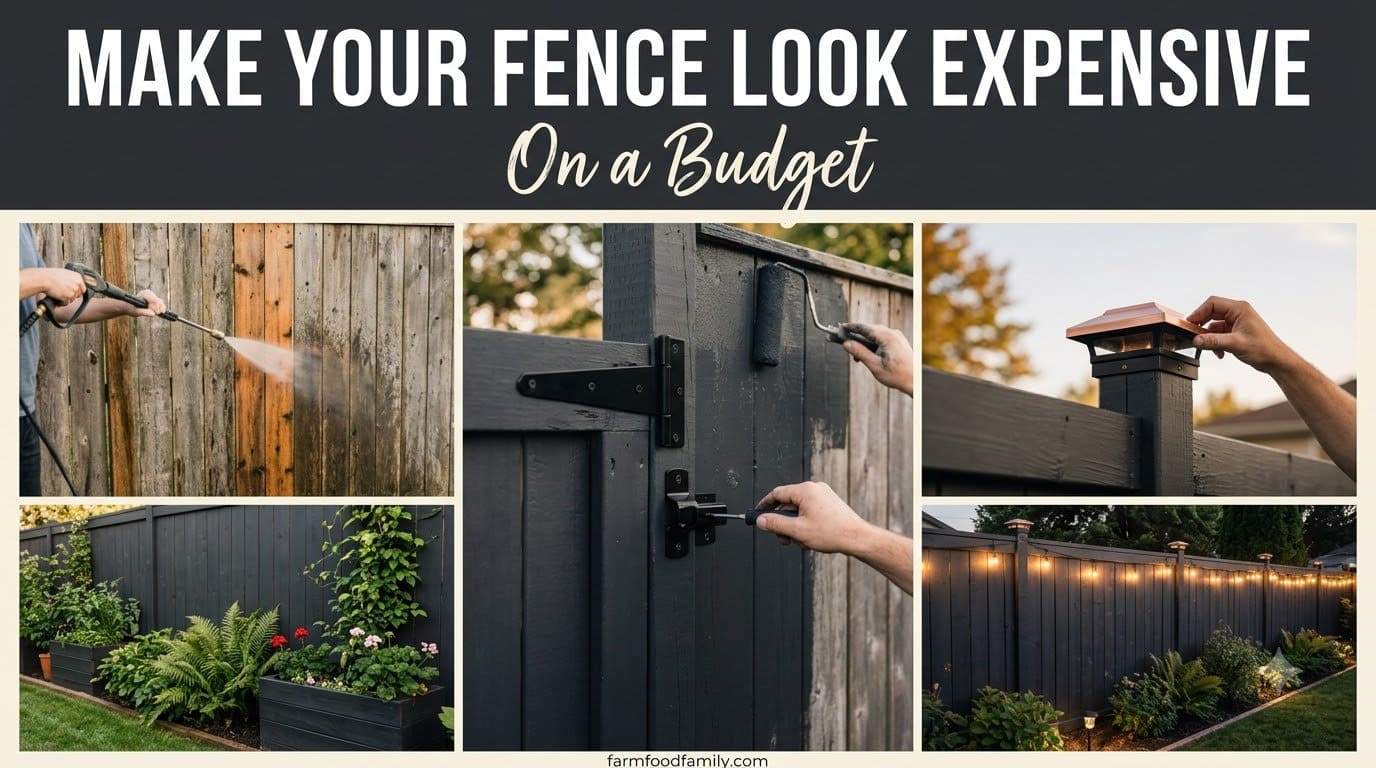
22 Stunning Brick Ranch House Ideas That Fix the Dated Look for Good (2026)
Your brick ranch isn’t ugly, it’s just stuck in 1974, and these 22 real fixes (with real budgets) get it unstuck without a full remodel.

Never miss an update — choose FarmFoodFamily as your preferred source on Google.
How it works: Tap the button below to open Google’s settings page, then check the box next to FarmFoodFamily.
Tap the checkbox to turn it blue — that’s how you know it’s set.
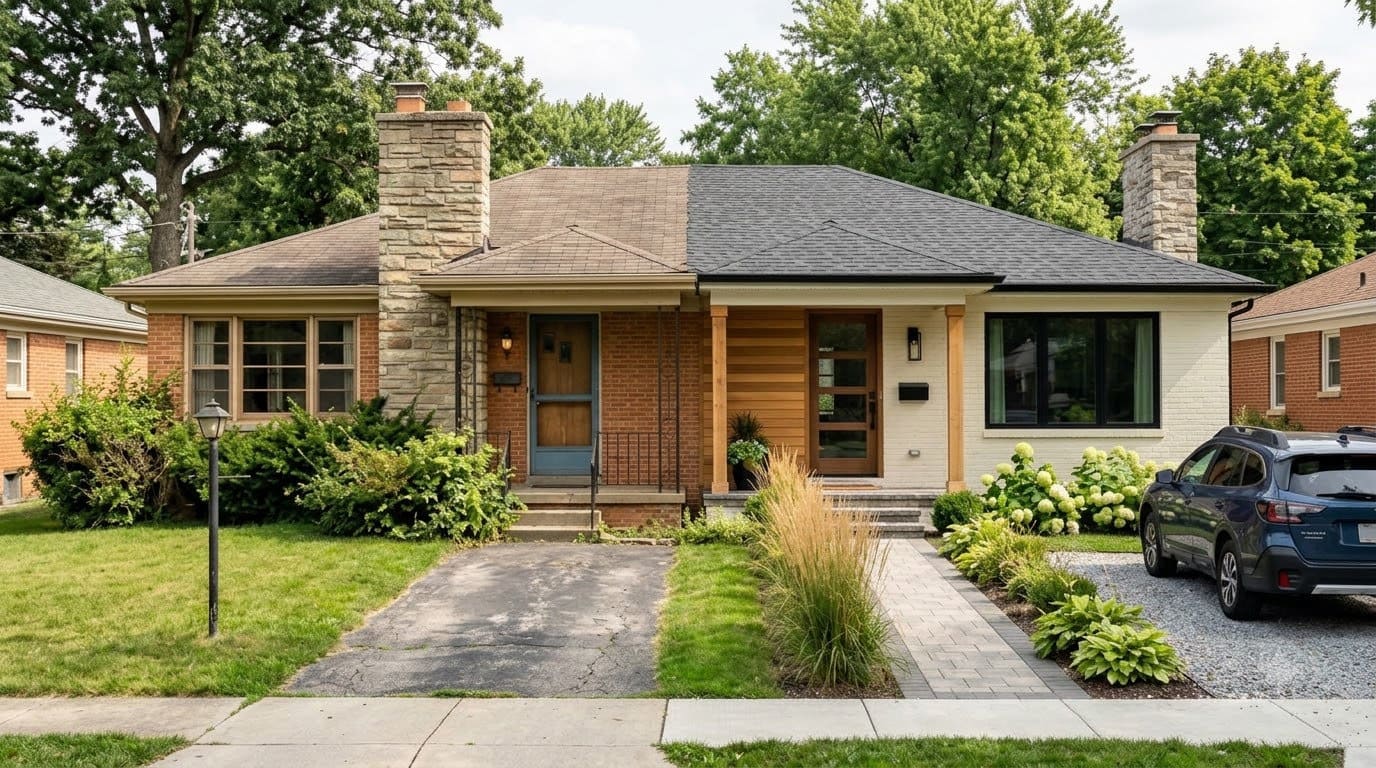
If you own a brick ranch, you already know the feeling. The house is solid, the layout works, the bones are honestly better than half the new builds going up down the street. But it looks tired. Maybe it’s the flat red brick with no texture, maybe it’s that weird band of siding stapled onto the top half like an afterthought, maybe it’s just that nothing about the front of the house has changed since Nixon was in office.
There’s one decision to make before you touch anything: are you keeping the brick natural, or are you painting it? That single choice drives almost every other decision on this list, and it’s worth sitting with for a minute.
Sherwin-Williams’ own painting guidance is honest about this too: brick needs to be at least a year old and in good repair before you paint it, and once it’s painted, it’s painted.
According to the Wisconsin Historical Society, painting historic masonry traps moisture against the wall and is generally not considered reversible in practice, even though people talk about it like it’s a weekend decision. I’m not saying don’t paint your brick. I’m saying know that going in.
One more thing before the list: most of what’s here is cosmetic, paint, lighting, plants, a new door. Anything that touches the roofline (a portico, a roof extension over the porch) or moves/enlarges a window usually needs a local building permit. Check with your municipality before you commit to those bigger swings.
Budget tags below are rough: Budget (under $200), Mid-range ($200 to $1,500), Splurge ($1,500+). Materials and labor costs vary a lot by region, so treat these as a starting point, not a quote.



Work with the brick, don’t fight it
Painting isn’t the only answer, and honestly, a lot of dated-looking ranch brick just needs context, not cover-up.
1. Clean the brick before you judge it.
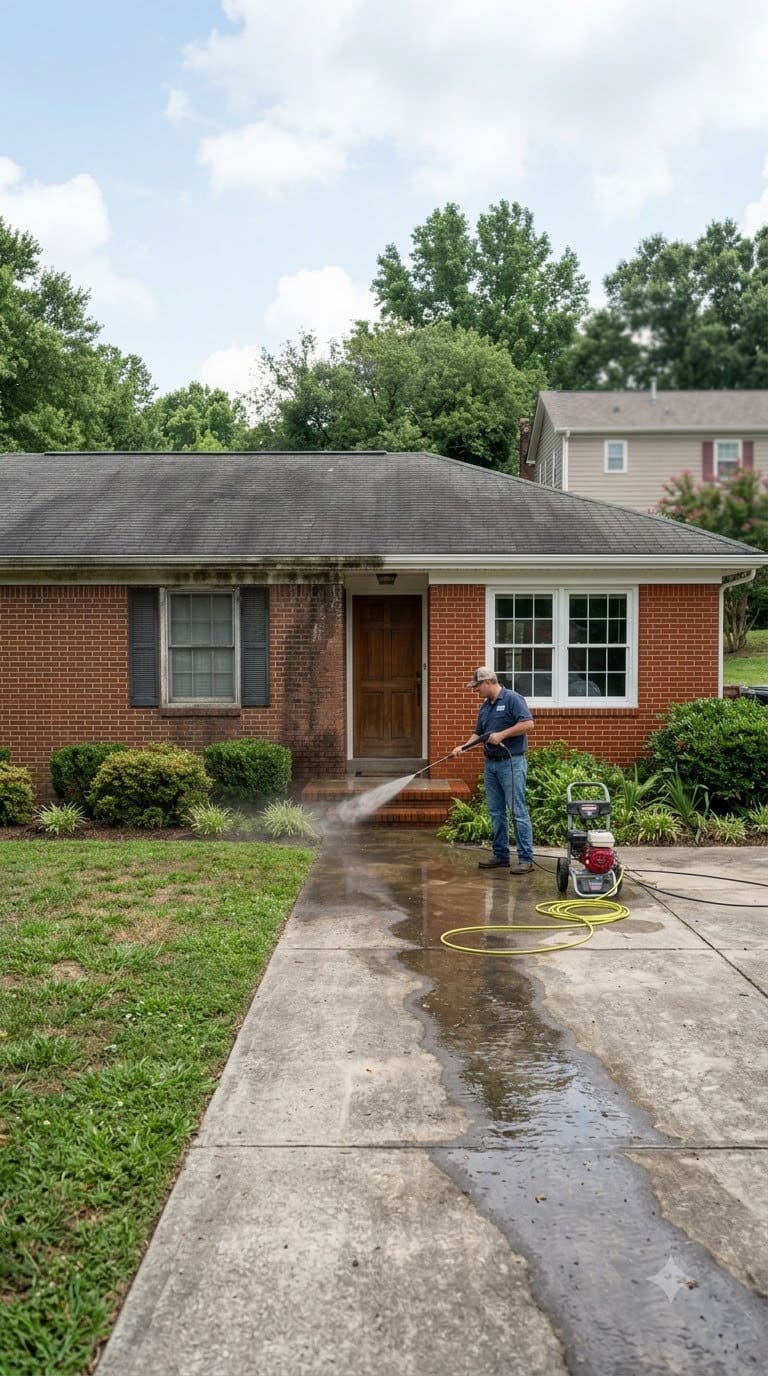
A huge amount of what reads as “dated” is actually just decades of pollen, dirt, and mildew film sitting on the surface.
A TSP-based wash (diluted per the label, roughly half a cup per gallon of warm water) and a stiff brush can knock years off the look for the price of a bucket and an afternoon.
One common mistake here: cranking a pressure washer above 1,500 psi and holding the tip a few inches from the wall, which drives water into the mortar joints and erodes them faster than the dirt ever would.
Keep the nozzle at a wide fan angle, roughly 45 degrees, and stay at least a foot back. Do this first, always, even if you’re planning to paint eventually. Budget tier: Budget.
2. Repoint the mortar joints.
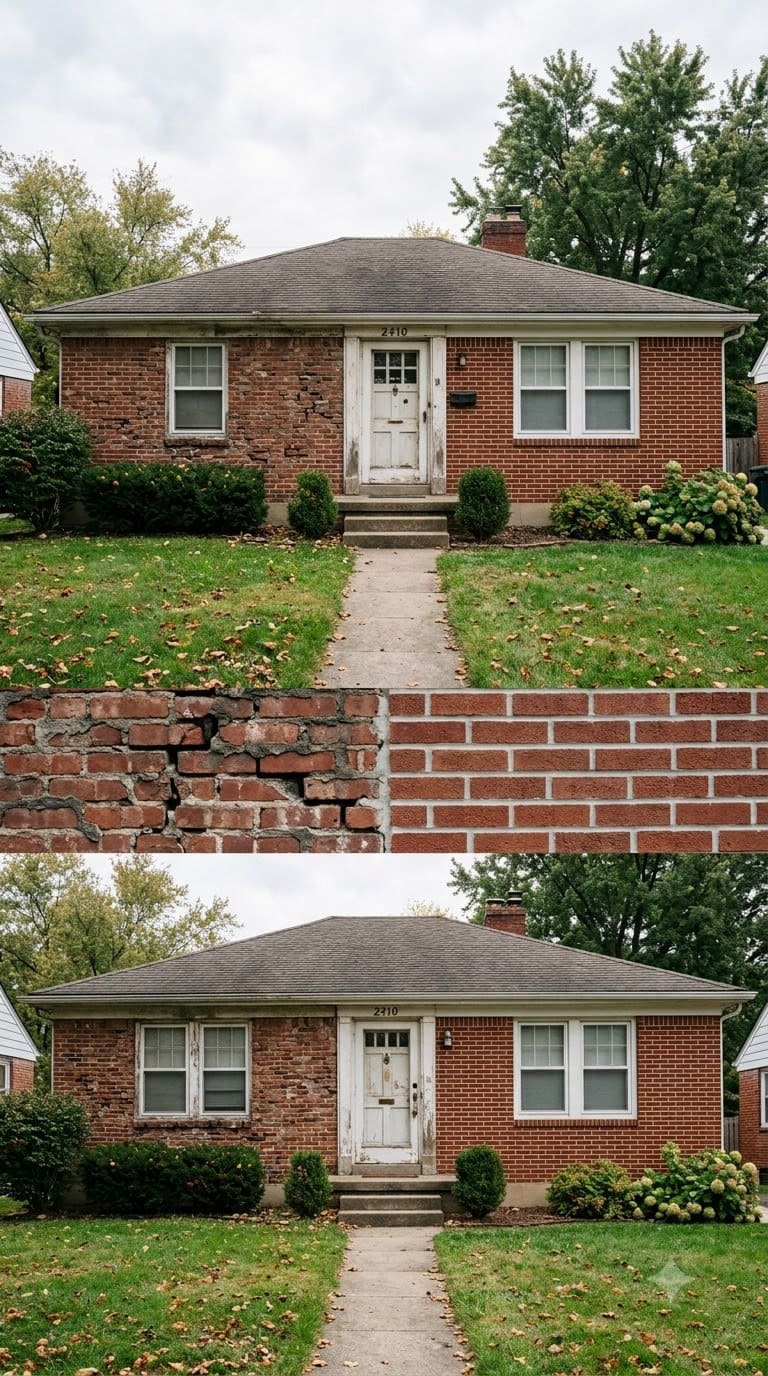
If the mortar between your bricks is crumbling, cracked, or a weird patchy gray from old repairs, repointing (grinding out the old mortar and packing in new) resets the whole facade’s texture without touching the brick color at all.
Match the new mortar’s tint and joint profile to the old work, or it’ll look like a patch job instead of a restoration. Joints deeper than about a quarter inch should get raked out fully before repacking, and most 1950s-1970s ranches want a Type N mortar mix, softer, older pre-1930 brick sometimes needs Type O so the mortar stays weaker than the brick itself and takes the wear instead of cracking it. Mid-range, sometimes Splurge if the whole house needs it.

Self-priming acrylic latex paint made for masonry and brick, covers 250-400 sq ft per gallon, mildew-resistant and water-repellent finish. Good starting point if you've decided to paint rather than limewash.
Shop NowThis post contains affiliate links. We may earn a commission on qualifying purchases at no extra cost to you.
3. Swap the shutters for a size that actually fits the windows.
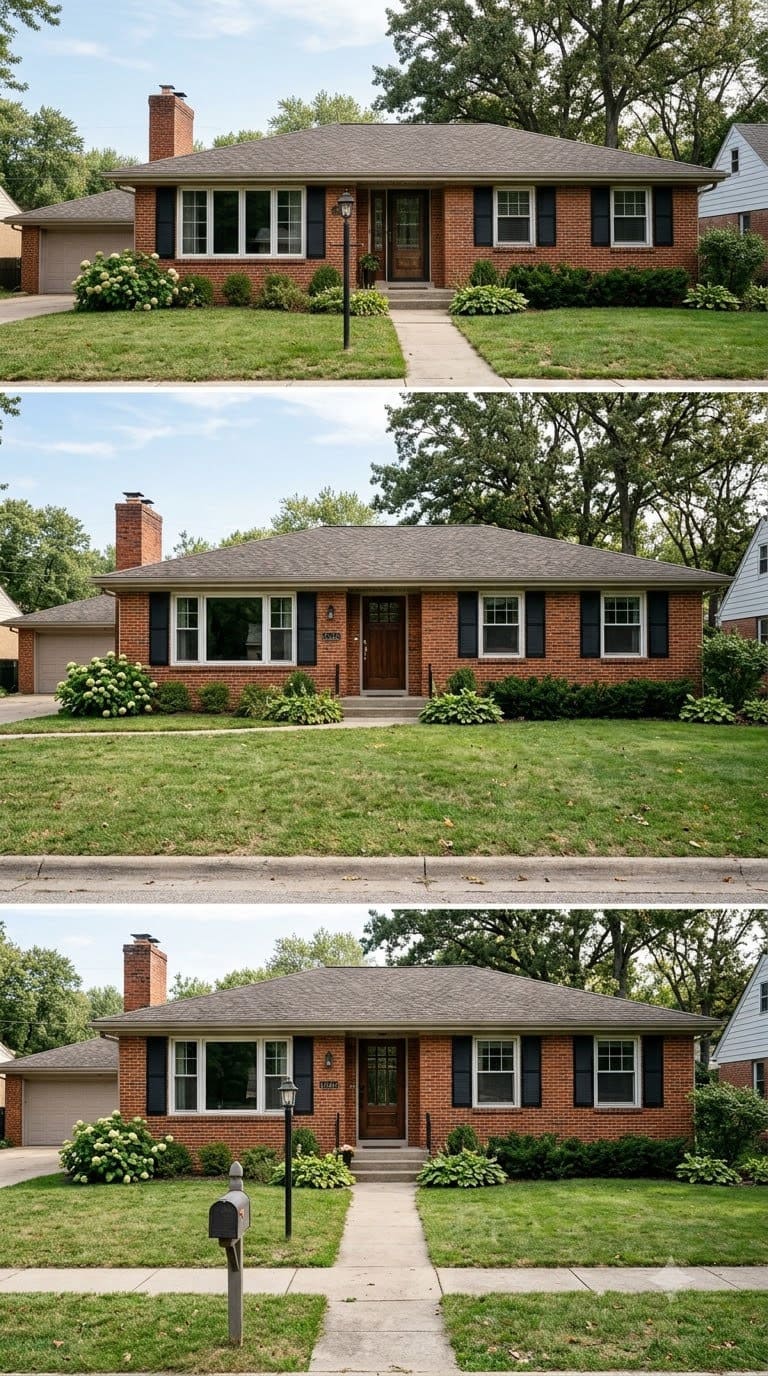
This sounds too simple to matter, but half the “off” feeling on a ranch facade comes from shutters that are visibly too narrow for the window they’re supposedly meant to close.
Measure the window opening and buy shutters sized to actually cover half of it if closed, even if you’re mounting them decoratively. Composite (not vinyl) holds paint better and won’t warp in full sun.
Add furring strips, about three-quarters of an inch, behind the mounts so the shutters sit slightly proud of the wall instead of flush, that small gap creates a real shadow line and reads as functional hardware rather than a flat decoration screwed straight to the brick. Budget to Mid-range.
4. Add a stone or brick veneer accent at the base.
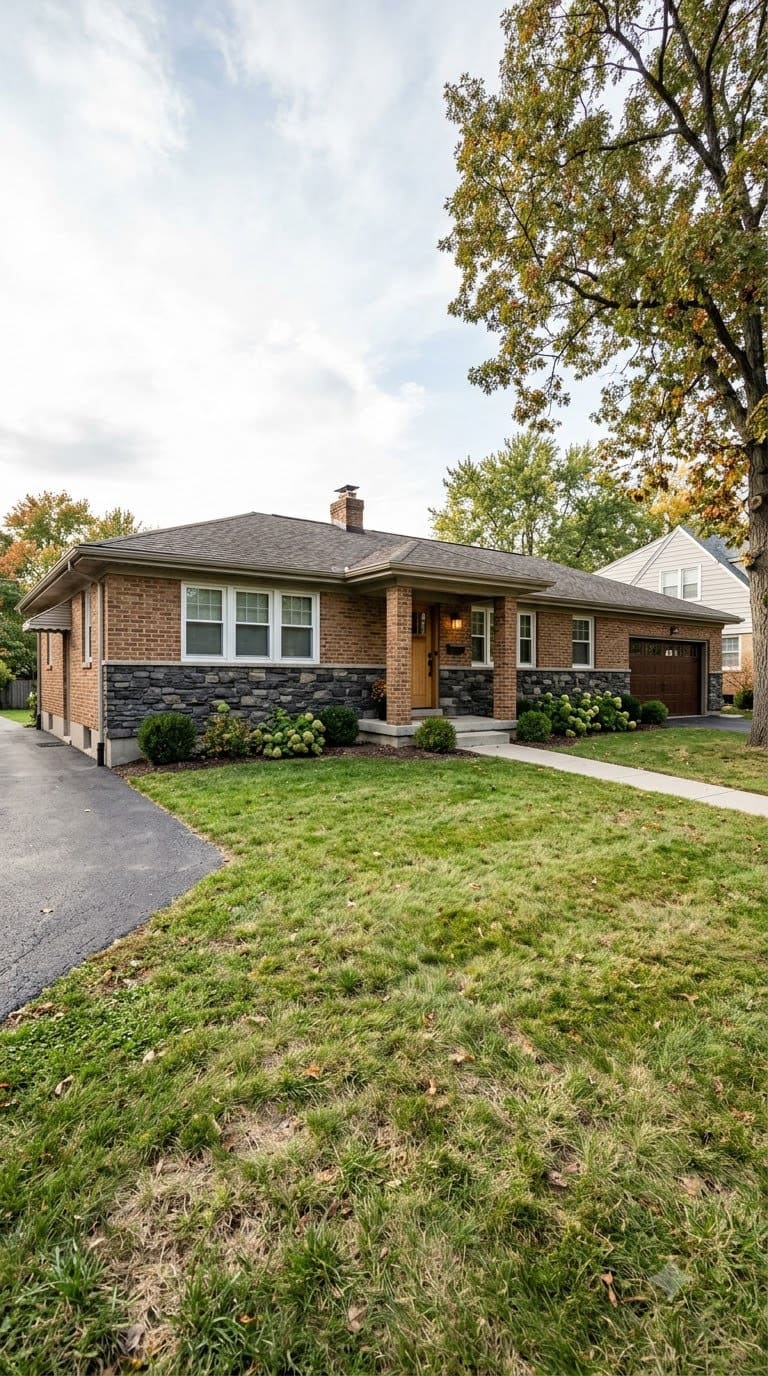
A contrasting veneer, ledgestone or a darker brick, at the bottom third of the facade or wrapping the garage gives a flat brick wall real depth without a full re-clad.
This is one of the more effective fixes brick&batten’s own before-and-afters keep coming back to, and it reads as an intentional design choice rather than a repair.
Manufactured stone veneer typically runs an inch to an inch and a half thick and needs a weep screed installed at the base so trapped moisture has somewhere to drain, skip that detail and you’re setting up rot behind the very accent meant to fix the wall. Splurge.
5. Widen and darken the window trim.
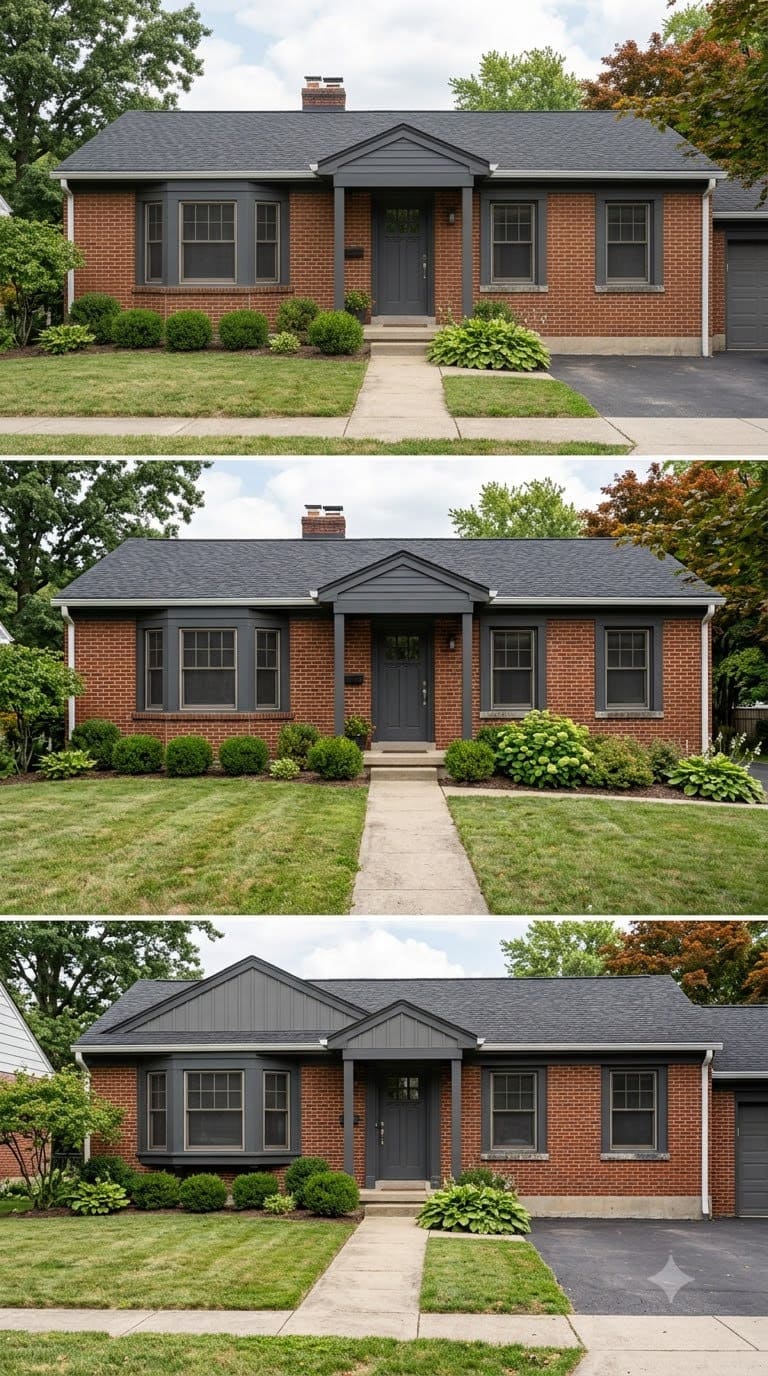
Wide, dark trim (charcoal, black, deep bronze) against red or tan brick does a lot of heavy lifting for very little money.
It gives the windows visual weight and makes the whole facade look more architecturally deliberate instead of like four holes punched in a wall.


Most original ranch trim runs about 3.5 inches wide, widening it to 5 or 6 inches makes a real visible difference, and stick with a satin finish rather than gloss since gloss trim shows every dent and brush mark under direct sun. Budget to Mid-range, mostly labor if you’re hiring it out.
6. Replace the garage door, not just paint it.
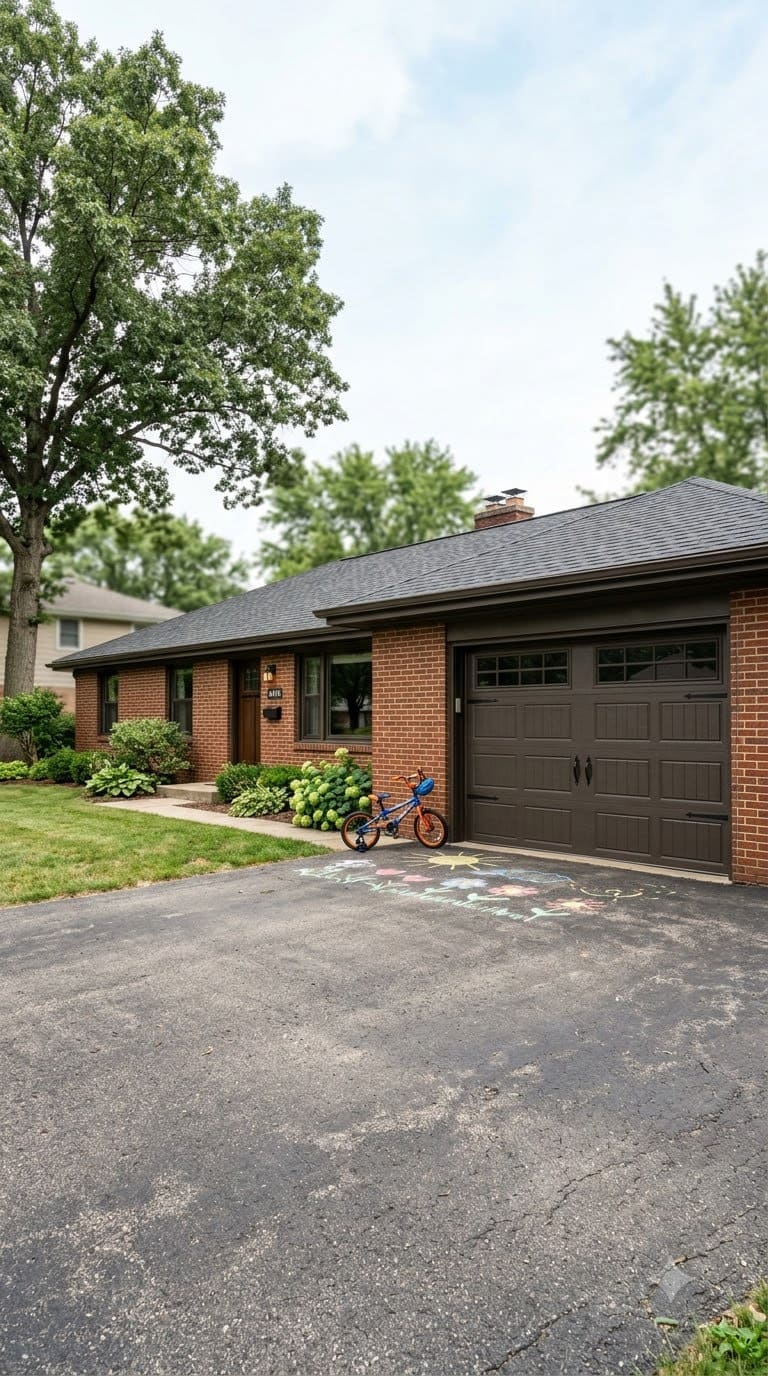
On a ranch, the garage door is often the single largest visual element on the front of the house, sometimes bigger than the front door and windows combined.
A carriage-style door with real (or faux) hardware changes the whole read of the facade. If a new door isn’t in the budget this year, at minimum repaint the existing one in a color that coordinates with your trim, not the brick.
Most ranch garage doors are a standard 16 by 7 feet, so buy strap hinges and handles sized for that scale, not the small decorative kits made for a single-car carriage door, undersized hardware on a big door reads as a toy rather than an upgrade. Mid-range to Splurge.
Paint and limewash, if you’re going there
This is the section for owners who’ve already decided: the brick is coming.
7. Try limewash before committing to full paint.
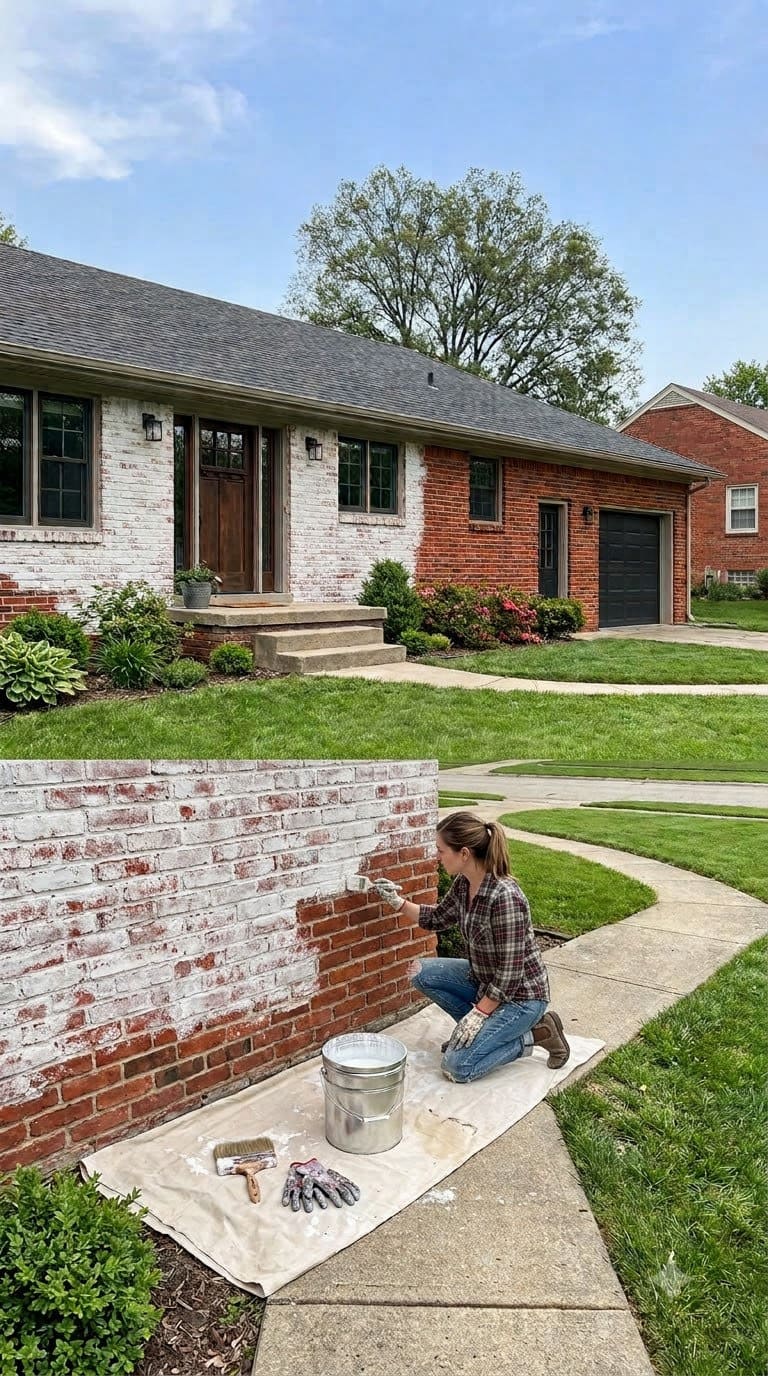
Limewash sits differently than acrylic paint, it’s more of a mineral wash that lets some of the brick’s texture and variation show through, and it’s breathable in a way regular paint isn’t.
It’s also easier to remove while it’s fresh (a pressure washer will strip a lot of it off), which makes it a lower-stakes way to test whether you actually like painted brick before you go full commit.
Apply it in two or three thin coats rather than one heavy pass, the first coat almost always looks patchy and uneven, which panics people into over-applying, and that’s exactly what causes flaking down the line. Mid-range.
8. If you paint, prime it right.
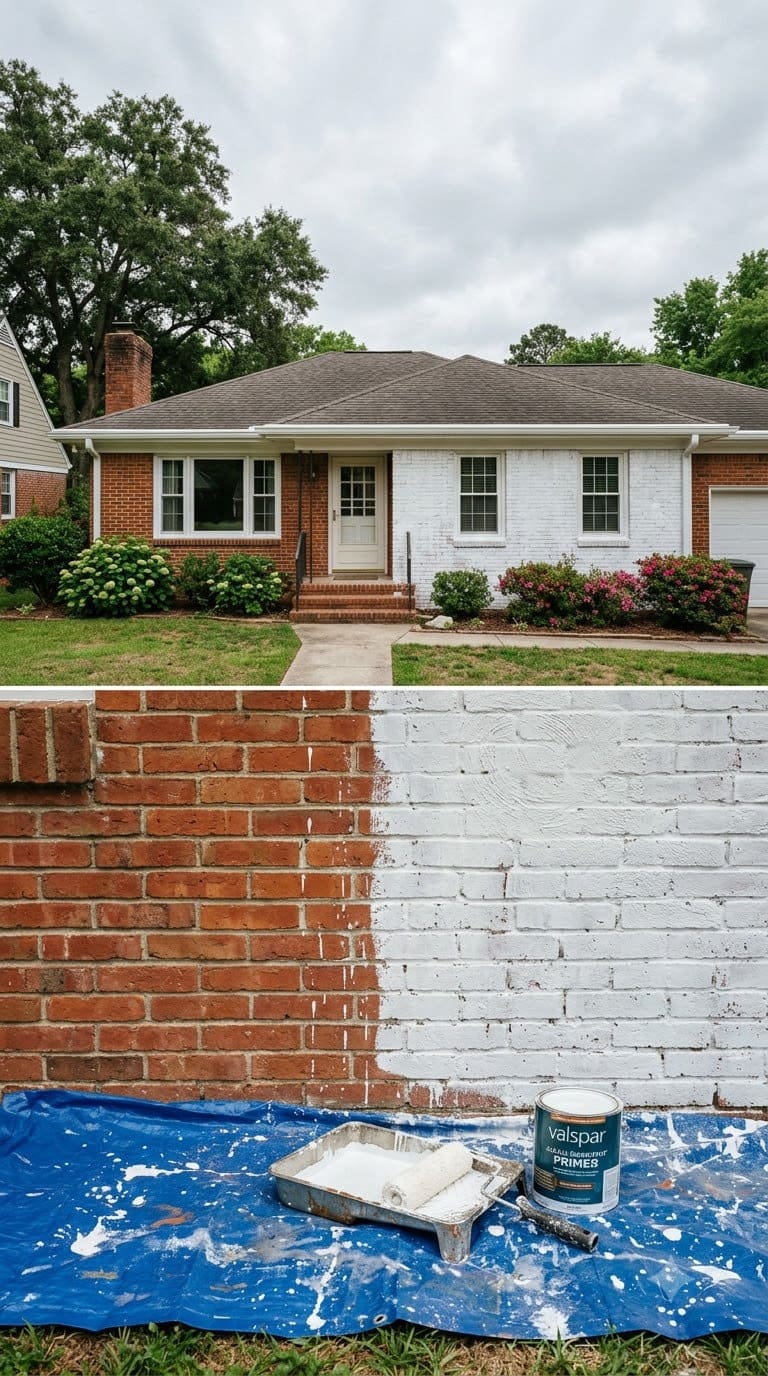
Skip this step and you’ll be repainting in three years. Sherwin-Williams recommends a dedicated masonry conditioner or an alkali-resistant primer before the topcoat, and their guidance is specific that Loxon-type primers shouldn’t go on brick or mortar less than a year old.
This isn’t a “any primer will do” situation. Give the primer a full 24 hours to cure before topcoating, and stretch that to 48 or even 72 hours in cold or humid weather, rushing this step is the single most common reason people end up with paint peeling off in sheets within a year or two. Mid-range to Splurge depending on square footage.
9. Go with a warm white or greige, not stark white.
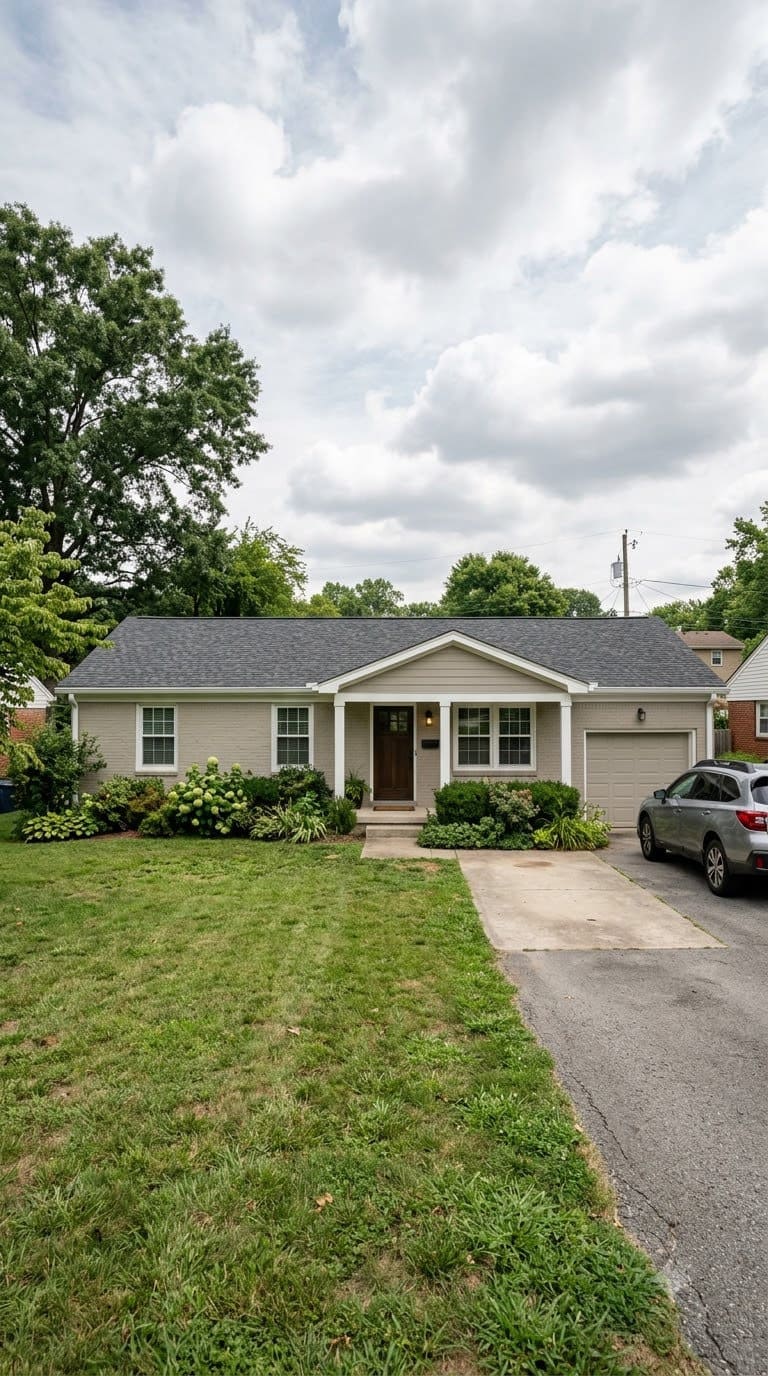
Stark white brick photographs beautifully but shows every bit of dirt, tree sap, and lawn-sprinkler overspray within a season.
A warm white or soft greige (competitor research turned up Benjamin Moore’s Pale Oak and Simply White as popular real-world picks) hides grime better and still gives you that bright, updated look.
Test a large sample board directly on the brick itself, not just on siding or drywall, and look at it in morning and late-afternoon light, brick’s texture scatters light differently than a smooth paint chip does, so colors that look right on the little card can read colder or pinker once they’re on the actual wall. Mid-range.
10. Or go dark and moody instead of light.
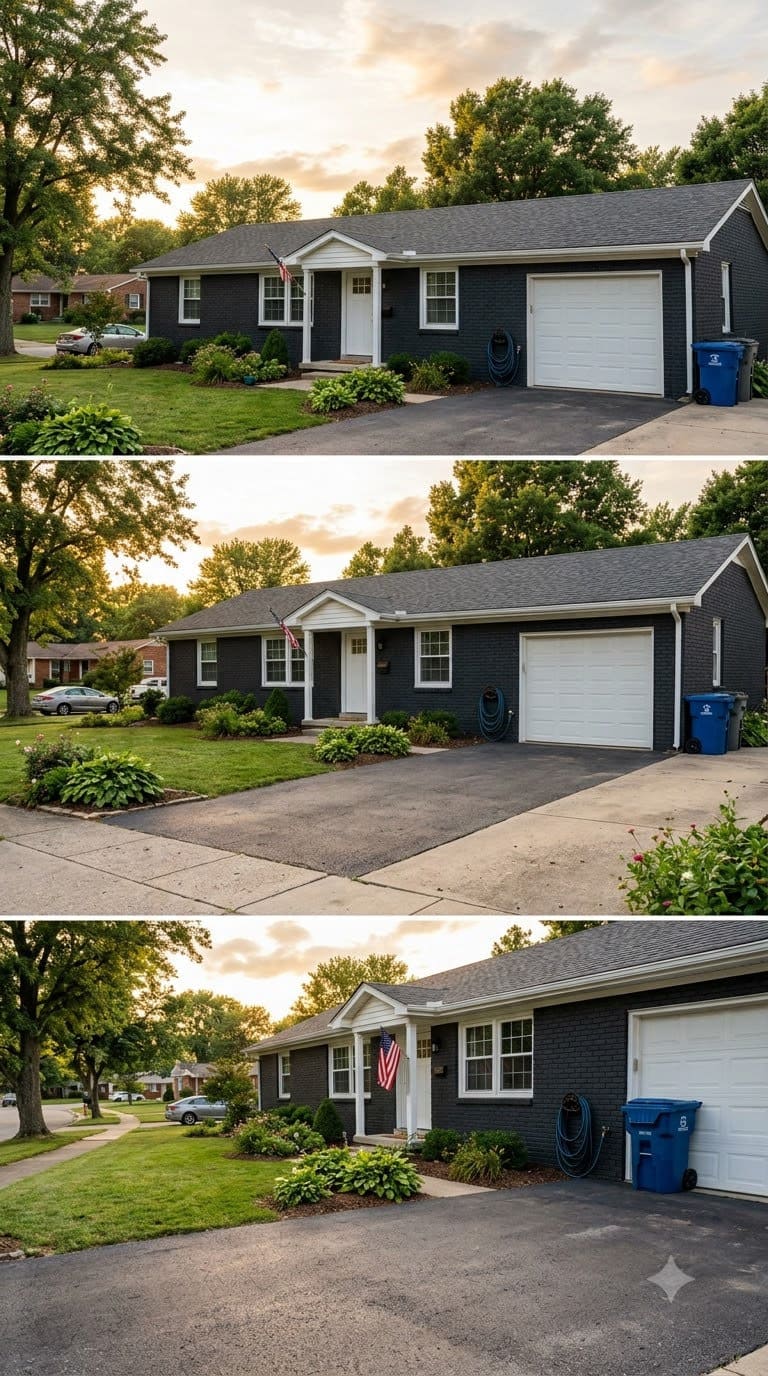
Charcoal or near-black brick (Benjamin Moore Kendall Charcoal and Sherwin-Williams Tricorn Black both show up a lot in real before-and-afters) reads modern and expensive, and it hides dirt far better than white does.
This is the move if your neighborhood already has three white farmhouse conversions on the block and you want the house to look like a different decision, not a copy.
One tradeoff worth knowing: dark pigments absorb a lot more heat, and on a wall with full southern exposure and little shade that can push surface temperatures up noticeably in summer, which shortens paint life over time.
Look for a formula with reflective or “cool color” pigment technology if your facade gets hit with sun most of the day. Mid-range.
11. Keep the trim a genuinely different value than the brick, not just a different hue.
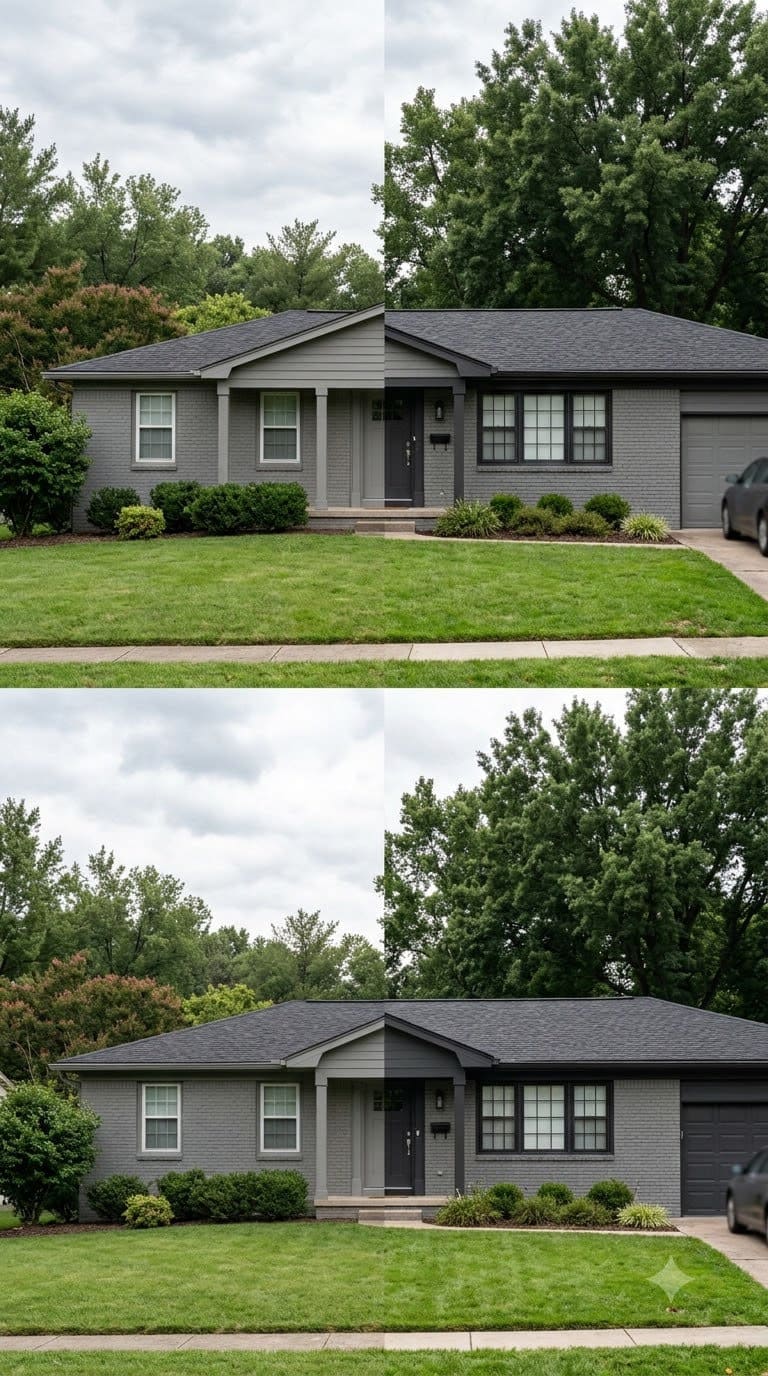
A common mistake: painting the brick a mid-tone gray and the trim a slightly different mid-tone gray. From the street, it reads as one flat blob. Push the trim noticeably lighter or darker than the field color so the architecture still has edges.
The trap is picking that trim color off a tiny paint chip indoors, where subtle value differences look obvious, then finding it reads as basically identical to the field color once both are up on the full facade in daylight, always test full-size boards outside before committing. Free, this is a paint-selection decision, not a cost.
12. Accept that you’re not getting the brick back easily.
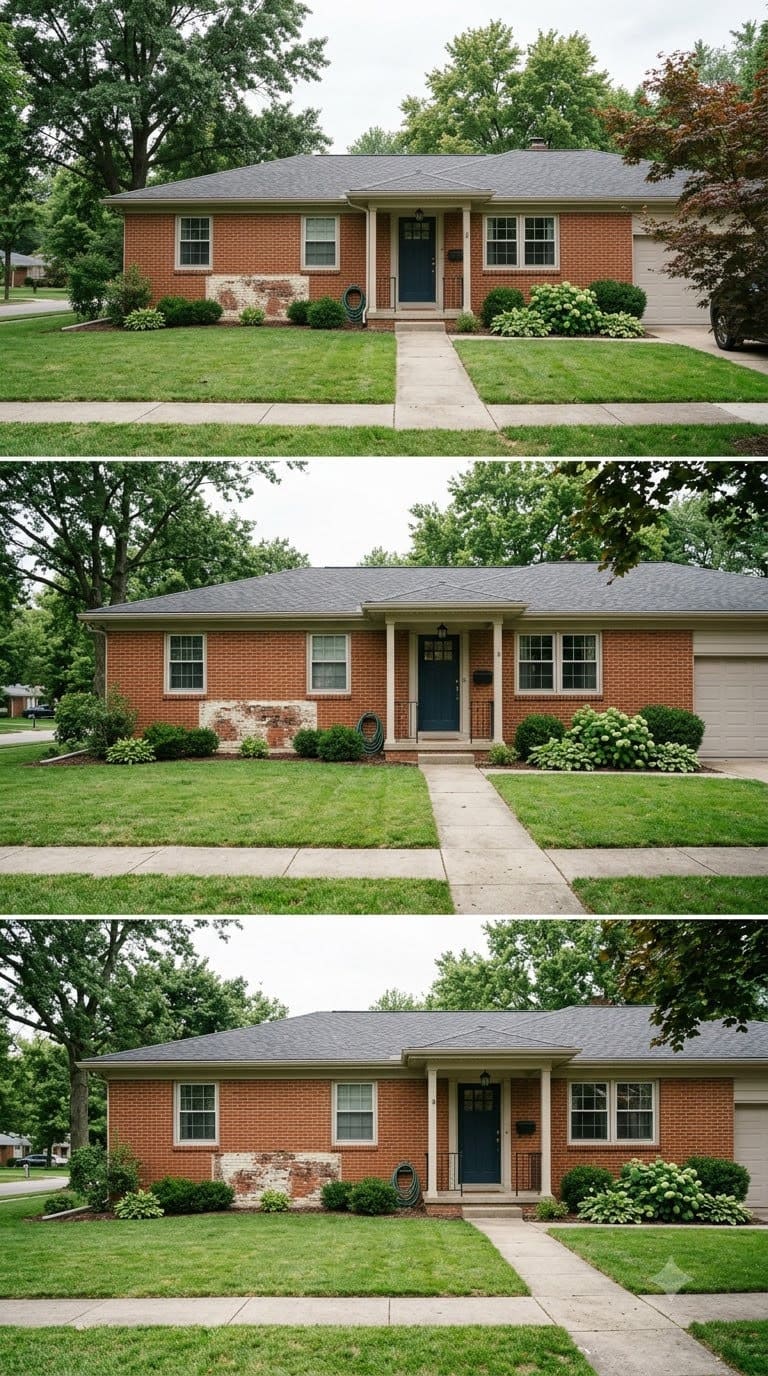
This is the one non-negotiable in the whole list. Once acrylic paint is on brick and cured, stripping it back to bare masonry is a specialized, expensive job, and it isn’t guaranteed to come out clean.
Removal usually means a chemical poultice or gel stripper applied in stages, and on a modest ranch facade that can easily run into several thousand dollars with no guarantee every trace of pigment comes out of the brick’s texture.
If there’s any chance a future owner (or future you) will want exposed brick again, limewash is the safer bet. If you’re sure, paint away, plenty of people are thrilled with the result and never look back.
Fixing the half-brick, half-siding look
If your ranch has brick on the bottom and siding, shingles, or board-and-batten up top (or vice versa), this is its own specific problem, and it’s the one competitor content barely touches.
13. Color-block on purpose instead of by accident.
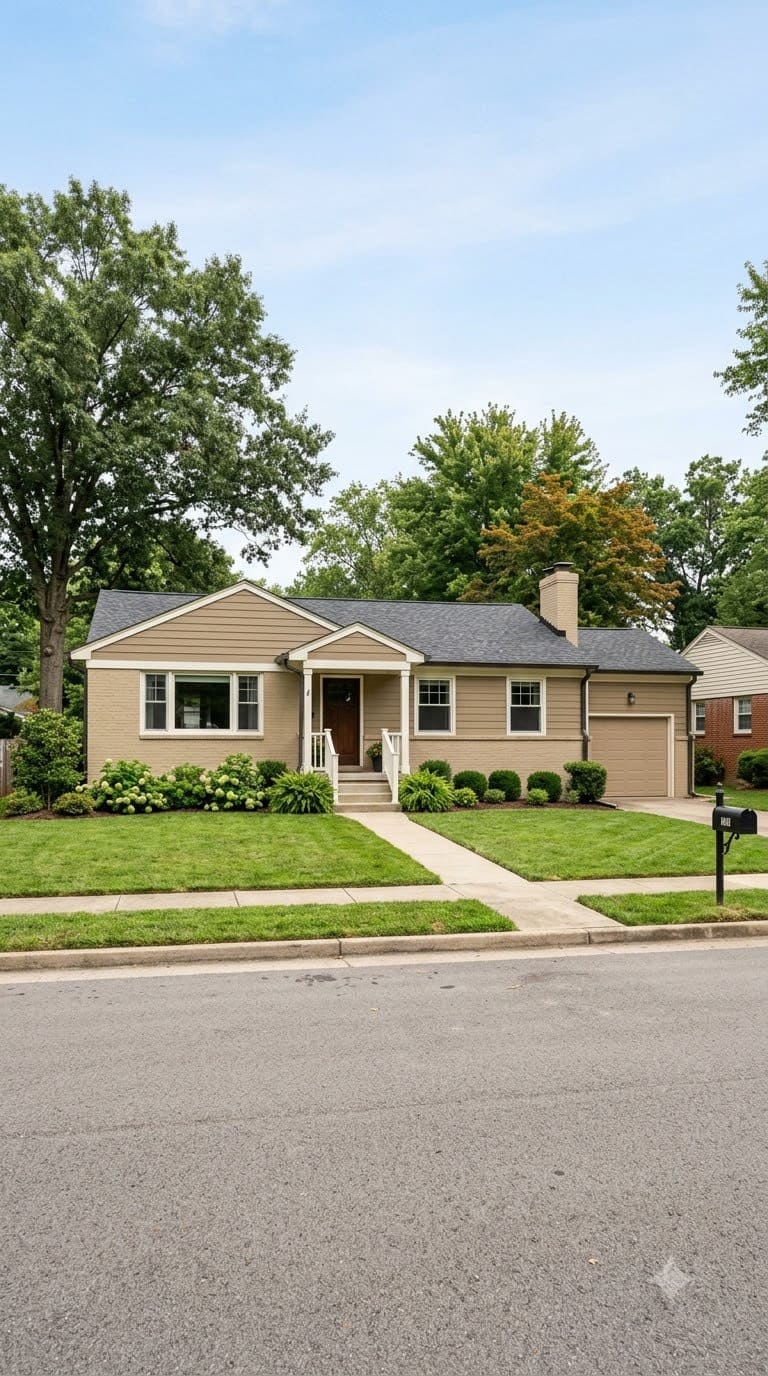
A lot of half-brick homes look awkward because the two materials were never meant to coordinate, they just happened to end up on the same wall over decades of piecemeal repairs.
Pick one dominant tone and let the second material read as a deliberate accent (a contrasting Hardie panel band, or brick painted to sit one or two shades off the siding color) rather than two unrelated decisions stacked on top of each other.
The mistake to avoid: pairing a warm-toned brick with a cool blue-gray siding, or vice versa, mixing temperature families is what usually makes a color-blocked facade look accidental instead of planned, even when both colors are individually fine. Mid-range.
14. Replace the siding portion with a material that actually reads as an upgrade.
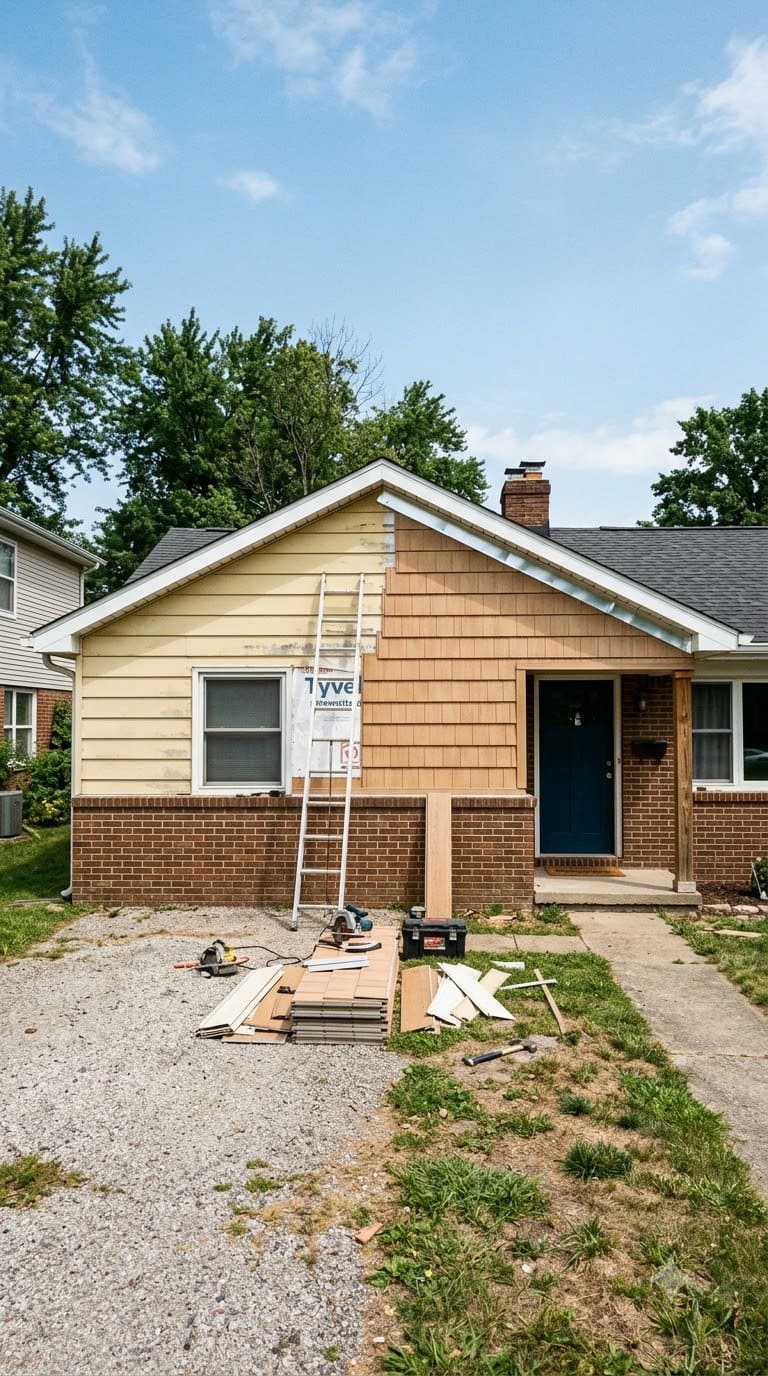
Vinyl siding above brick often ages worse than the brick below it. Swapping that top section for fiber-cement board (Hardie panel or shingle profile) gives you a material with real texture and a much longer paint life, and it’s one of the more common real fixes shown across brick&batten’s own catalog of before-and-afters.
Prefinished panel (sold under names like ColorPlus) skips the repaint cycle almost entirely, but don’t skip flashing the top edge where the new material meets the roofline, that’s the single spot most likely to let water sneak behind the panel if it’s not detailed properly. Splurge.
15. Add a transition detail where the two materials meet.
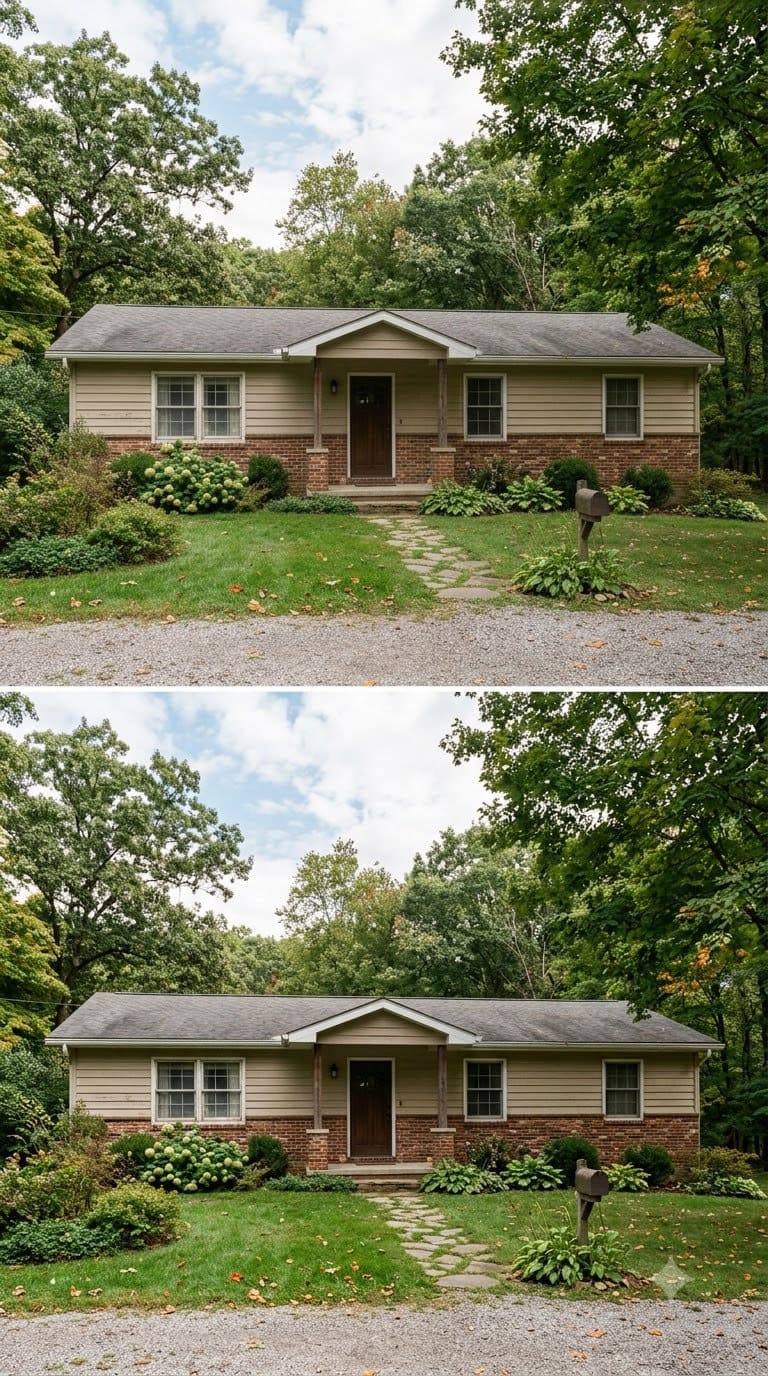
A plain butt joint where siding meets brick looks unfinished and, honestly, a little cheap.
A simple trim board, a small drip cap, or a shift in the brick coursing at that line gives the eye a place to land instead of an abrupt jump.
Whatever detail you use, give it at least a half-inch reveal so water sheds off cleanly instead of wicking back behind the upper material, a flush butt joint with no reveal at all is exactly what tends to fail first. Budget to Mid-range, mostly labor.
16. When in doubt, unify with paint rather than material replacement.
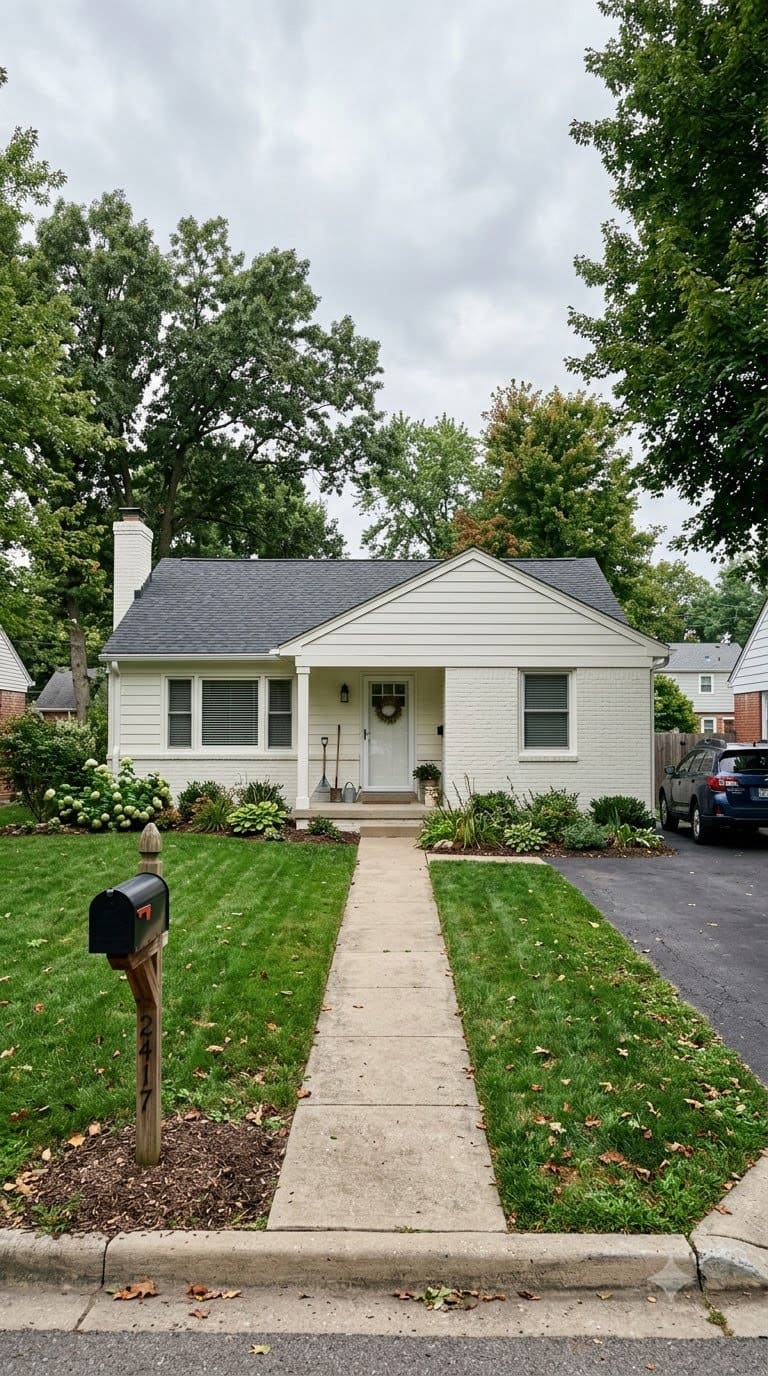
If a full re-side isn’t in the budget, painting both the brick and the siding the same color (or two very close values) is the cheapest way to make a mismatched facade read as one house instead of two houses stapled together.
This won’t fix texture differences, brick and siding still catch light differently even under the exact same tint, so use a masonry-formulated flat on the brick and a siding-rated satin on the siding, matched to the same base formula, rather than assuming one paint can does both jobs.
It solves the biggest visual complaint, which is usually color clash, not material clash.
Entry, lighting, and landscaping on a budget
This is where you get outsized visual impact for the least money, and where a real $85 front-door refresh (one blogger’s actual receipt: $30 for door paint, $6 for hardware spray paint, $13 for secondhand galvanized lights, $10 for planters, $8 for mums, $11 for a doormat) proves you don’t need a big budget to move the needle.
17. Paint the front door a color with actual saturation.
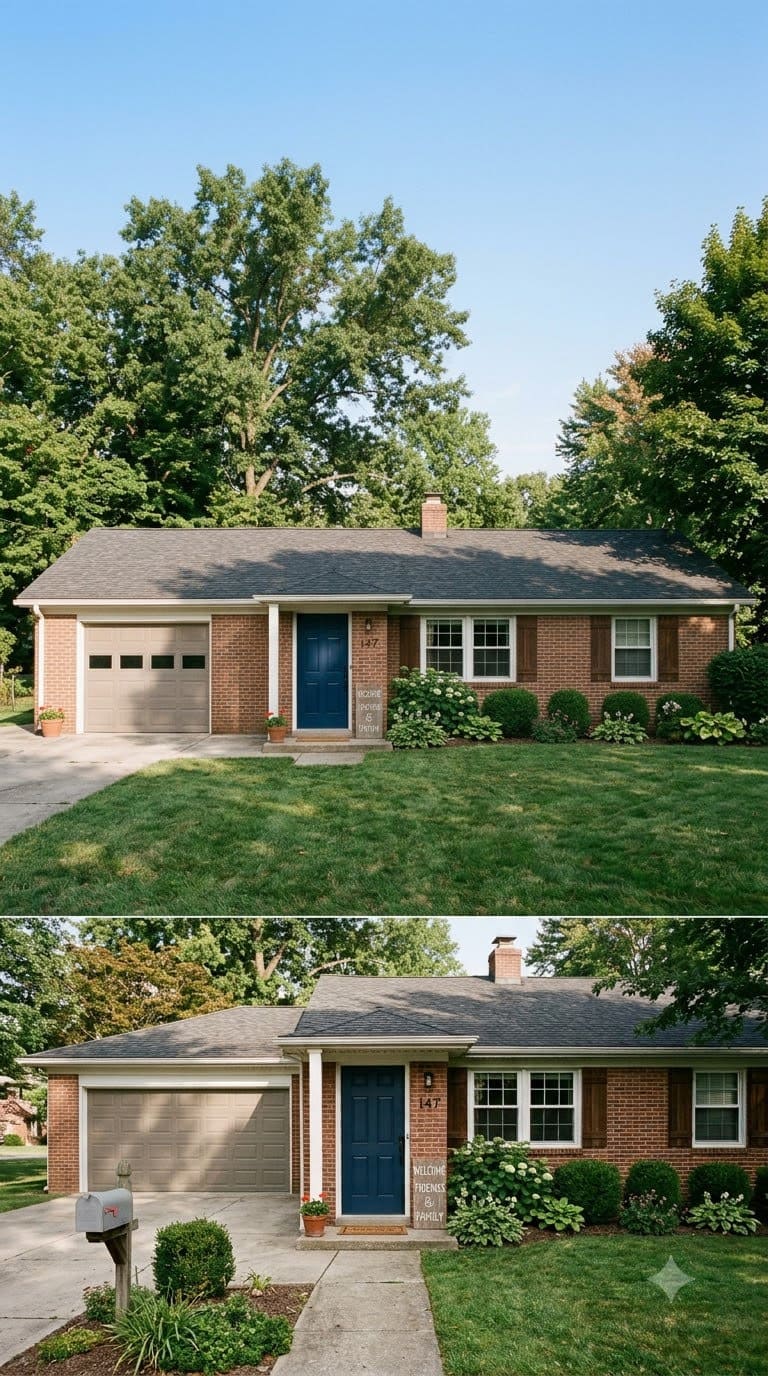
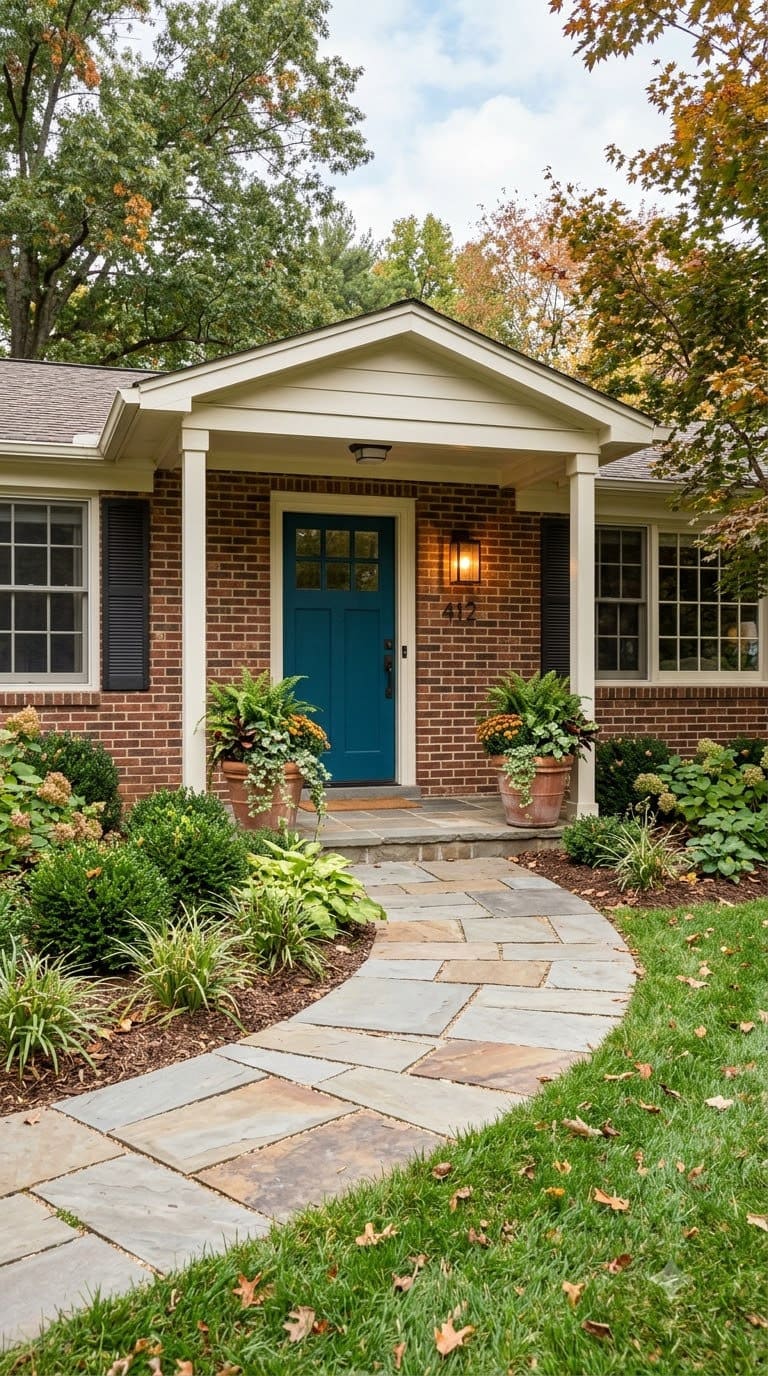
A navy, a deep brick red, or even black against a lighter facade does more per dollar than almost anything else on this list.
Skip the beige-on-beige safe choice, this is the one spot on the house where a little boldness photographs well and doesn’t overwhelm the whole exterior.
Use a paint actually formulated for exterior doors with UV-resistant pigment, interior paint (even a leftover quart that matches perfectly) chalks and fades fast on a south- or west-facing door that gets direct afternoon sun. Budget.
18. Follow the “no more than three features” rule.
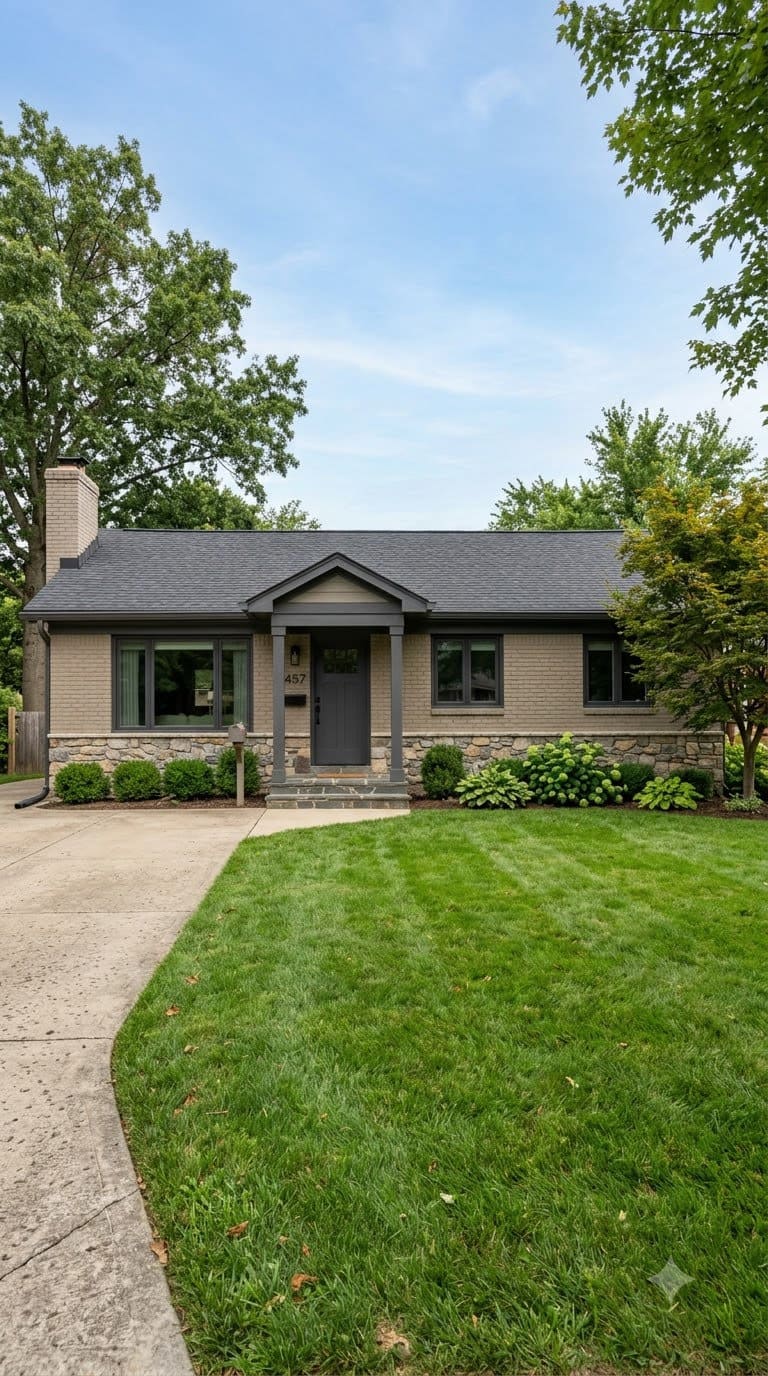
Leigh Misso, owner of River Brook Design & Construction, advises limiting an exterior to a small number of deliberate “features,” counting paint colors and materials each as one, so the facade reads restrained and intentional instead of busy.
On a ranch, that usually means: one brick or paint tone, one trim color, one accent material. Stop there.
If you’re staring at a wish list with a veneer accent, a new door color, new shutters, and new light fixtures all at once, Misso’s rule is a useful gut check for picking which two or three actually make the cut this year instead of trying to do everything simultaneously. Free, it’s a design discipline, not a purchase.
19. Upgrade the exterior light fixtures to something proportional.
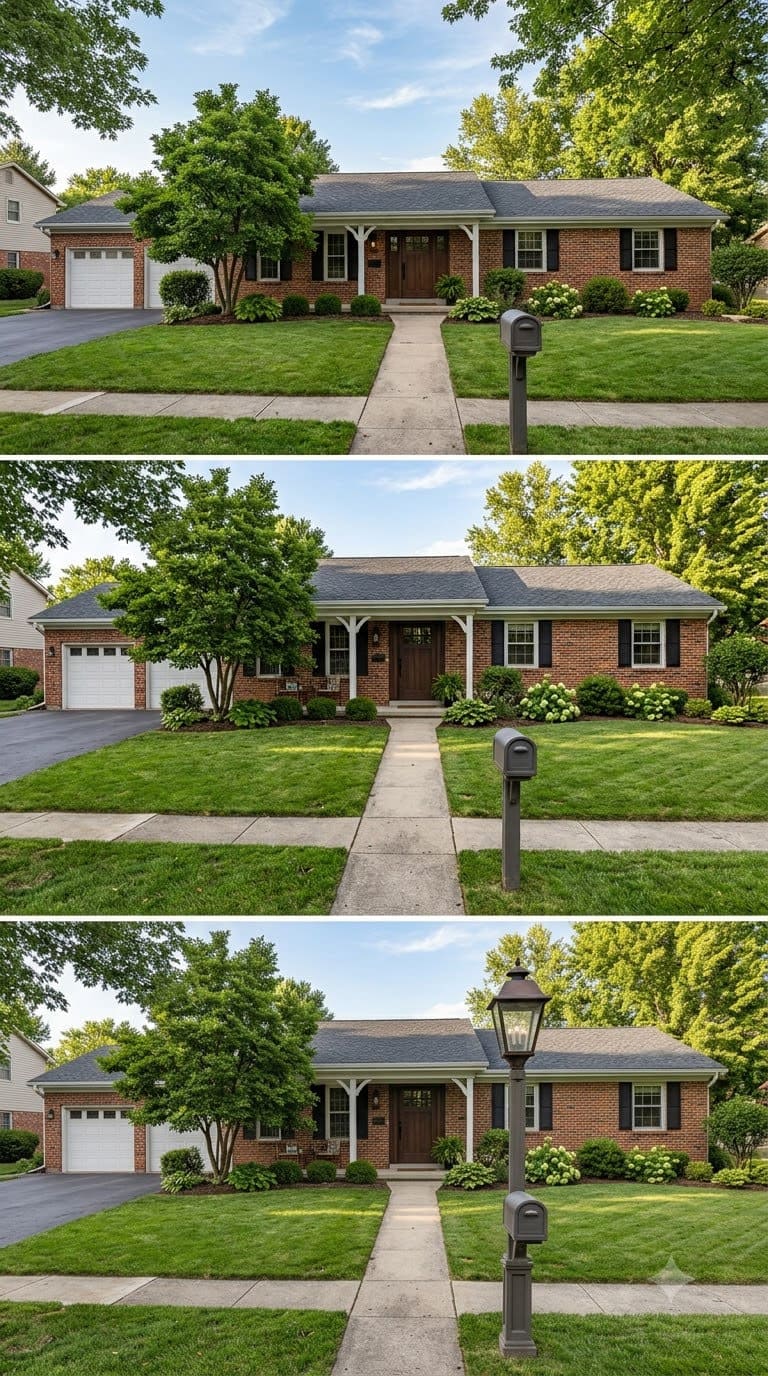
Tiny brass carriage lights left over from the original build look lost on a wide ranch facade. Size up, and pick a finish (matte black, aged bronze) that pulls double duty with your door hardware.
A rough rule of thumb: the fixture’s height should land around a third of your door’s height, most people buy the fixture that looked cute on the store shelf instead of actually measuring against their own door, and end up right back where they started, too small for the wall. Budget to Mid-range.
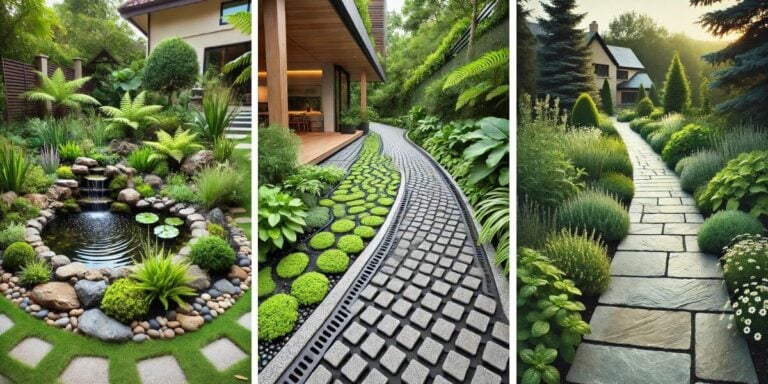
20. Add a curved walkway or stepping-stone path.
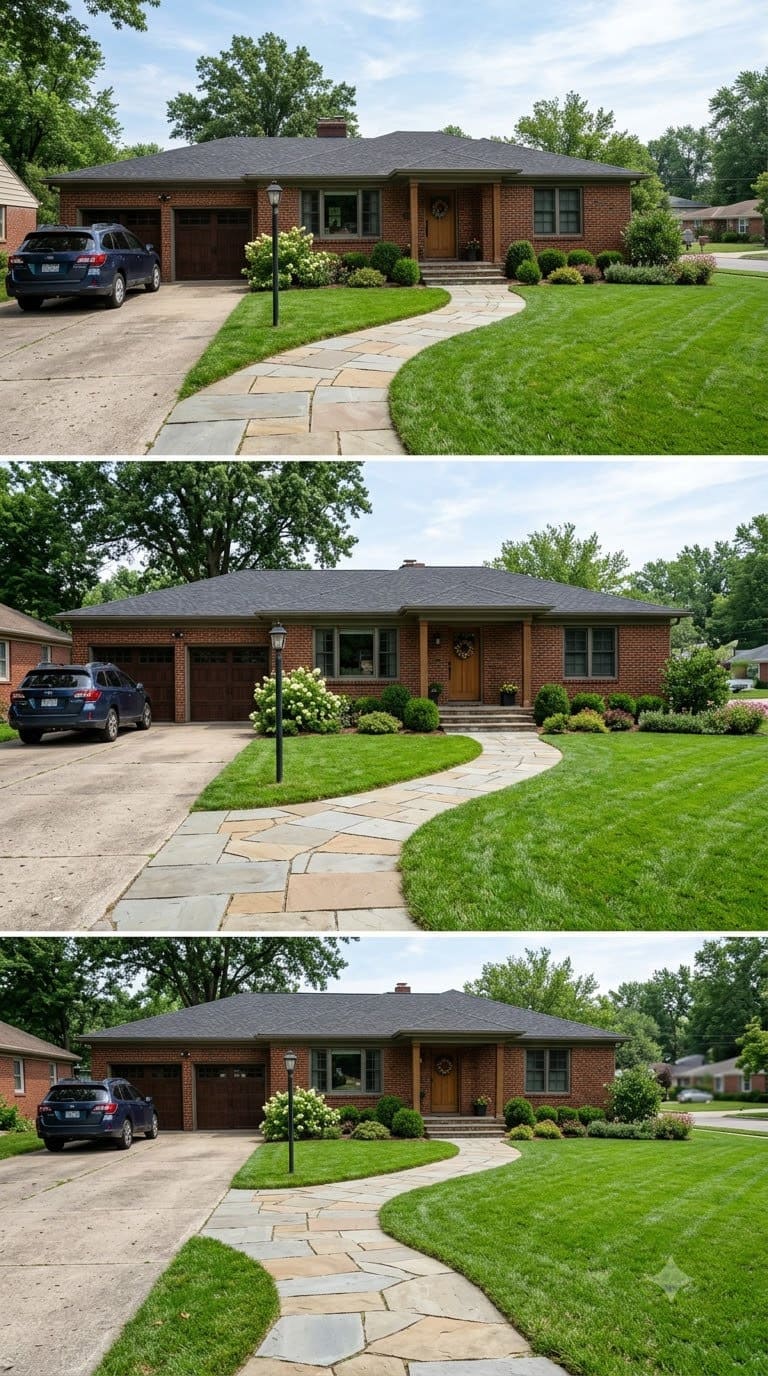
Ranch homes have strong horizontal lines, and a straight concrete path just repeats that line flatly.
A curved flagstone or stepping-stone path breaks it up and gives the eye somewhere to wander before it hits the front door.
Keep it at least 3 feet wide so two people can comfortably walk it side by side, a narrow, over-curvy path that snakes around for the sake of curves alone tends to feel gimmicky rather than functional once you’re actually the one walking groceries in from the car. Mid-range.
21. Flank the entry with a matched pair of plantings, not a random assortment.
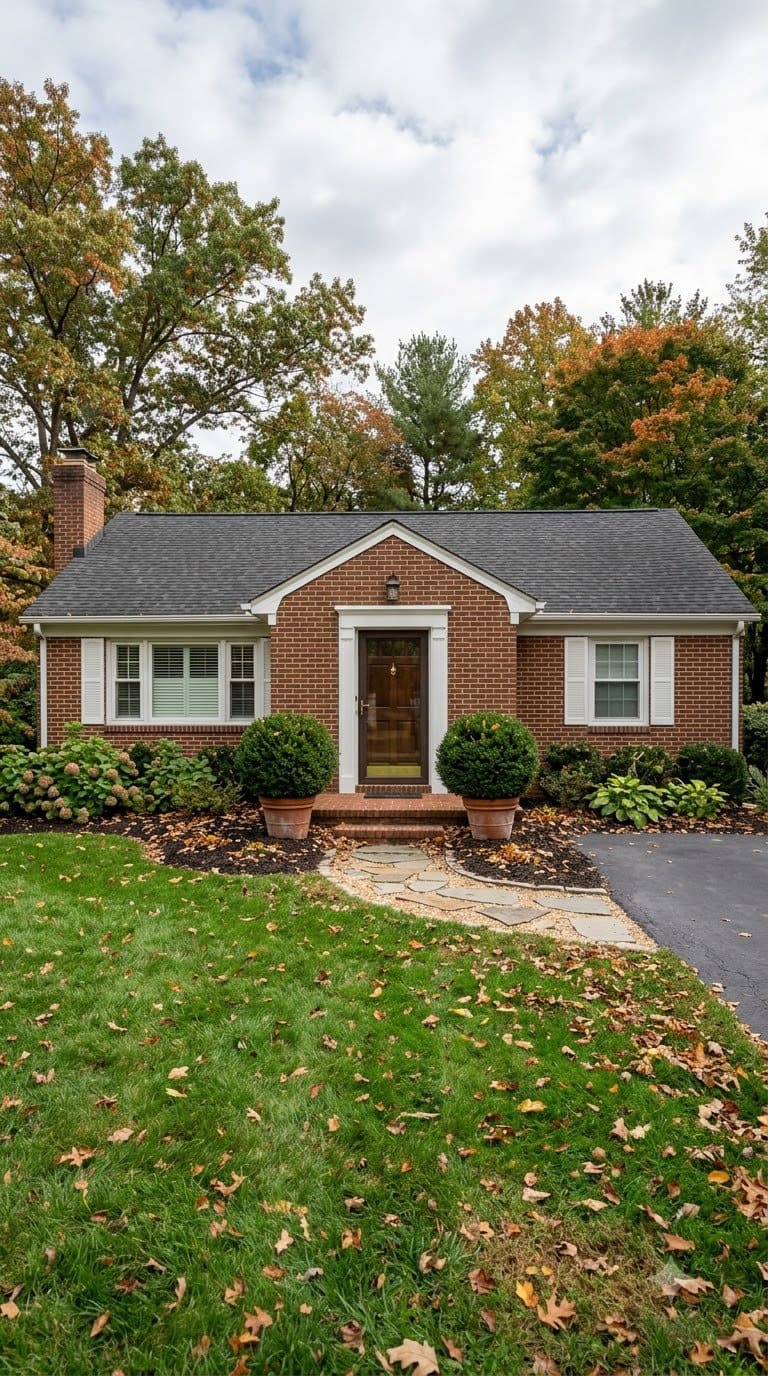
Two matching boxwoods, ornamental grasses, or small flowering shrubs on either side of the door instantly reads as “someone planned this,” even if you bought them both at the same big-box garden center last Saturday.
Check the plant’s mature size before you plant it that close to the door, a shrub tagged “compact” at the nursery can still triple in size over two or three seasons and end up needing constant shearing just to keep the walkway clear. Budget to Mid-range.
22. Add a real address plaque, not the builder-grade stick-on numbers.
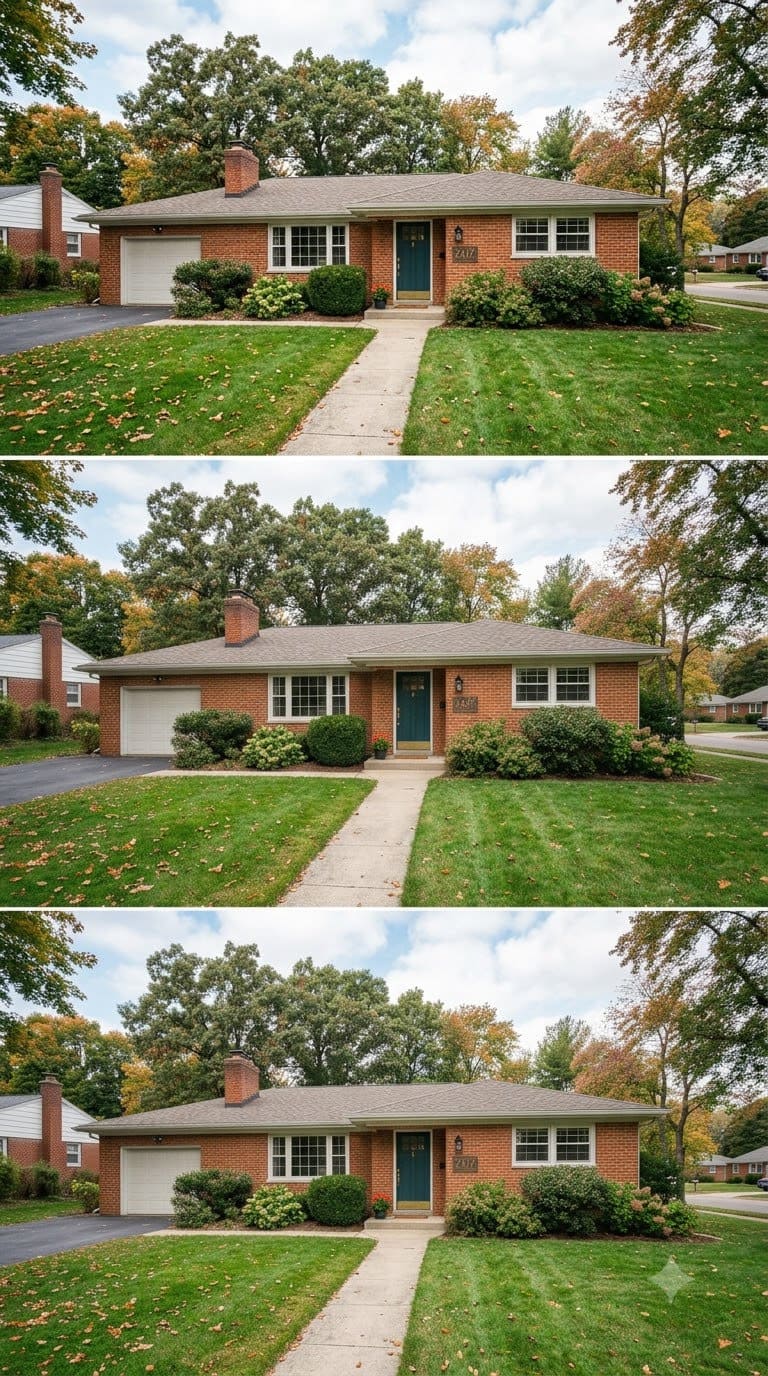
It’s a small thing, and I’ll admit it’s an odd one to end on, but a weatherproof metal address plaque near the door is one of those details that quietly signals the whole house got attention, not just the parts you can see from the street.
Mount it where it’s legible from the street both day and night, and if you don’t already have a wired light aimed at that spot, a small solar spotlight staked in the bed below solves that for under twenty bucks. Budget.
What we learned the hard way
This is the part of a brick ranch project nobody puts on the moodboard, and honestly, it’s the part that saves people the most money if they read it before starting instead of after.
The biggest one: the mistake most people make with painted brick isn’t the color, it’s the prep. Every forum thread we came across (Houzz’s “Painting brick exterior on a ranch house” thread is a good example) eventually surfaces someone whose paint started peeling in sheets within a couple of years, and almost every time, the cause traces back to skipping or rushing the primer step, not a bad paint choice.
Sherwin-Williams is blunt about this in their own guidance, and it’s worth repeating here because it’s the one detail that gets skipped under time pressure: the brick needs to be at least a year old, clean, dry, and properly primed before a topcoat goes on, not “mostly dry” after a quick hose-down the same afternoon.
If there’s one thing worth doing differently, it’s treating the paint decision as permanent from day one, not a “we can always change it later” placeholder.
We heard this from more than one owner in the research for this piece: they painted brick expecting to repaint or strip it in a few years if they didn’t love it, then found out that stripping cured paint off masonry is its own specialized, expensive job with no guarantee of a clean result.
The Wisconsin Historical Society’s guidance on this lines up with what those owners ran into in practice, painting masonry is treated as a one-way door in preservation circles for a reason.
A smaller but real pain point: half-brick, half-siding owners on a budget often try to save money by painting just the siding portion and leaving the brick alone, figuring two separate projects are cheaper than one big one.
It’s not wrong exactly, but it usually backfires visually, because now you’ve got fresh siding paint next to old, dingy brick and the contrast reads worse than the original mismatch did.
If the budget only allows one phase this year, do the brick cleaning pass (idea 1) and the two-material color unification together rather than splitting them across separate seasons.
And one thing that surprised us doing this research: almost nobody talks about HOA approval for exterior color changes on a brick ranch, even though plenty of established neighborhoods (especially ones built in the same era as most brick ranches) do have architectural review committees that require sign-off before repainting brick or replacing a garage door.
We couldn’t find solid national data on how often this actually trips people up, so take that one with a grain of salt, but it costs nothing to check your HOA’s exterior-modification rules before you buy the paint, and it’s a lot cheaper than repainting twice.
Frequently Asked Questions
Should I paint my brick ranch house or leave it natural? It depends on whether you value reversibility or you’re ready to commit. Painting brick is, for practical purposes, a one-way decision. If you’re not sure, try limewash first, or clean and repoint the brick and see if that alone solves the “dated” feeling before you reach for a paint sprayer.
What’s the best way to fix a half-brick, half-siding exterior? Either unify the two materials with a shared or closely matched paint color, or replace the upper siding section with a material (like fiber-cement panel) that actually reads as an upgrade, and add a clean transition detail where the two meet.
Can I update a dated ranch exterior without a full remodel? Yes, and most of this list is built around exactly that. Cleaning, repointing, trim color, lighting, landscaping, and a door swap can transform how a ranch reads from the street without touching a single structural element.
Do I need a permit to update my brick ranch’s exterior? Not for paint, lighting, doors, or landscaping in most places. You likely do need one for anything touching the roofline, like a new portico or roof extension over the porch, or for enlarging or relocating a window. Check with your local building department before starting those specific projects.
How much does a brick ranch exterior makeover cost? It’s a huge range. Some owners have pulled off a real, visible transformation for under $500 focused on the front door and entry alone, spread out over a season. A full repaint of the brick plus new garage door and windows can run well into five figures. Start with the budget tier that matches what you actually have to spend this year, not what the whole project would cost if you did everything at once.
For more low-cost ways to boost your home’s exterior, check out our curb appeal ideas guide, and if you’re still deciding whether ranch is even the right style match for your lot, our breakdown of different types of houses is worth a look too.
Products We Recommend
This post contains affiliate links. We may earn a commission on qualifying purchases at no extra cost to you.
KILZ Self-Priming Masonry, Stucco and Brick Paint (Gray, 1 Gallon)
Self-priming acrylic latex paint made for masonry and brick, covers 250-400 sq ft per gallon, mildew-resistant and water-repellent finish. Good starting point if you've decided to paint rather than limewash.
Shop Now
Rutland TSP-PF Clean & Prep, Phosphate-Free All-Purpose Cleaner (1 lb bag)
Phosphate-free TSP substitute for cleaning and prepping brick and masonry before painting or just to strip years of grime off natural brick. Mix roughly a half cup per gallon of warm water.
Shop Now
Custom Address Plaque, Weatherproof Aluminum House Number Sign
Laser-carved metal address plaque with pre-drilled holes for easy mounting, an easy Idea #22 upgrade over stick-on builder-grade numbers.
Shop NowNever miss an update — choose FarmFoodFamily as your preferred source on Google.
How it works: Tap the button below to open Google's settings page, then check the box next to FarmFoodFamily.
Tap the checkbox to turn it blue — that's how you know it's set.