Concrete Sleeper and Steel Post Retaining Wall: How We Rebuilt Ours So It Won’t Rot Again
We pulled out a rotten timber sleeper wall last spring and rebuilt it in concrete and galvanised steel. One wet season later, nothing has warped and no corner has gone soft.


Never miss an update — choose FarmFoodFamily as your preferred source on Google.
How it works: Tap the button below to open Google’s settings page, then check the box next to FarmFoodFamily.
Tap the checkbox to turn it blue — that’s how you know it’s set.
Quick Answer: Is a concrete sleeper and steel post retaining wall worth it?
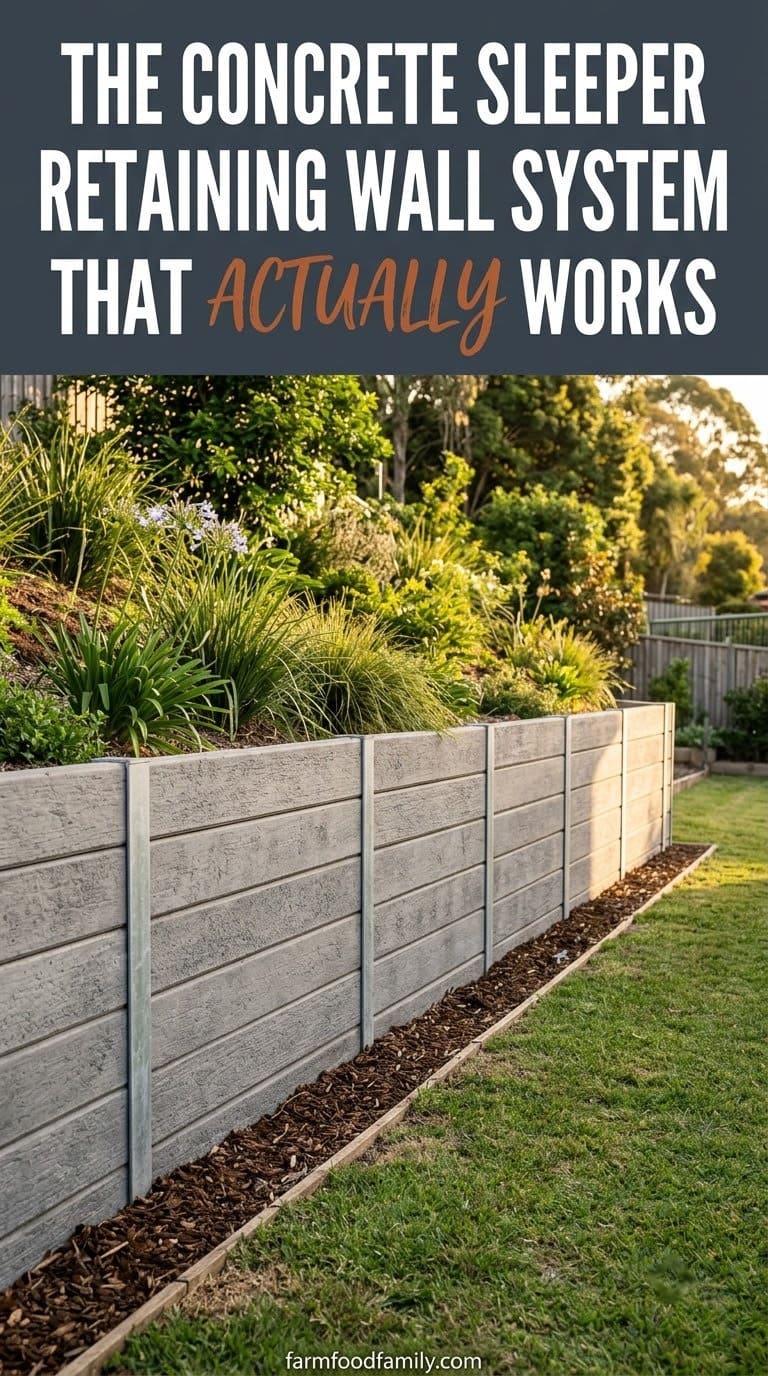
A concrete sleeper and steel post wall costs more upfront than timber, but it does not rot, warp, or attract borers. Each sleeper slides into a channel on a galvanised steel post and stacks under its own weight. There is no nailing or fixing hardware to fail over time.
The system suits garden edges and full driveway-height walls alike, as long as the post and sleeper strength matches the wall height. Light-duty posts suit a low garden edge. Taller walls, or anything near a driveway, need heavier-rated posts and stronger sleepers.
Footing depth is what actually holds the wall up, not the sleeper. Shallow footings, not weak sleepers, are the most common reason these walls start leaning within a year. Get the post footings right and the rest of the build is mostly patience.
We pulled out a rotten timber sleeper wall last spring, and I promised myself I’d never do that job twice. When we rebuilt, we went with concrete sleepers dropped into galvanised steel posts. One wet season on, nothing has warped and no corner has gone soft.
If your slope keeps sliding, or you’ve got a tired railway-sleeper wall going punky at the base, this is the system I’d point you to. Concrete sleepers are heavier to lift than timber, no argument there. You just build the wall once and then you leave it alone. If you’re still comparing wall materials before you commit, our retaining wall cost comparison breaks down block, concrete, stone, and timber pricing side by side.



1. Why concrete sleepers and steel posts beat timber
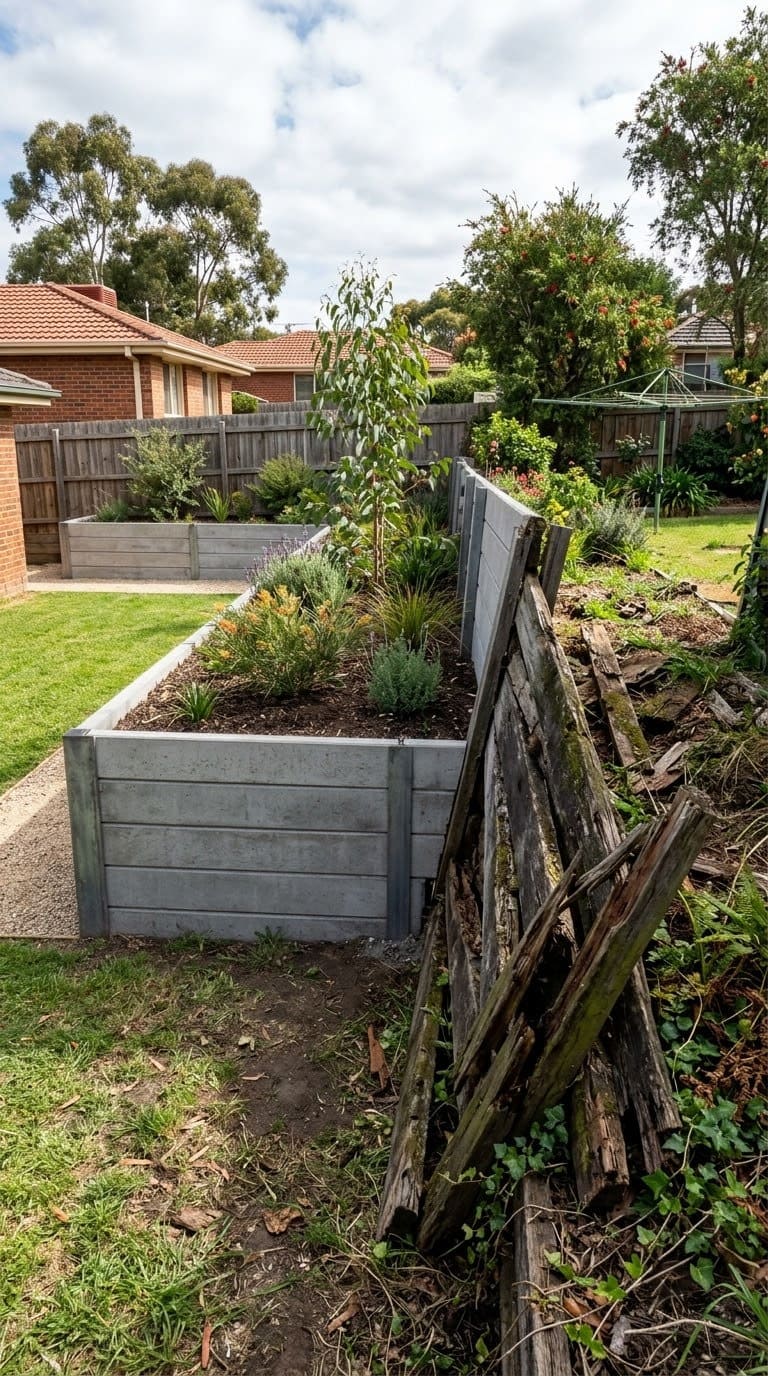
Timber and railway sleepers look great for about five years. Then ground moisture gets in, our summers cook them, and the borers finish off whatever’s left. Concrete sits there and does nothing, which is the entire point of it.
Answer 4 quick questions and get matched to the exact fix for your yard — drainage, budget, layout, or something else entirely.
Take the Free QuizThe sleepers are precast concrete panels. Each galvanised steel post has a channel running up its face, and the sleepers slide down into that channel and stack on each other. You don’t nail a single thing. Gravity and the channel hold the whole wall in place, which is what makes it so forgiving to build, provided you’re patient with your levels early on.
Quick tip: if you’re replacing an existing timber wall, don’t reuse the old post holes. Old timber posts rot from the inside out, so the soil around the original holes is usually looser than it looks. Dig fresh footings offset from the old ones, even if it means a slightly different post spacing.
2. Choosing your posts and sleepers
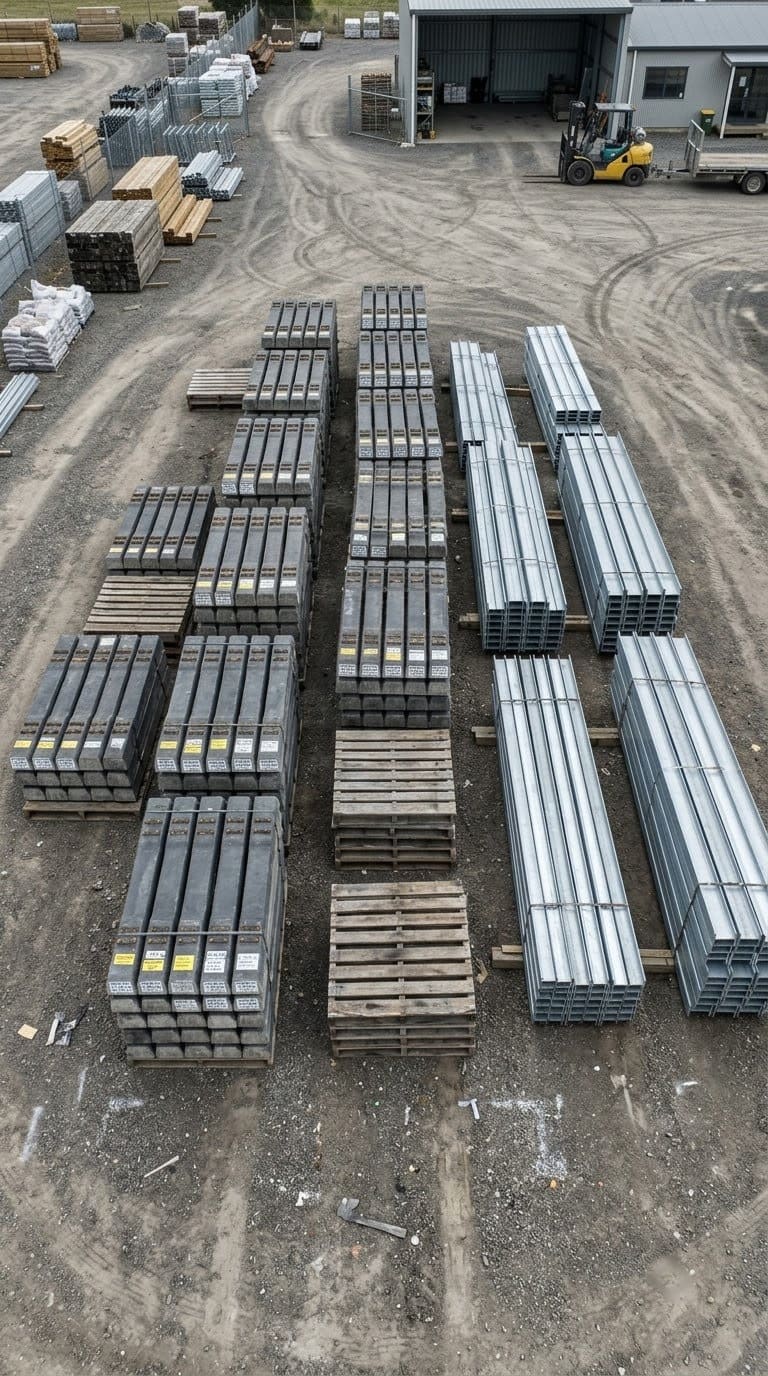
Get this part right before you dig anything, because the rest of the wall is built around it.
There are two post shapes. C-beam posts have a channel open on one face, and they go at the ends of a wall and anywhere along a straight run. H-beam posts have a channel on both faces, so they join two lengths of wall together and the sleepers from each side tuck into the same post. Sketch your wall on paper and mark every C and every H before you phone the yard. It saves a second trip.
Sleepers are sold by concrete strength, usually 40MPa and 55MPa. The taller the wall, the heavier the sleeper and the beefier the post you want under it. A low garden edge is a light-duty job. Anything holding back real weight, near a driveway or over about a metre, is where the 55MPa sleepers and the stronger post earn their keep. When in doubt, size up.
When I was choosing, it helped to see both parts sitting together. Australian Landscape Supplies had the concrete sleepers and the galvanised posts out in the yard. I could watch a sleeper drop into the channel before I spent anything. That’s also where the case for the system clicked for me. It doesn’t rot or warp the way railway sleepers or treated pine do. Termites can’t touch it either. That’s why so many people pulling out a dead timber wall switch over instead of rebuilding the same thing again.
One more thing, and it matters. These sleepers are properly heavy. Two people can manage the shorter ones between them. For a long or tall wall, ask about crane-truck delivery so the pallet lands where you’re actually working instead of at the end of the driveway.
Most yard problems trace back to one specific, fixable cause. Find yours in 4 quick questions.
Take the Free QuizQuick tip: measure your access before you order, not after. A crane truck needs clear overhead space and a firm, level spot to set down outriggers. If your side gate is narrow, tell the yard when you book delivery so they can plan the drop for the driveway or nature strip instead.
Concrete sleeper walls vs. the alternatives
| Wall type | Typical lifespan | Upfront cost | DIY-friendly? | Worst-case failure |
|---|---|---|---|---|
| Concrete sleeper + steel post | 40+ years | Higher | Yes, with a helper for lifting | Footing failure, not the wall itself |
| Treated timber sleeper | 5–15 years | Lowest | Yes | Rot, borers, fixings rusting out |
| Besser block (mortared) | 20–30 years | Mid | Moderate | Cracking without weep holes |
| Poured concrete | 50+ years | Highest | No, needs formwork + a crew | Rarely fails if engineered correctly |
Timber wins on day-one price. Concrete sleepers win on the years you don’t spend rebuilding. Is your wall holding back a slope near a structure, a driveway, or a neighbour’s fence line? Then the lifespan gap matters more than the sticker price.
3. Setting out the line
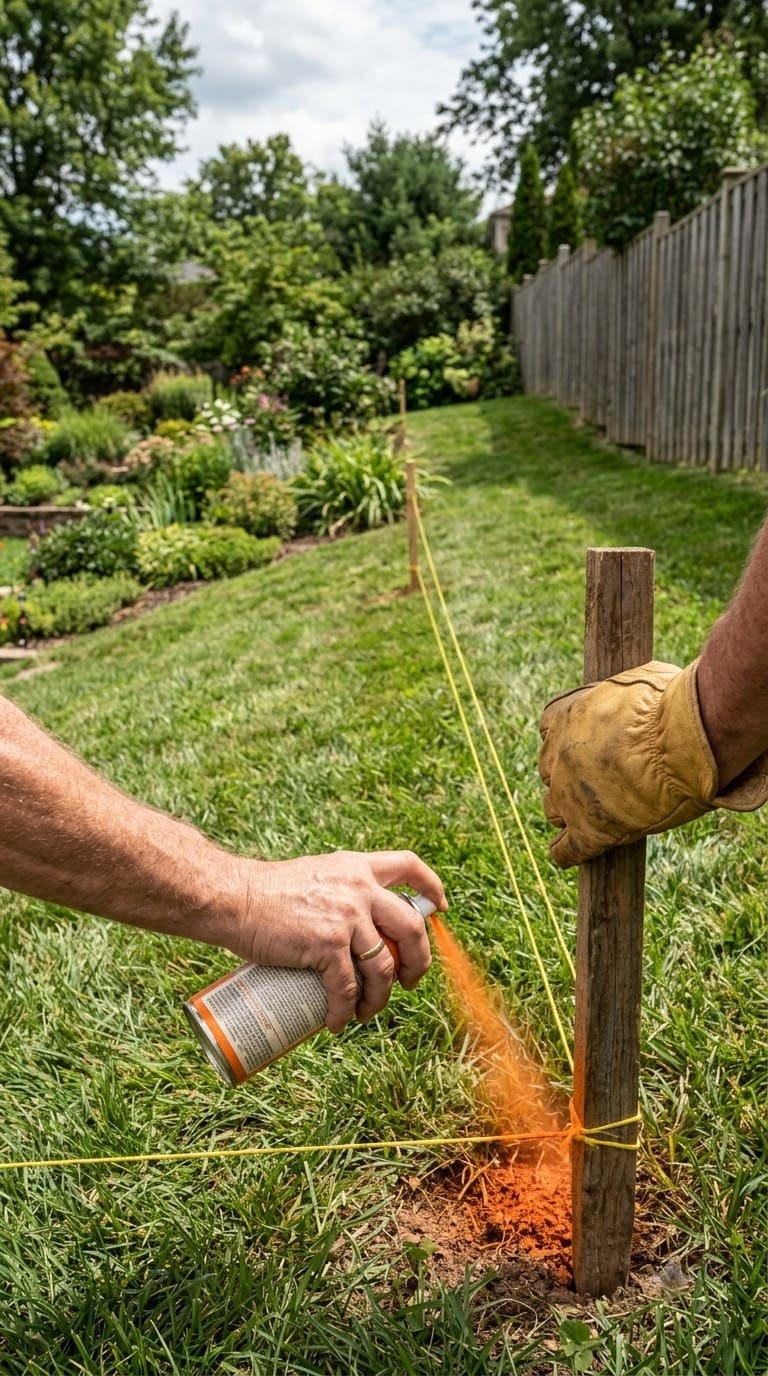
Run a string line where the front face of the wall will sit, and mark each post position along it. Your post spacing comes straight off the sleeper length, so measure one sleeper and set your post centres to match. Don’t eyeball it.
Check the run with a spirit level or a laser as you go. A few degrees out at the string stage will fight you for the rest of the day.
Quick tip: if the wall has to turn a corner or step down a slope, mark every H-beam post position first, then fill in the C-beams between them. Getting the H-beam corners locked in early stops small measuring errors from compounding across a long run.
4. Digging and pouring the footings
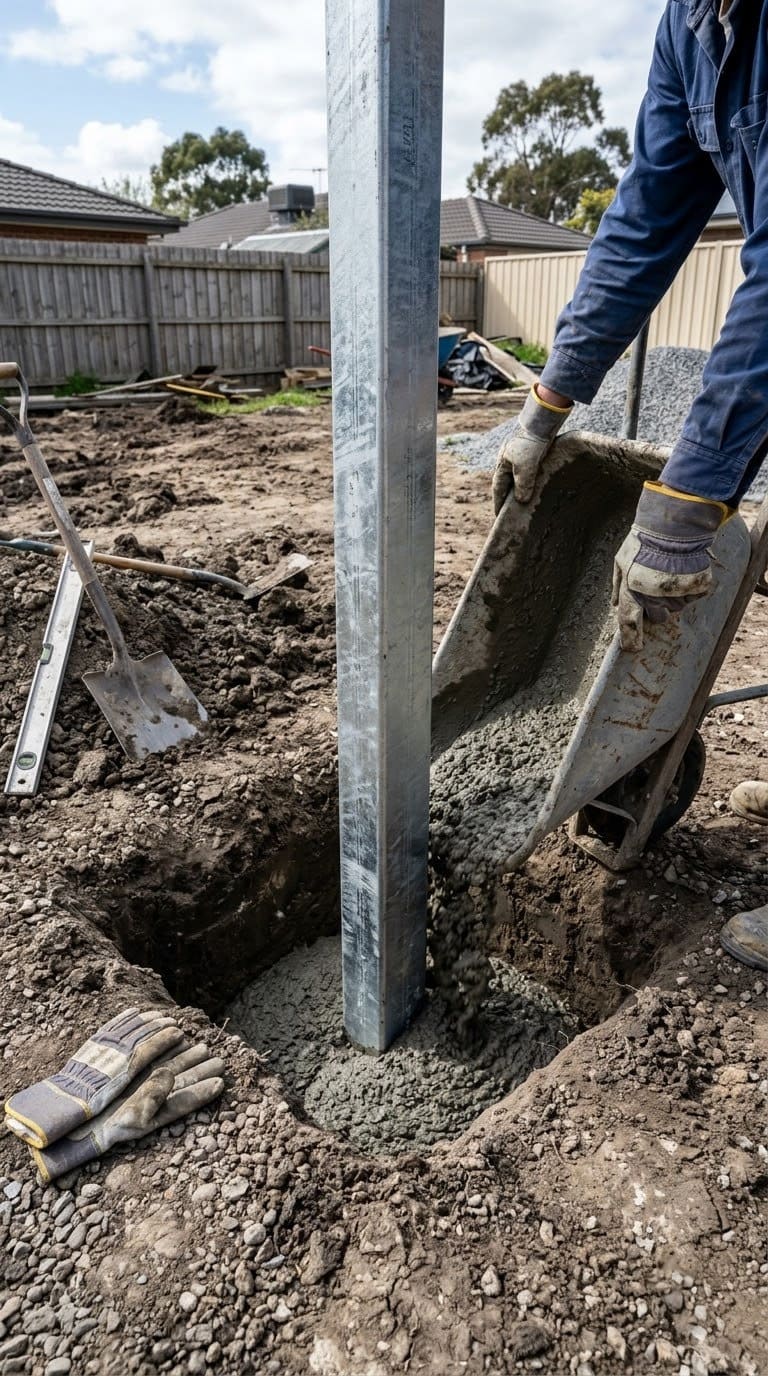
Each post sits in its own concrete footing, and that footing is what actually holds the wall up. Rough rule: dig the hole about a third the height of the finished wall, and wider than feels necessary. Taller wall, deeper hole. Some heights need an engineer’s sign-off, so check your local requirements before you order concrete.
| Finished wall height | Rough footing depth | Who to check with |
|---|---|---|
| Under 0.5m (garden edge) | Roughly 150–200mm | Usually no sign-off needed, still check locally |
| 0.5m–1m | Roughly a third of the wall height | Council planning desk, especially near a boundary |
| Over 1m, or near a driveway/structure | Deeper again, plus wider footing | An engineer, before you dig |
Treat those numbers as a starting point, not a substitute for your own local rules. Retaining wall height limits and approval triggers vary by council and by state. A wall that also carries a driveway’s weight, or sits close to a boundary, gets stricter requirements than a freestanding garden wall of the same height.
Dig each hole, drop the post in, then pour around it. This is not the place to save yourself a bag of concrete. Shallow footings are the number one reason these walls start leaning a year later.


Quick tip: if you hit clay or waterlogged soil at the bottom of the hole, go deeper again and add a layer of compacted gravel before you pour. Concrete poured straight onto wet clay can still shift once the ground around it dries and shrinks.
5. Standing the posts
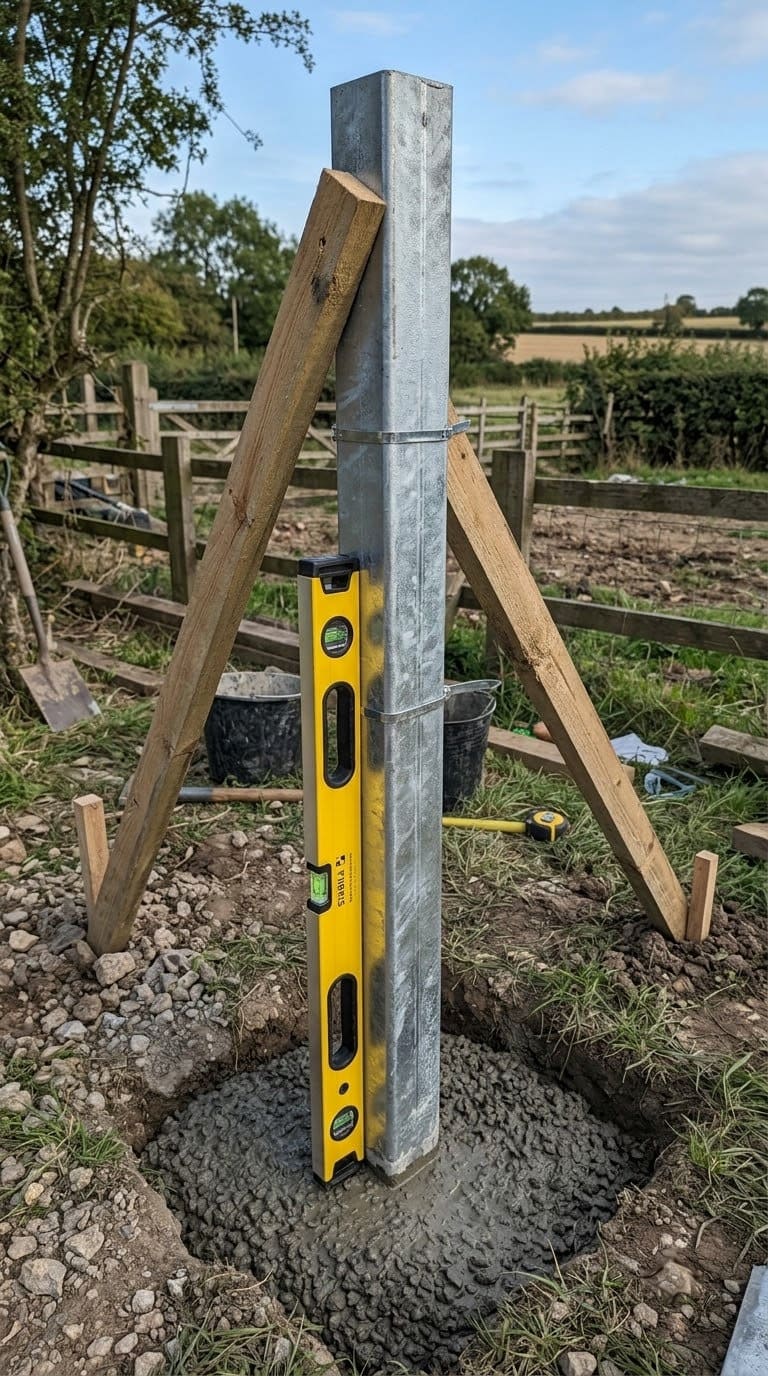
With the post in the wet footing, brace it plumb in both directions and check it against your string line. Get it dead vertical, because every sleeper above copies whatever the post is doing. Prop each one with timber stays and let the concrete cure properly before you load any weight on. This is the slow, boring part, and rushing it is exactly how you end up with a lean you can never quite chase back out.
Standard concrete needs around 24 to 48 hours before it can take the light load of the first sleepers. Give it closer to 7 days before it carries real backfill pressure. Fast-set mixes cut the first wait down. Read the bag, don’t guess.
The average homeowner spends $616/year on yard fixes that don't address the real problem. Find out what yours actually is — before you spend another dollar.
Take the Free Quiz6. Dropping in the sleepers
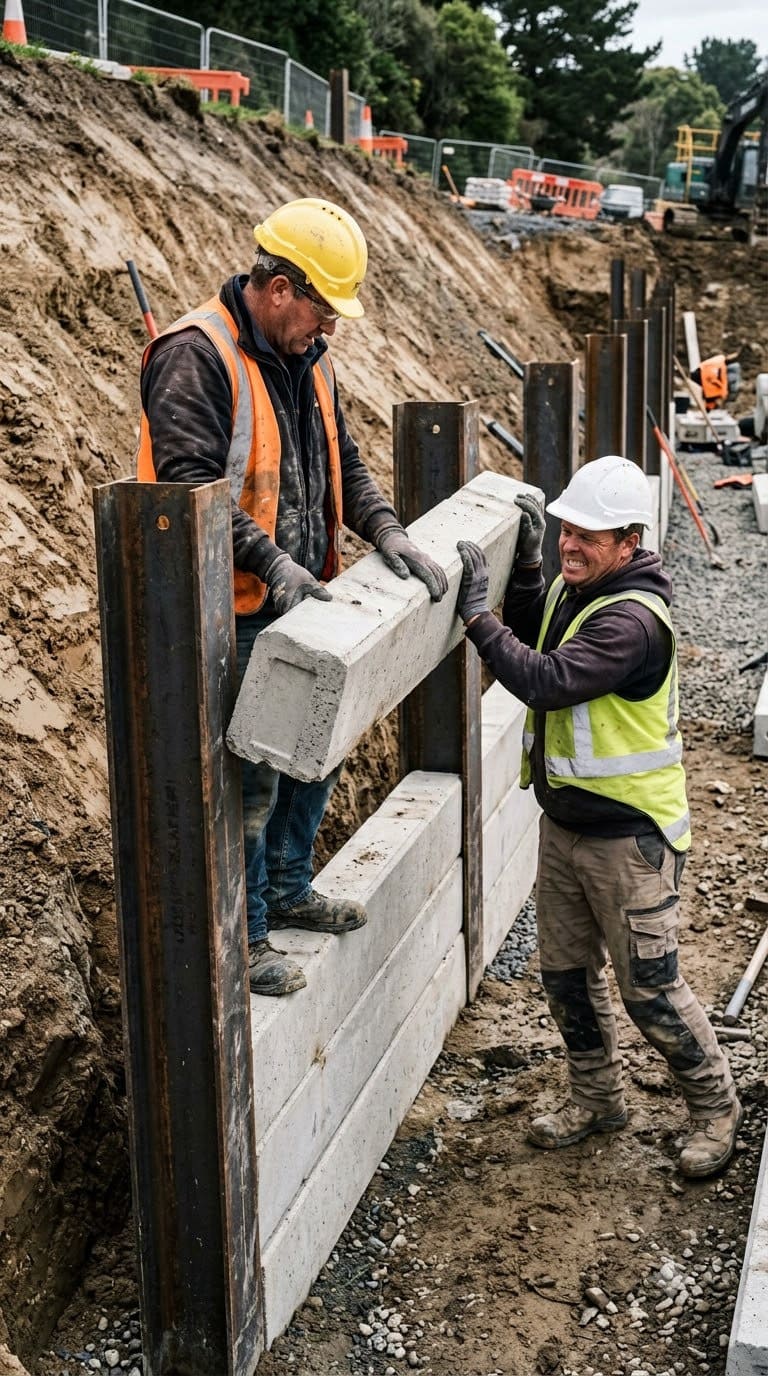
Once the footings have cured, this is the satisfying bit. Slide the first sleeper down the channel between two posts until it lands on the footing. Then stack the next one on top, and the next, until you reach your height.
Check your level every couple of courses rather than only at the end. A few thin shims at the base keep the stack sitting true, and the weight of the concrete does everything else.
Quick tip: stack from the lowest end of a sloped run first. Starting at the low point gives you a true, level reference course to build the rest of the wall off, instead of chasing a level line uphill.
7. Backfill and drainage
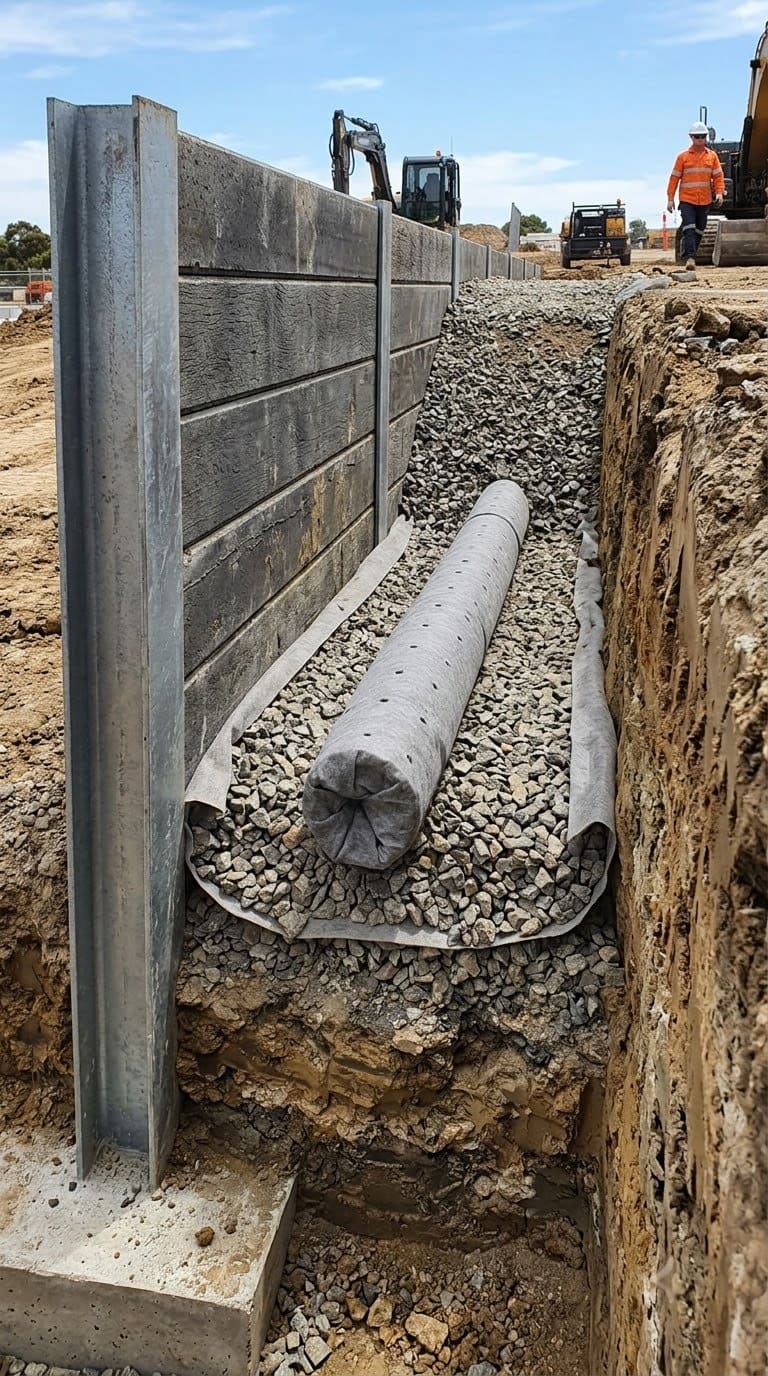
Water is the thing that kills retaining walls, so give it somewhere to go. Lay a slotted drainage pipe, usually 90–100mm agricultural pipe, along the base behind the wall. Run it out to a point where the water can escape, either daylighting downhill or into stormwater. Wrap the pipe in geotextile fabric so soil doesn’t clog the slots over time.
Backfill with gravel rather than soil, so the water drains down to the pipe instead of building pressure behind the sleepers. Top the last few inches with soil if you’re planting into it. Building on a genuinely wet slope? Read through drainage ideas for sloped yards before you backfill. The pipe route and outfall point are far easier to plan before the wall is finished than after.
Quick tip: don’t backfill all in one go. Fill and lightly compact in layers of 150–200mm, especially behind a wall over half a metre. Dumping the whole load at once puts a sudden shock of pressure on posts that haven’t had a chance to settle.
What we’d tell a friend before they start
The honest pain point on this build wasn’t the technique, it was patience. Waiting on footings to cure while a pallet of sleepers sits in the driveway is the part nobody warns you about. We finished ours over two weekends, and most of that was standing around waiting on concrete rather than lifting anything. It hasn’t shifted a millimetre through the wet. The dog’s already worn a track along the top of it.
If your existing wall is short and mostly cosmetic, a straight swap to concrete sleepers is a genuinely manageable weekend project. If it’s tall, holds up a driveway, or sits close to a boundary, get the footing depth and any council sign-off sorted before you touch a shovel. That’s the one step on this whole job that isn’t optional.
Frequently asked questions
Do I need council approval for a concrete sleeper retaining wall? It depends on the wall’s height and what it’s holding back. Many areas don’t require approval for a low garden-edge wall, but walls over roughly a metre, walls carrying a driveway, or walls near a boundary commonly do. Check with your local council before you dig, not after the footings are poured.
Can I build a concrete sleeper wall myself? Yes, for garden-height walls. The system is designed to go together without welding or specialist tools, just a level, a post-hole digger or auger, and a helper for lifting the sleepers. Taller structural walls are still worth having an engineer check, even if you’re doing the physical labour yourself.
How long do concrete sleeper retaining walls last? Precast concrete sleepers on galvanised steel posts commonly outlast timber sleepers by decades, since neither material rots, warps, or attracts borers. The footing, not the sleeper, is usually what determines how long the wall performs well.
Related reading
- Uses of Sleepers in Retaining Wall Designs
- 45 Creative Retaining Wall Ideas for Sloped Backyards
- 13+ Tiny Backyard Slope Ideas (Plus Retaining Wall Rules)
Never miss an update — choose FarmFoodFamily as your preferred source on Google.
How it works: Tap the button below to open Google's settings page, then check the box next to FarmFoodFamily.
Tap the checkbox to turn it blue — that's how you know it's set.