Why Your Sprinklers Leave Brown Patches on the Lawn
The shape of a brown patch tells you whether the sprinkler is to blame, and once you know that, the fix is usually a five-dollar part, not more minutes on the timer.

Never miss an update — choose FarmFoodFamily as your preferred source on Google.
How it works: Tap the button below to open Google’s settings page, then check the box next to FarmFoodFamily.
Tap the checkbox to turn it blue — that’s how you know it’s set.
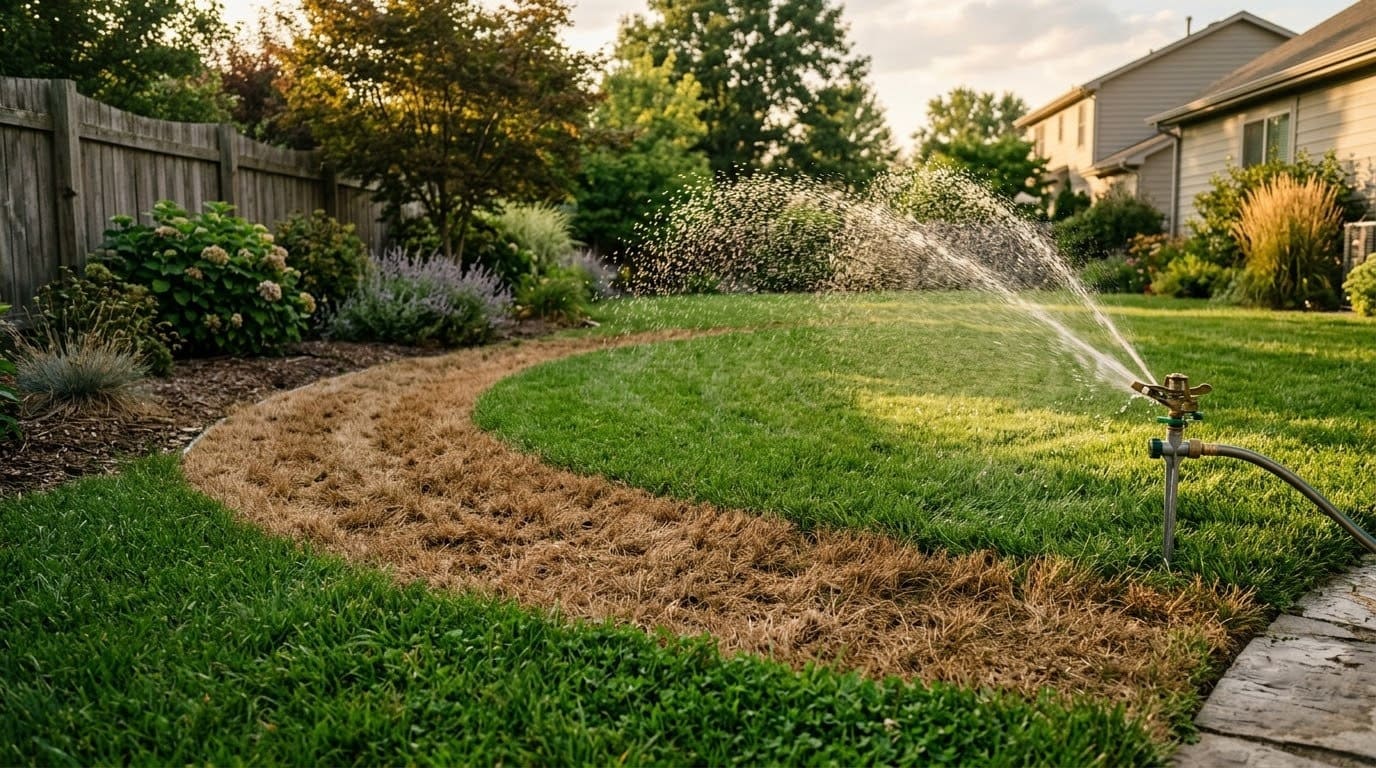
Look at the shape before you touch anything. Brown that spreads in a wedge, an arc, or a stripe, and gets worse the farther you go from a sprinkler head, is almost always a coverage problem.
Brown in a tidy circle with a darker ring around it is probably a disease. Brown that peels up like a rug is grubs. Round spots with a green halo are the dog.
If the pattern says sprinkler, more watering won’t fix it. Cranking the run time just floods the parts of the lawn that were already fine while the dry spot stays dry. The fix is getting water to land where it isn’t landing now.
Quick Answer
Sprinkler-caused brown patches follow the spray pattern. They show up in the gaps between throws, usually driest about halfway between two heads or in a corner one head can’t quite reach, and they hold their shape season after season. Rain Bird’s design standard is head-to-head spacing, meaning each head’s spray reaches the next head, so heads set at half their throw distance apart. Wider than that and the overlap disappears, leaving a dry zone.
Confirm it before you adjust anything. Set straight-sided cans around the zone, run it, and measure.


If the cans between the heads hold noticeably less water than the ones near the heads, you have a uniformity problem, not a run-time problem. The real causes are spacing, mixed head types, a tilted or sunk head, a bad nozzle, a blocked spray, low pressure, or a slope shedding water.
Answer 4 quick questions and get matched to the exact fix for your yard — drainage, budget, layout, or something else entirely.
Take the Free QuizIs it really the sprinkler?
Confirm the cause before you spend money. Each of these browns differently.
| Cause | Shape | Tug test | Other tells |
|---|---|---|---|
| Sprinkler coverage gap | Wedge, arc, or stripe, worst far from heads | Grass firmly rooted, soil dry below | Same shape every dry spell, footprints stay visible for minutes |
| Brown patch fungus | Roughly circular, 6 inches to several feet | Rooted, blades have tan lesions | Darker “smoke ring” edge in morning dew, spreads in warm humid weather |
| Grubs | Irregular, expanding | Peels up like loose carpet | White C-shaped larvae in the top inch of soil, birds or skunks digging |
| Dog urine | Small round spots | Rooted | Ring of extra-green grass around each spot, repeats in the same places |
| Dull mower blade | No patches, whole-lawn haze | Rooted | Grayish or tan cast on the cut leaf tips a day or two after mowing |
Kansas State University’s turf team notes that more than half of the summer lawn samples sent to university diagnostic labs have no disease in them at all. It’s heat, drought, or uneven water. So if the shape points to the sprinkler, trust that and start there.
The dull-blade look and the dog spots both have their own fixes that no amount of irrigation tuning will solve, so rule them out first.
1. Your heads are spaced too far apart for head-to-head coverage
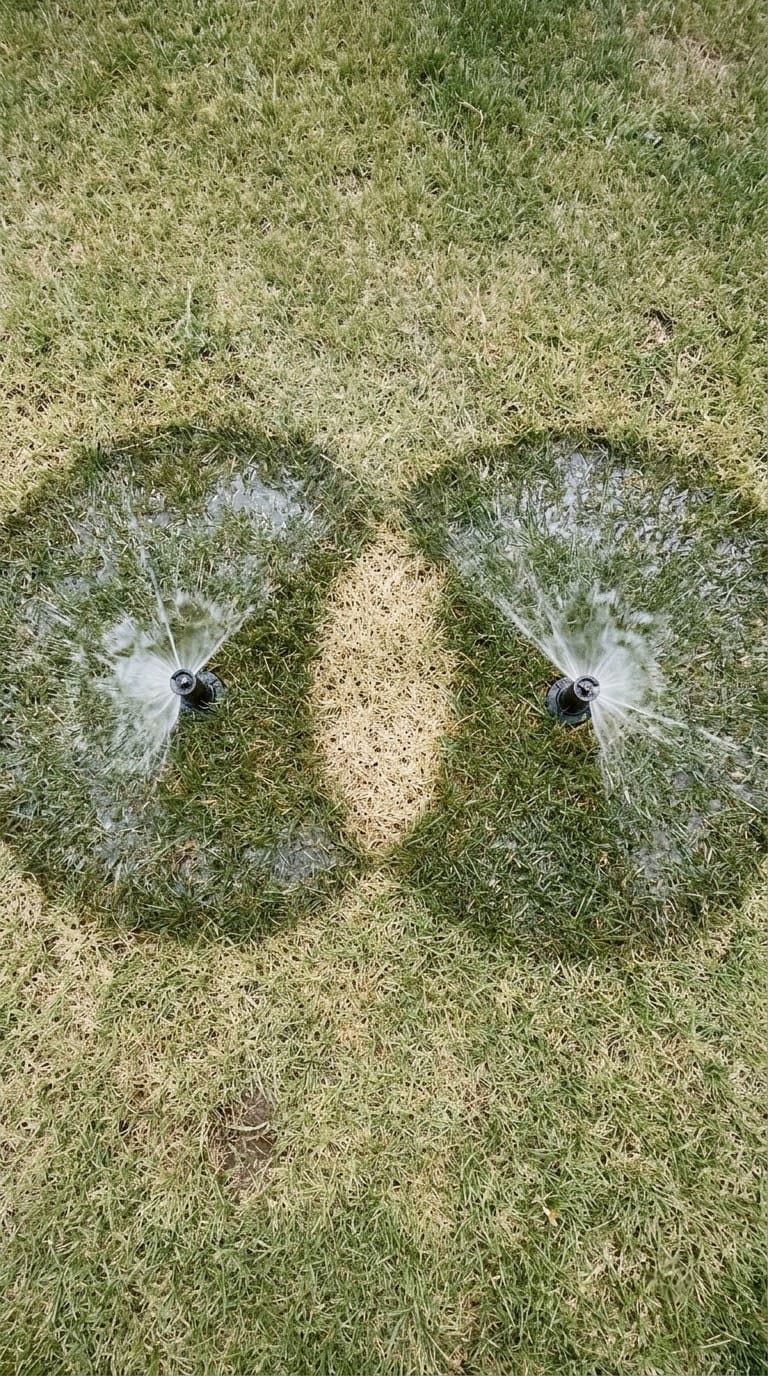
A sprinkler doesn’t lay down water evenly across its whole circle. It puts down the most close to the head and the least at the far edge of the throw. Head-to-head spacing exists to cancel that out, because the thin far edge of one head’s spray lands where the next head is strong.
Space the heads at 60 or 70 percent of the throw instead of 50, and that overlap vanishes. You get a ring or a crescent of dry grass sitting between every pair of heads, and it’s worst in July.
Quick fix: Measure the actual throw of your heads, then measure the spacing. If heads are more than about half their throw apart, you need another head in the gap, or lower-flow nozzles on the existing heads so the coverage tightens up. Adding minutes will not close a spacing gap.
2. You’ve got rotors and spray heads mixed on the same zone
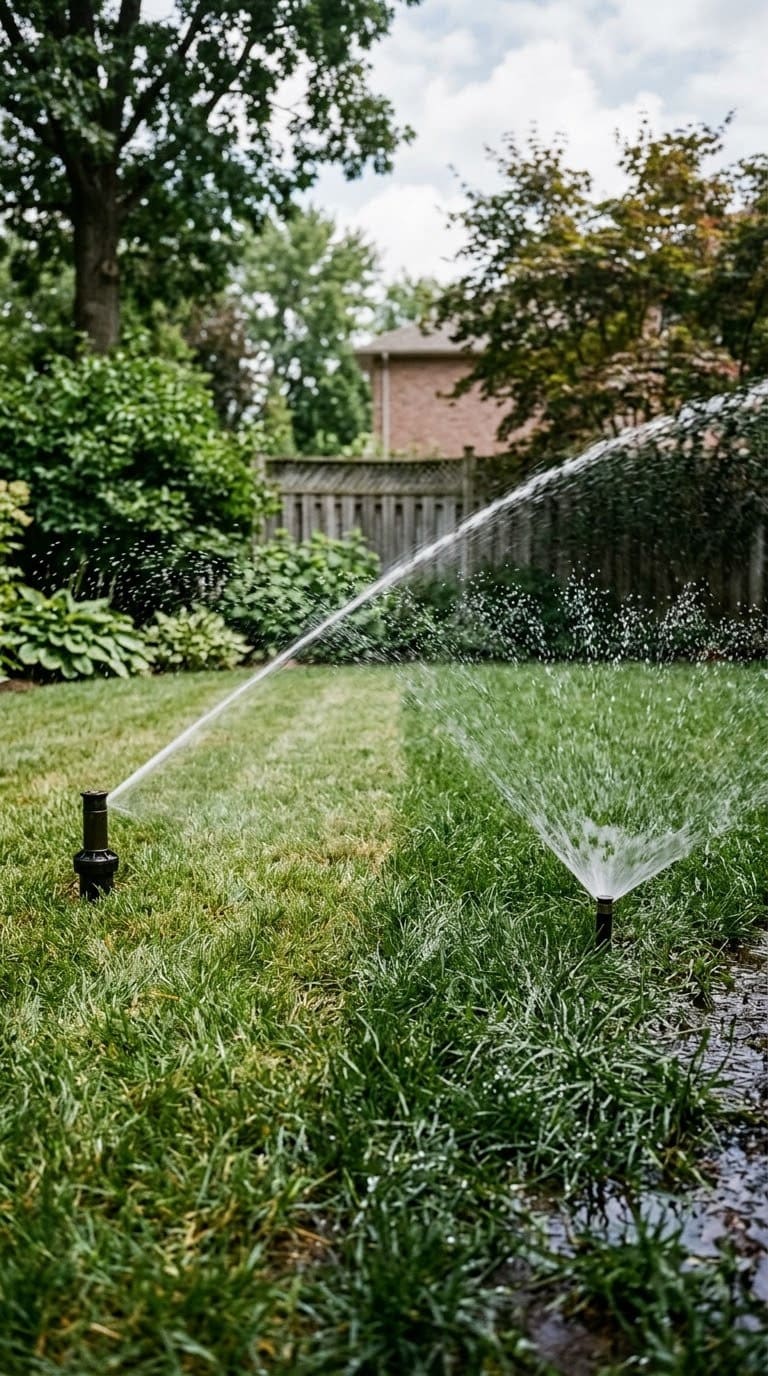
Rotors and spray heads put down water at completely different rates. A typical spray head applies around 1.5 inches per hour, while a typical rotor applies closer to 0.4.
Most yard problems trace back to one specific, fixable cause. Find yours in 4 quick questions.
Take the Free Quiz
Straight-sided marked cups for running a catch-can distribution-uniformity test on a zone
Shop NowThis post contains affiliate links. We may earn a commission on qualifying purchases at no extra cost to you.
Put both on one valve and run it long enough to satisfy the rotor section, and the spray section has been flooded four times over. Run it for the spray section and the rotor section is bone dry.
Colorado State University Extension’s Mary Small puts it plainly. Mix head types in the same zone and you apply too much and too little water at the same time.
Quick fix: Separate them onto different valves if you can. If re-plumbing isn’t realistic, convert the whole zone to matched precipitation rate nozzles, like rotary nozzles that drop into a spray body, so every head on the zone applies water at the same rate.
3. A head is tilted, sunk, or only popping up partway
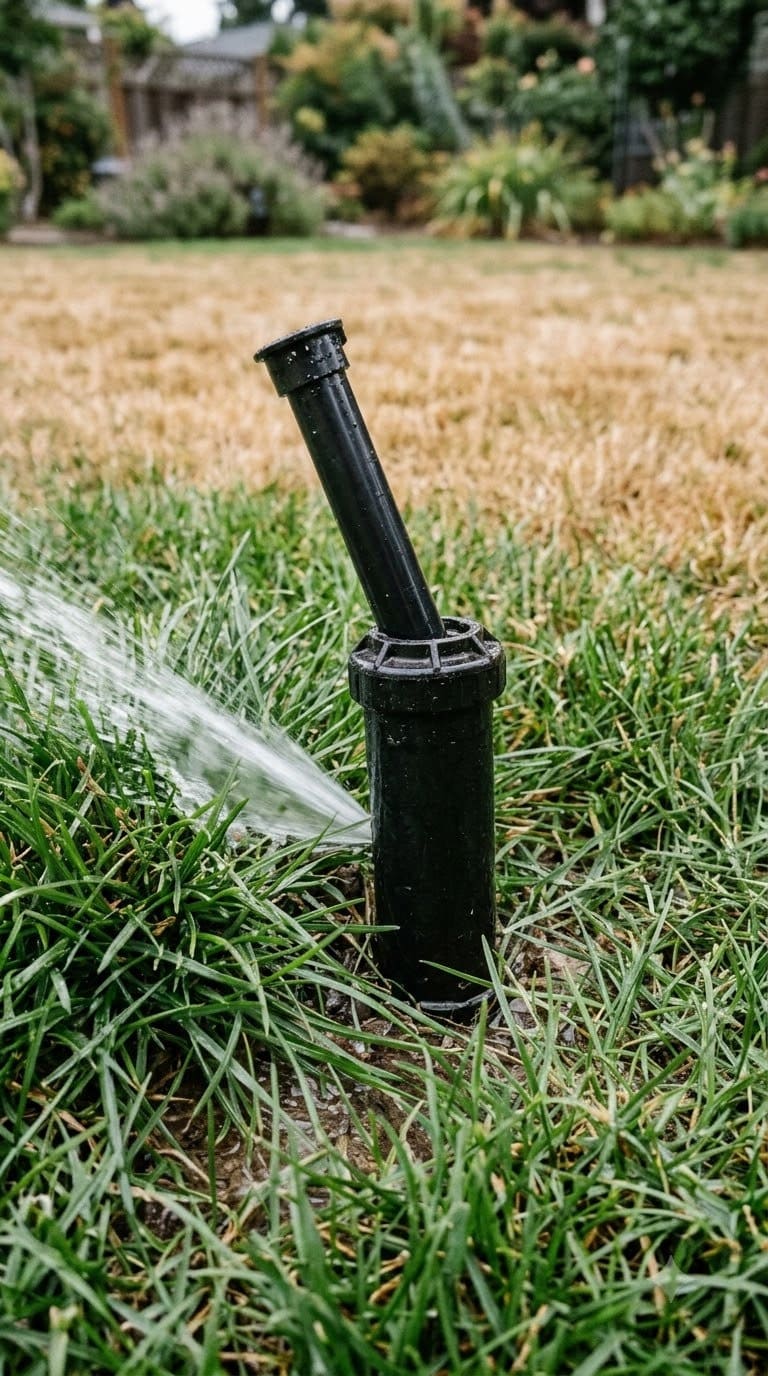
This is the one Mary Small found on her own lawn, three times over. One head was knocked crooked so it watered a shrub instead of the grass, one popped up only partway and wet a tiny circle around itself, and one was partially plugged.
A head that sits low gets its spray knocked down by the surrounding grass before it travels. A head tilted a few degrees throws long on one side and short on the other. Either way the pattern it was designed to produce is gone.
Quick fix: Run each zone by hand and watch every head come up. Straighten any that lean, and reset any sitting below grade so the nozzle clears the turf by half an inch when extended. A sunk head usually just needs to be dug around, raised on the riser, and the soil tamped back.
4. A nozzle is clogged, worn, or the wrong size for that spot
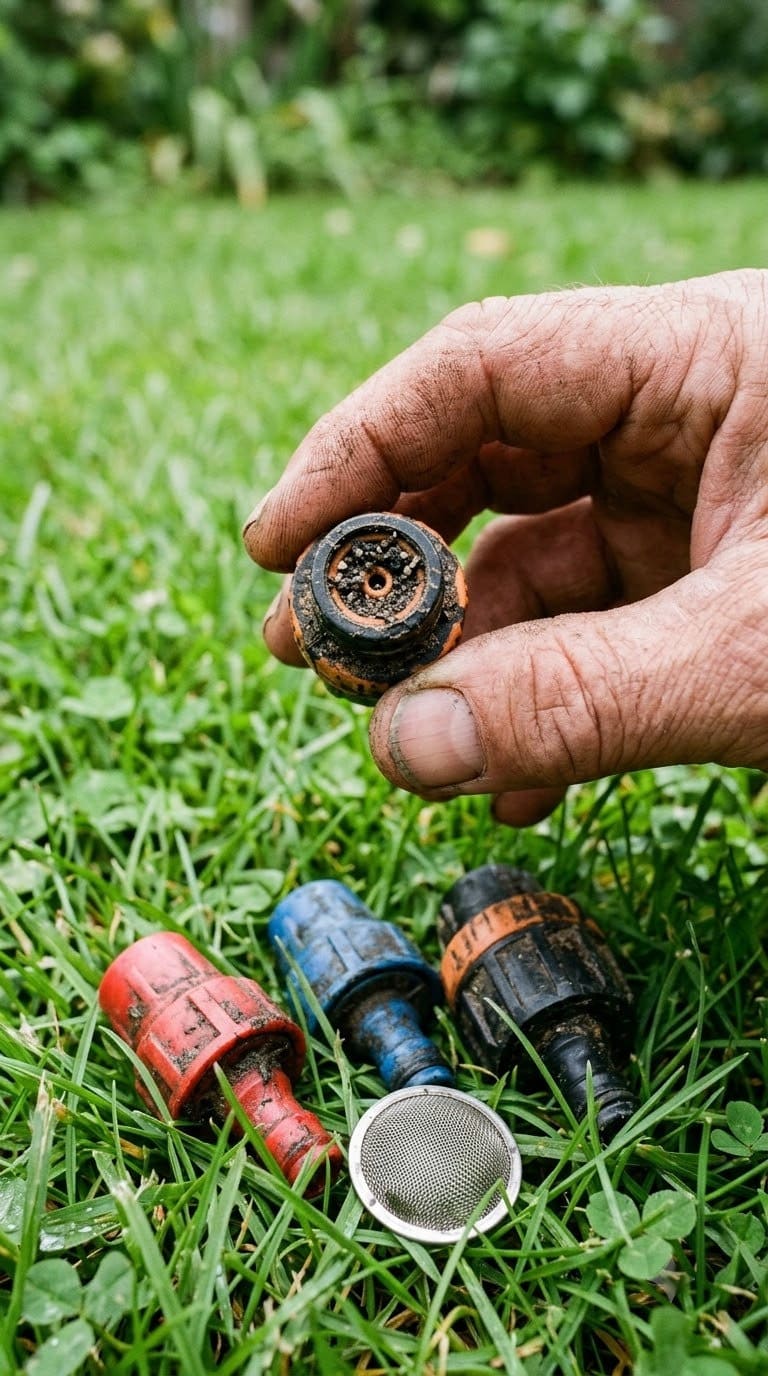
Grit from the water line lodges in a nozzle and chokes the pattern. You get a head that dribbles instead of throwing, or one that has lost a slice of its arc. After a few years the plastic orifice also wears larger and the stream breaks up short.
The wrong nozzle is subtler. A corner that needs a quarter-circle nozzle throwing 15 feet won’t get covered by a quarter nozzle rated for 8, and no run time fixes a stream that physically stops 7 feet short of the brown.


Quick fix: Pull and rinse the nozzles and the filter screens under them. Replace any that look chewed up, they’re a couple of dollars each. Match the nozzle’s rated radius to the distance it actually needs to cover, and keep every nozzle on the zone from the same family so the precipitation rates stay matched.
The average homeowner spends $616/year on yard fixes that don't address the real problem. Find out what yours actually is — before you spend another dollar.
Take the Free Quiz5. Something is blocking the spray
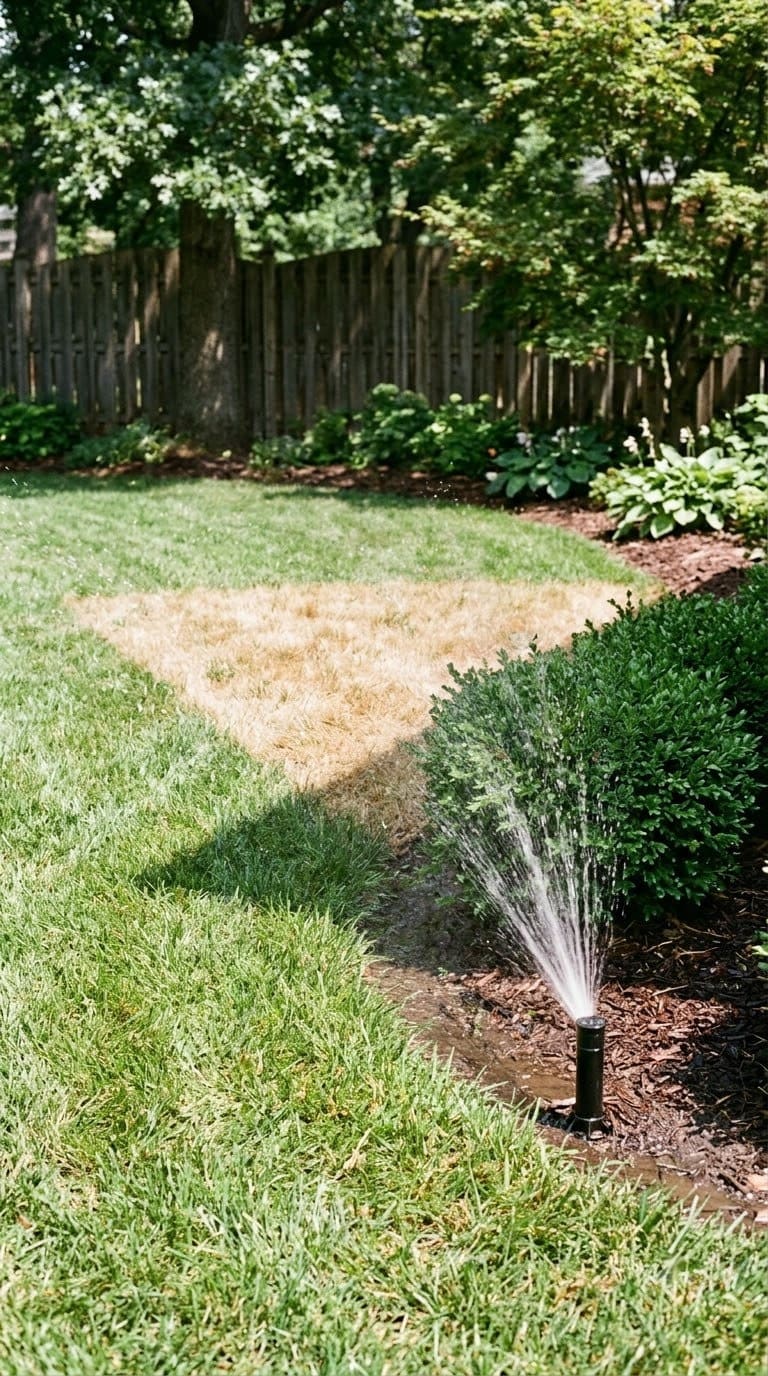
Water can’t go through a solid object. A shrub that has filled out, a new fence panel, a downspout extension, even a section of grass that grew tall because the mower can’t reach it, all cast a dry shadow on the far side.
CSU Extension makes the same point about trees. Spray that hits a trunk leaves a dry spot on the opposite side, shaped like the object doing the blocking.
Quick fix: Walk the zone while it runs and look for spray hitting something it shouldn’t. Prune the shrub back, move the head out past the obstruction, or add a short head on the dry side. A downspout that dumps onto the lawn can block spray and wash out soil at the same time, so reroute it while you’re there.
6. Your water pressure is too low, or there are too many heads on the zone
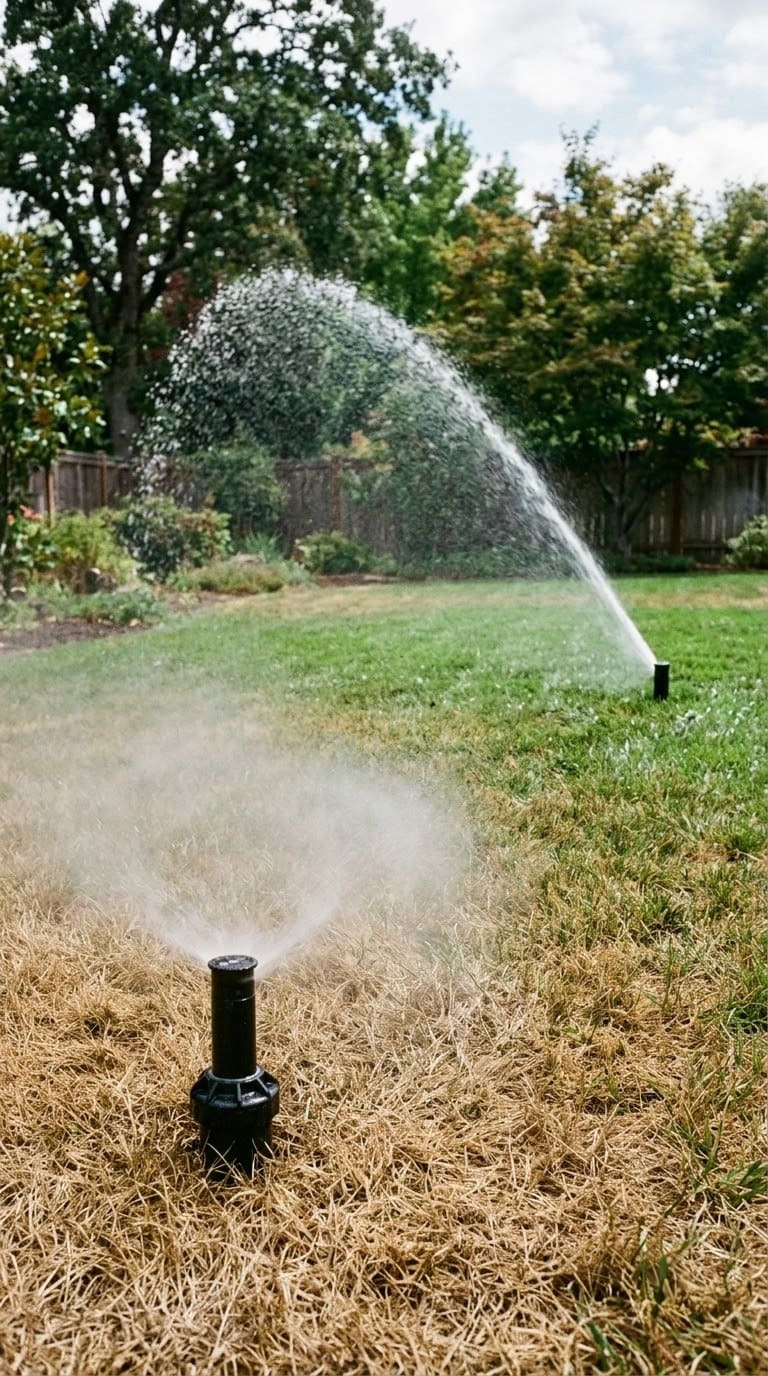
Every nozzle has a pressure it’s designed for. Below that, the stream falls short and often fogs into mist that drifts away or evaporates.
Above it, the stream shatters into fine droplets that also don’t carry. Either way the far edge of the pattern goes dry.
Too many heads on one valve is the common cause at home. The pump or city main can only supply so much flow, and splitting it across eight heads when the zone was sized for five drops the pressure at every head.
Quick fix: Check the pressure at a head with a gauge, or just watch the spray. Fogging and short throw at every head on a zone means low pressure. Count the heads and their combined flow against the zone’s capacity, pull a head or two onto another valve, and consider pressure-regulating bodies if incoming pressure is high and swinging.
7. You water in short daily bursts instead of deep and infrequent
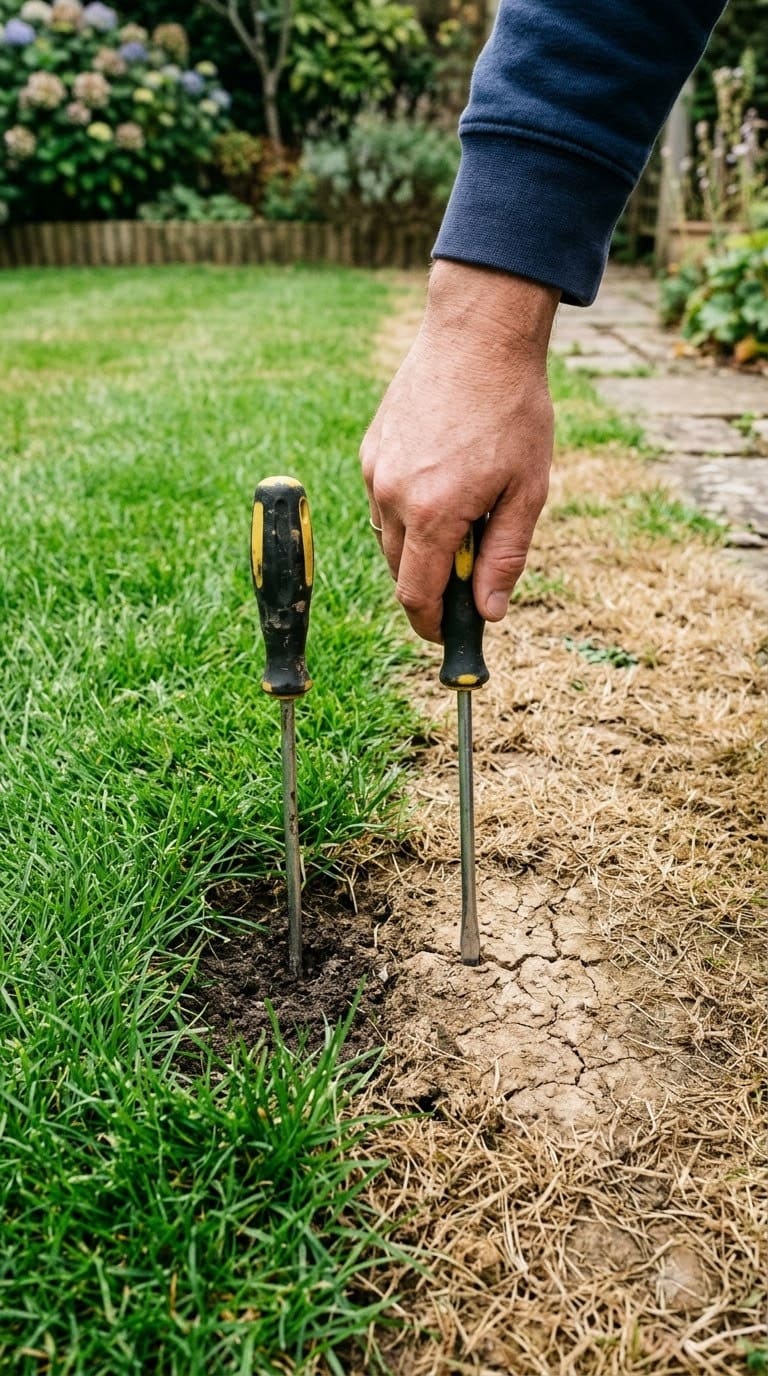
Light daily watering wets the top inch and never gets deeper. Roots follow the water, so they stay shallow, and shallow roots dry out fast in a hot spell. The thinnest-soil spots, over a buried rock or an old walkway, go first.
This looks like a sprinkler problem because the patches are patchy, but the timer is the culprit. More frequent watering makes it worse by keeping the roots lazy.
Quick fix: Water two or three times a week, long enough each time to put down about half an inch to an inch, so it soaks 6 inches down. Push a screwdriver in an hour after a cycle to check depth. A soil moisture sensor on the controller skips cycles the lawn doesn’t need, which trains deeper roots. Planting beds inside the same yard do better on drip lines than on the lawn spray anyway, so splitting those off is worth doing at the same time.
8. It’s a slope, and the water runs off before it soaks in
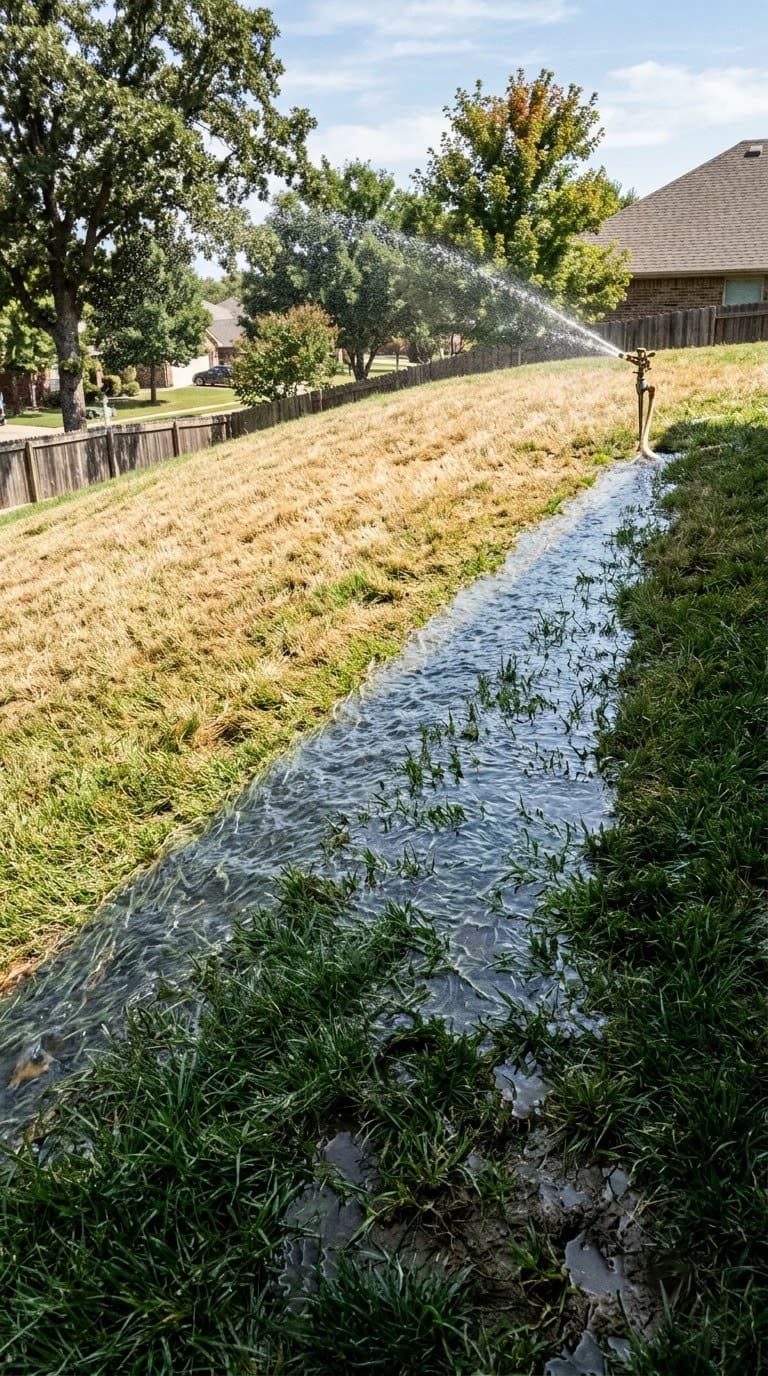
On a slope, a sprinkler often applies water faster than the soil can absorb it. The excess runs downhill. The top of the slope stays dry and brown, the bottom stays soggy and green, and a longer run time just sends more water down the hill.
Clay soil and compacted, high-traffic areas do the same thing on flat ground.
Quick fix: Use cycle and soak. Split the zone’s total time into two or three short runs 30 to 60 minutes apart, so each run stops before runoff starts and the water has time to sink in between. Most modern controllers have this built in. Aerating a compacted or clay lawn also lets water in faster.
How do you run a catch-can test?
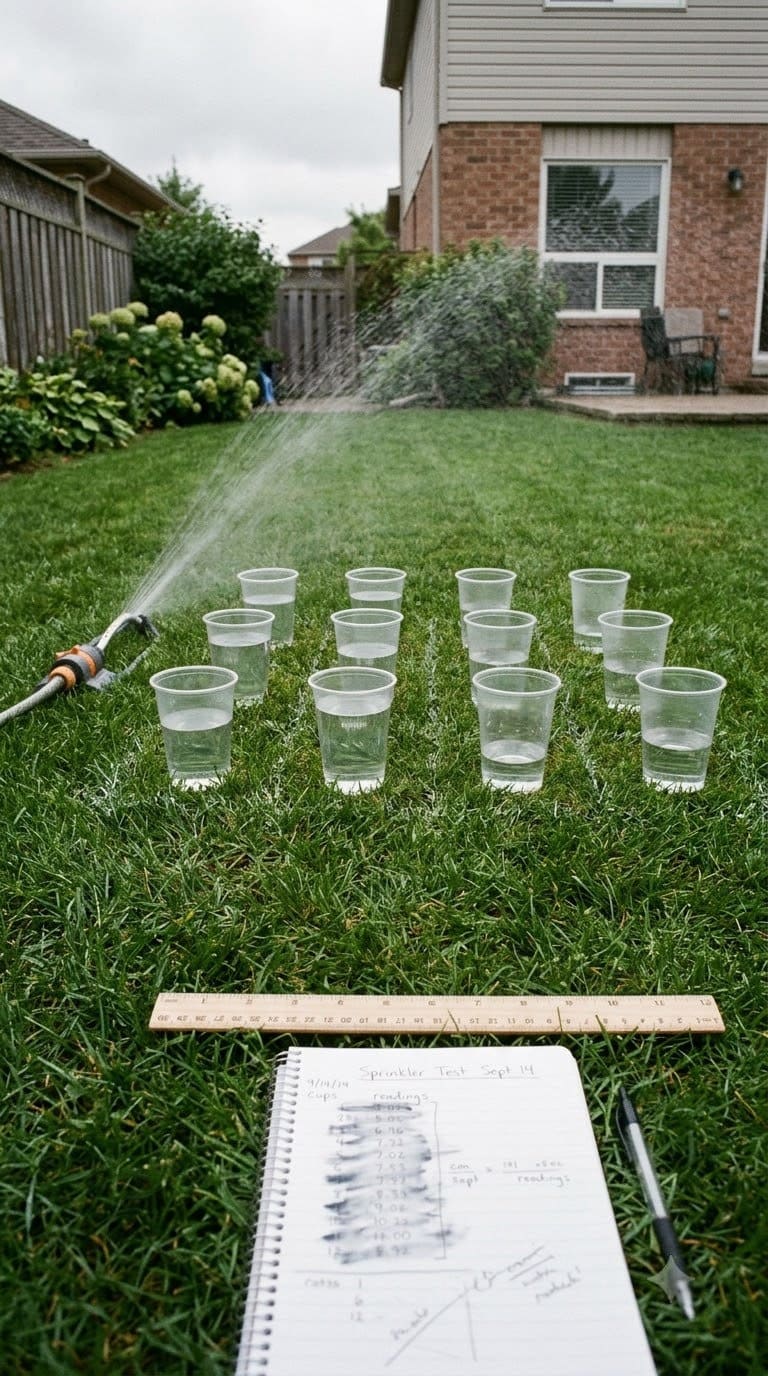
This is the one step that turns a guess into a number, and it costs nothing if you save tuna cans.
Set out at least 24 straight-sided containers across the zone in an even grid, University of Minnesota Extension recommends. Put some right next to heads, some halfway between, and some in the corners and the brown spot.
Run the zone for its normal test time. UMN suggests 5 to 10 minutes for spray heads and 10 to 20 minutes for rotors, long enough for at least five full rotations.
Measure the depth in every can with a ruler. Average all of them, then average just the driest quarter, the driest 6 out of 24. Divide the driest-quarter average by the overall average.
If that number is below about 0.65, your coverage is poor and no run-time change will even it out. The cans also show you exactly where the water isn’t reaching, which points you straight at the head or nozzle to fix.
Run times that actually apply an inch
The right run time depends entirely on what kind of head is on the zone. This is why a single timer setting can’t serve a whole yard.
| Head type | Rough precipitation rate | Minutes to apply 0.5 inch | Notes |
|---|---|---|---|
| Fixed spray head | 1.5 in/hr | About 20 minutes | Split into 2 cycles on slopes or clay |
| Gear rotor | 0.4 in/hr | About 75 minutes | Almost always needs cycle and soak |
| MPR rotary nozzle | 0.6 in/hr | About 50 minutes | Even coverage, but plan for the longer run |
Run each zone its own time based on the head type, then verify the real number with the catch-can test, since pressure and nozzle wear shift these figures.
What we learned the hard way
A few things that only clicked after wasting water and grass.
We bumped the clock all summer. Every time a patch browned we added five minutes, and by August the zone ran 40 minutes and the same patch was still dead while the rest of the lawn was spongy.
The catch-can test took 20 minutes and showed the middle cans at half the depth of the edge cans. It was a spacing gap the whole time.
A three-dollar nozzle beat a service call. We paid an irrigation company to look at a stubborn corner, and they said the coverage was “within spec” and left.
The corner needed a 15-foot quarter nozzle and had an 8-foot one in it. Swapped it ourselves, and the corner greened up in a week.
The head really was watering the fence. One head near a new privacy fence had been fine for years, then the fence went in 18 inches in front of it and half its arc hit the boards.
Moving the head one foot out fixed a brown stripe we’d blamed on the dog.
And the slope needed three cycles, not more minutes. The top of our side yard browned every year until one 15-minute run became three 5-minute runs 45 minutes apart.
The runoff stopped. Same total water, completely different result.
Frequently asked questions
Why is only one strip of my lawn brown? A strip or wedge is the signature of a coverage gap, usually between two heads spaced too far apart, or downstream of something blocking a spray. Circles and blobs point to disease, grubs, or pets instead. The strip shape is doing you a favor by telling you it’s the sprinkler.
Will more watering fix a dry spot? Almost never. If the water isn’t physically landing on that spot, running the zone longer just overwaters everywhere else. Fix the coverage first, with spacing, nozzles, head height, or a blockage, then set the run time to match the head type.
How do I know if it’s a pressure problem? Low pressure shows up at every head on the zone at once, not one spot. The spray looks weak, throws short, or fogs into a mist that drifts. A single dry area with normal-looking spray elsewhere is a spacing or nozzle issue, not pressure.
Can I mix rotors and sprays if I add MPR nozzles? You can mix different rotary nozzles, or different spray nozzles, as long as they’re all matched precipitation rate within their family. You still should not run true gear rotors and fixed sprays on the same valve, because their rates are too far apart even to approximate.
Is it the sprinkler or a fungus? Check in the early morning while there’s dew. Brown patch disease often shows a grayish cottony film and a darker ring at the edge of the circle. A sprinkler dry spot has none of that, the grass is just dry and firm, and the shape follows the spray pattern rather than forming a clean circle.
Do I need a whole new sprinkler system? Usually not. Spacing tweaks, nozzle swaps, head leveling, a pressure check, and cycle-and-soak scheduling fix the large majority of brown-patch complaints. A genuine redesign is only needed when a zone was built with too few heads for its area, or the pipe is undersized for the flow.
Related Posts

Products We Recommend
This post contains affiliate links. We may earn a commission on qualifying purchases at no extra cost to you.
Orbit 26251 Sprinkler Catch Cups
Straight-sided marked cups for running a catch-can distribution-uniformity test on a zone
Shop Now
Sprinkler Tool Pack (pull-up key and nozzle tools)
Head pull-up tool plus filter and nozzle cleaning tools for straightening heads and clearing clogged orifices
Shop Now
Rain Bird R-VAN Adjustable Rotary Nozzles (13 to 18 ft, 5-pack)
Matched-precipitation rotary nozzles that thread onto a standard spray body to even out a mixed or low-uniformity zone
Shop NowNever miss an update — choose FarmFoodFamily as your preferred source on Google.
How it works: Tap the button below to open Google's settings page, then check the box next to FarmFoodFamily.
Tap the checkbox to turn it blue — that's how you know it's set.