September Pumpkin & Squash Harvest: 5 Telltale Signs They’re Ready to Pick Right Now
A pumpkin or winter squash won’t ripen any further once it’s off the vine, so the trick is catching the right week, not guessing and hoping for the best.

Never miss an update — choose FarmFoodFamily as your preferred source on Google.
How it works: Tap the button below to open Google’s settings page, then check the box next to FarmFoodFamily.
Tap the checkbox to turn it blue — that’s how you know it’s set.
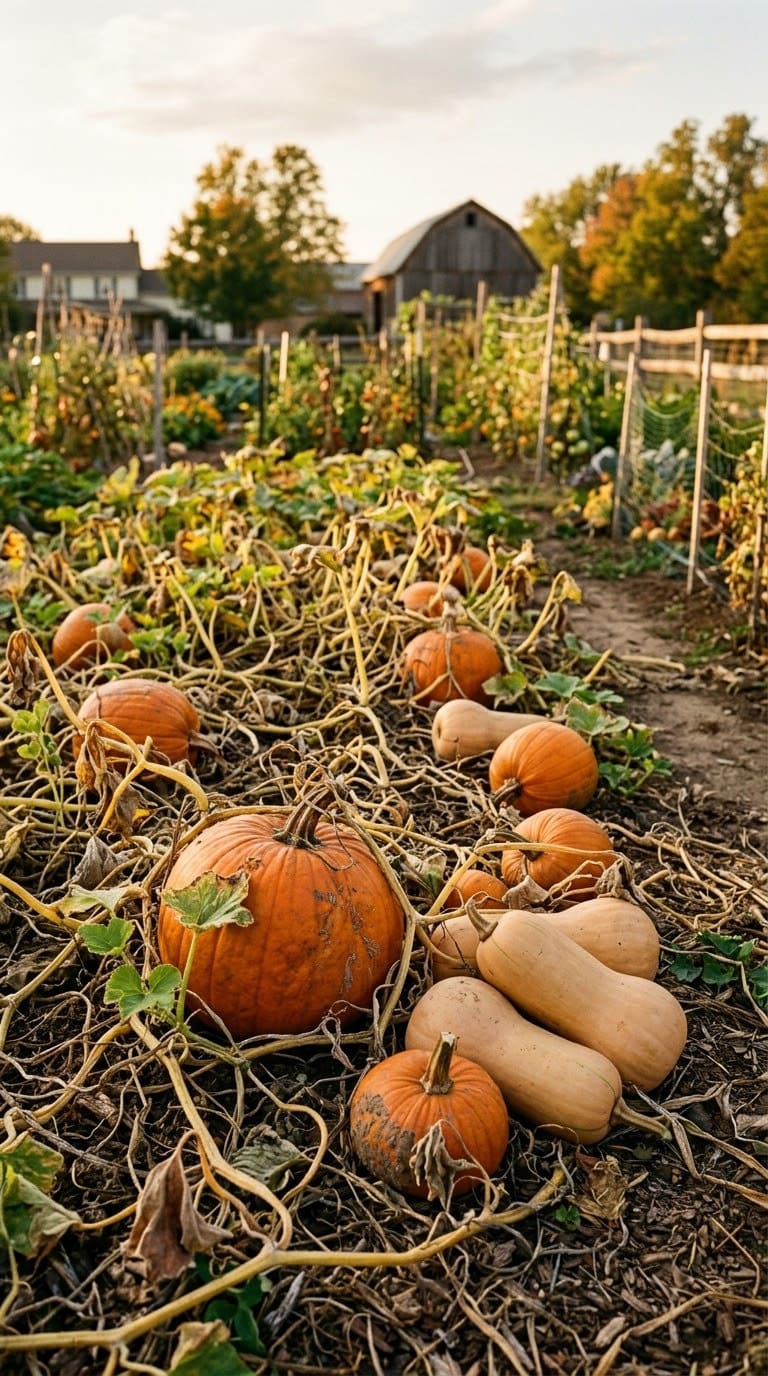
September is decision month for pumpkin and squash growers. The vines are tired, the leaves are yellowing, and somewhere under all that foliage sits a crop that either needs another two weeks or needed to come off yesterday. Guess wrong in either direction and you either shorten your storage window or end up with a fruit that never develops the flavor and texture it should have.
If this is your first pumpkin patch, the same raised vegetable garden bed setup that works for tomatoes and peppers gives sprawling vines better drainage and easier access for checking these signs all season.
And the good news: pumpkins and squash give you real, physical signals when they’re done. You just have to know which ones actually mean something and which ones are false alarms. Below are the 5 signs worth trusting, the mechanism behind each one, and the specific lookalike that trips people up.
Quick Answer
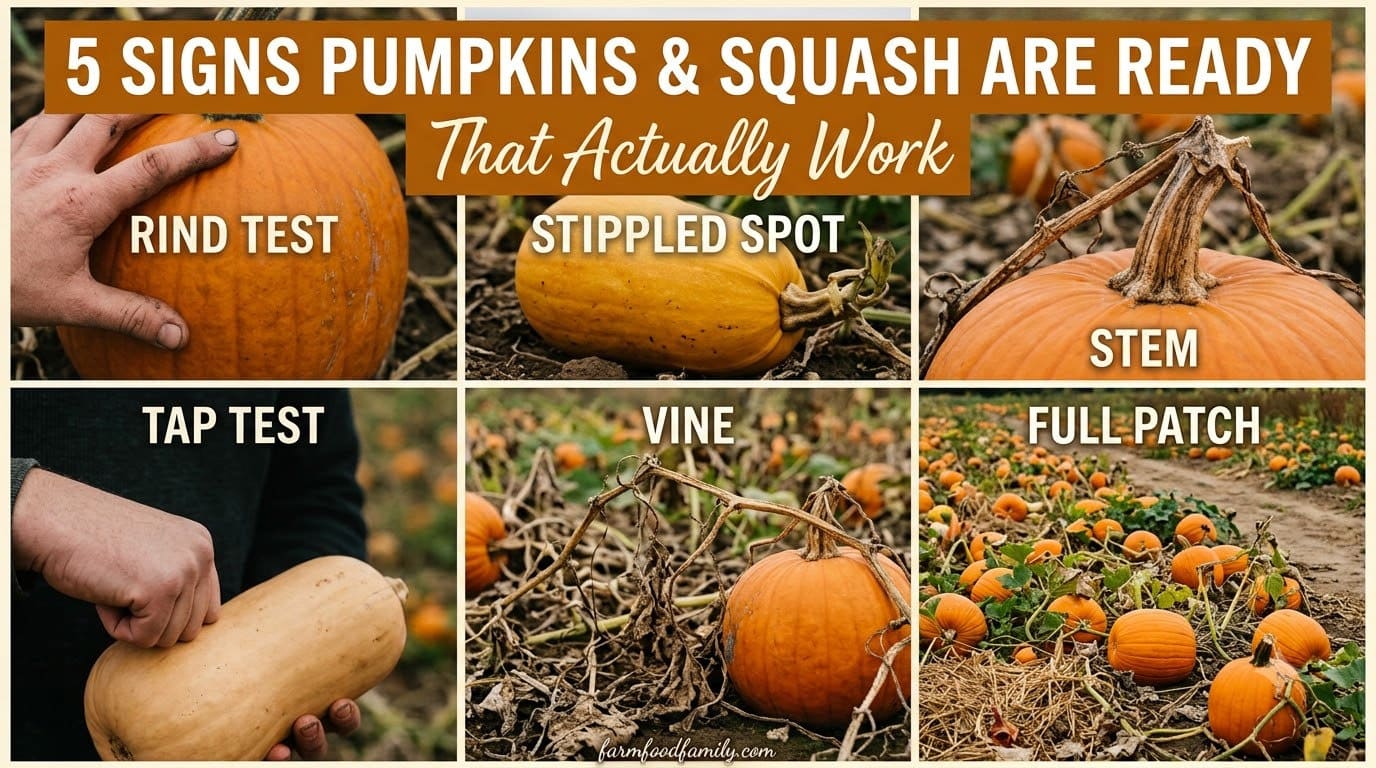
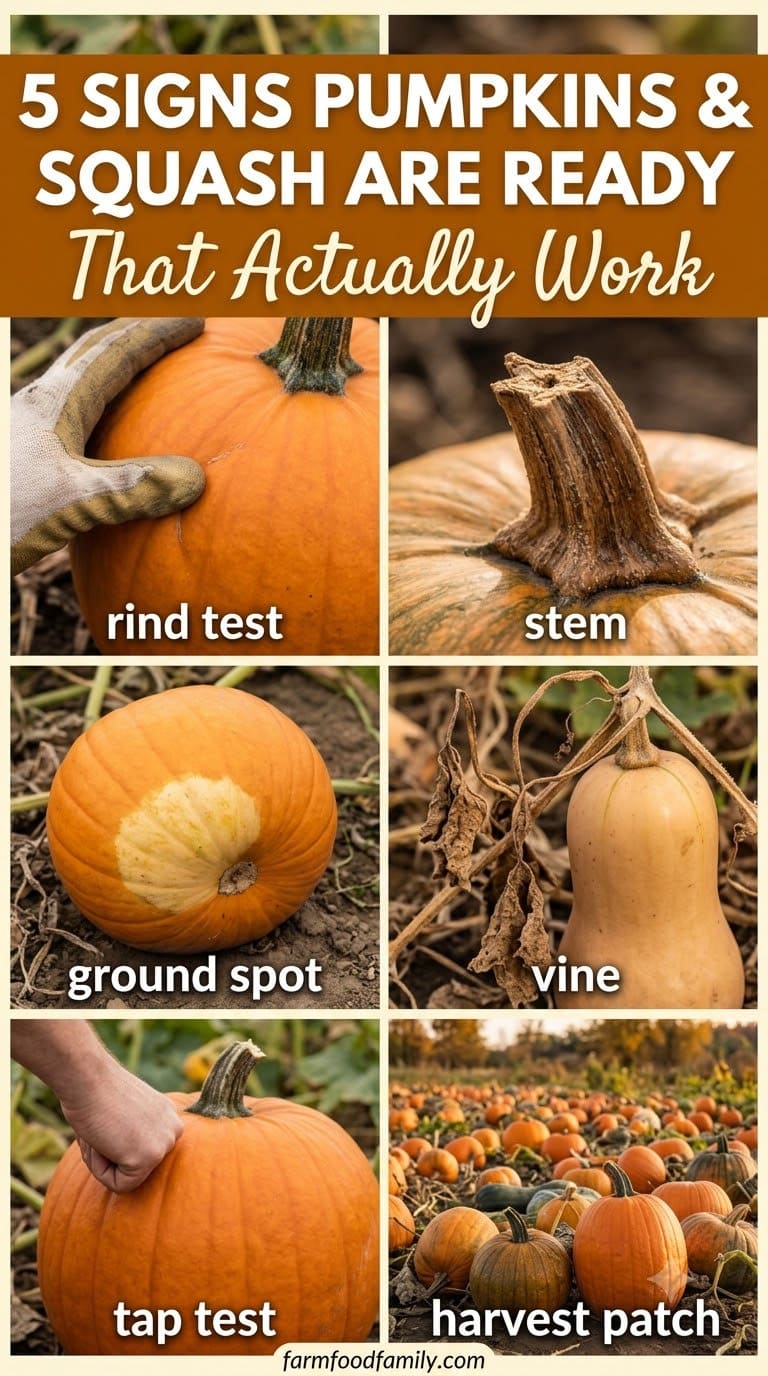
Pumpkins and winter squash are ready to pick when at least three of five signs agree.
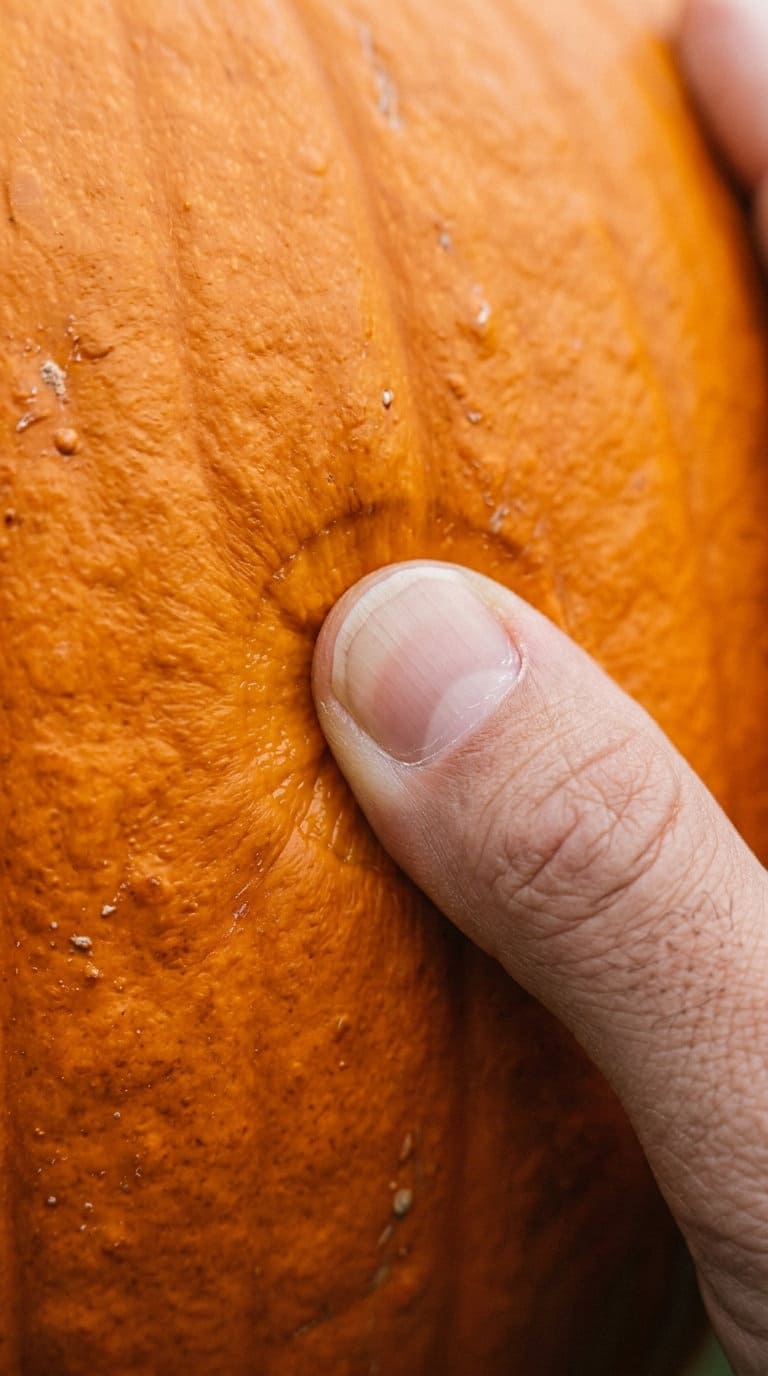
First, the rind resists a thumbnail: press your nail into the skin, and a mature fruit leaves only a shallow dent instead of puncturing.
Second, the stem has turned tan to brown and feels dry and corky, not green and fleshy, since the vine has stopped feeding the fruit.
Answer 4 quick questions and get matched to the exact fix for your yard — drainage, budget, layout, or something else entirely.
Take the Free QuizThird, on acorn and kabocha squash, the ground spot where the fruit rests on soil has shifted from pale yellow to deep orange or cream.
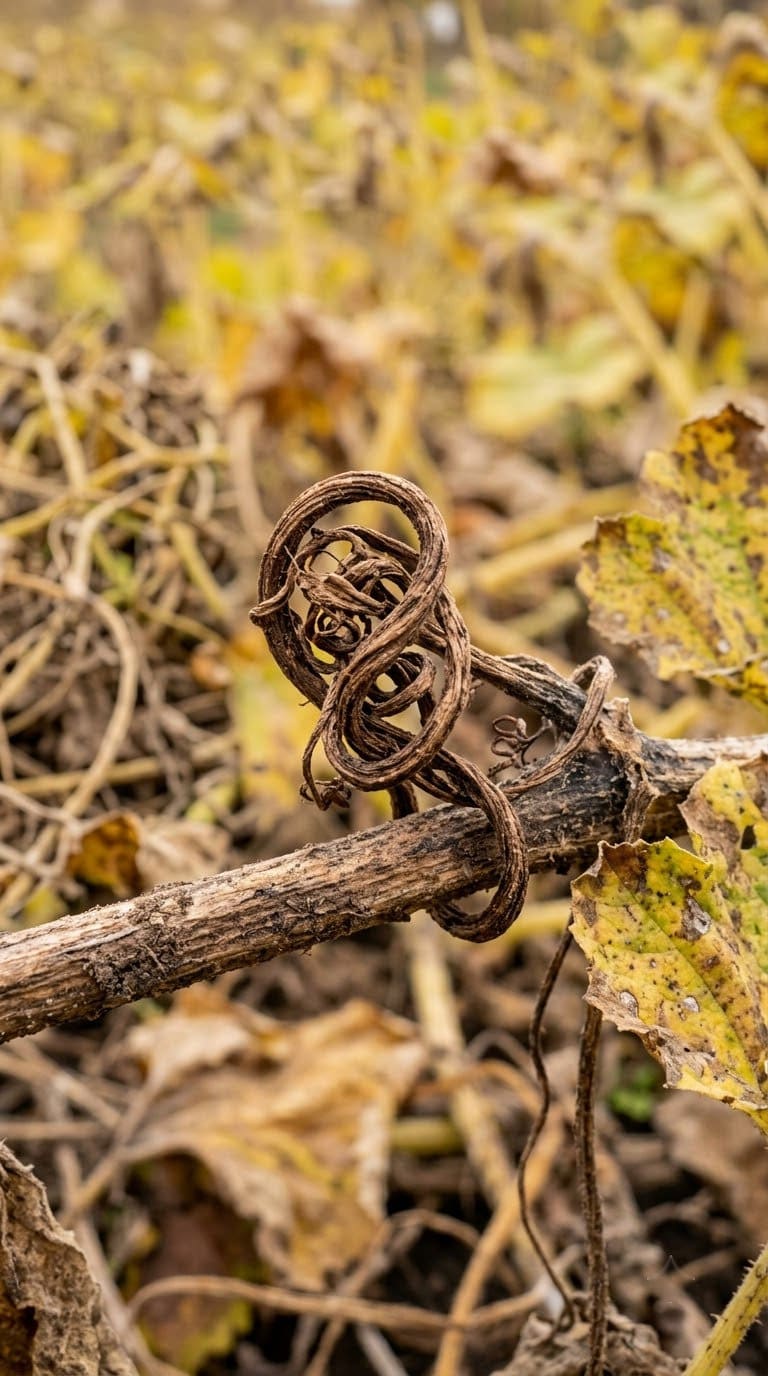
Fourth, the vine and the tendrils nearest the stem have dried and browned as the plant finishes its season.
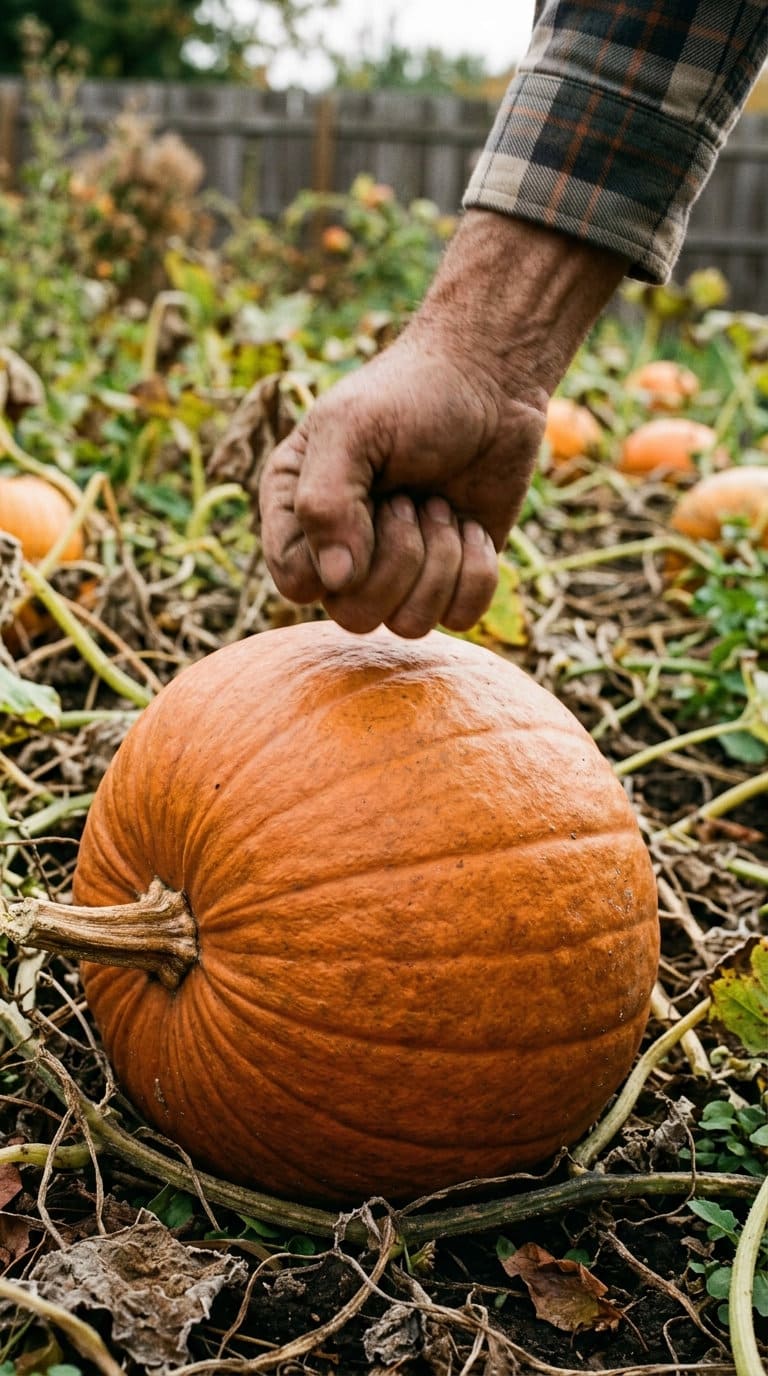
Fifth, a knuckle rap produces a hollow thump rather than a dense thud, though this sign alone is unreliable.
According to South Dakota State University Extension, harvest before temperatures drop below 45°F, since pumpkins and squash do not ripen further once cut from the vine.
5 Signs at a Glance
| Sign | What It Means | How to Test | False Positive to Watch For |
|---|---|---|---|
| Rind hardness | Skin has finished lignifying (hardening) for storage | Press a thumbnail into the skin at 2-3 spots | A hard press leaving a bruise-like mark on a still-soft rind, so test with light pressure, not force |
| Stem color and drying | Vine has stopped feeding the fruit | Check color and feel near the fruit, not the whole vine | Sun-scorched or diseased stem that’s brown but still soft/pliable underneath |
| Ground spot color | Fruit’s shaded contact point has finished ripening | Roll the fruit gently, check the pale patch touching soil | Dark, soft, or fuzzy discoloration, that’s rot, not ripening |
| Vine and tendril dieback | Plant is redirecting energy away from vegetative growth | Look at tendrils nearest the fruit’s own stem | Patchy dieback from powdery mildew or vine borers earlier in the season |
| Hollow sound when tapped | Flesh has firmed and the seed cavity has more open space | Knuckle-rap the fruit and listen for a deep thump | Large, thick-walled varieties can sound hollow slightly before they’re fully ready |
Sign 1: Does the Rind Resist a Thumbnail?
This is the single most reliable test, and the one to trust when the others disagree. As a pumpkin or squash matures, the rind lignifies, meaning it builds up the same kind of woody compounds that toughen bark and stems.
An immature rind is still soft enough for a fingernail to pierce it cleanly. A mature one resists that same pressure, leaving nothing more than a faint dent that doesn’t break the skin.
Most yard problems trace back to one specific, fixable cause. Find yours in 4 quick questions.
Take the Free Quiz
Curved serrated blade for cutting pumpkin and squash stems cleanly with 2-4 inches left attached, the correct technique described in "What We Learned the Hard Way" above
Shop NowThis post contains affiliate links. We may earn a commission on qualifying purchases at no extra cost to you.
Test at 2-3 different spots on the fruit, not just one, since sun exposure and ground contact can mature different parts of the same fruit at slightly different rates. Press with your thumbnail, not your whole nail bed, and use light, deliberate pressure rather than force.
The lookalike to watch for: pressing too hard on any rind, even a genuinely ready one, can leave a visible mark that looks like a partial puncture. The real test isn’t whether you see a mark at all, it’s whether that mark is a shallow dent or an actual break in the skin. If your nail goes in and you can lift a sliver of rind, it’s not ready yet, no matter what the stem or color say.
Sign 2: Has the Stem Turned Corky and Dry?
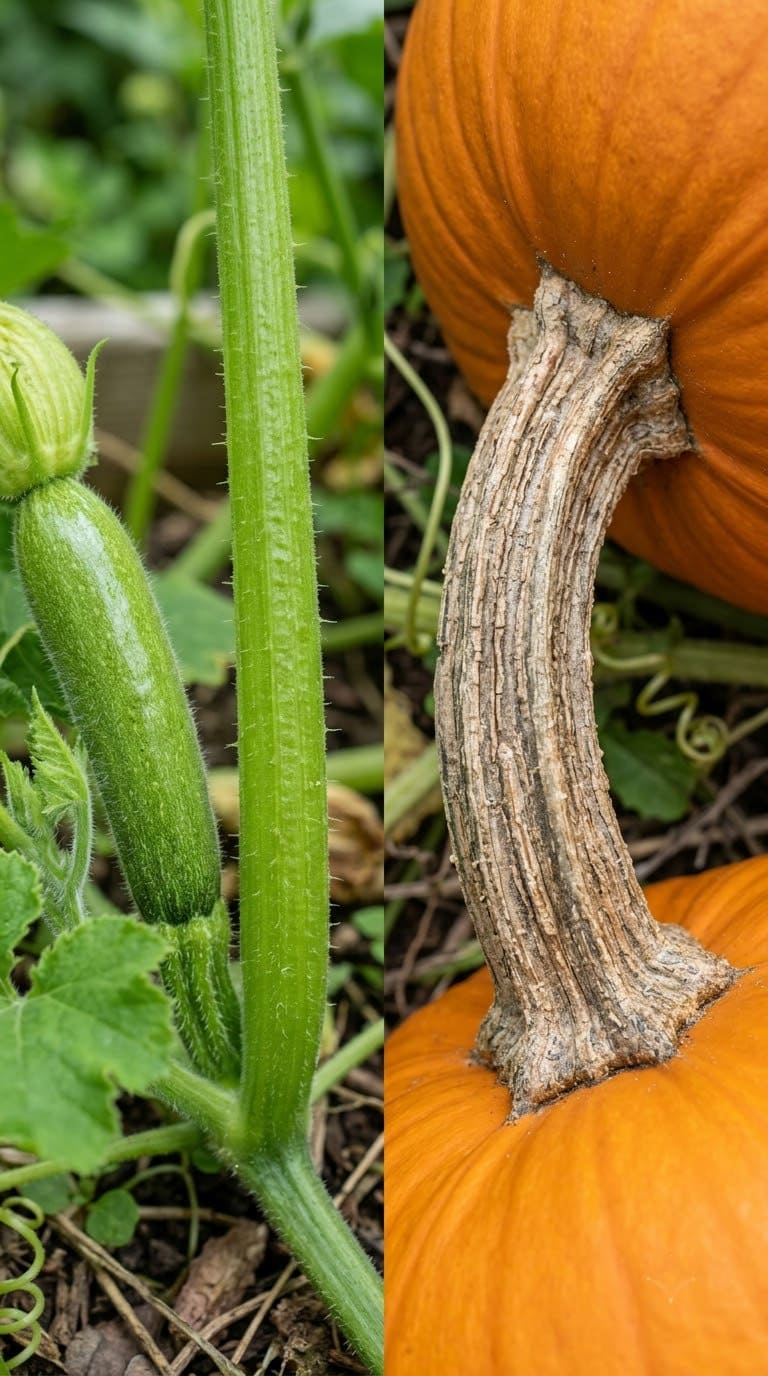
Look at the stem where it meets the fruit, not the vine in general. As the fruit finishes ripening, the plant cuts off the flow of water and nutrients to it, and the stem responds by losing its green chlorophyll and developing a corky, tan-to-brown, woody texture right at the point of attachment. South Dakota State University Extension calls this “loss of green and the development of brown, woody stripes on the stem” and treats it as the primary maturity indicator, ahead of rind hardness for some squash types.
A stem that’s still green, soft, or fleshy means the vine is still actively feeding that fruit. Leave it another week and check again rather than force the issue.
The lookalike: sun-scorch or early disease can turn a stem brown while it’s still soft and pliable underneath, which isn’t the same thing as true corking. Squeeze the stem gently. If it gives like a fresh vegetable stalk, that’s not corking yet, regardless of the color you’re seeing on the surface.
Sign 3: Has the Ground Spot Changed Color?
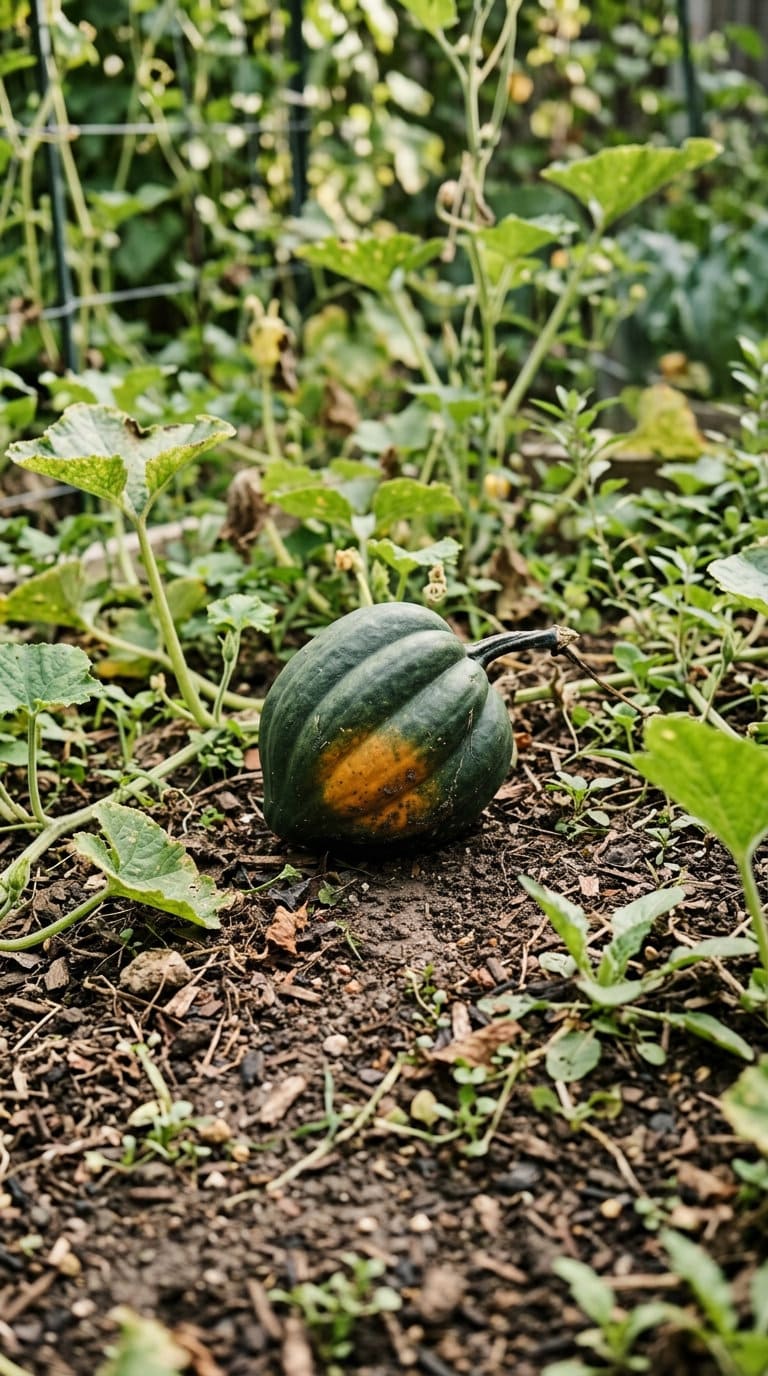
This one matters most on acorn and kabocha squash, since they typically rest with one consistent patch touching the soil. That contact point is shaded from the sun and ripens on a slightly different schedule than the rest of the fruit, which is exactly why it’s a useful cross-check. As the fruit finishes maturing, this ground spot shifts from a pale yellow or near-white color to a deeper orange or cream.
Roll the fruit gently (don’t yank it, the stem is still attached) and check the underside. If that patch still looks pale and washed-out while everything else looks ready, give it a few more days.
The lookalike: a dark, soft, or slightly fuzzy discoloration on the ground spot isn’t a ripeness signal, it’s the early stage of rot or mold from sitting on damp soil. That fruit needs to be checked for softness and possibly harvested early anyway, before it gets worse, but it’s a different problem than simple ripening.
Sign 4: Are the Vine and Nearby Tendrils Dying Back?
As the growing season winds down and the plant finishes putting its energy into the fruit rather than new vegetative growth, the vine naturally begins to senesce. Leaves yellow, and the tendrils closest to the fruit’s own stem dry out and turn brown, the same signal gardeners already use for judging melon ripeness.
The average homeowner spends $616/year on yard fixes that don't address the real problem. Find out what yours actually is — before you spend another dollar.
Take the Free QuizThis is a supporting sign, not a stand-alone one. Check the tendrils within a foot or two of the specific fruit you’re evaluating, since dieback doesn’t happen uniformly across a sprawling vine.
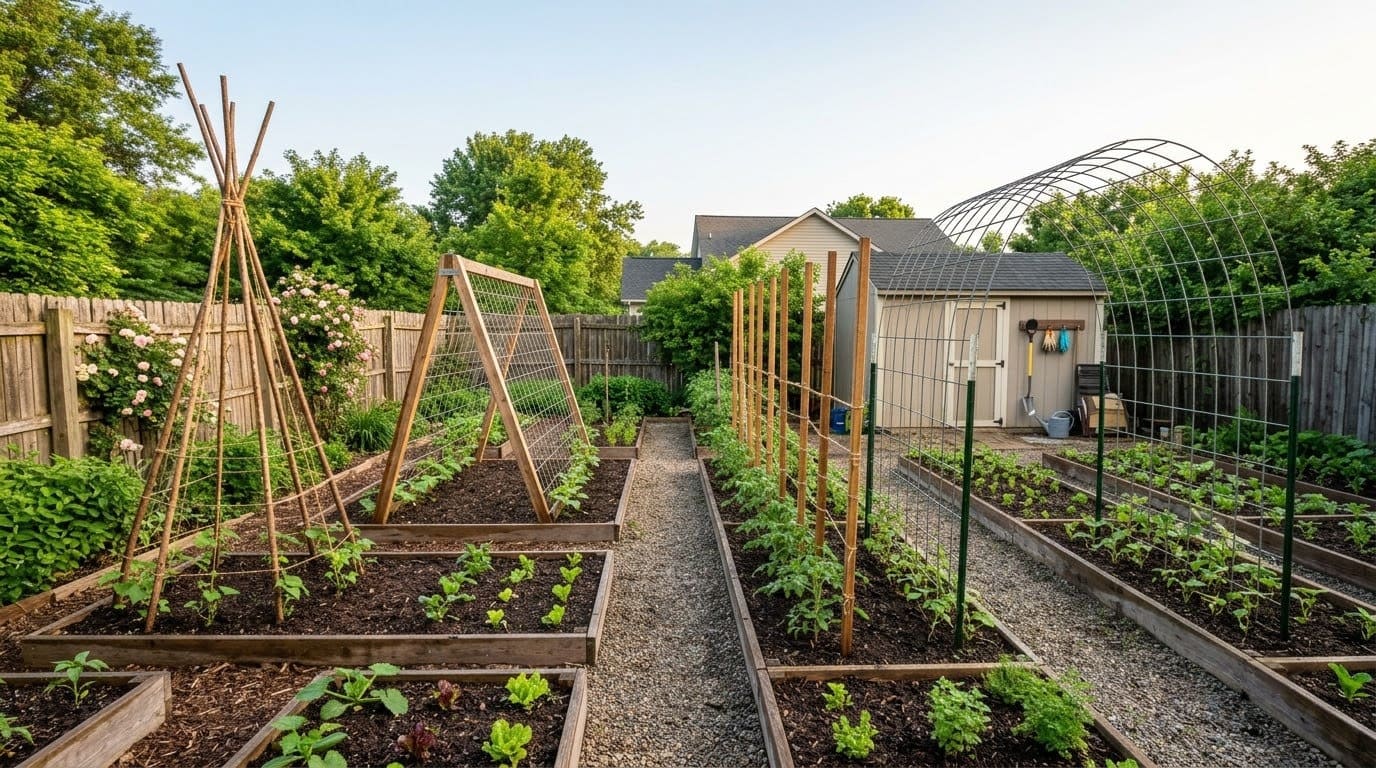
The same sprawl that makes vines hard to inspect is also why keeping vines contained matters, and the trellising and edging tricks in our vegetable garden fencing guide make it easier to reach every fruit without trampling the bed.
The lookalike: dieback earlier in the season from powdery mildew, squash vine borer damage, or plain heat stress looks similar but means something different, a stressed or dying plant, not necessarily a finished fruit. If the dieback is patchy, isolated to one section, or shows up alongside visible pest damage or white powdery patches on leaves, don’t treat it as a ripeness cue on its own. Check the fruit’s own signs (rind, stem, ground spot) before deciding.
Sign 5: Does It Sound Hollow When Tapped?
Rap the fruit with your knuckles the way you’d check a watermelon. As the flesh dries slightly and firms and the seed cavity takes up proportionally more of the interior space, a mature fruit produces a deeper, more hollow-sounding thump, while an immature one sounds denser, more like a dull thud.
Treat this as a confirmation sign, not a primary one. It’s the least reliable of the five on its own, since fruit size, wall thickness, and variety all change how the sound comes through. A large, thick-walled variety can sound hollow slightly before it’s actually finished ripening by the other measures.
Use it as your last check after the rind, stem, and color have already agreed, a way of double-checking rather than deciding on its own.
Pumpkins vs. Winter Squash: Where the Timing Actually Differs
Both crops share the same 5 signs, but the order they show up in, and which one to trust first, shifts by type.
Pumpkins lean most heavily on rind hardness, full color development, and stem corking together, since most varieties aren’t grown resting flat against a single soil-contact patch the way acorn and kabocha squash are, which makes the ground-spot test less useful for them specifically.
Butternut squash is the type most likely to trip people up on timing: its rind actually reaches full hardness roughly 2-3 weeks before its color fully sets into the mature tan shade. Relying on color alone with butternut means harvesting later than necessary. If the thumbnail test already shows a hard rind, trust that over a rind that still looks slightly green-tinged.
Acorn and kabocha squash lean hardest on the ground-spot color shift, since their rind can feel “hard enough” to pass the thumbnail test before the fruit has actually finished ripening internally.
What We Learned the Hard Way
The single most common mistake with pumpkins and winter squash is picking too early because the vine is starting to look tired and it feels like time to clear the bed. Unlike a tomato, a pumpkin or squash is not a climacteric fruit. It doesn’t keep ripening once it’s cut from the vine, the sugars and rind hardening it still needed happen on the plant, not in your kitchen or garage.
The result of picking early looks fine at first, which is exactly what makes the mistake so easy to repeat. The fruit sits on the counter looking perfectly normal for a week, sometimes two. Then it softens at the stem end, wrinkles, or starts to rot from the inside out well before it should, and by then it’s too late to do anything but toss it or use it as compost.
The fix that actually works: wait until at least 3 of the 5 signs above agree before you cut anything. One sign alone isn’t enough, and a hollow sound or a slightly firm rind on its own has fooled plenty of first-time growers into harvesting a week too soon. If you’re on the fence, give it another few days and check again rather than harvesting on a hunch.
Cutting technique matters too. Use a knife or pruners rather than twisting or pulling the fruit free, and leave 2-4 inches of stem attached. A torn or missing stem opens the door to stem-end rot that can spread into the whole fruit within weeks, undoing all the patience that went into waiting for the right pick date in the first place.
When Should You Actually Cut Everything, Ready or Not?
Watch the forecast, not just the calendar. University of Vermont Extension and other university extension offices generally recommend getting fruit off the vine before a hard frost, and South Dakota State University Extension specifically flags 45°F as the point to start paying close attention, since pumpkins and squash can tolerate a brief dip to around 35°F if warmed back up quickly, but sustained cold damages the rind and shortens storage life regardless of how ripe the fruit otherwise looks.
If a hard freeze is forecast and some fruit hasn’t hit 3 of the 5 signs yet, harvest it anyway rather than risk losing it to cold damage. A slightly underripe pumpkin that gets cured properly still beats a fully mature one that froze on the vine.
How Do You Cure Pumpkins and Squash After Harvest?
Curing matters as much as timing. Set harvested fruit in a warm, dry, sunny spot (or indoors near 80-85°F) for 7-10 days to further harden the rind and heal the cut stem, then move to storage at 50-60°F with 50-70% relative humidity.
Storage life varies by type: acorn squash keeps roughly 2 months, butternut 2-3 months, and hubbard squash up to 5-6 months when cured and stored correctly. Keep stored fruit away from apples, pears, or ripening tomatoes, since the ethylene gas those give off can speed up spoilage in stored squash.
Before you’re even at the harvest stage, healthy soil underneath those vines makes a real difference in how well the fruit sizes up and ripens on schedule. If you haven’t fertilized your vegetable garden soil this season, it’s worth doing before next year’s pumpkin patch goes in, and working finished compost into the bed (see our guide to making garden compost) tends to produce sturdier vines that hold up better through a long growing season.
Frequently Asked Questions
Can a pumpkin ripen after you pick it? Not meaningfully. Pumpkins and winter squash are not climacteric fruit, so the color and rind development they still need happens on the vine, not in storage. Picking early locks in whatever ripeness level the fruit had at cutting.
Why did my pumpkin rot from the stem end after I picked it? This is usually a cutting or curing problem, not a ripeness problem: a torn stem (from twisting instead of cutting), a stem cut too short, or skipping the 7-10 day cure before moving fruit into storage all open the door to stem-end rot.
Is it okay to harvest before all 5 signs show up? Yes, if frost is coming. A fruit that shows 3 of the 5 signs and gets cured properly will store better than one left on the vine through a hard freeze. Waiting for a perfect 5-for-5 isn’t worth risking cold damage.
Do winter squash and pumpkins need to be washed before storage? No, and you shouldn’t scrub them. Wipe off loose soil with a dry cloth. Washing can introduce moisture that encourages mold during the curing and storage period.
How do I keep squash vine borers or other pests from ruining fruit right before harvest? Check the base of the stem for sawdust-like frass, a sign of vine borer activity, and inspect vines regularly through late summer. Our guide to common vegetable garden pests covers what else to watch for as the season winds down.
Related Posts
Products We Recommend
This post contains affiliate links. We may earn a commission on qualifying purchases at no extra cost to you.
Zenport K208P Harvest Sickle, 6.5-Inch Stainless Steel Blade
Curved serrated blade for cutting pumpkin and squash stems cleanly with 2-4 inches left attached, the correct technique described in "What We Learned the Hard Way" above
Shop Now
HABAU Wood Potato Onion Storage Bins, 3-Tier Stackable, Ventilated
Open-front wooden bins for the 50-60°F, well-ventilated storage stage after curing, sized right for a home harvest of acorn, butternut, or hubbard squash
Shop Now
HANDLANDY Long Leather Rose Pruning Gloves, Thorn-Proof Gauntlet
Elbow-length puncture-resistant gloves for reaching into dying, prickly vines to check the signs and cut fruit free without scratched forearms
Shop NowNever miss an update — choose FarmFoodFamily as your preferred source on Google.
How it works: Tap the button below to open Google's settings page, then check the box next to FarmFoodFamily.
Tap the checkbox to turn it blue — that's how you know it's set.