20 Clever Ideas to Hide Your AC Unit Outside (Without Frying the Compressor)
Twenty real ways to disguise that ugly condenser, plus the actual clearance numbers most “hide your AC” guides never bother to give you.

Never miss an update — choose FarmFoodFamily as your preferred source on Google.
How it works: Tap the button below to open Google’s settings page, then check the box next to FarmFoodFamily.
Tap the checkbox to turn it blue — that’s how you know it’s set.
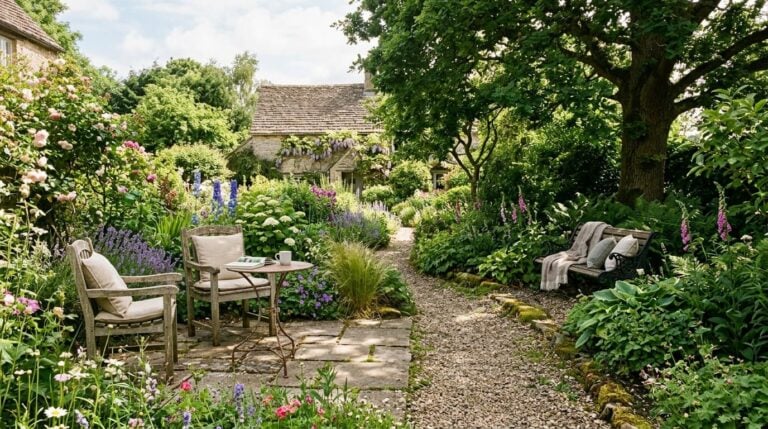
Nobody designs a backyard around a gray metal box with a fan in it. But that box is exactly what greets you every time you step outside, usually parked somewhere between the patio and the narrow strip along the side of the house that rarely gets any design attention at all.
The good news: hiding it is genuinely doable. The part almost nobody tells you is that hiding it wrong can shorten the unit’s life, spike your energy bill, or void the manufacturer’s warranty outright.
How Much Clearance Does an Outdoor AC Unit Actually Need?
Every “creative ways to hide your AC” article says some version of “just make sure you leave enough room.” Here’s the actual number. The Air Conditioning Contractors of America (ACCA), the trade group whose standards most HVAC techs are trained to, calls for 12 to 24 inches of clear space on the sides of the unit, a full 60 inches of open air above it, and at least 3 feet of clear space in front of whichever panel the technician needs to open for service.
Skip that clearance and the condenser can’t dump heat properly, so it works harder, cycles more, wears out faster, and in a lot of cases, that restricted airflow is exactly the kind of installation error that gives a manufacturer grounds to deny a warranty claim.
Quick answer: Hiding an outdoor AC condenser is safe as long as the screen or planting stays clear of the manufacturer’s airflow zone. The Air Conditioning Contractors of America (ACCA) standard calls for 12 to 24 inches of open space on every side of the unit, a full 60 inches above it, and at least 3 feet in front of the service access panel. A lattice, slatted, or open-picket screen built to those measurements lets air pass through freely, while a fully solid, sealed box, even a good-looking one, traps hot exhaust air, forces the compressor to work harder, and can shorten the unit’s lifespan or void the manufacturer’s warranty. Visual screening also does nothing for noise complaints, since decibel levels and sightlines are two separate problems with two separate fixes. HOA covenants that require a condenser to be “screened from view” are describing a design constraint, not a ban on air conditioning, and picking any airflow-safe option from the list below usually satisfies that requirement without a dispute.

Two more things worth settling before you touch a single fence post.
First, if you’re in an HOA, don’t assume a “must be screened” rule in your covenants means you’re being singled out or that AC units are banned outright. In most places an HOA can regulate how a condenser is screened or placed, but can’t ban climate control equipment entirely, that’s a real legal distinction, and it means the fix is usually just picking a screening option your board already has on file as approved, not a fight.
Answer 4 quick questions and get matched to the exact fix for your yard — drainage, budget, layout, or something else entirely.
Take the Free QuizSecond, hiding a unit visually does nothing about noise. Residential noise ordinances typically cap daytime sound at 60 to 65 dBA and drop to 50-55 dBA overnight, while a basic condenser running close to a property line can hit 60 to 80+ dBA on its own. If a neighbor’s actual complaint is about sound, not sightlines, a wood screen won’t fix it.
That’s a separate problem solved with sound blankets or unit relocation, not landscaping.
With those numbers in hand, here are 20 real ways to make the unit disappear into the yard instead of dominating it.
Which Screening Method Is Actually Best? A Quick Comparison
Before the full list, here’s how the four main approaches stack up on the things that actually matter: airflow safety, cost, upkeep, and how fast you get real coverage.
| Approach | Airflow Safety | Typical Cost | Maintenance | Time to Full Coverage |
|---|---|---|---|---|
| Landscaping (hedges, grasses, vines) | High if planted at real distance, needs periodic clearance checks | DIY-cheap to moderate | Ongoing (pruning, growth checks 2x/year) | Slow, 1-3 seasons |
| Slatted/lattice screens (wood, metal, bamboo) | High, open-grid design lets air pass freely | Moderate to bigger investment | Low, occasional restaining/sealing | Immediate |
| Solid enclosures (shed, box, masonry) | Lowest risk category, requires deliberate vents/louvers to stay safe | Bigger investment | Low, but repairs are a bigger job | Immediate |
| Pergola (overhead only, no side walls) | Highest, nothing blocks the sides at all | Moderate to bigger investment | Low | Immediate |
Which Landscaping Options Hide an AC Unit Without Blocking Airflow?
1. A dense evergreen hedge (arborvitae or similar)
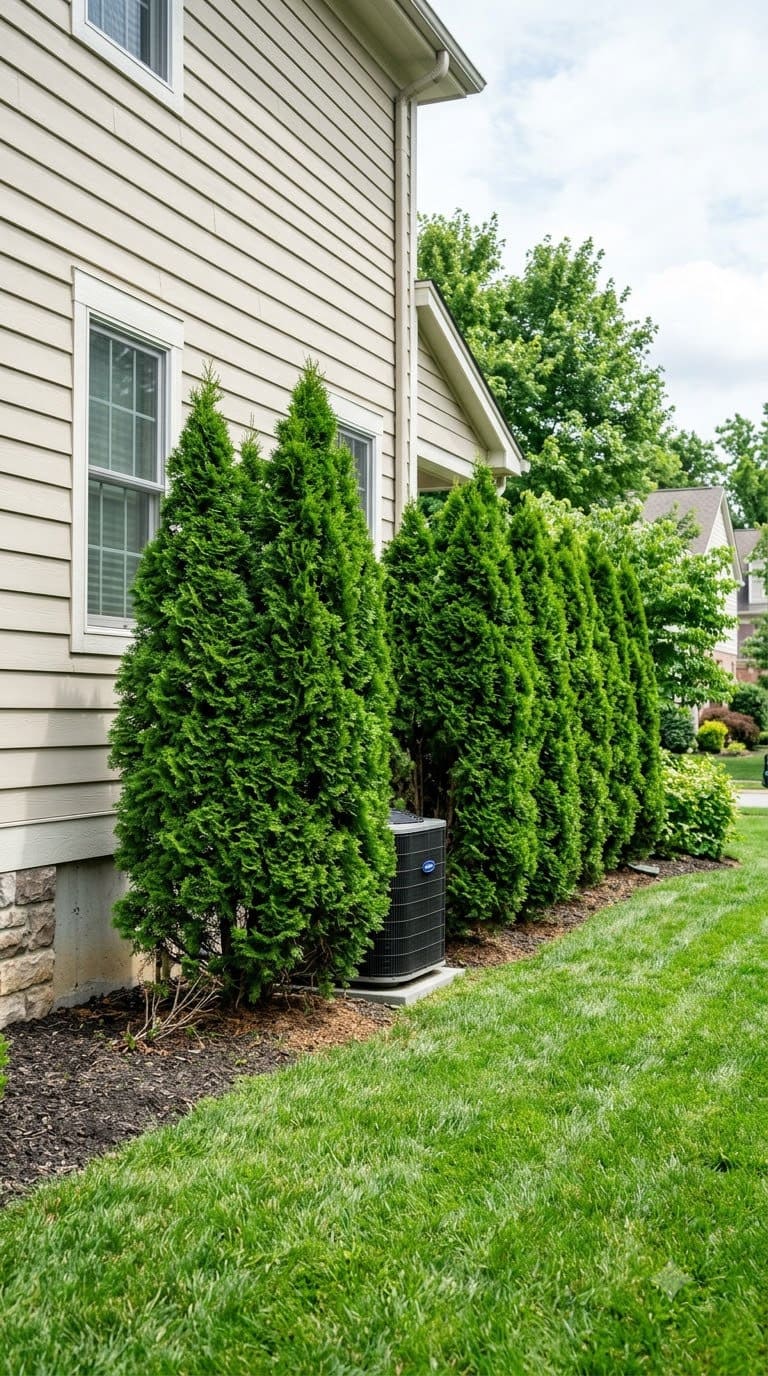
Narrow, columnar evergreens planted in a staggered double row give year-round coverage without the bare-branch gap you get from deciduous shrubs every winter.
Set the closest plants at least 3 feet from the unit’s edge, further than most planting guides suggest, since arborvitae fill out wider than their nursery tag promises, a variety sold at “18-24 inches wide” often settles closer to 3-4 feet at full maturity, and you don’t want to be re-transplanting a 6-foot tree in two years. Space the plants themselves 2-3 feet apart in the row for a solid screen within 2-3 growing seasons without the wasted expense of over-planting.
If you want something more compact that won’t crowd the clearance zone as it matures, look at smaller evergreen varieties bred to stay narrow, sized for exactly this kind of tight planting.
Most yard problems trace back to one specific, fixable cause. Find yours in 4 quick questions.
Take the Free QuizBudget tier: DIY-cheap if you buy small stock (typically 2-3 feet tall from a nursery) and let it grow in over 2-3 seasons; moderate if you go straight to mature 5-6 foot specimens for immediate coverage. Pairs well with idea 4’s tiered planters to fill the gap while the hedge establishes.
2. Ornamental grass border
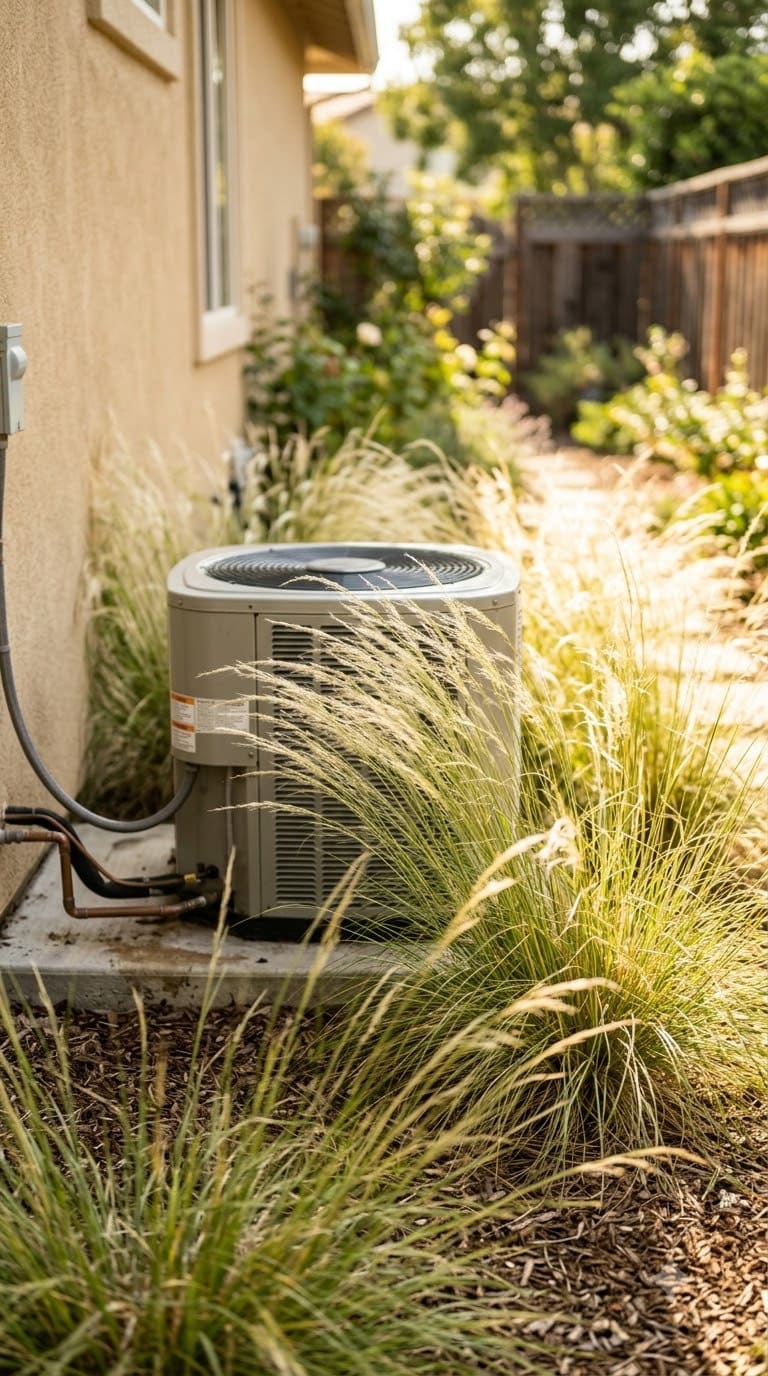
Feather reed grass or maiden grass planted in a loose curve 2-3 feet in front of (not against) the unit softens the hard edges without fully enclosing it, which keeps airflow completely unobstructed since grass blades don’t create a solid wall the way shrubs can.
Space individual grass clumps 18-24 inches apart so they read as a continuous border once mature rather than isolated tufts, and cut it back hard each late winter, down to 4-6 inches from the crown, so old growth doesn’t build up against the coil or create a fire-fuel pile against the unit. Budget tier: DIY-cheap, one of the least expensive options on this list.
3. A vine-covered iron trellis
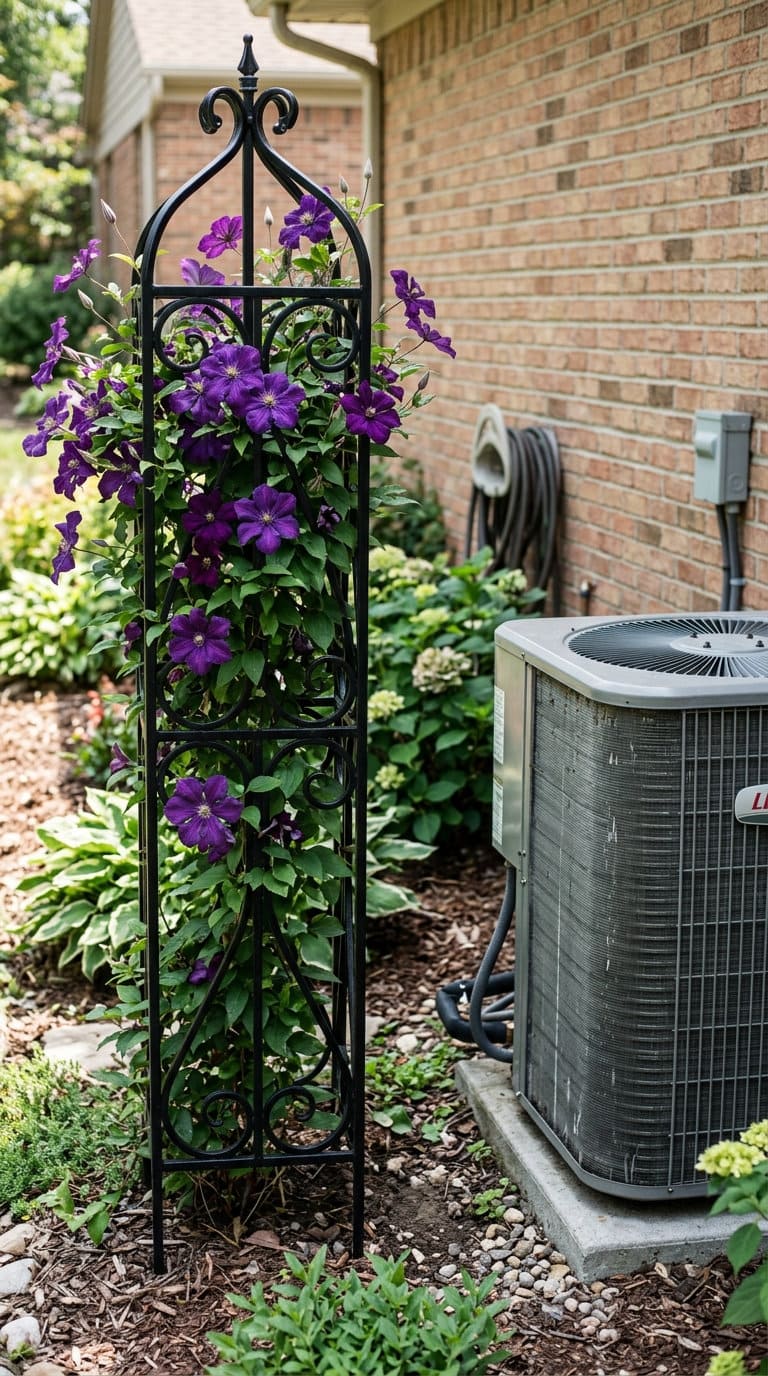
An iron or powder-coated steel trellis set at least 18 inches off the unit’s side, roughly 6 feet tall to give the vine real height to climb, with clematis, climbing hydrangea, or trumpet vine trained up it, gives you height and texture without a solid surface blocking exhaust air.
The catch almost nobody mentions: fast growers like trumpet vine can put on 10-15 feet of new growth in a single season and will happily root into the gap between the trellis and the coil if you don’t check on it twice a season, and vine tendrils working into the fins are a real maintenance headache, not a hypothetical one.
Train new growth back toward the trellis face (not toward the unit) every few weeks during the growing season to keep it honest. Budget tier: moderate, mostly labor.
4. Tiered planters with heat-tolerant species
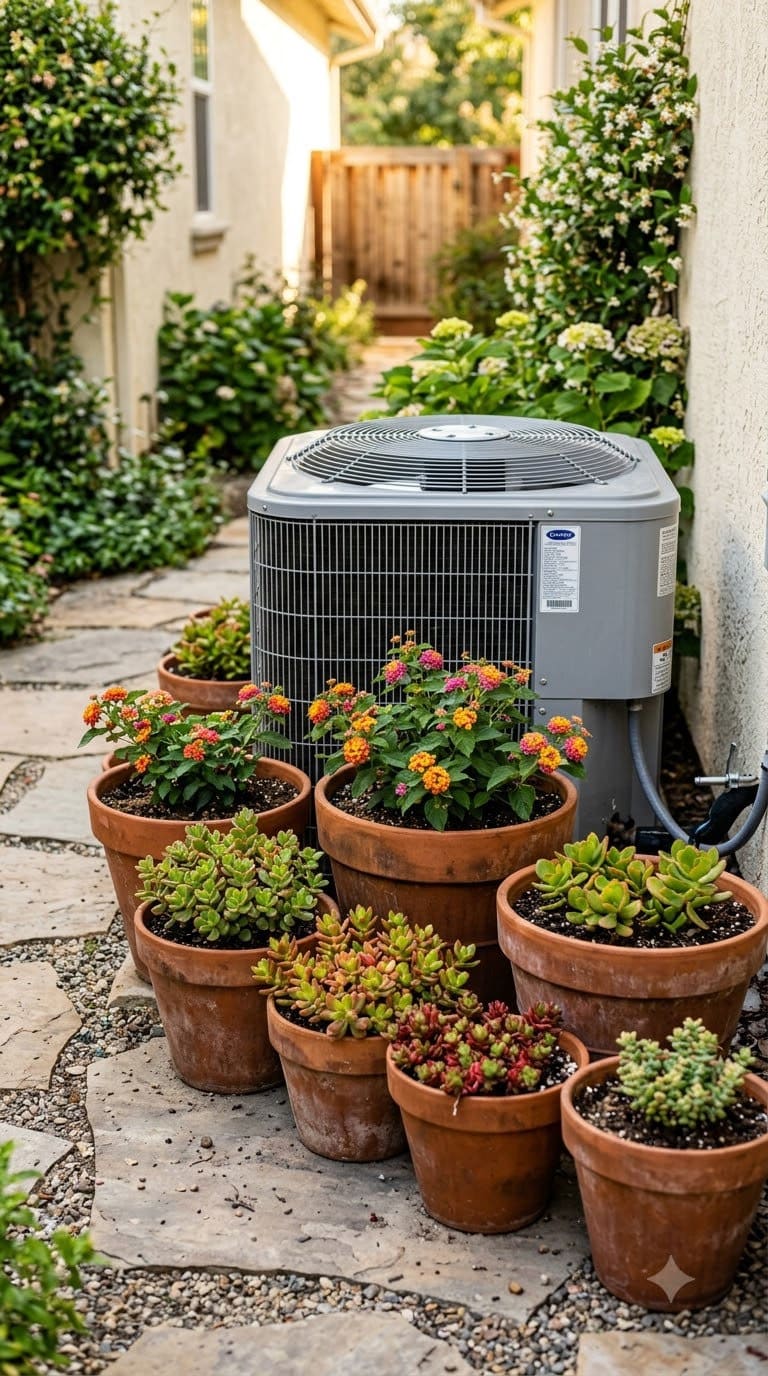
Stacked terra cotta or resin planters (a common tiering pattern is a 20-inch base pot, a 14-inch middle, and a 10-inch top) holding sedum, lantana, or ornamental peppers, arranged in a staggered arc 2-3 feet from the unit, add height and color while staying fully repositionable if a technician needs clear floor space.



Since planters sit further back than in-ground shrubs typically do and can simply be moved rather than dug up, this is one of the safer landscaping options for clearance, and one of the easiest to adjust if the ACCA numbers turn out tighter than expected once installed. Budget tier: DIY-cheap.
5. A living or artificial green wall
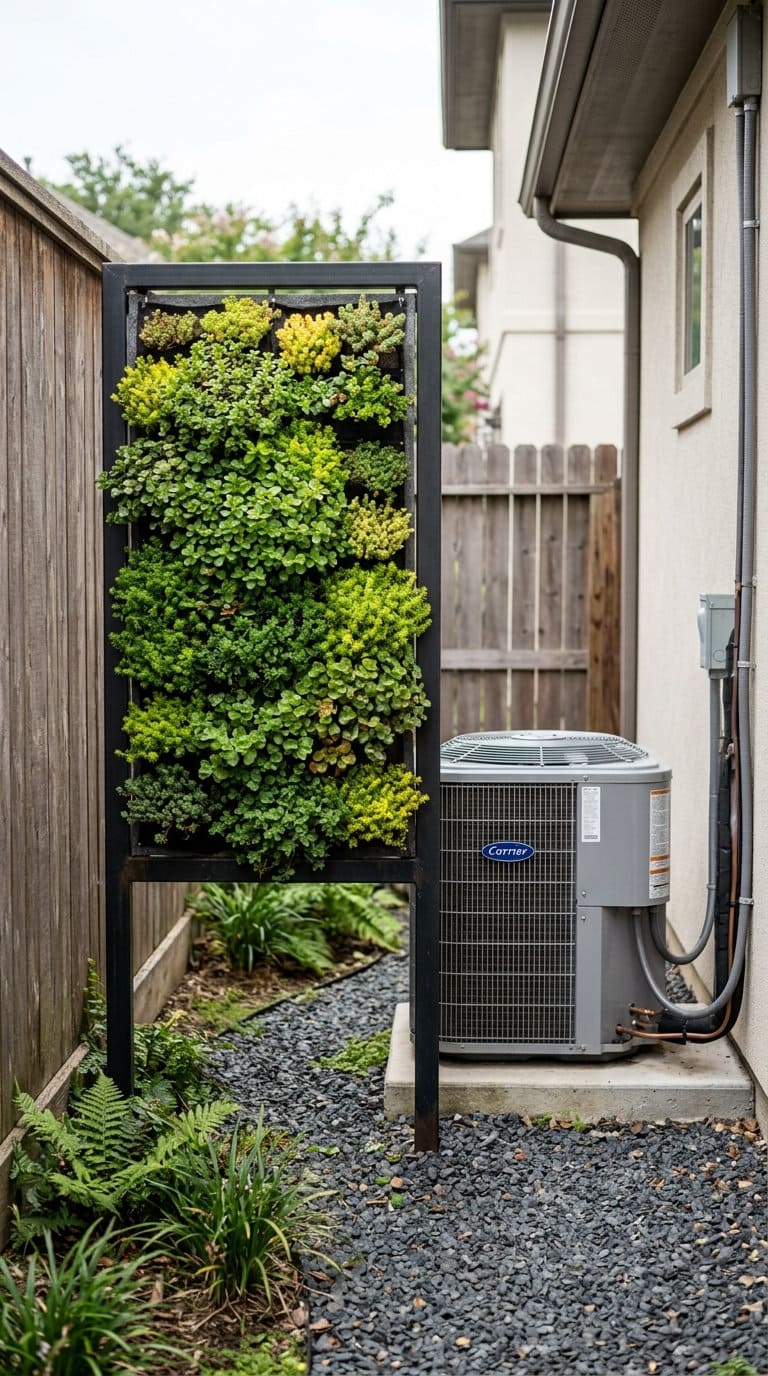
A vertical panel system planted with sedum or, for a zero-maintenance version, a quality artificial green wall panel, mounted on a freestanding frame (never directly bolted to the unit’s casing) gives a lush, modern look in a tight side-yard footprint where a full hedge won’t fit.
Standard modular green-wall panels run about 12×12 or 16×16 inches per tile, so a 4×6-foot frame section takes roughly 18-24 tiles to fill, order a few extra to allow for cutting around the frame edges.
Set the frame on its own posts with the same side clearance as any screen option below. Budget tier: moderate to bigger investment depending on real vs. artificial and panel quality.
The average homeowner spends $616/year on yard fixes that don't address the real problem. Find out what yours actually is — before you spend another dollar.
Take the Free QuizWhich Screen or Fence Style Works Best for Hiding an AC Unit?
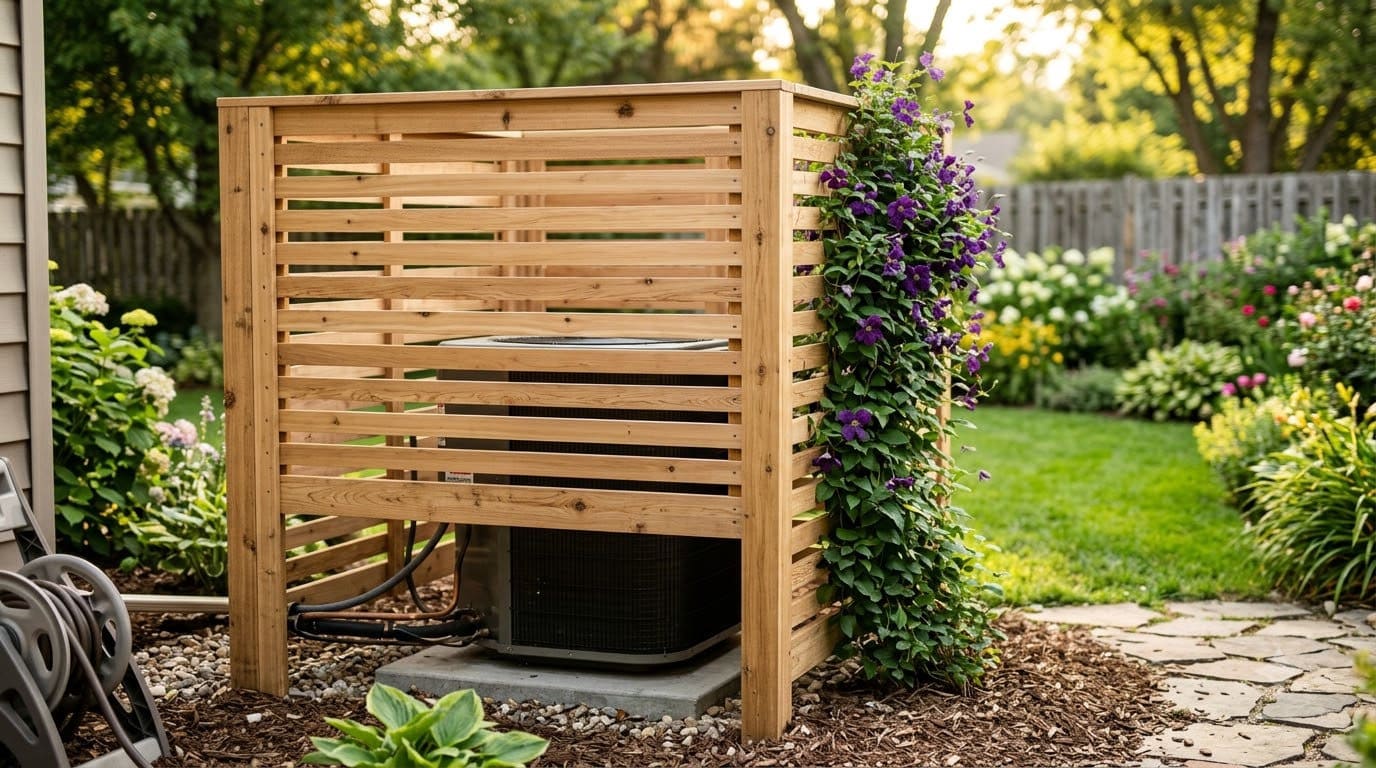
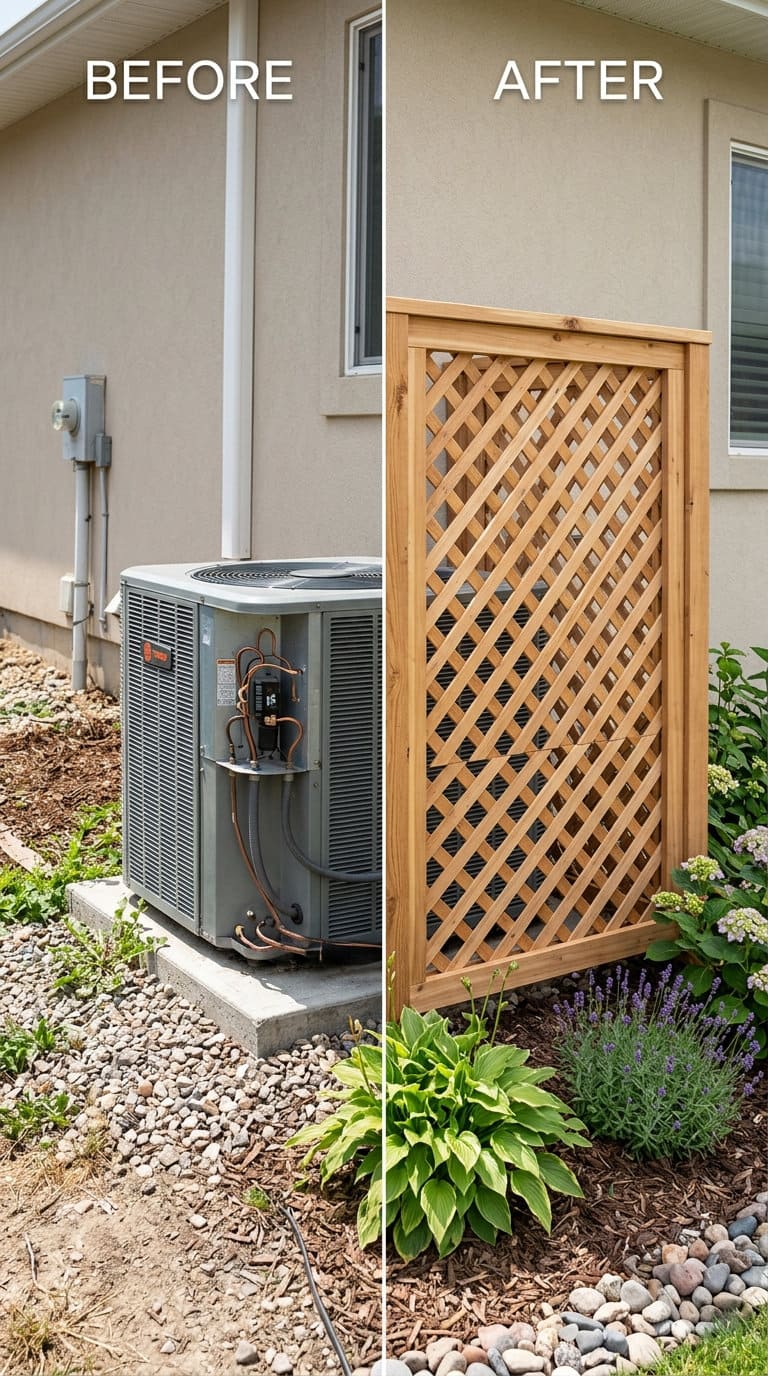
6. A three-sided wood lattice screen
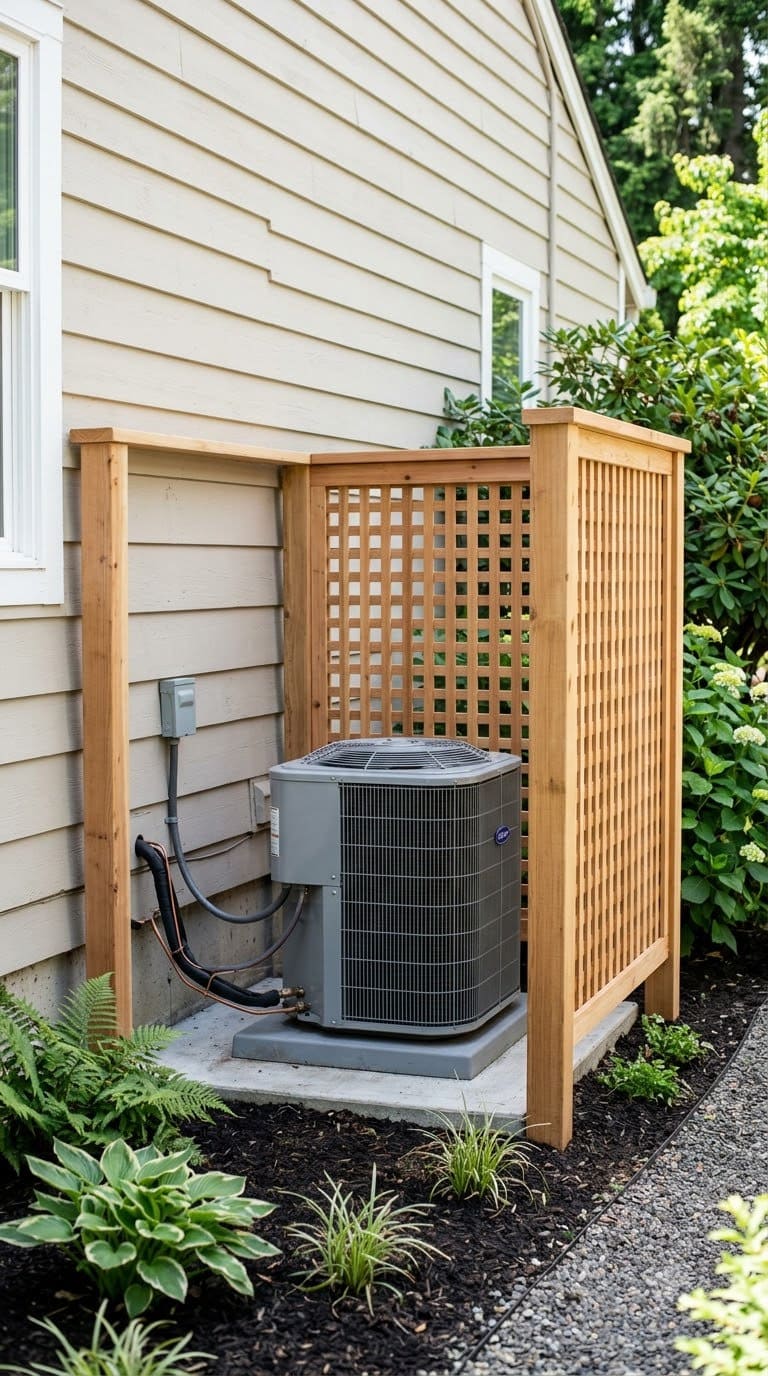
This is the single most recommended fix across every source we checked, for good reason: the open grid lets air pass through freely while still breaking up the sightline completely.
Build it as three panels, U-shaped around the unit, each panel set at least 12-24 inches off the casing to match the ACCA numbers, leaving the fourth side (the service-panel side) fully open and unscreened, not just openable, actually open, so a technician never has to disassemble anything to reach the unit.
Standard lattice comes in 1×1 or 2×2-inch grid spacing, both work fine for airflow, the 2×2 pattern reads as slightly more modern and breaks up the sightline a bit less completely.
Cedar or pressure-treated pine both hold up outdoors; stain or paint to match your house trim.
7. A bamboo fence enclosure
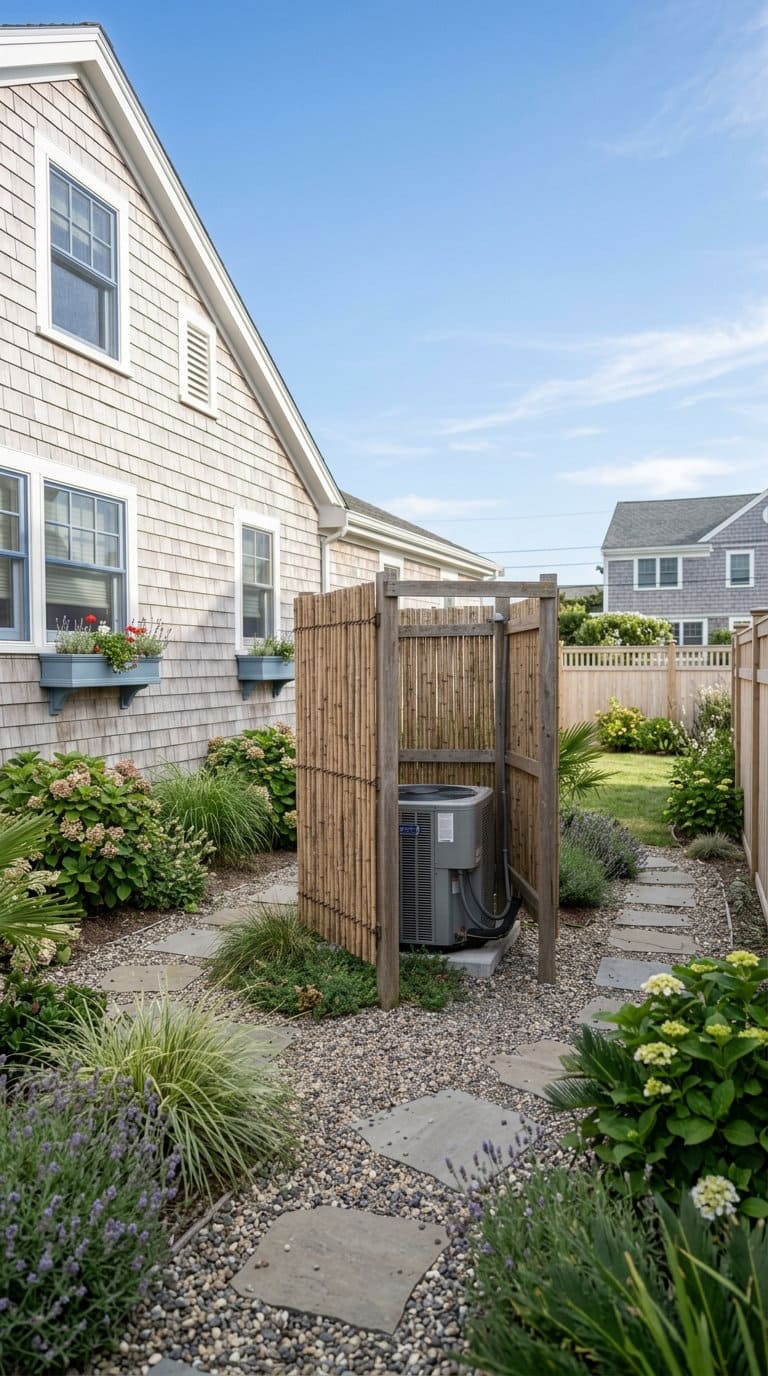
Rolled bamboo fencing zip-tied or stapled to a simple 2×2 wood frame reads as more casual and coastal than lattice, and it’s one of the cheapest true screening materials per square foot, typically running well under half the cost of a milled cedar lattice panel of the same size.
Leave the same gap spacing as any slatted option, bamboo poles are rounder than milled slats (usually 3/4 to 1 inch in diameter) and can end up tighter together than you expect if you don’t check spacing as you install, gaps under half an inch start to noticeably restrict airflow compared to milled lumber’s flatter profile.
There’s more on matching bamboo screening to different house styles if you want to take the look further.
8. A picket fence cover
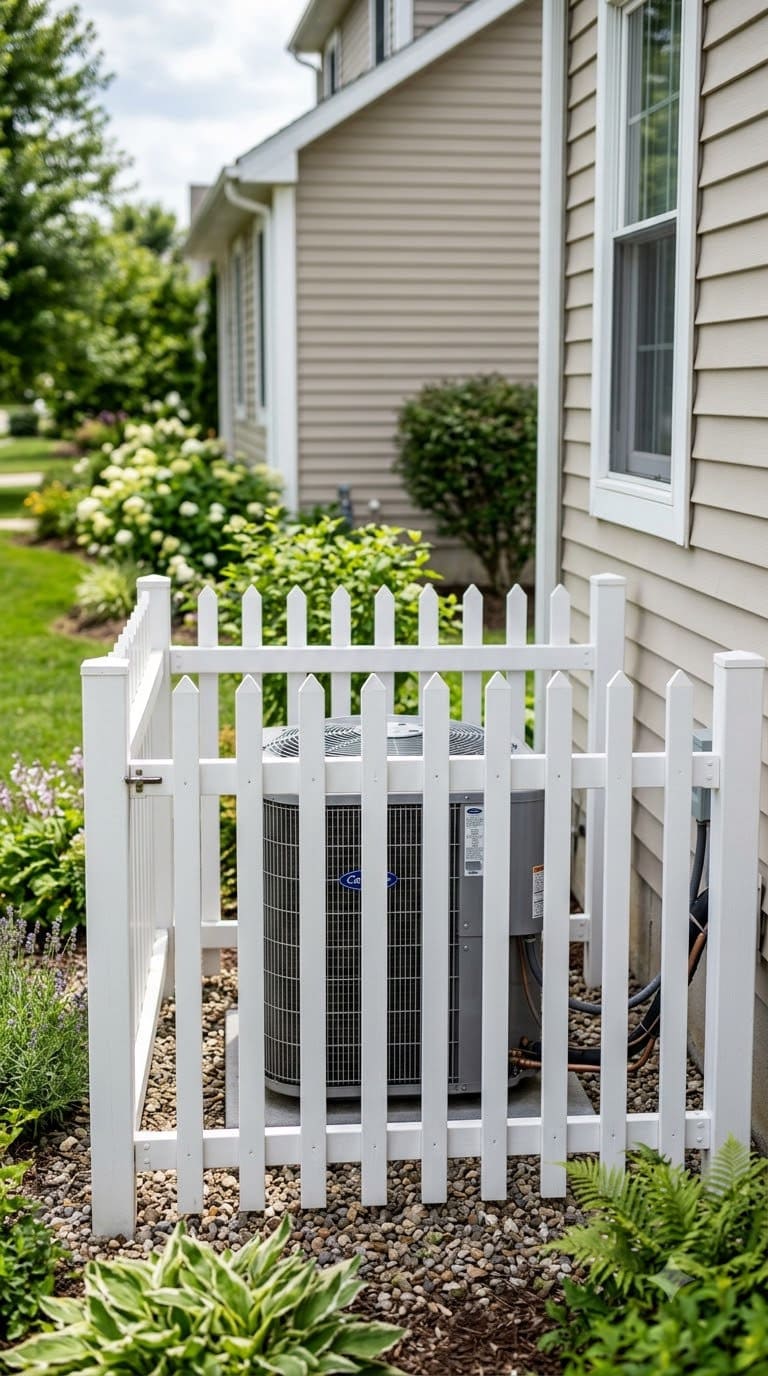
Build it 4-6 inches taller than the unit and paint or stain it to match your home’s trim rather than the main siding color, so it reads as an intentional design feature (a mini garden fence) instead of an obvious cover-up.
Space pickets with real 1.5-2 inch gaps, this isn’t a privacy fence, and the gaps are doing real ventilation work, not just a style choice, tighter spacing than that starts to meaningfully cut the open-air percentage the ACCA clearance numbers assume.
Spacing and paint-color pairings that work well for a picket-style build are covered in more depth elsewhere on the site.
9. A cedar slat privacy screen
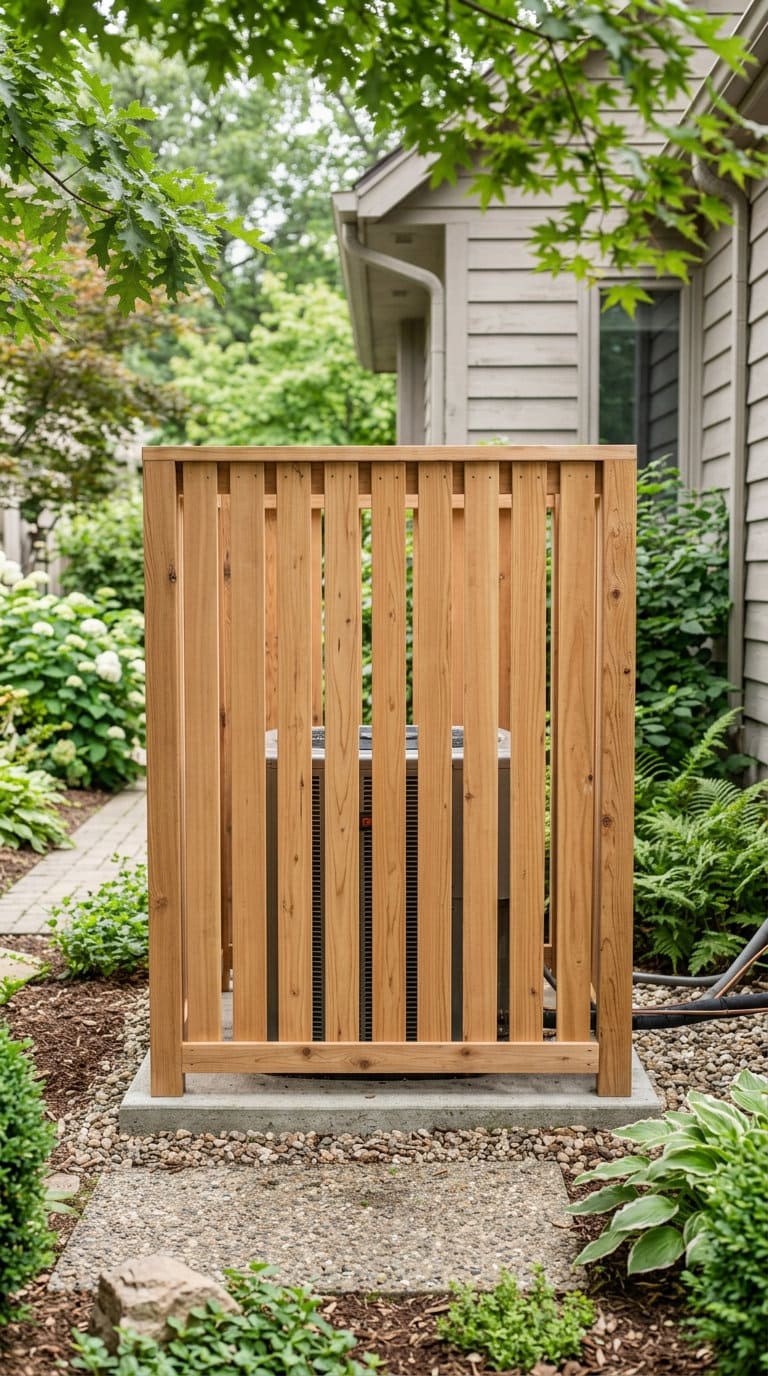
Vertical cedar 1x4s hung with a consistent half-inch to inch gap between boards, on a simple 2×4 frame, gives a clean, modern look that reads more “built-in design element” than “thing hiding an appliance.”
Set the whole frame 12-24 inches off the unit’s sides per the ACCA numbers, and leave a couple of inches between the top of the slats and any roofline above so the 60-inch vertical clearance requirement isn’t accidentally compromised by the screen itself.
Cedar’s natural rot resistance means it holds up without sealing for years, though a clear exterior sealant extends that further. Budget tier: moderate.
10. A custom metal or aluminum slat screen
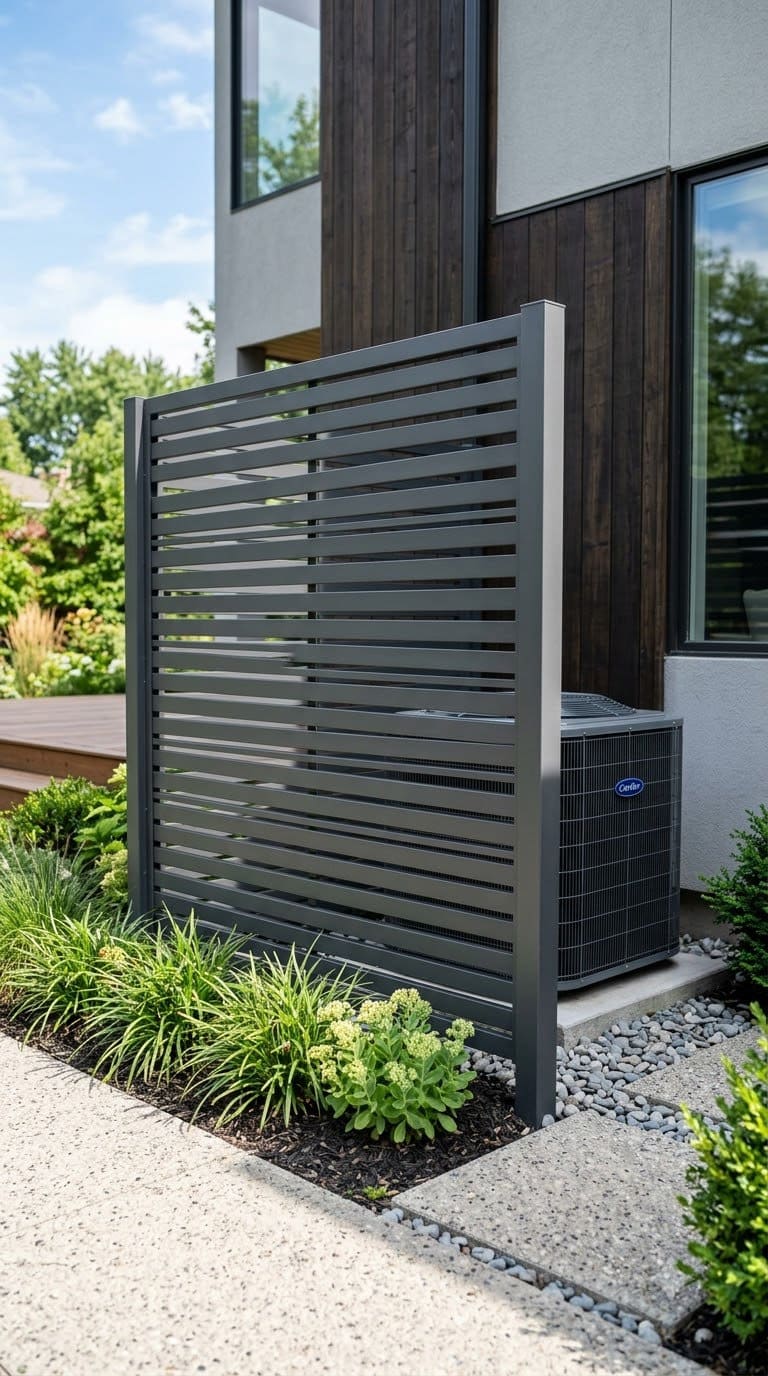
Interior designer Joe Waroquier, founder of Joe Waroquier HOME, recommends custom metal grilles and slatted screens specifically because they read as an architectural feature rather than a utilitarian cover, and he pairs them with plantings so the concealment feels intentional rather than like an afterthought bolted on to hide something.
Powder-coated aluminum slats typically run 1/8 to 1/4 inch thick and resist weathering better than wood long-term, expect a good powder coat to hold up 15-20 years outdoors with essentially zero repainting, versus a 3-5 year restaining cycle for wood.
Budget tier: bigger investment if custom-fabricated, moderate if you use a prefab aluminum slat panel kit.
11. A budget chain-link-and-slat cover
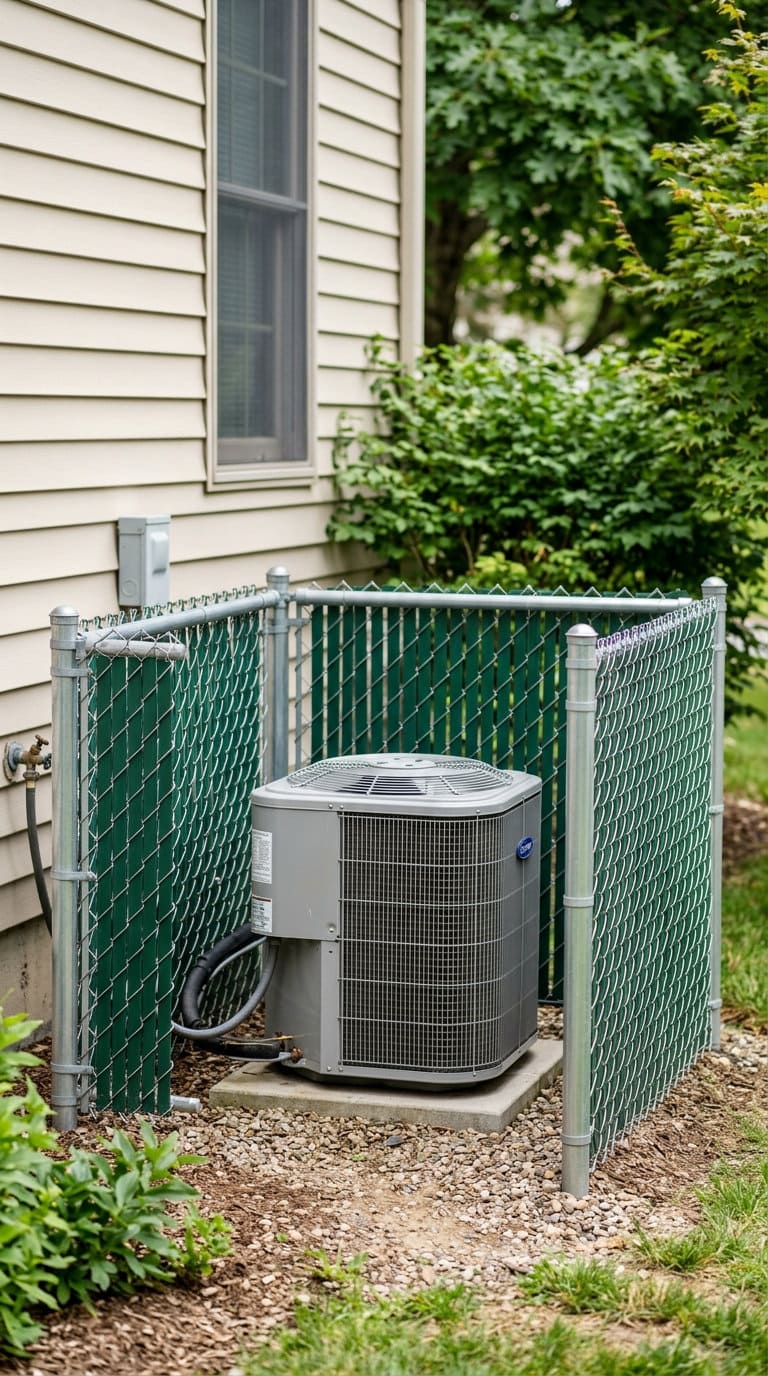
Nick Martzahl, owner of Valley Hardscapes, points to a genuinely budget-friendly option: 3- to 4-foot chain-link fencing woven with privacy slats, built as a simple U around the unit with each side set at the standard 12-24 inch clearance.
His one non-negotiable: always leave one full side open and easily removable, since “HVAC techs may need to reach the unit to recharge it, diagnose electrical problems, replace it,” and a permanently closed box means a service call turns into a demolition job first.
Use a simple gate hinge and hook latch on that fourth side rather than wiring it shut, so “removable” actually means removable in under a minute. Budget tier: DIY-cheap, one of the least expensive true enclosures here.
12. A stone or cinder block wall
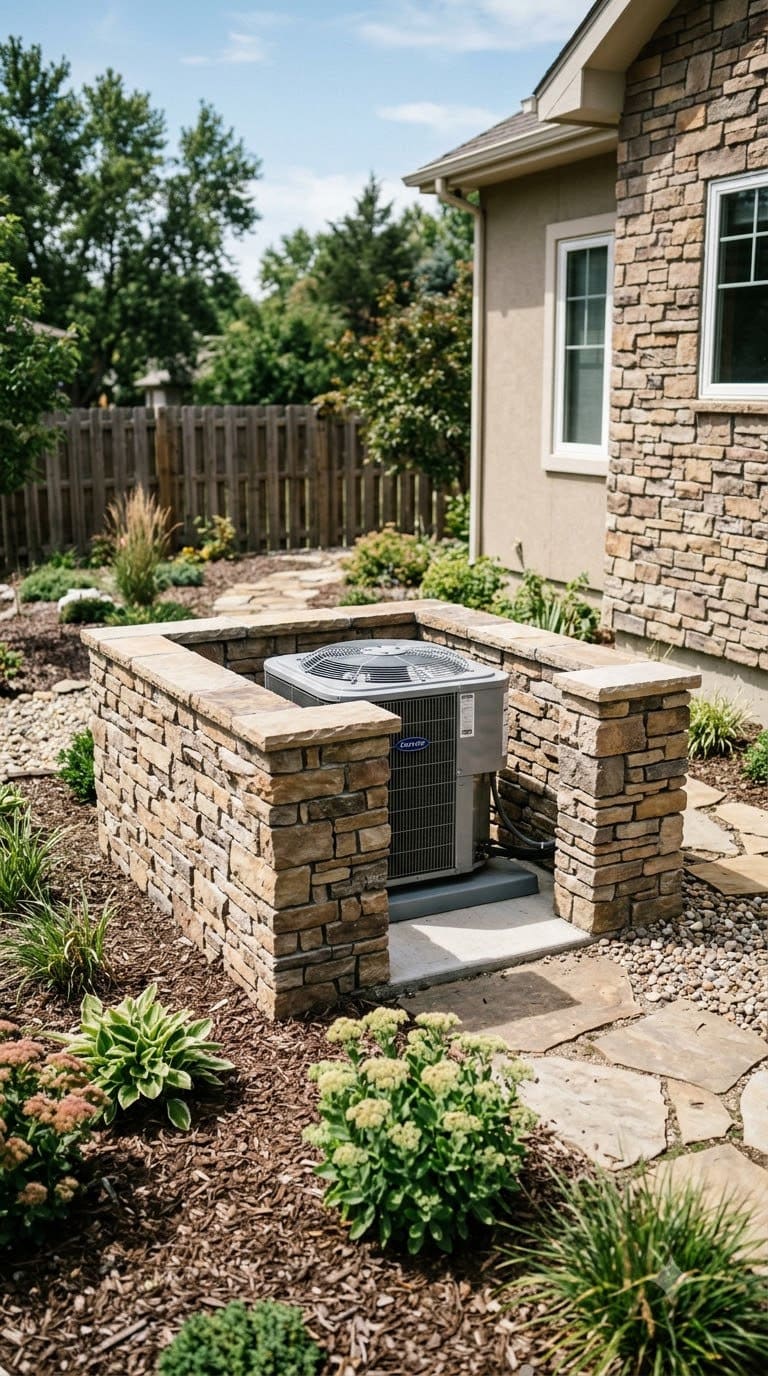
A short, U-shaped wall of stacked stone veneer or painted cinder block, typically 3-4 feet tall and built with standard 8x8x16 inch block, gives the most solid, permanent-feeling concealment on this list, and pairs naturally with a home that already has stone or brick accents elsewhere.
This is the option where clearance discipline matters most, masonry doesn’t flex or get trimmed back the way a hedge does, so measure the ACCA numbers from Before You Start twice before you set the first block, and leave a full course of open, unmortared “weep” gaps near the base of each wall section if you want any passive airflow beyond the fully open top.
Budget tier: bigger investment, likely a weekend project minimum or a mason for anything beyond a low garden wall.
13. A pergola-style shade structure
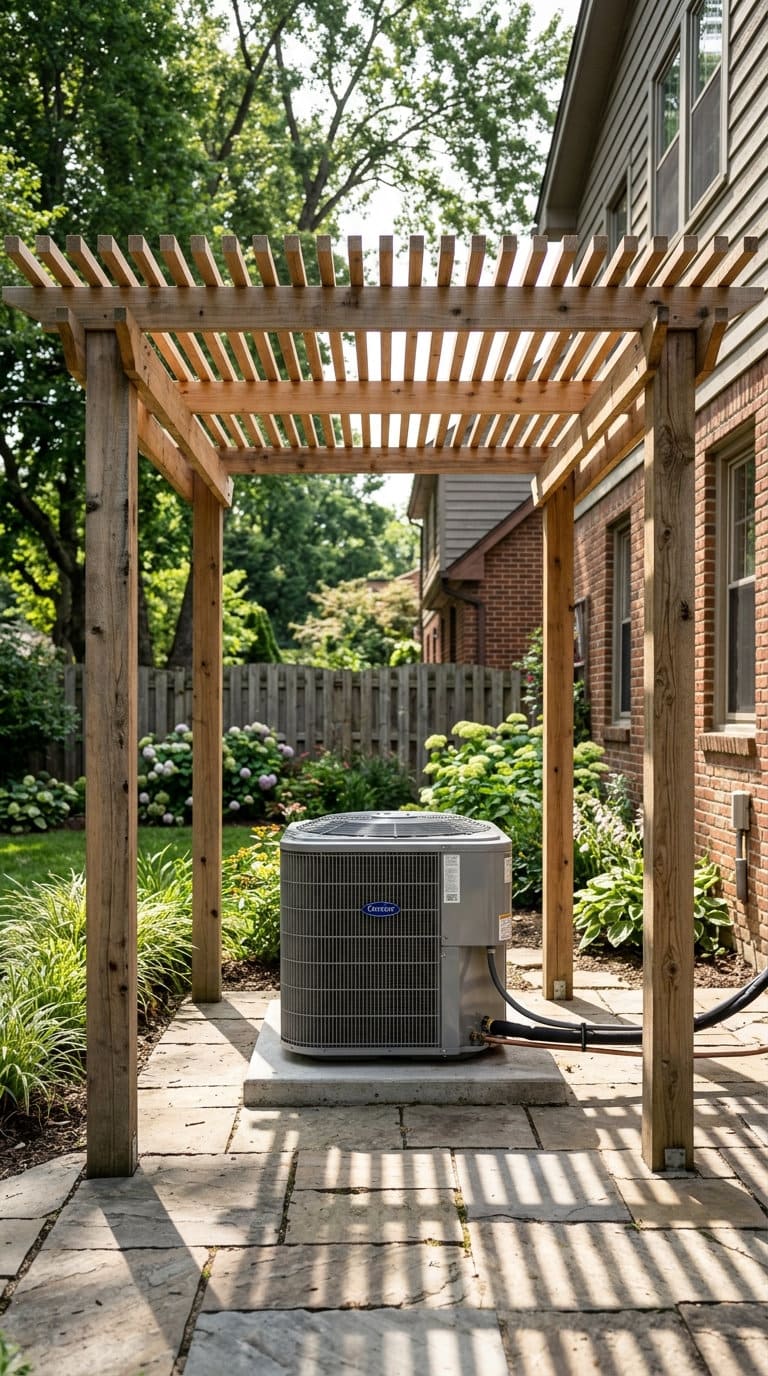
Rather than enclosing the unit on the sides, a simple open-slat pergola built over the top, typically with rafters spaced 12-16 inches apart, shades the unit from direct sun (which does measurably reduce ambient heat load on hot afternoons, sun-exposed condensers can run several degrees hotter at the coil than a shaded one) while leaving all four sides completely open.
Build the pergola posts a full 24-36 inches out from the unit on every side, well past the ACCA minimums, since a pergola’s job here is shade, not concealment, and posts set too close just become another obstruction.
This is the safest option on the list for airflow, since nothing at all blocks the sides, and it doubles as a design feature if you extend it slightly to cover an adjacent bench or storage area too, see idea 16 below. Budget tier: moderate to bigger investment.
What Are Some Decorative Ways to Disguise an AC Unit?
14. A mini shed-style AC house
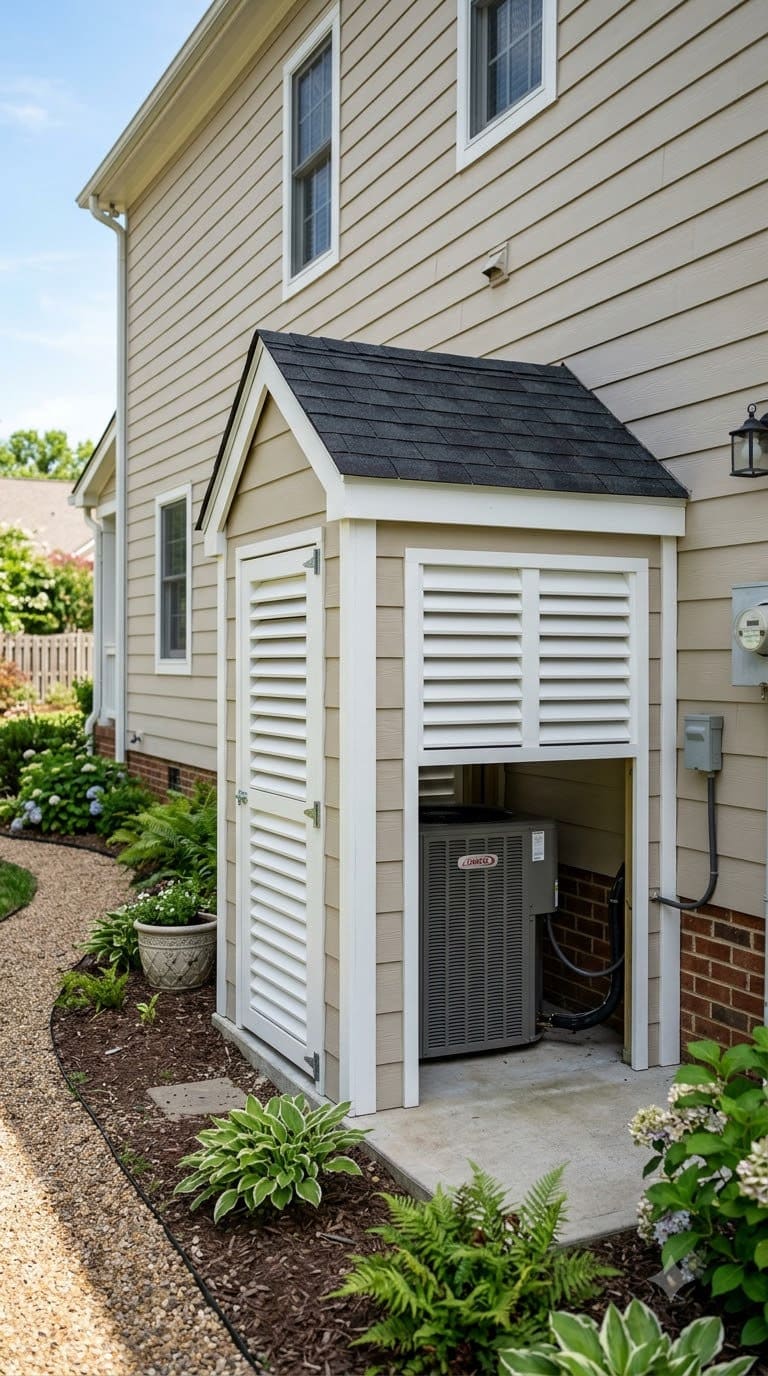
A small gable-roofed enclosure, essentially a miniature shed built specifically around the unit’s footprint, sized about 12-18 inches larger than the unit on every side to preserve real clearance, gives the most finished, “built-in” look of anything on this list, especially if you match the roofline and siding to your actual house.
Ventilated louvered panels on at least two sides are non-negotiable here, sized to give roughly the same open-air percentage as the lattice option in idea 6, a solid-walled mini shed with only a door for airflow is the single fastest way to overheat a condenser.
Budget tier: bigger investment if built to match your house’s siding and trim.
15. A removable-door cover box
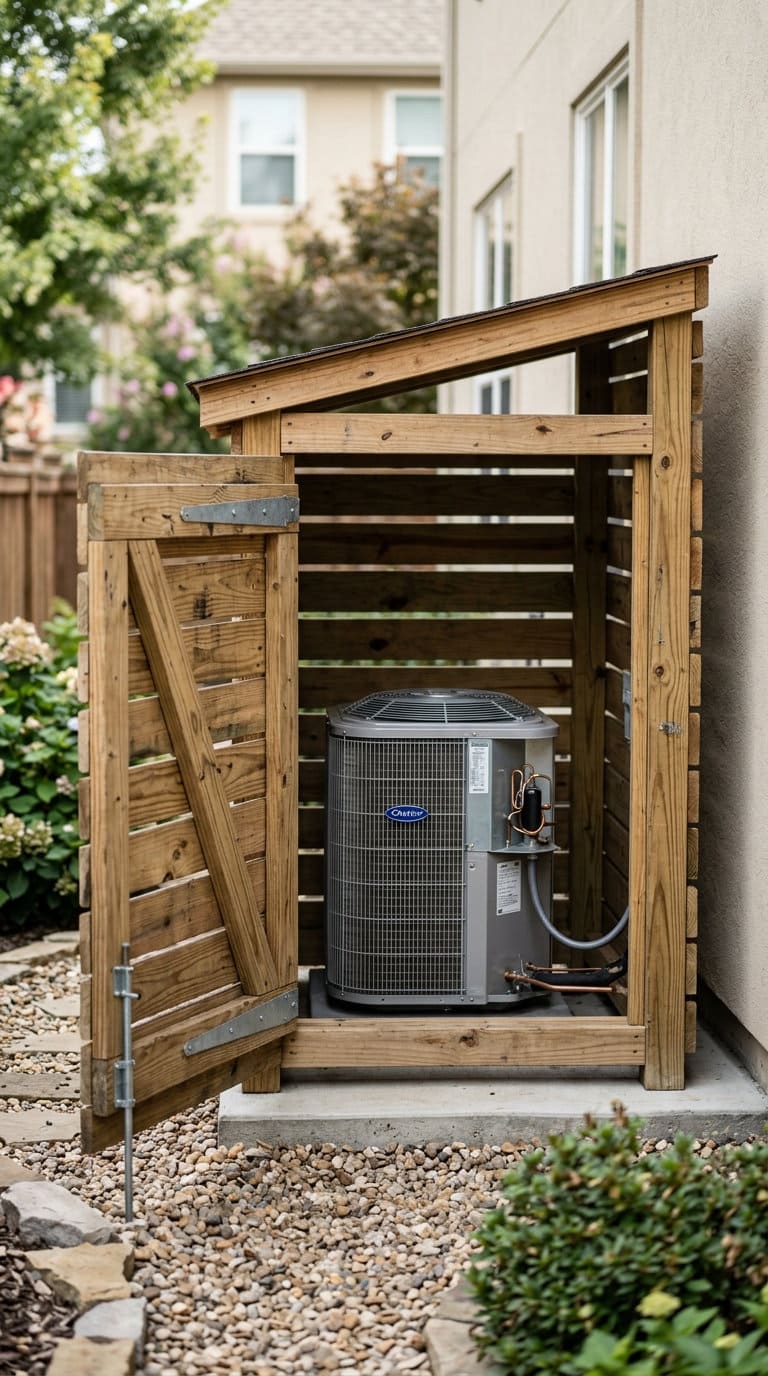
A simple hinge-front or lift-off-panel box, built slightly oversized (again, that same 12-18 inch buffer on every side) so there’s real air gap on every side, not flush to the casing, gets you a tidy look with dead-simple technician access, just open the door instead of dismantling a screen.
Use a full-width piano hinge on the door rather than two small hinges, the door gets opened and closed repeatedly over the unit’s lifespan and small hinges are the first thing to fail.
This is a good weekend-project step down from idea 14 if you don’t want to match your house’s exact roofline. Budget tier: DIY-cheap to moderate.
16. Outdoor seating with a built-in cover
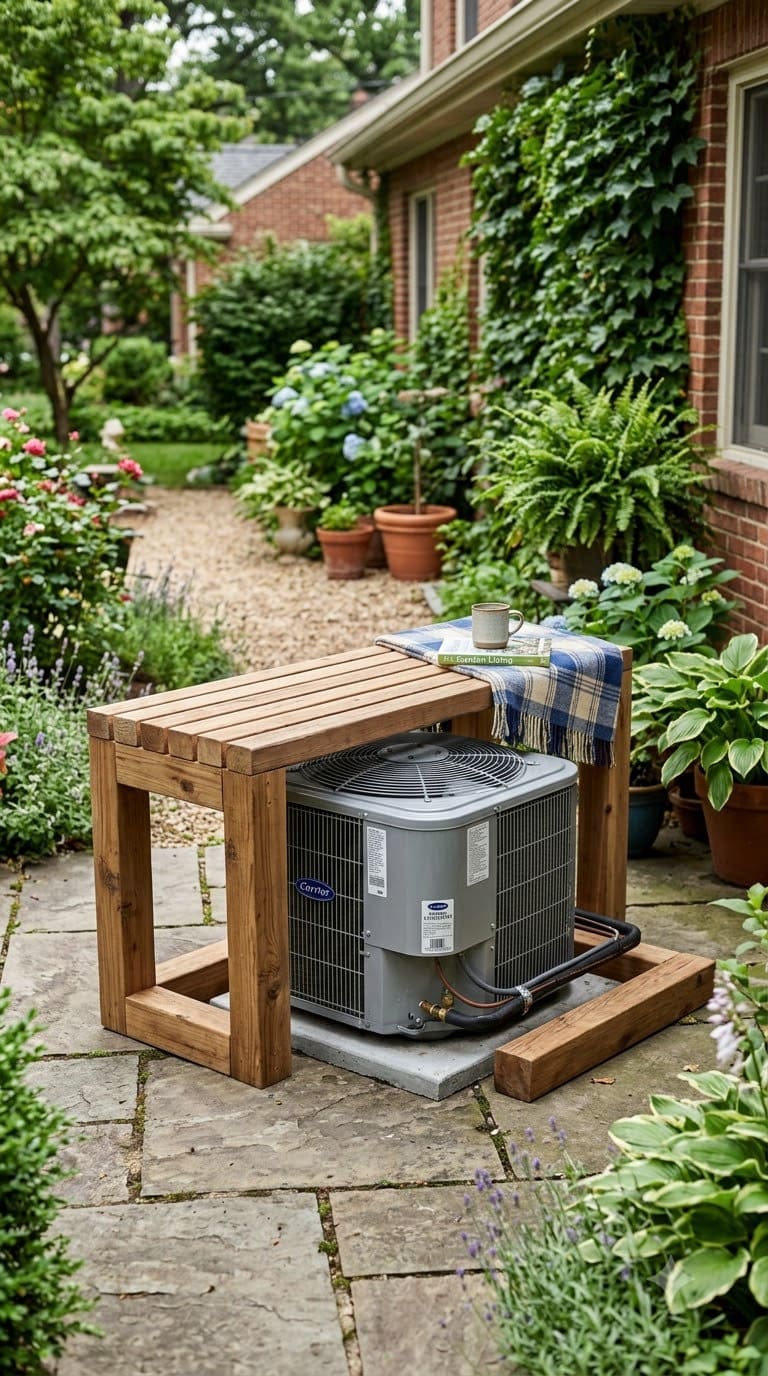
Build a simple bench or storage seat with a U-shaped, open-bottom base that straddles the space around the unit, sized to the same 12-24 inch side clearance as any screen option, giving you functional patio seating and concealment in one structure.
Keep the base open on the unit’s sides, not solid, cladding only the front and top of the bench structure, so it works as camouflage rather than an actual enclosure. Pairs well with idea 6’s lattice screen for a matching side-yard structure.
17. A mosaic or stained-glass accent screen
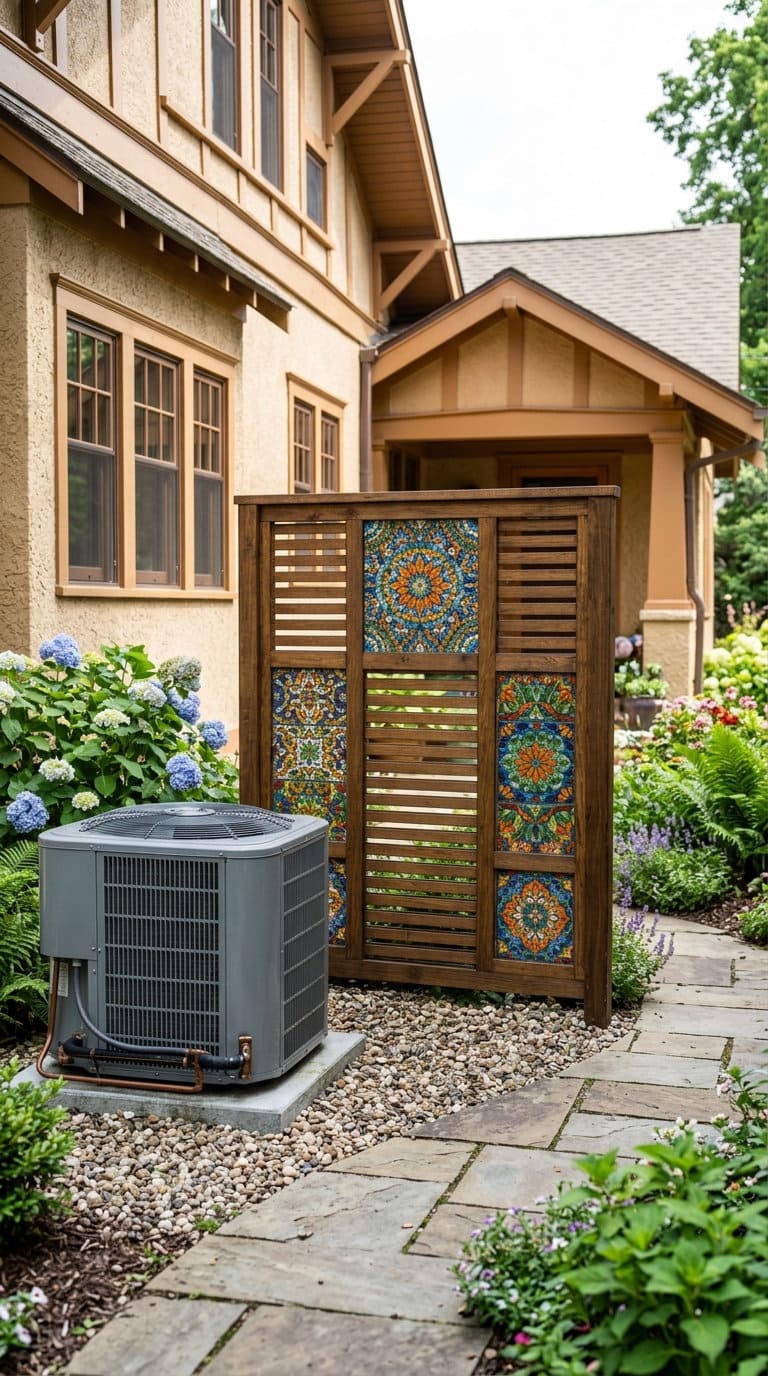
For a side yard that’s more visible than most (near a front walkway or a shared fence line, say), a screen panel inset with mosaic tile or colored glass, built on the same slatted or gapped frame as idea 6 or 9, turns the cover itself into a piece of yard art, distracting the eye rather than just blocking it.
Keep any solid glass or tile inserts to a small fraction of the panel’s total area, no more than 20-30 percent, so the majority of the screen face stays open for airflow.
Build it on the same open-slat or gapped-panel principle as any other screen here, decorative doesn’t mean solid.
18. Oversized decorative planters or urns
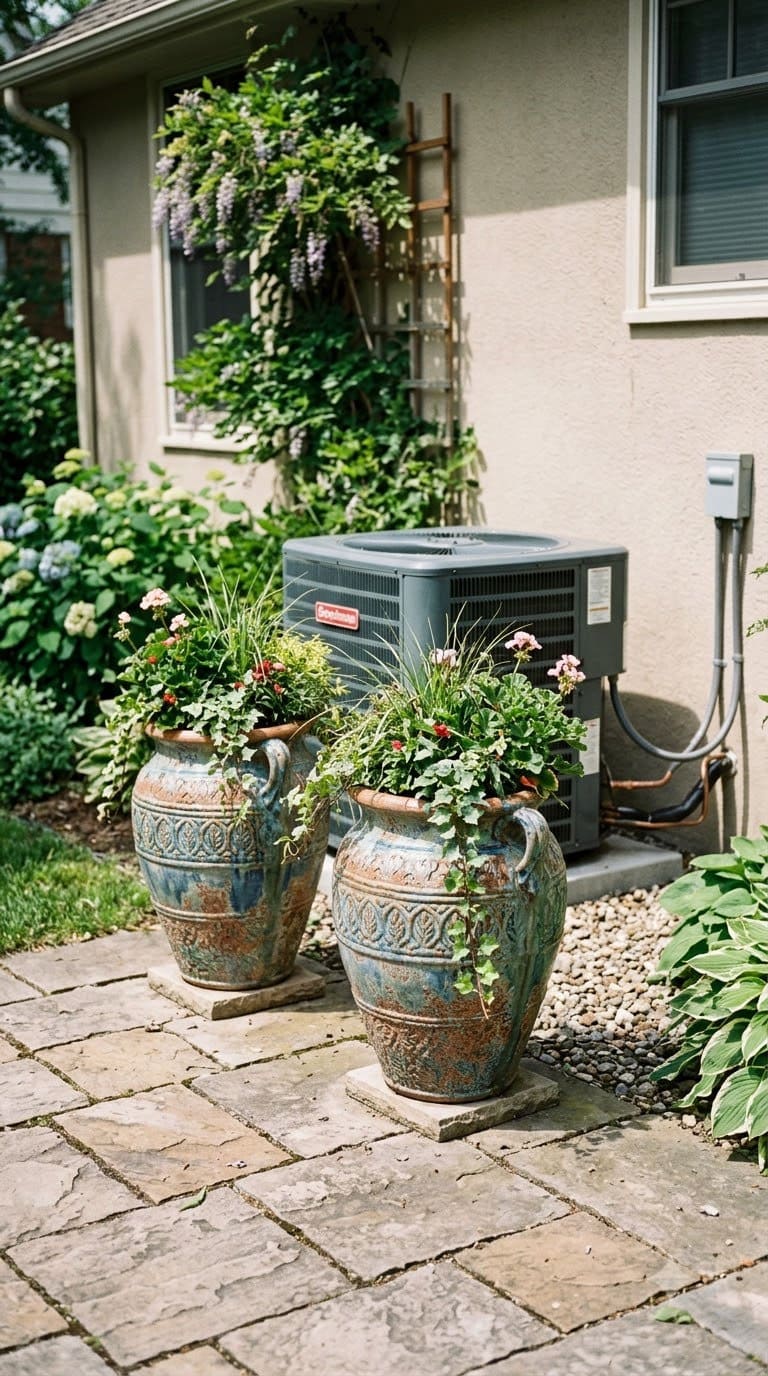
Sometimes the simplest fix is misdirection: a pair of large, striking urns or planters, 24-30 inches tall for real visual weight, placed 3-4 feet in front of (never against) the unit pulls the eye toward them instead of the condenser behind.
This works best combined with a low hedge or grass border (ideas 1 or 2) rather than alone, on its own it only helps from certain angles, mainly the direct sightline from a patio or window, and does nothing for a side or rear view of the unit.
Are There Ready-Made Solutions for Hiding an AC Unit?
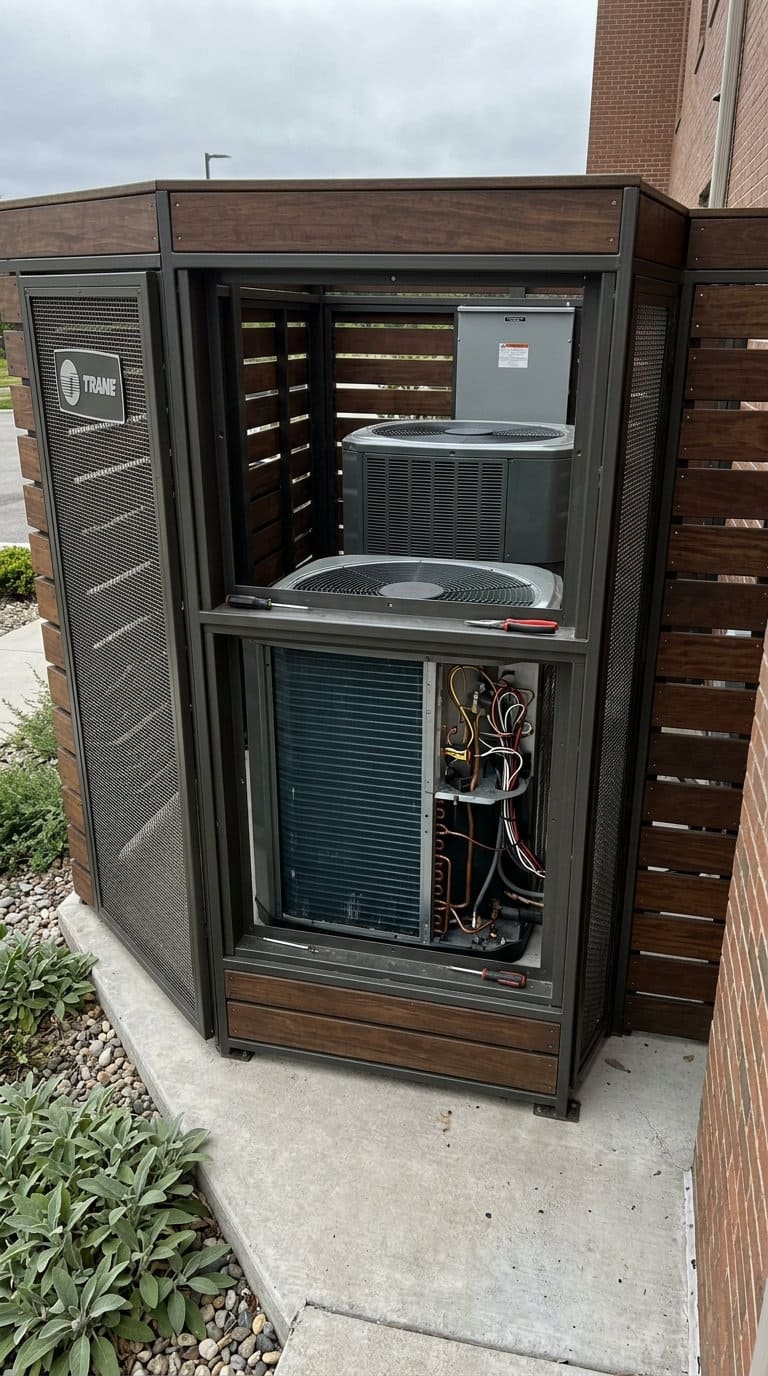
19. A prefabricated AC enclosure
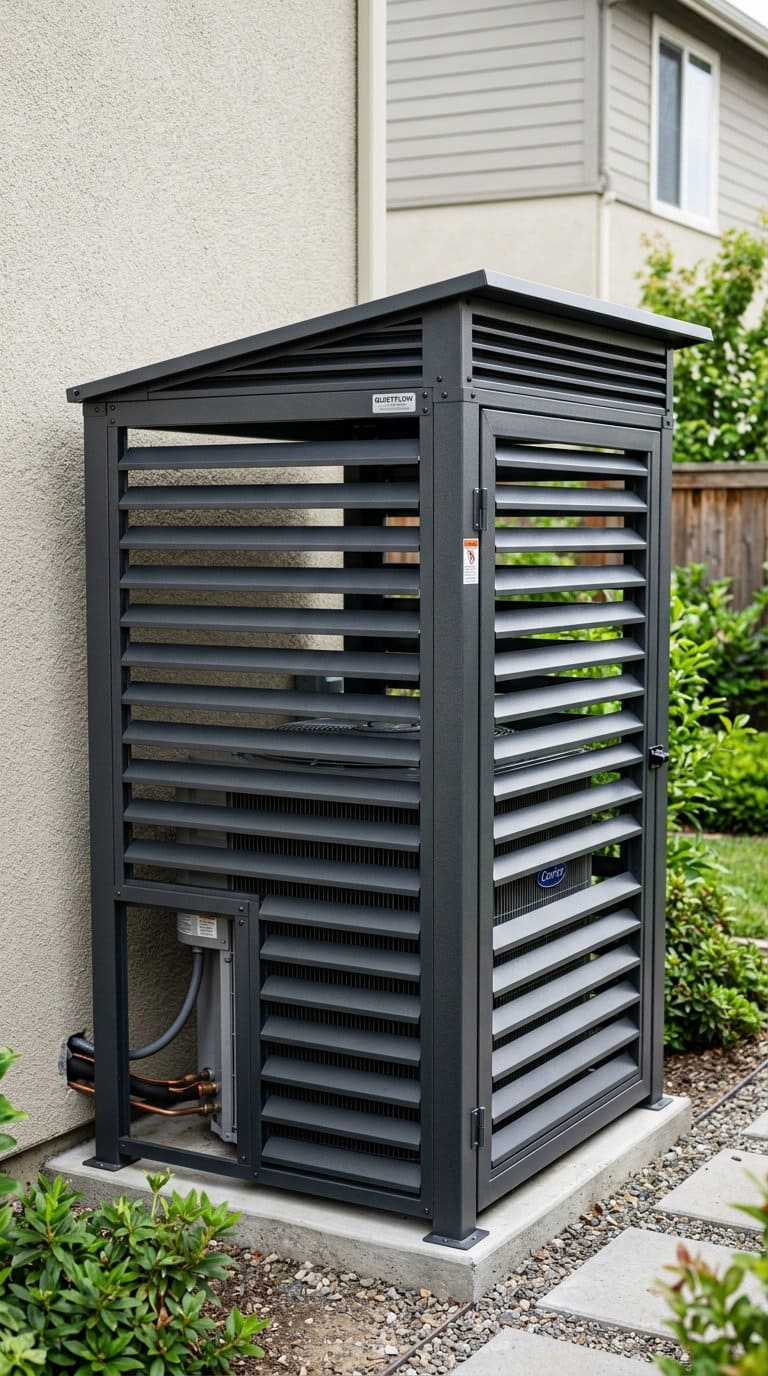
Manufactured louvered enclosures, sold specifically for this purpose, are engineered with the clearance and ventilation math already worked out, worth considering if you’d rather not calculate airflow gaps yourself.
Confirm the specific model’s rated clearance against the ACCA minimums above before buying, sizing varies more between manufacturers than you’d expect, some prefab units are sized for a single small window-unit-style condenser and won’t actually clear a full-size split-system compressor, check the manufacturer’s stated unit-size compatibility, not just the box’s outer dimensions.
20. A birdhouse-style picket mini fence
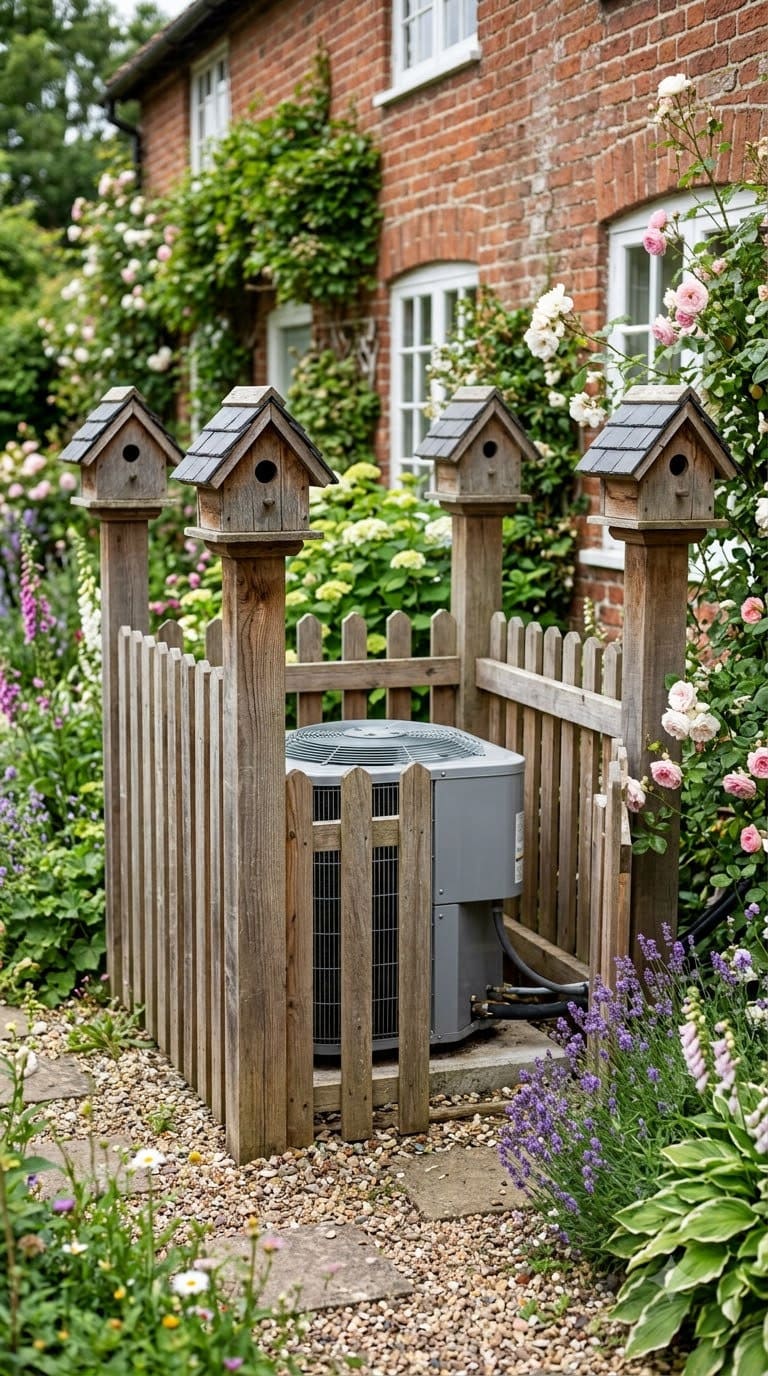
A scaled-down picket fence with a small peaked “roof” cap on the corner posts, styled like an oversized birdhouse, built to the same 1.5-2 inch picket spacing and 12-24 inch clearance as idea 8, is a fun, cottage-garden-style variation for anyone who wants something a little more whimsical than a straight picket run.
Same spacing and clearance rules as any picket option apply.
What We Learned the Hard Way
The mistake we see most often isn’t picking an ugly cover, it’s picking a cover that’s too tight. Someone builds a beautiful solid-wood box because it looks the cleanest, and within a season the unit is short-cycling or the compressor’s working overtime in July because there’s nowhere for the hot exhaust air to go.
If there’s one thing worth doing differently from the start, it’s measuring the ACCA clearance numbers before you build anything, not eyeballing “looks about right.”
The second mistake is the slow one: vines. Trumpet vine and clematis look great on a trellis for the first year, then by year two or three a few tendrils have worked their way past the trellis and into the coil fins themselves, and now what should’ve been a quick coil cleaning is a genuine untangling job.
Check vine growth against the unit twice a season, spring and late summer, and trim anything reaching toward the casing.
We’ve also seen homeowners assume an HOA’s screening requirement means a fight worth having, when it’s usually just a design brief.
Read the actual covenant language (it typically says something like “must be screened from view,” not “prohibited”), and in most cases you can pick from a pre-approved screening style and be done with it in an afternoon instead of an argument.
And the one nobody plans for: forgetting the technician. Every enclosure on this list needs one side that opens completely, not a screen you’d have to unscrew, an actual door or gap.
A tech showing up for an annual service call and having to partially demolish a beautiful lattice box to reach the panel is an avoidable, annoying, and sometimes extra-billed problem.
FAQs
How much clearance does an outdoor AC unit actually need? Per ACCA guidance, plan on 12 to 24 inches clear on the sides, a full 60 inches of open air above the unit, and at least 3 feet in front of the service access panel. Always check your specific unit’s manual too, since exact numbers vary by manufacturer and model.
Can my HOA make me remove or hide my AC unit? Usually an HOA can require screening or dictate placement, but generally can’t ban air conditioning equipment outright, those are legally different things. Check your covenants for the specific wording (screening requirement vs. an outright restriction) before assuming you’re stuck.
Will hiding my AC unit make it quieter? No, visual screening and noise reduction are separate problems. A wood or metal screen does essentially nothing for decibel levels; if noise is the actual complaint, you need a sound blanket product built for HVAC units or a conversation about relocating the unit, not a prettier cover.
Do vines or shrubs planted around a condenser hurt it? Not if you keep real clearance and check growth twice a year. The risk isn’t the plant itself, it’s letting fast growers like trumpet vine or an overgrown hedge creep in tight enough to block airflow or root into the coil fins.
What’s the cheapest way to hide an AC unit? An ornamental grass border (idea 2) or a chain-link-and-privacy-slat cover (idea 11) are the least expensive options here, both well under what a custom-built lattice box or masonry wall would run.
Trying to camouflage more than just the condenser? There’s a broader look at making trash cans, utility boxes, and other yard eyesores disappear elsewhere on the site, plus a piece specifically on the same clearance-vs-concealment tradeoff for utility boxes.
Looking for more screening styles for a project like this one? There’s a whole roundup of additional trellis and vine-support designs worth a look too.
Never miss an update — choose FarmFoodFamily as your preferred source on Google.
How it works: Tap the button below to open Google's settings page, then check the box next to FarmFoodFamily.
Tap the checkbox to turn it blue — that's how you know it's set.