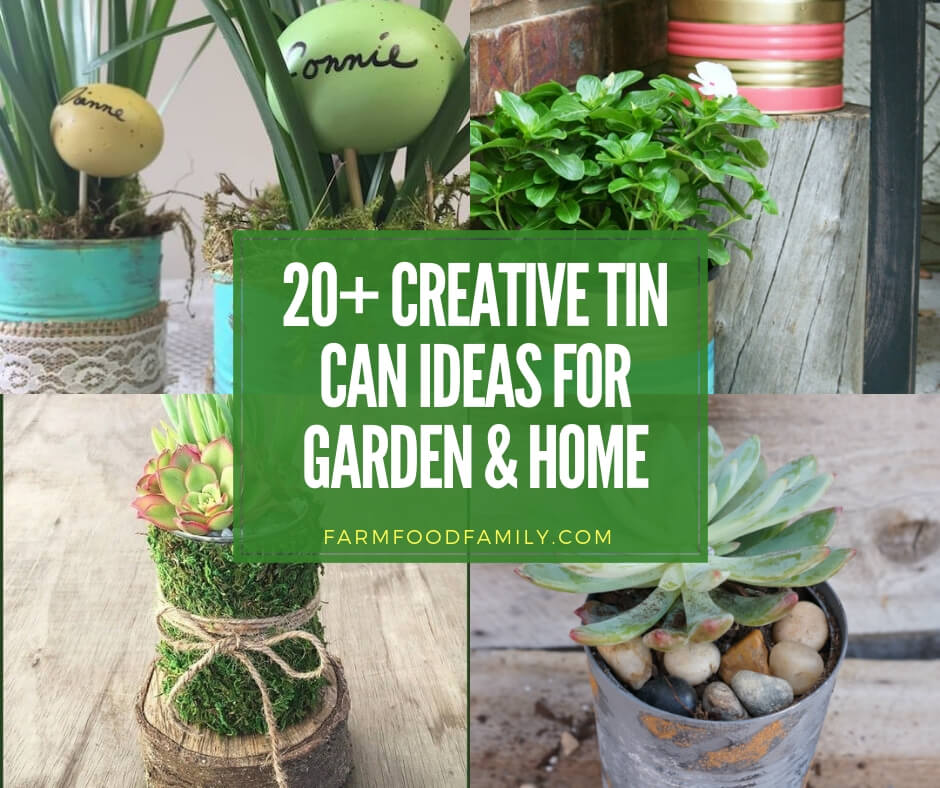
20+ Awesome DIY Tin Can Ideas & Projects For Your Garden & Home
Empty tin cans are one of the cheapest, most versatile upcycling materials sitting in your recycling bin right now, planters, lanterns, organizers, even a full DIY light fixture, all for the cost of a coat of paint. Before you start cutting into any of them, though, there’s a real, sharp-edge safety step worth five minutes…

Never miss an update — choose FarmFoodFamily as your preferred source on Google.
How it works: Tap the button below to open Google’s settings page, then check the box next to FarmFoodFamily.
Tap the checkbox to turn it blue — that’s how you know it’s set.
Empty tin cans are one of the cheapest, most versatile upcycling materials sitting in your recycling bin right now, planters, lanterns, organizers, even a full DIY light fixture, all for the cost of a coat of paint.
Before you start cutting into any of them, though, there’s a real, sharp-edge safety step worth five minutes that most tin-can-craft guides skip entirely. Here are 20 real ways to use them, done safely.
Before You Start: Handling Sharp Edges Safely
A freshly opened tin can has a genuinely sharp edge, real accounts online describe it bluntly as “like a razor blade,” and it’s the single most common way these projects go wrong. A few real, practical fixes, cheapest and easiest first:
- Use a smooth-edge (safety) can opener if you’re buying a new one. These cut along the side seam of the lid rather than through the top rim, leaving a rounded edge instead of a jagged one, the best prevention available.
- If the can is already open and sharp, an adult wearing sturdy gloves can file or sand the rim smooth with a metal file or coarse sandpaper, or use needle-nose pliers to gently bend any sharp points inward, working slowly around the whole rim.
- The fastest, safest fix for any project involving kids: tape the rim with masking tape, duct tape, or electrical tape, folded over both the inside and outside edge to create a soft lip. This is genuinely the easiest option and works well even for younger kids.
- A real, safer way to open the can in the first place: lay it flat on a table with the pull-ring facing away from you, push the ring away first, then hold the can down and pull the ring back toward yourself. This avoids the cutting motion behind most pull-tab finger injuries.
Divide labor by task, not by project: an adult should handle opening the can and fixing the edge every time, while kids take over once the can is genuinely safe to touch, painting, decorating, gluing, and assembling. None of this adds real cost or much time to any project below.
20 DIY Tin Can Ideas
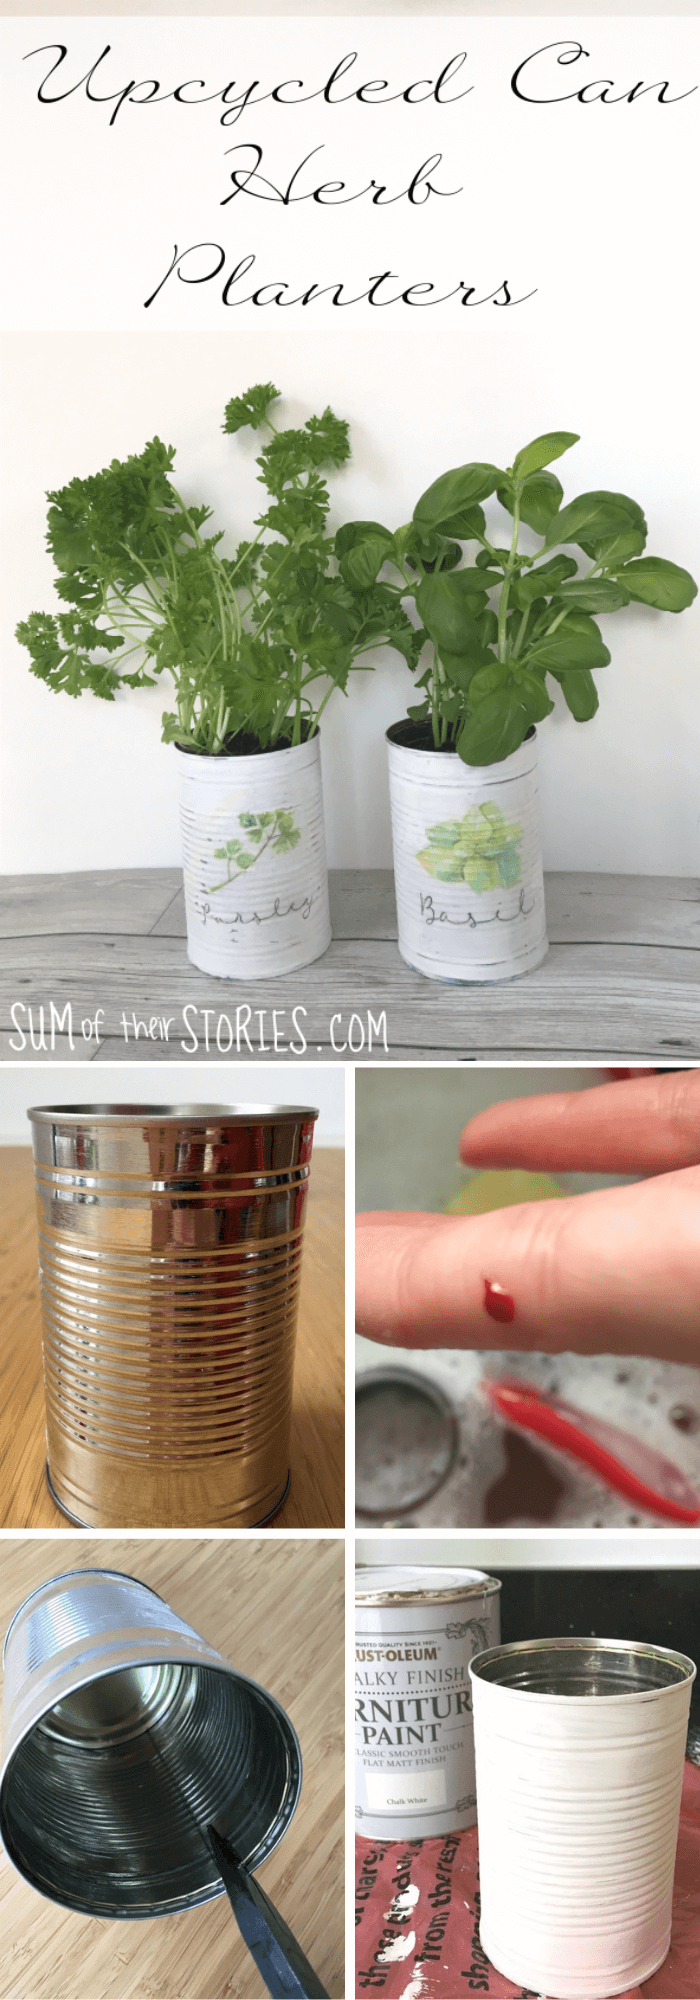
1. Upcycled Can Herb Planters
Answer 4 quick questions and get matched to the exact fix for your yard — drainage, budget, layout, or something else entirely.
Take the Free QuizA cleaned, edge-safe tin can makes a genuinely good herb planter: punch a few drainage holes in the bottom (from the outside in, to avoid pushing a sharp burr up into the can), add a layer of small gravel or broken pottery shards for drainage, then fill with potting soil.
Basil, thyme, and mint all do well in a can-sized container, and a row of them on a sunny windowsill looks intentional rather than improvised.
2. Can Stilts Kid Craft
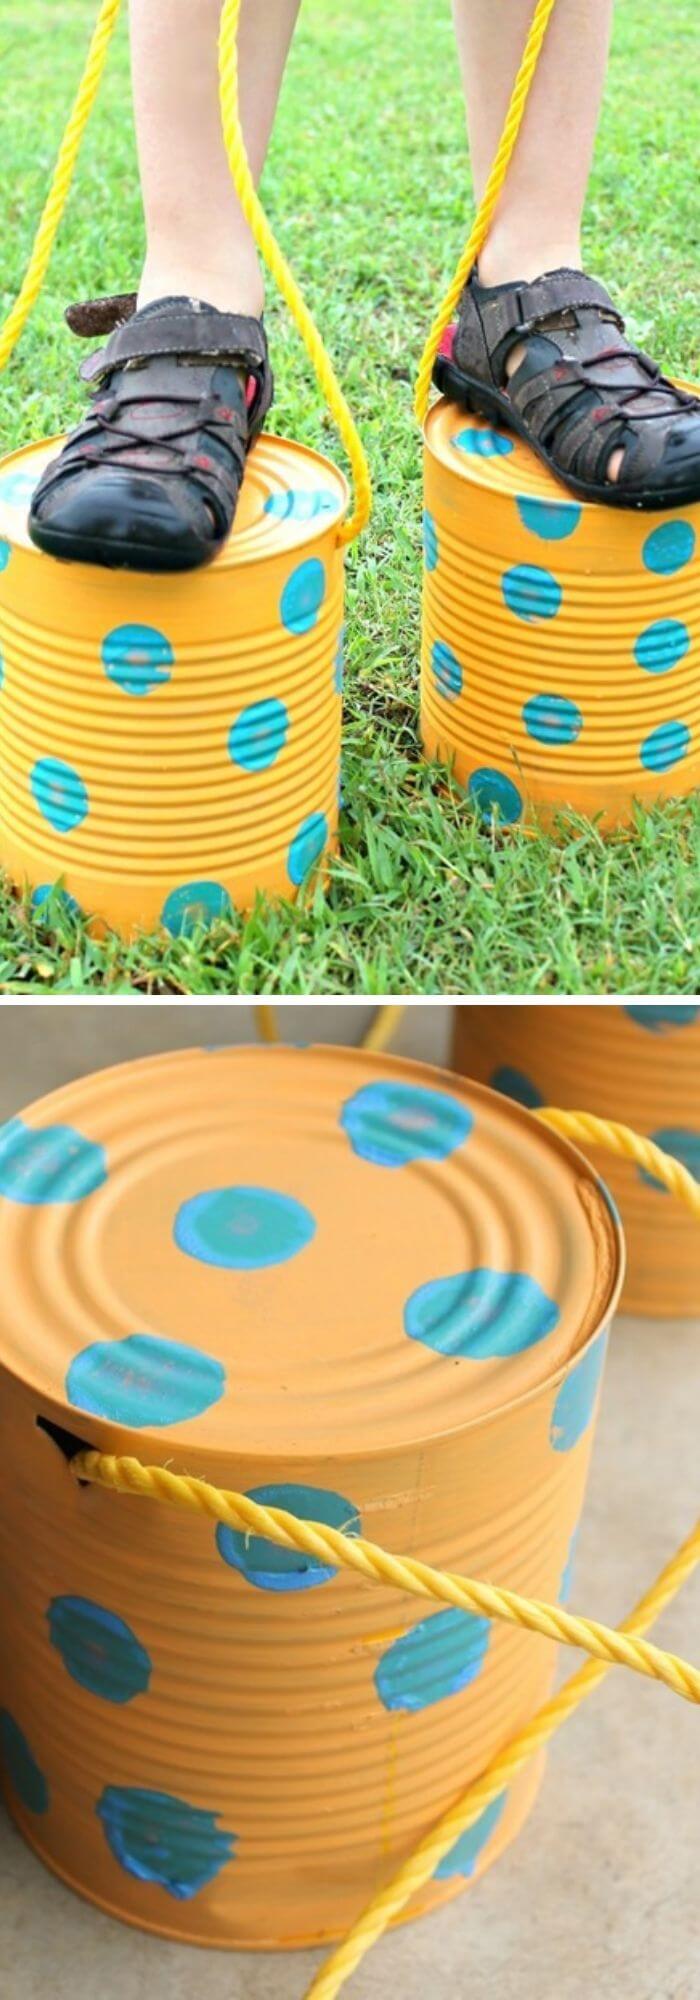
Two cans per stilt, with a hole punched near the top on opposite sides and a length of sturdy rope or cord threaded through and knotted to hold onto, make a classic backyard kids’ activity.
This is squarely an adult-prep, kid-play project: prep the edges and punch the holes yourself first (see the safety section above), then let kids decorate the outside and take over from there.
3. Silverware Caddy Organizer
Most yard problems trace back to one specific, fixable cause. Find yours in 4 quick questions.
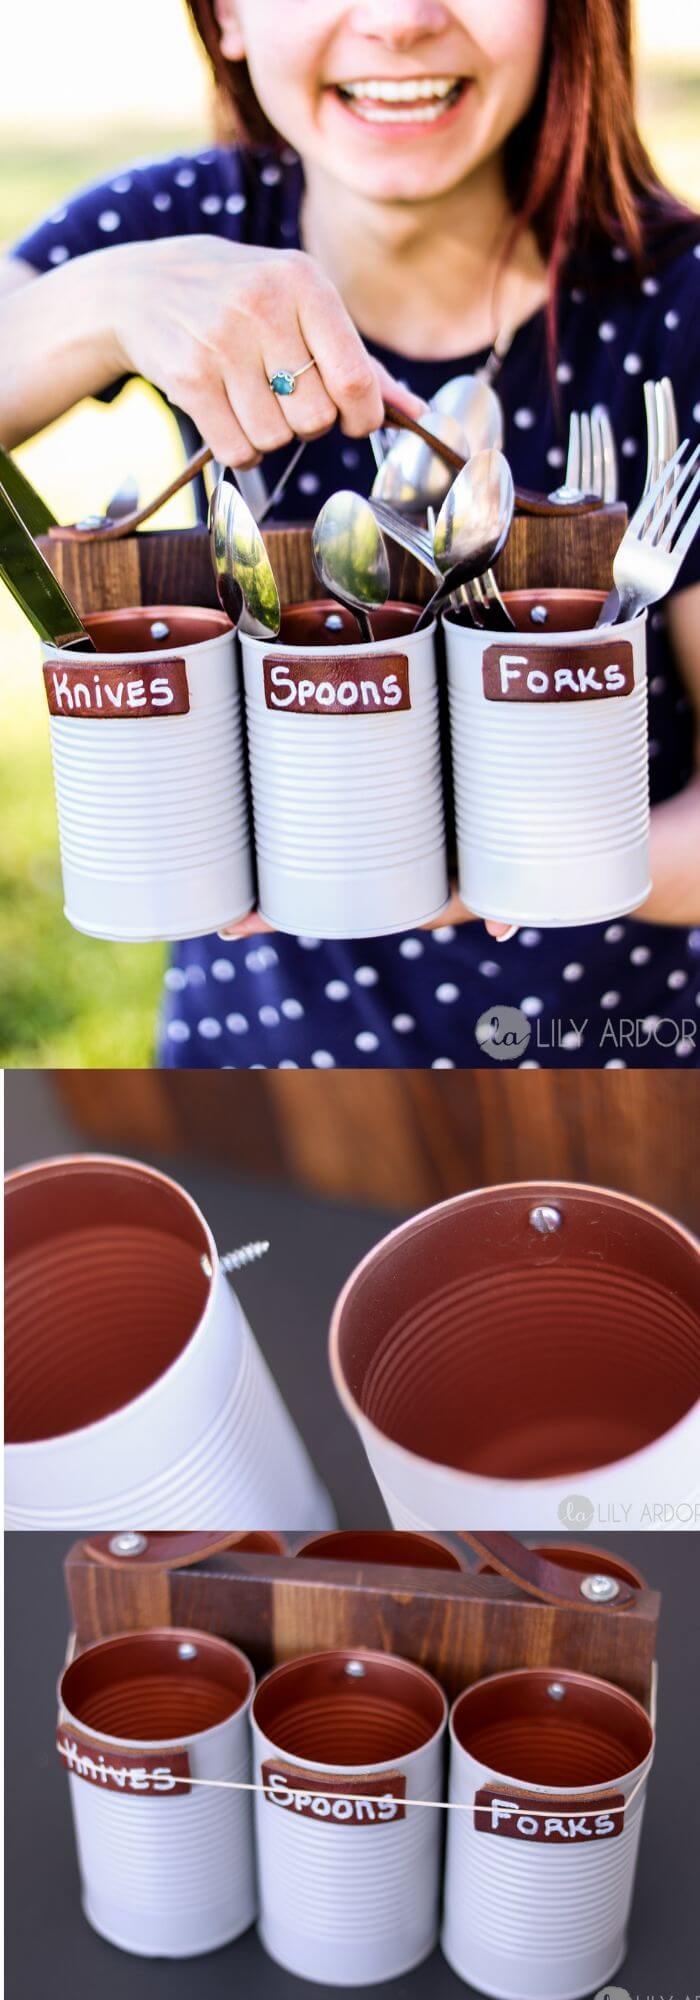
Take the Free QuizThree or four cans of varying heights, wired or glued together side by side (a wood base underneath adds real stability), makes a genuinely useful silverware or utensil caddy for a kitchen counter or picnic table. Painting each can a different color or wrapping them in twine gives visual variety without any extra structural work.
4. Decoupage Tin Can Planters

Decoupage, gluing paper (napkins, scrapbook paper, or maps) onto a surface and sealing it with a decoupage medium, turns a plain can into a genuinely decorative planter cheaply. Coat the can in glue, smooth the paper on, let it dry, then seal with a top coat of decoupage medium or clear varnish for durability against watering splashes.
5. Tin Can Activities (Sensory and Learning Bins)
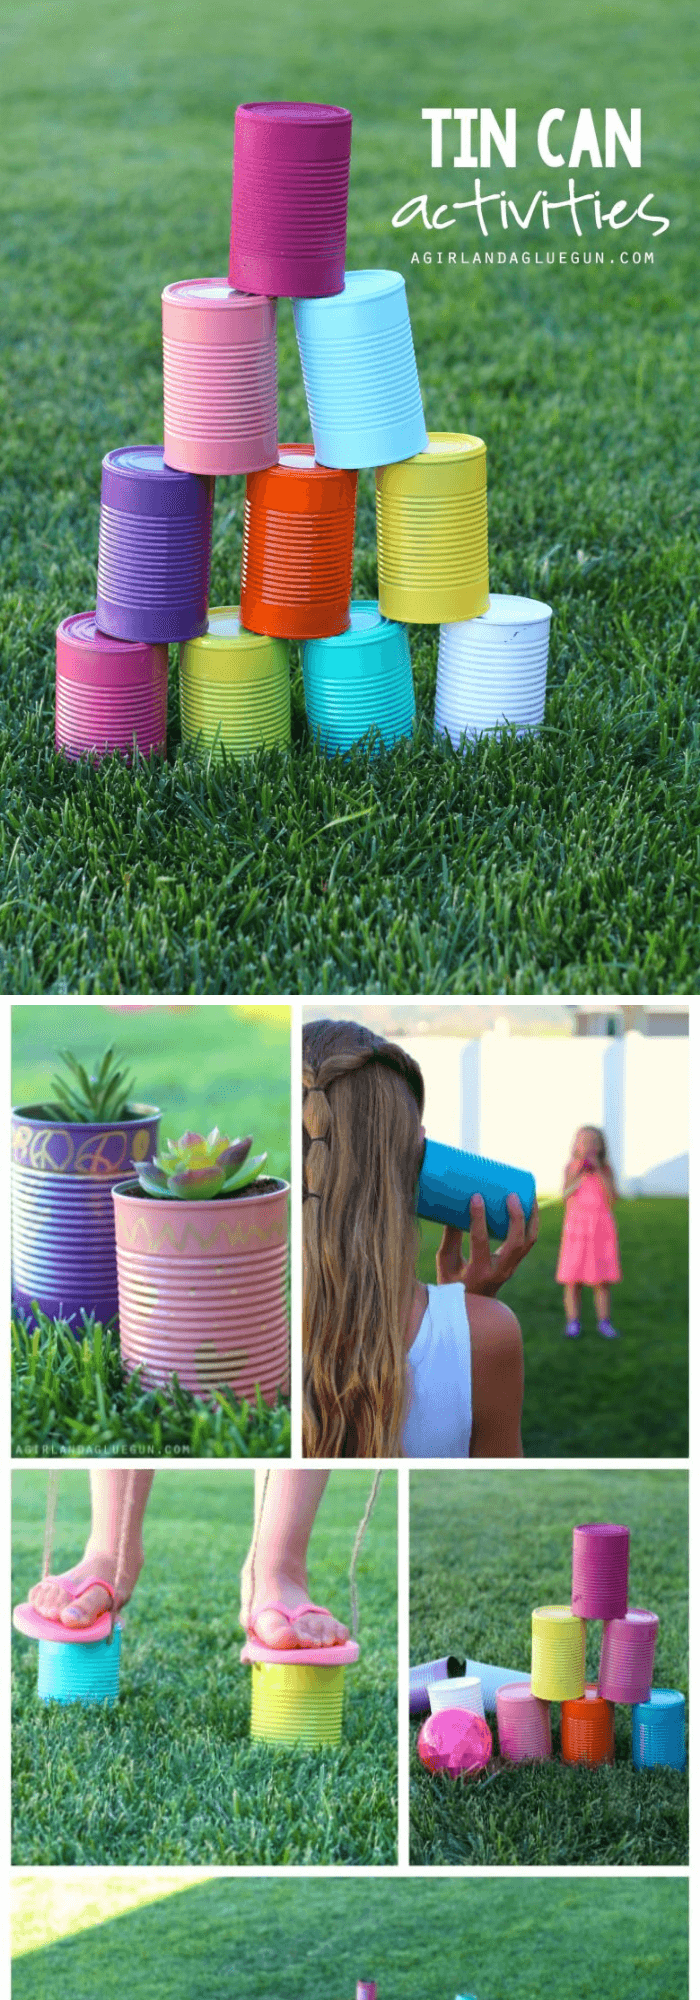
Beyond crafts, a clean tin can makes a simple sensory or learning bin base for younger kids, filled with rice, dried beans, or small toys for scooping and sorting play.


As with the stilts idea above, an adult should handle the initial edge-prep before any activity involving young kids, since this is one of the projects where a child’s hands are in and around the can’s rim repeatedly.
6. Tin Can Pendant Lights (real electrical safety, read first)
The average homeowner spends $616/year on yard fixes that don't address the real problem. Find out what yours actually is — before you spend another dollar.
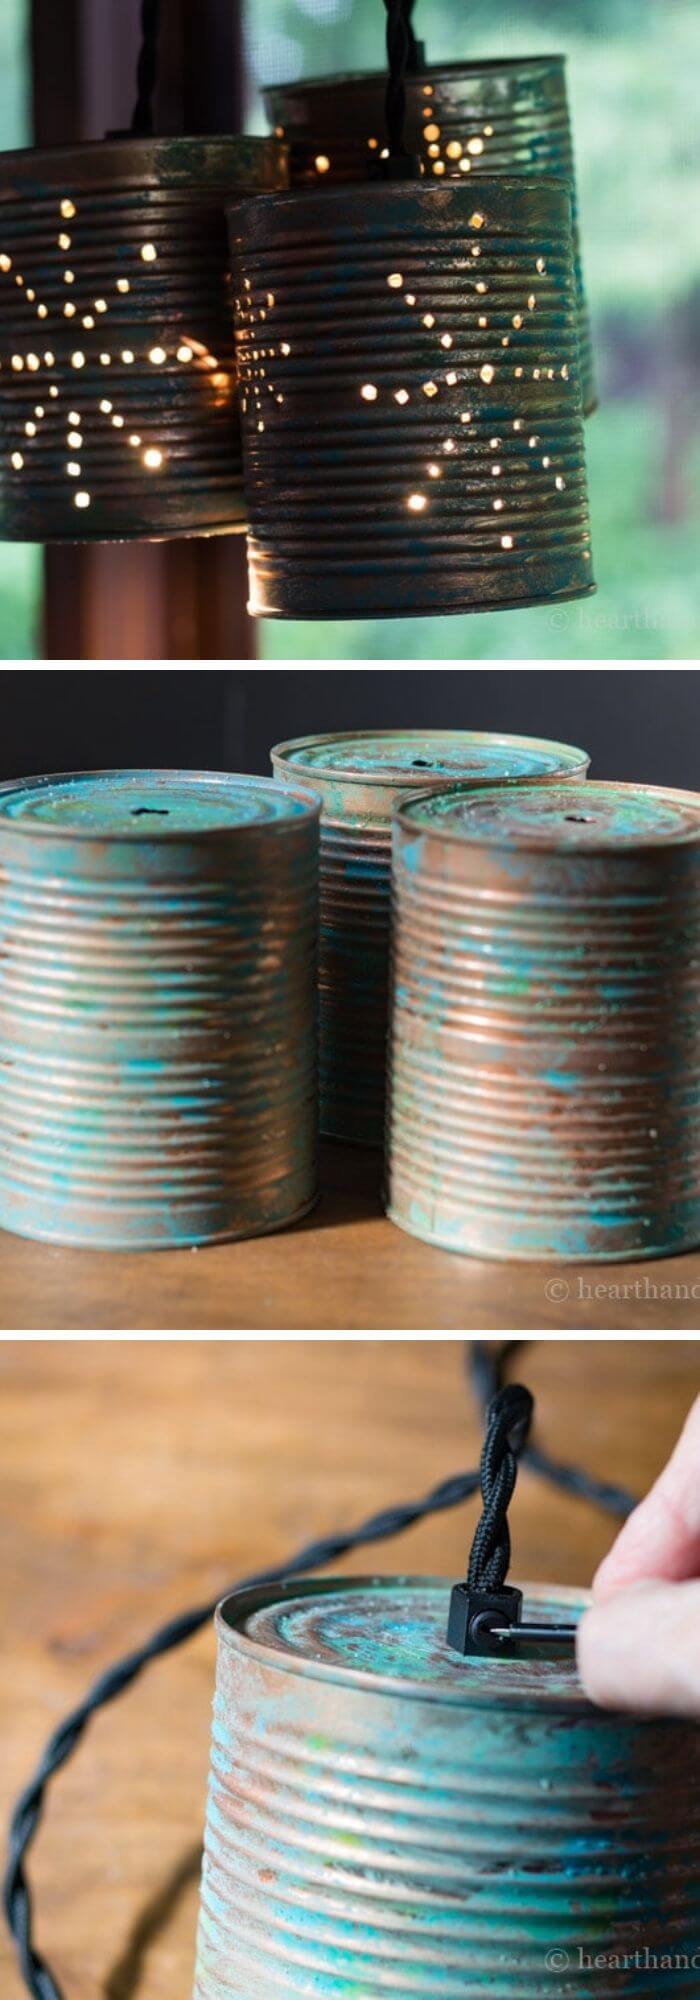
Take the Free QuizA row of punched-tin cans wired as pendant lights is a genuinely striking DIY lighting project, but it’s the one idea on this list with real electrical stakes, not just craft stakes.
Always use a UL- or ETL-listed pendant light cord kit rather than bare, unrated wire, and match the cord’s wattage rating to your bulb, an underrated cord risks melting or fire.
A metal can body is electrically conductive, so make sure the socket and wiring are properly insulated from direct contact with the can’s interior, bare wire touching the can shell is a real shock and short-circuit risk.
If you’re not confident wiring it yourself, a pre-made cord kit with a shielded socket removes most of that risk for a few extra dollars.
7. Colorful Tin Can Planters
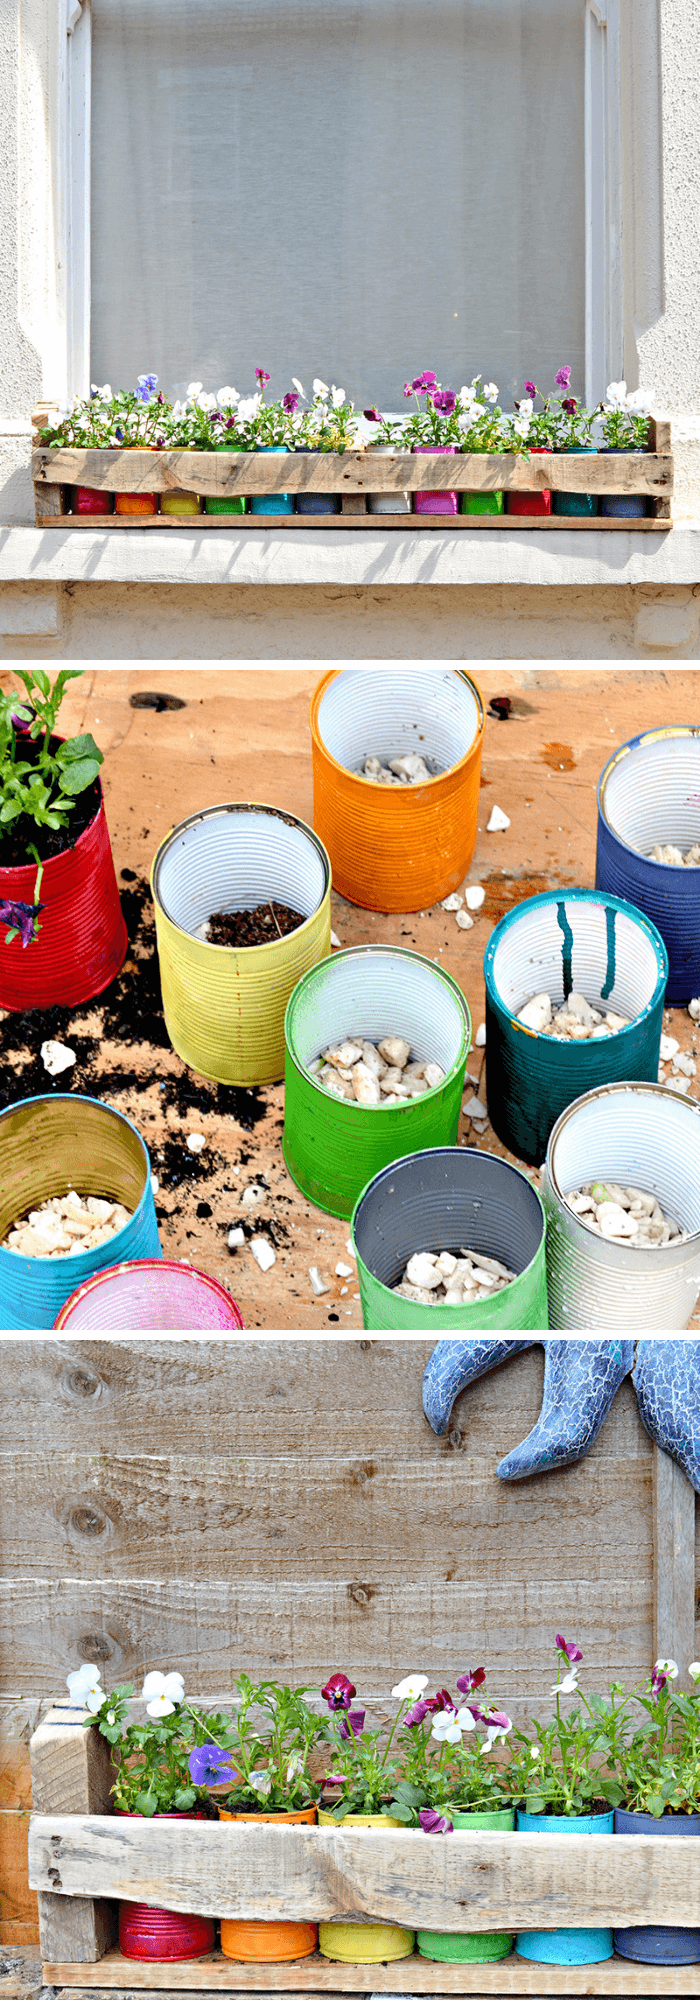
Spray paint (rated for metal) in a bold color turns a plain can into a genuine style statement with almost no effort: two light coats, allowing full drying time between them, hold up far better outdoors than one heavy coat.
Grouping several different colors together on a shelf or windowsill reads as an intentional collection rather than mismatched leftovers.
8. DIY Tin Can Man
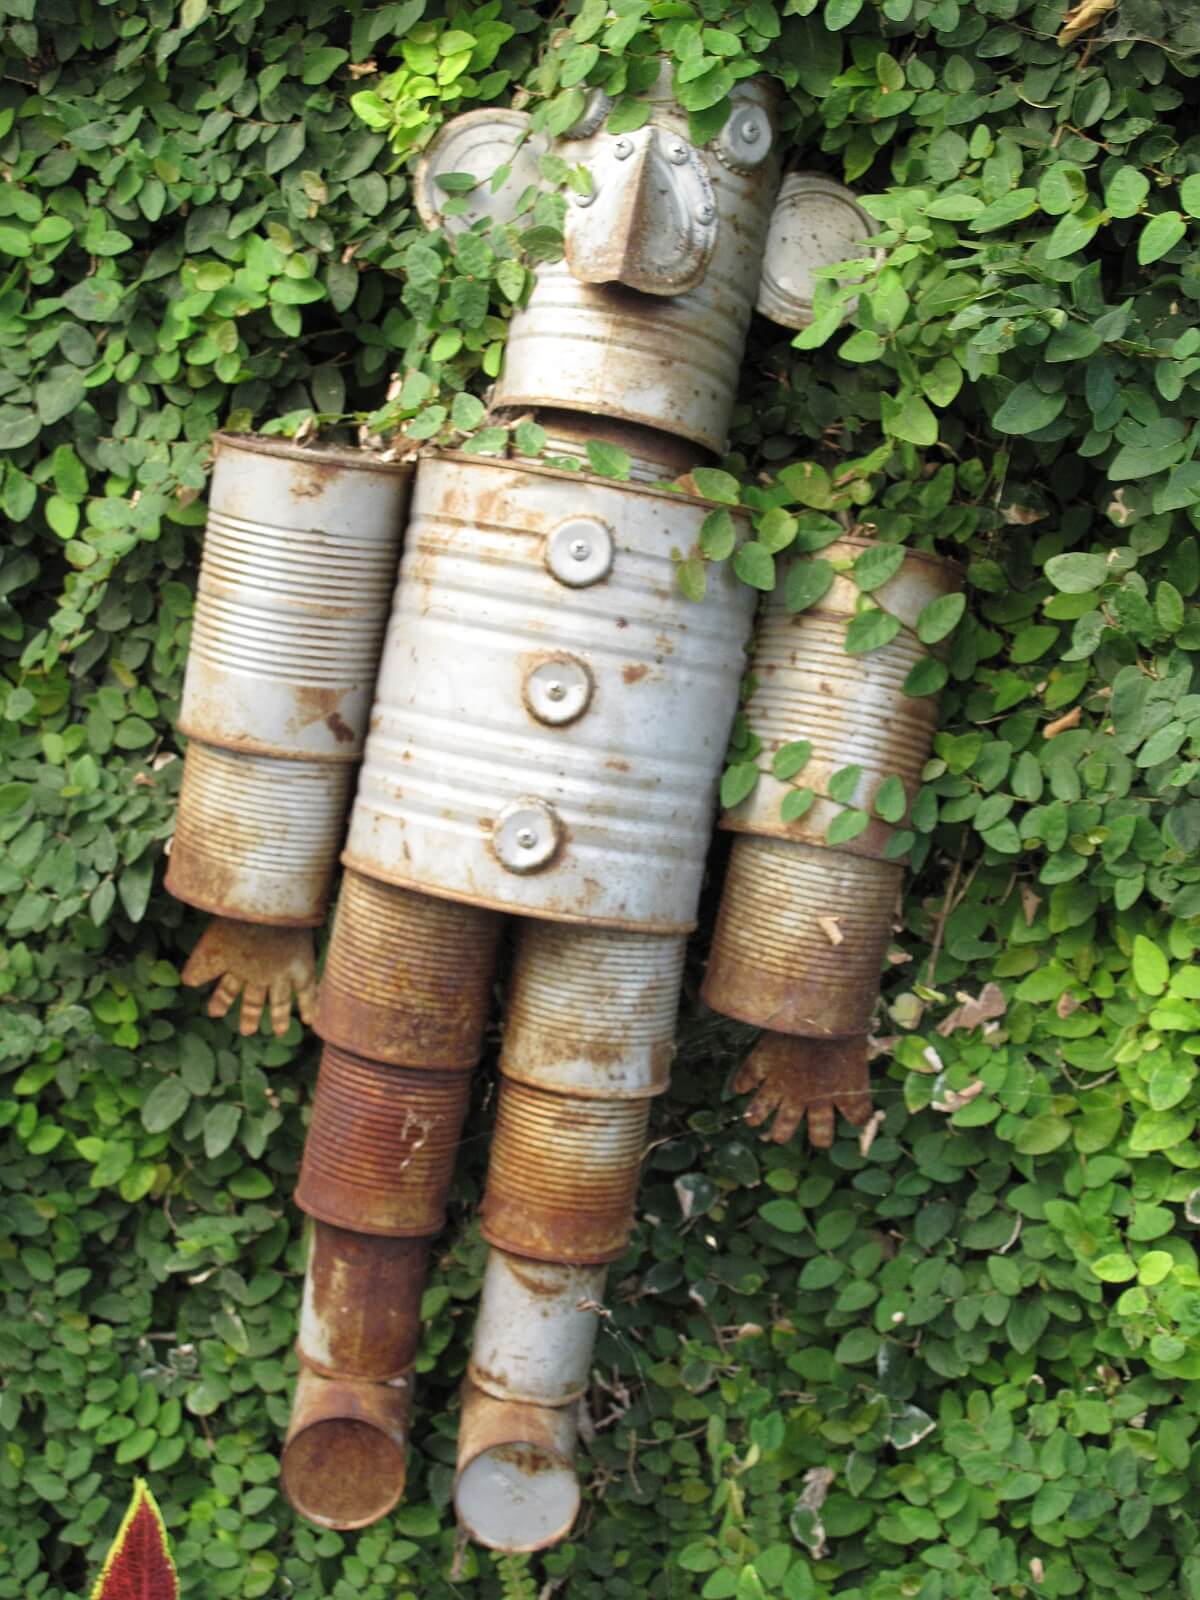
A stack of two or three cans of different sizes, glued or wired together and decorated with painted-on features, buttons, and craft-store accessories, makes a whimsical seasonal decoration (a snowman look works especially well with silver or white cans). This is a genuinely kid-friendly decorating project once the cans are edge-safe.
9. Painted Tin Can Planters
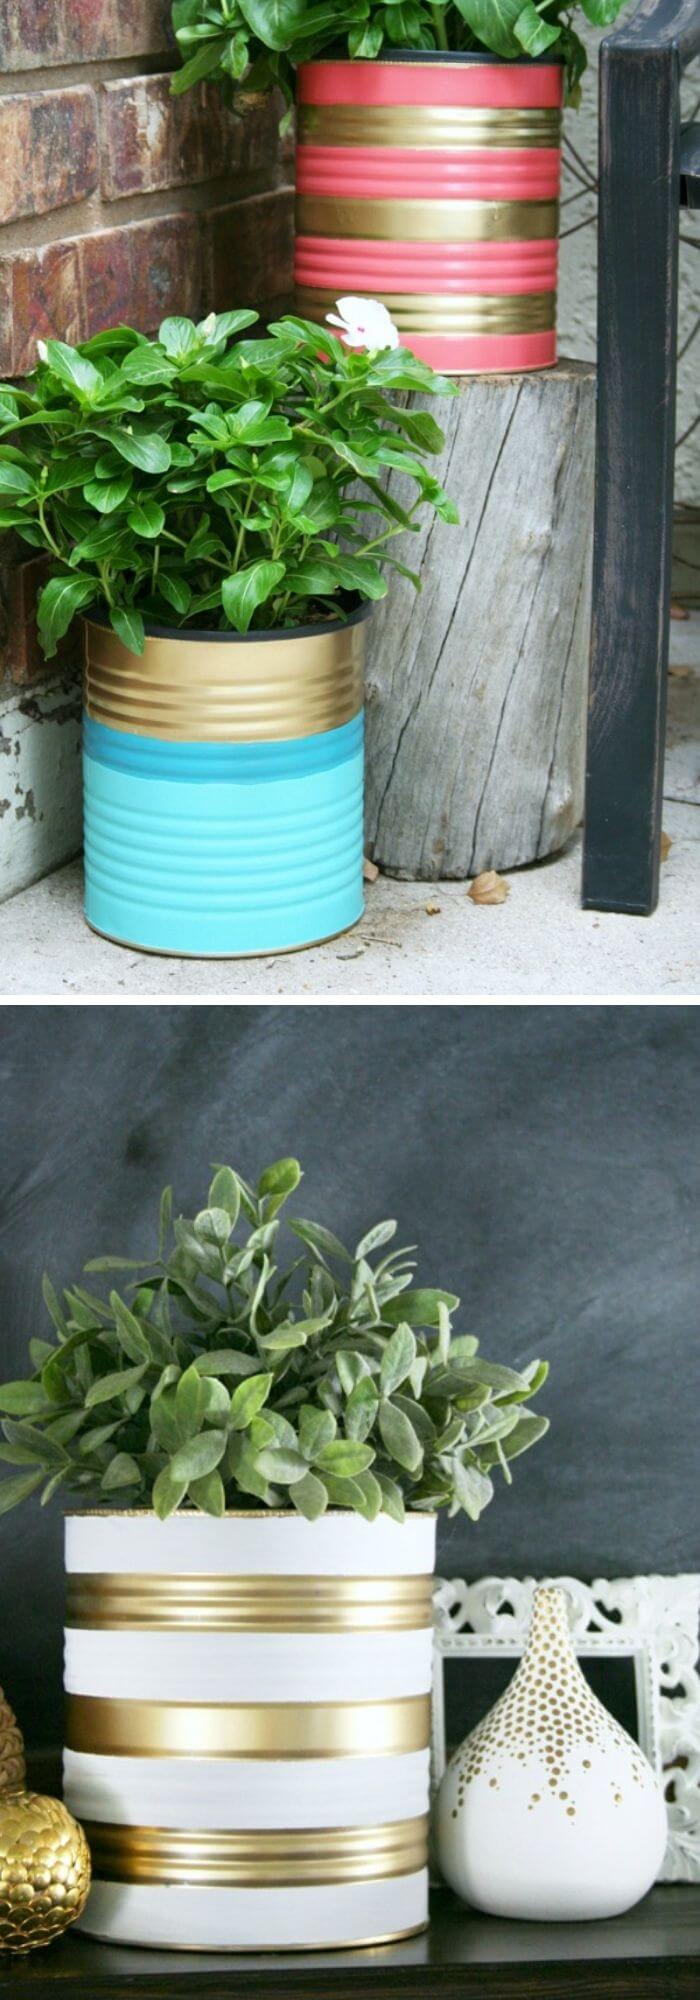
Beyond a single solid color, hand-painted patterns, stripes, polka dots, simple florals, on a cleaned can give it a more personal, artisanal look than spray paint alone. A coat of clear sealant over the finished design protects it from watering splashes and outdoor weather if the planter lives outside.
10. Recycled Tin Can Lantern and Hanging Planter
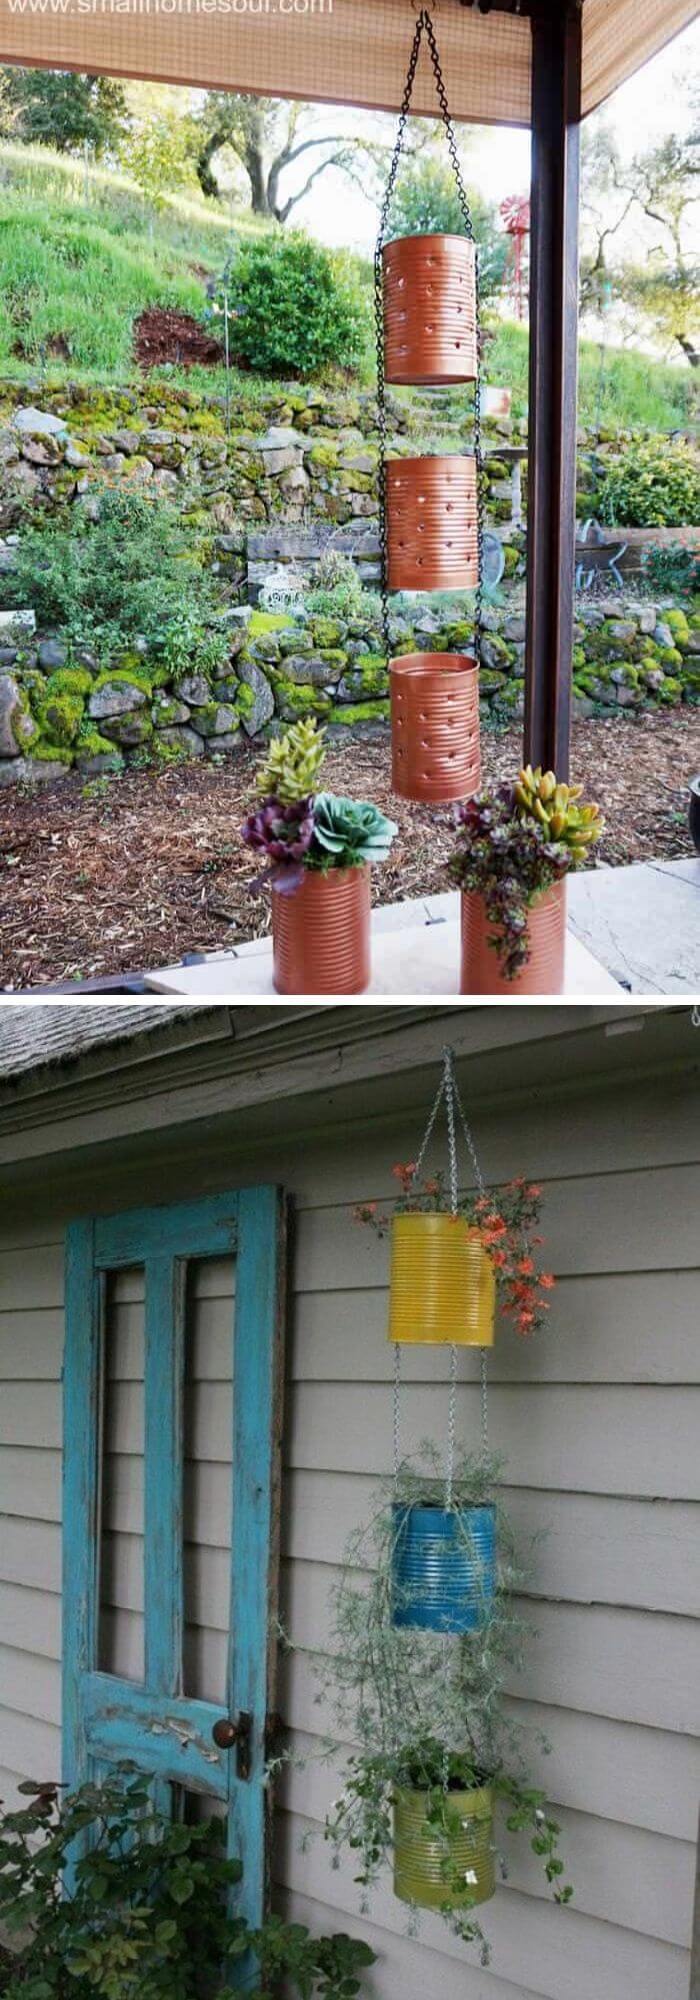
Punching a decorative pattern of small holes through the can’s side (a hammer and a nail, working from the outside, does this safely) lets light shine through in a pattern once a tea light or LED candle is placed inside, and the same punched can works as a hanging planter with a wire handle. Stick to a flameless LED tea light rather than a real flame if the lantern will hang anywhere near fabric, dried plants, or other flammable decor.
11. Tin Can Planters With Easter Eggs
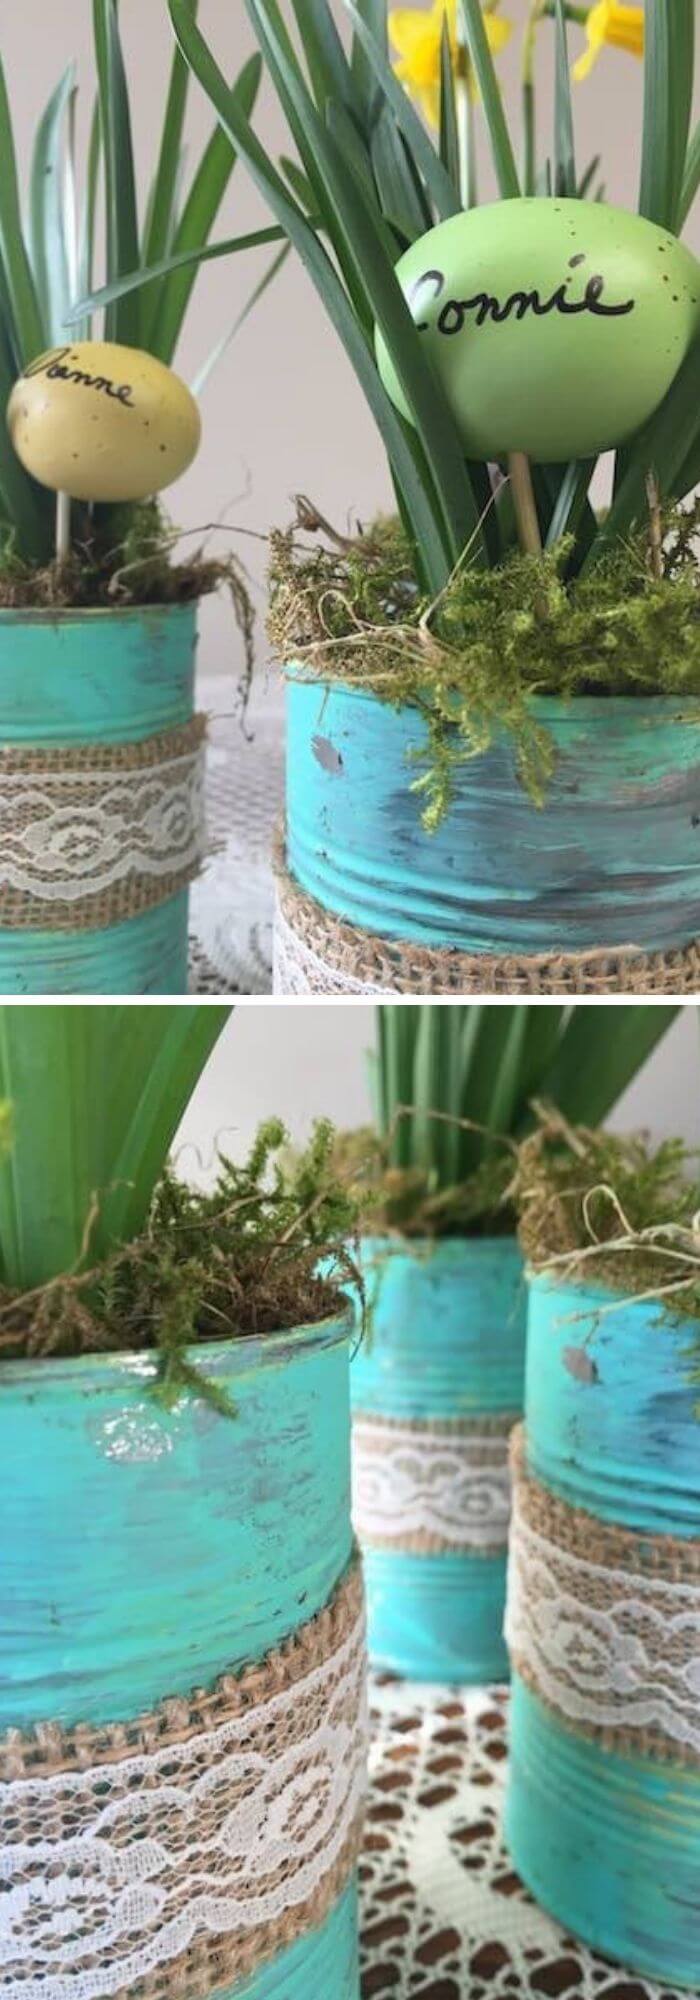
A seasonal variation: fill a small can with easter grass and plastic eggs as a centerpiece, or use the can itself as a planter with a few painted eggs glued around the rim as a spring-specific decorative touch. This is one of the simplest, lowest-cost ideas on the list, mostly leftover holiday craft supplies.
12. Tin can hanging planters
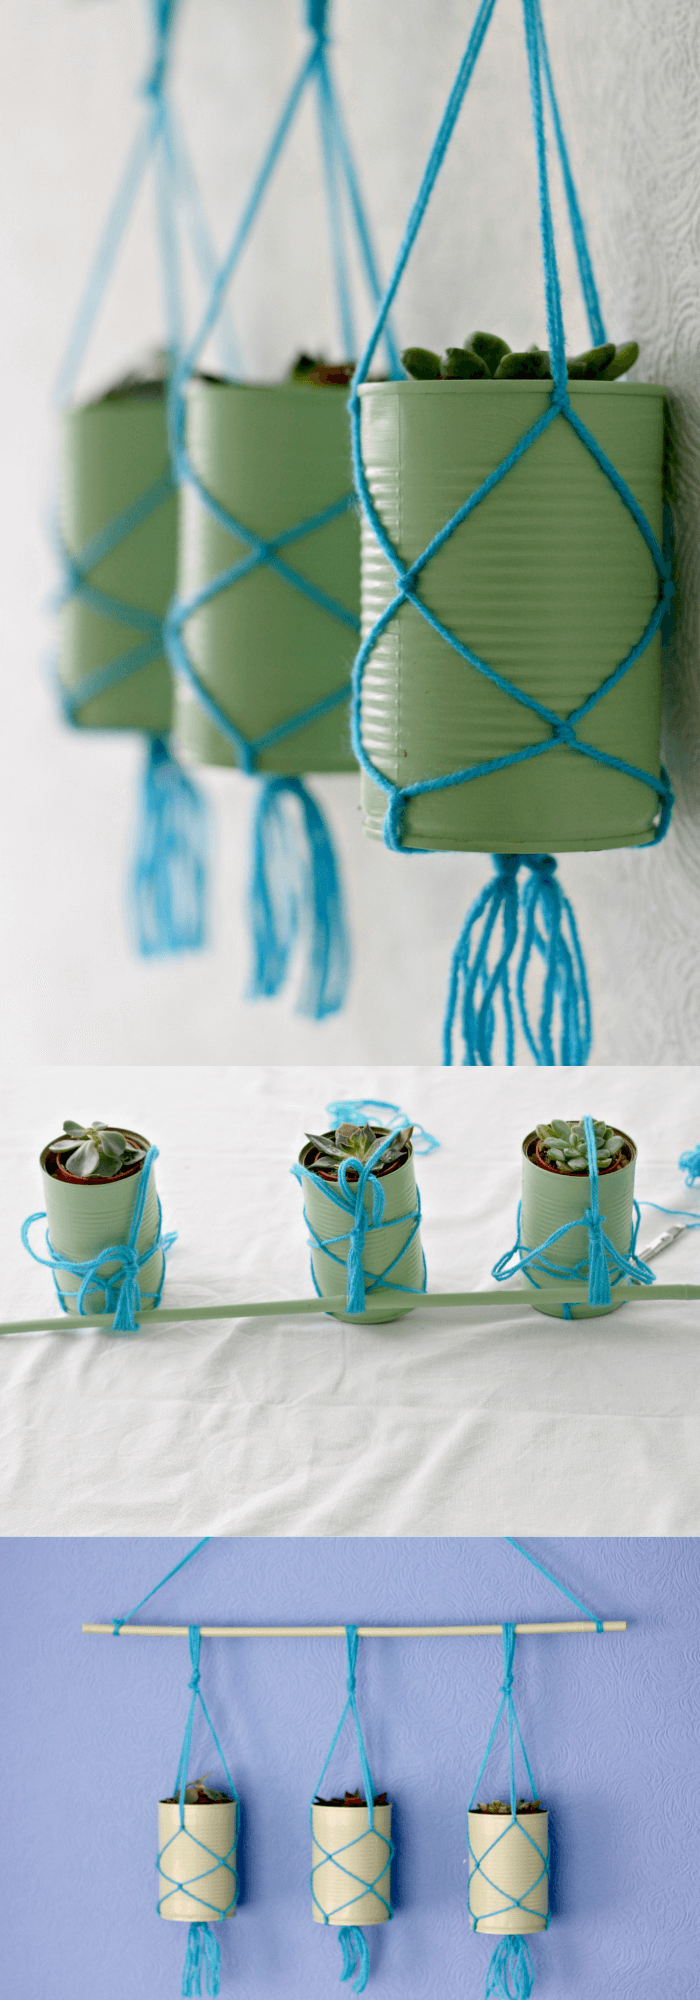
Punch two holes near the rim on opposite sides, thread wire or sturdy cord through both, and knot it above the can to create a hanging planter. This works especially well for trailing plants (like ivy or a trailing succulent) that benefit from height, and a row of them along a porch beam or fence rail makes a real visual statement for very little material cost.
13. Crushed Can Planter
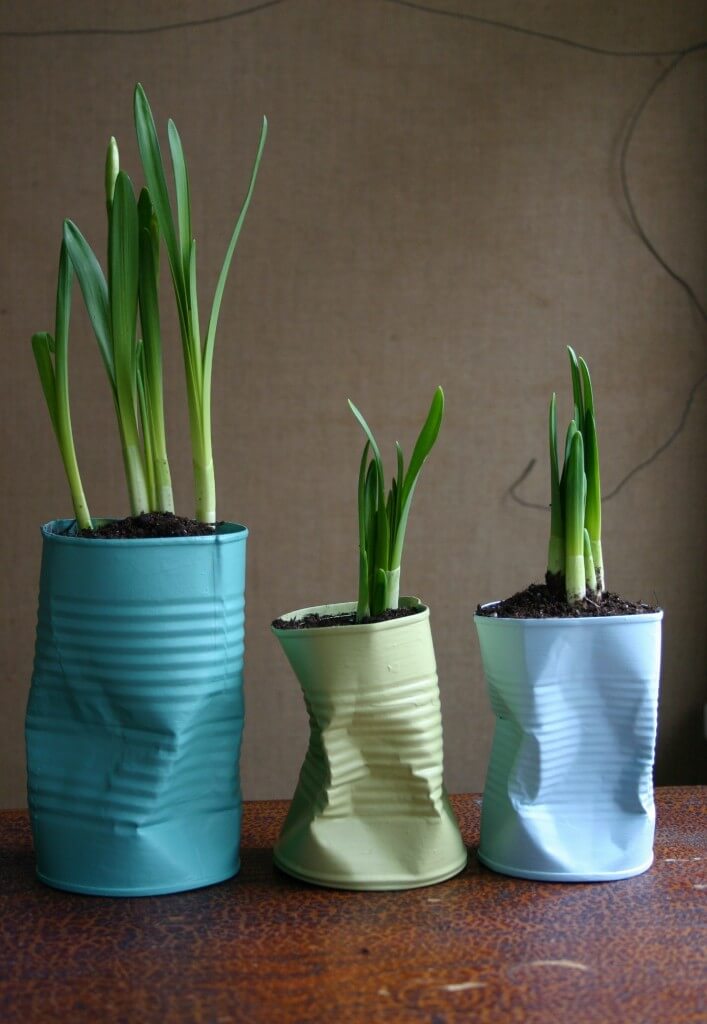
Gently crushing or denting a can before painting it gives an intentionally rustic, weathered look that a pristine can doesn’t have. Crush it before cutting or punching any holes, not after, working with a flattened or dented shape is much easier before the metal has open edges to deal with.
14. DIY Tin Can Planters Perfect For Succulents
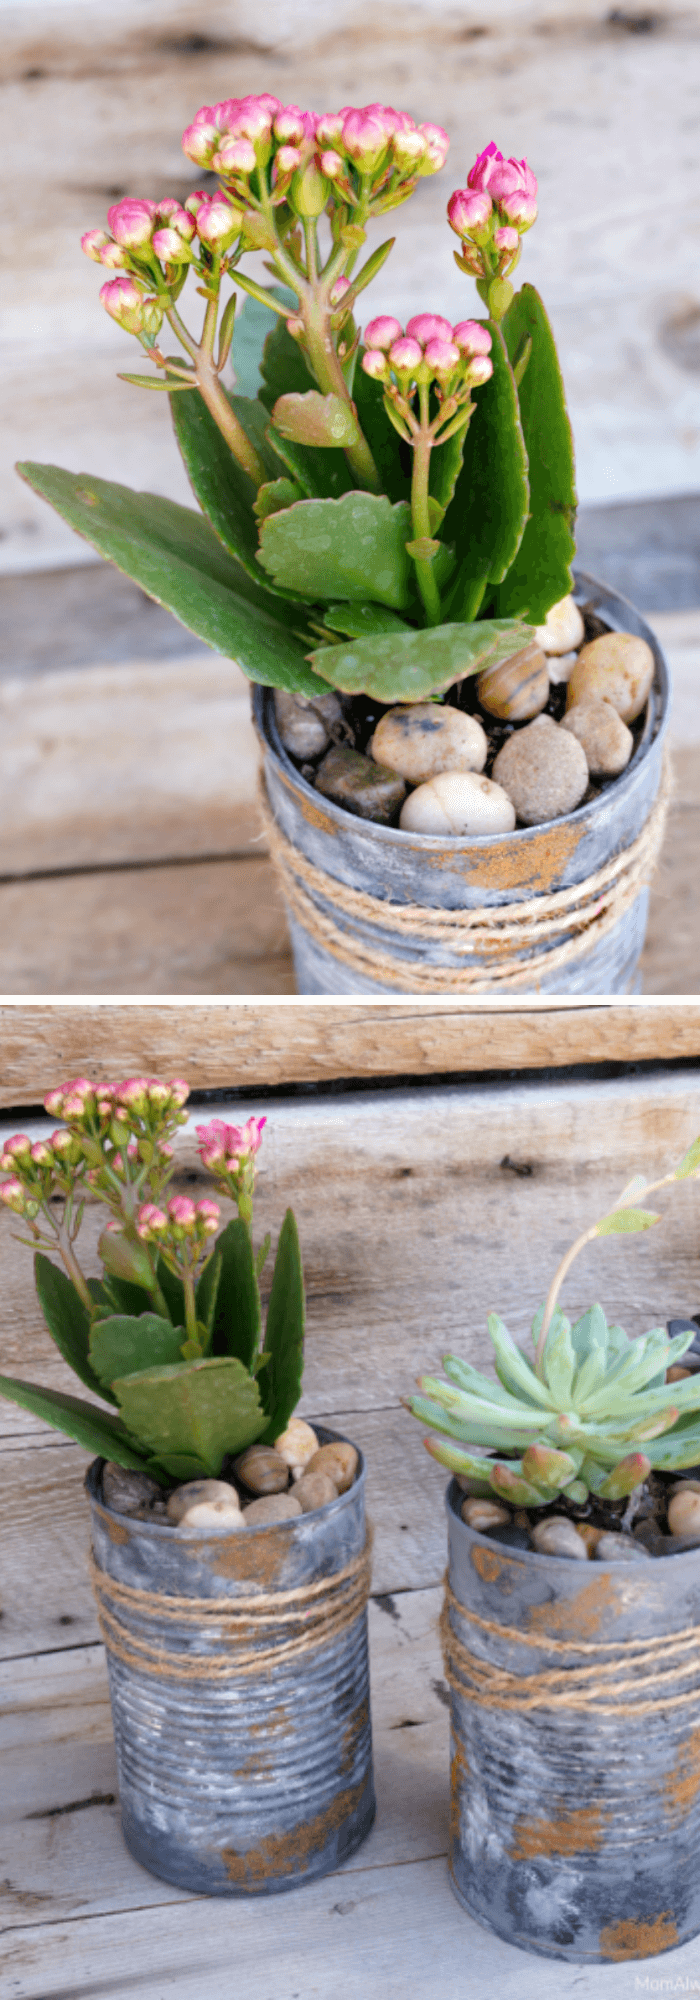
Succulents specifically do well in a can planter because the material doesn’t retain excess moisture the way a thick ceramic pot can, provided you punch real drainage holes in the bottom. A shallow layer of gravel below the soil further reduces the root-rot risk succulents are especially prone to.
15. Bunny Planters from Tin Can
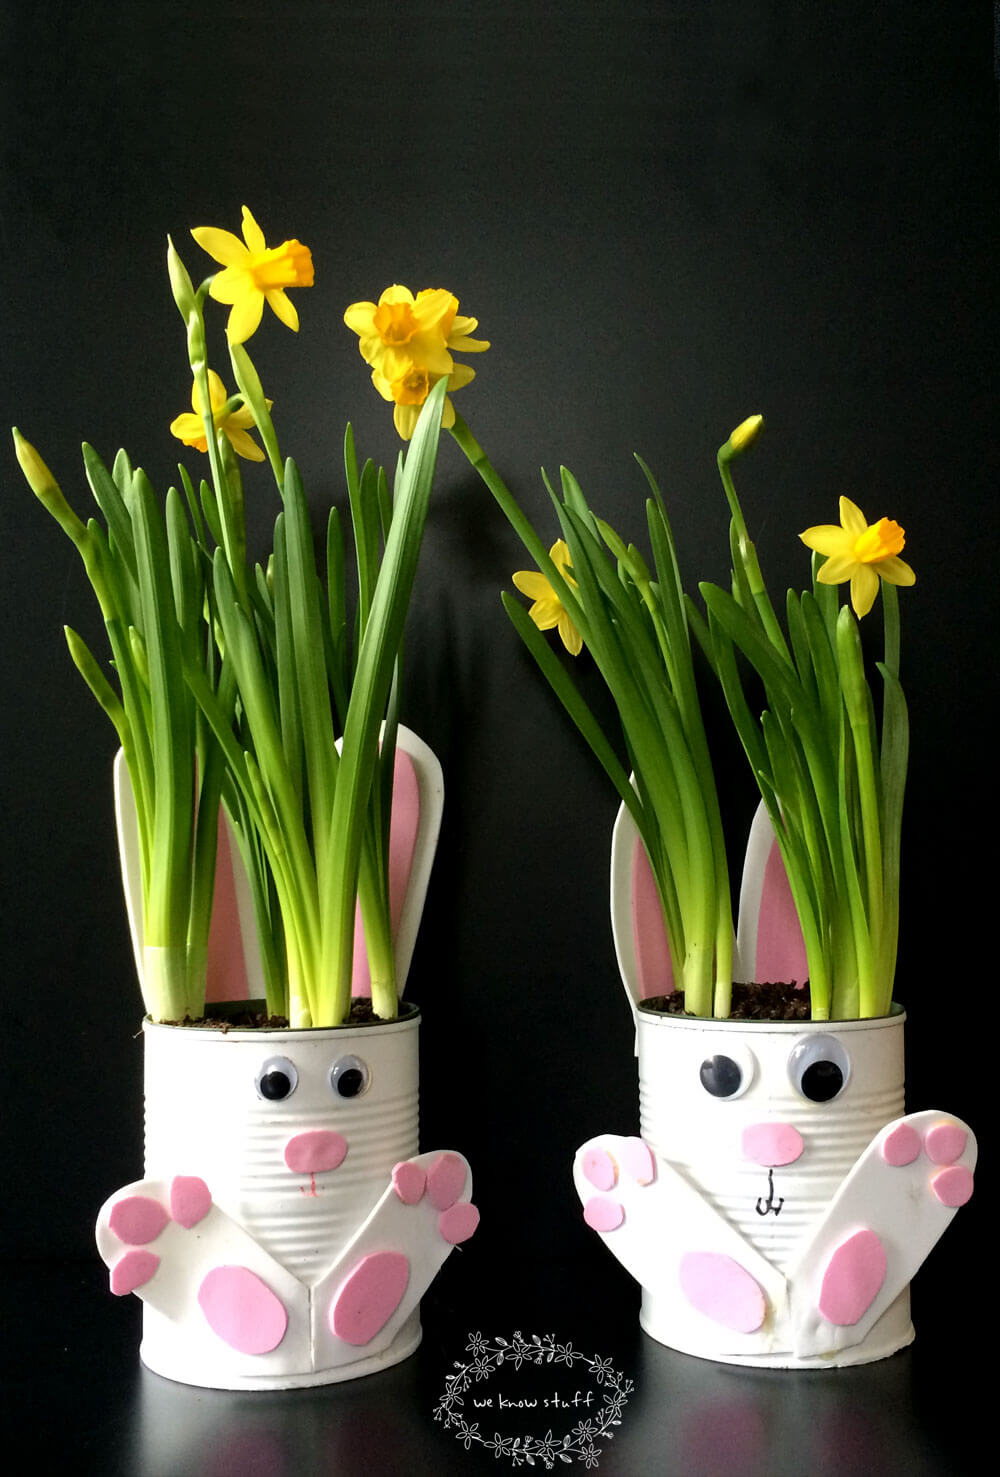
A can painted white or pastel with felt or paper ears glued to the rim and a simple painted-on face makes a genuinely cute seasonal planter, popular around Easter but honestly cute enough to keep out year-round with a plant inside. This is a low-skill, high-payoff project that works well as a kid-and-adult collaboration once the edges are prepped.
16. Hanging Tin Can Planters for Window
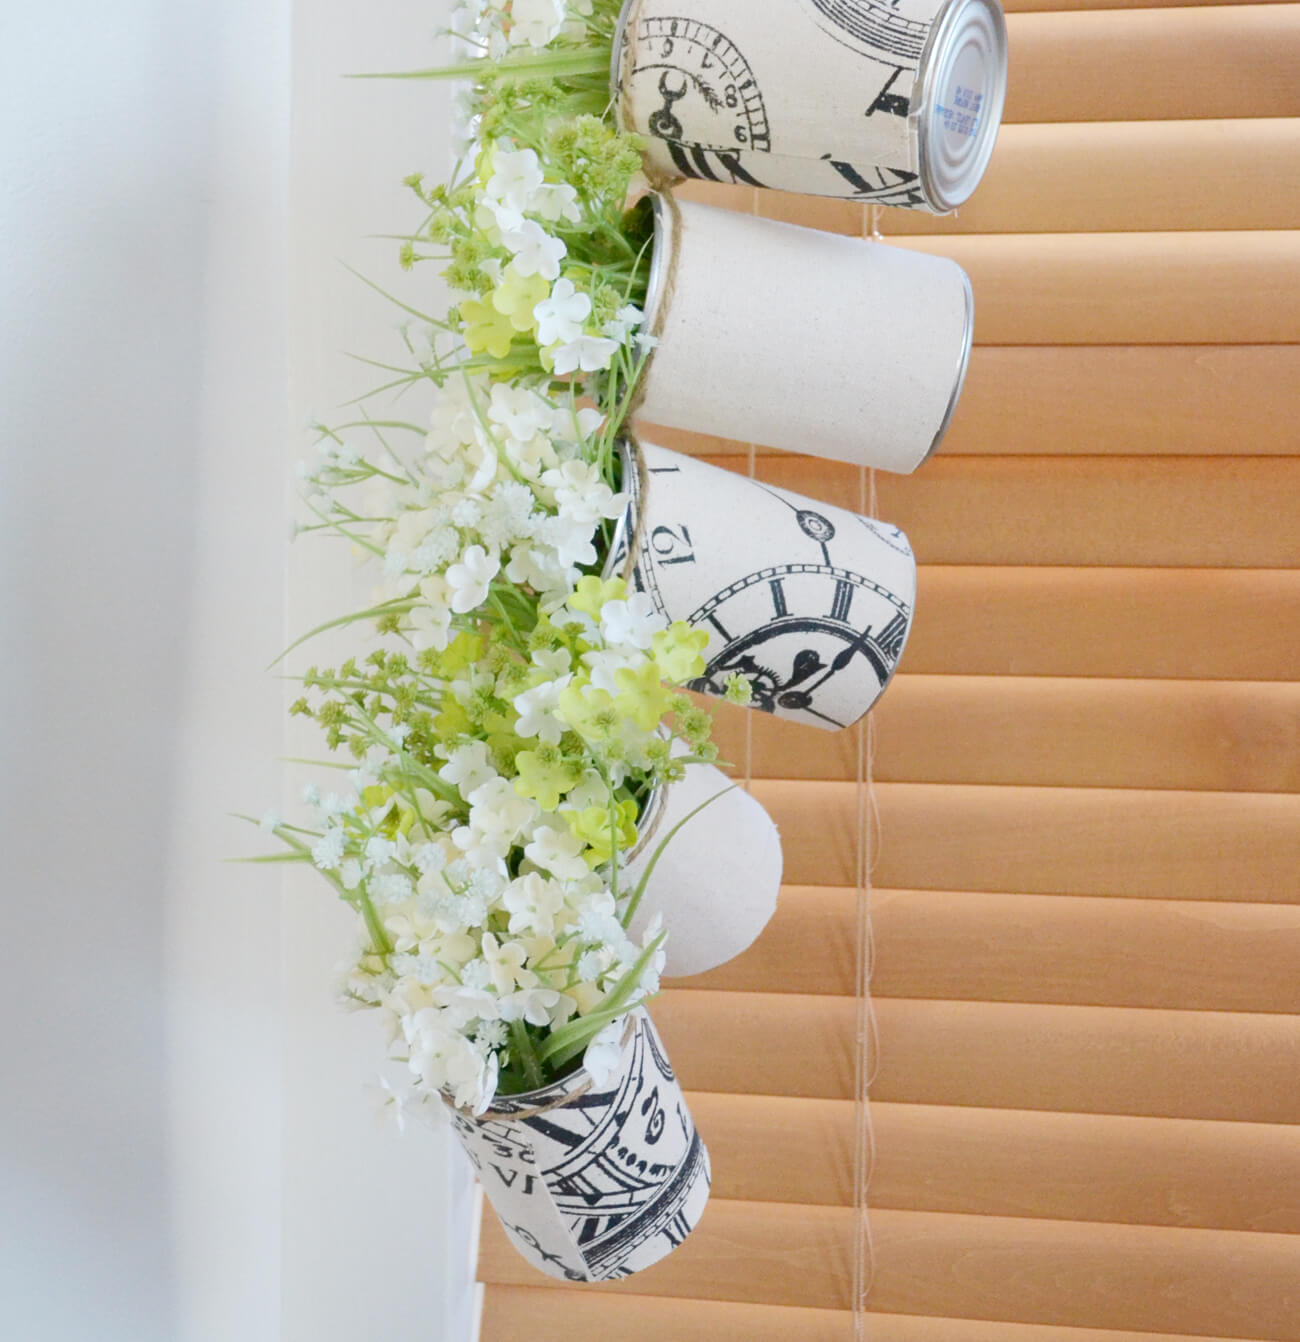
Mounted on a simple wood or metal bracket just below a window frame, a row of small hanging cans makes an indoor herb or succulent display that takes advantage of natural light without taking up any counter or sill space. This pairs well with idea #1’s herb planter concept if you want a full kitchen-window herb garden.
17. DIY Upcycled Essential Oil Burner (real fire safety, read first)
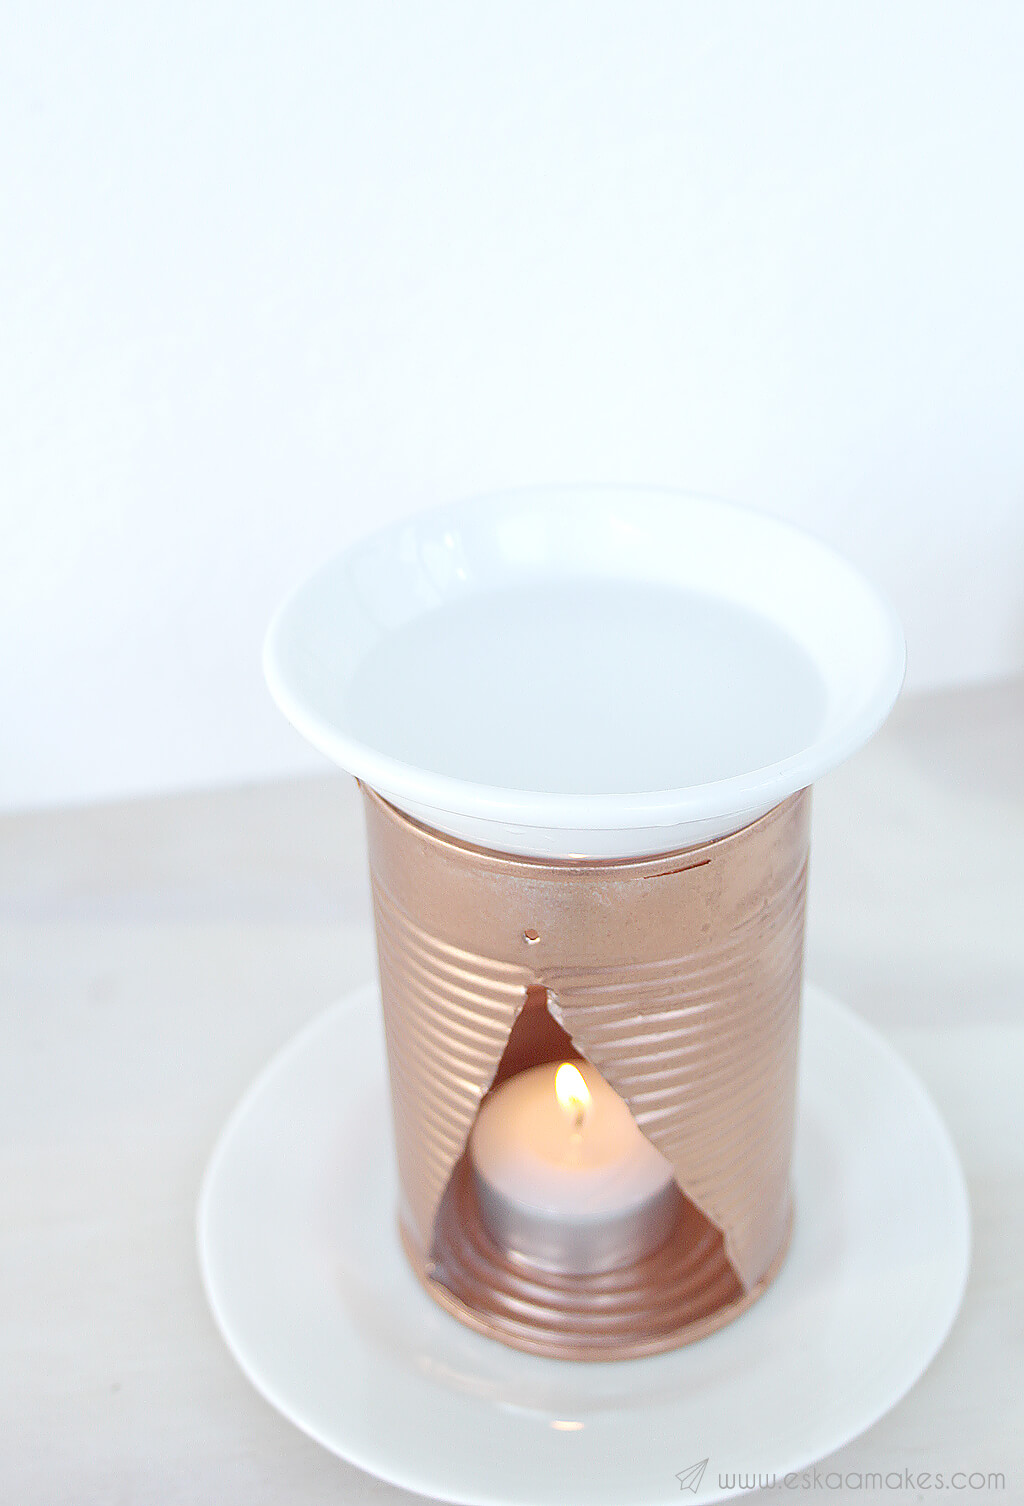
A can with a few holes punched in the lid, a tea light placed inside, and a small dish of water-and-essential-oil mixture set on top turns a tin can into a simple oil burner or diffuser. The real safety rule here, confirmed consistently across fire-safety sources, is to never leave a lit burner unattended, essential oil is itself flammable, and a burner that overheats or gets overfilled is a genuine fire risk, not a theoretical one.
Always set the finished burner on a heat-resistant surface (a ceramic tile or ceramic-topped table, not directly on wood or fabric) regardless of how sturdy the can itself feels. If an oil fire does start, never use water on it, smother it with a metal pan or use baking soda or salt instead.
18. Shabby Chic Candle Holder (real fire safety, read first)
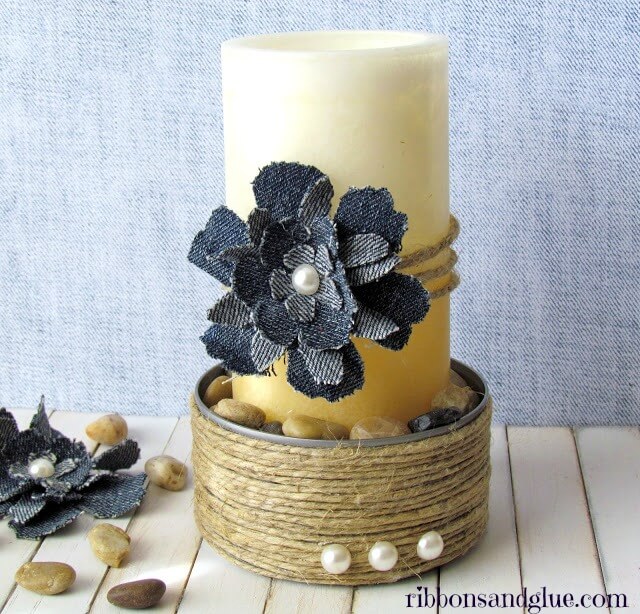
A distressed-paint finish on a can, sanded lightly at the edges for a worn look, makes a charming candle holder, but the same real caution applies here as with the oil burner above.
According to the National Fire Protection Association’s home candle fire research, candles are the fifth-leading cause of home fire injuries, and 55% of home candle fires start specifically because the candle was placed too close to something that could burn. Keep any tin can candle holder well clear of curtains, dried florals, paper décor, or anything else flammable, and never leave a lit candle burning in an unattended room.
19. Upcycled tin can caddy
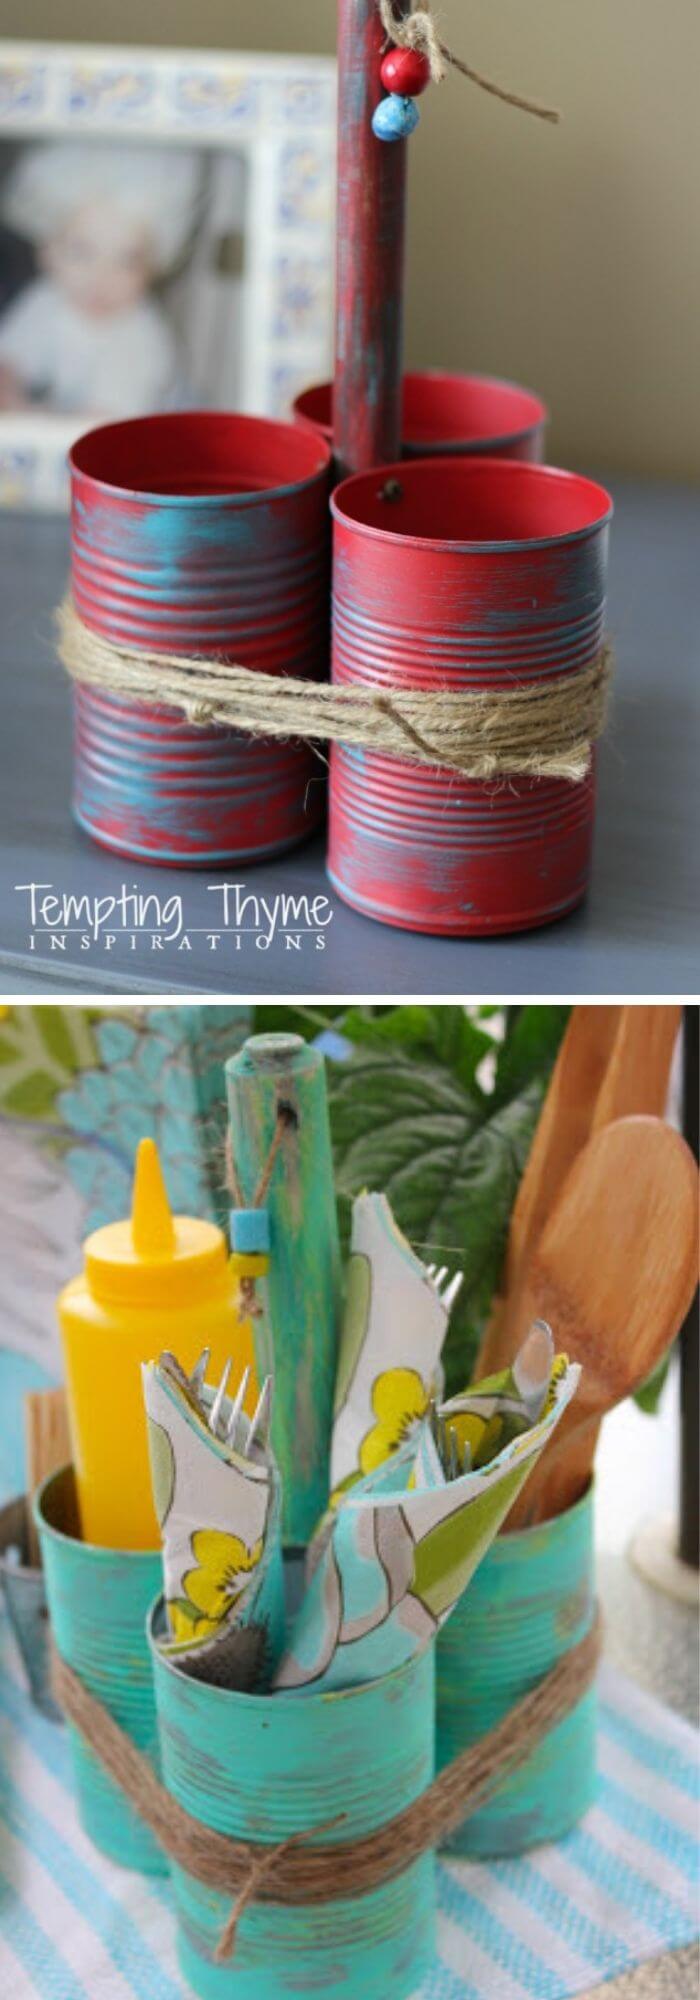
A cleaned can (or a few grouped together) makes a genuinely useful desk or craft-room caddy for pens, brushes, scissors, or garden tools, functionally the same idea as the silverware caddy above but scaled for a different room. Lining the bottom with a thin layer of felt or fabric keeps small metal tools from scratching the can’s painted finish.
20. Tin Can Mossy Pots
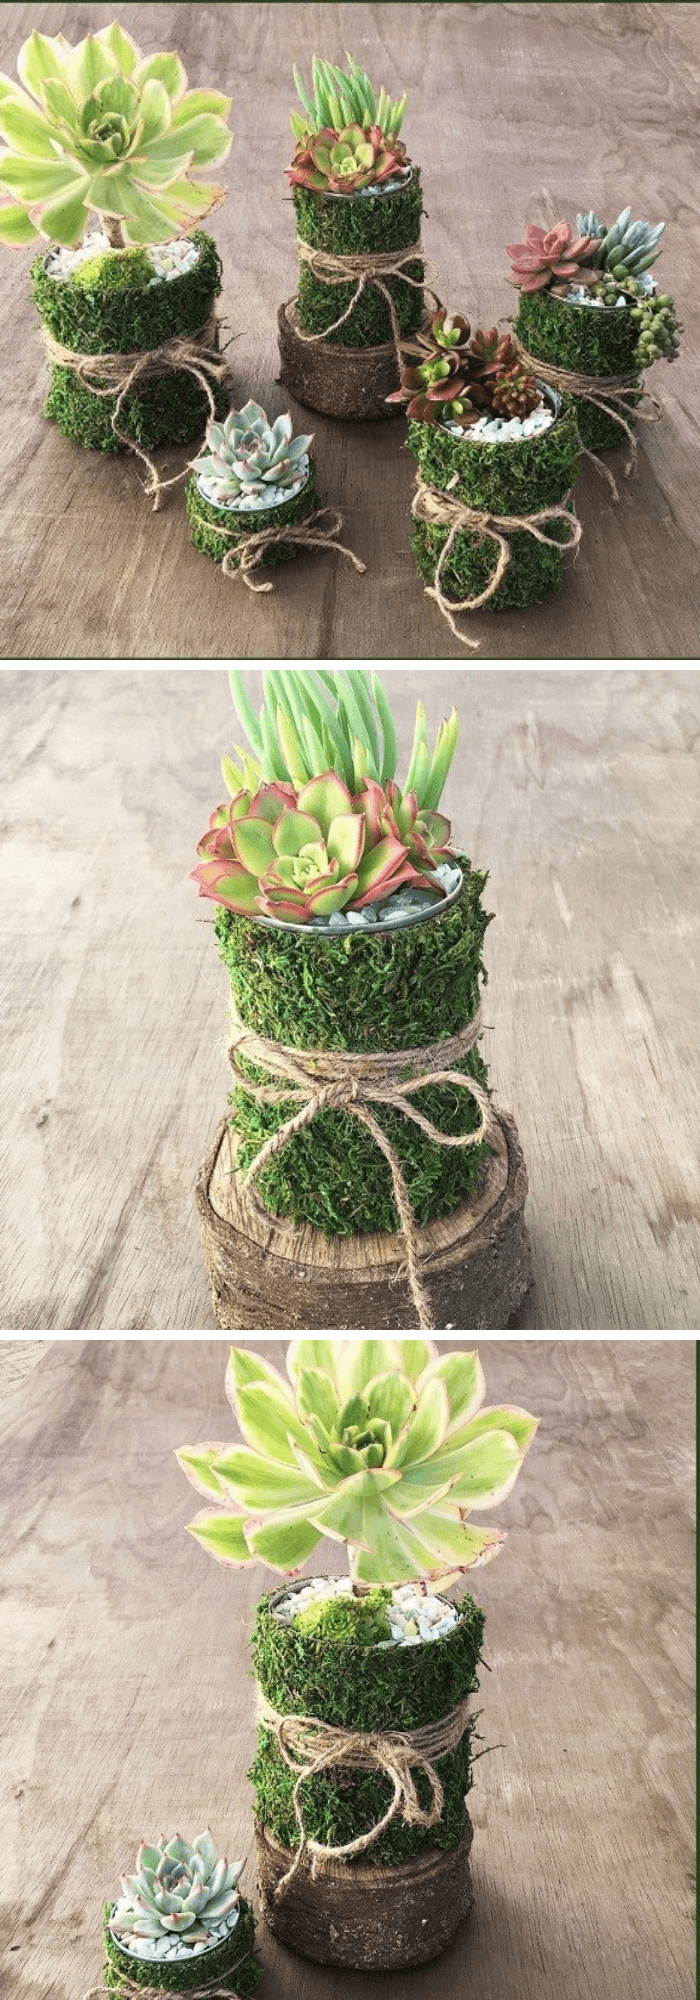
Coating the outside of a can in craft glue and pressing on sheet moss (available at most craft stores) gives it a genuinely natural, woodland look that pairs especially well with small succulents or air plants. This is one of the more visually distinctive ideas on this list and holds up well both indoors and in a shaded outdoor spot.
FAQs
Are tin can crafts safe for kids? With the right prep, yes. The real risk is the cut edge left after opening a can, not the craft itself. An adult should always handle opening the can and smoothing or taping the edge first (see the safety section above); once that’s done, kids can safely take over painting, decorating, and assembly for most of the ideas on this list. Projects involving open flame (the candle holder and oil burner ideas) or electrical wiring (the pendant light idea) should stay adult-only throughout, not just at the prep stage.
Is it safe to put a candle in a tin can? It can be, with real precautions. Keep it well clear of anything flammable (curtains, dried florals, paper décor), since 55% of home candle fires start because a candle was placed too close to something that could burn, and never leave it burning unattended. A flameless LED tea light removes the fire risk entirely if you’d rather not worry about it, and it works just as well for the lantern-style ideas on this list.
Never miss an update — choose FarmFoodFamily as your preferred source on Google.
How it works: Tap the button below to open Google's settings page, then check the box next to FarmFoodFamily.
Tap the checkbox to turn it blue — that's how you know it's set.