25 Cute and Easy Christmas Ornament Ideas
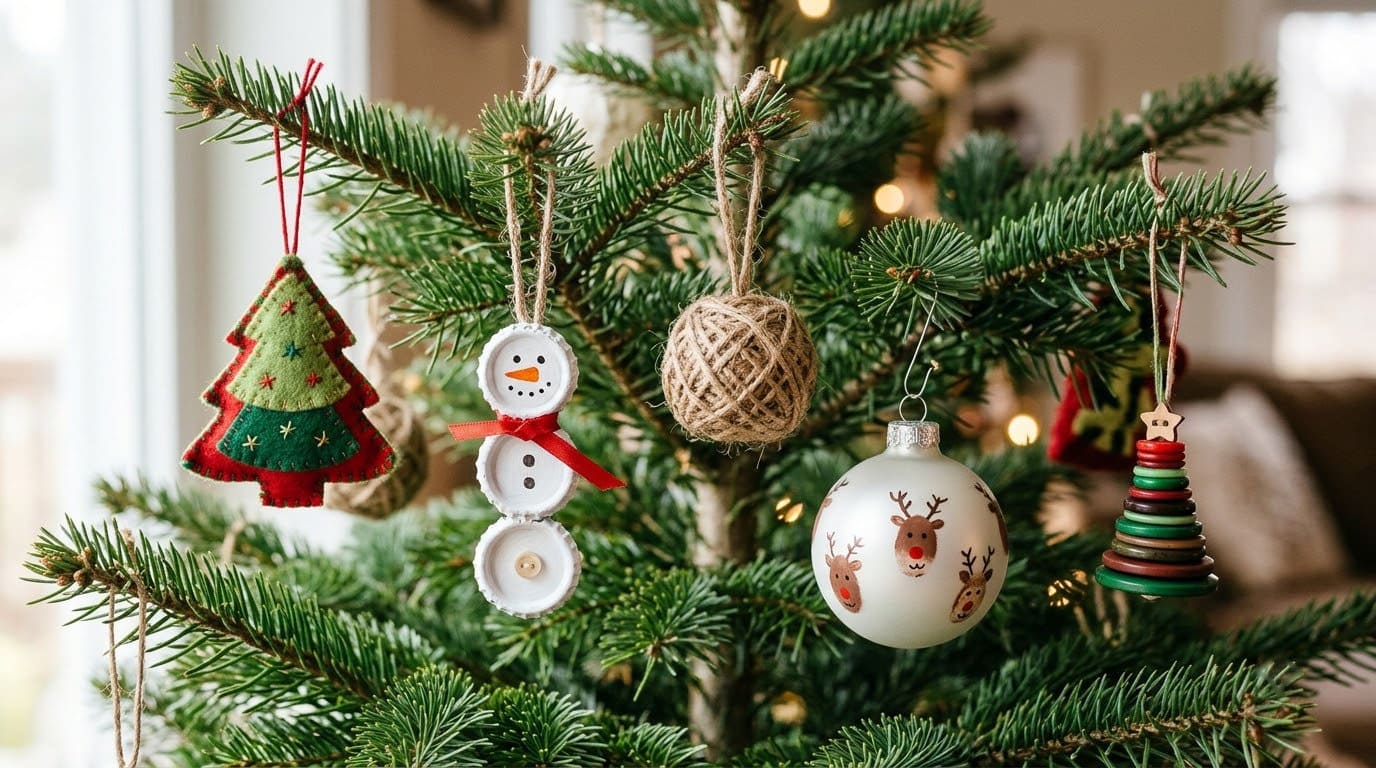
Bottle caps, felt, buttons and twine make cute ornaments. Use cool glue, and watch small parts and flames.

Never miss an update — choose FarmFoodFamily as your preferred source on Google.
How it works: Tap the button below to open Google's settings page, then check the box next to FarmFoodFamily.
Tap the checkbox to turn it blue — that's how you know it's set.
Bottle caps, felt, buttons and twine make cute ornaments. Use cool glue, and watch small parts and flames.
Products We Recommend
This post contains affiliate links. We may earn a commission on qualifying purchases at no extra cost to you.

Surebonder 10W Ultra Low Temp Cool Shot Mini Glue Gun Kit With 12 Glue Sticks
A low-temperature mini glue gun, the type the CPSC art and craft guide prefers over high-temperature guns. It still gets warm, so supervise kids.
Shop Now
12 Pack Clear Plastic Fillable Ornament Balls, 3.15 in (80 mm)
Shatterproof clear balls for thumbprints, glitter and painted designs, a safer start than glass for young kids.
Shop Now
28pcs Thick 1.4mm Soft Felt Fabric Sheet, Assorted Color, 25 x 25 cm
Assorted felt squares for trees, holly, owls and coffee cups. The set is not Christmas-specific, so pick the greens and reds you need.
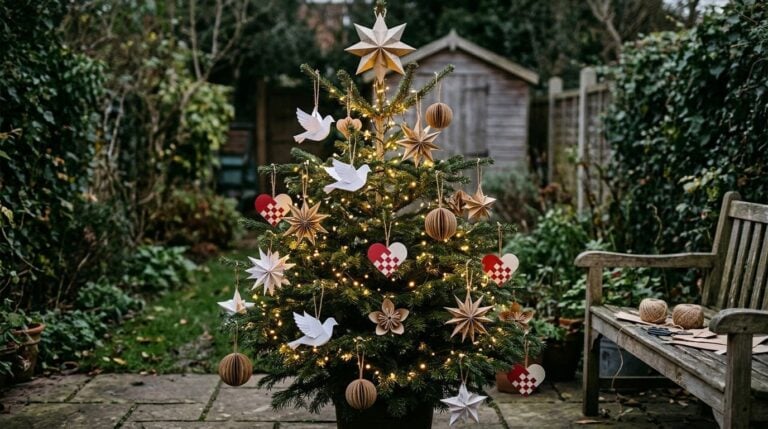
Shop NowThe easiest Christmas ornaments use things you already own, such as bottle caps, felt, buttons and twine. Most need only scissors, paint and a glue gun. Pick the idea that fits your skill and your kids’ ages, and keep a few spare supplies on hand.
Use the right glue. The CPSC’s Art and Craft Safety Guide says to avoid high-temperature hot glue guns and use low-temperature models. It also says to supervise children closely.
Mind small parts and flames. The CPSC says a small part is anything that fits in a cylinder sized like a toddler’s throat. And the USFA says to keep candles at least 12 inches from anything that burns.
These 25 ideas keep their original order, with a short intro, a supply list, steps and a safety note for each one.
Making your own ornaments is a cheap way to decorate. It is also a calm family project. Kids can paint a thumbprint or glue a button tree, and adults can handle the glue gun.
This guide covers 25 ideas, from a 20-minute thumbprint reindeer to a stitched burlap star. Each one has a short intro, what you need, simple steps and a safety note. We kept the original order of the ideas, so you can still match each one to its photo.
Start with the safety section. It will save you from burns, spills and lost beads.


How Do You Pick the Right Ornament Project?
Think about who is making it. A young child needs big pieces, washable paint and no hot glue. A teen or adult can handle sewing, cutting and drilling.
Use this table to match a project to a maker. The skill levels and times are our own guess.
| Project type | Best for | Needs a glue gun | Skill |
|---|---|---|---|
| Thumbprint ball, paper cutouts | Young kids | No | Easy |
| Bottle cap, button, cork | Kids with help | Yes | Easy |
| Felt, burlap, yarn | Teens, adults | Sometimes | Medium |
| Clear ball and glitter | All ages | No | Easy |
| Bell jar, shadow box | Adults | Yes | Medium |
| Candle holder, tin can | Adults | Yes | Medium |
If you are new to crafting, start with a clear ball or a felt tree. They are forgiving.
What Safety Rules Apply to Ornament Crafts?
Ornament crafts use glue, paint, small pieces and sometimes fire. Read these rules first.
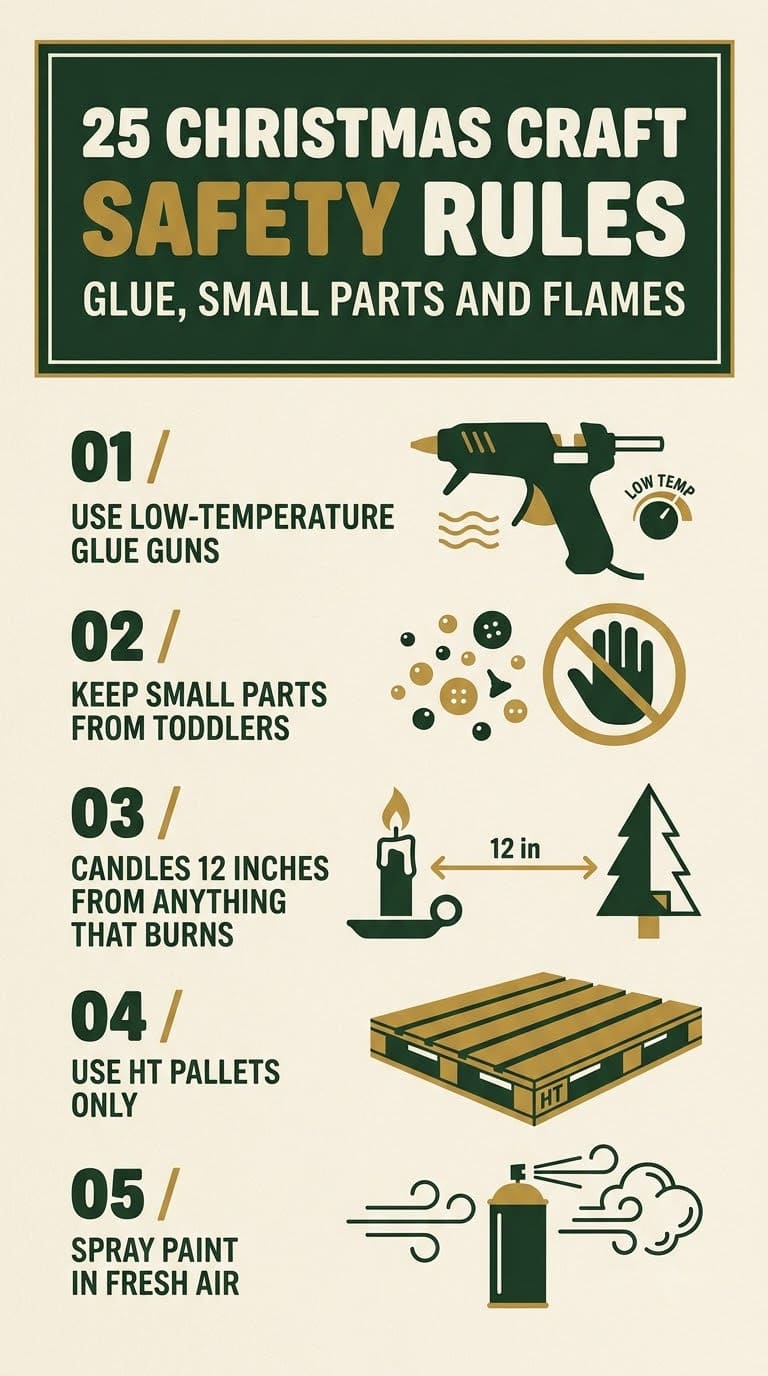
Use low-temperature glue. The CPSC guide says to avoid hot glue guns on high heat and to use low-temperature models. It says insulated gloves protect hands from burns. Lia Griffith’s owl tutorial, which uses a low-temperature glue gun, says that hot glue can still burn, and suggests tacky glue for young children.
Choose safer materials for kids. The CPSC guide says to avoid solvent-based supplies and spray cans when kids help. It says to supervise children closely.
Watch small parts. The CPSC says a small part is any object that fits completely in a small-parts cylinder, which approximates the throat of a child under three. Buttons, beads, pom-poms and bells can all fit. Keep these away from toddlers.
Keep flames away. The USFA says to keep candles at least 12 inches from anything that burns, and to use stable holders. It suggests battery-operated flameless candles. They look, smell and feel like real ones.
A low-temperature mini glue gun, the type the CPSC art and craft guide prefers over high-temperature guns. It still gets warm, so supervise kids.
Shop NowThis post contains affiliate links. We may earn a commission on qualifying purchases at no extra cost to you.
Pick pallet wood with care. University of Illinois Extension educator Candice Miller, quoted by Earth911, says to use pallets stamped HT, which means heat treated. She says to avoid MB pallets and unmarked ones.
Spray in fresh air. Spray paint in a well-ventilated area. Wear gloves when you handle wire mesh or cut tin. That tip comes from the snowman candle holder tutorial.
1. Lid Christmas Ornament

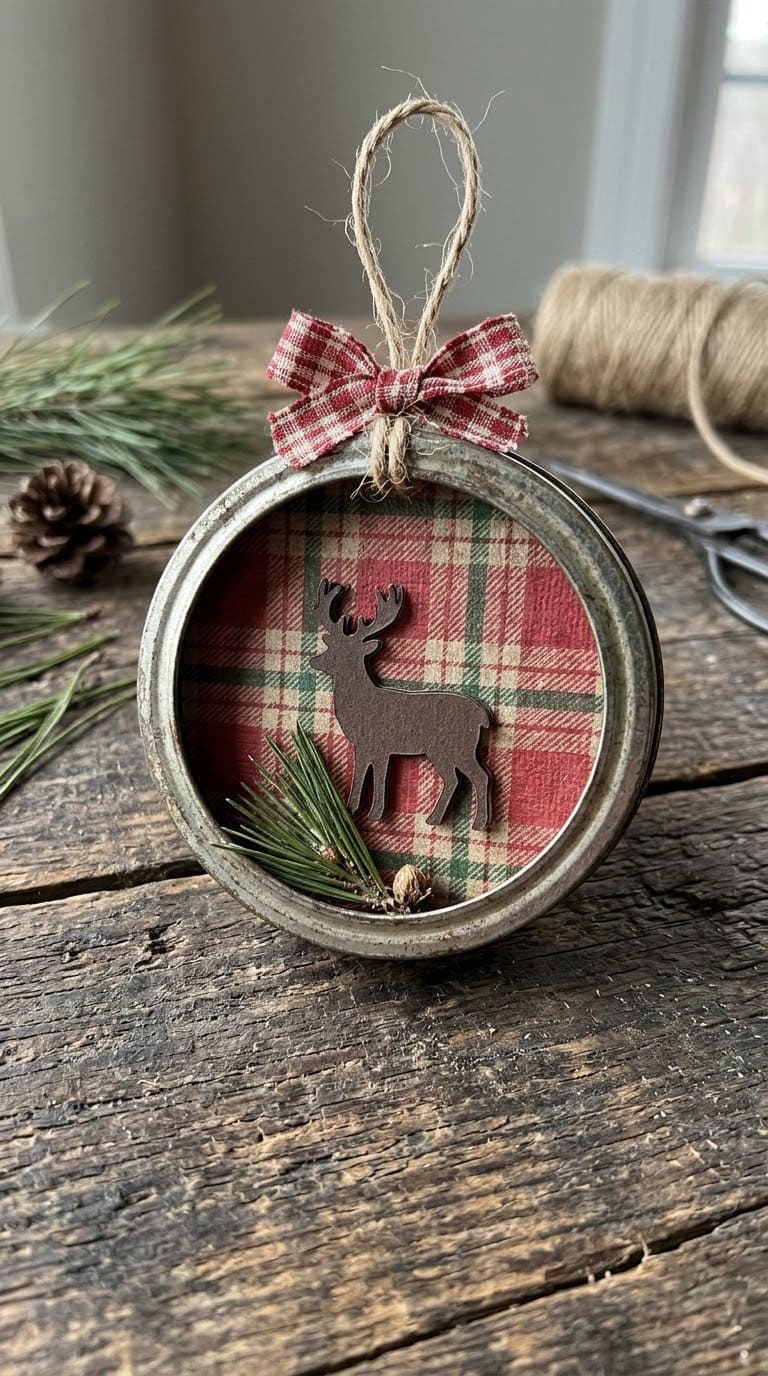
A canning jar lid ring becomes a tiny picture frame. Patterned paper fills the ring, and a small silhouette sits in the center. It is a quick way to use scrapbook scraps.
You’ll need: canning jar lid rings, patterned scrapbook paper, a small silhouette or picture, scissors, glue and ribbon.
- Trace the inside of the ring on the paper, and cut out the circles.
- Fit a paper circle with your picture into the ring.
- Glue the layers in place.
- Add a ribbon loop to hang it.
Style tip: use plaid paper for a classic look.
Safety: check the ring for sharp edges.


Tip: let each coat of paint or glue dry before you move on.
Check: hang it only when it feels dry.
2. Snowman Candle Holder
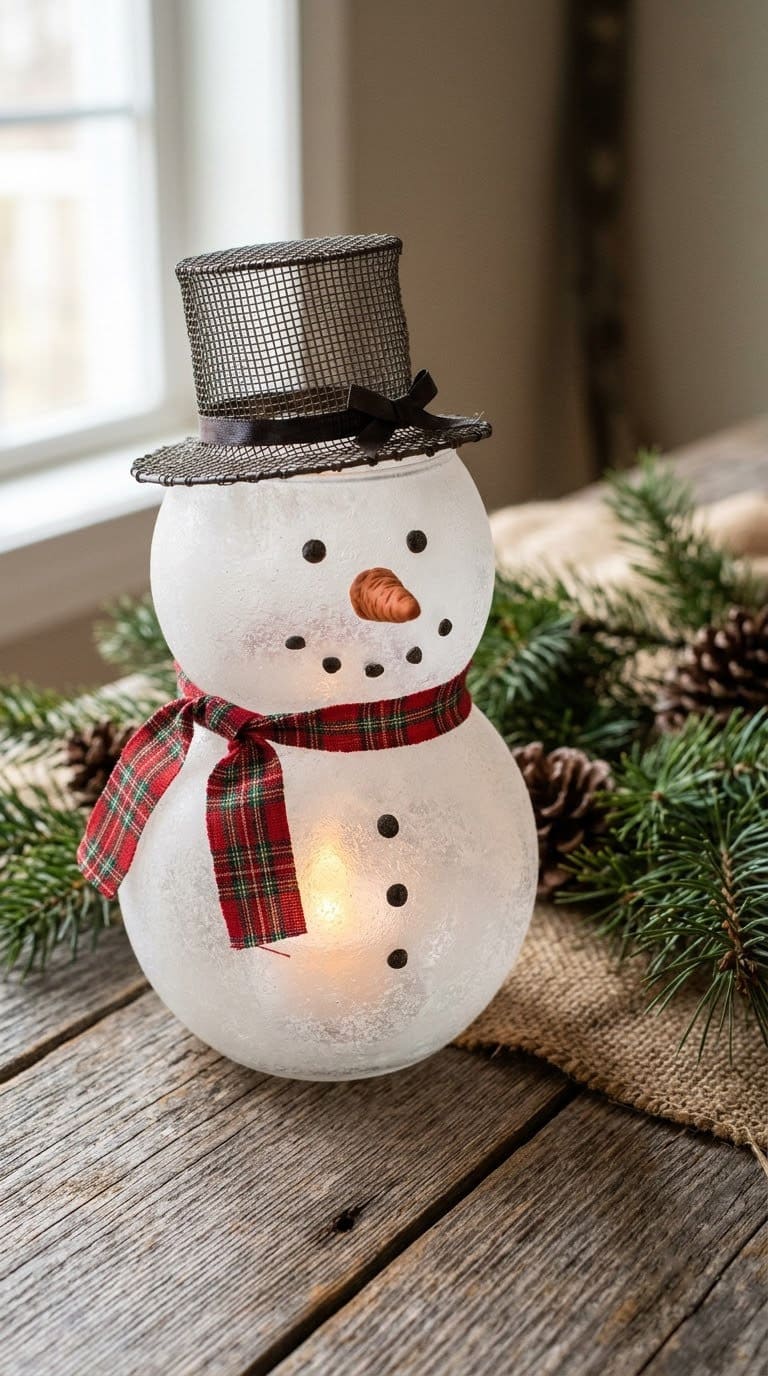
A frosted glass bowl becomes a glowing snowman. This one is a table piece, not a tree ornament. The tutorial uses a six-inch glass bowl, frosted spray paint, black glass paint and orange polymer clay for the carrot nose.

You’ll need: a six-inch glass bowl, frosted glass spray paint, black glass paint, orange polymer clay, a golf tee, wire craft mesh, ribbon, a hot glue gun and a votive candle.
- Spray the bowl with frosted paint in a ventilated area.
- Paint the eyes and smile with black glass paint.
- Shape the clay into a cone around a golf tee, and bake it.
- Glue on the nose, then shape a wire mesh hat and wrap it with ribbon.
Style tip: set it on a mirror tray so the glow doubles.
Safety: the tutorial uses a votive candle. Swap in a battery-operated flameless candle. The USFA suggests them. Wear gloves when you cut wire mesh.
Tip: let each coat of paint or glue dry before you move on.
Check: hang it only when it feels dry.
3. Pallet Wood Christmas Trees
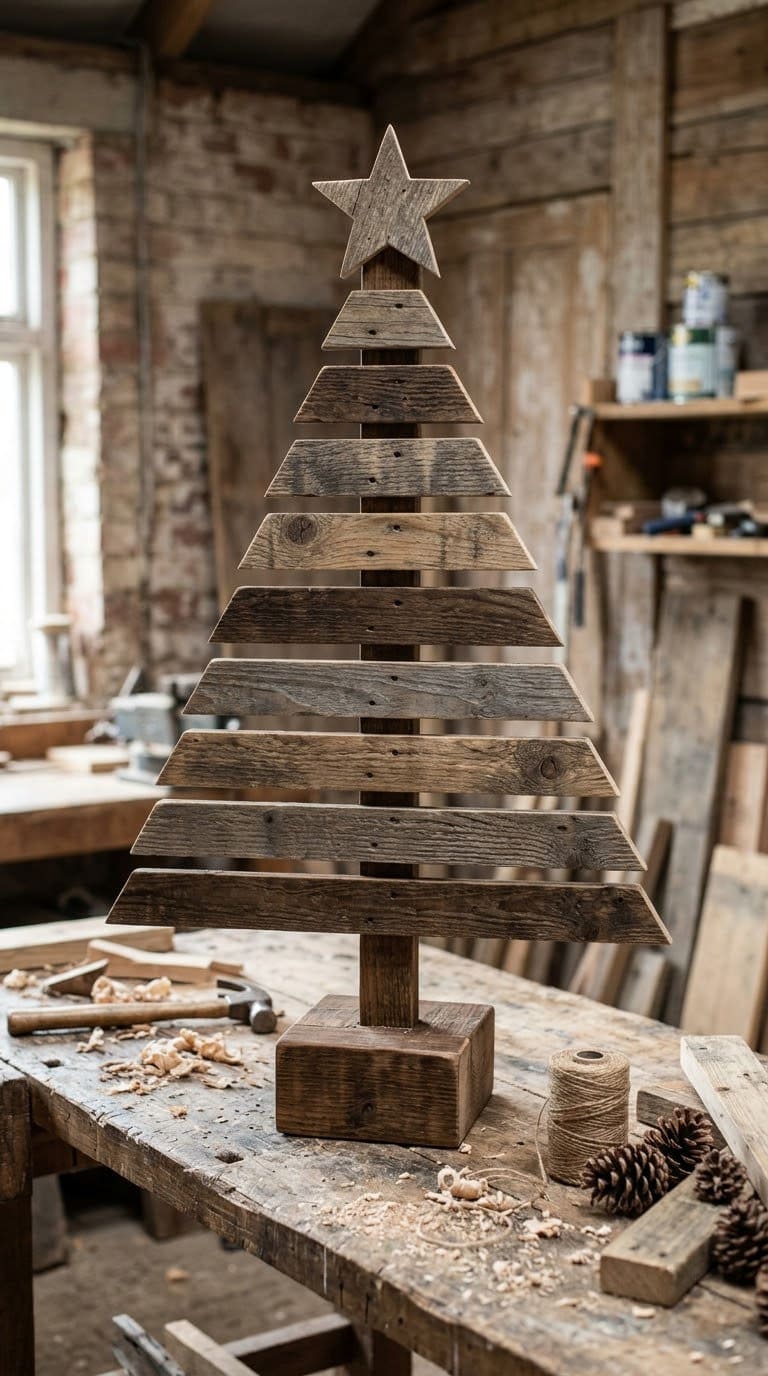
Stacked pallet boards make a rustic tabletop tree. Short boards of different lengths stack into a tree shape, and a coat of stain finishes them.

You’ll need: pallet boards, a saw, sandpaper, wood glue or screws, stain or sealer.
- Check the pallet stamp. Use only HT pallets.
- Cut boards in graduated lengths, longest at the bottom.
- Sand each board smooth.
- Stack and glue them in a tree shape, and add a trunk piece.
- Stain or seal the tree.
Style tip: use boards of different tones for a patchwork look.
Safety: wear gloves and eye protection, and remove every nail. Pull out nails before you saw.
Tip: let each coat of paint or glue dry before you move on.
Check: hang it only when it feels dry.
More: see our rustic Christmas decor ideas.
4. Thumbprint Ornaments

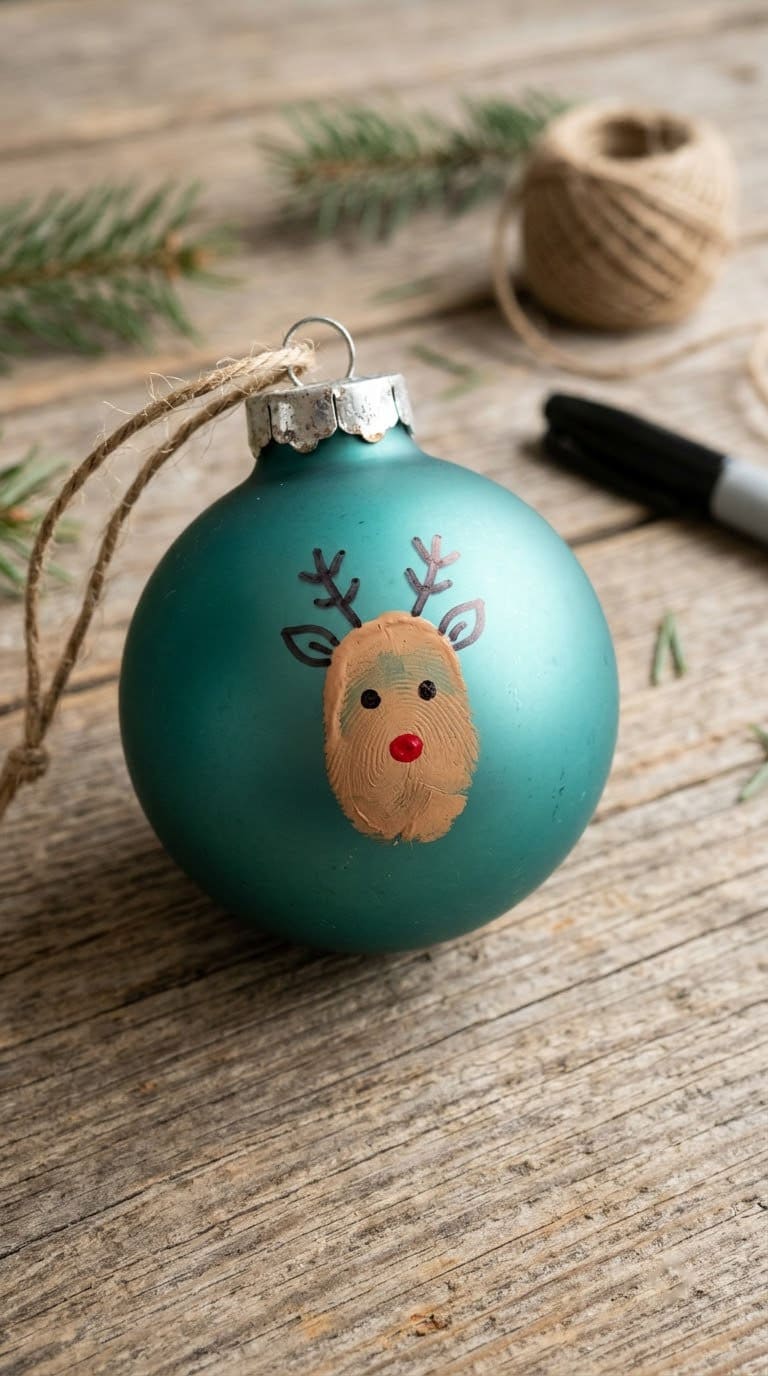
A thumbprint becomes a reindeer face. A dab of brown paint makes the head, and a marker adds antlers, eyes and a red nose. It is a great project for young kids.
You’ll need: plain ball ornaments, craft paint, a black marker, a red paint dot or sticker.
- Press a thumb in paint, and stamp it on the ball.
- Let the paint dry.
- Draw antlers and eyes with a marker.
- Add a red dot for the nose.
Style tip: make a row in different ball colors.
Safety: for young kids, use shatterproof plastic balls instead of glass. That tip is our own.
Tip: let each coat of paint or glue dry before you move on.
Check: hang it only when it feels dry.
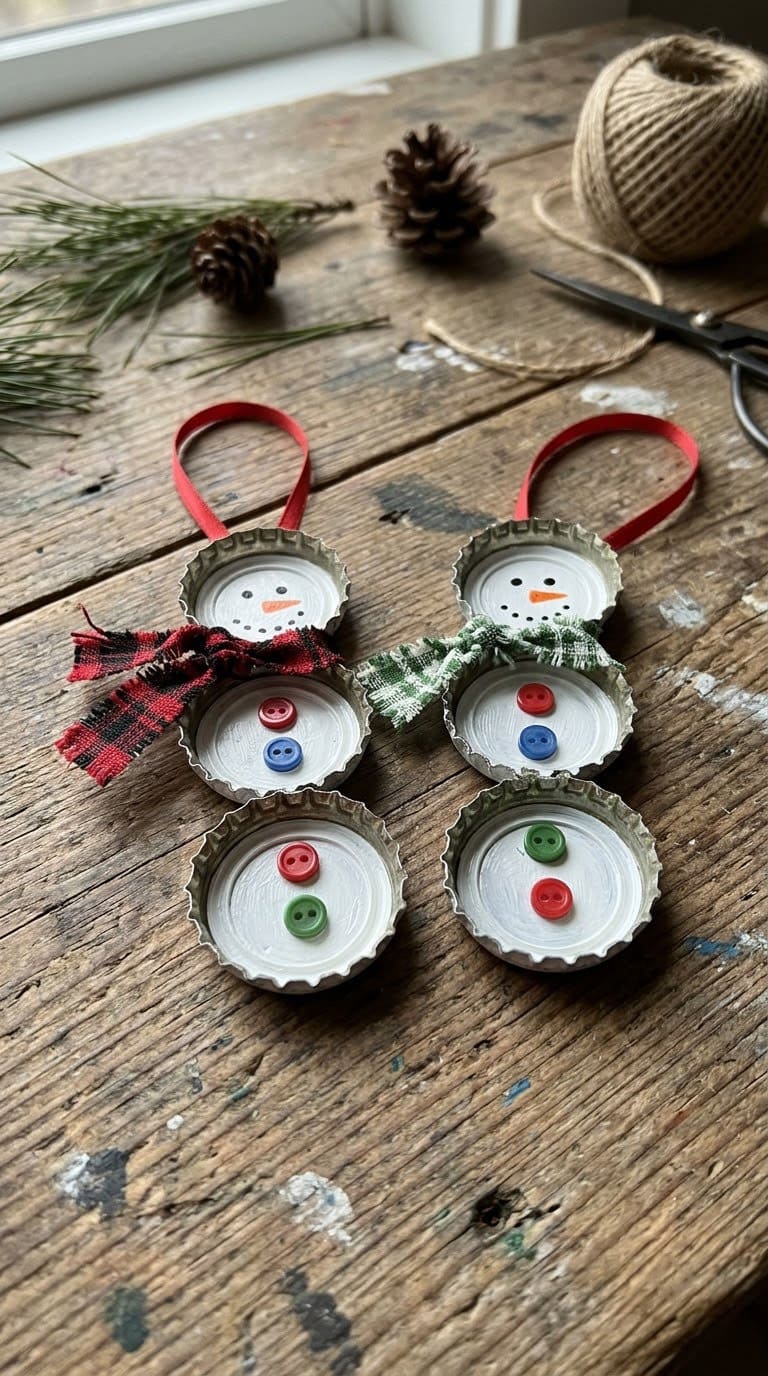
5. Bottle Cap Snowman

Three bottle caps stack into a tiny snowman. Buttons make the coat, and a ribbon or fabric strip makes the scarf. A loop of ribbon on top turns him into an ornament.
You’ll need: bottle caps, white paint, small buttons, ribbon, a marker for the face, glue.
- Wash the caps, and paint them white.
- Glue the caps in a stack.
- Add buttons and a face.
- Tie on a scarf, and loop a ribbon on top.
Style tip: use crown caps with their ridges for a snowy edge.
Safety: bottle caps and buttons are small parts. Keep them away from toddlers.
Tip: let each coat of paint or glue dry before you move on.
Check: hang it only when it feels dry.
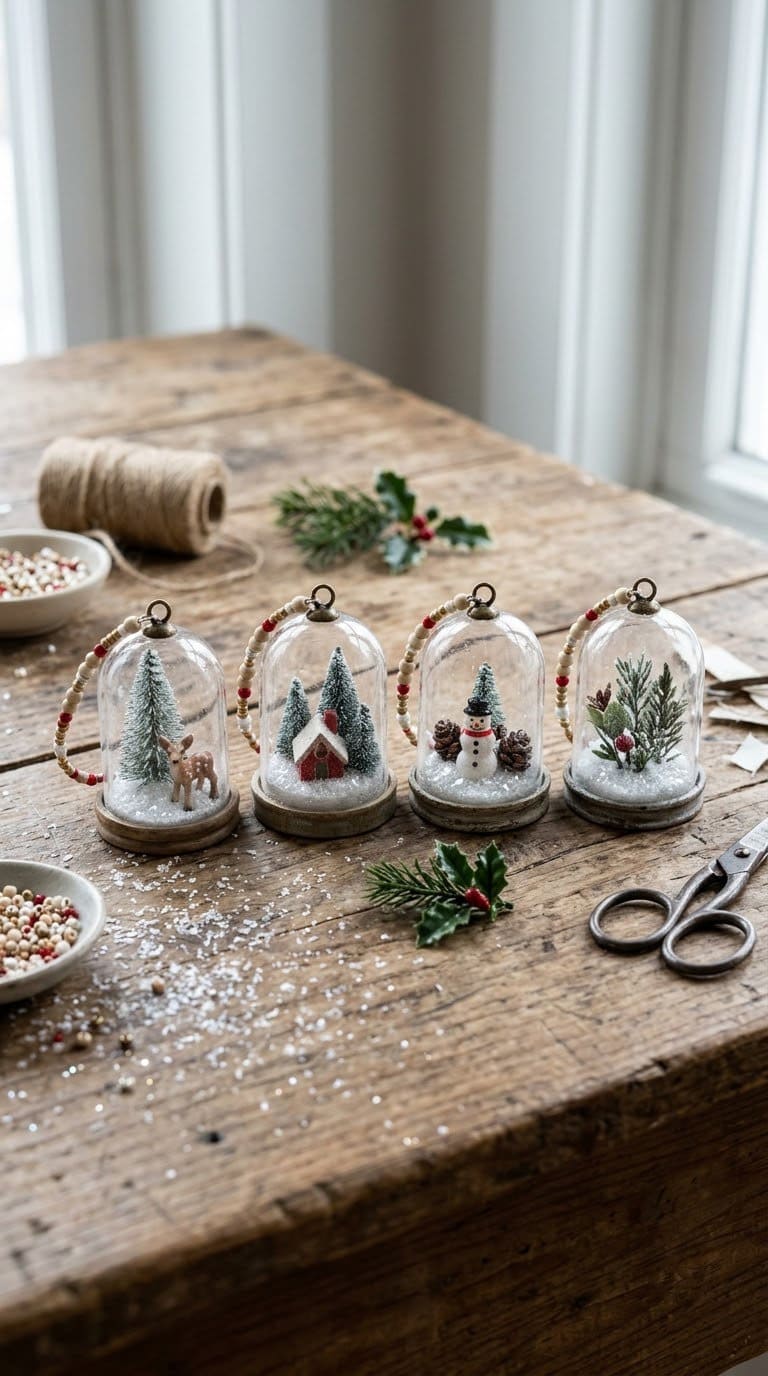
6. Vintage Inspired Bell Jar Ornaments
A tiny scene sits under a clear dome. The tutorial uses plastic wine glasses as the domes. Each sits on a paper-covered base with small trinkets and glitter snow.

You’ll need: plastic wine glasses, chipboard, scrapbook paper, trinkets or cupcake toppers, glitter, large beads, pipe cleaners or twine, hot glue.
- Cut the wine glass stems short. A Dremel is easier than a utility knife.
- Cover chipboard circles with paper.
- Glue the trinkets to the base, and glue the glass over them.
- Pour in glitter, and add a bead hanger.
Style tip: use tiny trees or vintage figures for a retro look.
Safety: the tutorial warns that hot glue and glitter need care around children. Cut stems slowly so the plastic doesn’t crack.
Tip: let each coat of paint or glue dry before you move on.
Check: hang it only when it feels dry.
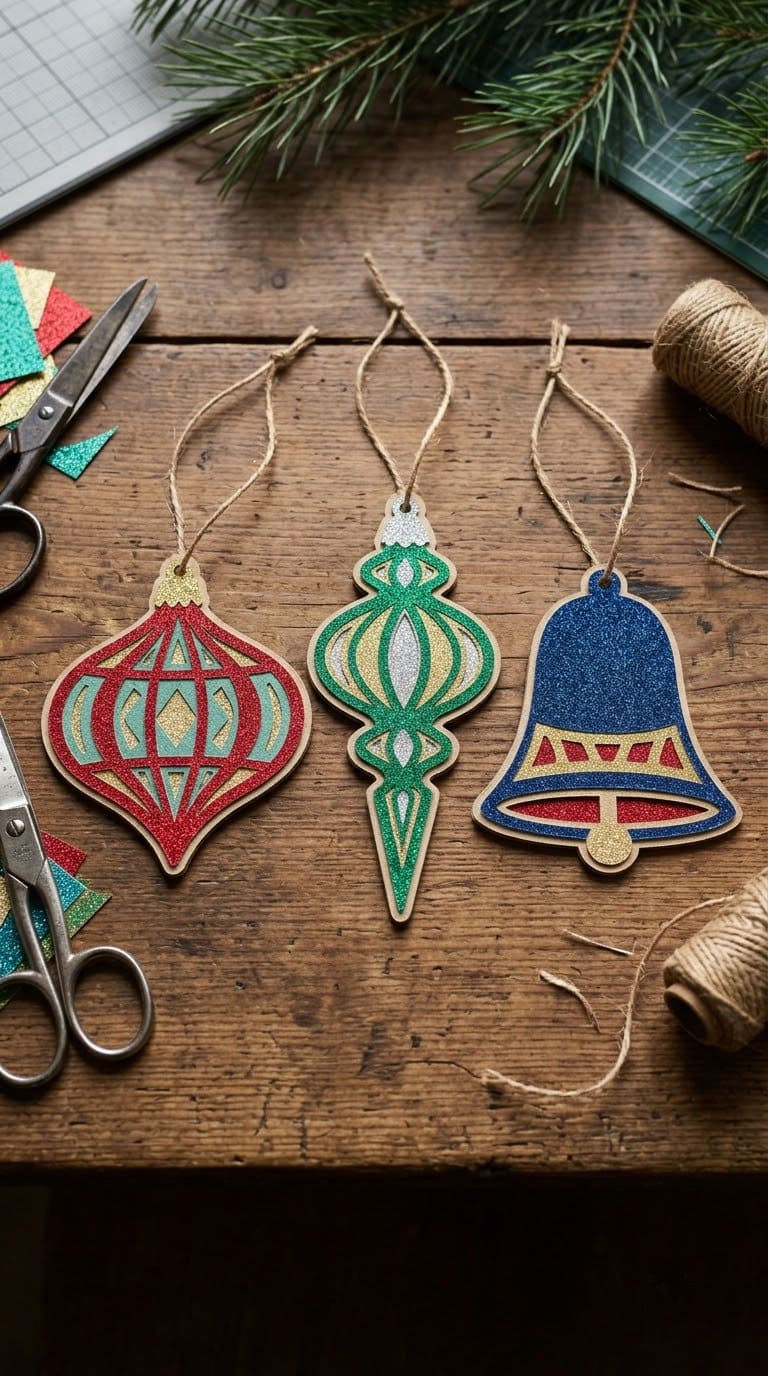
7. Retro cut paper ornaments
Layered paper in bright colors makes flat retro ornaments. The shapes look like old-fashioned glass ornaments, such as an onion, a finial and a bell, cut from glitter and solid cardstock.

You’ll need: colored cardstock, glitter paper, scissors, glue, string.
- Draw ornament shapes on cardstock, and cut them out.
- Cut matching shapes from glitter paper.
- Layer and glue the pieces.
- Add a string loop on top.
Style tip: pick teal, pink and green for a mid-century palette.
Safety: supervise kids with scissors.
Tip: let each coat of paint or glue dry before you move on.
Check: hang it only when it feels dry.
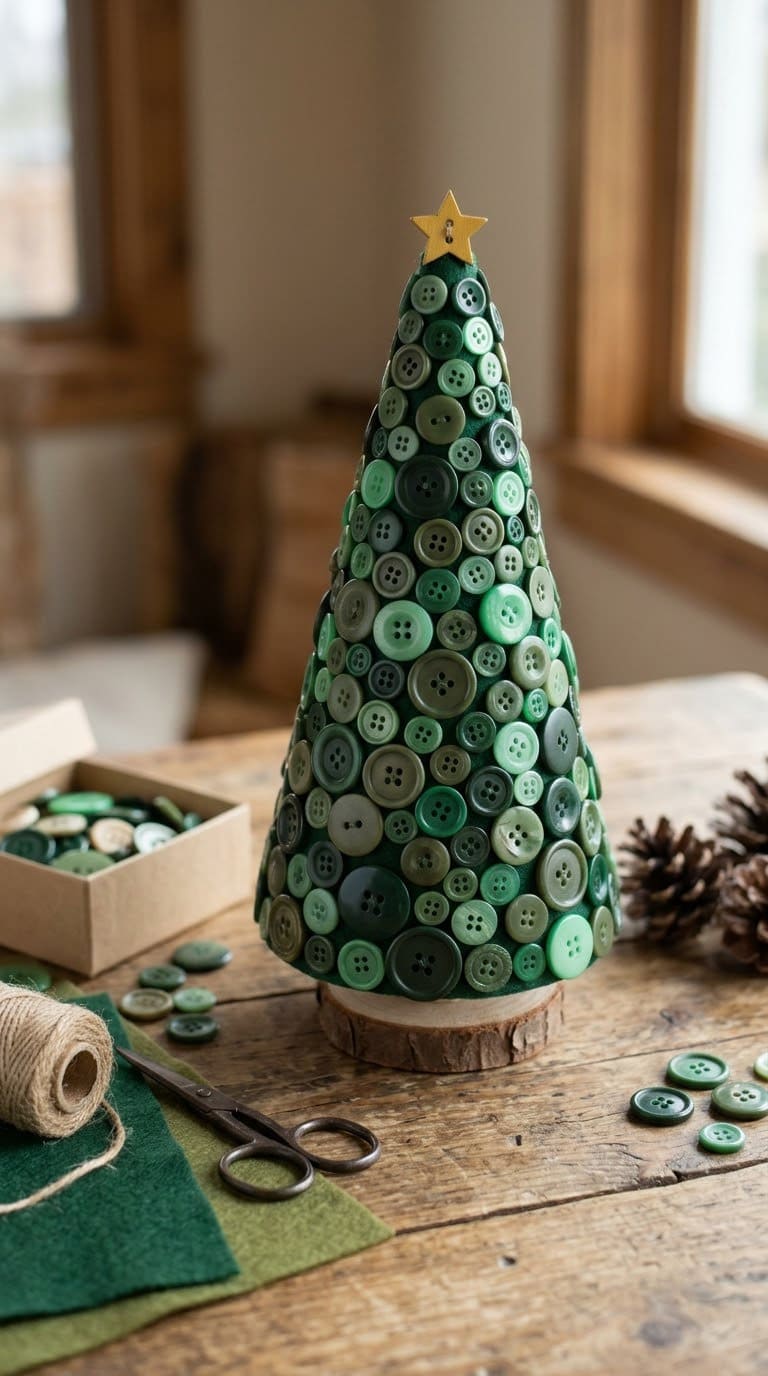
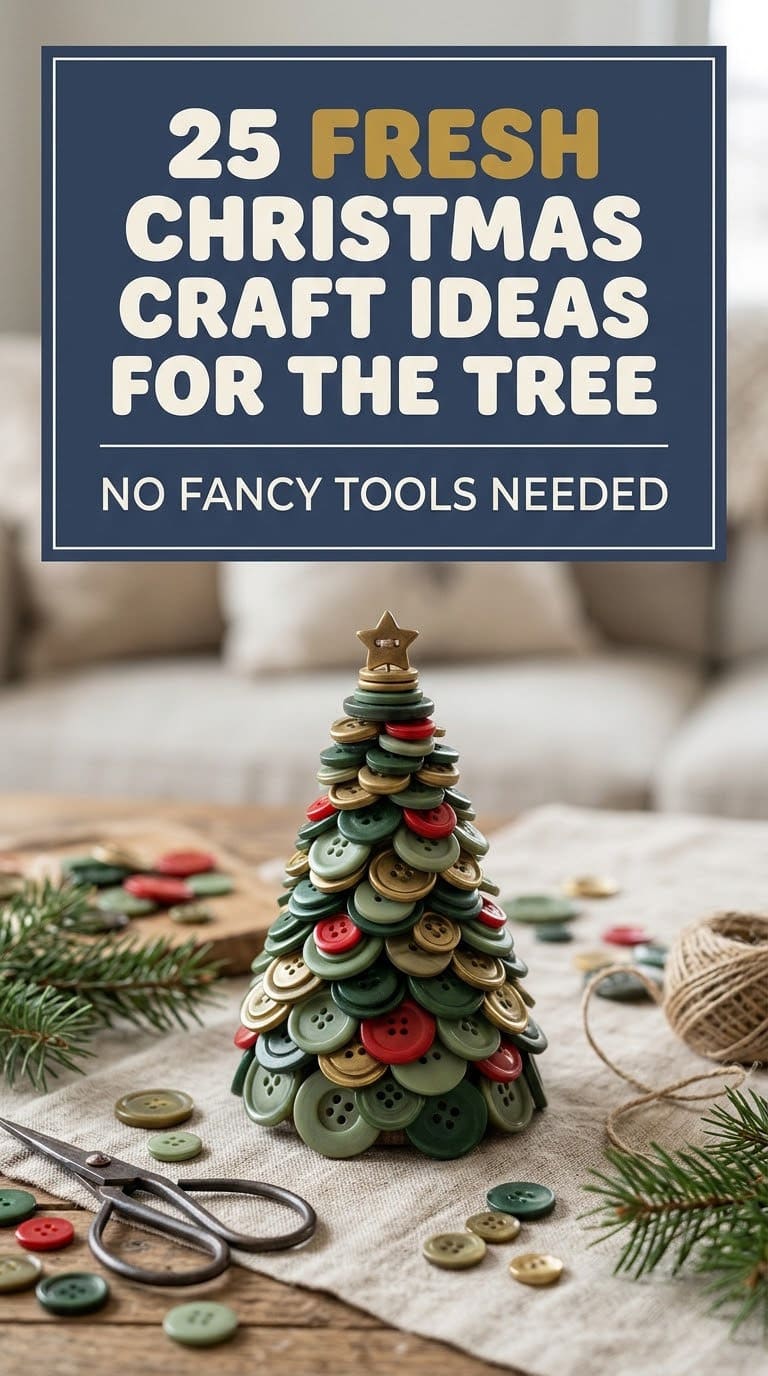
8. Button Christmas Trees
A foam cone covered with green fabric becomes a little tree. Rows of green buttons are pinned on, so the tree looks full and textured.

You’ll need: a foam cone, green fabric, green buttons in several sizes, pins, glue, a top star or bead.
- Cover the cone with fabric.
- Pin buttons from the bottom row up.
- Mix button sizes to fill the gaps.
- Add a star at the top.
Style tip: use buttons in two or three shades of green.
Safety: pins and buttons are sharp and small. Keep this project away from young children.
Tip: let each coat of paint or glue dry before you move on.
Check: hang it only when it feels dry.
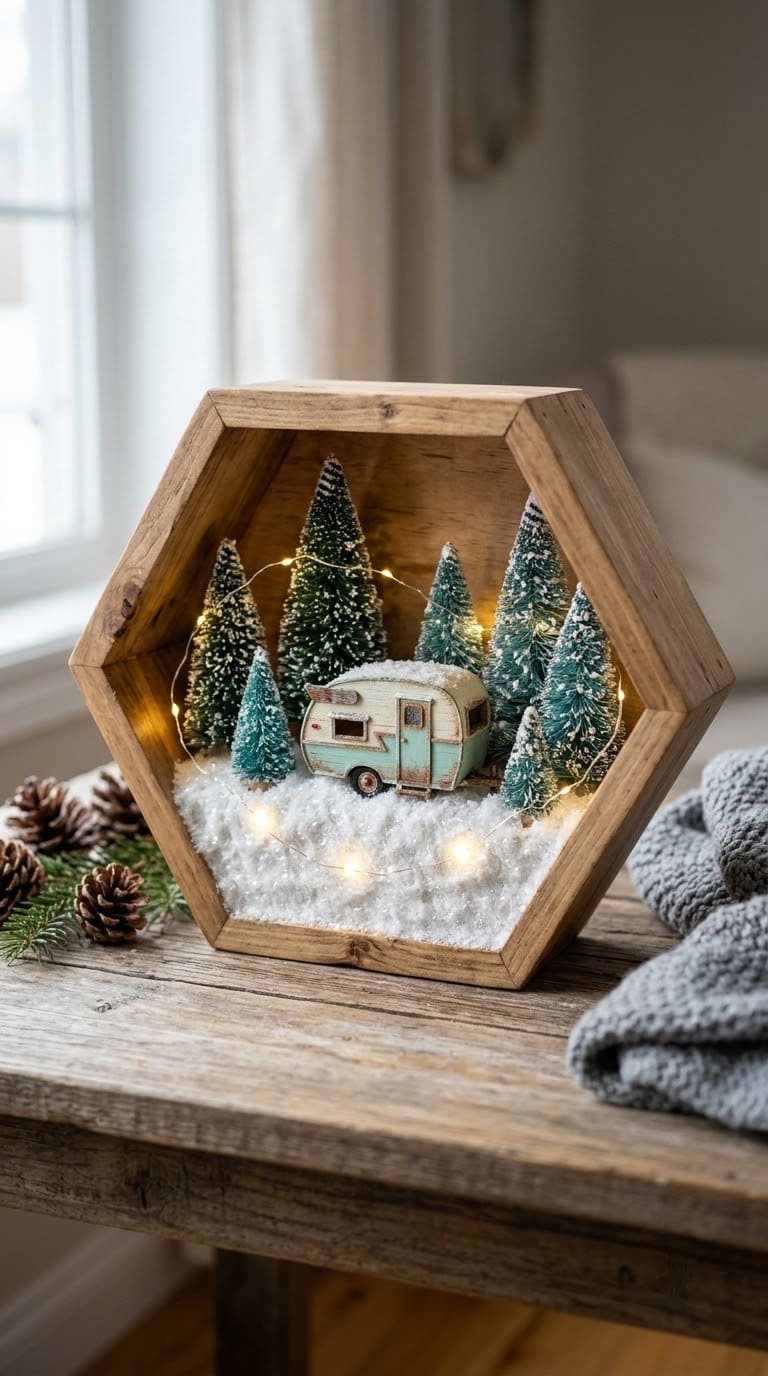
9. Easy retro winter shadow
A wood shadow box holds a small winter scene. A hexagon box is lit with string lights, with bottle brush trees and a tiny camper inside.

You’ll need: a wooden shadow box, battery string lights, bottle brush trees, small vintage figures, craft knife, tape.
- Cut a window for the lights, or tape the string lights inside.
- Arrange the trees and figures.
- Glue each piece down.
- Switch on the lights.
Style tip: add white cotton for snow.
Safety: use battery lights, and keep paper and cotton away from heat. Take care with the craft knife.
Tip: let each coat of paint or glue dry before you move on.
Check: hang it only when it feels dry.
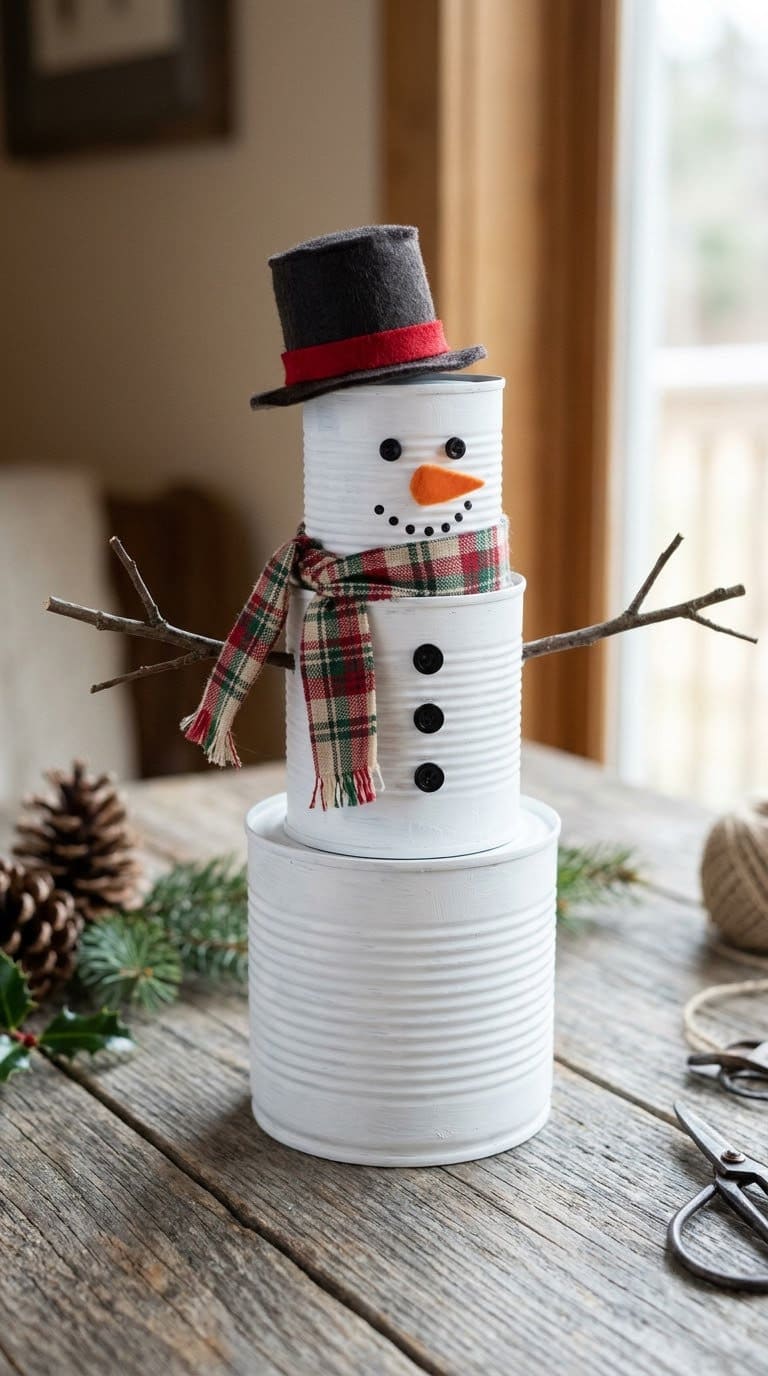
10. Tin Can Snowman
Three tin cans stack into a snowman. The tutorial paints the cans white, adds button eyes, nose and coat, twig arms, a felt hat and a fabric scarf.

You’ll need: three tin cans of different sizes, white and pink paint, buttons, twigs or floral wire, black felt, fabric, a hot glue gun, a drill.
- Paint all three cans white.
- Glue on the face, and paint pink cheeks.
- Drill arm holes in the middle can, and insert the arms.
- Stack the cans, and glue on the hat and scarf.
Style tip: add jingle bells to the scarf.
Safety: the tutorial doesn’t mention sharp can rims. Check each can’s edge, and file or tape any rough spot. That tip is our own.
Tip: let each coat of paint or glue dry before you move on.
Check: hang it only when it feels dry.
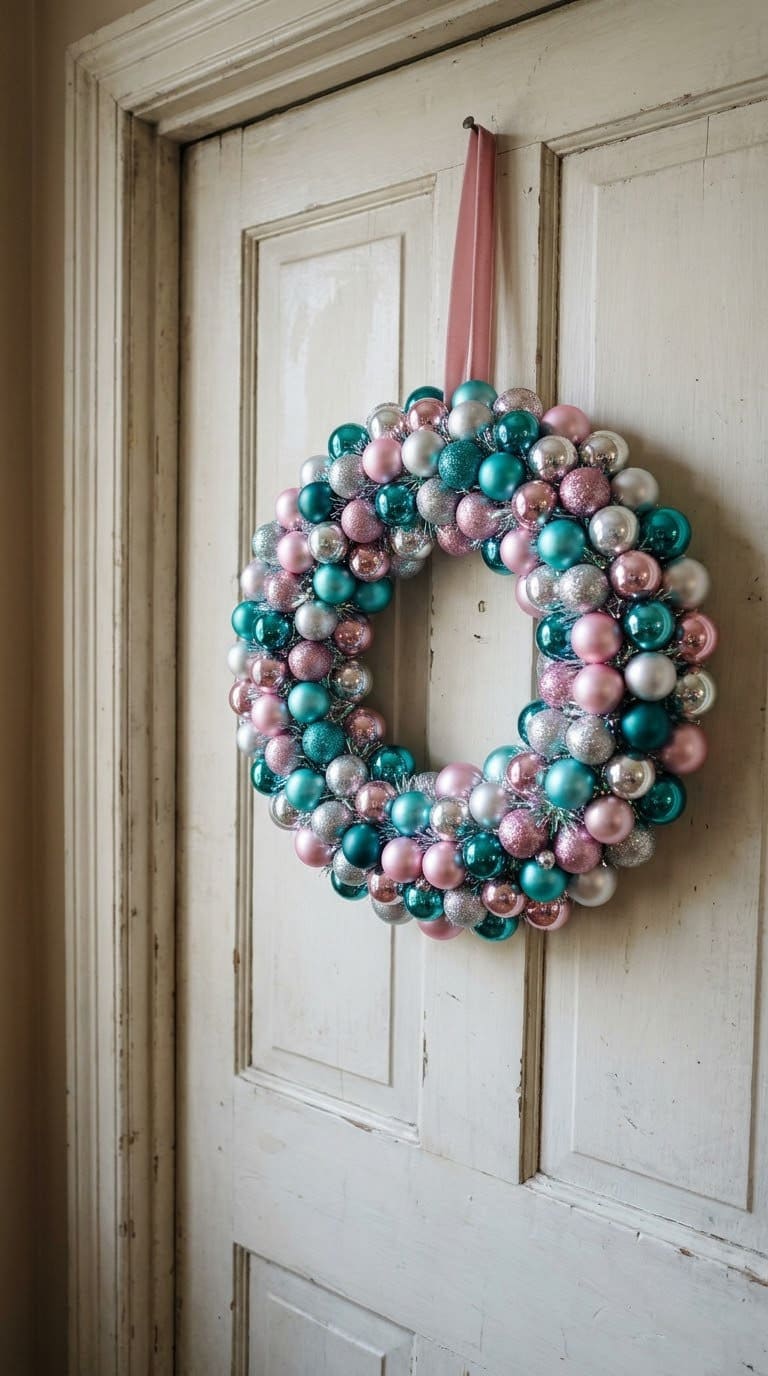
11. Christmas Ornament Wreath
A wreath made of tiny glass ornaments sparkles like a jewelry piece. A wreath form wrapped with tinsel garland holds mini ornaments in pink, teal and silver.

You’ll need: a straw or foam wreath form, tinsel garland, mini ornaments, floral wire or glue.
- Wrap the wreath form with tinsel garland.
- Plan the layout by color.
- Wire or glue each ornament in place.
- Add a hanging loop on the back.
Style tip: group colors in clusters, not rows.
Safety: use shatterproof ornaments if kids or pets are around.
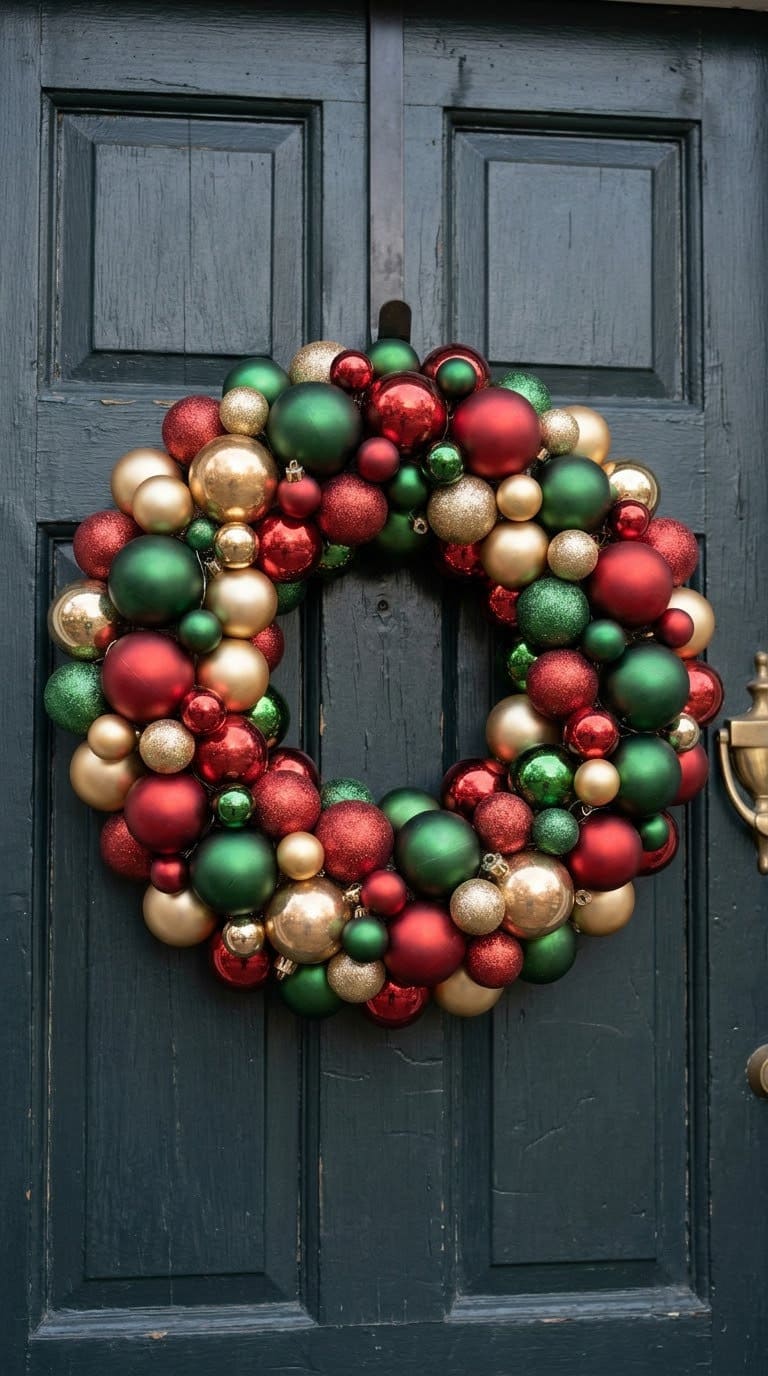
12. Wreath wire hangers

Wire hangers make a cheap wreath form. This version fills the form with many small ball ornaments, packed so no wire shows.
You’ll need: a wire hanger, many small ball ornaments, floral wire, pliers, a ribbon.
- Shape a wire hanger into a circle.
- Thread ornaments on the wire, and fill the ring.
- Twist the ends together, and tuck them in.
- Hang it with ribbon.
Style tip: use one color family, such as gold and bronze.
Safety: wear gloves when you bend the wire.
Tip: let each coat of paint or glue dry before you move on.
Check: hang it only when it feels dry.
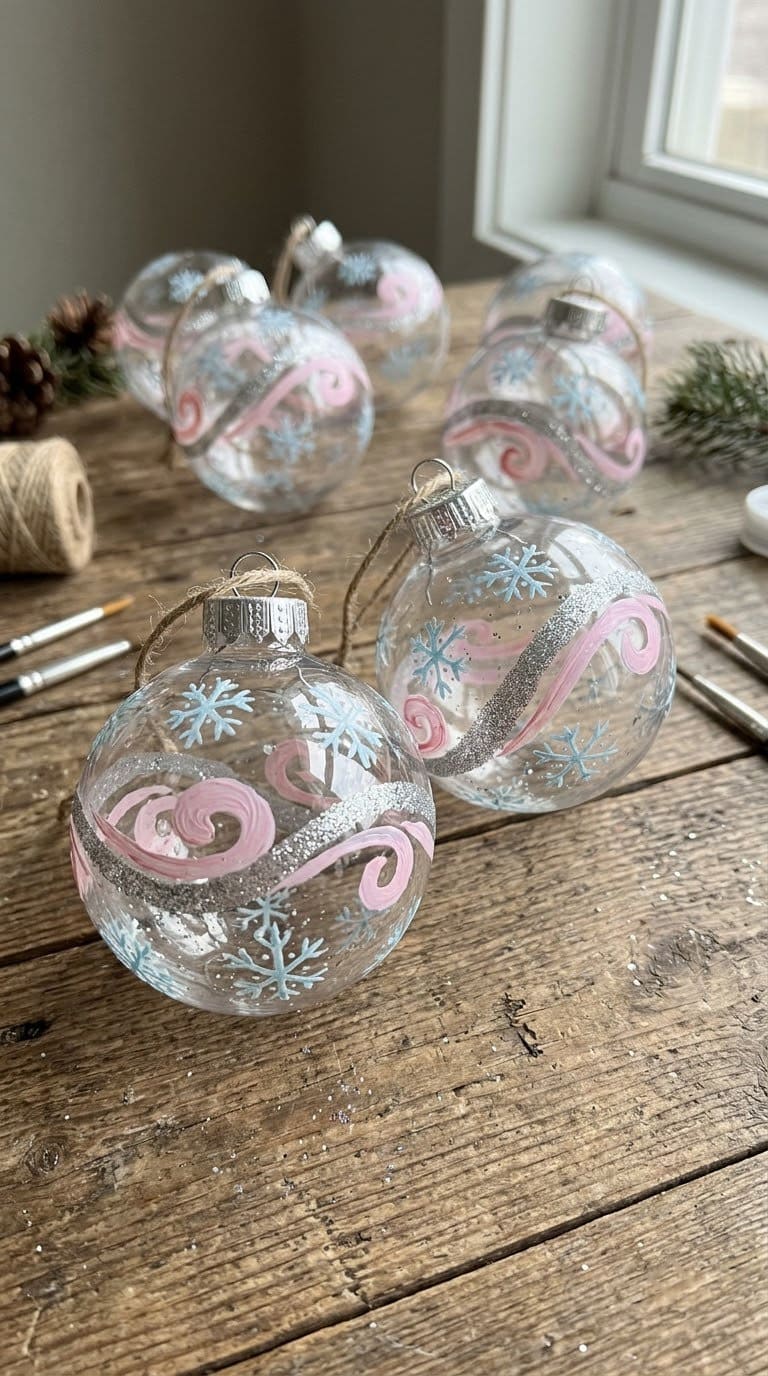
13. Clear ball Christmas ornament
A plain clear ball is a blank canvas. The tutorial decorates the outside with silver spray, glitter stripes, tape, stickers and gold dots. The same page also lists fillings, such as a snow scene, hot cocoa mix, vacation souvenirs and sheet music.

You’ll need: clear ball ornaments, craft paint, glitter, double-stick tape, ribbon or washi tape, stickers, a gold leaf marker.
- Tape off the top, and spray silver paint, or add stripes of tape.
- For a glitter stripe, roll the ball in fine glitter over double-stick tape.
- For a paint swirl, add a little paint inside, and roll the ball.
- Let everything dry fully before you remove the tape.
Style tip: use one color with different finishes.
Safety: use plastic balls for young kids. That tip is our own, since the tutorial doesn’t compare glass and plastic.
Tip: let each coat of paint or glue dry before you move on.
Check: hang it only when it feels dry.
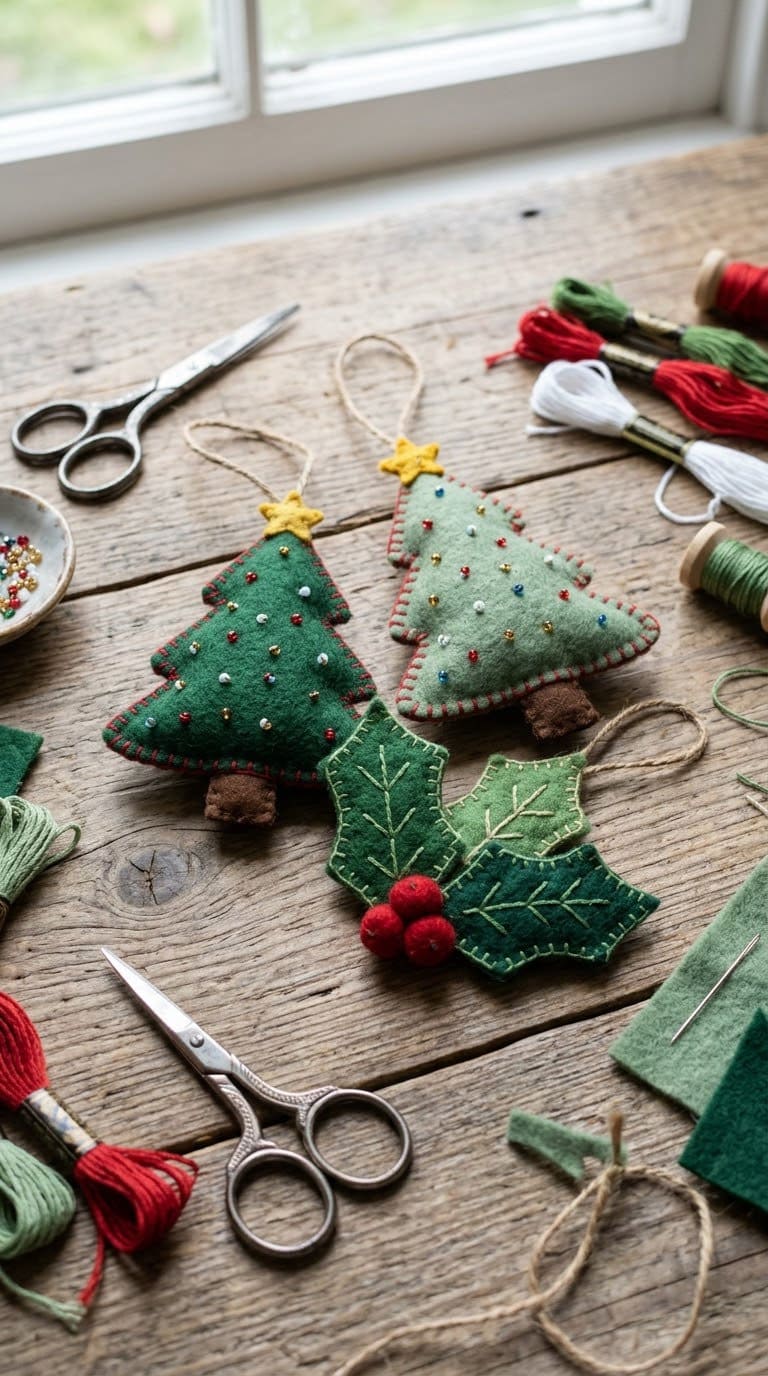
14. Felt Christmas ornaments
Felt is soft, cheap and forgiving. The photos show stitched felt trees, a holly garland and a round holly ornament with a stitched edge.

You’ll need: felt in green, red and cream, embroidery thread, a needle, fiberfill, beads or sequins, scissors, ribbon.
- Cut two matching shapes from felt.
- Sew around the edge with a blanket stitch, leaving a gap.
- Stuff lightly, and close the gap.
- Add beads or sequins, and a ribbon loop.
Style tip: use cookie cutters as templates.
Safety: keep beads and sequins off ornaments for toddlers.
Tip: let each coat of paint or glue dry before you move on.
Check: hang it only when it feels dry.
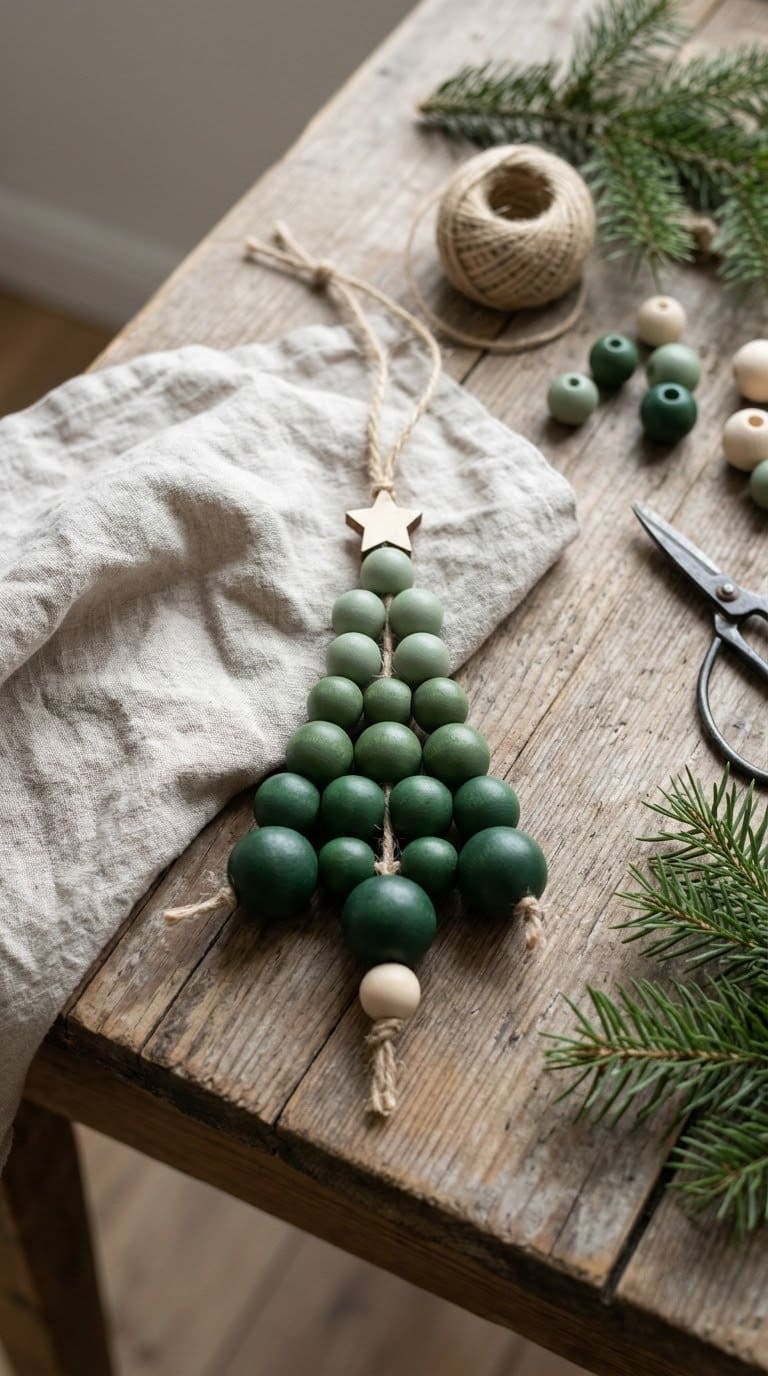
15. Wooden bead Christmas tree ornament

Wooden beads on cord make a neat little tree. The tutorial uses 15 round beads and 1 or 2 square beads for the trunk, strung on hemp cord, with a toothpick to keep the bottom row from sagging.
You’ll need: about 15 round wooden beads, 1 or 2 square beads, hemp cord, toothpicks, green spray paint, scissors.
- Spray the beads green, and let them dry.
- String one bead, then rows of 2, 3, 4 and 5.
- Add the trunk beads, and put a toothpick in the bottom row.
- Tie a square knot, and make a loop to hang.
Style tip: skip the glitter. The author found it made the beads bumpy.
Safety: keep loose beads away from toddlers.
Tip: let each coat of paint or glue dry before you move on.
Check: hang it only when it feels dry.
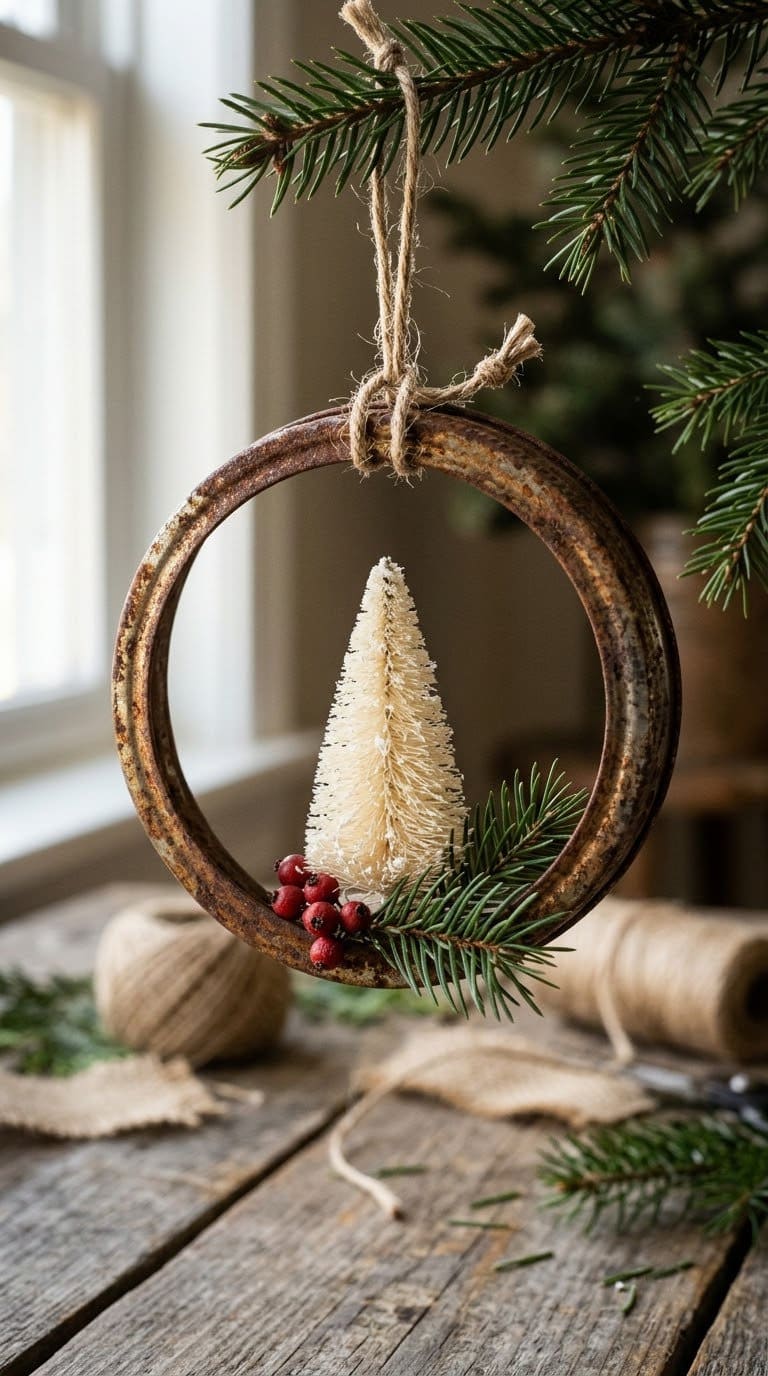
16. DIY bottle brush Mason jar ring ornament

A rusty jar ring becomes a woodland frame. The tutorial glues a flocked fir branch, a cream bottle brush tree and faux berries inside the ring, hung with red cord.
You’ll need: a jar ring, a flocked fir branch, a bottle brush tree, faux berries, red cord, a hot glue gun.
- Glue the fir branch inside the bottom of the ring, and hold it until the glue cools.
- Glue the bottle brush tree to one side.
- Add berries.
- Tie a red cord through the top.
Style tip: keep the tree smaller than the ring.
Safety: hold the pieces by the edges so you don’t burn your fingers.
Tip: let each coat of paint or glue dry before you move on.
Check: hang it only when it feels dry.
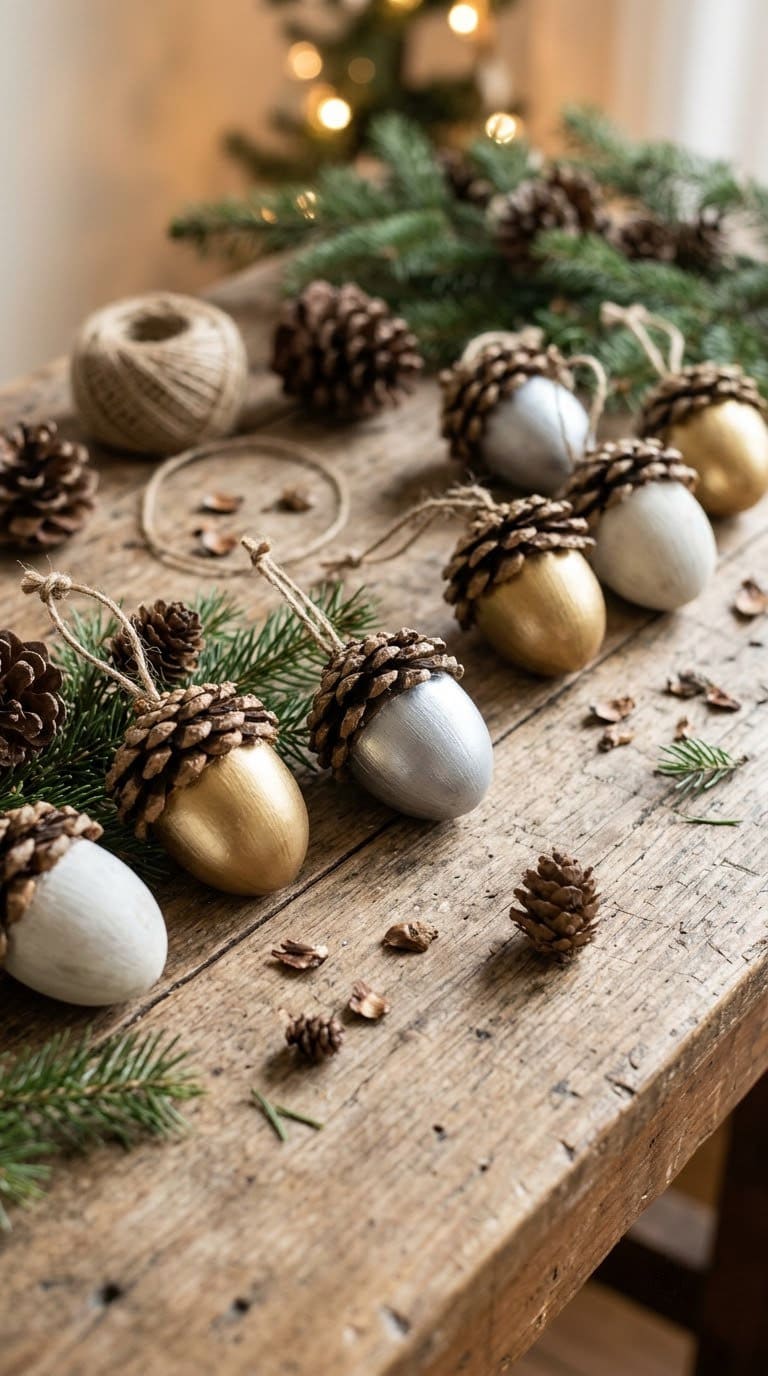
17. Faux Acorn Christmas Ornaments

Plastic Easter eggs become acorns. The tutorial paints the eggs, seals them and tops each one with twine or pinecone pieces and a twig stem.
You’ll need: plastic eggs, spray paint, clear sealer, twine, pinecone pieces, twigs, a hot glue gun, ornament hooks.
- Spray the eggs with paint, and seal them.
- Brush gold over silver eggs for contrast.
- Glue twine or pinecone pieces on top.
- Add a twig and a hook.
Style tip: keep the eggs openable and tuck a small gift inside.
Safety: spray paint outdoors or in a ventilated area.
Tip: let each coat of paint or glue dry before you move on.
Check: hang it only when it feels dry.
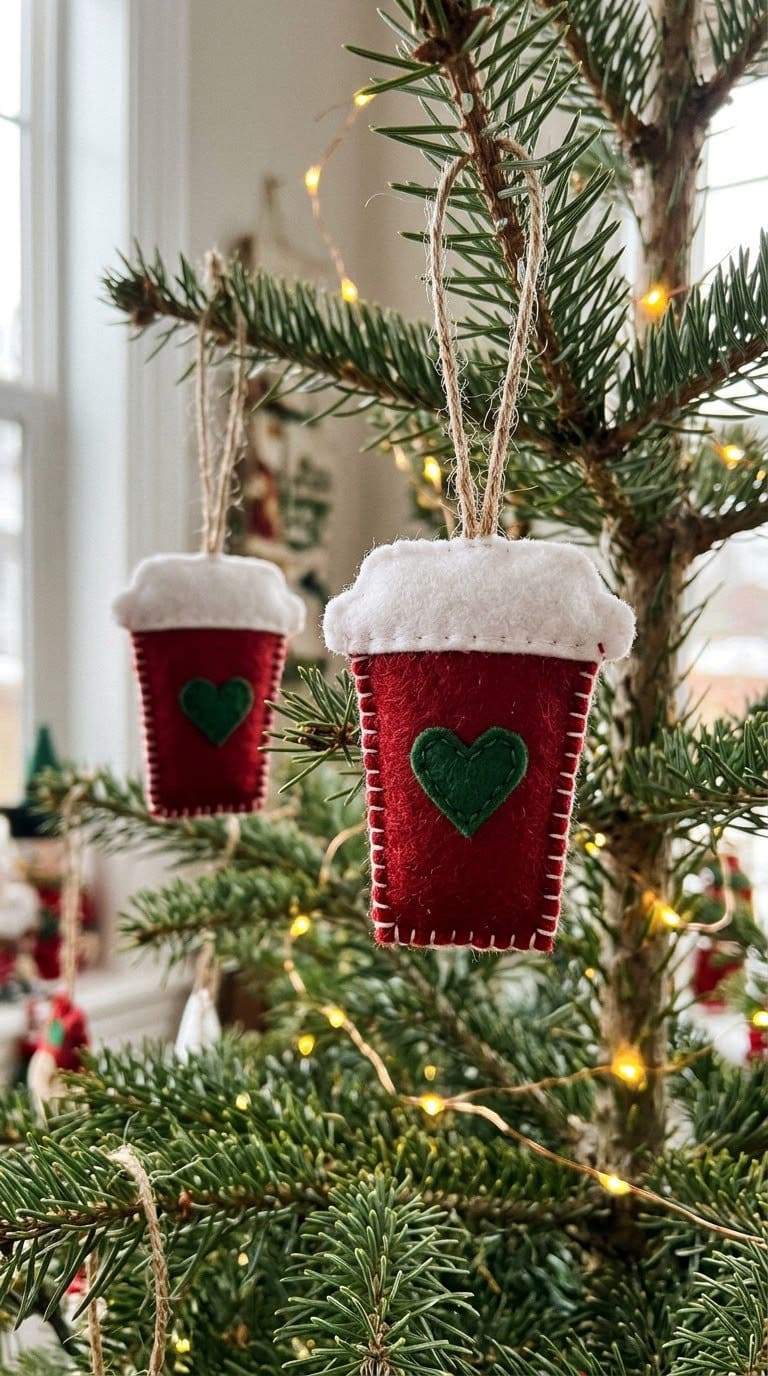
18. DIY Felt Coffee Cup Ornaments

A tiny felt coffee cup looks like a holiday drink. The photos show red felt cups with a white lid, a green heart label and a twine hanger.
You’ll need: red and white felt, a green felt heart, red and white twine, glue or thread, scissors.
- Cut two cup shapes from red felt.
- Add a white strip for the lid and a green heart.
- Stitch or glue the edges, leaving the top open.
- Add a twine hanger.
Style tip: fill the cups with a candy cane.
Safety: keep these off a low branch if pets chew felt.
Tip: let each coat of paint or glue dry before you move on.
Check: hang it only when it feels dry.
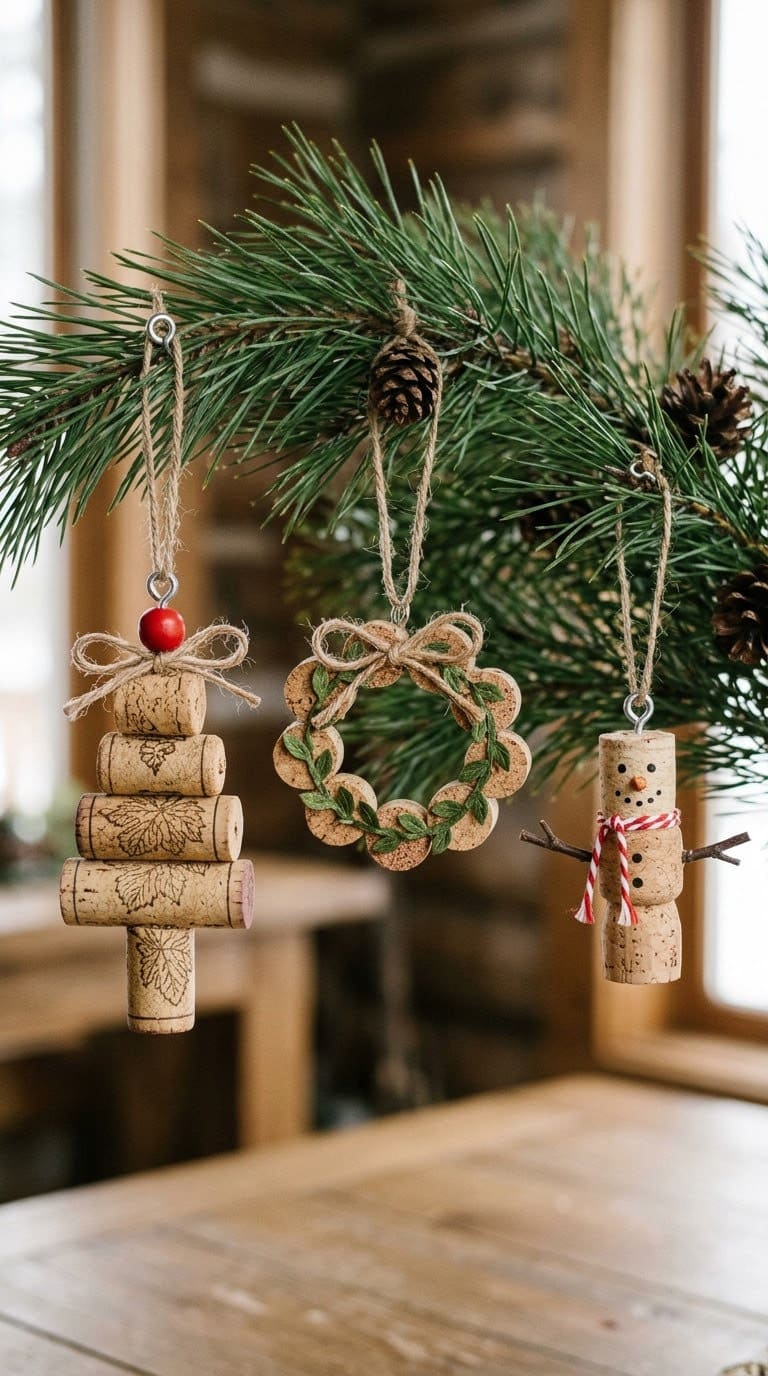
19. DIY Wine Cork Ornaments

A cork turns into a small, rustic ornament. The photos show corks with hooks and tiny details, hung on a branch.
You’ll need: wine corks, small screw eyes or hooks, paint or markers, twine or ribbon.
- Choose corks with a good shape.
- Twist a screw eye into the top of each cork.
- Decorate with paint, markers or small trims.
- Tie a ribbon or a hook to hang.
Style tip: keep the cork color and add one small detail.
Safety: start a pilot hole for the screw eye so the cork doesn’t crack.
Tip: let each coat of paint or glue dry before you move on.
Check: hang it only when it feels dry.
More wine cork tutorials
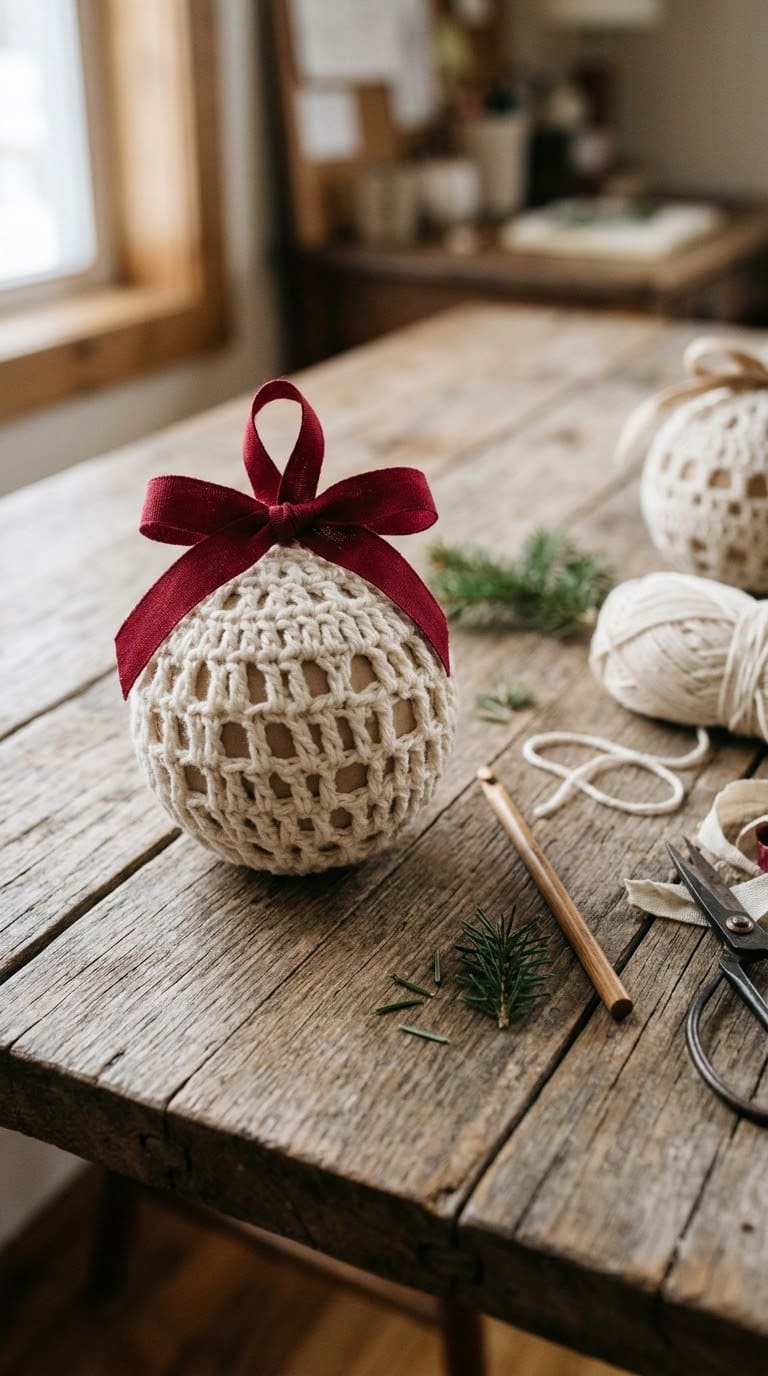
20. DIY Knit Christmas Ornaments

A crocheted chain wraps a plain ball. The tutorial crochets ivory yarn into a long chain. It glues the chain around an old ornament and adds a red ribbon.
You’ll need: ivory yarn, a plain ball ornament, a crochet hook, a glue gun, red ribbon.
- Crochet a very long chain. Braiding the yarn gives a similar look.
- Glue the chain around the ball, working in rounds.
- Tuck in the end, and glue it down.
- Tie on a red ribbon.
Style tip: use chunky cream yarn for a cozy feel.
Safety: keep glue off the yarn tail so it doesn’t burn your skin.
Tip: let each coat of paint or glue dry before you move on.
Check: hang it only when it feels dry.
21. Rustic Christmas Ornaments

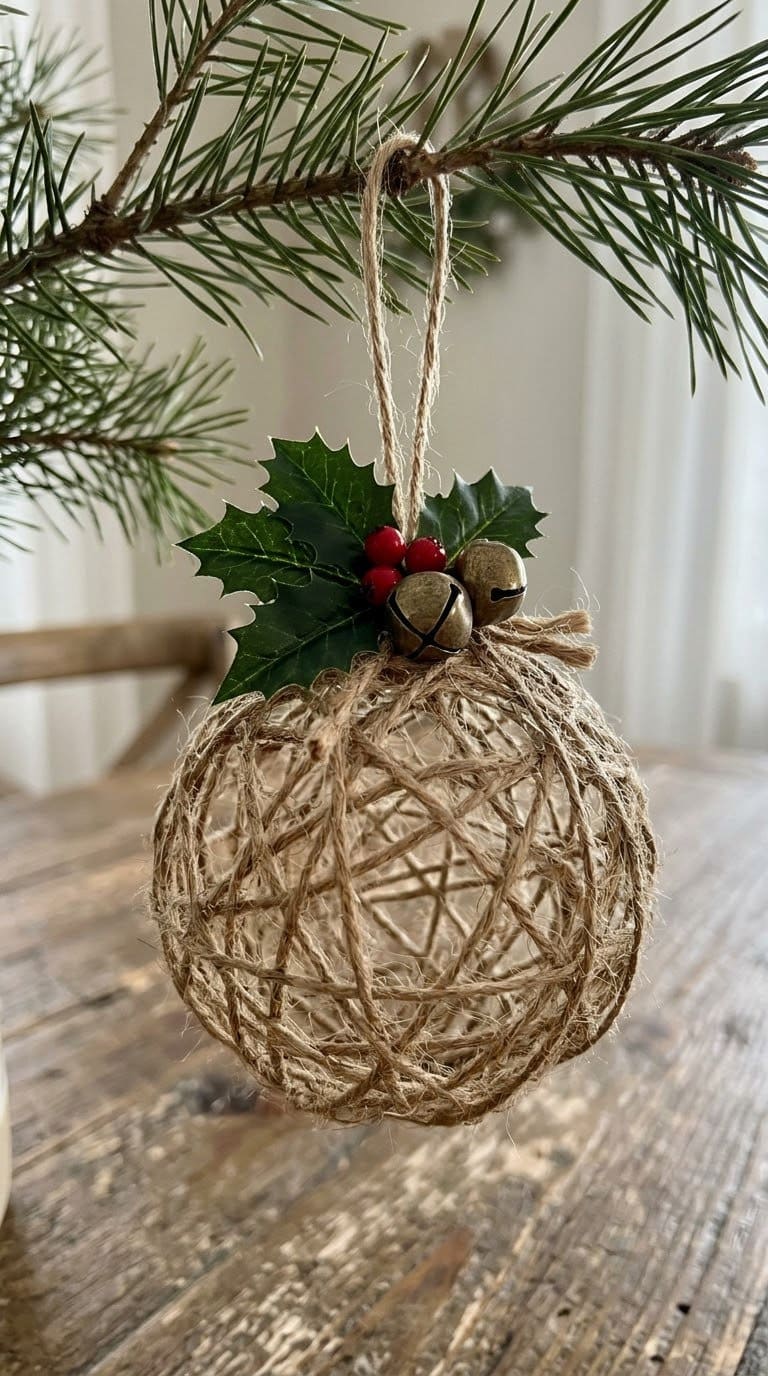
Stiffened jute makes a lacy ball. The tutorial wraps jute around a balloon in plastic wrap. It brushes on thinned decoupage glue, dries it for 24 hours and pops the balloon.
You’ll need: jute string, small balloons, plastic wrap, decoupage glue, twine, brass bells, a holly berry garnish.
- Wrap a balloon in plastic wrap, and wind jute around it.
- Brush on thinned decoupage glue, and hang it to dry for 24 hours.
- Pop the balloon, and remove it.
- Add a twine loop, bells and holly with hot glue.
Style tip: spray a little glitter dust outdoors for sparkle.
Safety: the tutorial says to coat all the string so the ball holds its shape, and to spray glitter in a ventilated area.
Tip: let each coat of paint or glue dry before you move on.
Check: hang it only when it feels dry.
22. DIY Christmas ornament angels

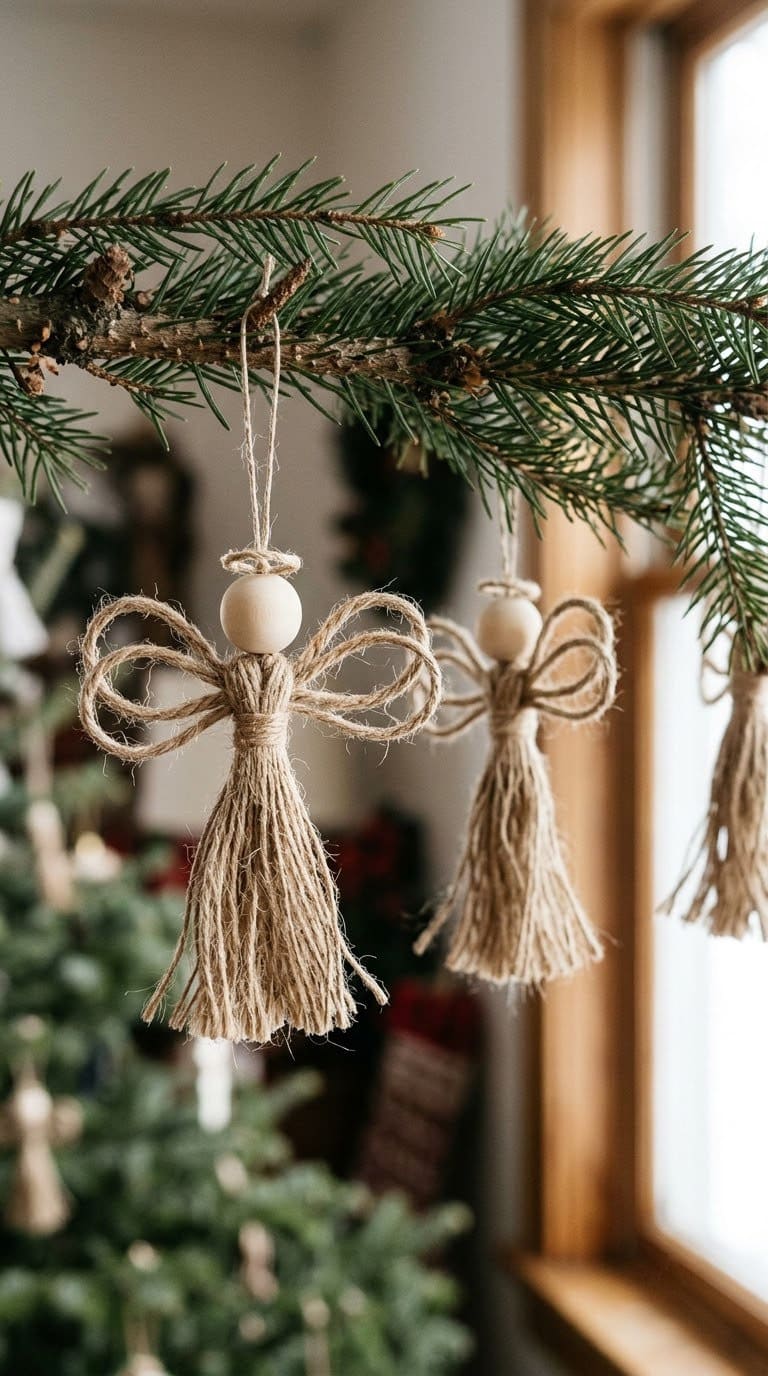
A twine angel looks delicate but takes little. The photos show jute angels with looped wings, a tied head and a bow.
You’ll need: jute or cotton twine, a small piece of cardboard, scissors, glue.
- Wrap twine around a piece of cardboard to make a loop bundle.
- Tie the bundle near the top to form a head.
- Make a smaller loop bundle for the wings.
- Glue the wings on, and add a hanging loop.
Style tip: use natural jute for a farmhouse tree.
Safety: keep scissors out of young hands.
Tip: let each coat of paint or glue dry before you move on.
Check: hang it only when it feels dry.
23. Felt & Pine cone owl ornaments

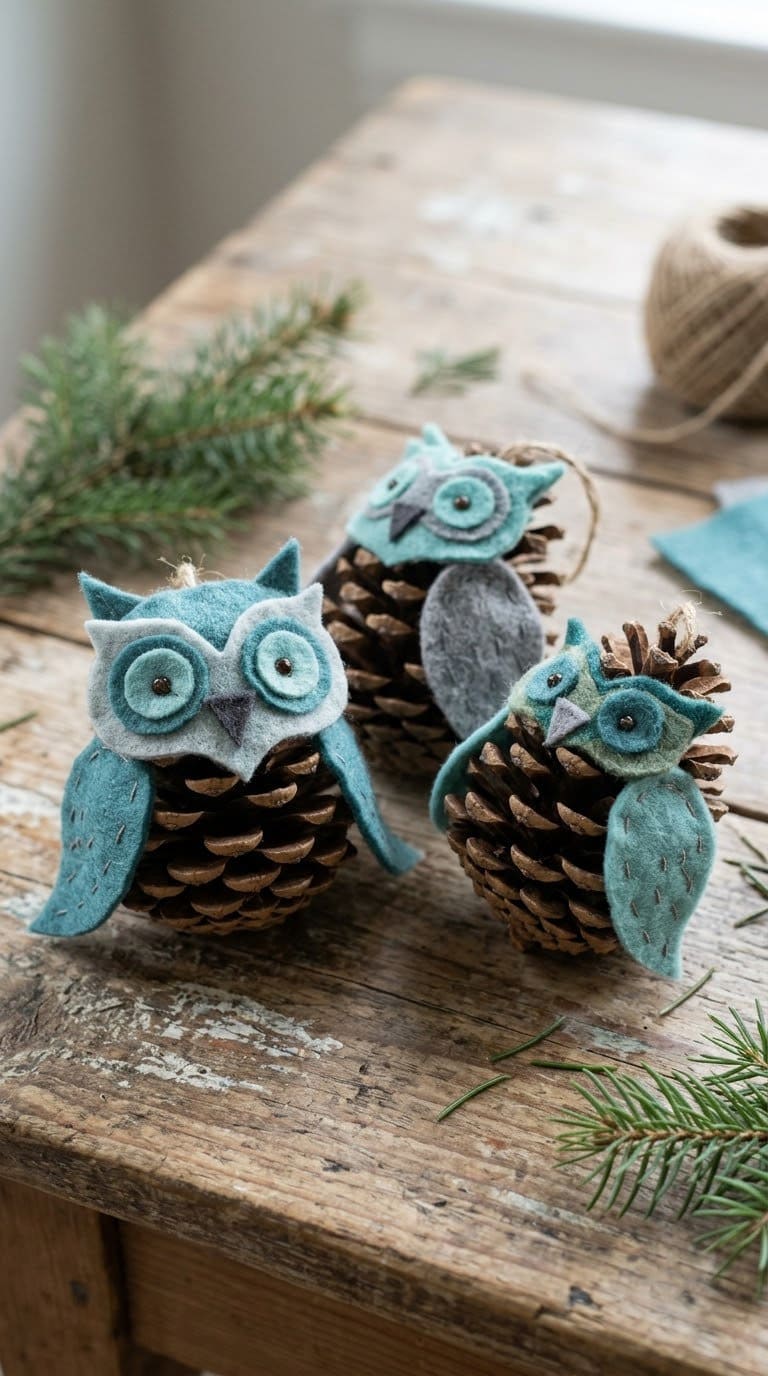
A pine cone becomes an owl. The tutorial uses felt for the face and wings and a brown chenille stem for the feet. Lia Griffith offers three owl designs.
You’ll need: pine cones about 3 inches tall, wool blend felt, a chenille stem, a low-temperature glue gun, detail scissors, string.
- Cut the felt face and wing pieces.
- Glue the pieces into an owl face and wings.
- Glue the face and wings to the pine cone.
- Add a loop of string on the head.
Style tip: use gray and blue-green felt for a calm look.
Safety: Lia Griffith says hot glue can burn. She suggests Elmer’s glue for young children.
Tip: let each coat of paint or glue dry before you move on.
Check: hang it only when it feels dry.
24. DIY Rustic Burlap Christmas Ornaments

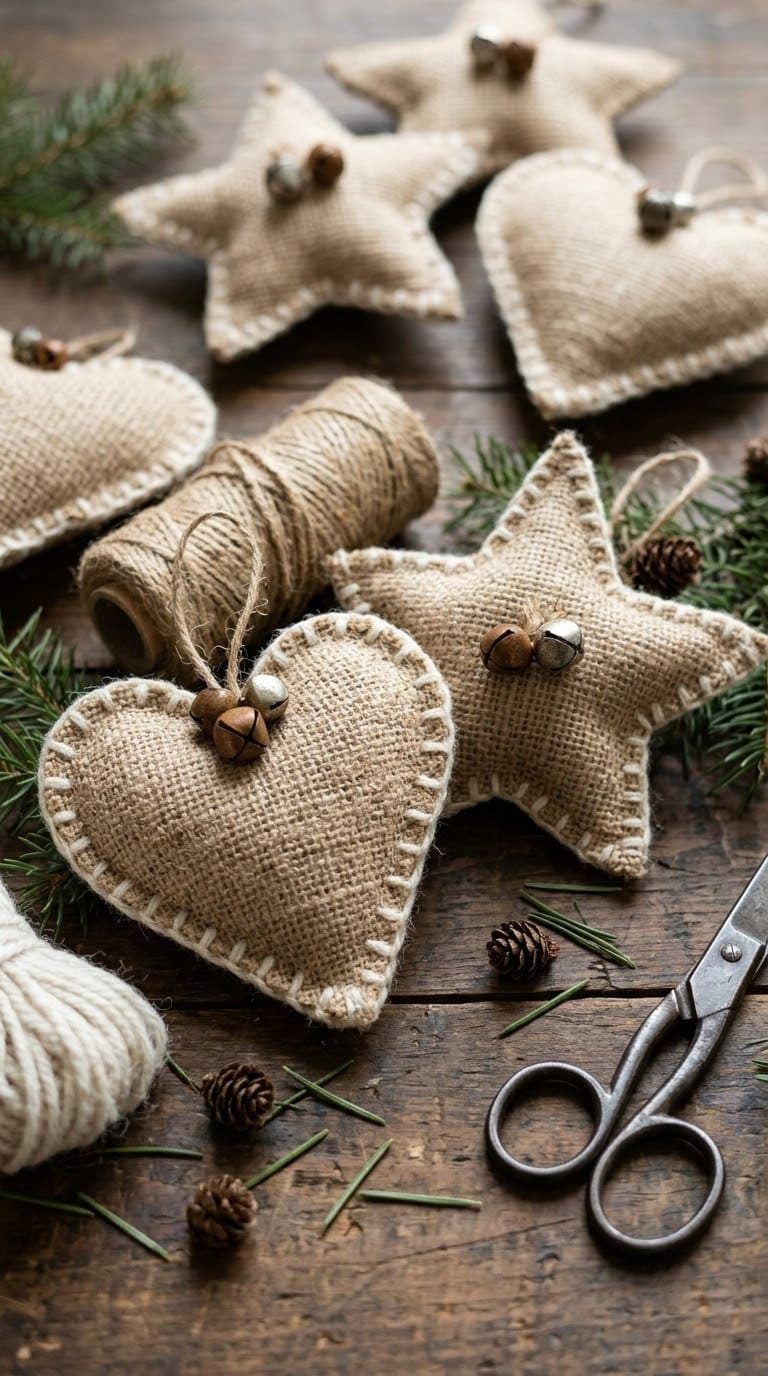
Stitched burlap hearts and stars add a country touch. The tutorial sews two burlap shapes together and stuffs them lightly. It adds white yarn stitches, a twine hanger and a jingle bell bow.
You’ll need: burlap, pillow stuffing, thread and needle, thin white yarn, twine, jingle bells, scissors.
- Make paper templates of a heart and a star.
- Cut two burlap pieces for each ornament, and sew them together with a gap.
- Stuff lightly, and close the gap.
- Add yarn stitches, a twine hanger and a bell.
Style tip: don’t overstuff, or the shape will lose its definition.
Safety: burlap sheds fibers. Work on a cloth you can shake out.
Tip: let each coat of paint or glue dry before you move on.
Check: hang it only when it feels dry.
25. Yarn wrapped Christmas Tree Twig Ornament

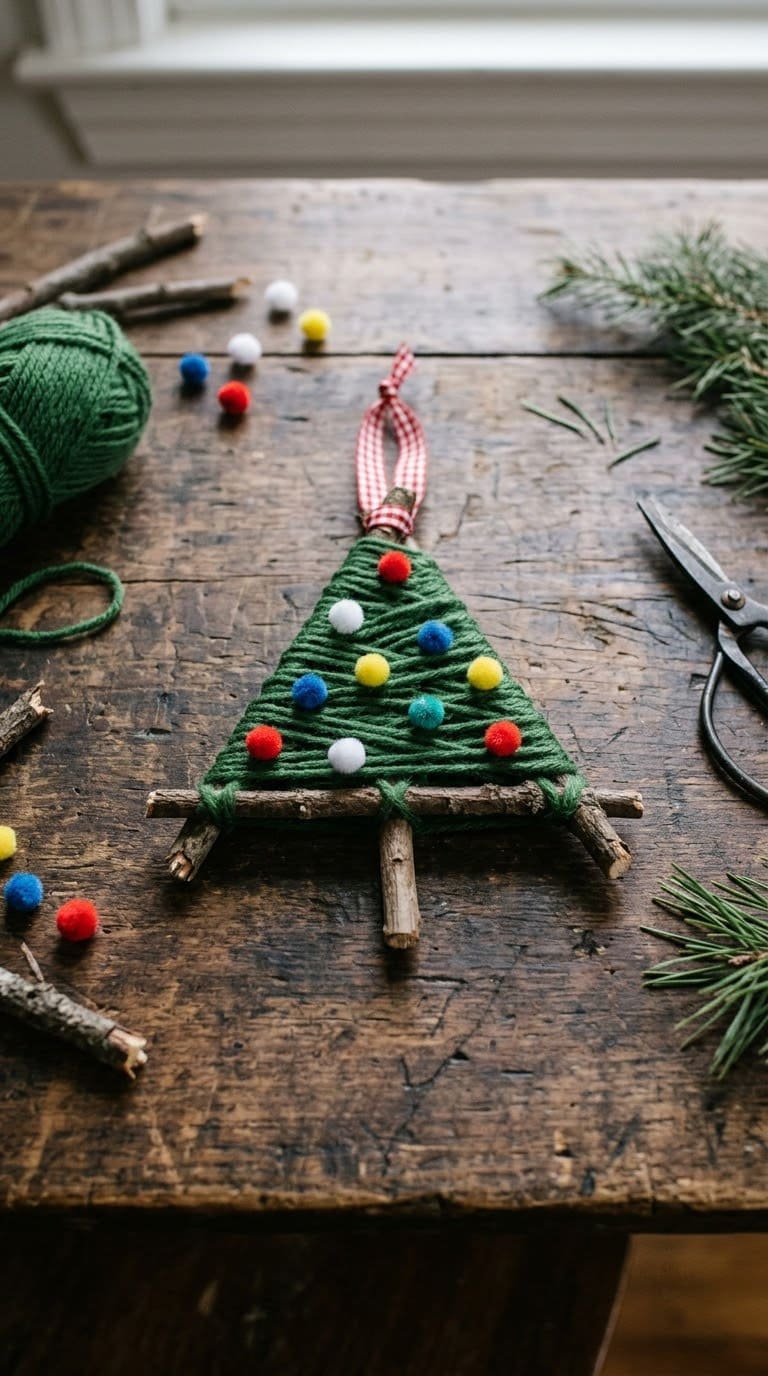
Twigs and yarn make a tree in minutes. The tutorial glues three twigs into a triangle, wraps it with green yarn, adds a trunk and a ribbon, and is made for preschoolers with help.
You’ll need: twigs, 4 to 5 feet of green yarn, ribbon, a low-heat glue gun, optional foam star and mini pom-poms.
- Break the twigs to length, and glue them into a triangle.
- Glue the yarn end, and wrap it in different directions.
- Glue on a trunk, and add a ribbon loop.
- Add a star sticker and pom-poms, and let the glue dry.
Style tip: use variegated green yarn for depth.
Safety: the tutorial says adult supervision is required when children use a hot glue gun, and to use low heat.
Tip: let each coat of paint or glue dry before you move on.
Check: hang it only when it feels dry.
26. Walnut Reindeer Ornament

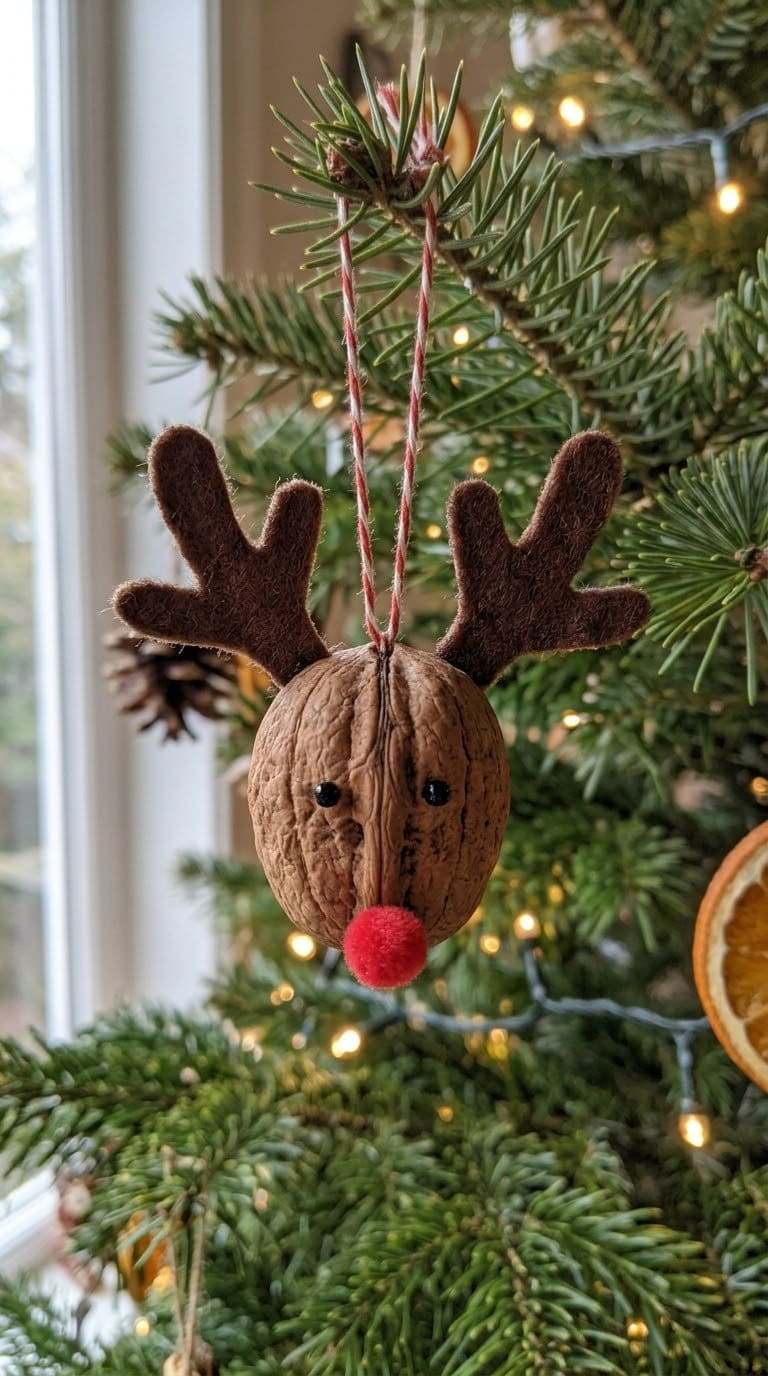
A walnut shell becomes a reindeer head. The tutorial splits a walnut, cleans out the halves, glues in felt antlers and a ribbon loop, and finishes with a red pom-pom nose and drawn eyes.
You’ll need: a walnut, brown felt or paper, a red mini pom-pom, ribbon, PVA glue, a black pen, a knife.
- Split the walnut in half, and clean out the halves.
- Cut out antlers from felt.
- Glue the antlers and ribbon inside, and press the halves together.
- Add the nose and eyes.
Style tip: use googly eyes for a funny look.
Safety: the tutorial gives no guidance on nut allergies, the knife or the small pom-pom. Have an adult split the walnut, and skip this project if anyone is allergic to nuts. That tip is our own.
Tip: let each coat of paint or glue dry before you move on.
Check: hang it only when it feels dry.
How Should You Hang and Store Ornaments?
Hang heavy ornaments near the trunk, where branches are strong. Keep light ones on the tips. Use hooks, not loose string, for glass.
Store each one in its own space, such as an egg carton or a divided box.
Keep felt, paper and burlap dry. Label the box with the year and the maker. These tips are our own.
What Do Ornament Crafts Cost?
Costs vary by store. The sources didn’t list prices, so the ranges below are our own guess.
| Project | Cost | Time |
|---|---|---|
| Thumbprint ball | Low | 20 minutes |
| Bottle cap snowman | Low | 30 minutes |
| Felt tree | Low | 1 hour |
| Bead tree | Low | 1 hour |
| Bell jar | Mid | 2 hours |
| Rustic jute ball | Low | A day, with drying |
Common Mistakes to Avoid
- Using a hot glue gun on its highest heat. The CPSC says to use low-temperature models.
- Giving small pieces to toddlers. The CPSC says a small part fits in a toddler-throat cylinder.
- Leaving a real flame near the tree. The USFA says to keep candles 12 inches from anything that burns.
- Using the wrong pallet. Use only HT pallets.
- Hanging heavy ornaments on weak branch tips. Use the trunk side.
- Skipping the dry time. Paint, glue and decoupage need time to set.
A One-Weekend Ornament Plan
Friday evening: Pick five ideas. Gather supplies, and cover a table.
Saturday morning: Paint the base pieces, such as balls, cans and beads. Let them dry.
Saturday afternoon: Glue, stitch and assemble.
Sunday: Add hangers, and let everything dry. Then hang your ornaments on the tree.
FAQ
What are the easiest Christmas ornaments to make?
Thumbprint balls, clear balls with glitter, felt trees and bottle cap snowmen. They need few supplies and simple steps.
What glue is safest for kids?
The CPSC’s Art and Craft Safety Guide says to avoid high-temperature hot glue guns. Lia Griffith suggests Elmer’s or tacky glue for young children.
Are buttons and beads safe for toddlers?
No. The CPSC says a small part is anything that fits in a toddler-throat cylinder. Keep these away from children under three.
Can I use a real candle in the snowman candle holder?
The tutorial does. The USFA says to keep candles 12 inches from anything that burns. It suggests flameless candles.
Is pallet wood safe for ornaments?
Use only HT pallets. University of Illinois Extension educator Candice Miller says to avoid MB and unmarked pallets.
Related Posts
- Quick and Easy Pinecone Ornaments
- DIY Paper Christmas Tree Ornament Craft Ideas
- Creative Christmas Crafts for Kids
Never miss an update — choose FarmFoodFamily as your preferred source on Google.
How it works: Tap the button below to open Google's settings page, then check the box next to FarmFoodFamily.
Tap the checkbox to turn it blue — that's how you know it's set.