How to Install a Patio Paver Base: The Genius Step-by-Step Guide Pros Actually Follow
A paver patio can look flawless the day it’s laid and still sink within two years, and the difference almost always comes down to what’s buried under it, not the pavers themselves.

Never miss an update — choose FarmFoodFamily as your preferred source on Google.
How it works: Tap the button below to open Google’s settings page, then check the box next to FarmFoodFamily.
Tap the checkbox to turn it blue — that’s how you know it’s set.
Quick Answer: A patio paver base needs 4 to 6 inches of compacted crushed stone. Build it in 2 to 3-inch layers and pack each one down with a plate compactor. Then add a 1-inch layer of coarse sand before the pavers go down. Skipping this compacting step, or packing one thick layer instead of a few thin ones, is the top reason DIY patios sink or go uneven within a couple of years. A trade group called ICPI sets the actual standard here: pack the soil to 98% of its densest possible state, and keep no more than 1/8 inch of height difference between pavers once you’re done. Get the base right, follow the steps in order, and a paver patio can last 25 to 50 years with little upkeep.
Most people planning a paver patio spend their time picking a color and a pattern. That’s the fun 10%.
The other 90% is what happens underground, and nobody posts pictures of that part. But it’s what decides whether your patio still looks flawless in five years, or has three pavers rocking loose by next spring.
We mapped out the build order that contractors actually use. We checked it against ICPI’s actual compaction standard, not the vague “compact it well” advice most guides give. If you’re renting a plate compactor for a weekend, this order keeps you from redoing the job.
What You’ll Need
| Materials | Notes |
|---|---|
| 3/4-inch-minus crushed stone (base) | Angular graded aggregate, not round pea gravel, so it locks together when compacted |
| Coarse concrete sand (bedding layer) | 1-inch layer, screeded flat, never compacted before the pavers go down |
| Edge restraints | Plastic or concrete, sized to your paver thickness |
| Polymeric or jointing sand | Swept into paver joints after placement |
| Geotextile fabric | Optional on well-drained soil, close to mandatory on clay per CMHA/ICPI, laid directly on the compacted subgrade |
| Tools | Notes |
|---|---|
| Plate compactor | Rent for anything larger than a small walkway |
| Hand tamper | Fine for tiny areas or tight corners a plate compactor can’t reach |
| Screed board or rails | 2×4 board plus pipe or conduit rails to level the sand layer |
| String line and stakes | Marks the excavation footprint and keeps edges straight |
| Level and rubber mallet | For setting individual pavers flush |
Before You Start
Budget reality check. A weekend plate compactor rental, plus base materials, costs a fraction of a full pro install. But it also means you’re the one who has to get the compaction right. Still deciding on a layout or a paver style? Browse patio builds done on a tighter budget before you buy materials. Does the patio touch the house, sit over utility lines, or cover a large area? Get a pro quote before you commit to DIY.

Call 811 before you dig. It’s free. It’s the only sure way to know there’s no gas, electric, or water line under the spot you’re about to dig.
Answer 4 quick questions and get matched to the exact fix for your yard — drainage, budget, layout, or something else entirely.
Take the Free QuizThe specs below are for foot traffic only. Prepping the base under a driveway instead? It needs a deeper base and a tighter compaction standard. See the comparison table further down. Don’t use the patio numbers for a driveway project.
Building next to a pool? The base under pavers around a pool deck needs extra care with drainage, since splashed water hits that spot constantly. More on that in the FAQ below.
Step 1: Plan and Mark the Layout
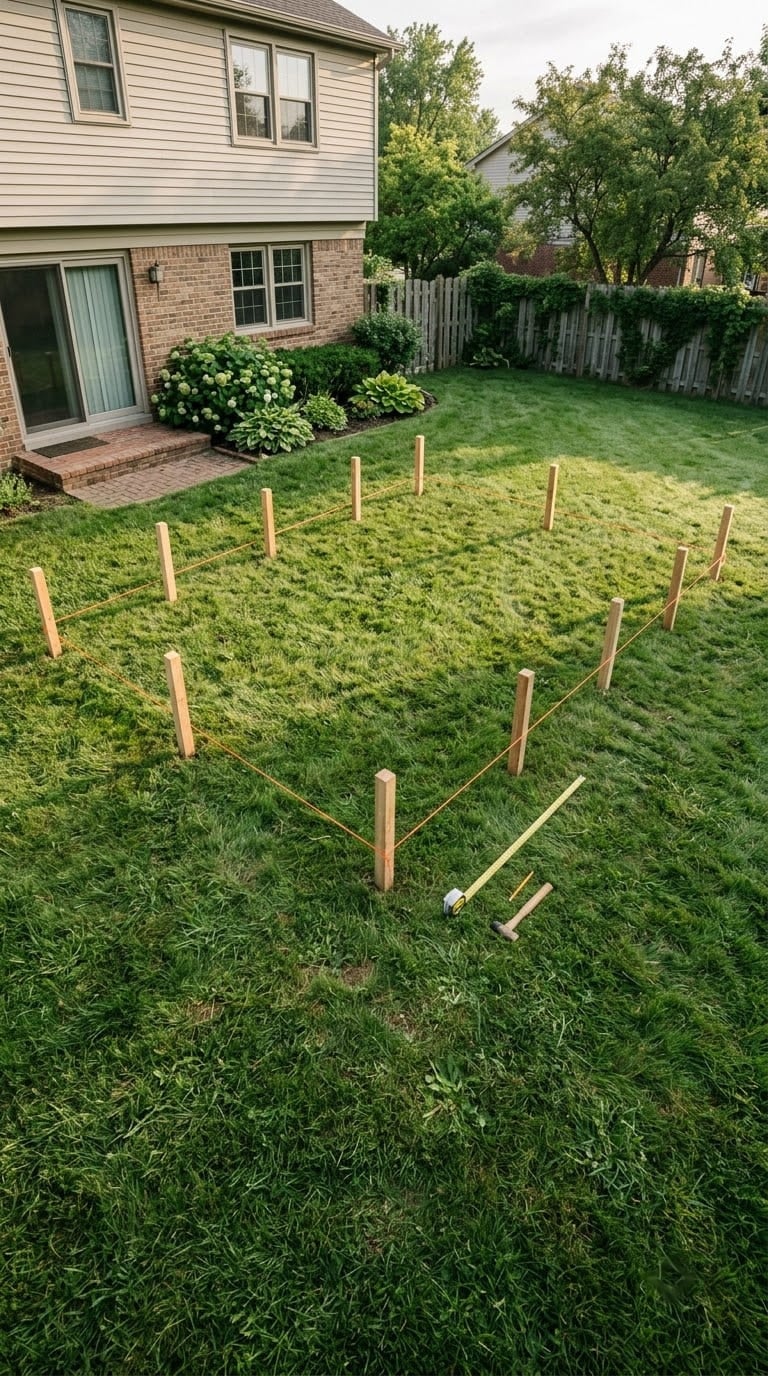
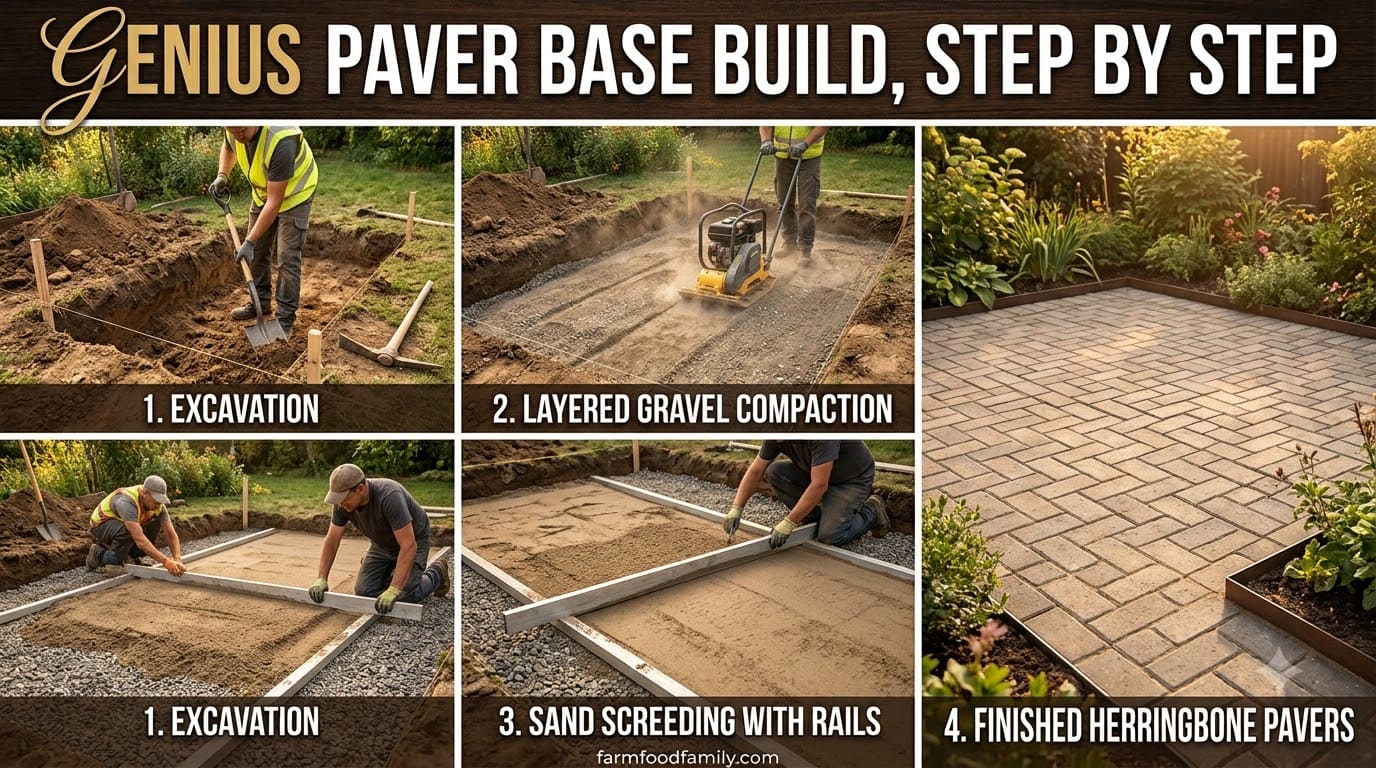
Drive stakes and run a string line around the planned patio shape. Dig 6 to 12 inches past the string line on every side.
That extra margin is where your edge restraints will sit. Skip it, and your edge restraints end up floating with nothing solid to grip.
Step 2: Excavate to Depth
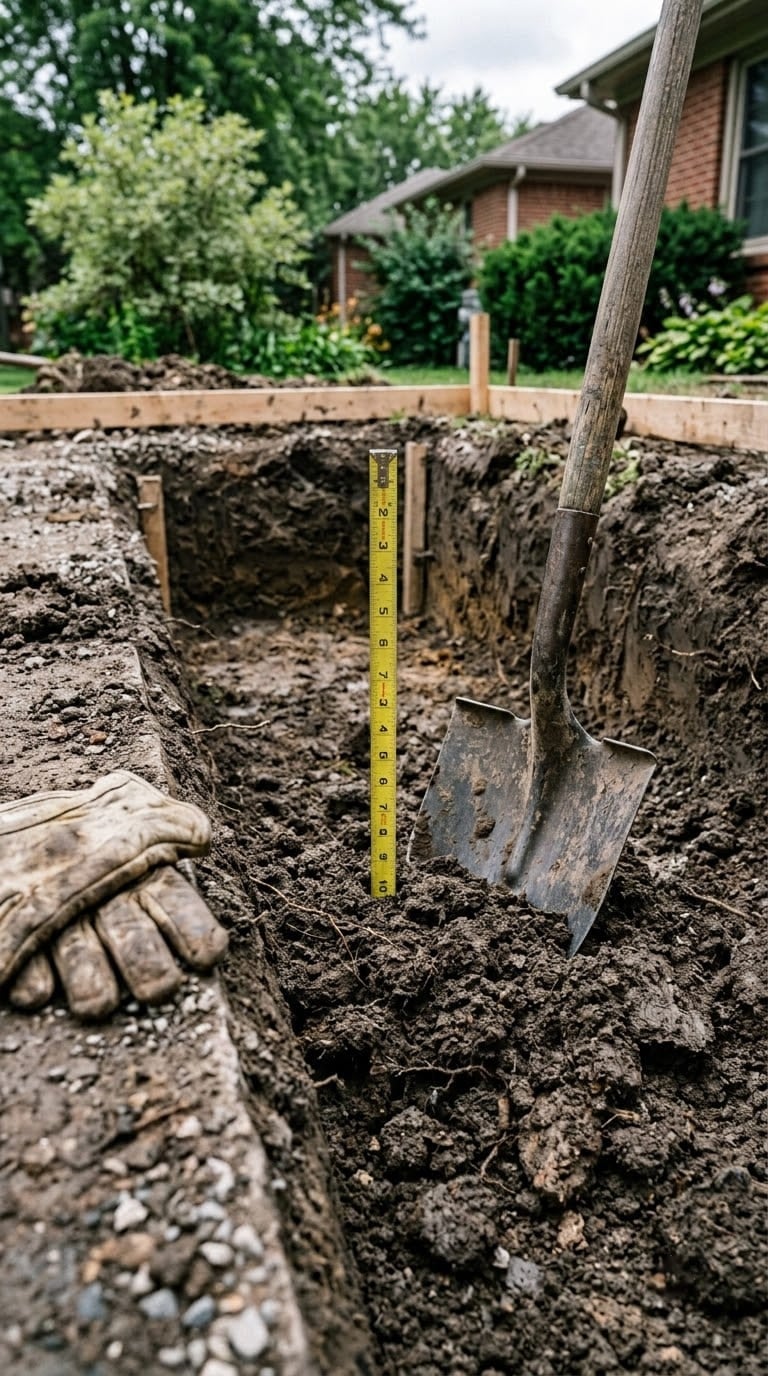
Dig out 6 to 10 inches total for a standard patio or walkway. That covers the packed base, the sand layer, and the pavers, all stacked together, not just the base alone.
Clear out every bit of grass, roots, and topsoil as you go. They rot over time. That leaves a gap the patio will settle into later.
Step 3: Compact the Subgrade
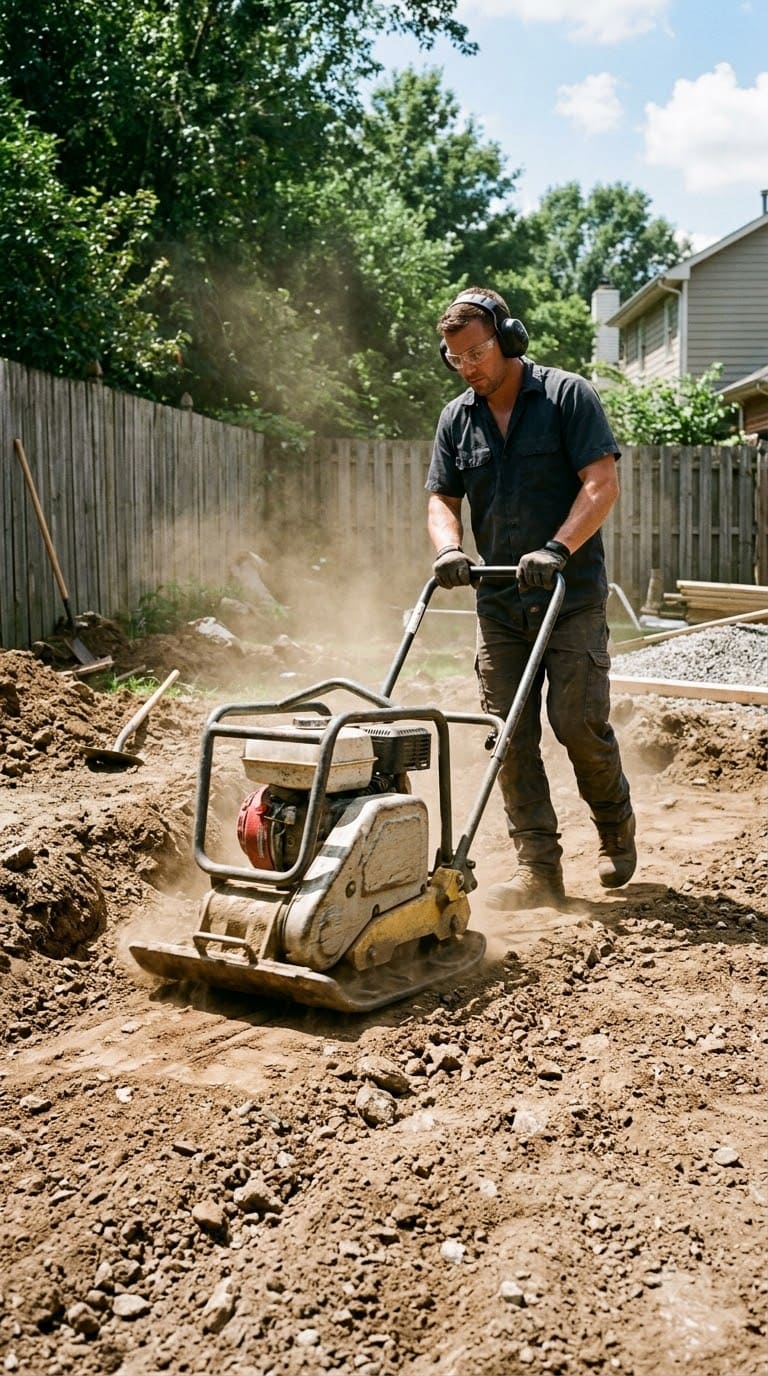
Most DIY guides skip this step. That’s a mistake, since it’s the one that matters most. Before any stone goes in, run the plate compactor over the bare soil itself.
Most yard problems trace back to one specific, fixable cause. Find yours in 4 quick questions.
Take the Free Quiz
For hand-compacting the subgrade (Step 3) and tight corners a plate compactor can't reach, detachable 3-piece handle
Shop NowThis post contains affiliate links. We may earn a commission on qualifying purchases at no extra cost to you.
CMHA, a trade group that sets the industry’s own build specs, has an actual number for this. Pack the soil to 98% of its densest lab-tested state for a patio or walkway. Driveways need an even denser pack, since cars add more weight.
You won’t have lab gear at home to test that exact number, but the practical version is simple. Compact the soil until a few more passes stop visibly changing it, not just one pass for show.
On clay soil, add fabric here, not as an afterthought. CMHA treats fabric as close to mandatory on clay soil, not the optional extra most guides make it out to be. Skip it, and tiny clay particles creep up into your base every time it rains. Installers call this “pumping.”
It’s a slower version of the same problem bad compaction causes. Pavers that sat level on day one go uneven a year or two later, with no clear cause.
Lay the fabric right on the packed soil, before any stone goes in. Overlap each strip by at least 12 inches.
Step 4: Add and Compact the Base in Lifts
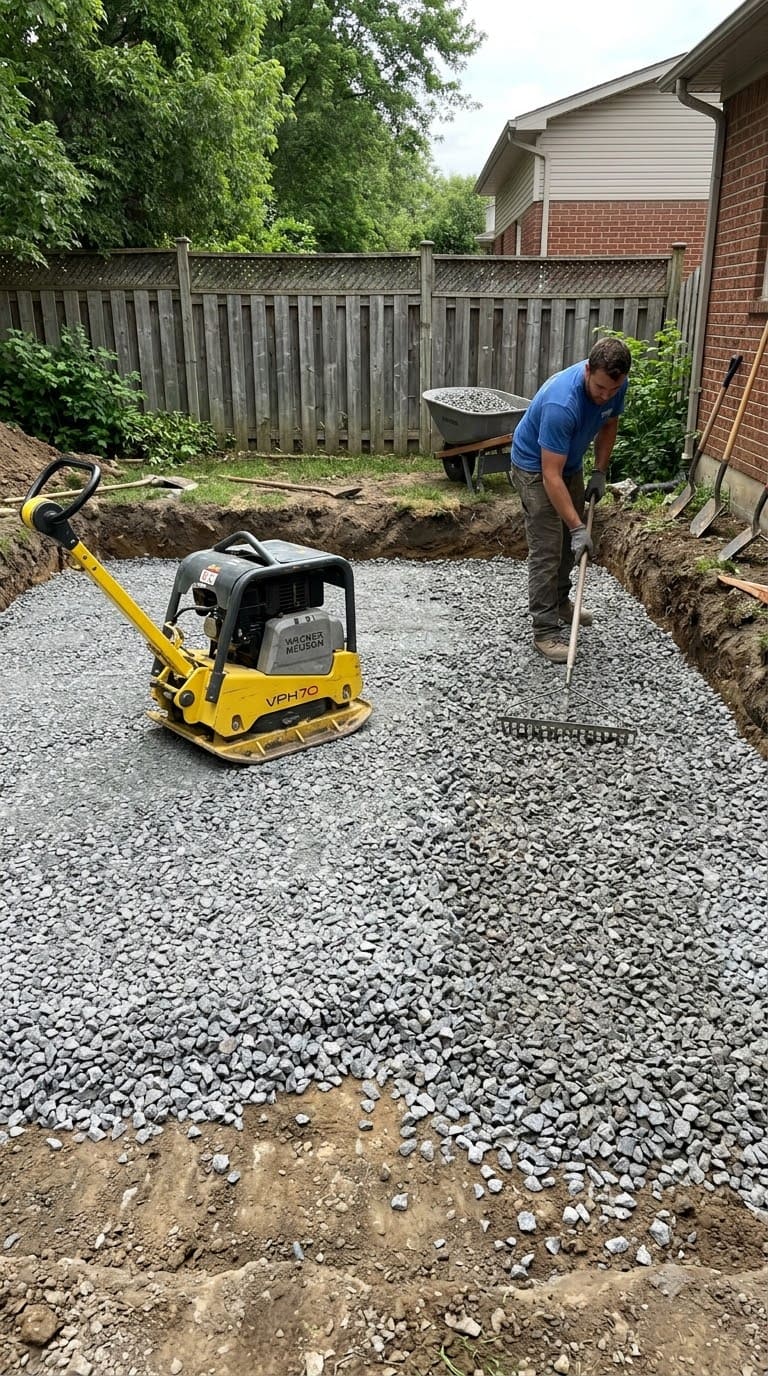
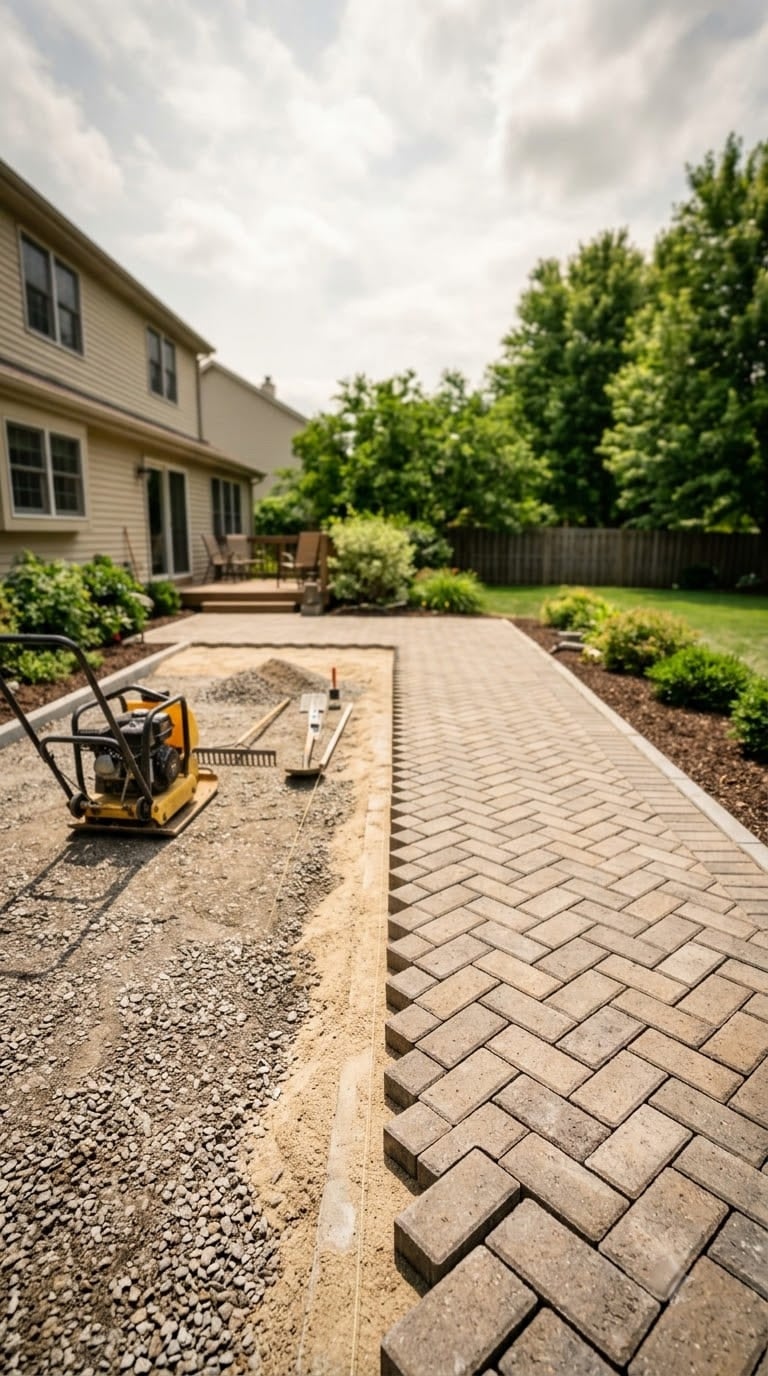
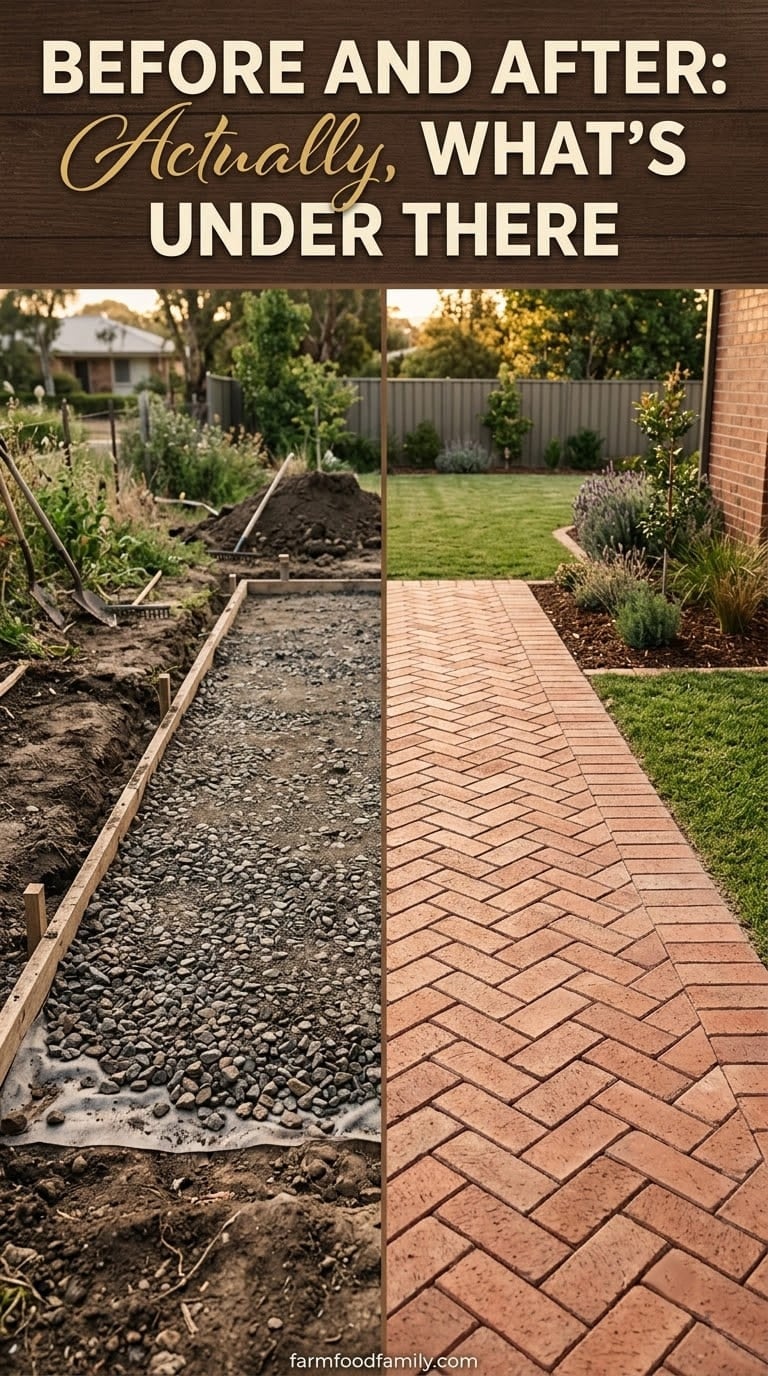
Spread your crushed stone in 2 to 3-inch layers, called lifts. Compact each one before you add the next.
Don’t dump the full 4 to 6 inches in one go and compact it just once. A thick, loose layer traps air pockets a plate compactor can’t fully reach. Those pockets are exactly where future sinking starts.
Use crushed stone, not round pea gravel and not plain sand. Crushed stone has angular edges that lock together when packed down.

Round stone and loose sand simply can’t do that. A sand-only base will always shift and wash out, no matter how many times you compact it.
The average homeowner spends $616/year on yard fixes that don't address the real problem. Find out what yours actually is — before you spend another dollar.
Take the Free QuizThis base build works the same whether you’re setting concrete pavers or brick pavers on top. The material on top changes. The ground underneath doesn’t.
Step 5: Set Edge Restraints
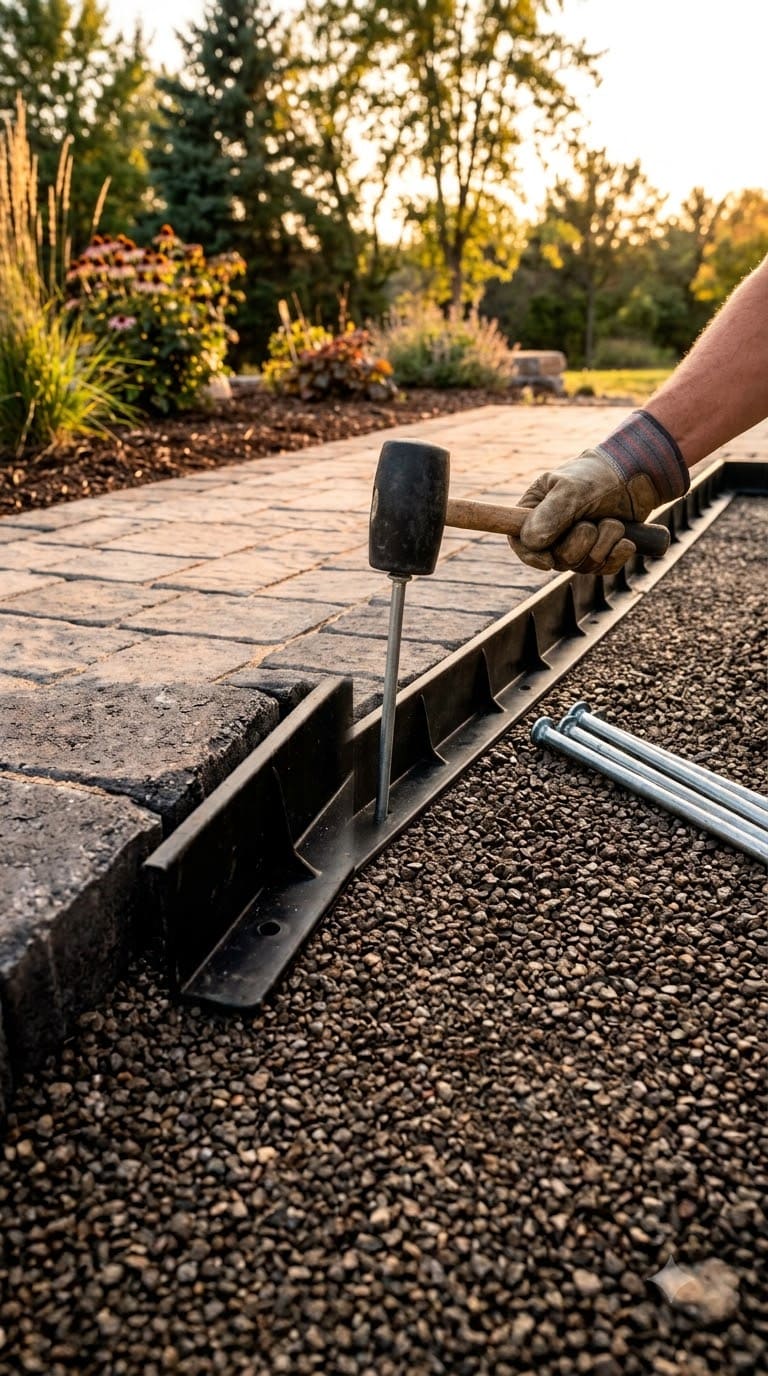
Install your edge restraints along the edge, anchored into the extra margin from Step 1. They stop the whole system from spreading outward under foot traffic. That’s one of the quiet ways a patio goes uneven over time, even when the base itself was built right.
Step 6: Screed the Bedding Sand
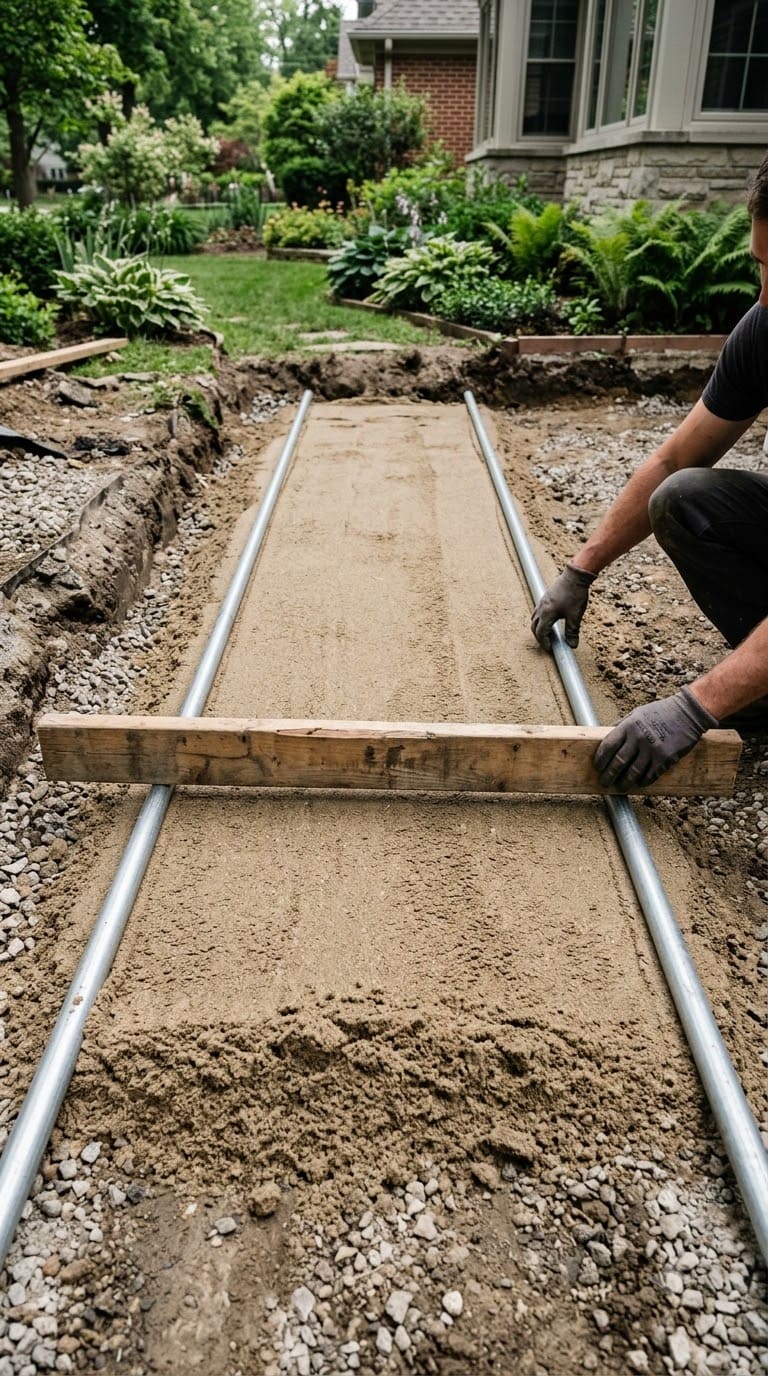
Lay your screed rails (PVC pipe or metal conduit both work) on top of the packed base. Pour coarse sand between them, about 1 inch deep. Drag a straight 2×4 board across the rails to level the sand into one flat plane.
Don’t compact this layer. The sand should stay loose. That way the pavers settle into it a bit, then lock together once you compact the finished surface in Step 7.
Step 7: Lay and Compact the Pavers
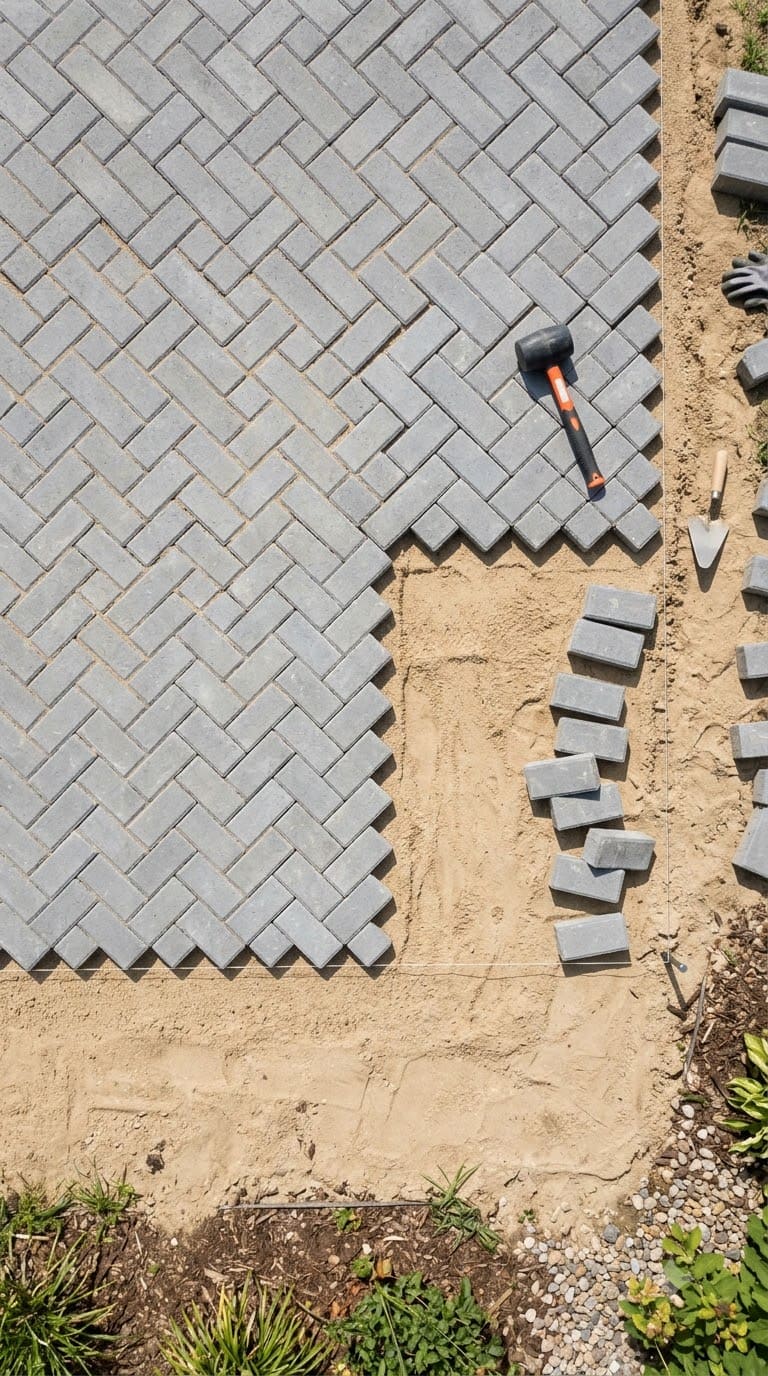
Set your pavers into the sand, following your pattern, working out from one fixed corner or edge. Plan ahead for anything that will sit on top of the finished surface, like a pergola anchored into the patio itself. Adding a footing later means pulling pavers back up.
Once the whole surface is laid, run the plate compactor over the pavers themselves. This does two jobs at once. It seats every paver evenly into the sand, and it locks the sand into place underneath.
ICPI’s tolerance here is tight. No more than 1/8 inch of height difference, called lippage, between any two pavers next to each other once you’re done compacting.
See more than that? Pull that paver up and reset it. Don’t just pound it down with a mallet.
Step 8: Sweep in Joint Sand and Final Compaction
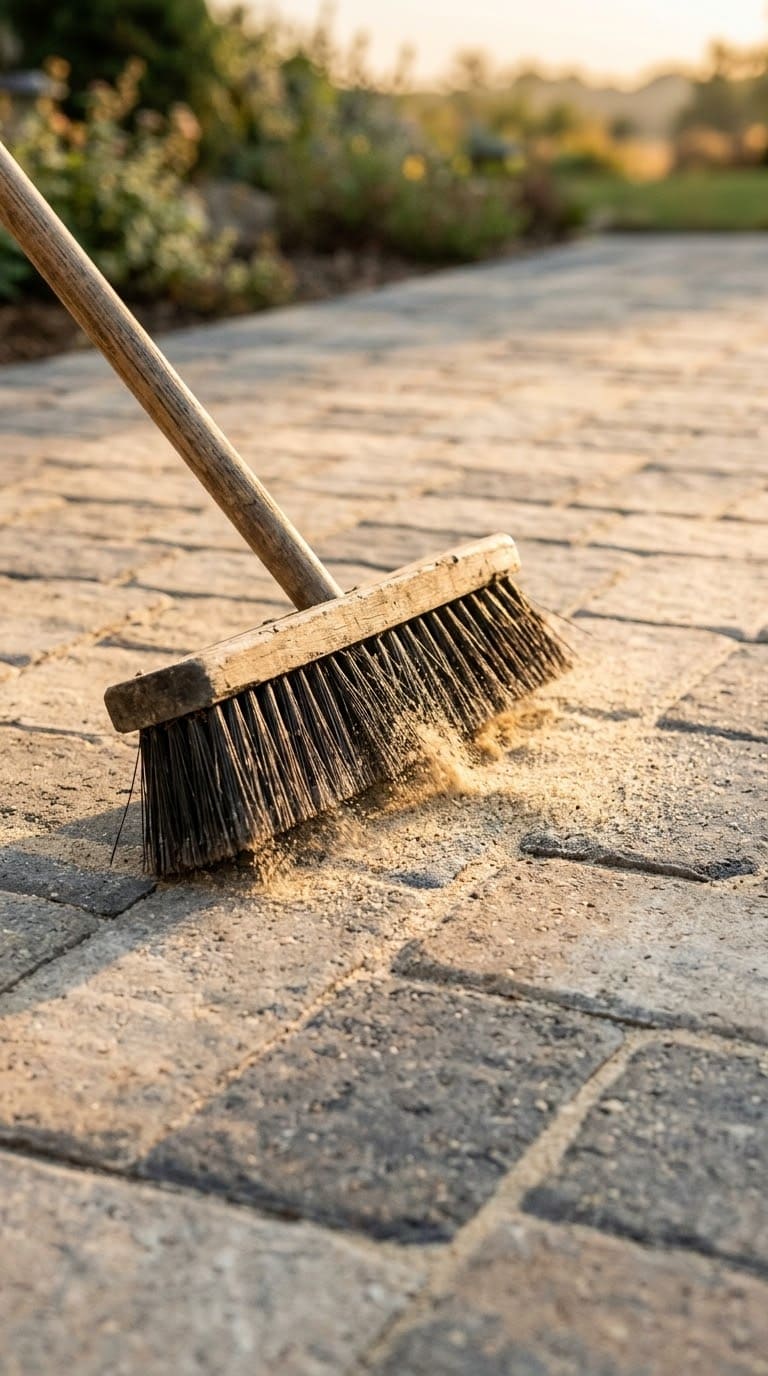
Sweep polymeric or regular joint sand across the surface, into the gaps between pavers. Then run the compactor over the whole patio one last time to pack the sand down into the joints. This is what locks the pavers into one solid system, not just a loose set of tiles.
Step 9: Check the Final Slope
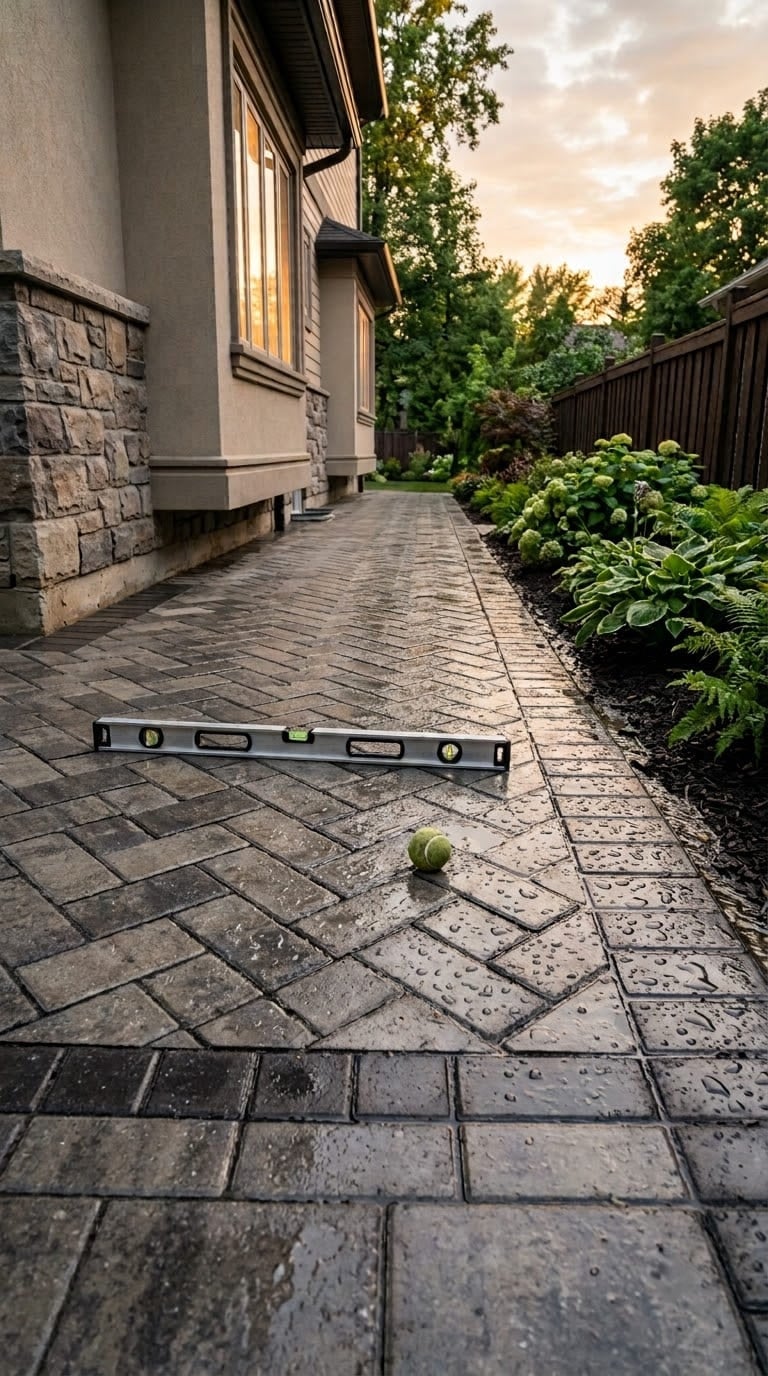
Check that the finished surface slopes about 1/4 inch per foot away from your house or any other structure. Water pooling against a foundation is a much bigger problem than a slightly uneven patio.
It’s also much easier to fix before the pavers go down than after. On a sloped yard, you may need a short retaining wall to hold the grade at the low end, instead of fighting the slope with base depth alone.
Does Your Climate Change the Base Depth?
Yes, and most paver guides skip this part entirely. In cold regions, water trapped under a patio freezes and expands.
That’s what lifts pavers unevenly over winter, a problem called frost heave. It has nothing to do with the pavers themselves. It’s all about how well the base drains, and how deep it sits.
The frost line is how deep the ground actually freezes in winter. It varies a lot across the US.
It’s close to the surface in the Deep South. It’s several feet down in the northern states.
A 4 to 6-inch base works fine in a mild climate. In a region with a deep frost line, that same base can be too shallow, since it sits right in the freeze zone and gets pushed and pulled every winter.
Live somewhere with cold winters? Check your local frost line depth first. Your building department can tell you, or a quick search of your county’s rules will show it.
Then lean toward the deeper end of the base range, or add a couple more inches. Don’t just use the national-average number for your own yard.
Open-Graded vs. Dense-Graded Base: The Method Most Guides Never Mention
Every step above describes a dense-graded base. That’s crushed stone with fine dust mixed in.
The dust fills the gaps between the bigger rocks and packs into one solid layer. It’s the standard method, and it’s what most homeowners should use.
There’s a second option gaining ground with pros, mostly in cold climates or on yards with drainage trouble. An open-graded base uses clean, angular stone with no dust mixed in, at all.
Since there’s no dust filling the gaps, the stones lock together but leave open pockets between them. Water drains straight down through the base, instead of pooling and freezing inside it.
| Factor | Dense-Graded Base (standard) | Open-Graded Base (drainage-focused) |
|---|---|---|
| Aggregate | Crushed stone with fines (stone dust) | Clean crushed stone, no fines, typically ASTM No. 57 |
| Bedding layer | 1-inch coarse sand | 2-inch layer of No. 8 stone, not sand |
| Drainage | Water can pool inside the base if it doesn’t drain fast enough | Roughly 30 to 40% void space, water drains straight through |
| Frost heave risk | Higher if water gets trapped and freezes inside the base | Lower, since standing water has nowhere to accumulate |
| Best for | Most standard patios and walkways on well-drained soil | Freeze-thaw climates, poor-draining soil, pool decks, anywhere standing water is a recurring problem |
For a simple patio on soil that already drains well, the dense-graded method above is simpler, cheaper, and the right call. Does your yard hold water after rain?
Do you live somewhere with hard winters? Ask a local supplier about open-graded base material before you commit to the standard method. It’s a small swap that fixes a problem the dense-graded method can’t.
Why Most DIY Paver Patios Sink (And It’s Never the Pavers’ Fault)
We’ve read through enough failed-patio breakdowns from working hardscape contractors, including Earth Turf & Wood’s own rundown of common sinking causes. The same two culprits keep showing up. And neither one is the pavers themselves.
The first is compaction, specifically skipping the lift-by-lift process in Step 4. It’s tempting to dump all your gravel in one go and run the compactor over it once, especially near the end of a long DIY weekend.
But that one pass never reaches the bottom of a thick layer the way three separate 2-inch passes do. The gap doesn’t show up until months later, when the buried air pockets finally give way.
The second is drainage, or having no plan for it at all. A patio can be compacted perfectly and still sink at one corner. That happens when water keeps pooling there and slowly washes fine particles out from under the base.
See standing water anywhere on your finished patio after a rainstorm? That’s not just a look problem. It’s showing you exactly where the base will fail first.
If there’s one thing worth doing differently from the start, treat compaction and drainage as the actual project. Picking the pavers is the easy part that comes after.
Patio and Walkway vs. Driveway: What Actually Changes
| Factor | Patio or Walkway (foot traffic) | Driveway (vehicle traffic) |
|---|---|---|
| Total excavation depth | 6 to 10 inches | 10 to 16 inches |
| Compacted base depth | 4 to 6 inches | 8 to 12 inches |
| Compaction standard | 98% standard Proctor density | 98% modified Proctor density (denser standard) |
| Base material | 3/4-inch-minus crushed stone | Same material, thicker lifts and more passes |
| Edge restraints | Standard plastic or concrete | Heavier-duty restraints, often concrete |
FAQs
How deep should a paver base be for a patio? Plan on 4 to 6 inches of compacted crushed stone, under a 1-inch sand layer. Once you add the pavers, total dig depth runs about 6 to 10 inches.
Can I skip the sand layer and set pavers directly on the base? No. The sand layer lets you fine-tune each paver’s height. It gives them a soft surface to settle into. Set pavers right on the stone, and the finish comes out rougher and less even.
What happens if I don’t compact the base enough? The base keeps settling under normal use and weather. That shows up later as sinking, rocking, or uneven pavers. It’s the exact failure most DIY patios run into within their first couple of years.
Do I need landscape fabric under a paver patio? It’s optional on most soil types. But it genuinely helps on clay soil or ground with a weed problem, since it keeps the base separate from the soil below and slows weeds from pushing up through the joints.
Does my climate change how deep the base needs to be? Yes. In cold, freeze-thaw regions, build closer to your local frost line depth than the general 4 to 6-inch patio number. A shallow base near the freeze zone is what actually causes frost heave over time.
What’s the difference between open-graded and dense-graded base? Dense-graded base uses stone with dust mixed in. It packs into one solid layer, and it’s the standard choice for most patios. Open-graded base uses clean stone with no dust, so water drains straight through it. That makes it a better pick on soil that drains poorly, or in a hard freeze-thaw climate.
Products We Recommend
This post contains affiliate links. We may earn a commission on qualifying purchases at no extra cost to you.
Walensee 8"x8" Steel Hand Tamper, 48" Handle
For hand-compacting the subgrade (Step 3) and tight corners a plate compactor can't reach, detachable 3-piece handle
Shop Now
Bon Reinforced Aluminum H Screed, 3/4in x 4in x 4ft
The actual professional screed board for Step 6, leveling the bedding sand to a flat, uniform 1-inch layer
Shop Now
One Stop Outdoor 50-Pack 8" USA-Made Plastic Edging Anchoring Stakes
Spikes for Step 5's edge restraints, compatible with Dimex/Proflex restraint systems
Shop NowNever miss an update — choose FarmFoodFamily as your preferred source on Google.
How it works: Tap the button below to open Google's settings page, then check the box next to FarmFoodFamily.
Tap the checkbox to turn it blue — that's how you know it's set.