10 Amazing DIY Wall Treatment Ideas With Heights, Costs and Steps
Wainscoting, board and batten and plank walls are weekend jobs with a nailer and a level. Wall height, wood prep and old paint decide if they go well.

Never miss an update — choose FarmFoodFamily as your preferred source on Google.
How it works: Tap the button below to open Google's settings page, then check the box next to FarmFoodFamily.
Tap the checkbox to turn it blue — that's how you know it's set.
Wainscoting, board and batten and plank walls are weekend jobs with a nailer and a level. Wall height, wood prep and old paint decide if they go well.
Products We Recommend
This post contains affiliate links. We may earn a commission on qualifying purchases at no extra cost to you.

CRAFTSMAN V20 Brad Nailer, 18GA, Cordless, Bare Tool Only (CMCN618B)
An 18 gauge cordless brad nailer for trim, battens and planks. It is tool only, so you need a V20 battery. Use a single-shot or sequential trigger and wear eye protection.
Shop Now
Zircon StudSensor A100 Stud Finder w/ Live Wire Detection
A stud finder that also flags live AC wire. Mark studs before you nail planks or battens, and turn off power before you cut around outlets.
Shop Now
OX Caulk Gun No Drip 10 oz Dripless Caulking Gun Skeleton Frame
A dripless caulk gun for trim seams and construction adhesive. Cut the tube tip small and wipe the bead with a damp finger.
Shop NowThe easiest DIY wall treatments are picture-frame wainscoting, board and batten, plank walls and beadboard. Each one adds trim to a flat wall with a nailer, glue, caulk and paint. Most take a weekend.
Wainscoting looks best at about one-third of the wall height. Bob Vila’s team puts that at about 32 inches on an 8 foot wall and 36 inches on a 9 foot wall.
Safety comes first. The EPA says about three-quarters of homes built before 1978 still have some lead paint. Test before you cut or sand, and use a nail gun with care.
These 10 ideas give you materials, steps, a style tip and a watch-out each. Pick one wall, measure twice, and start with the smallest project first. Order about 10 percent extra wood, because cuts and mistakes happen.
How Do You Choose a DIY Wall Treatment?
Start with your skill and your tools. A brad nailer and a miter saw open every project below. A hammer and a hand saw still work for some, but they take longer.
Use this table. The skill levels and times are our own guide, except where a source gives a number.
| Treatment | Skill | Time for one wall | Best room |
|---|---|---|---|
| Picture-frame wainscoting | Medium | One weekend | Dining room, hall, nursery |
| Batten-only board and batten | Easy | One day | Entryway, bedroom |
| Full-board board and batten | Medium | Two to three days | Entry, mudroom |
| X-pattern wainscoting | Hard | One weekend | Mudroom, den |
| Plank wall | Easy | One weekend | Nook, bedroom |
| Beadboard panels | Easy | One to two days | Bathroom, laundry |
| Paneled wall | Hard | Two weekends | Dining room |
| Reclaimed board wall | Medium | One weekend | Den, bar wall |
If you are new to this, start with batten-only. It uses the fewest cuts and the most forgiving math.



What Height Should Wall Paneling Be?
Height decides if the wall looks planned or odd. The common rule is one-third of the wall.
The same guide says the rule includes the cap and moldings, and it is a starting point, not a law. A second designer source adds one firm rule: never stop halfway up the wall.
| Wall height | One-third height | Use it for |
|---|---|---|
| 8 feet | About 32 in | Calm, classic look |
| 9 feet | About 36 in | Calm, classic look |
| 8 or 9 feet, two-thirds | About 64 to 72 in | Bold look behind a bed or sofa |
| Bathroom | About 40 in | Clears the vanity backsplash |
Designer Alexa Hampton prefers about 36 inches. Pick one height for the whole room, and line it up with window sills if you can.
What Safety Rules Apply to DIY Wall Treatments?
These projects use sharp tools and old paint. Read this before you buy wood.
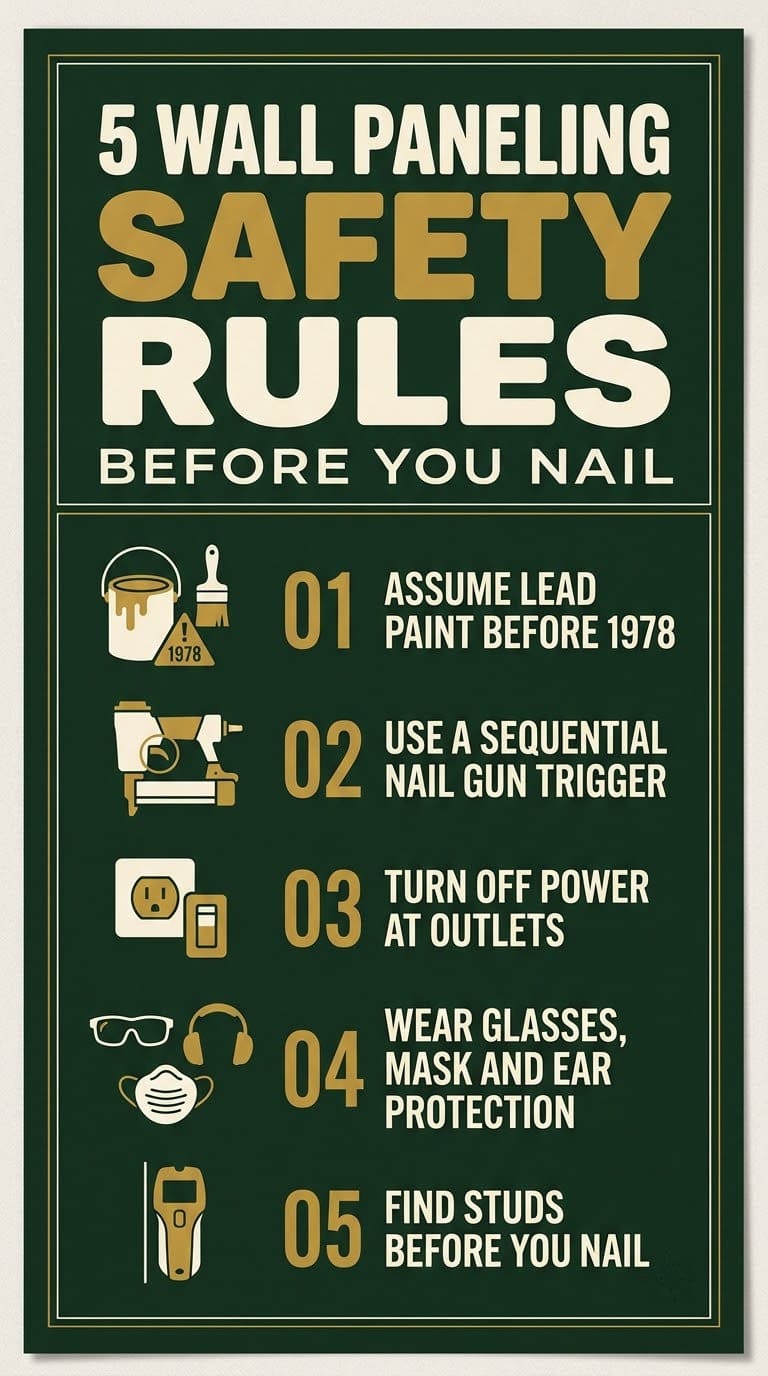
Lead paint. The EPA says the rules don’t generally cover owners working on their own home. But lead dust is still dangerous.
For homes built before 1978, assume lead if you don’t know. Cover floors with plastic, mist the wall before you sand, and bag your waste.
Nail guns. The CDC and NIOSH report about 37,000 nail gun emergency room visits a year. Hands and fingers are hurt most.
Use a single-shot or full sequential trigger, not a bump trigger. Never rush.
An 18 gauge cordless brad nailer for trim, battens and planks. It is tool only, so you need a V20 battery. Use a single-shot or sequential trigger and wear eye protection.
Shop NowThis post contains affiliate links. We may earn a commission on qualifying purchases at no extra cost to you.
Outlets. Turn off the power at the breaker before you cut around an outlet. Check with a tester. This is our advice.
Dust, eyes and ears. Wear safety glasses, a dust mask and hearing protection when you saw or sand. This is our advice.
Ladders. Keep both feet on the rungs and your belt buckle between the rails. This is our advice.
What Tools and Supplies Do You Need?
Gather everything before you start. It saves trips to the store.
Tools: stud finder, 4 foot level, tape measure, pencil, brad nailer with 2 inch 18 gauge nails, miter saw or miter box, caulk gun, putty knife, sanding block, drop cloth.
Supplies: primed MDF or pine trim, construction adhesive, paintable acrylic caulk, wood filler, primer, and two cans of paint.
Order 10 percent extra wood for cuts and mistakes. Cost guides often say the same.
1. Picture-Frame Wainscoting
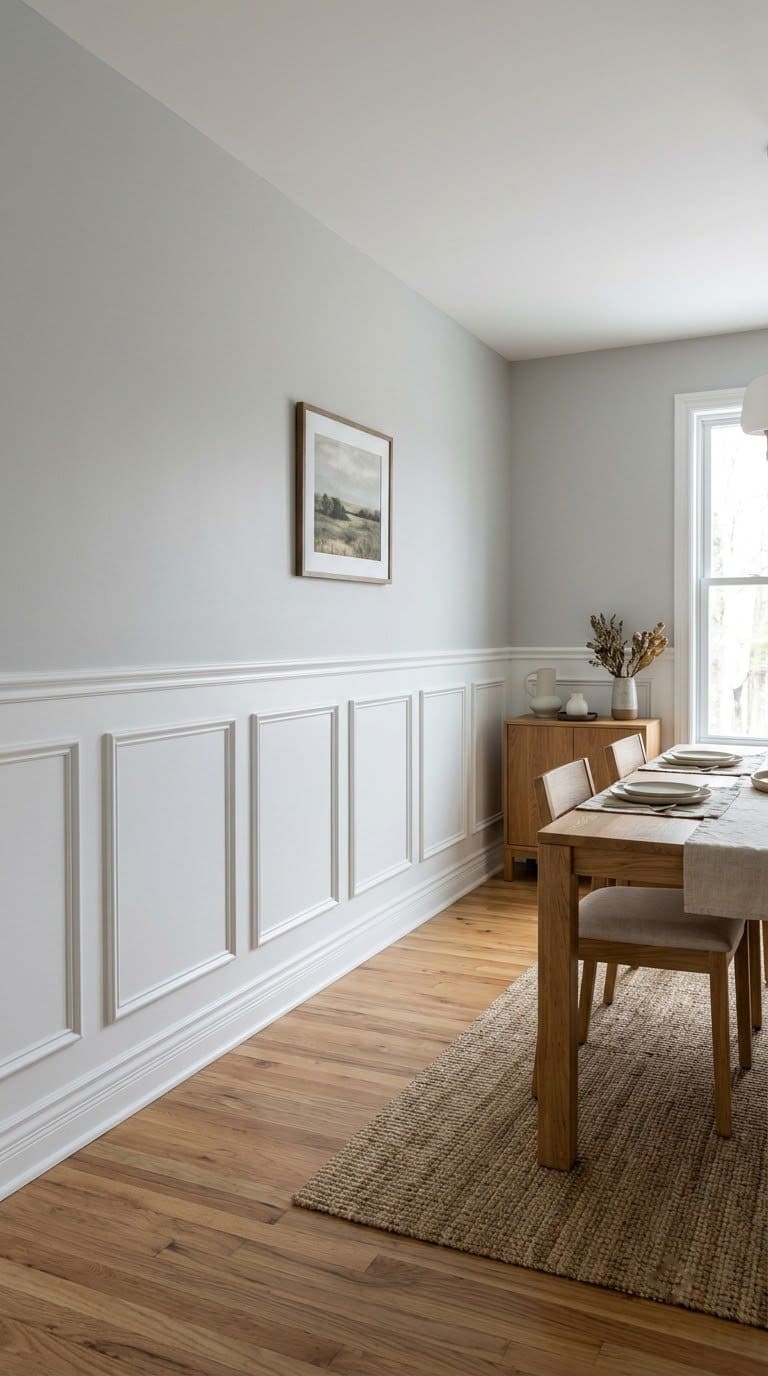
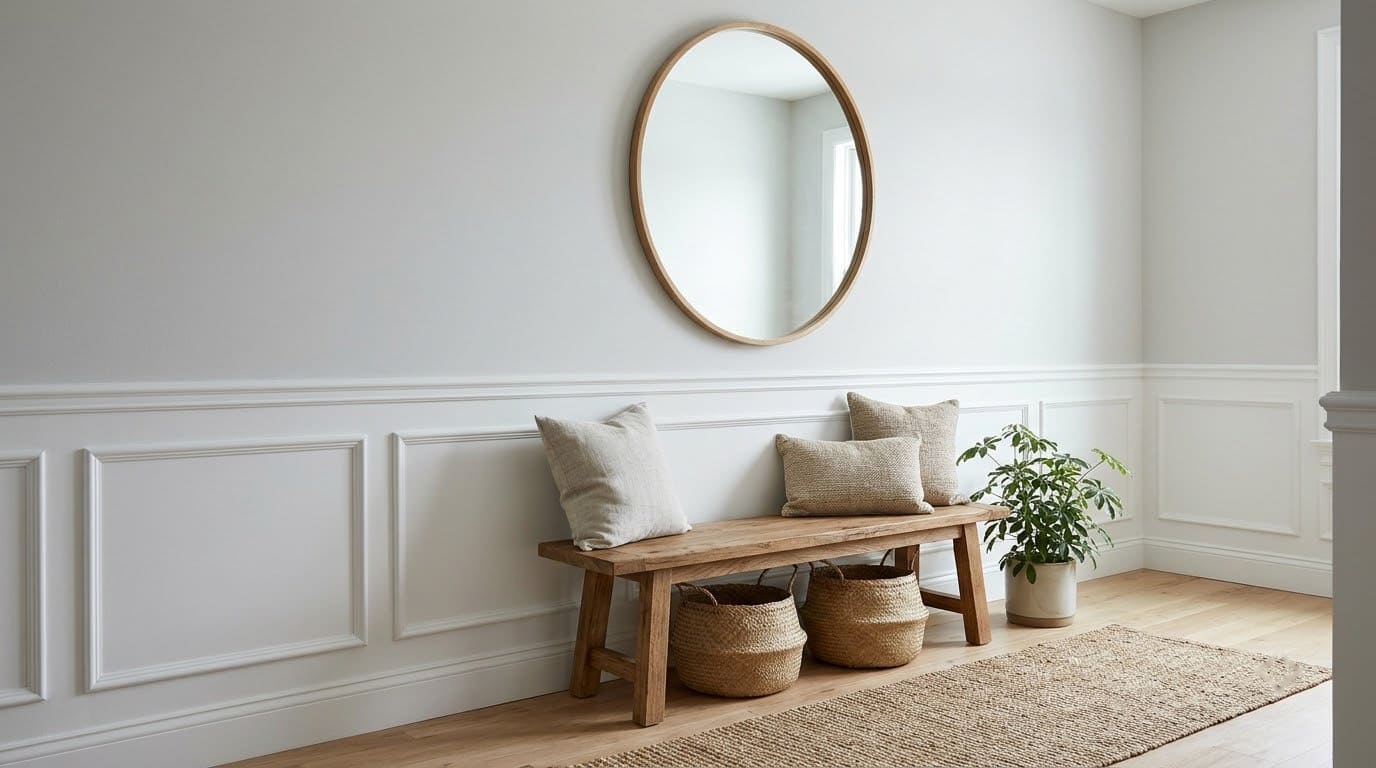
Picture-frame wainscoting is thin trim nailed into a grid of boxes. It looks like old paneling but costs far less.



This Old House says an easy version runs under $200 and takes 4 to 5 hours. It does about 33 linear feet in a day. The trim is also thin, so you don’t tear up your molding.
Best for: dining rooms, halls and nurseries.
You need: 1×4 trim for rails, thinner trim for stiles, wood glue, 18 gauge 1 inch nails, caulk and paint.
Steps:
- Find your top and bottom lines. Mark them with a level.
- Frame height equals the space from the baseboard to the chair rail, minus 7 inches. That leaves room for two 1×4 rails.
- Plan an odd number of frames. You need one more stile than frames.
- Cut the rails and stiles with 45 degree miters.
- Glue the back of each piece. Nail about every 10 inches.
- Caulk every seam. Fill nail holes.
- Prime. Paint at least two coats.
Style tip: Paint the trim and the wall the same satin white. The shadows do the design work. Hampton’s 36 inch height looks right in most rooms.
Watch out: Mark the layout on paper first. Uneven frames show right away.
2. Batten-Only Board and Batten
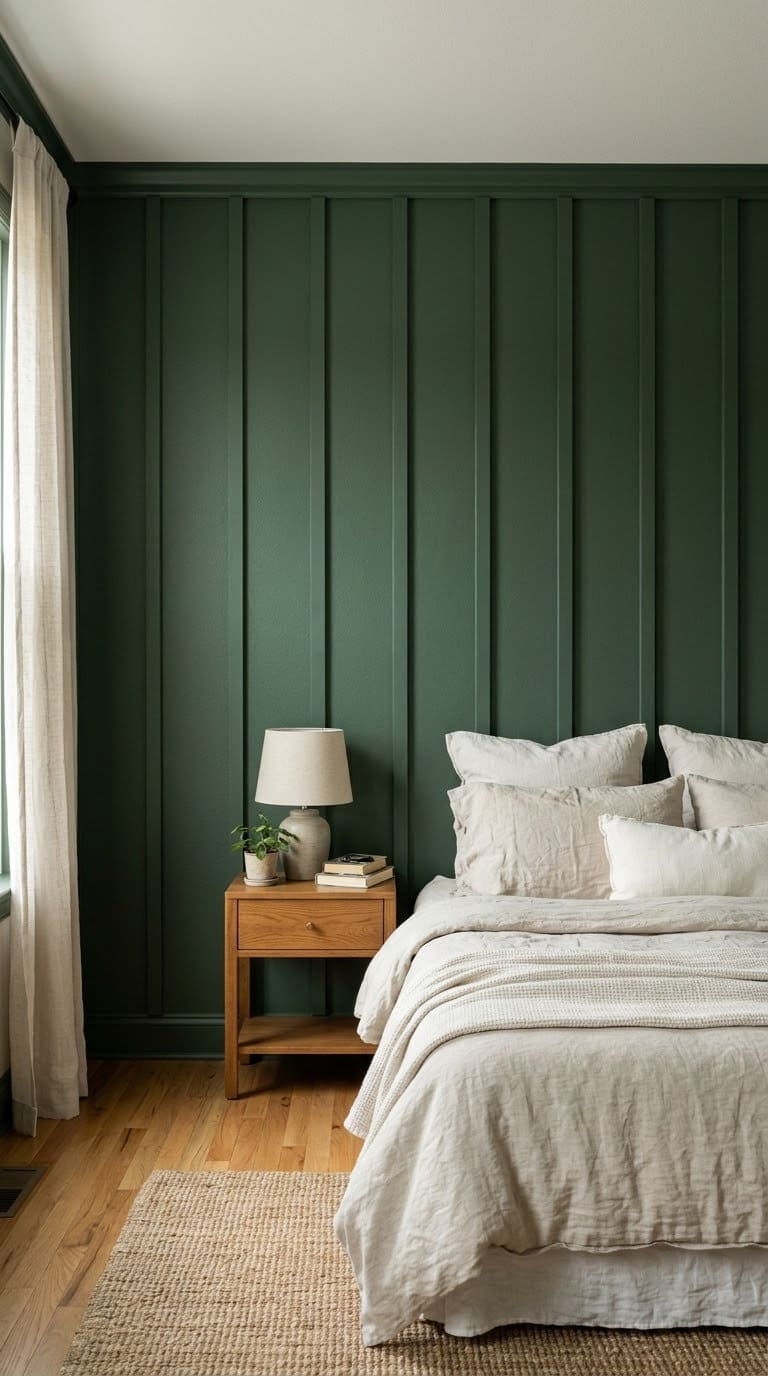
This is the simplest wall treatment. You nail thin vertical battens to a painted wall. For more looks, see our board and batten accent wall ideas.
One DIY tutorial reports about $200 and 6 hours for a whole wall. Another says to space battens about 16 inches apart and center them on the studs, with the top rail at 4 feet or less.
Best for: entryways and bedrooms.
You need: 1/2 inch thick battens about 2 1/2 inches wide, a top rail, a level, adhesive, caulk and paint.
Steps:
- Paint the wall first, in the final color.
- Decide on the top rail height. A rail at 4 to 6 feet is common.
- Measure the wall width. Divide it by your batten count to get even gaps. A 100 inch wall with 8 battens leaves about 11 inches between battens.
- Mark each batten on the wall with a plumb line.
- Glue and nail each batten. Check the level on every one.
- Caulk, fill and touch up the paint.
Style tip: Paint the wall and the battens a deep color. Navy and green look rich.
Watch out: Walls are rarely straight. Trust the level, not the ceiling.
3. X-Pattern (Barn Door) Wainscoting
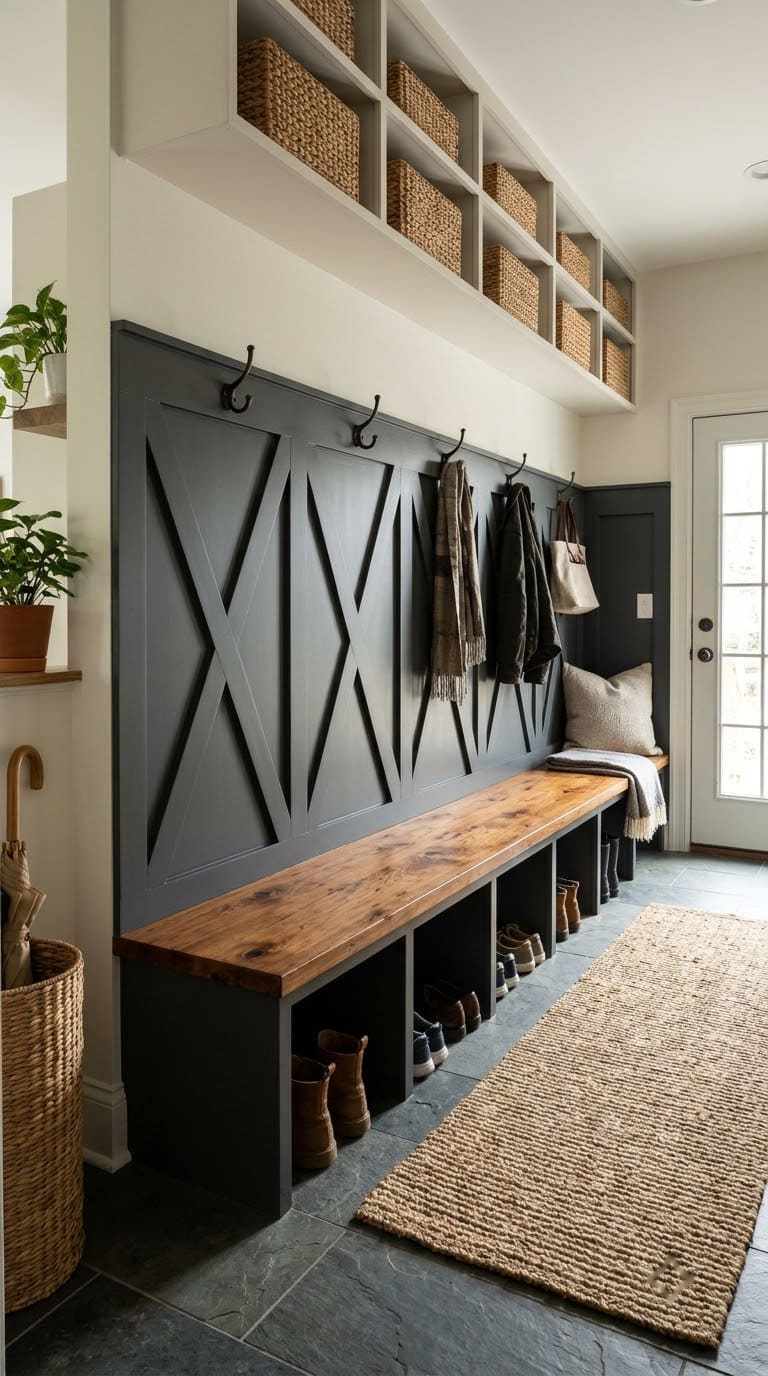
This one puts diagonal trim inside each frame to look like barn door braces. It looks rustic and strong. For a baby’s room, our nursery accent wall ideas show gentler options.
We didn’t find a tested source for this pattern. The steps below build on idea 1 and are our own method. Test on a scrap wall first.
Best for: mudrooms and dens.
You need: the picture-frame supplies, plus 1×3 boards for the diagonals.
Steps:
- Build the rails and stiles as in idea 1.
- Hold a 1×3 across a frame corner to corner. Mark the angle.
- Cut both ends at that angle. Test the fit.
- Cut a second piece the same way for the other diagonal.
- Notch or overlap the pieces where they cross.
- Glue, nail, caulk and paint.
Style tip: Paint it a dark charcoal. The X shapes read as a bold pattern.
Watch out: Each frame is slightly different. Cut every diagonal to its own frame.
4. Modern Planked Wall
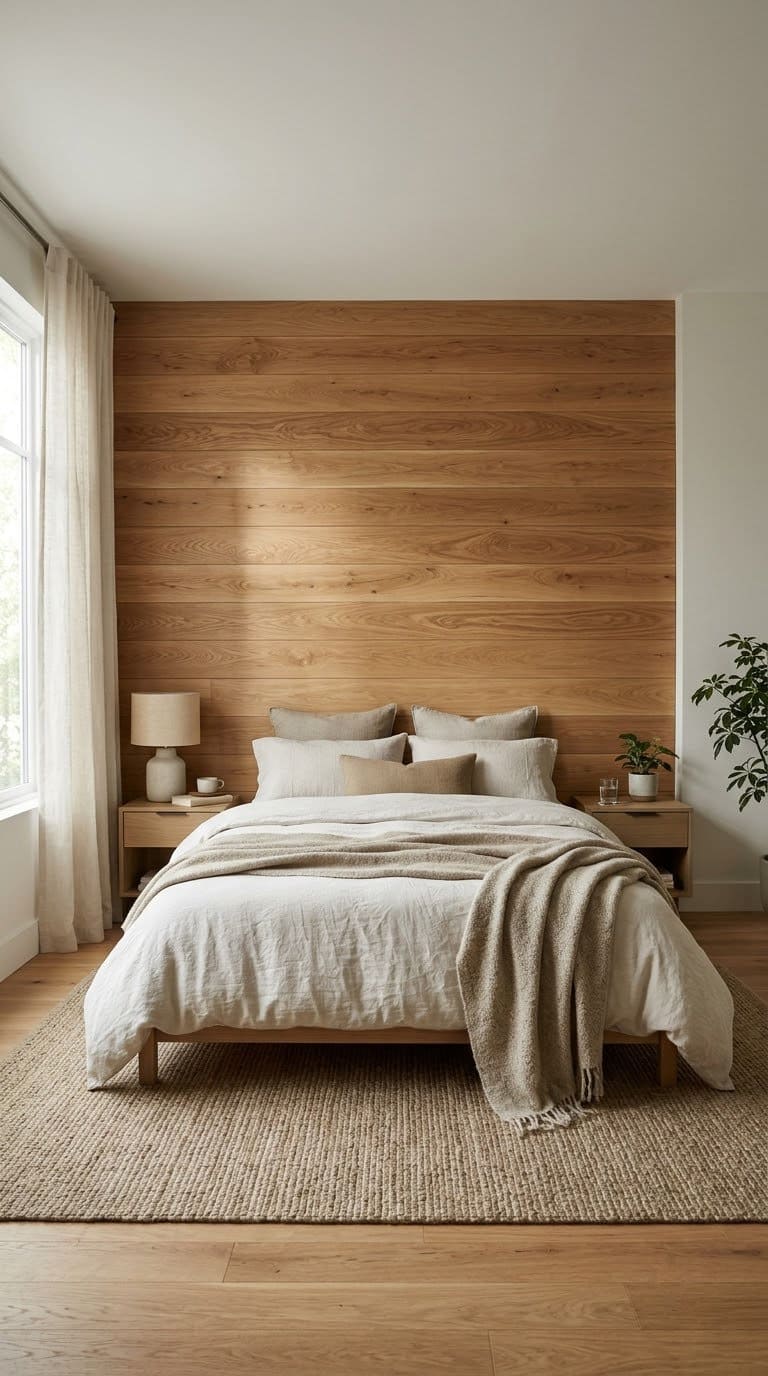
A plank wall is boards running side to side or up and down. It adds warmth and a clean line. See also our painted accent wall ideas.
One shiplap guide says to mark studs top to bottom, use 2 inch finish nails and set 1/8 inch spacers between boards. It also warns against skipping the wood’s rest time.
Best for: nooks, bedrooms and offices.
You need: 1×6 or 1×8 boards, spacers, a level, finish nails and a jigsaw.
Steps:
- Let the boards sit in the room for a few days.
- Find the studs. Mark them with painter’s tape.
- Start at the bottom. Check level on the first board.
- Set a spacer on top. Place the next board.
- Nail into every stud. Keep the nail line straight.
- Cut around outlets with the power off.
- Fill, sand and paint or stain.
Style tip: Run the planks up and down for a taller feel.
Watch out: A crooked first board throws off the wall. Take your time on row one.
5. Beadboard Wall Shelf
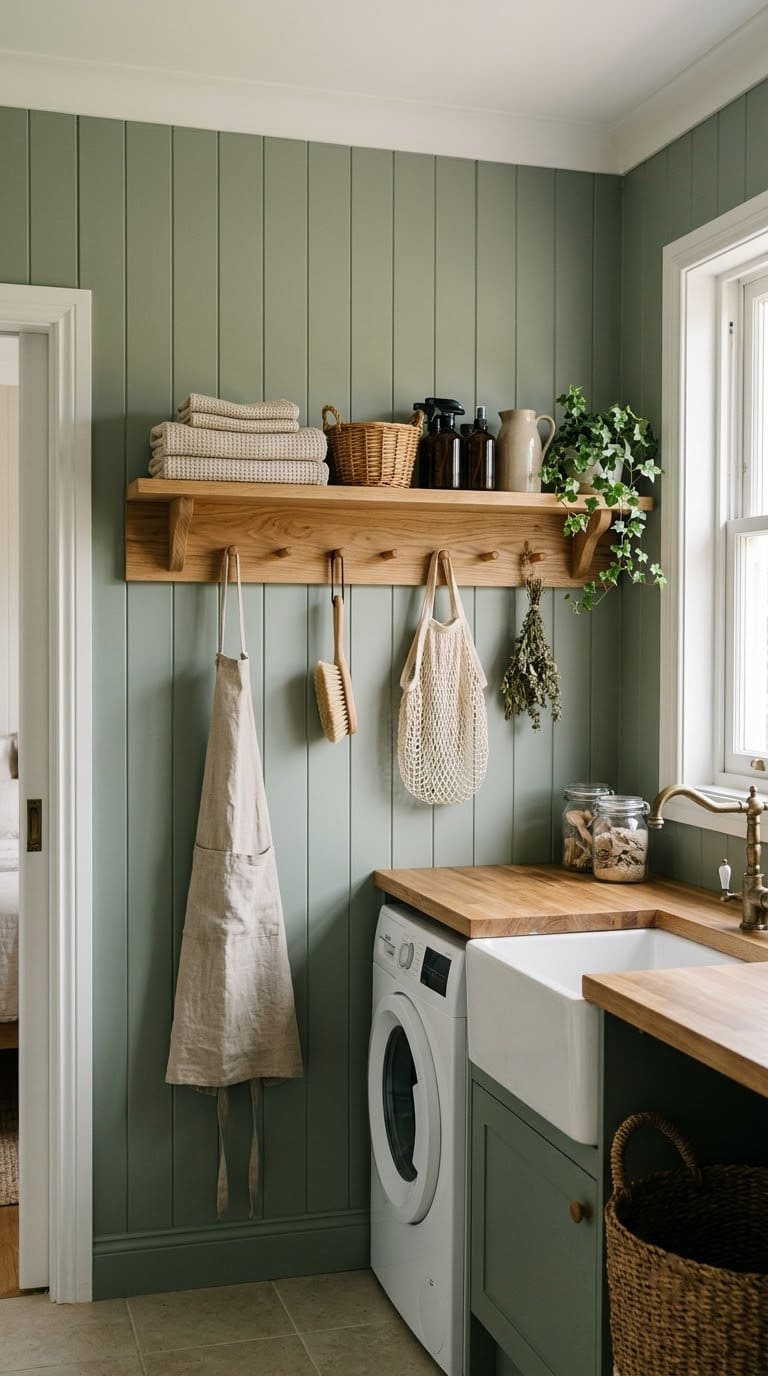
Beadboard has grooved lines that look like a classic cottage wall. A shelf on top adds a place to put things. In a bathroom, see our bathroom wainscoting ideas.
Installers suggest stacking beadboard panels with spacers for about 72 hours before you hang them. That lets the wood settle in your home. They also use 2 inch finish nails and construction adhesive over drywall.
Best for: laundry rooms, kitchens and kids’ rooms.
You need: beadboard panels, a 1×4 cap, a shelf board, brackets, adhesive and paint.
Steps:
- Rest the panels in the room for three days.
- Cut panels to height. Dry fit them.
- Glue and nail each panel to the studs.
- Cap the top edge with a 1×4.
- Mount a shelf on brackets into studs.
- Caulk, fill and paint.
Style tip: Paint beadboard a soft sage. Hang pegs under the shelf.
Watch out: Don’t hang a heavy shelf into drywall alone. Use studs.
6. The Paneled Wall
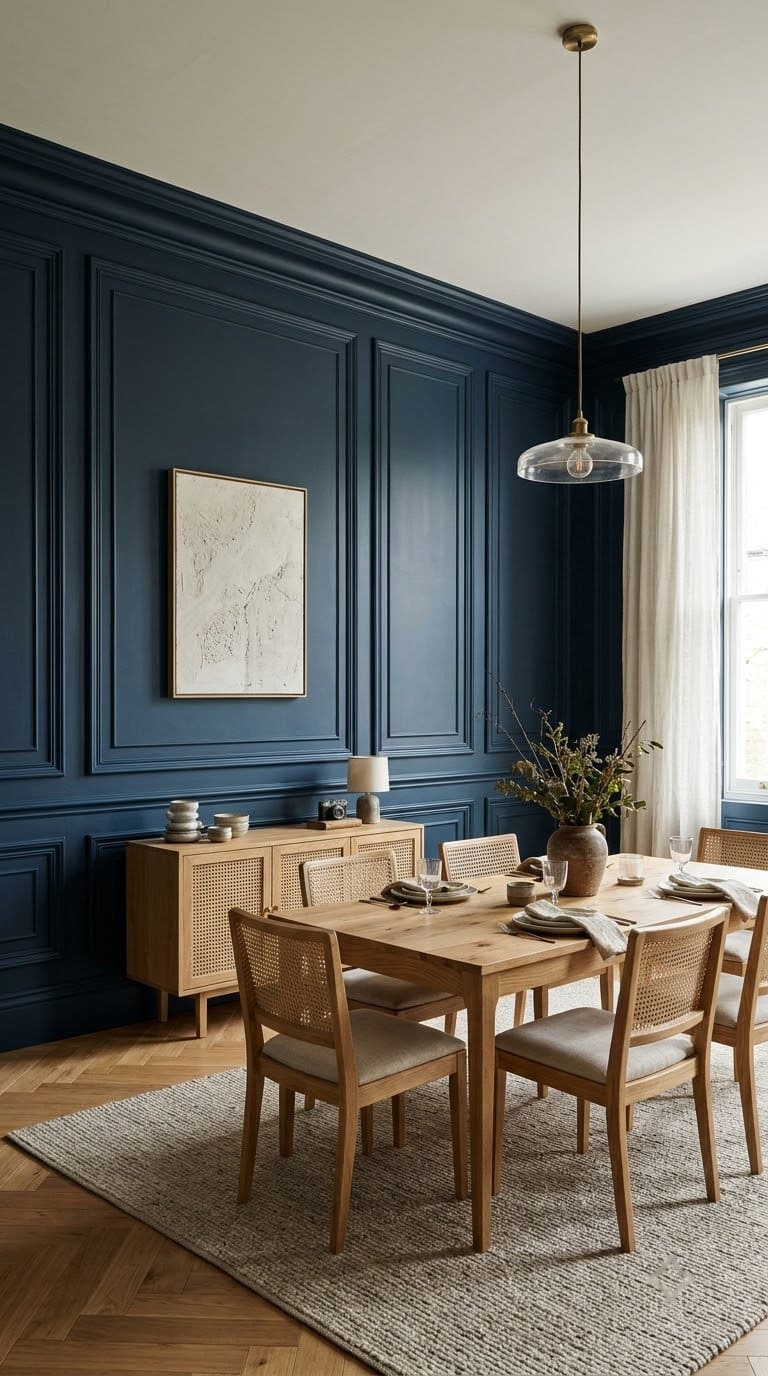
A paneled wall covers the whole wall in frames, from the baseboard to the ceiling. It’s the most formal look here.
Designer Lynn Pries uses wider panels for formal rooms. Plan it on paper first, because it’s the hardest job on this list.
Best for: dining rooms and libraries.
You need: the picture-frame supplies in larger quantity, plus a crown or cap molding.
Steps:
- Measure the wall height and width.
- Choose how many panels fit evenly.
- Mark all lines on the wall with a level.
- Build the frames in a row.
- Nail, caulk and fill.
- Paint with a small roller and a brush.
Style tip: Paint the whole wall one deep color. Panels look expensive.
Watch out: Order extra trim. You will make cutting errors.
7. Beadboard Backdrop
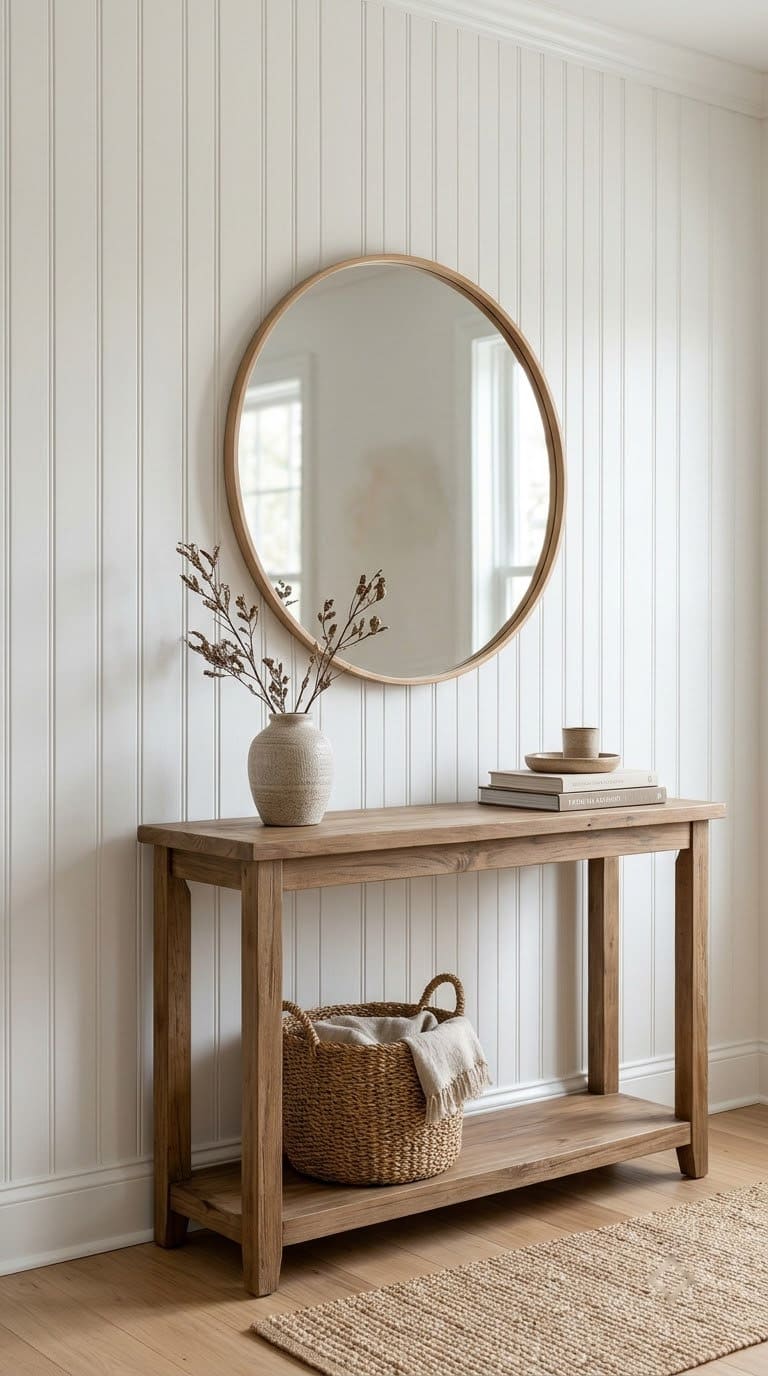
A beadboard backdrop is a small section behind a bed, desk or console. It’s cheaper than a whole wall.
One home tutorial totaled about $73 for a small beadboard wall, with sheets near $24 each.
Best for: behind a headboard, desk or entry table.
You need: one or two beadboard sheets, trim, adhesive and a brad nailer.
Steps:
- Measure the width of your furniture. Add 6 inches each side.
- Cut the beadboard to size.
- Glue and nail to studs.
- Add a trim cap on top.
- Caulk, fill and paint.
Style tip: Paint the backdrop a color that matches your bedding.
Watch out: Keep the backdrop at a consistent height with other trim.
8. Breakfast Nook Plank Wall
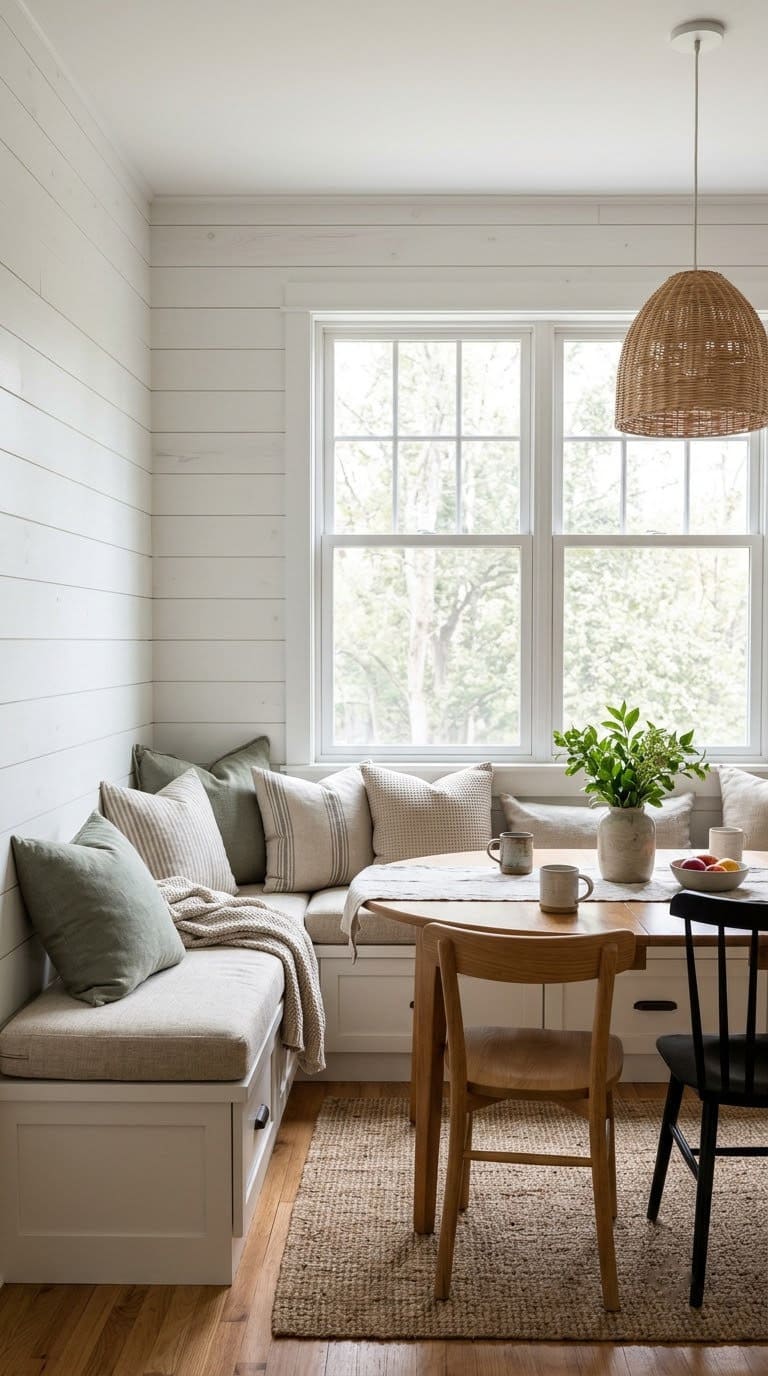
A nook is a small space, so a plank wall makes a big change. It also hides scuffs from chair backs. Pair it with a gray accent wall nearby for contrast.
Best for: breakfast nooks and window seats.
You need: planks, finish nails, spacers and paint or stain.
Steps:
- Measure the nook width and height.
- Cut the planks to fit.
- Start from the bottom edge.
- Nail each plank into studs.
- Trim the edges.
- Seal or paint.
Style tip: Run the planks horizontally to make a narrow nook feel wider.
Watch out: Check for outlets and switches before you cut.
9. Full-Board Board and Batten
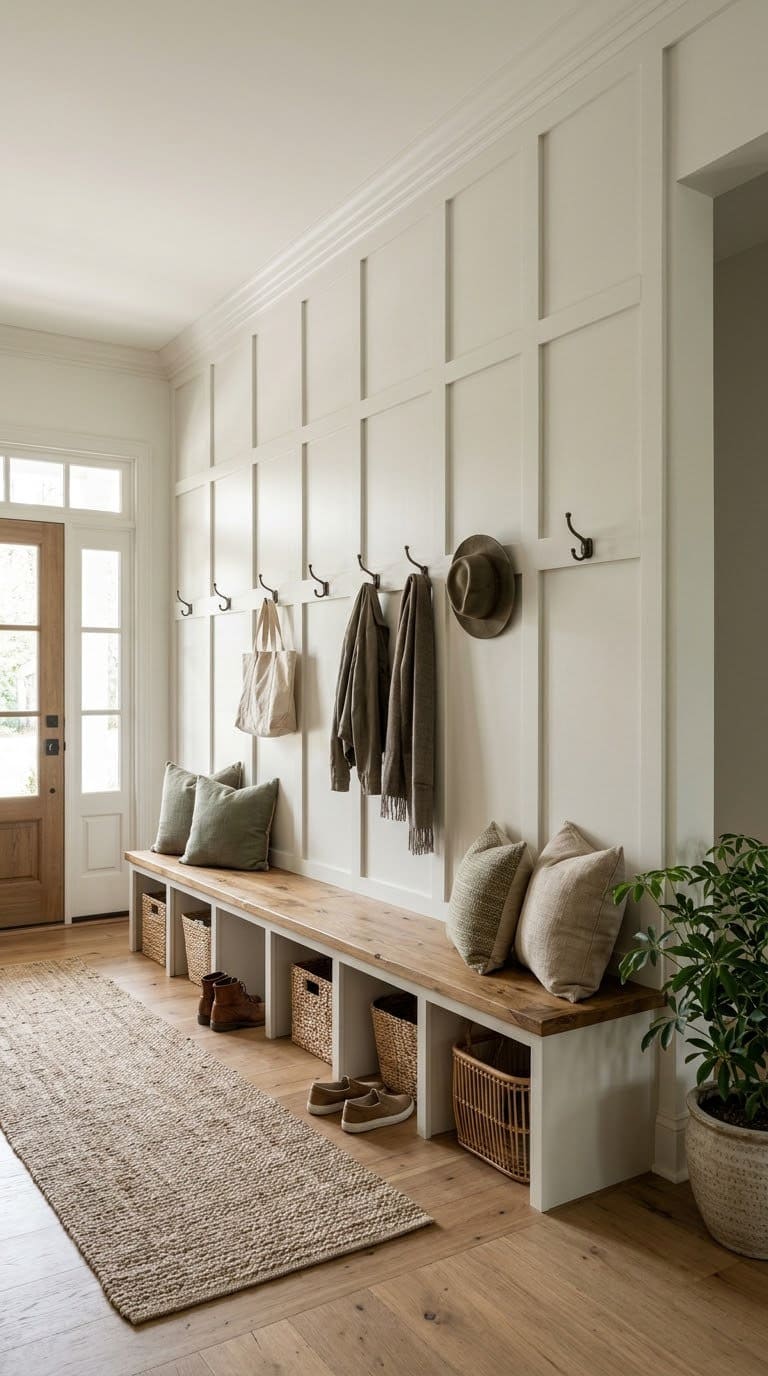
This version uses wide boards with narrow battens over the seams. It looks substantial.
One installer guide uses 1×12 boards, 1×2 battens and 15 gauge finish nails. It sets a 1/4 inch gap between boards, glues each board and caulks the seams.
It notes that wood moves more across its width than along it. It lists $900 to $2,000 if you buy everything, with 16 hours of work and 22 hours in total.
Best for: entryways and mudrooms.
You need: 1×12 boards, 1×2 battens, a 1×6 baseboard, adhesive, caulk and paint.
Steps:
- Mark a plumb line on the wall.
- Cut the boards. Stay within 1/4 inch of your length.
- Glue and nail the first board to the plumb line.
- Use a 1/4 inch gap between boards.
- Cover each gap with a batten.
- Caulk, fill and paint two coats.
Style tip: Paint it all one color for a quiet, rich look.
Watch out: Budget for waste, tools and paint. The cost range is wide.
10. Rustic Board Focal Wall
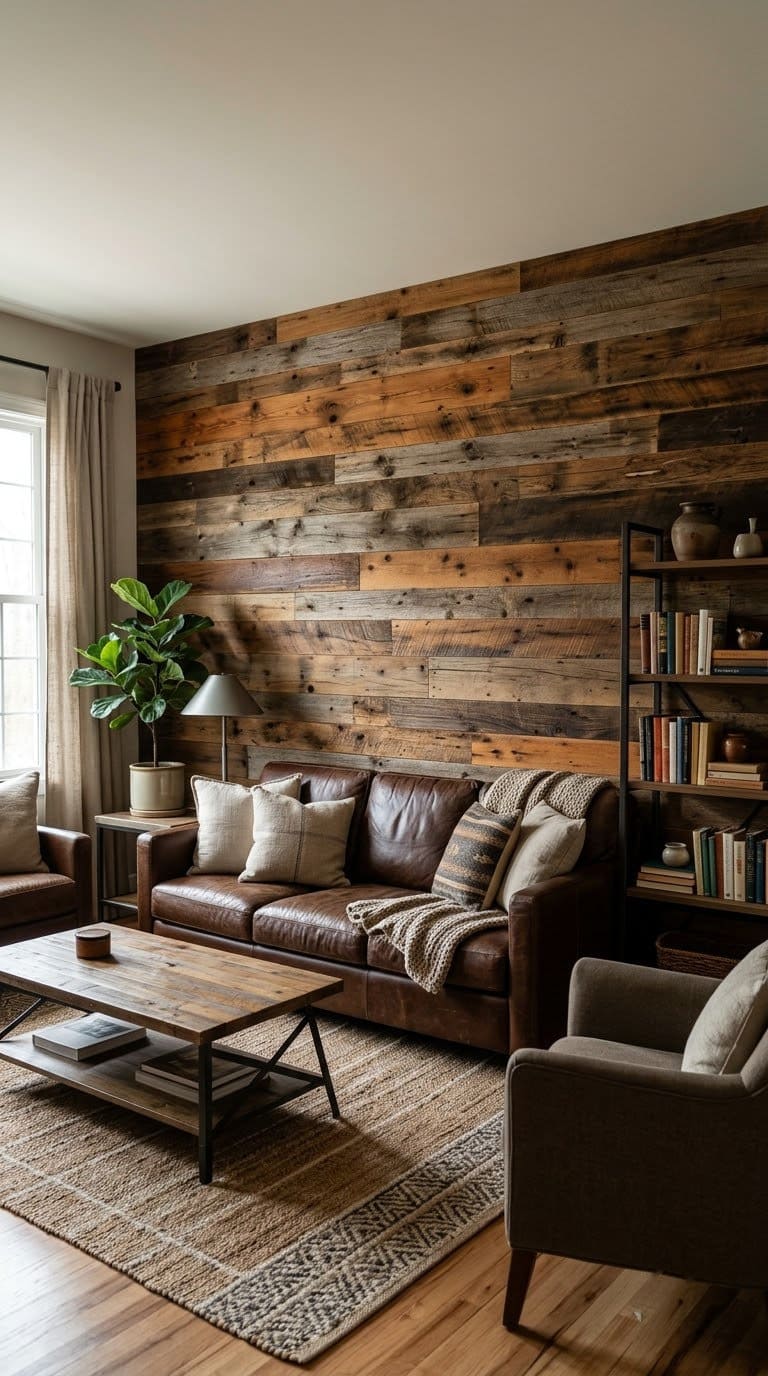
A rustic wall uses rough or reclaimed boards in mixed tones. It brings a lot of warmth to one wall.
Best for: dens, bars and bedrooms.
You need: reclaimed or rough-sawn boards, finish nails, a stud finder and a clear sealer.
Steps:
- Check old boards for old paint, nails and rot.
- Remove nails. Brush off dust.
- Lay out the boards on the floor first.
- Mix tones across the wall.
- Nail into studs.
- Seal with clear finish.
Style tip: Mix widths for a natural look.
Watch out: Old painted wood can hold lead paint. Test it, and don’t sand it dry.
How Much Do DIY Wall Treatments Cost?
Cost swings with wood and the wall size. Cost guides put DIY wainscoting at about $1 to $31 per square foot, and pro installation at about $7 to $40.
Use this table. These are source numbers where noted, and our own ranges otherwise.
| Project | Reported cost | Source note |
|---|---|---|
| Easy picture-frame wainscoting | Under $200 | Easy-wainscoting guide |
| Batten-only wall | About $200 | One DIY tutorial |
| Beadboard backdrop | About $73 | One home tutorial |
| Full board and batten | $900 to $2,000 | One installer guide |
Cheaper paths: use MDF trim, buy 1x2s instead of 1x12s, and cover one wall only.
Common Mistakes to Avoid
Starting without a plan. Draw the wall and your layout first.
Hanging trim on a crooked wall. Use a level on every piece.
Skipping caulk. Gaps look messy under paint.
Nailing without finding studs. Boards will loosen over time.
Forgetting the outlets. Plan cut-outs and turn off power first.
Painting before you fill holes. Every nail dent will show.
Your Weekend Plan
Friday evening: measure the wall, mark studs and buy supplies. Saturday: cut and nail the trim, then caulk. Sunday: fill, prime and paint two coats.
FAQ
What is the easiest DIY wall treatment?
Batten-only board and batten. You nail thin battens to a painted wall. It needs few cuts and little math.
How high should wainscoting be?
About one-third of the wall height. That is about 32 inches on an 8 foot wall and 36 inches on a 9 foot wall. Never stop halfway up the wall.
How much does DIY wainscoting cost?
Easy versions run under $200 for a small wall. Full board and batten with every tool can reach $900 to $2,000.
Do I need to worry about lead paint?
If your home was built before 1978, assume it may have lead paint. Test first. Don’t dry sand it.
What is best for a nursery?
Picture-frame wainscoting or beadboard at about 36 inches. Keep shelves and heavy items away from the crib. This is our advice.
Related Posts

Never miss an update — choose FarmFoodFamily as your preferred source on Google.
How it works: Tap the button below to open Google's settings page, then check the box next to FarmFoodFamily.
Tap the checkbox to turn it blue — that's how you know it's set.