20 Clever Ideas to Hide Your Trash Cans Outside (That Raccoons Can’t Undo)
Twenty real ways to disguise your garbage bins, plus the actual dimensions, wildlife-proofing, and HOA rules most “hide your trash cans” guides skip entirely.

Never miss an update — choose FarmFoodFamily as your preferred source on Google.
How it works: Tap the button below to open Google’s settings page, then check the box next to FarmFoodFamily.
Tap the checkbox to turn it blue — that’s how you know it’s set.
Every house has one: the spot by the garage or side gate where the trash and recycling bins live, usually in full view of the driveway, usually the least attractive corner of the narrow strip along the side of the house that gets the least design attention of anywhere on the property.
Hiding them is a genuinely solvable design problem. What’s less obvious is that a cover built purely for looks can trap odor, block trash-day access, or fail to keep a determined raccoon out entirely.
How Big Should a Trash Can Enclosure Be, and Will It Keep Wildlife Out?
Most “hide your trash cans” articles just say “build a box.” Here’s what actually matters before you do.
A standard 96-gallon wheeled bin runs roughly 45 inches tall, 26 inches wide, and 34 inches deep, and purpose-built enclosure manufacturers like CITIBIN size their large wheeled-bin enclosures with a 30-inch front door clearance so a full bin actually rolls in and out without lifting it over a lip or wrestling it through a narrow gap.
Undersize the door and you’ll stop using the “hidden” enclosure within a month.
Quick answer: A trash can enclosure needs two things most decor guides skip: real door clearance and a real lid seal. A standard 96-gallon wheeled bin measures about 45 inches tall, 26 inches wide, and 34 inches deep, so purpose-built enclosures typically leave around 30 inches of front door clearance for the bin to roll through without lifting. Separately, the public-health vector-control standard most municipal codes follow requires containers to be rodent-proof, insect-proof, and watertight, with no gap larger than a quarter inch between a closed lid and the can’s body. Hiding a bin visually behind a screen or box does nothing to solve wildlife access on its own, that depends entirely on the lid seal and a real latch, not the enclosure’s looks. Most suburban HOA “screened from view” rules are a design requirement, not a ban, while true bear-resistant enclosure codes in mountain jurisdictions are a separate, stricter standard.
Second: the same public-health vector-control standard used by most municipal codes calls for containers that are rodent-proof, insect-proof, and watertight, with a tight-fitting lid that leaves no gap larger than a quarter inch between the lid and the body when closed. That number matters more than it sounds like it should, a quarter-inch gap is roughly the threshold that keeps out the animals actually capable of working a lid open.
Answer 4 quick questions and get matched to the exact fix for your yard — drainage, budget, layout, or something else entirely.
Take the Free QuizA pretty screen around a can with a loose or missing lid doesn’t solve the real problem, it just hides it from view while the actual access point stays open.
Third, know the difference between an HOA screening rule and an actual wildlife code.
Most suburban HOAs just require bins to be “screened from view,” which is a design brief, not a fight, pick an approved style and you’re done. But if you’re in bear country, some mountain and rural jurisdictions have real bear-resistant enclosure codes on the books, typically requiring a fully enclosed five-sided structure with a genuine latching mechanism, a meaningfully stricter standard than a suburban privacy screen. Check which one actually applies to you before building anything.
One more thing worth deciding before you build: where the cans live in the first place. Sarah Carr, Principal at Word + Carr Design Group, puts it simply: “It’s easier to hide utilities when they’re not in an important view.”
If you’re planning a bigger yard renovation anyway, moving the storage spot itself out of the main sightline does more work than any screen built around a bad location.
With those numbers in hand, here are 20 real ways to make the cans disappear without creating a new problem.

Purpose-built version of ideas 8/13, sized for a single wheeled bin, 4.2 stars / 346 ratings, live-verified $129.99
Most yard problems trace back to one specific, fixable cause. Find yours in 4 quick questions.
Take the Free QuizThis post contains affiliate links. We may earn a commission on qualifying purchases at no extra cost to you.
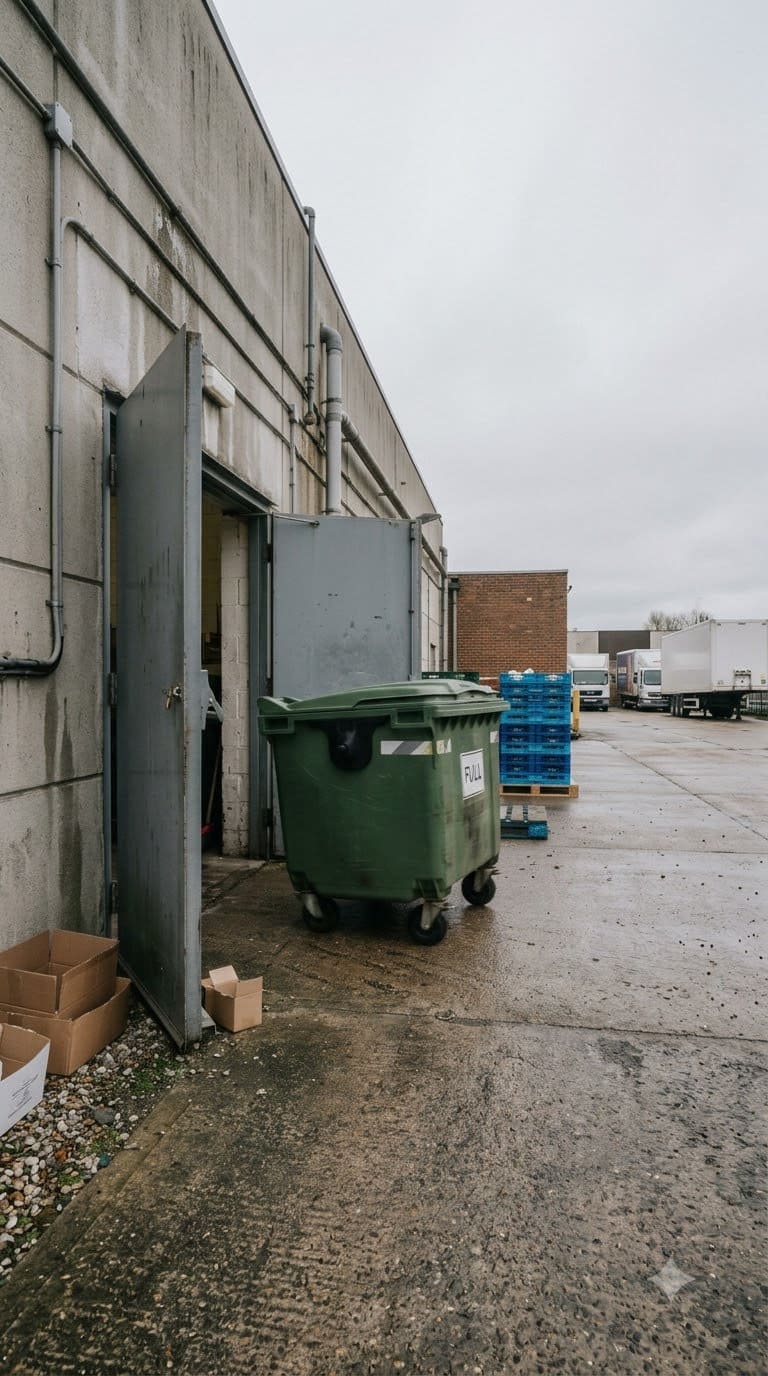
Which Trash Can Cover Is Actually Best? A Quick Comparison
Before the full list, here’s how the four main approaches compare on the things that actually decide whether you keep using the enclosure: wildlife-proofing, cost, upkeep, and trash-day ease.
| Approach | Wildlife-Proofing | Typical Cost | Maintenance | Trash-Day Ease |
|---|---|---|---|---|
| Landscaping (shrubs, hedges, vines) | None on its own, needs a latch/lid add-on | DIY-cheap to moderate | Ongoing (pruning, growth checks 2x/year) | High, no door to navigate |
| Slatted/lattice/pallet enclosures | Good if paired with a real lid latch | DIY-cheap to moderate | Low, occasional restaining | Depends entirely on door width |
| Solid structures (shed, masonry, prefab) | Best when combined with a proper latch, needs deliberate vents | Bigger investment | Low, but repairs are a bigger job | High if door is sized correctly |
| Raccoon-proof latch/tie-down kit alone | Highest impact for the lowest cost | DIY-cheap | Very low | No change, add-on only |
Which Landscaping Options Work Best for Hiding Trash Cans?
1. A dense evergreen shrub screen
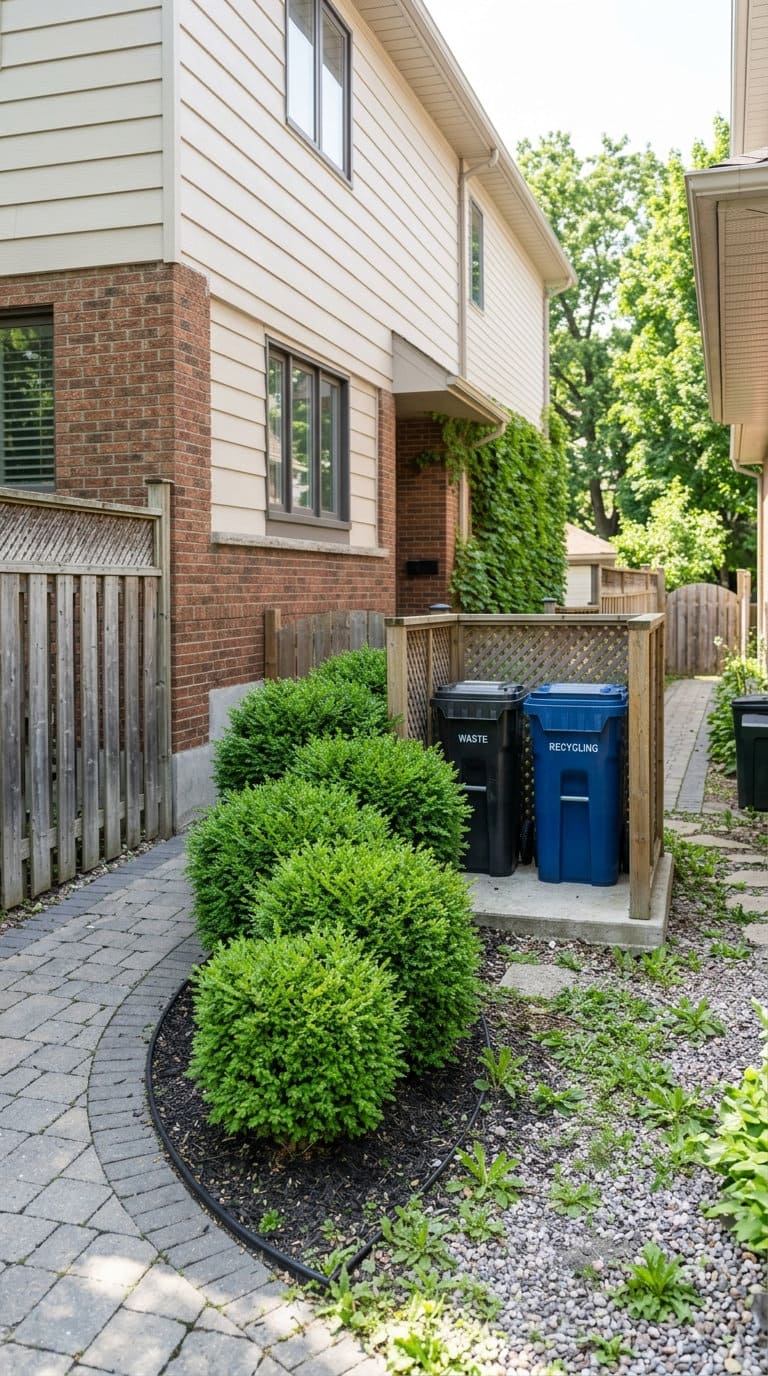
A staggered row of boxwood or holly, spaced 18-24 inches apart for boxwood or 3-4 feet for a faster-growing holly variety, planted 2-3 feet out from the enclosure area hides the bins from the street while staying green year-round, unlike a deciduous hedge that goes bare every winter right when the view matters most for curb appeal.
Leave real walking room, at least 24-30 inches, between the shrubs and the cans themselves, not just a decorative gap, you’ll be rolling a full 26-inch-wide bin through that space every collection day.
Budget tier: DIY-cheap with young 1-2 gallon stock, moderate for mature 5-gallon specimens that fill in immediately.
2. A planter-top enclosure box
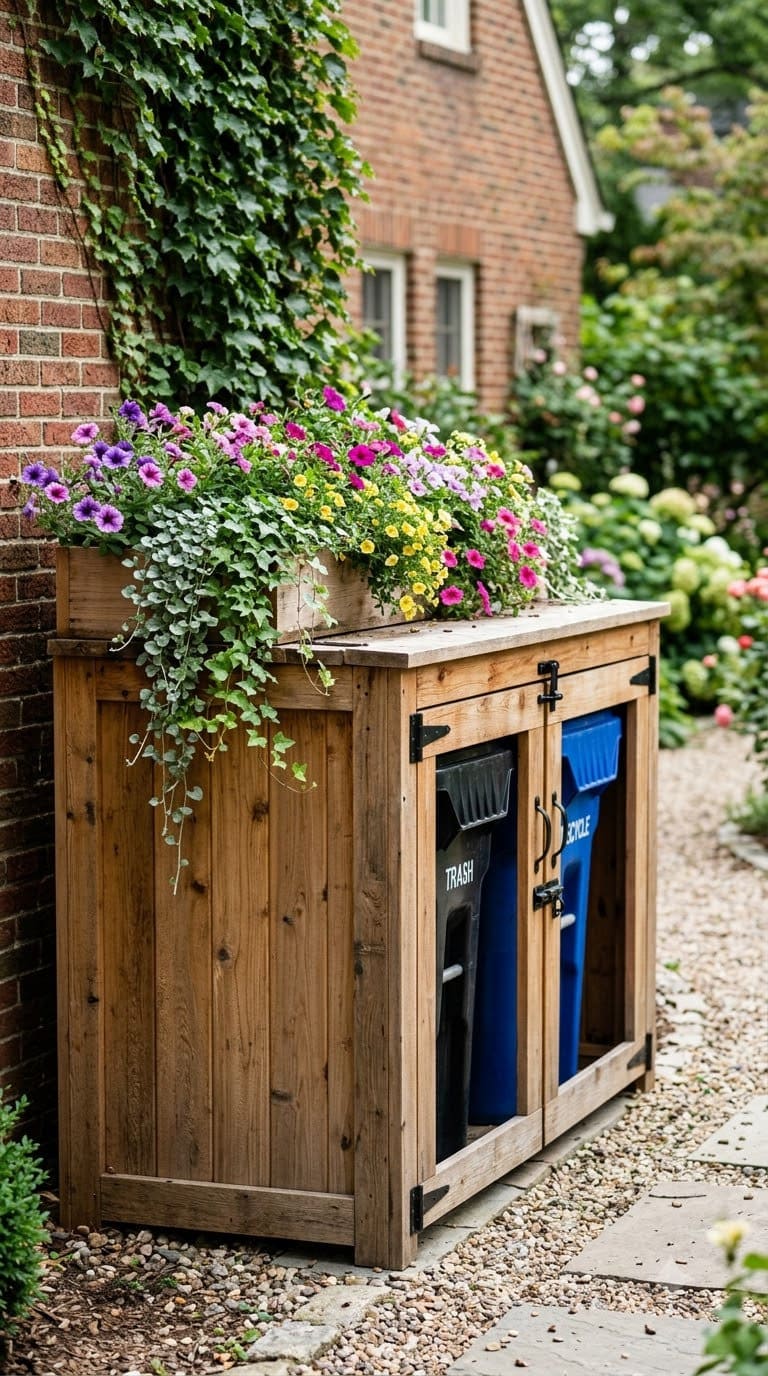
A simple wood box sized to the bins (build the interior a couple of inches larger than the bin’s 26×34 inch footprint), topped with a shallow 6-8 inch deep planter box growing trailing flowers or herbs, turns the ugliest spot in the yard into the one with the prettiest planter.
Keep the box’s lid separate from the bin lids themselves, hinge the planter section on its own frame, and make sure the planter’s weight (a filled 6-inch-deep planter can run 30-40 pounds with wet soil) doesn’t sit directly on a hinge you’ll need to lift on trash day.
Pairs well with idea 6’s swing-door cedar box if you want the planter feature without building the whole enclosure from scratch. Budget tier: moderate.
3. A vine-covered trellis enclosure
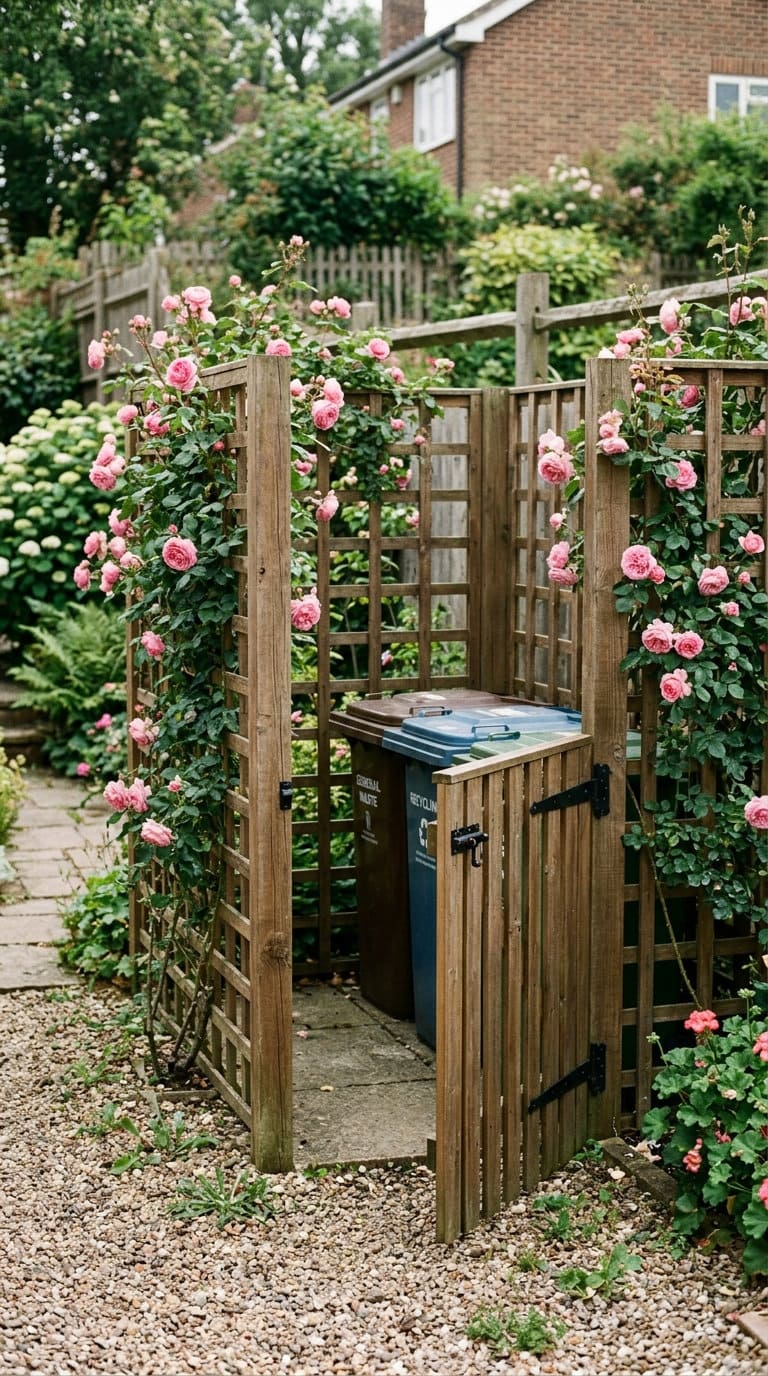
Multiple trellis panels, each roughly 4×6 feet, joined into a three-sided surround, planted with climbing roses or wisteria, gives real height and screening without a solid wall.

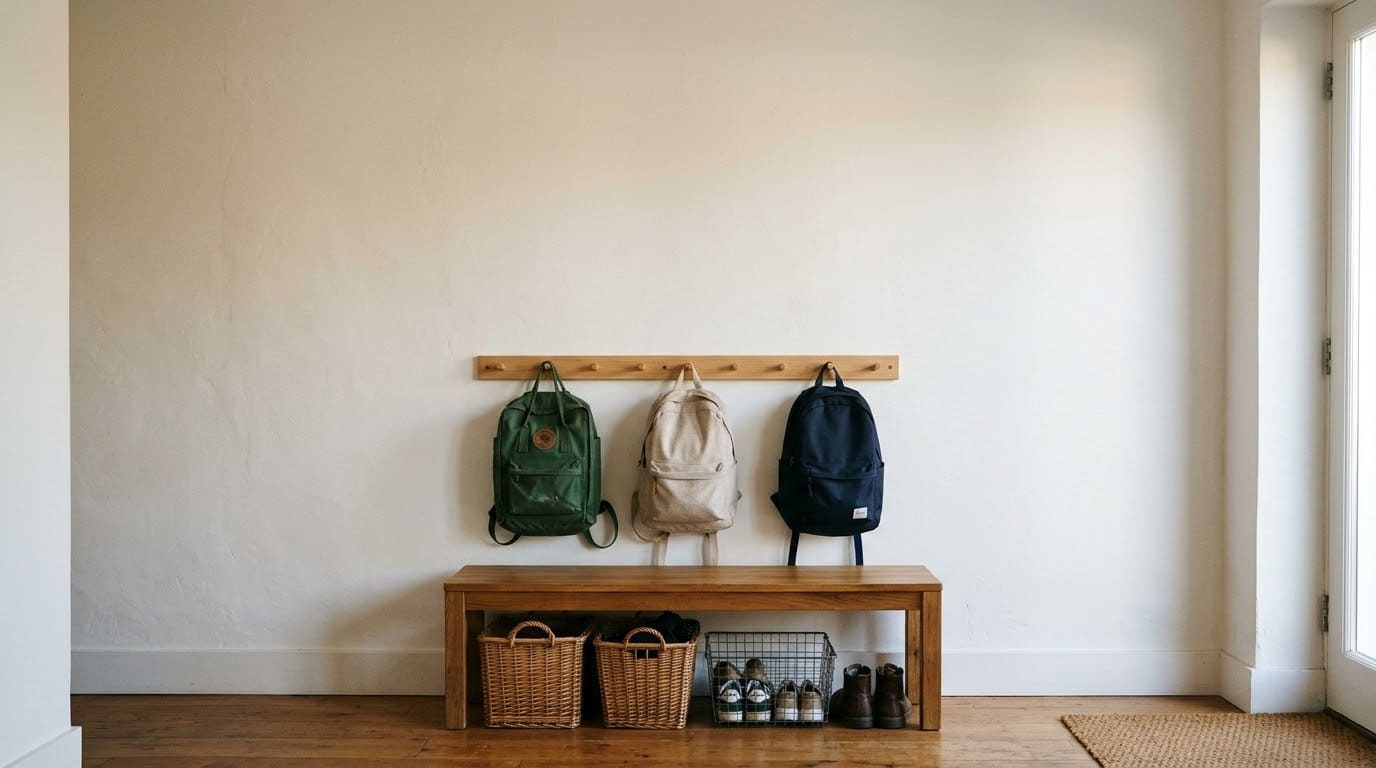
As with any vine option, check growth twice a season, fast climbers like wisteria can put on 10+ feet of new growth in one season and will happily work their way into door hinges and latch mechanisms if left unchecked, which is exactly the kind of thing that turns a simple trash-day chore into a fifteen-minute untangling job.
Budget tier: DIY-cheap for the trellis, moderate once mature plants are established.
The average homeowner spends $616/year on yard fixes that don't address the real problem. Find out what yours actually is — before you spend another dollar.
Take the Free Quiz4. A bamboo screen surround
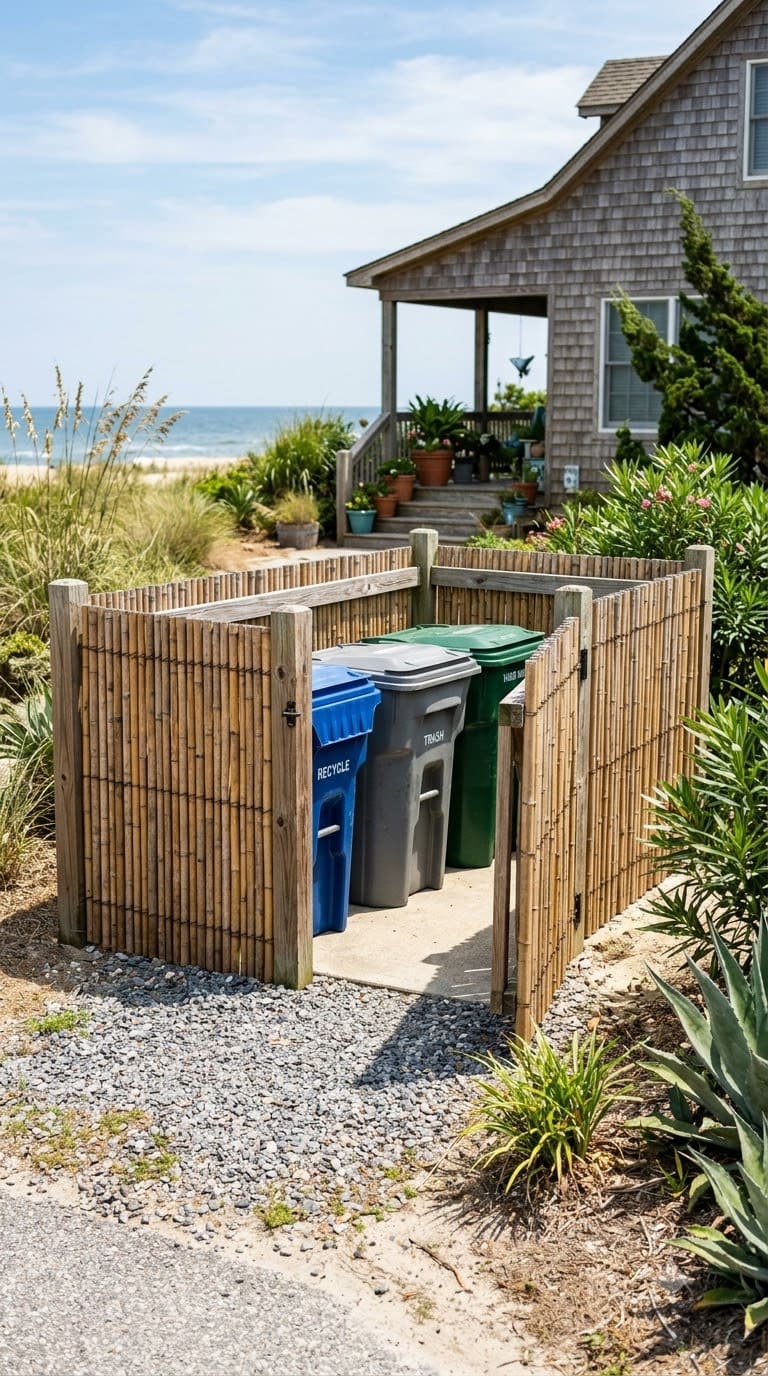
Rolled bamboo fencing (typically sold in 6×16 foot rolls) on a simple 2×2 frame reads more casual and coastal than a painted wood box, and it’s one of the cheaper true screening materials per square foot, often less than half the cost of milled cedar for the same coverage.
If you want the enclosure to tie into a bigger yard theme, there’s more on matching bamboo screening to different house styles worth a look. Budget tier: DIY-cheap.
5. A living hedge fence extension
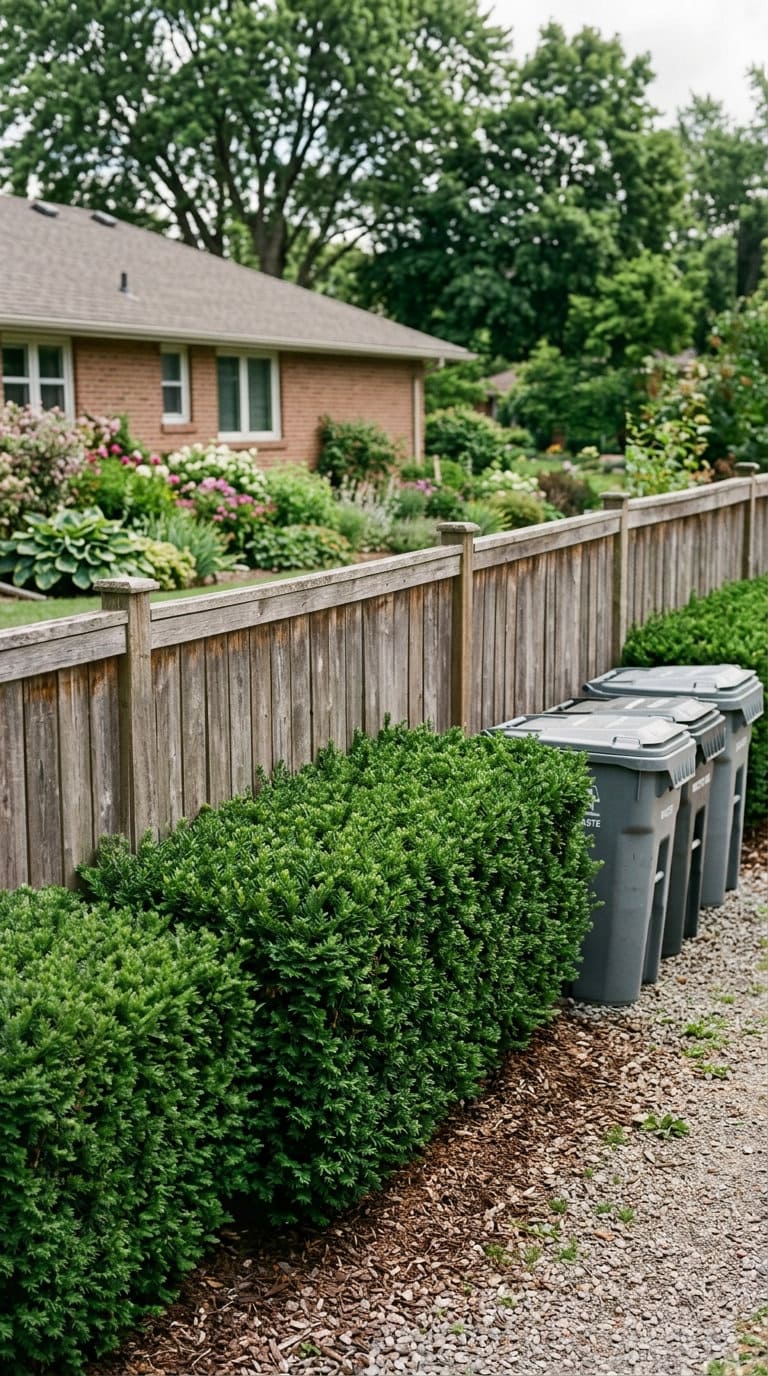
If you already have a fence running along the property line, extending a hedge 2-3 feet along its base specifically at the bin location blends the storage spot into the existing landscape line instead of creating an obviously separate feature.
Best for side yards where the cans sit against a fence anyway rather than freestanding in the open, since the fence itself already handles half the screening and the hedge only needs to cover the remaining sightline from the street or driveway. Budget tier: DIY-cheap to moderate.
Which Structures Make the Best Trash Can Enclosures?
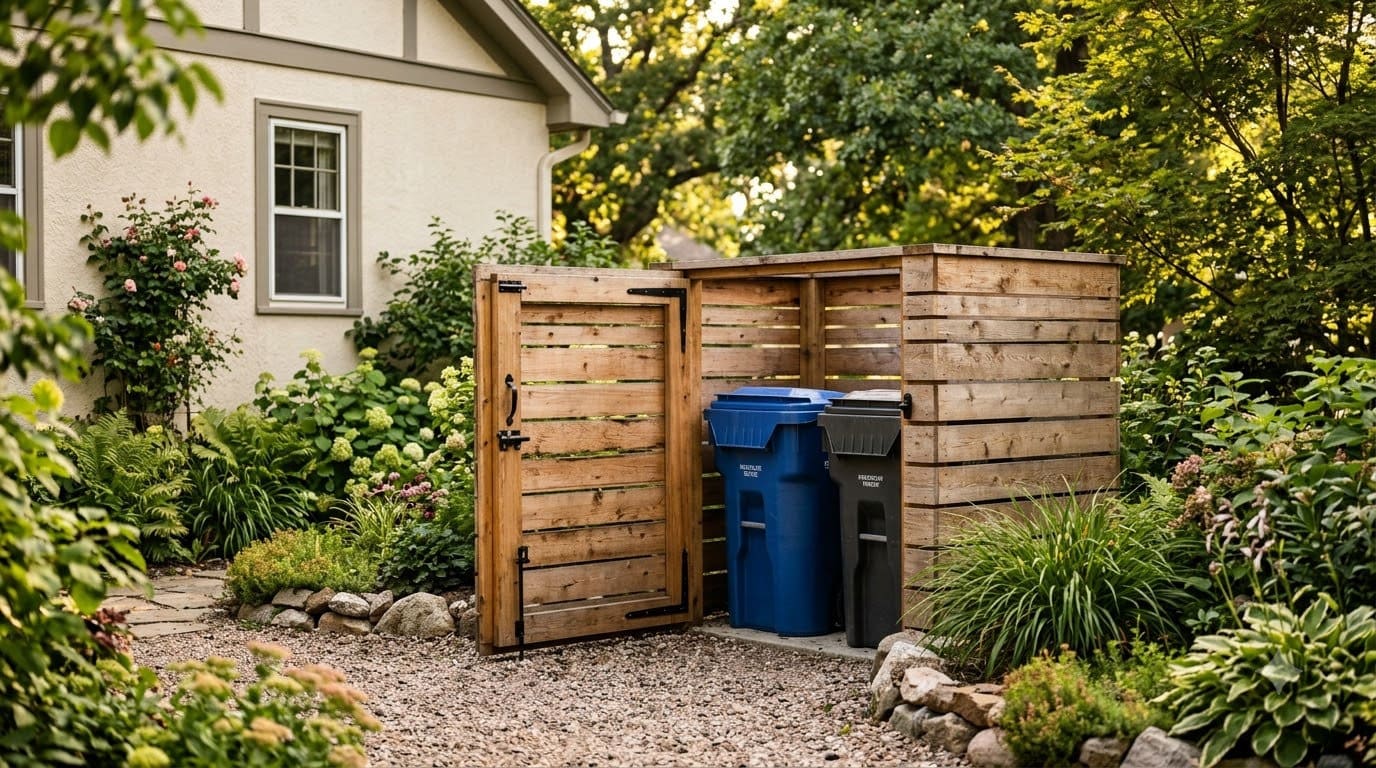
6. A horizontal wood-panel enclosure with metal rail accents
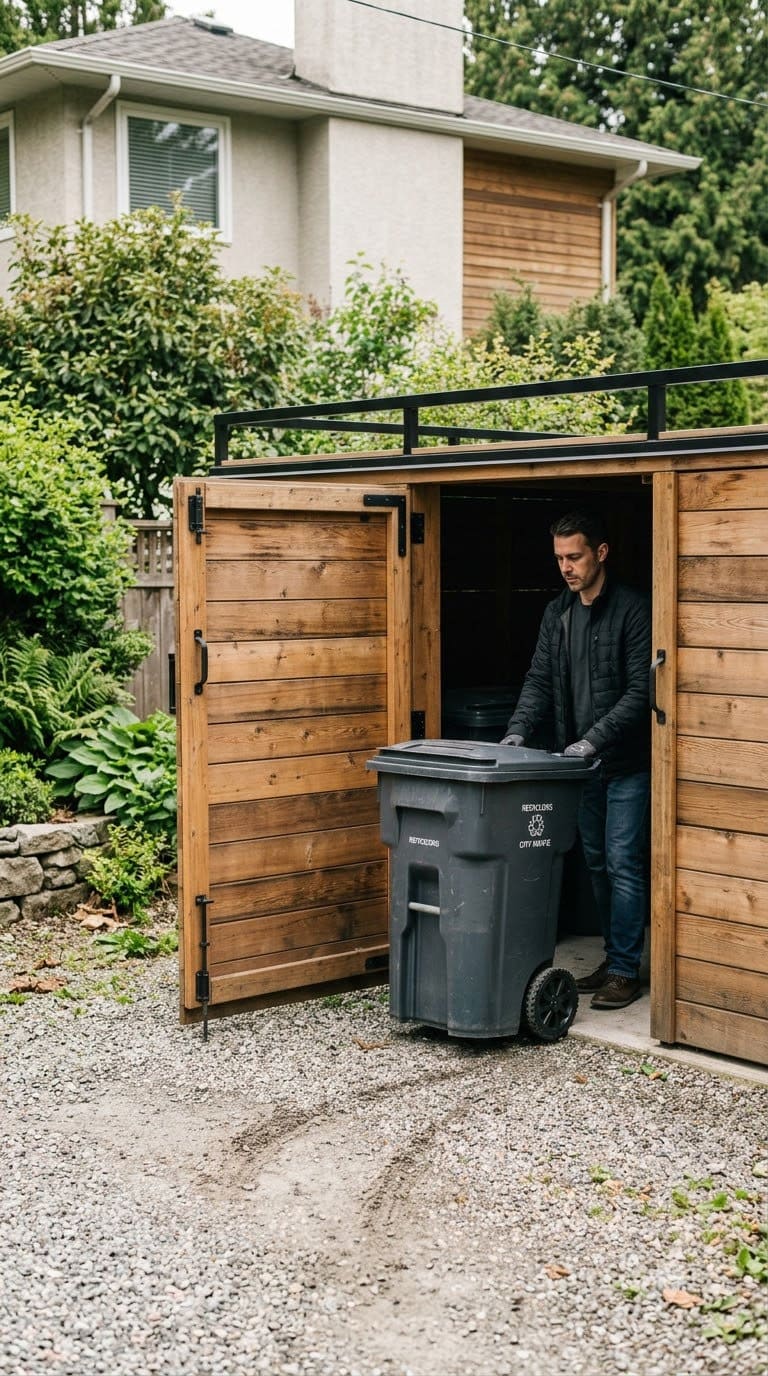
Horizontal cedar or pine 1×6 panels on a simple frame, with a thin black metal rail across the top for a more finished, architectural look, is the most commonly recommended fix across the sources we checked, and for good reason: it reads as an intentional design feature rather than a utility cover.
Build the front as a full swing door sized to the 30-inch clearance number from Before You Start, not a lift-off panel, so trash day doesn’t turn into disassembly, and use a continuous piano hinge rather than two small hinges since the door will handle a heavy bin passing through it hundreds of times a year.
7. A reclaimed pallet corral
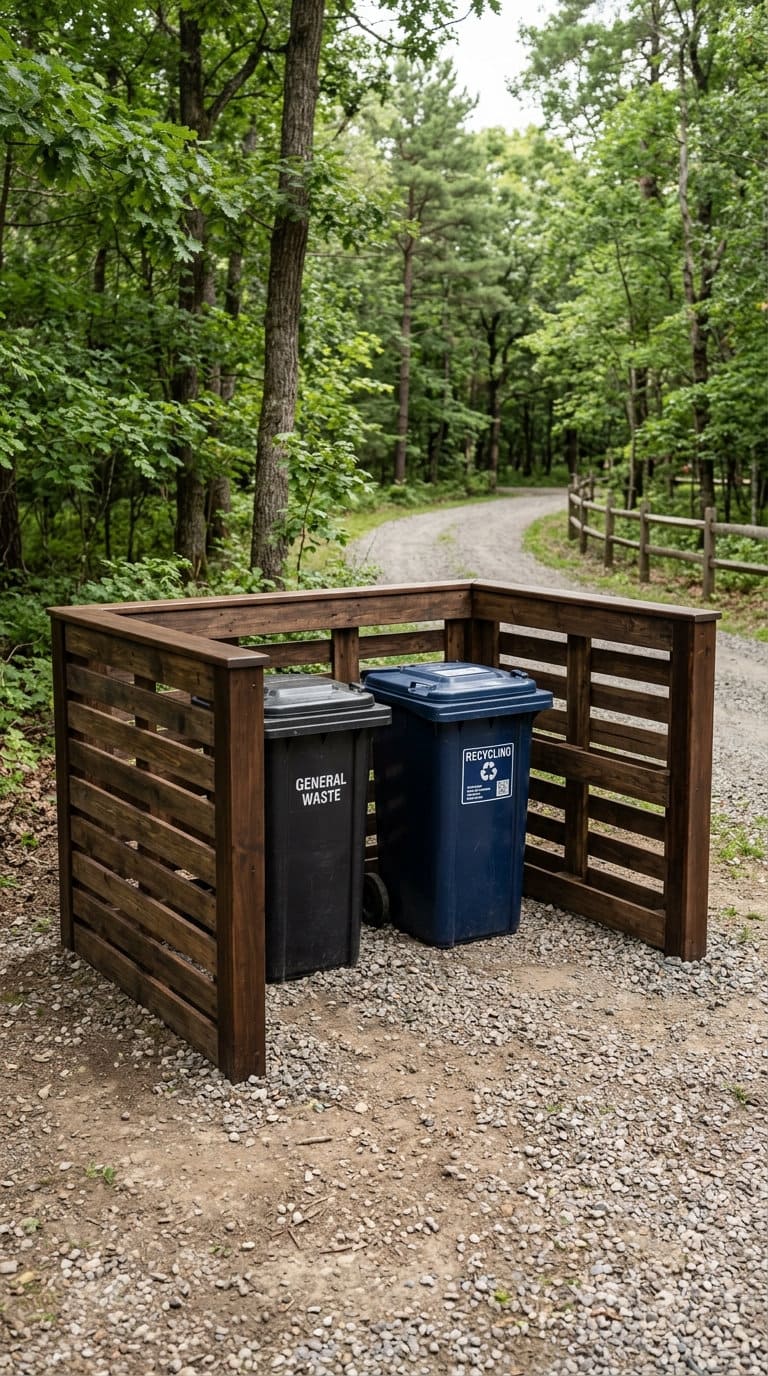
A simple three-sided corral built from 2-3 reclaimed shipping pallets (standard pallets run about 40×48 inches, so two side by side comfortably enclose a pair of 96-gallon bins) is one of the cheapest true enclosures on this list, and the natural 1.5-2 inch gaps between pallet boards happen to double as the ventilation the vector-control lid standard doesn’t cover on the enclosure itself.
Sand rough edges and add a coat of exterior stain so it doesn’t read as scrap lumber. There’s more elsewhere on the site about prepping and finishing reclaimed pallet wood safely if you go this route. Budget tier: DIY-cheap, likely the least expensive enclosure option here.
8. A lattice screen surround
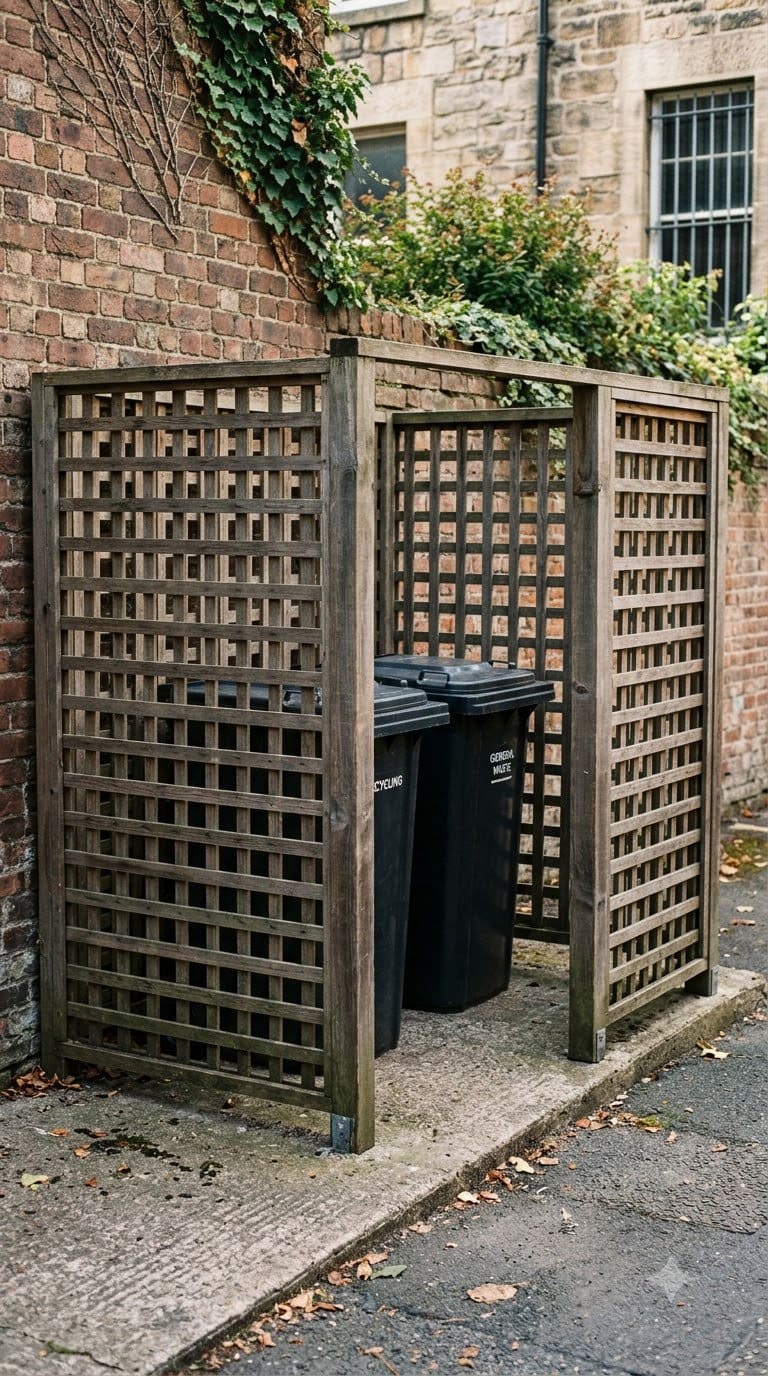
Open-grid lattice (standard 1×1 or 2×2 inch grid spacing) on three sides, matching the same principle used for AC unit screening, keeps air moving through the enclosure so odor doesn’t build up the way it can in a fully solid box.
Size each panel a couple of inches larger than the bin footprint on every side, and leave the front open or hinged, same rule as every enclosure on this list. Budget tier: DIY-cheap to moderate.
9. A cedar slat box with a real swing door
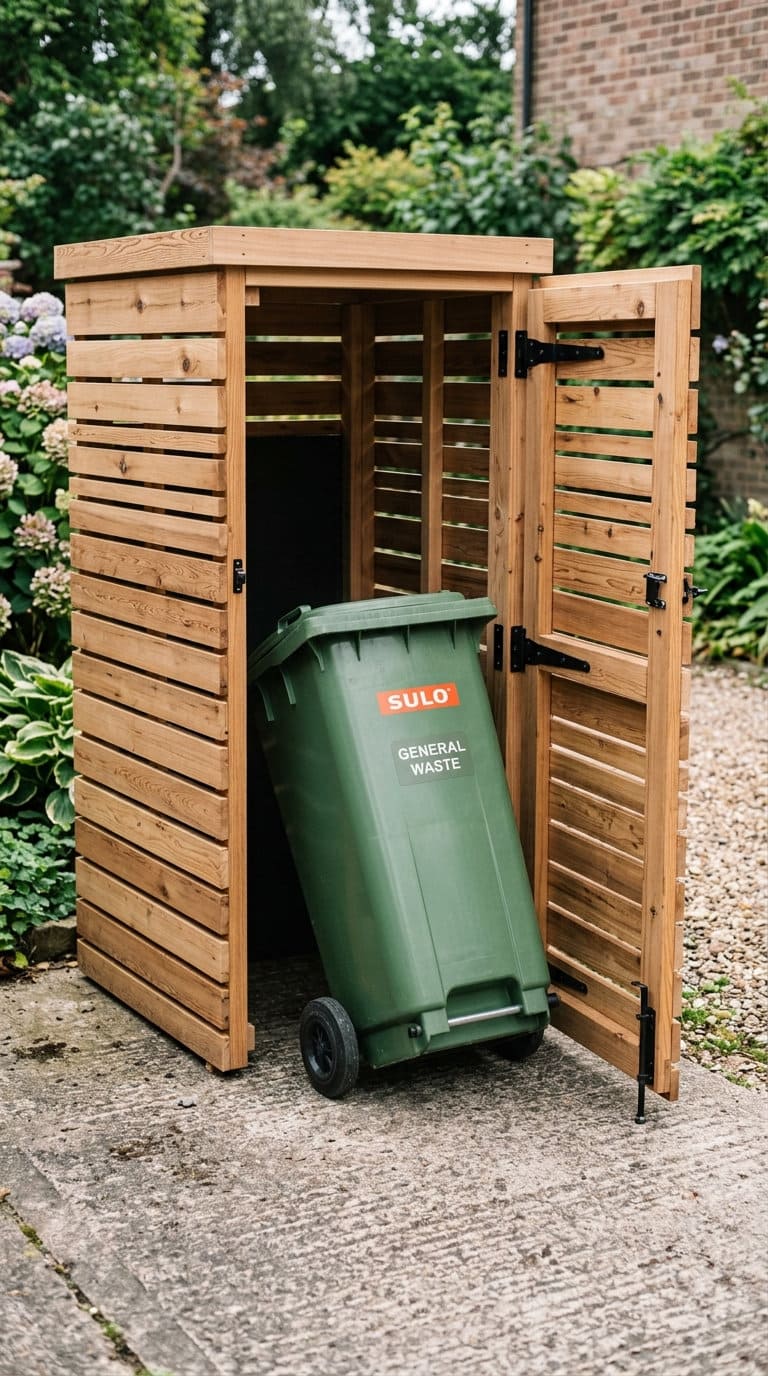
Vertical cedar 1×4 slats with a consistent half-inch to inch gap between boards for airflow, built with an actual hinged door (not a lift-off front) using a full-width piano hinge, gives the cleanest, most finished look while still solving the real trash-day access problem.
Cedar’s natural rot resistance means it holds up outdoors 15-20 years without heavy maintenance, versus 5-8 years for an untreated pine equivalent. Budget tier: moderate.
10. A stone or masonry enclosure matched to the house
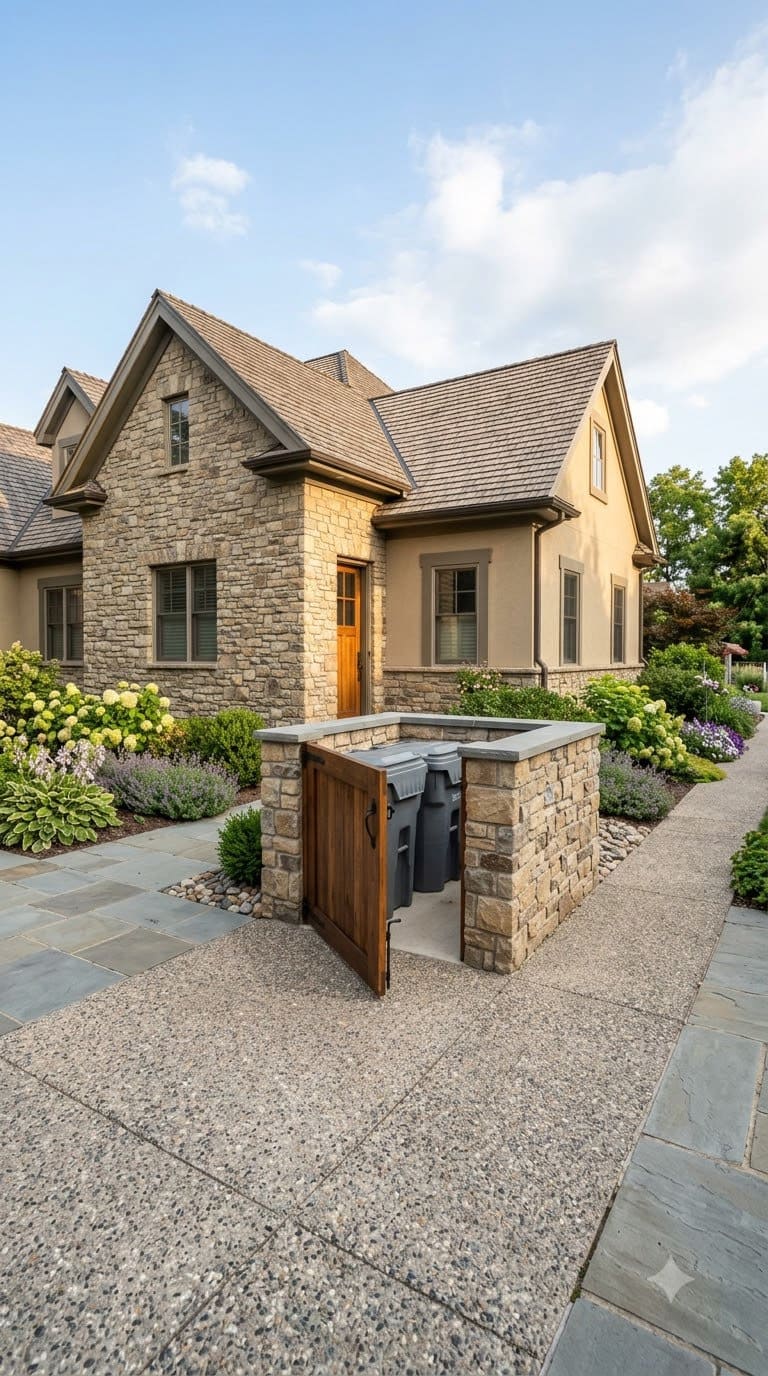
A short stone-veneer or painted block enclosure, typically 3-4 feet tall using standard 8x8x16 inch block, that echoes stone or brick accents already on your house is the most solid, permanent-feeling option here, and pairs naturally with a home that has masonry elsewhere.
Build the door as a real gate on a steel frame, not a solid stone wall on all four sides, masonry doesn’t flex or vent the way wood does, so airflow has to be designed in deliberately, leave a course of open weep gaps near the base of each wall section for passive ventilation. Budget tier: bigger investment.
11. A custom laser-cut steel screen
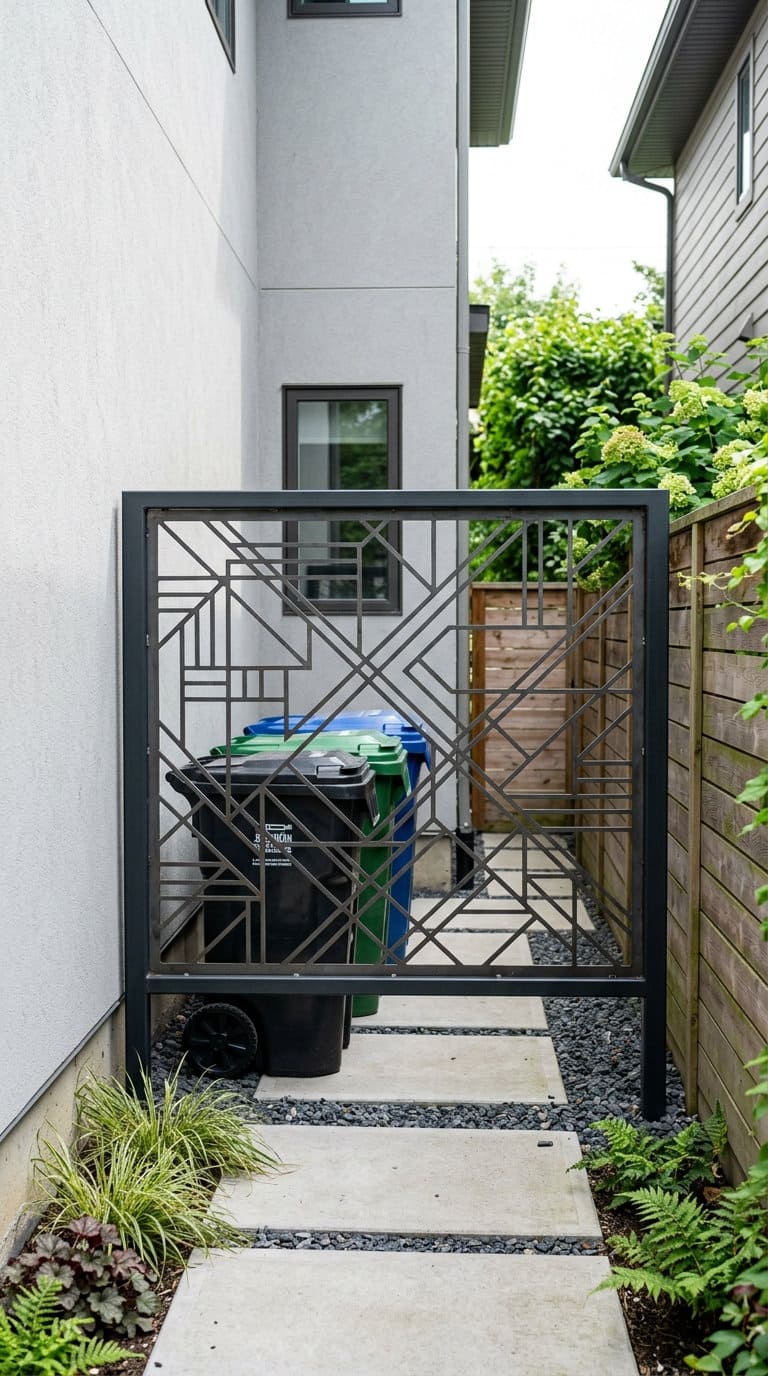
For a tight side-yard footprint where a full enclosure won’t fit, a single decorative laser-cut steel panel, typically 3-4 feet wide and cut with an open pattern covering 40-60 percent of the panel face, separates the bins from a seating or entry area without the footprint of a full box.
This works best as a partial screen (blocking the main sightline) rather than a full wraparound, since solid metal doesn’t ventilate the way a slatted material does. Budget tier: bigger investment if custom-fabricated.
12. A fence extension with a lattice top
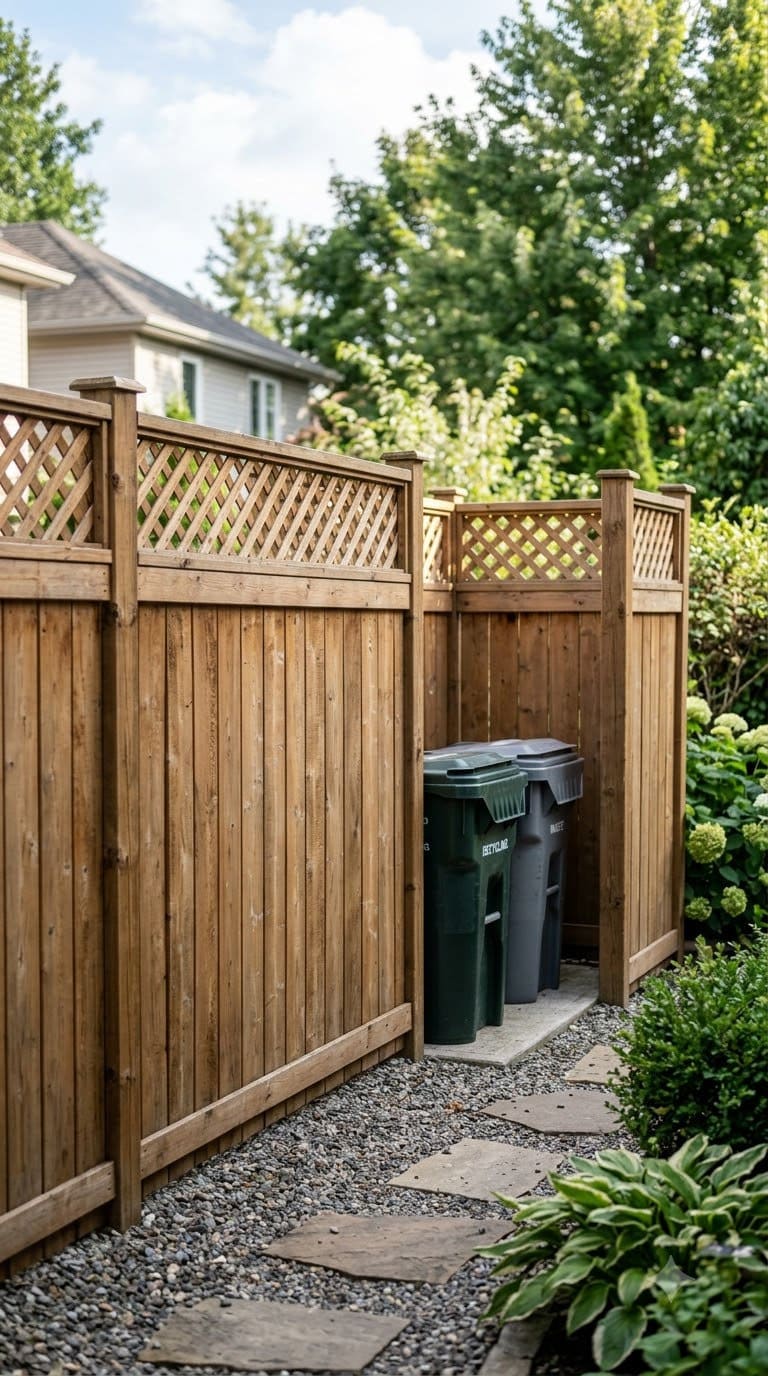
If your yard already has a solid privacy fence, extending it 3-4 feet at the bin location and topping just that section with 12-18 inches of lattice keeps the overall fence line looking uniform while adding the extra airflow a solid fence panel alone wouldn’t give the enclosed cans.
Budget tier: DIY-cheap if you’re already handy with the existing fence materials.
13. A prefabricated wheeled-bin enclosure
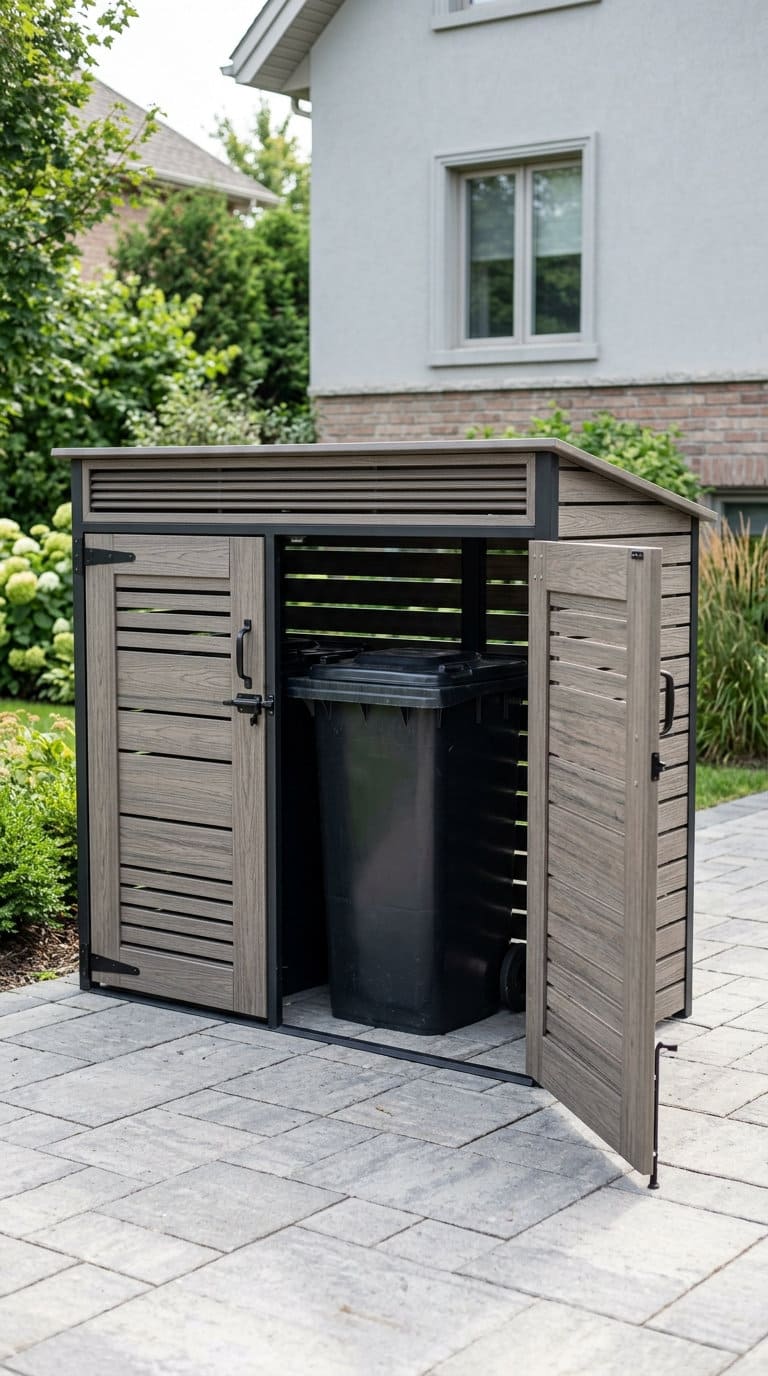
Purpose-built enclosures sized specifically for standard 65-96 gallon wheeled bins take the guesswork out of door clearance and ventilation, since the dimensions in Before You Start (45 inches tall, 26 inches wide, 34 inches deep, 30-inch door clearance) are exactly what these products are engineered around.
Worth the premium if you want a guaranteed fit without any measuring or building. Budget tier: bigger investment.
What Are Some Decorative Ways to Disguise Trash Cans?
14. A repurposed mini shed
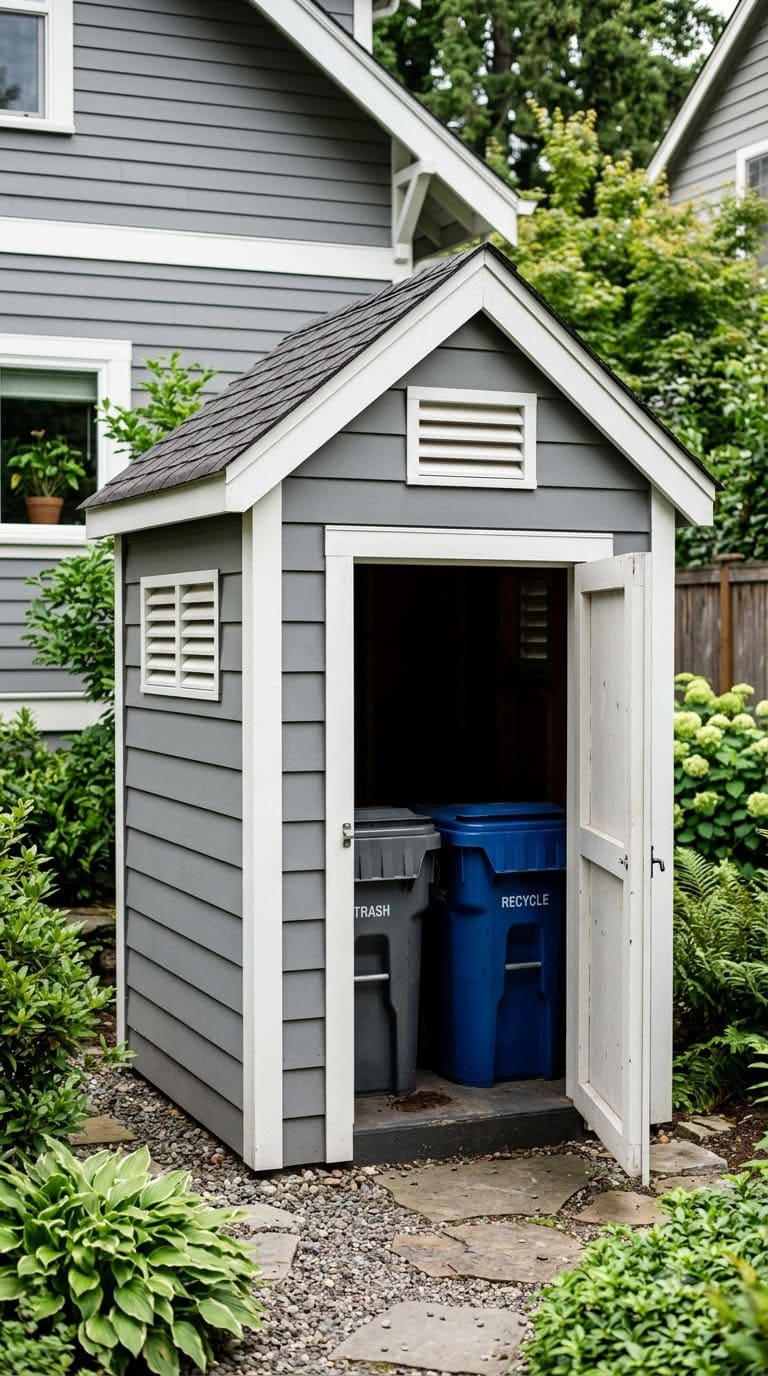
A small outbuilding, gable roof and all, sized about 4×6 feet for a two-bin setup, gives the most finished, “it was always meant to be there” look of any option here, especially matched to your house’s siding and trim.
Louvered vents on at least two sides, sized to give roughly the same open-air percentage as a lattice screen, are non-negotiable, the vector-control airflow principle applies just as much to a mini shed as it does to a slatted screen. Budget tier: bigger investment.
15. A mosaic or painted accent screen
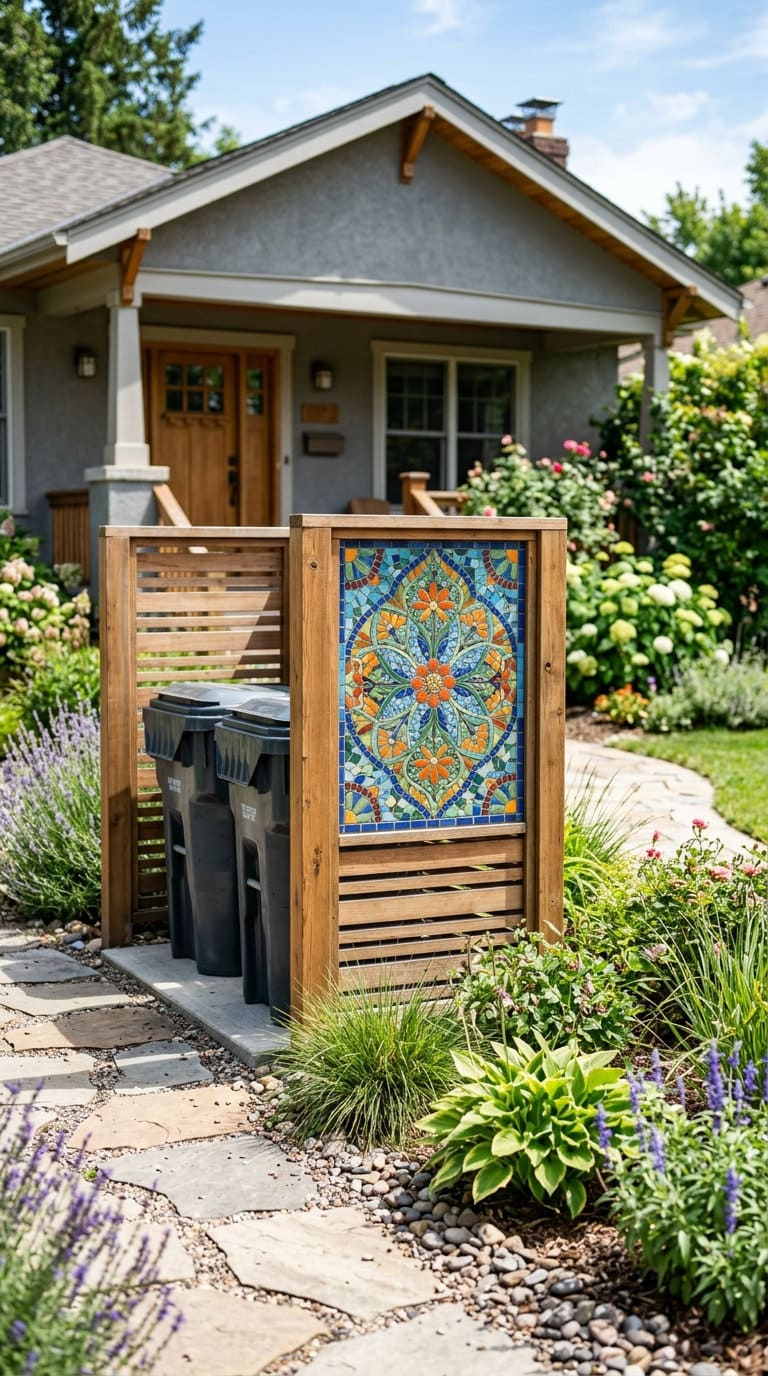
For an enclosure that sits somewhere more visible than most, near a front walkway or a shared fence line, a screen panel with mosaic tile or a hand-painted mural, built on the same slatted frame as idea 8 or 9, turns the cover itself into a piece of yard art.
Keep solid tile or mural sections to under a third of the panel’s total face so the majority stays open for airflow, and build it on the same gapped-panel principle as any structural screen here rather than a solid backing. Pairs well with idea 9’s cedar box as the base structure underneath.
16. A “dustbinbox” furniture-style piece
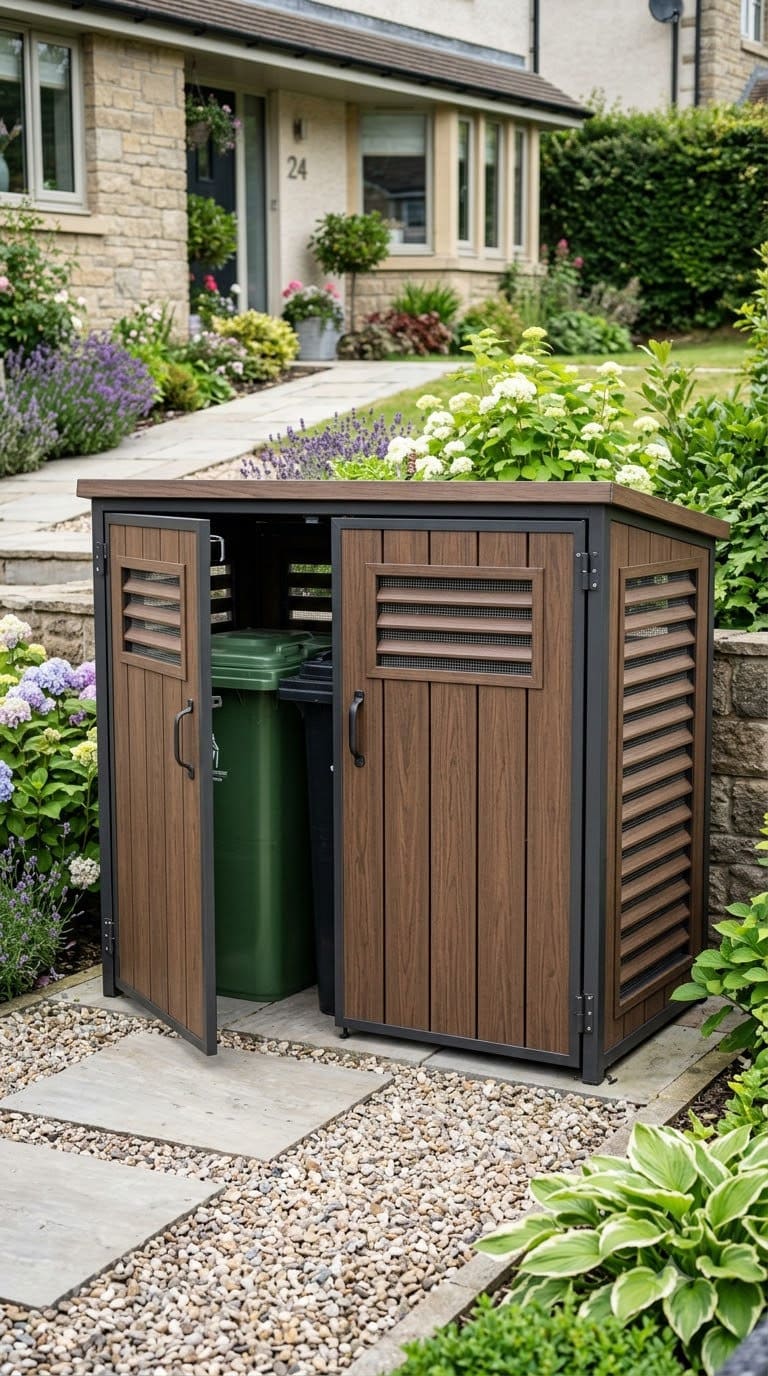
A styled, cabinet-like exterior enclosure, designed to look more like an outdoor furniture piece than a utility box, sized to the same 30-inch door clearance and vented back panel as any other option, works especially well for a front-yard location where the bins are genuinely part of the streetscape.
Look for or build one with a real hinged door and vented back panel rather than a solid furniture-style front with no ventilation at all.
17. A painted mural on an existing enclosure
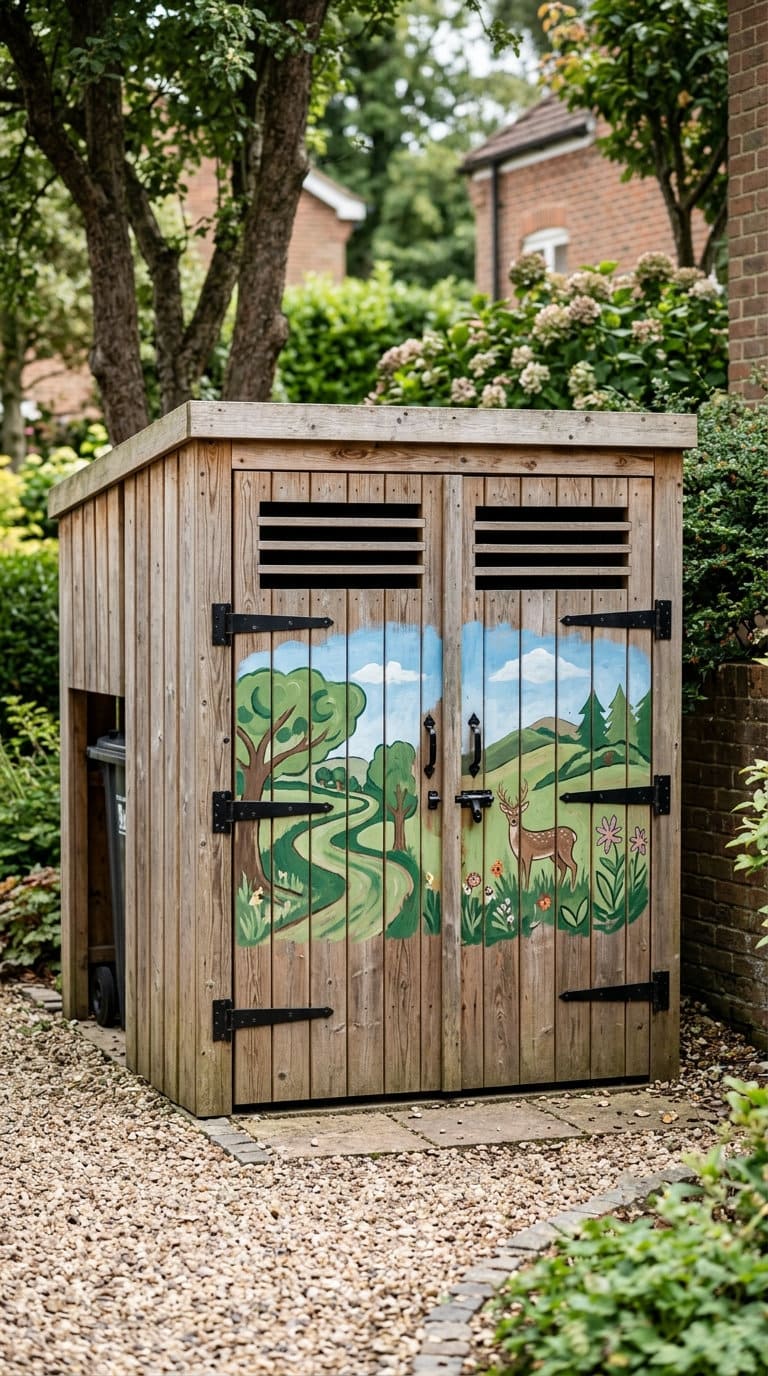
If you already have a plain wood or metal enclosure that’s structurally fine but visually flat, a simple painted mural or mural-style pattern is the cheapest possible upgrade, no new construction required.
Use exterior-rated (100% acrylic) paint rated for the surface material, and keep any painted design at least a couple of inches clear of the vent gaps and door hinges so paint buildup doesn’t gum up the moving parts.
What Modern or Practical Upgrades Help Most on Trash Day?
18. A wheeled caster-door enclosure
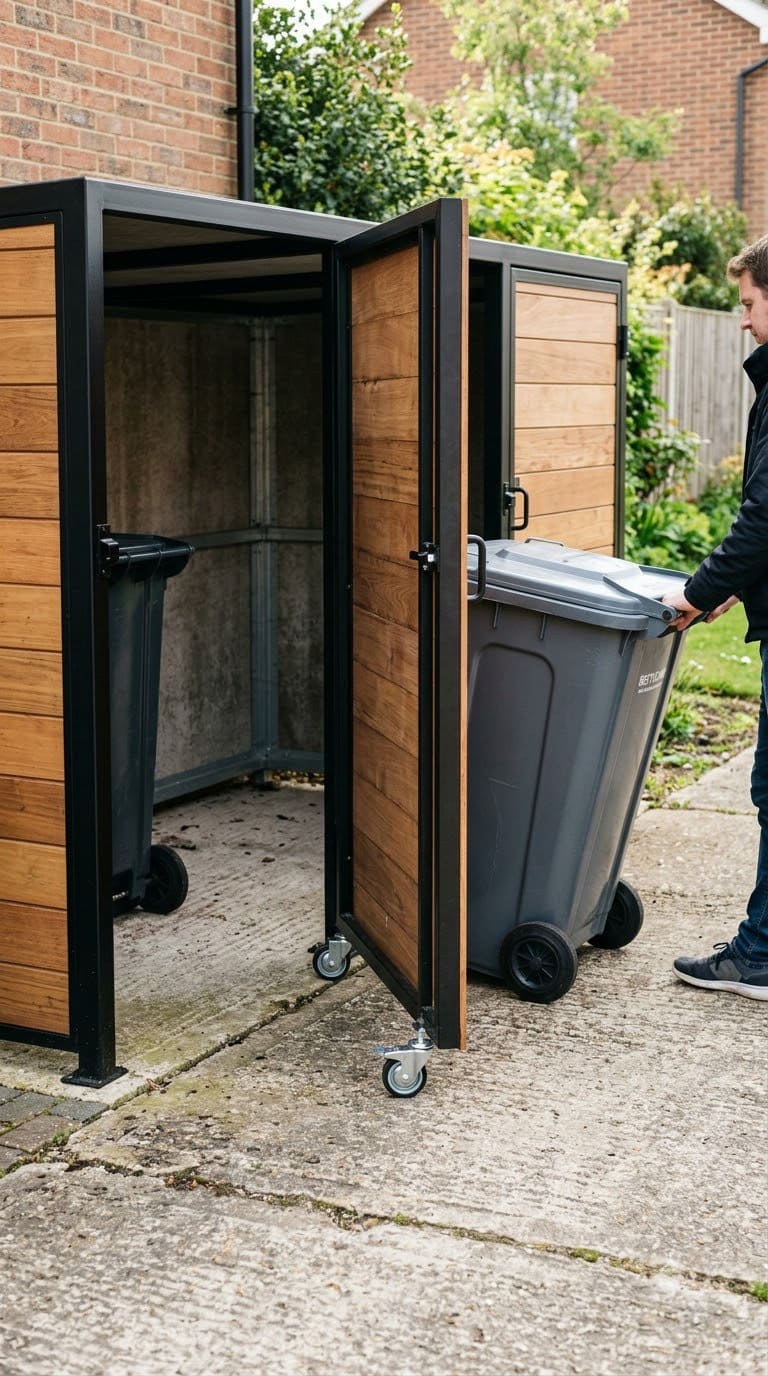
Adding two 2-3 inch locking caster wheels to the base of a swing-door or gate front makes opening and closing dramatically easier when you’re also wrestling a full 96-gallon bin at the same time, a small hardware upgrade that solves the trash-day friction competitors don’t mention at all.
Retrofit-able onto most of the wood-box options above in under an hour with basic hardware.
19. A gravel or paver base pad
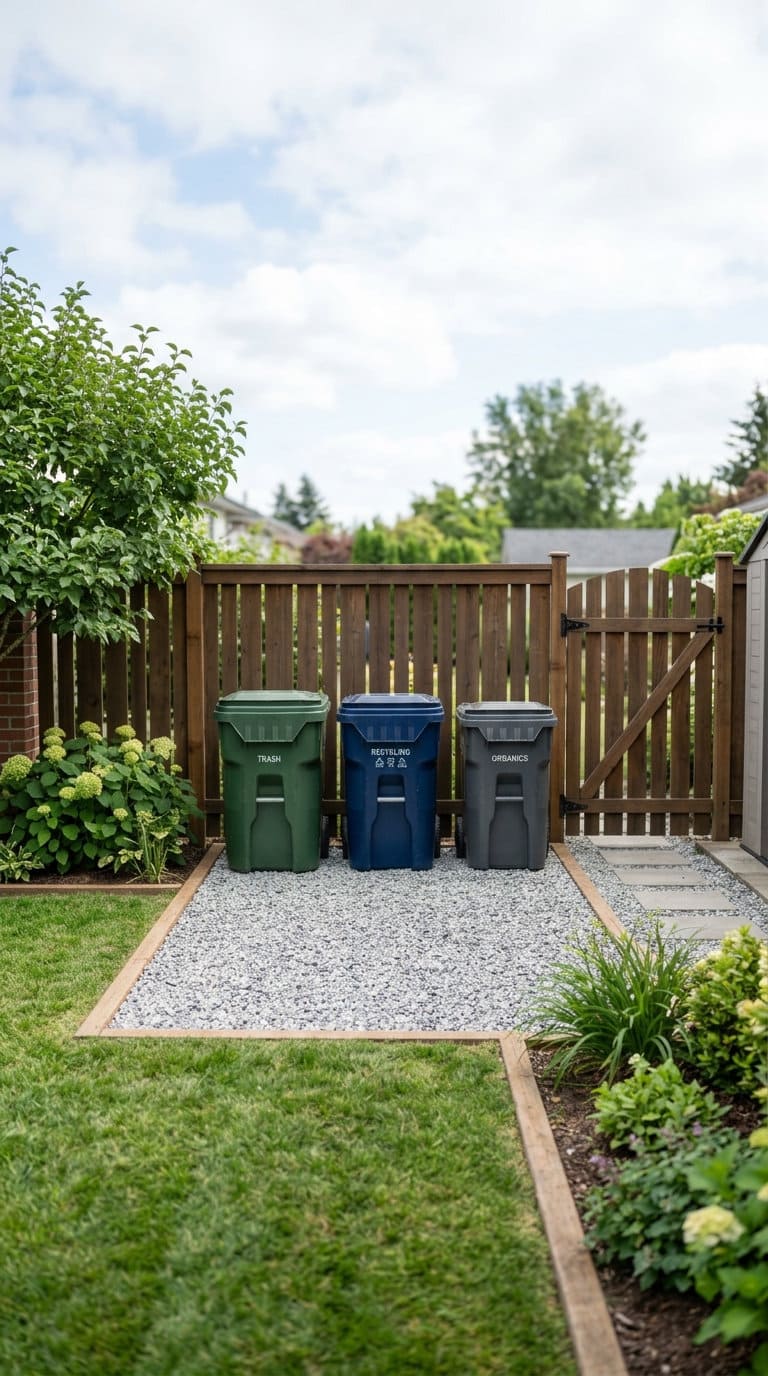
A simple 3-4 inch pad of compacted gravel or paver stones, extending a few inches beyond the enclosure’s own footprint on every side, under the whole storage area keeps bins from sitting in mud, rolls more smoothly on trash day than grass or dirt, and prevents the enclosure’s own structure from settling unevenly over time.
Pairs with any structural enclosure above as the foundation step almost nobody plans for in advance.
20. A raccoon-proof latch and tie-down kit
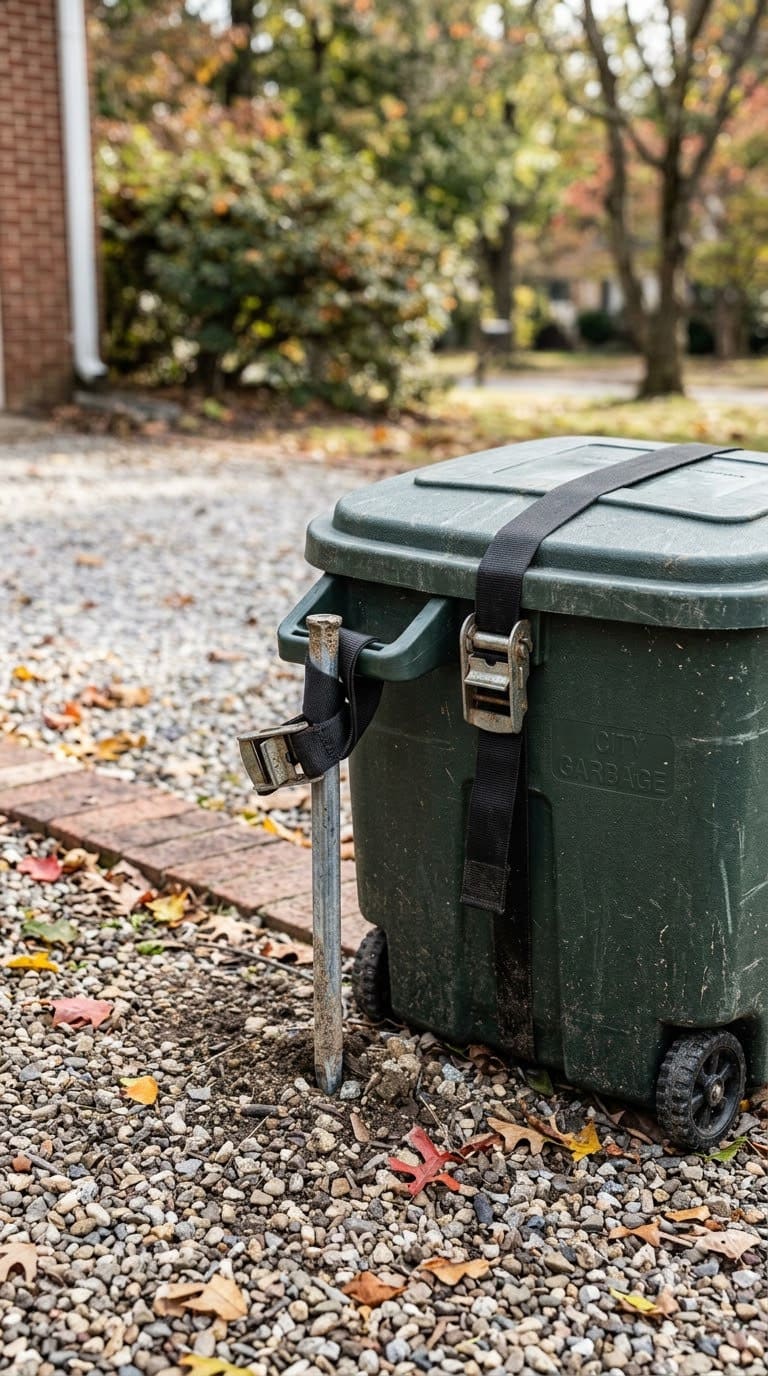
Rather than a new structure, this is the add-on every option above should genuinely have: a real latch, bungee cord, or chain securing each individual lid closed to within a quarter inch of the vector-control standard, plus the handle staked to the ground so a raccoon can’t tip the whole can over even if it does get a lid open partway.
This is the single cheapest, highest-impact fix on the entire list if wildlife access (not looks) is the actual problem, the same latch-and-secure logic applies if wildlife pressure in the yard extends beyond just the trash cans, there’s a separate piece on keeping squirrels out of the garden entirely for that broader problem.
What We Learned the Hard Way
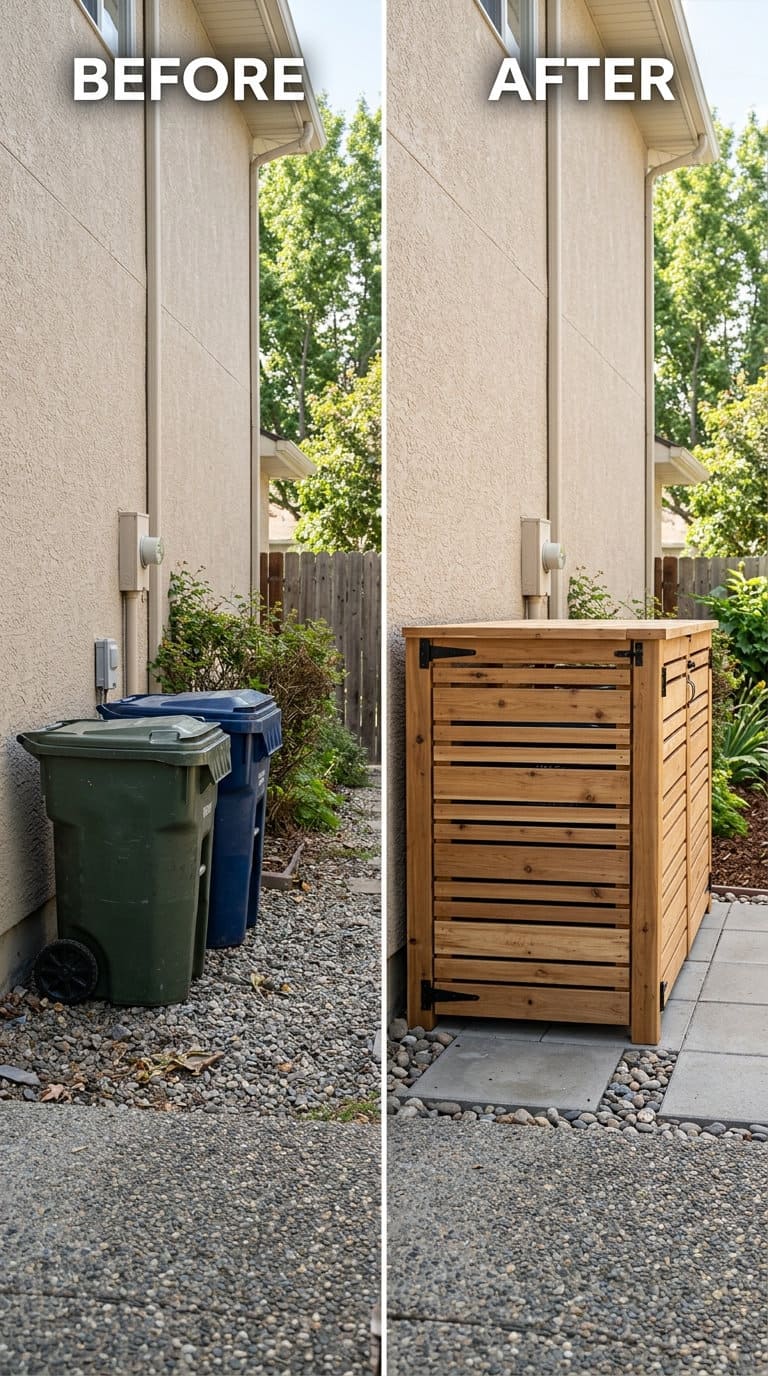
The most common mistake isn’t picking an ugly enclosure, it’s building one that’s sealed too tight. A gorgeous solid wood box with no gaps looks clean on day one, then by August it’s trapping heat and smell in a way an open lattice screen never would.
If there’s one thing worth doing differently from the start, it’s leaving real ventilation, the quarter-inch standard from Before You Start, not eyeballing “should be fine.”
The second mistake is assuming a pretty cover solves the raccoon problem. It doesn’t. We’ve seen enclosures that look completely finished still get raided because the actual bin lid inside was never latched or staked down, the screen just moved the mess out of sight instead of preventing it.
If wildlife access is the real issue, idea 20’s latch-and-tie-down kit matters more than anything else on this list, do that first regardless of which structure you build around it.
We’ve also seen the HOA-versus-bear-code confusion play out in real disputes: a homeowner assumes their suburban “must be screened” requirement is the same strict standard as an actual bear-resistant enclosure code, over-builds a five-sided steel box nobody asked for, and spends far more than necessary. Read your actual governing document’s wording before assuming which standard applies.
And the one nobody plans for until trash day itself: door clearance. An enclosure that looks perfect in photos but requires lifting a full 96-gallon bin over a 4-inch threshold gets propped open and abandoned within a few collection cycles. Build the door to the real bin dimensions from the start, not to whatever looked good in the design sketch.
FAQs
What size enclosure do I need for standard trash cans? Plan around a 96-gallon wheeled bin’s real dimensions, roughly 45 inches tall, 26 inches wide, and 34 inches deep, and give the front door at least 30 inches of clearance so the bin rolls in and out without lifting or squeezing.
Will hiding my trash cans keep raccoons out? Not on its own. A screen or box hides the view, but keeping wildlife out actually depends on a tight-fitting lid with no more than a quarter-inch gap, plus a real latch or tie-down. Add idea 20’s latch kit to any enclosure style on this list.
Can my HOA require me to hide my trash cans? Usually yes, most HOA covenants include a “must be screened from view” clause, which is a design requirement, not a ban. That’s a different, less strict standard than an actual bear-resistant enclosure code, which only applies in specific wildlife-prone jurisdictions, check your own governing documents for which one applies.
Does a fully sealed enclosure cause odor problems? Yes, this is a real tradeoff. A fully solid, gapless box traps heat and smell, especially in summer. The fix is intentional ventilation, gapped slats, a lattice section, or a vented panel, following the same roughly quarter-inch-and-up gap principle used in public-health vector-control standards.
What’s the cheapest way to hide trash cans? A reclaimed pallet corral (idea 7) or a bamboo screen (idea 4) are the least expensive true enclosures here, and a raccoon-proof latch kit (idea 20) is the cheapest single upgrade if wildlife access, not looks, is the real problem.
If trash cans aren’t the only thing you’re camouflaging, there’s a broader look at making utility boxes, hoses, and other yard eyesores disappear elsewhere on the site, along with a piece specifically on screening utility boxes with the same clearance concerns.
Building a screen from scratch? There’s more on sourcing and finishing reclaimed wood safely worth reading first.
Products We Recommend
This post contains affiliate links. We may earn a commission on qualifying purchases at no extra cost to you.
Mederlo 3-Panel Outdoor Fence Screen (cedar, 38"W x 42"H, doubles as AC/trash/pool-equipment cover)
Purpose-built version of ideas 8/13, sized for a single wheeled bin, 4.2 stars / 346 ratings, live-verified $129.99
Shop Now
KOMOHOM Bear Proof Trash Can Lid Lock, Raccoon Proof Strap
Direct product match for idea 20, the single highest-impact fix on this list, Amazon's Choice, 4.4 stars / 102 ratings, live-verified $12.99
Shop Now
DearHouse Artificial Ivy Privacy Fence Screen (118 x 39.4 in)
Fast-coverage option for idea 3's trellis without waiting on real vines to fill in, Amazon's Choice, 4.2 stars / 13,103 ratings, live-verified from $35.99
Shop NowNever miss an update — choose FarmFoodFamily as your preferred source on Google.
How it works: Tap the button below to open Google's settings page, then check the box next to FarmFoodFamily.
Tap the checkbox to turn it blue — that's how you know it's set.