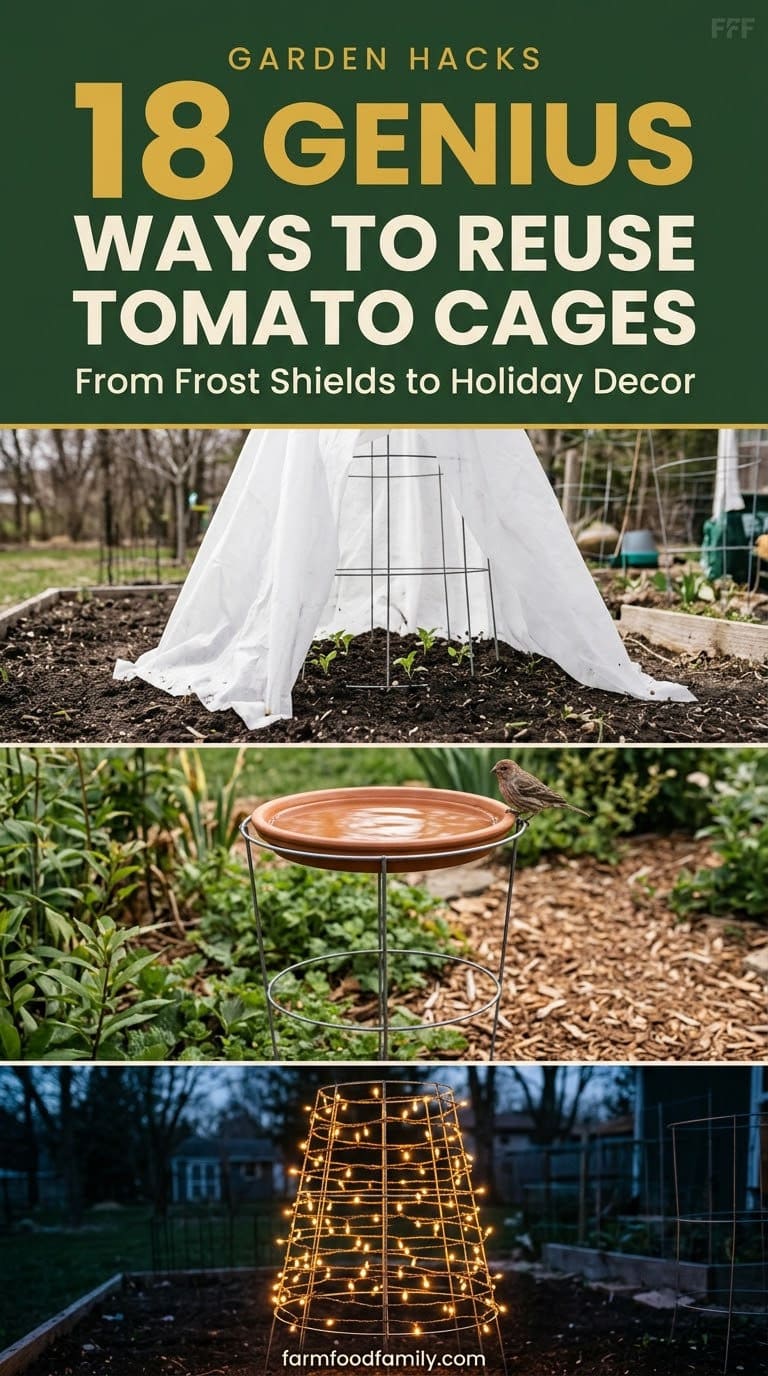
18 Genius DIY Hacks Using Tomato Cages (For Every Season)
Tomato cages work all year long, from spring frost shields to Halloween ghosts, and most of these hacks cost under $5.

Never miss an update — choose FarmFoodFamily as your preferred source on Google.
How it works: Tap the button below to open Google's settings page, then check the box next to FarmFoodFamily.
Tap the checkbox to turn it blue — that's how you know it's set.
Tomato cages work all year long, from spring frost shields to Halloween ghosts, and most of these hacks cost under $5.
Most gardeners pull their tomato cages out in October, stack them in a pile, and forget about them until May. That’s a missed opportunity. A tomato cage is one of the most flexible tools in the yard, and these 18 hacks prove it.
Some are functional. Some are decorative. A few are flat-out fun. All of them are worth trying with cages you already own.
Quick Answer
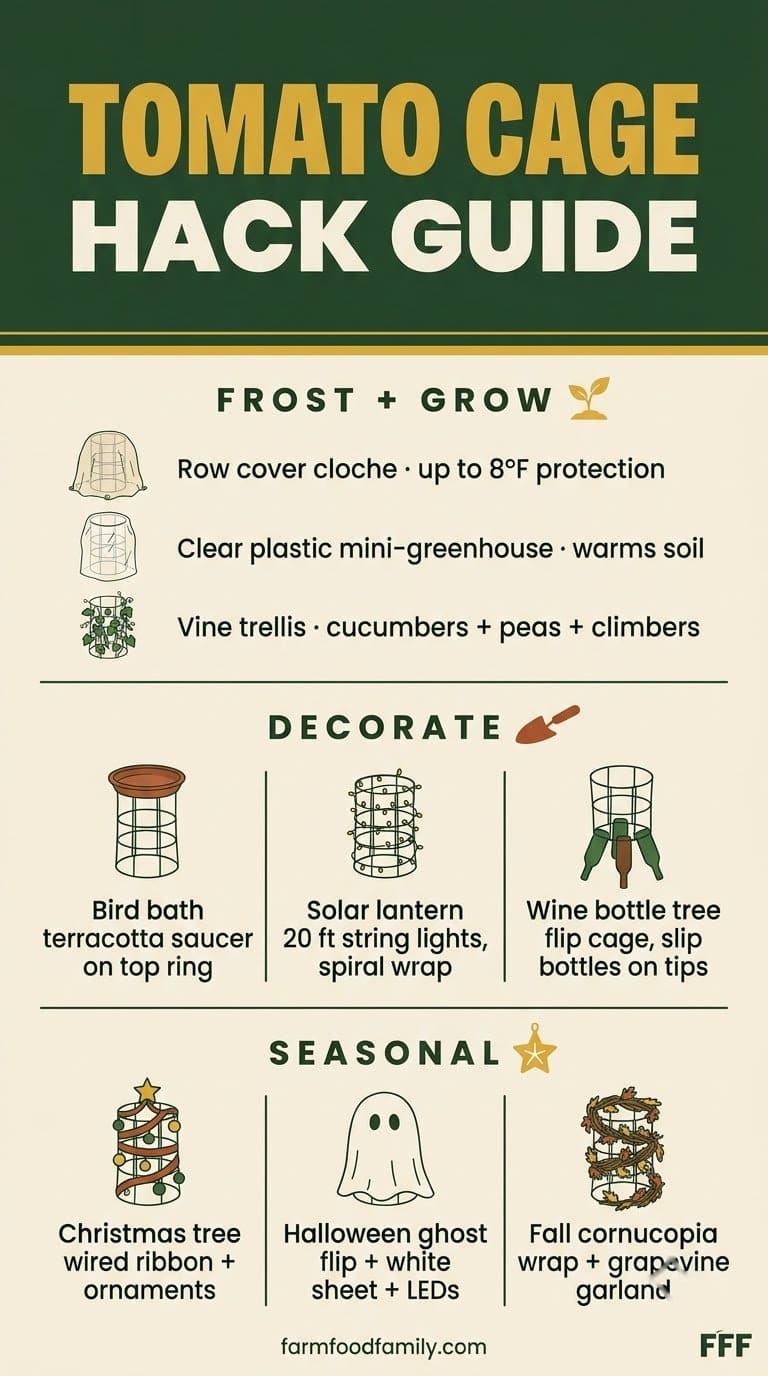
Tomato cages are useful in every season, not just for growing vegetables. The most practical garden hacks include draping them in row cover fabric to shield seedlings from frost (up to 8°F of protection, per University of Maryland Extension), wrapping them in clear plastic as a mini-greenhouse in early spring, and using them as a trellis for cucumbers, snap peas, or climbing flowers.
For decorative uses, a heavy-gauge cage makes a stable bird bath base. Just rest a shallow saucer on the top ring. Solar string lights wrapped around a cage create a warm garden lantern. The classic wine bottle tree uses bottles slipped over bent wire tips.
Holiday hacks are some of the best. Wrap a cage in Christmas ribbon for a yard tree, flip one upside down with white fabric for a Halloween ghost, or lay one on its side for a fall cornucopia. When cages are too bent for anything else, cut them into plant stakes or take the wire to a scrap metal recycler.
Answer 4 quick questions and get matched to the exact fix for your yard — drainage, budget, layout, or something else entirely.
Take the Free QuizWhich Cage Works Best for Each Hack?
Not every cage is right for every project. Here is a quick guide before you start.
Standard 3-ring cages (about 18 inches wide) are good for bird baths, lanterns, holiday decor, and single-pot plant stands. Four-ring cages (around 21 inches wide) work best for tiered planters, privacy screens, and projects that need extra height or stability.

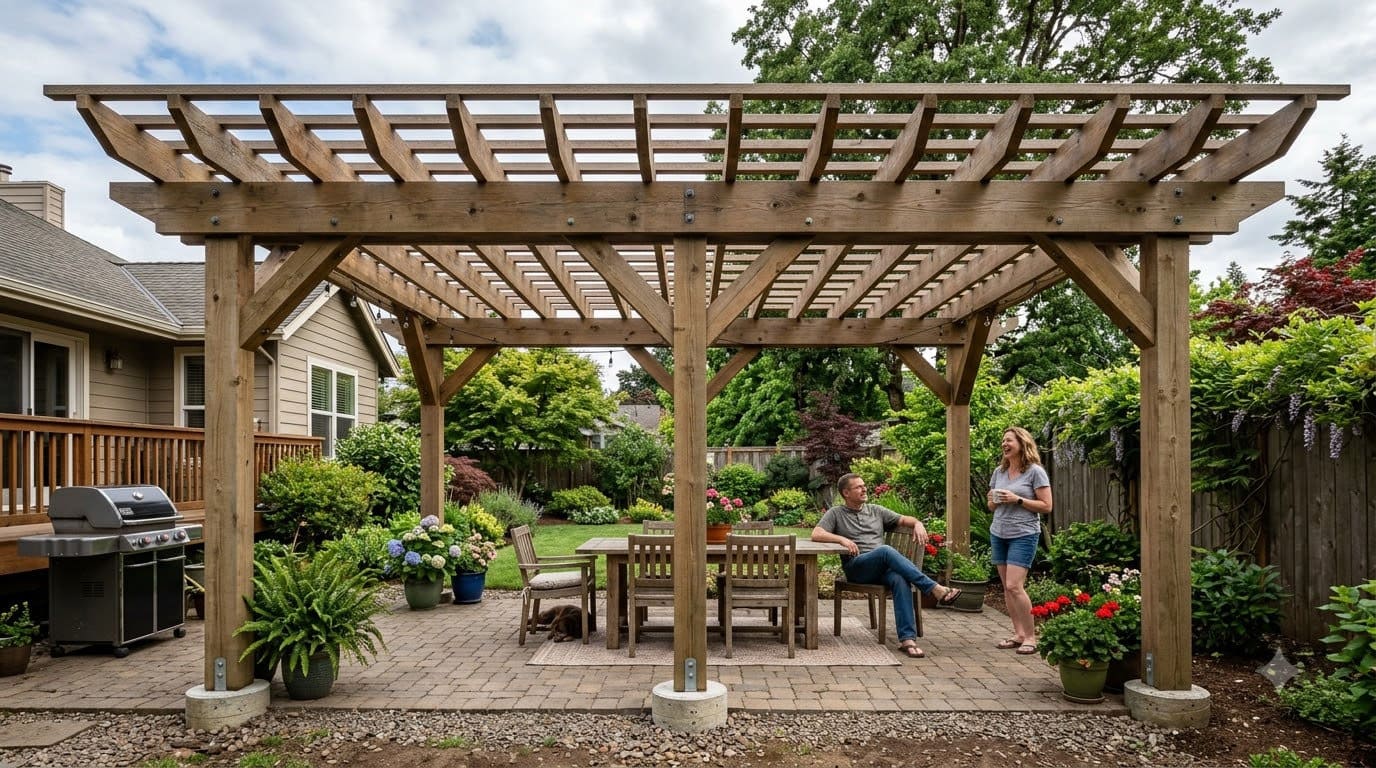

Heavy-gauge cages made from concrete wire or cattle panel rings are the right call whenever you plan to put weight on the rings: bird baths, side tables, and raised planters fall into this group. Light or flimsy cages are actually perfect for wrapping with fabric, lights, or garland. The structure is enough; the wire does not need to hold weight.
| Hack | Best cage type |
|---|---|
| Frost cloche | Any 3- or 4-ring |
| Bird bath | Heavy-gauge 3-ring |
| Tiered herb tower | 4-ring |
| Holiday decor | Any, including damaged |
| Side table | Heavy-gauge 3-ring |
| Wine bottle tree | Any with exposed tips |
Functional Garden Hacks
1. Frost Protection Cloche
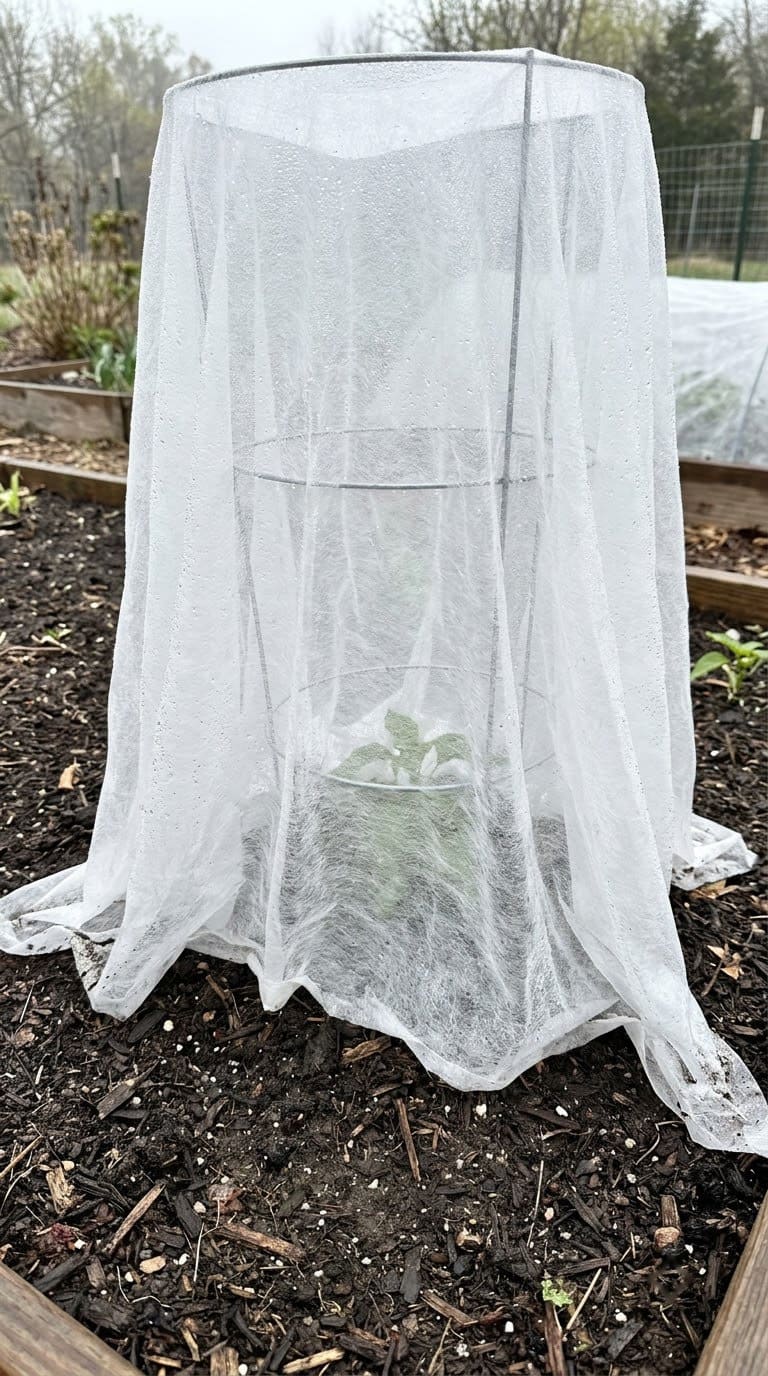
This is the most practical hack on the list. In early spring, a single late frost can wipe out seedlings that took weeks to grow. A tomato cage draped in row cover fabric keeps them safe.
University of Maryland Extension notes that lightweight row cover provides about 2°F of frost protection, medium-weight gives 4 to 6°F, and heavyweight fabric goes up to 8°F. The cage holds the fabric off the leaves so they do not freeze at the contact points.
What you need: Tomato cage, floating row cover fabric (sold at any garden center), garden staples or clips.
How to do it: Place the cage over the plant. Drape the row cover over the top and let it fall down the sides. Clip or staple the bottom edge to the ground so wind does not lift it. Remove the cover during the day so pollinators can reach any open flowers.
Most yard problems trace back to one specific, fixable cause. Find yours in 4 quick questions.
Take the Free QuizSee our guide to protecting harvest from frost in gardens.
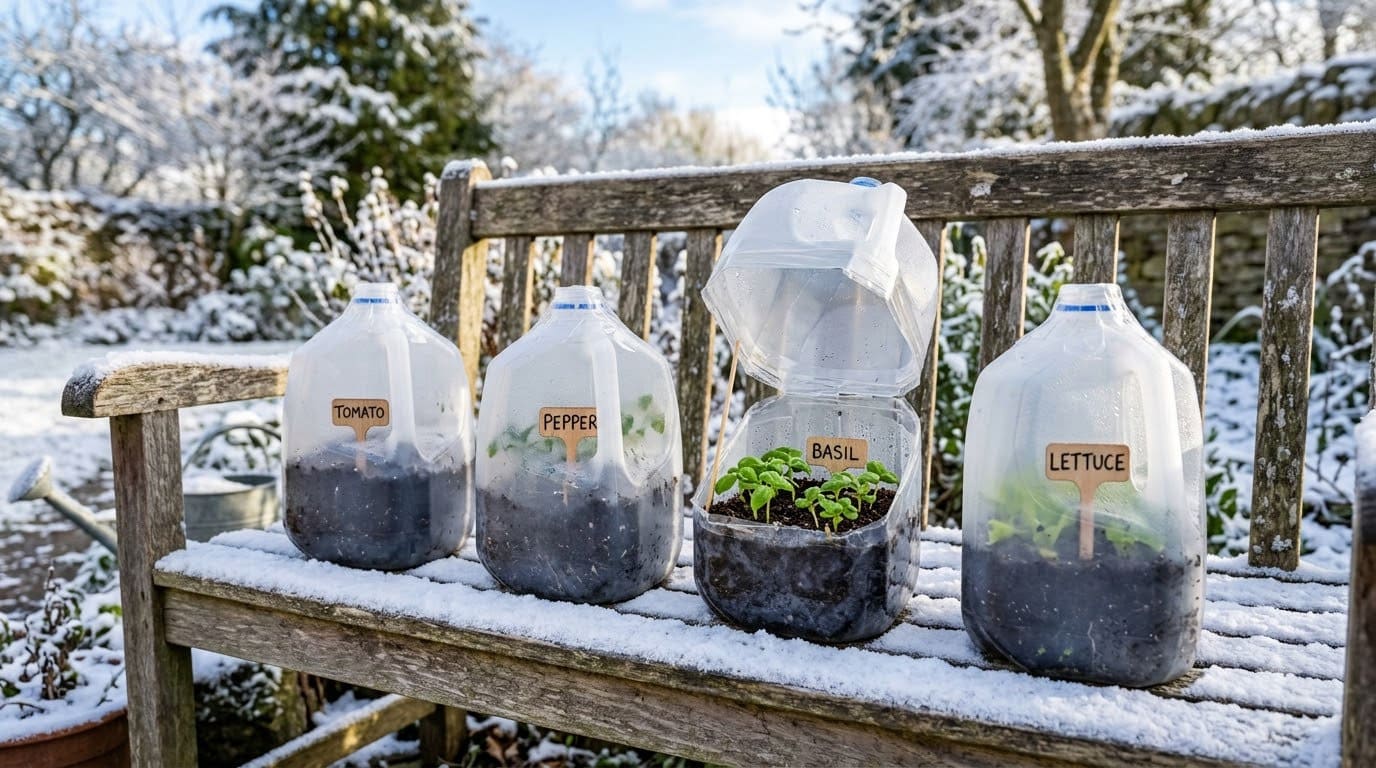
2. Mini-Greenhouse for Spring Seedlings
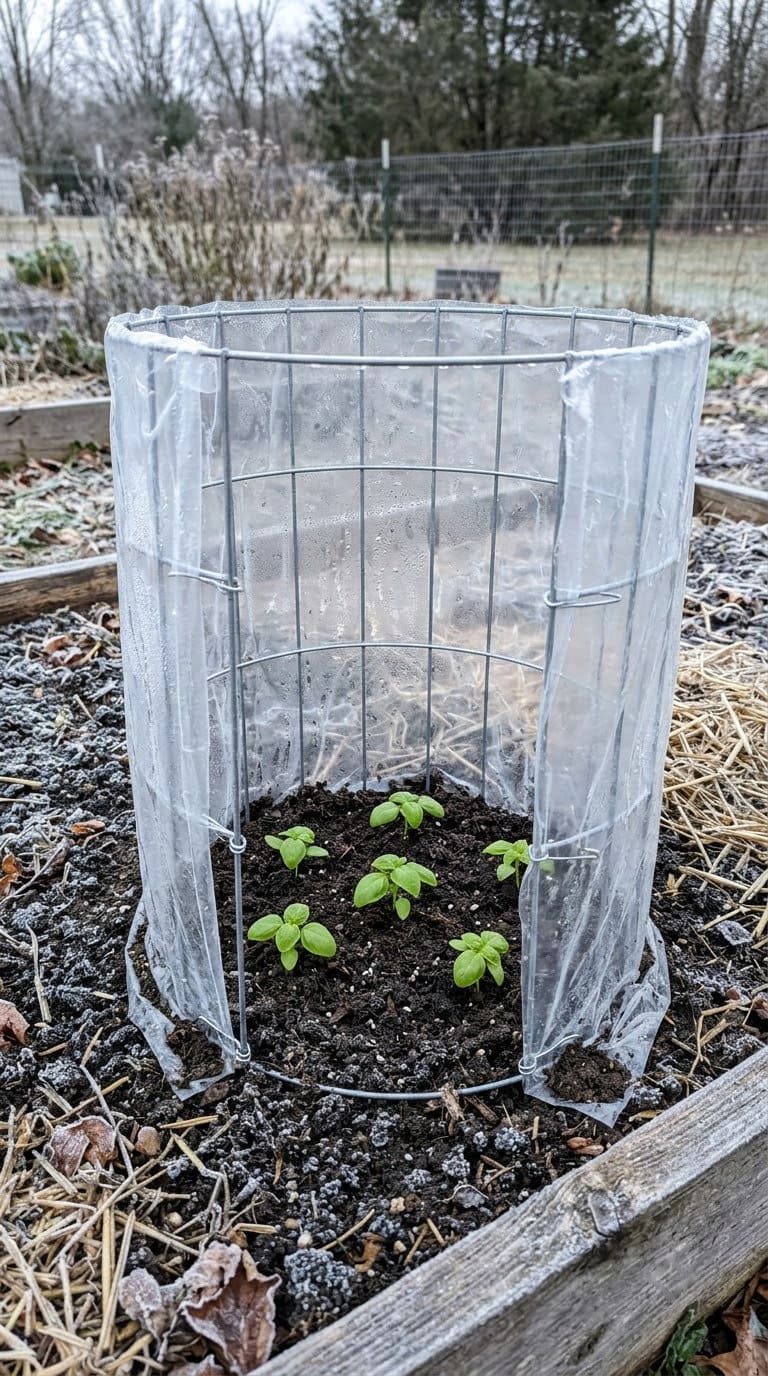
Clear plastic takes frost protection a step further by warming the soil during the day and holding that heat overnight. This is especially useful for heat-loving seedlings like basil and peppers.
Wrapping the cage on three sides and leaving one open for ventilation on warm days keeps the microclimate from overheating. University of Vermont Extension recommends this same approach for extending the growing season in cool climates.
What you need: Tomato cage, heavy clear plastic sheeting (6 mil), tape or clips.
How to do it: Set the cage over your seedling. Wrap three sides in plastic and leave the fourth open for airflow. Close that side overnight on cold nights. Open it again any day the temperature climbs above 50°F.
Learn more about starting an early spring garden.
3. Vine Trellis for Cucumbers, Peas, and Climbing Flowers
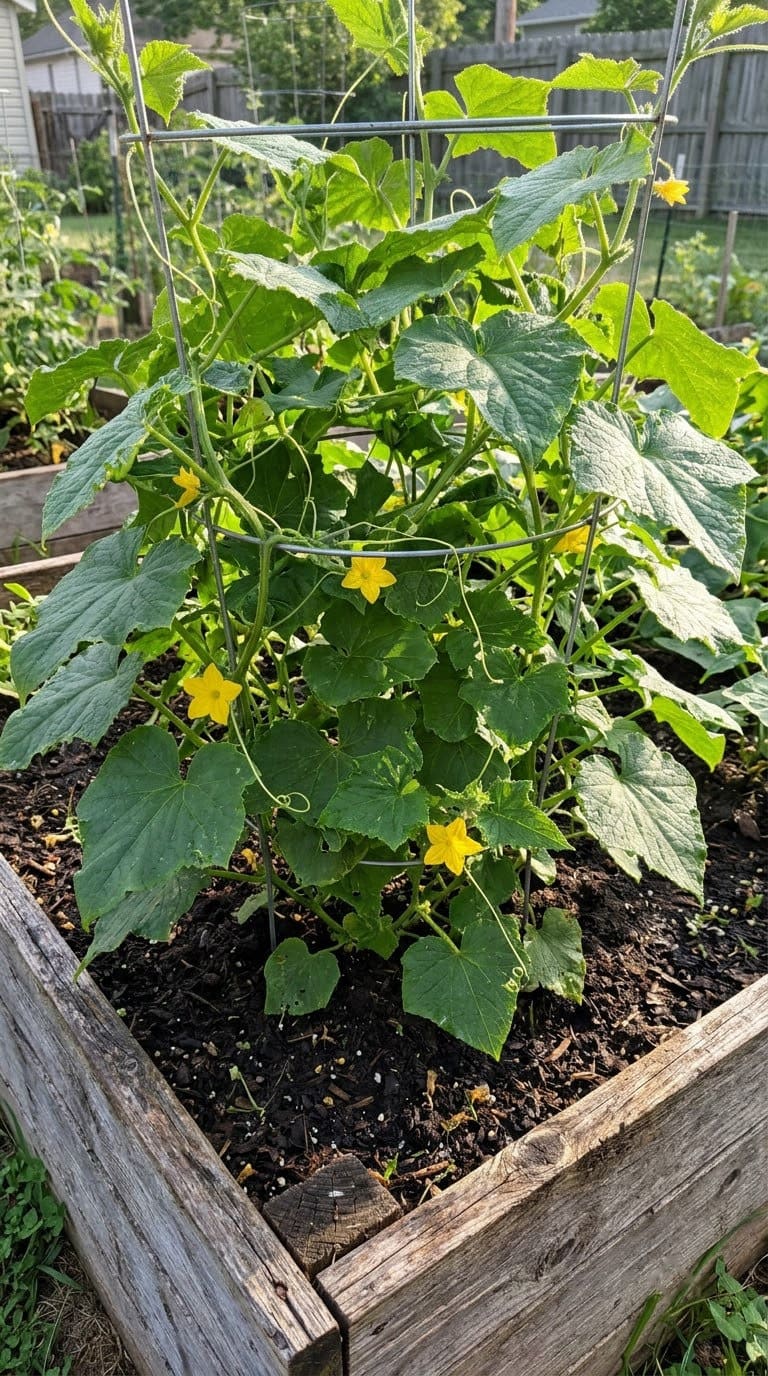
A tomato cage makes a reliable trellis for any plant that climbs. Cucumbers and snap peas grab on naturally as they grow. Black-eyed Susan vine, morning glory, and sweet pea love the structure too.
What you need: Tomato cage, soft jute twine (optional, to guide young vines).
How to do it: Push the cage firmly into the soil near the base of the plant. Tie the young vine loosely to the lower ring with jute twine. It will find the upper wires on its own. For a vine privacy screen, zip-tie three or four cages end-to-end along a fence line.
More trellis ideas: Fence Trellis Ideas and Pea Trellis Ideas.
4. Peony Ring
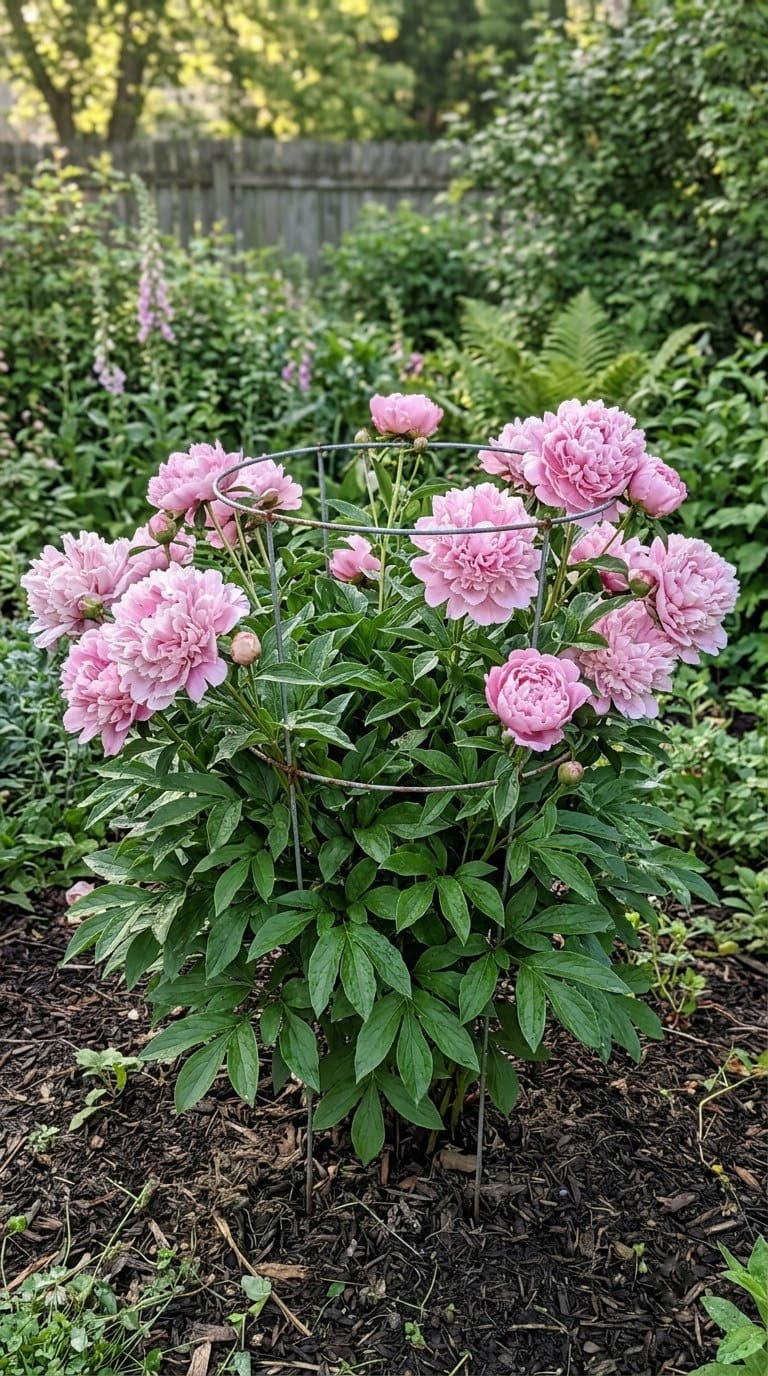
Peonies are beautiful until it rains. Then every stem falls over. A modified tomato cage solves this problem before it starts.
The average homeowner spends $616/year on yard fixes that don't address the real problem. Find out what yours actually is — before you spend another dollar.
Take the Free Quiz


What you need: Tomato cage, wire cutters.
How to do it: In early spring, cut the bottom ring off a 3-ring cage with wire cutters. You want only the top two rings attached to the uprights. Push those uprights 6 inches into the soil around the peony crown before the stems get tall. The plant grows up through the rings and stays upright all season without staking.
5. Winter Perennial Protection
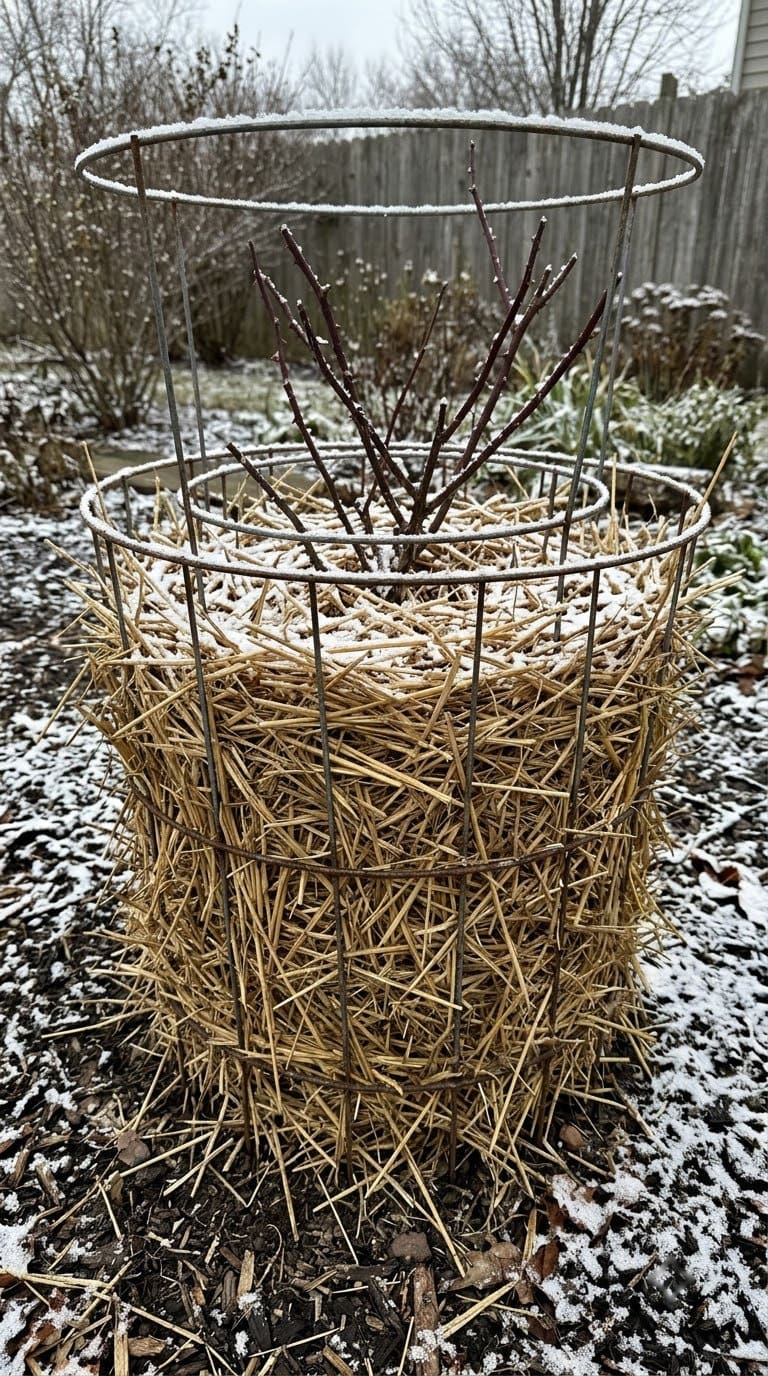
In cold climates, roses and tender perennials need both a windbreak and insulation after the ground freezes. Two nested cages work better than burlap alone because they keep the filling from blowing away.
What you need: Two tomato cages, dry leaves or straw, twine.
How to do it: Push one cage into the soil around the plant. Nest the second inside it, offset slightly so the wire openings are smaller. Fill the space between the cages and the plant with dry leaves or straw. Tie the cages loosely together at the top with twine.
Decorative Garden Ideas
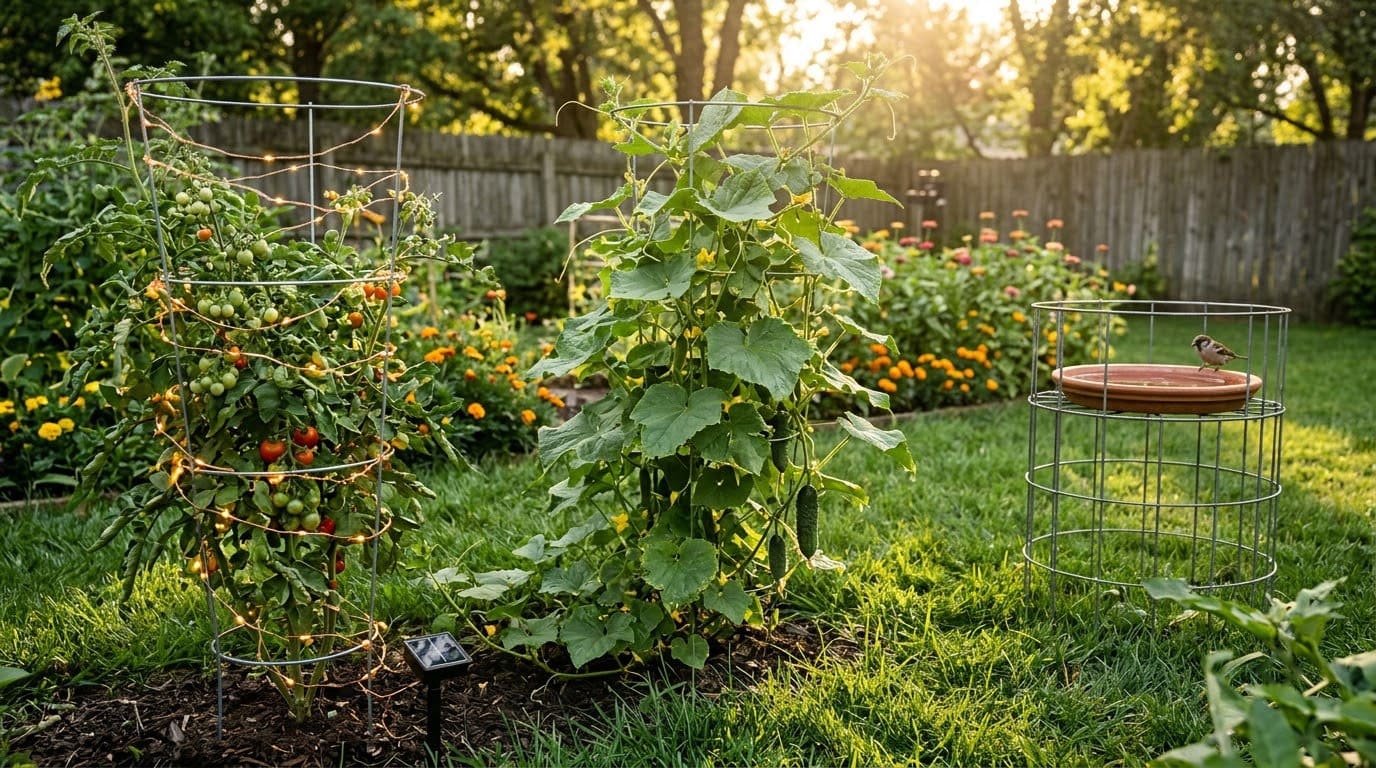
6. DIY Bird Bath
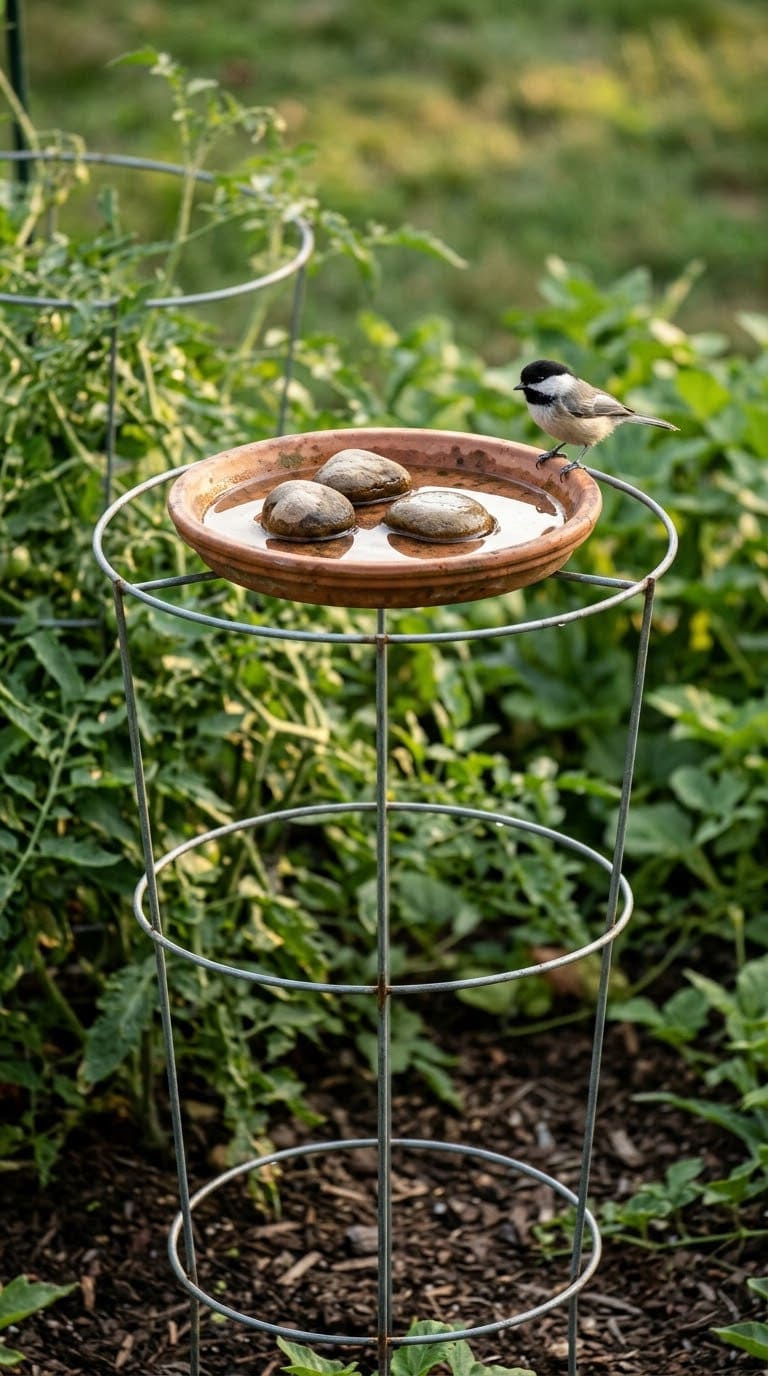
A heavy tomato cage makes a stable base for a bird bath at almost zero cost.
What you need: Heavy-gauge 3-ring tomato cage, shallow terracotta saucer (12 to 14 inches wide), zip ties.
How to do it: Push the cage into the ground. Rest the terracotta saucer on the top ring. It sits inside like a bowl in a holder. If it wobbles, secure it with two or three zip ties around the rim. Fill with clean water and add a few smooth stones for small birds to stand on. Change the water every two to three days.
More ideas: DIY Bird Bath Ideas.
7. Bird Feeder Station
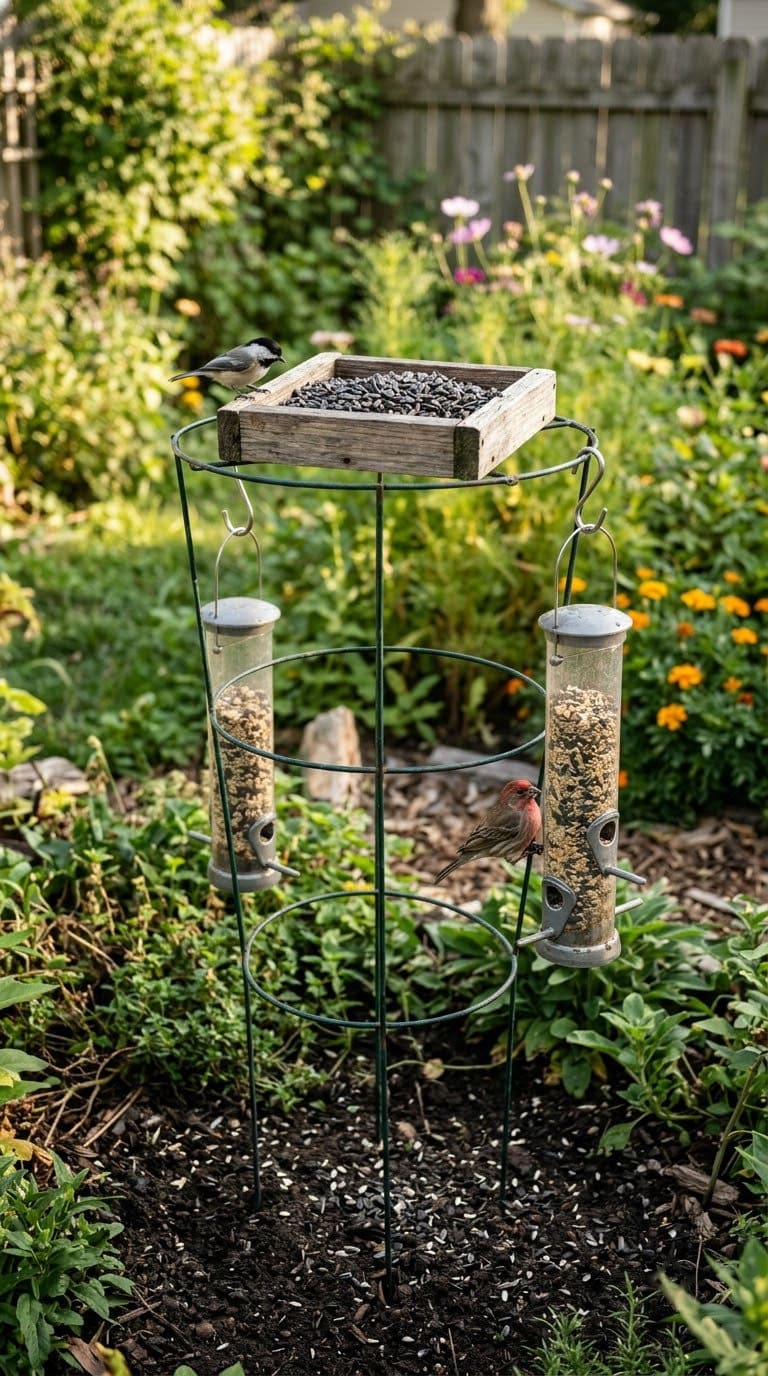
This setup lets you hang multiple feeders at different heights on a single structure.
What you need: Tomato cage, small platform feeder or shallow tray, S-hooks, birdseed.
How to do it: Push cage into the ground. Set the platform feeder on the top ring, or tie it with wire. Hang tube feeders from the lower rings using S-hooks. Fill and watch.
More ideas: Types of Bird Feeders.
8. Solar Light Garden Lantern
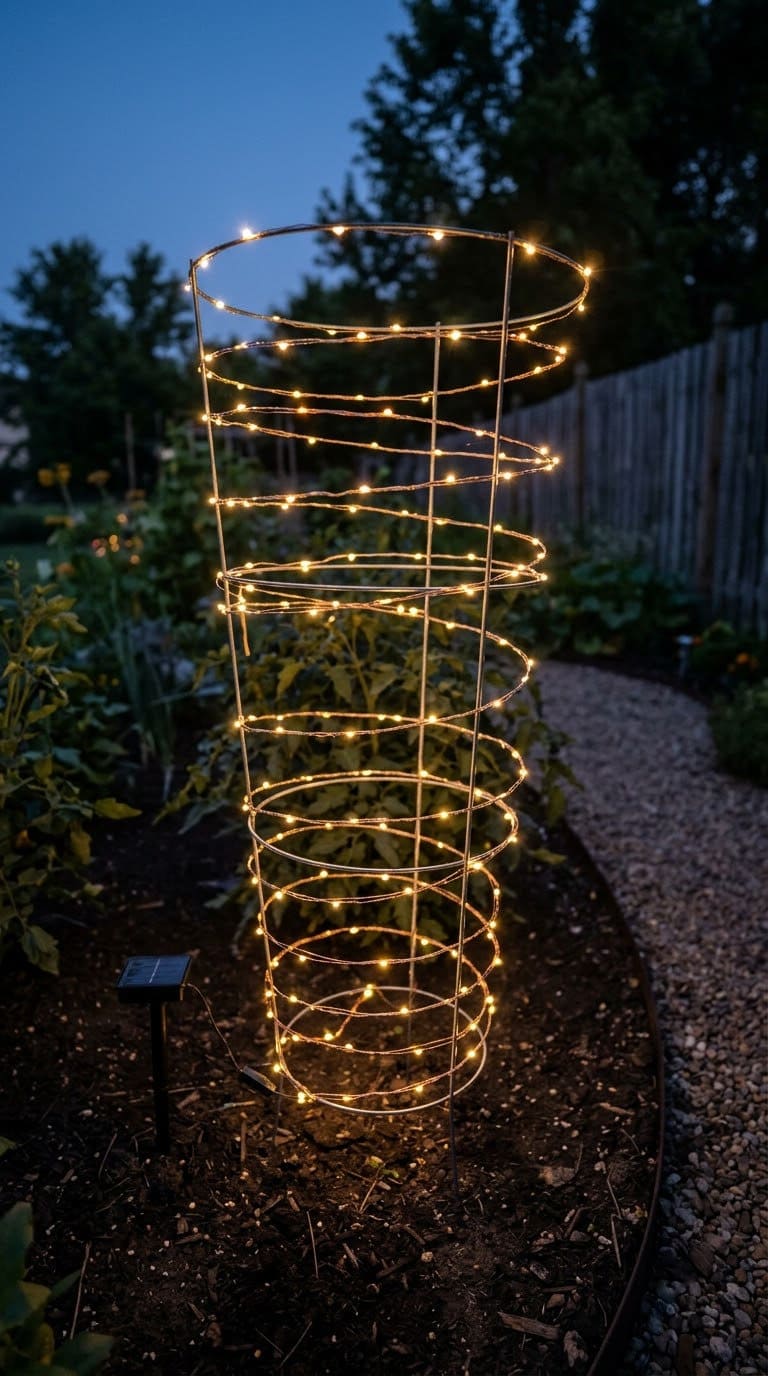
Wrap a tomato cage in solar string lights, push it into the garden, and by dusk it looks like a glowing lantern. Group two or three together for a path lighting effect.
What you need: Tomato cage, solar string lights (at least 20 feet per cage).
How to do it: Starting at the top of the cage, weave the light string between the rings and along the uprights in a spiral. Work downward. Leave the solar panel at the top and position it where it gets full sun during the day. Push the legs into the soil.
More ideas: Transform Your Garden With Outdoor Planter Lighting.
9. Wine Bottle Tree
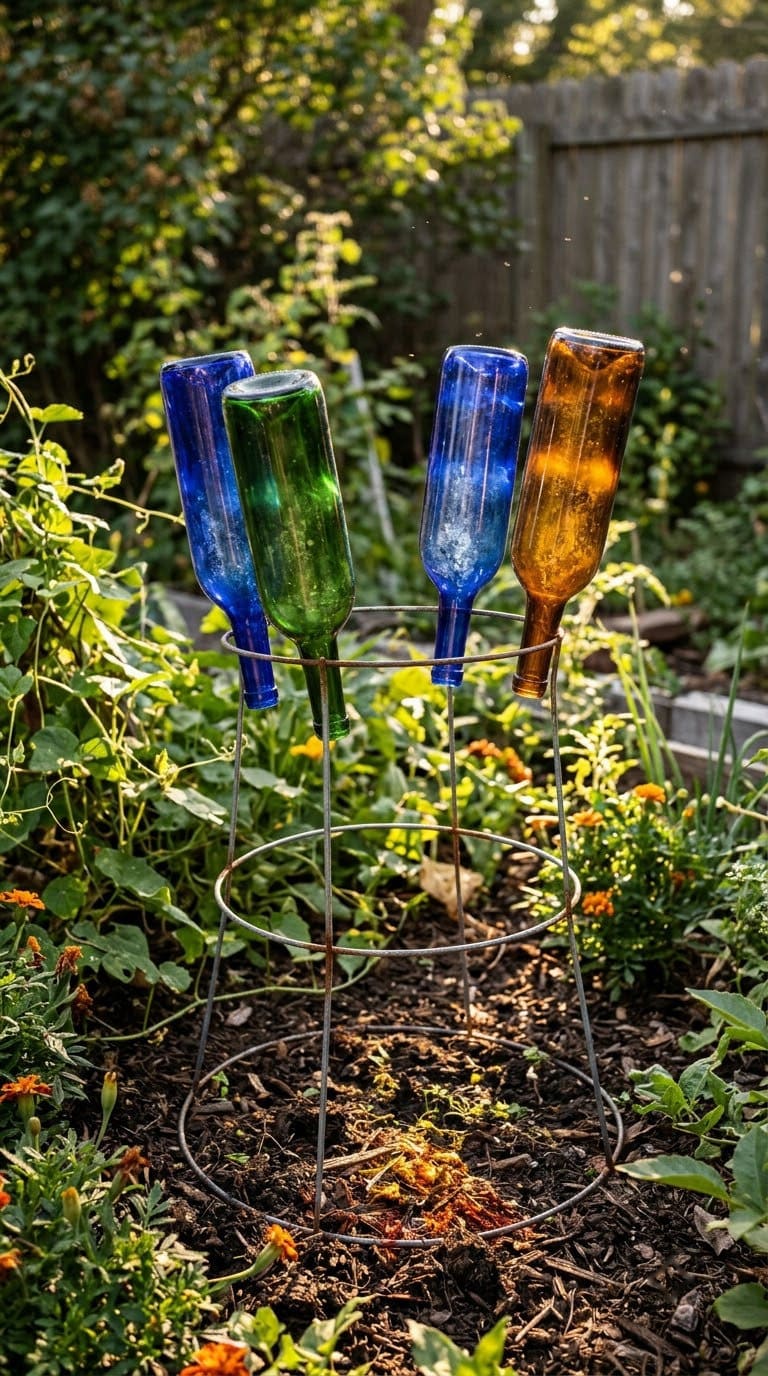
This is a classic Southern garden tradition. Tomato cages make it easy.
What you need: Tomato cage, six to ten colored glass bottles (cobalt blue, green, and amber catch light best).
How to do it: Push the wide base of the cage into the ground so the tines (normally the ground-stakes) point upward. Bend the tips outward and upward at roughly 45 degrees. Slip one bottle over each tip. The cage stays stable in the ground; the bottles rest on the wire tips.
10. Topiary Form
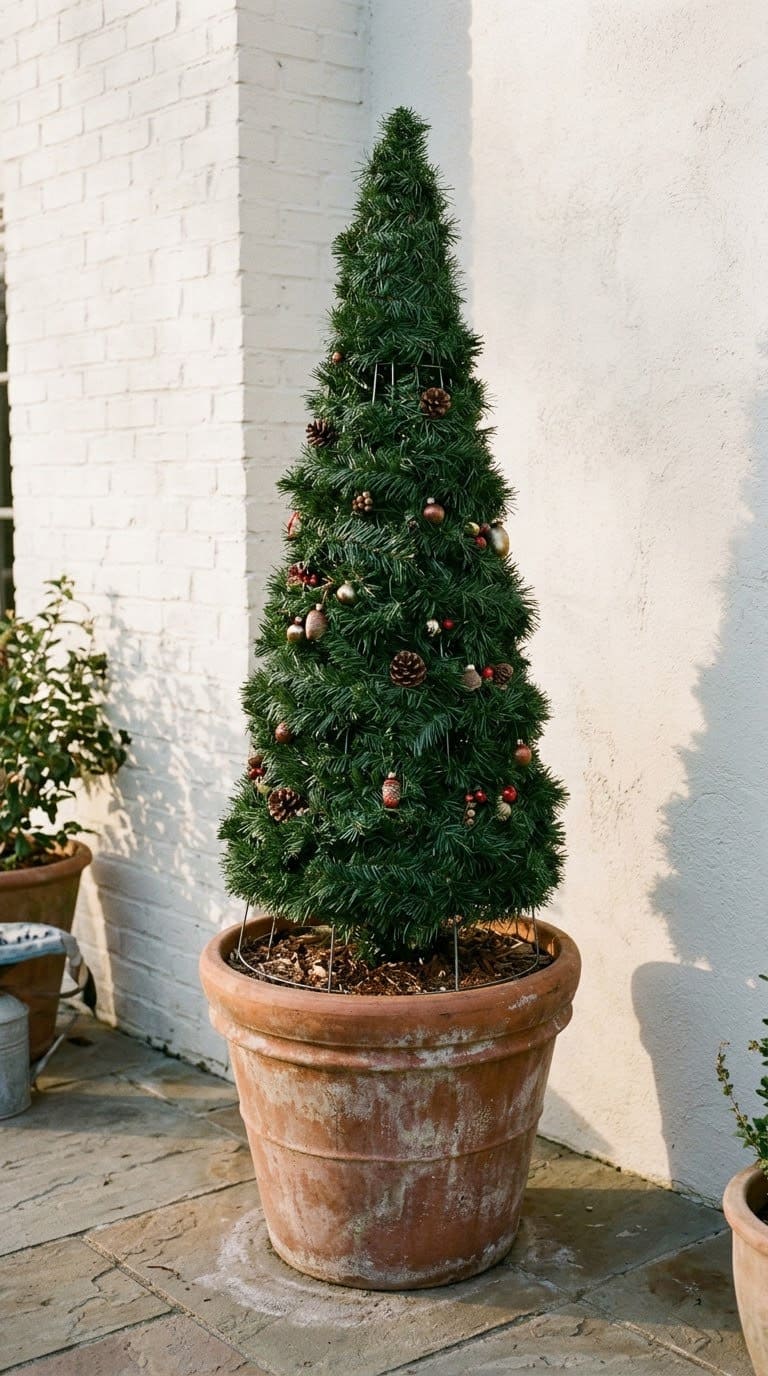
A tomato cage’s cone shape is a ready-made topiary frame. Wrap it in garland or faux moss for an instant topiary.
What you need: Tomato cage, outdoor garland or faux moss (6 to 8 feet per cage), floral wire.
How to do it: Anchor the cage in a container or in the ground. Wrap garland in a tight spiral from bottom to top, securing every few rings with floral wire. Fill any gaps with additional moss or greenery. For a double-ball topiary, pinch the cage narrower at the midpoint and tie it with wire before wrapping.
See also: Container Topiary Ideas.
Seasonal and Holiday Hacks
11. Christmas Tree
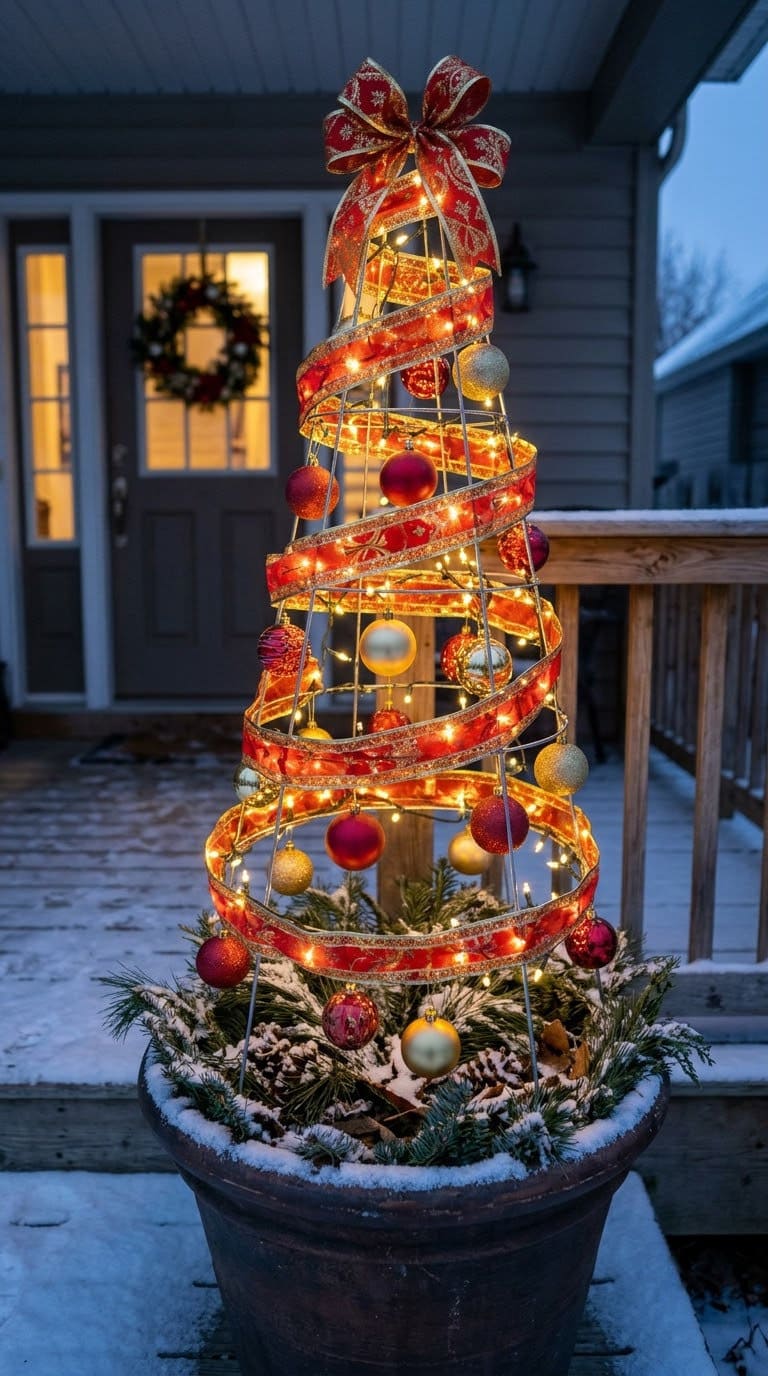
The cone shape of a tomato cage looks like a tree, and with some wired ribbon and a few ornaments it becomes one.
What you need: Tomato cage, wired holiday ribbon (one 10-yard roll, 2.5 inches wide), shatterproof ornaments, bungee cord and a heavy paver (for container anchoring).
How to do it: Anchor the cage in a large container or push the legs directly into outdoor soil. Weave the ribbon in and out of the rings in a loose spiral from bottom to top. Hang shatterproof ornaments from the wire. Loop a bungee cord around the bottom ring and place a heavy paver inside the container for extra stability on windy days.
More ideas: Outdoor Christmas Planter Ideas.
12. Halloween Ghost
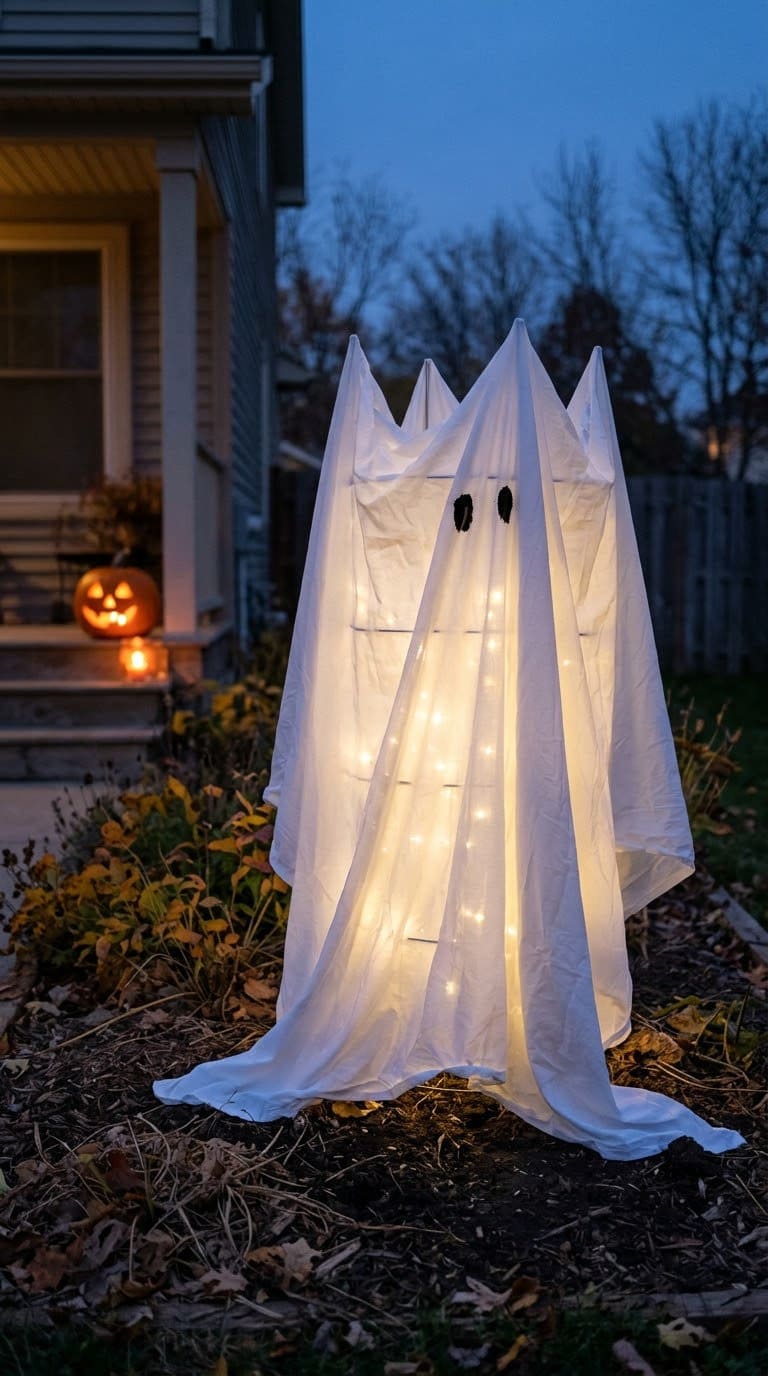
Flip, drape, and glow. This takes five minutes and costs almost nothing.
What you need: Tomato cage, white cheesecloth or old white sheet, small foam ball, white LED string lights.
How to do it: Push the wide base of the cage into the ground. Place a small foam ball on one of the tine tips as the ghost’s head. Run white LED lights inside the cage. Drape white fabric over the entire cage and foam ball. Cut small eye holes if you like. The lights glow through the fabric at night.
Related: Halloween Topiary Ideas.
13. Fall Cornucopia

What you need: Tomato cage, grapevine garland or burlap strips, mini gourds, dried corn, bittersweet or fall foliage.
How to do it: Lay the cage on its side. Wrap the entire cage in grapevine garland, securing with wire. Bend the pointed tip upward to form the horn shape. Fill the open end with fall harvest decor: mini pumpkins, dried corn, and bittersweet work well.
14. Easter Carrot
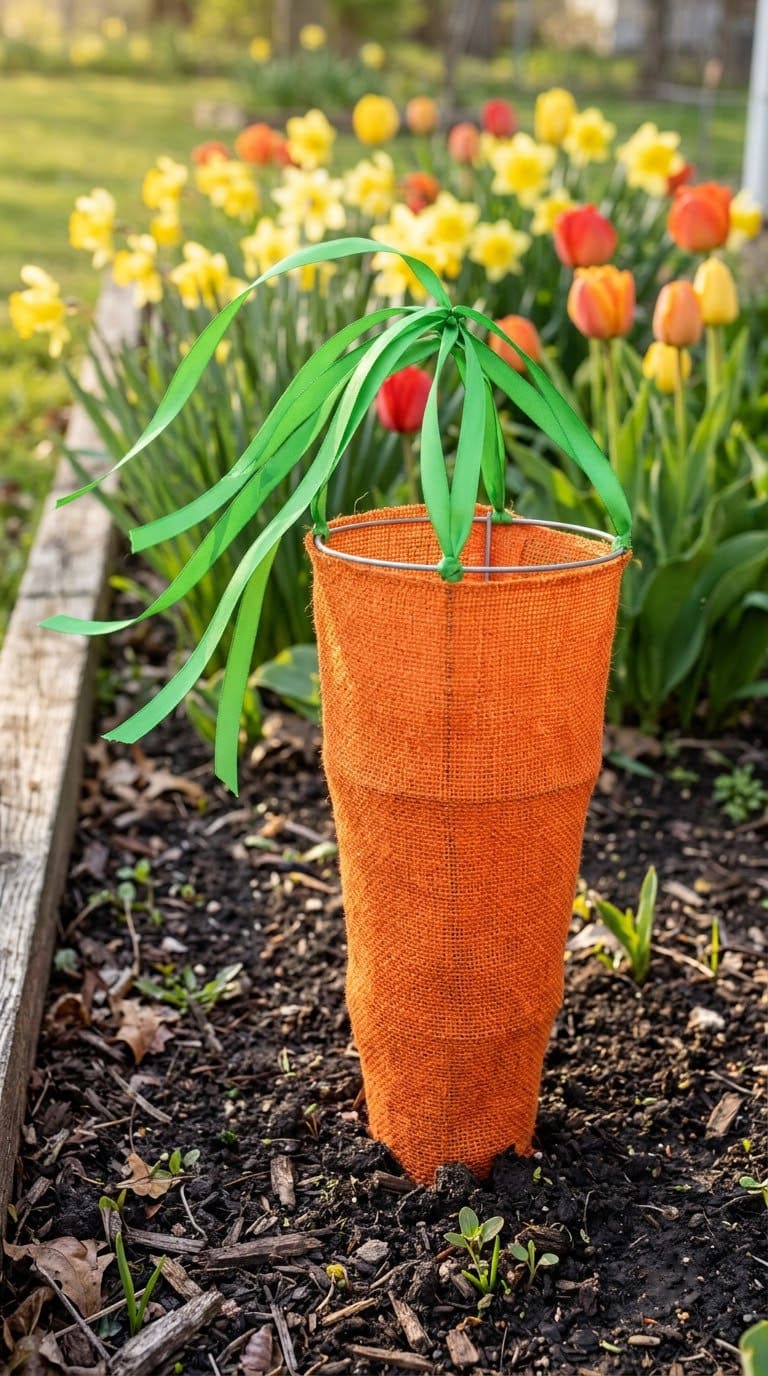
What you need: Small tomato cage, orange burlap or orange fabric, green ribbon or crepe paper.
How to do it: Wrap the cage tightly in orange burlap from the bottom ring to the top, securing with hot glue or wire. Attach five or six lengths of bright green ribbon to the top ring, pointing upward like carrot tops. Push the legs into a garden bed for an easy Easter yard decoration.
More Uses Worth Trying
15. Vertical Herb Tower
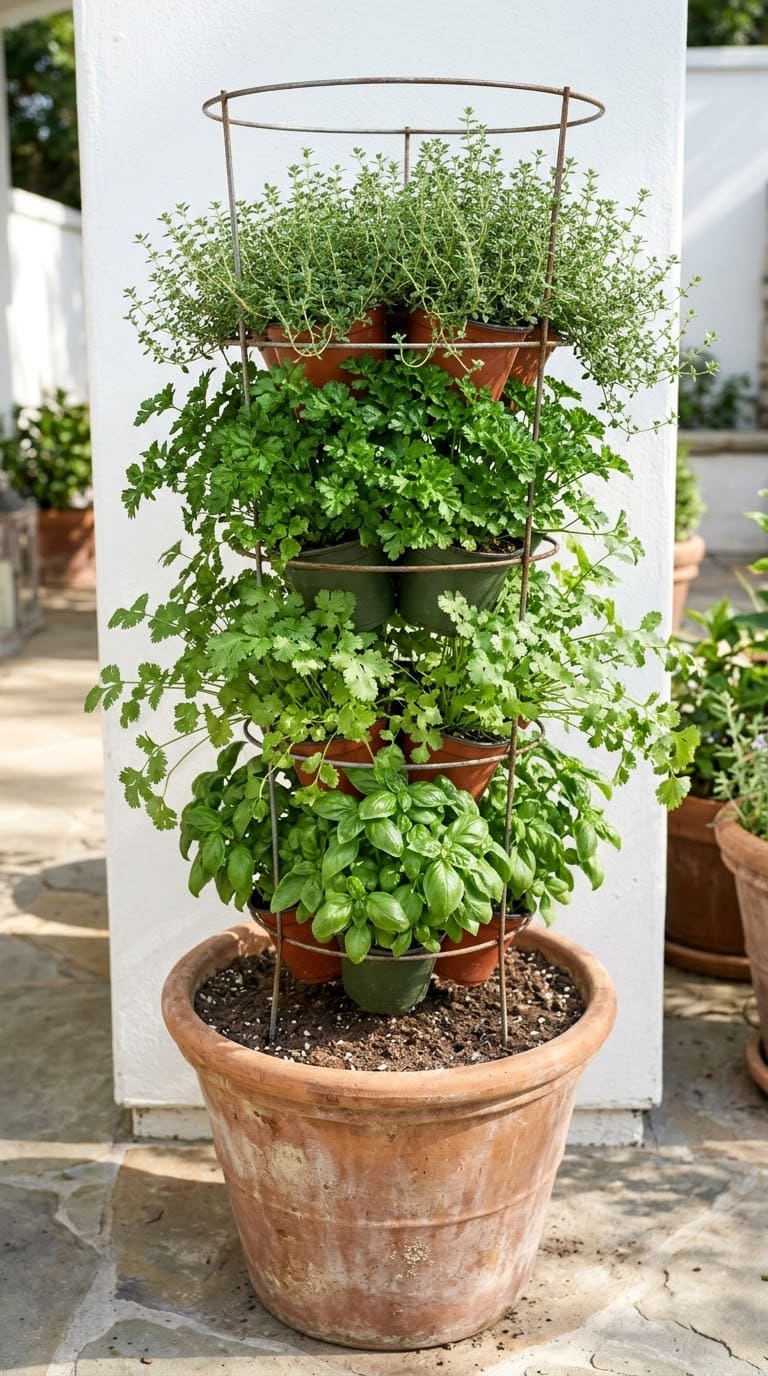
A 4-ring tomato cage in a large container can hold four separate small herb pots, one at each ring level. This turns a single container into a vertical herb garden for a small patio or balcony.
What you need: 4-ring tomato cage, large container (at least 12 inches wide and deep), four 4-inch herb pots, potting mix.
How to do it: Fill the large container with potting mix and push the cage legs firmly into it. Wedge one small herb pot between the cage frame and each ring, starting at the bottom. Add potting mix around the base to stabilize the outer pot. Place heat-tolerant herbs (basil) at the bottom and compact herbs (thyme, oregano) near the top where wind is stronger.
See also: Vertical Pocket Planter Ideas.
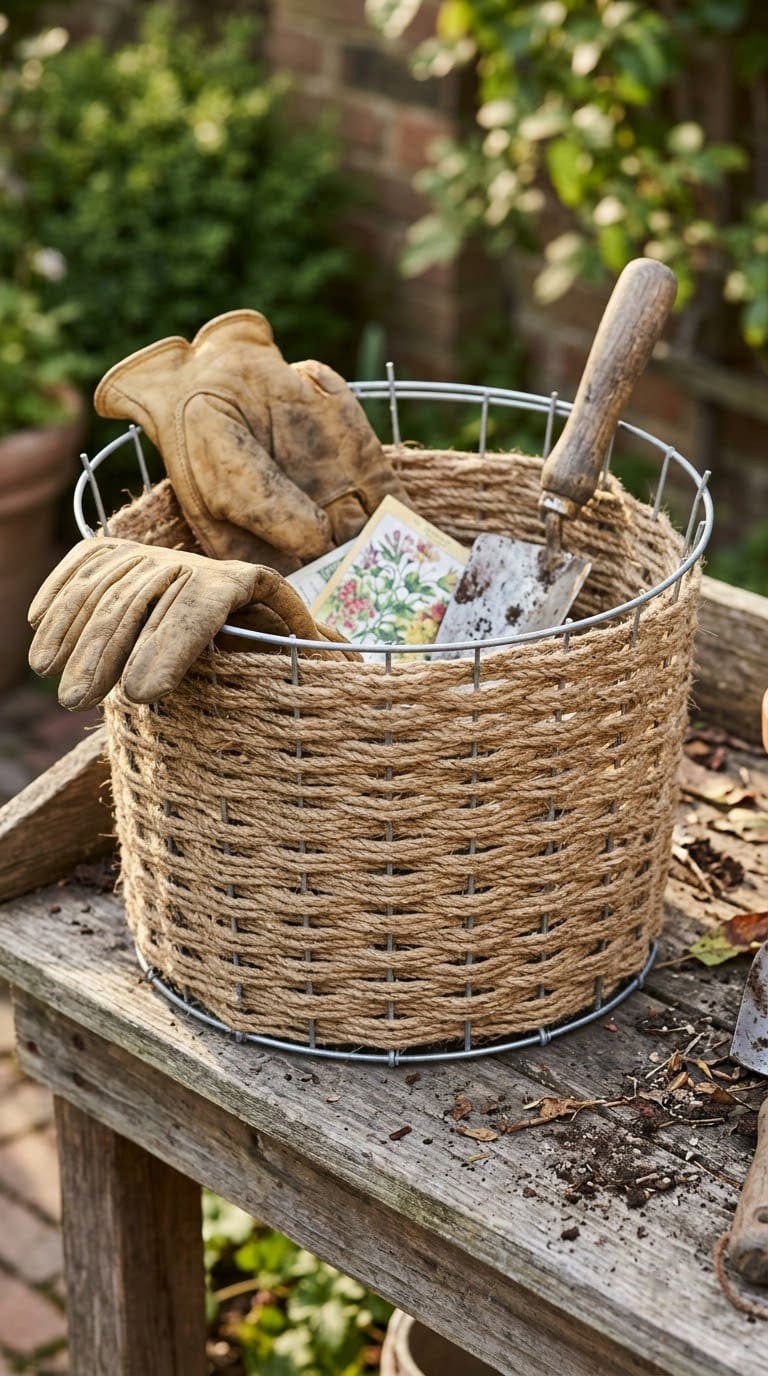
16. Storage Basket
What you need: Tomato cage (with at least two rings intact), thick yarn or rope, scissors.
How to do it: Cut the cage down to two rings, leaving the wire uprights between them. Weave yarn or rope tightly between the uprights to close the bottom. Continue weaving up the sides. The finished basket holds garden tools, outdoor toys, or sports balls.
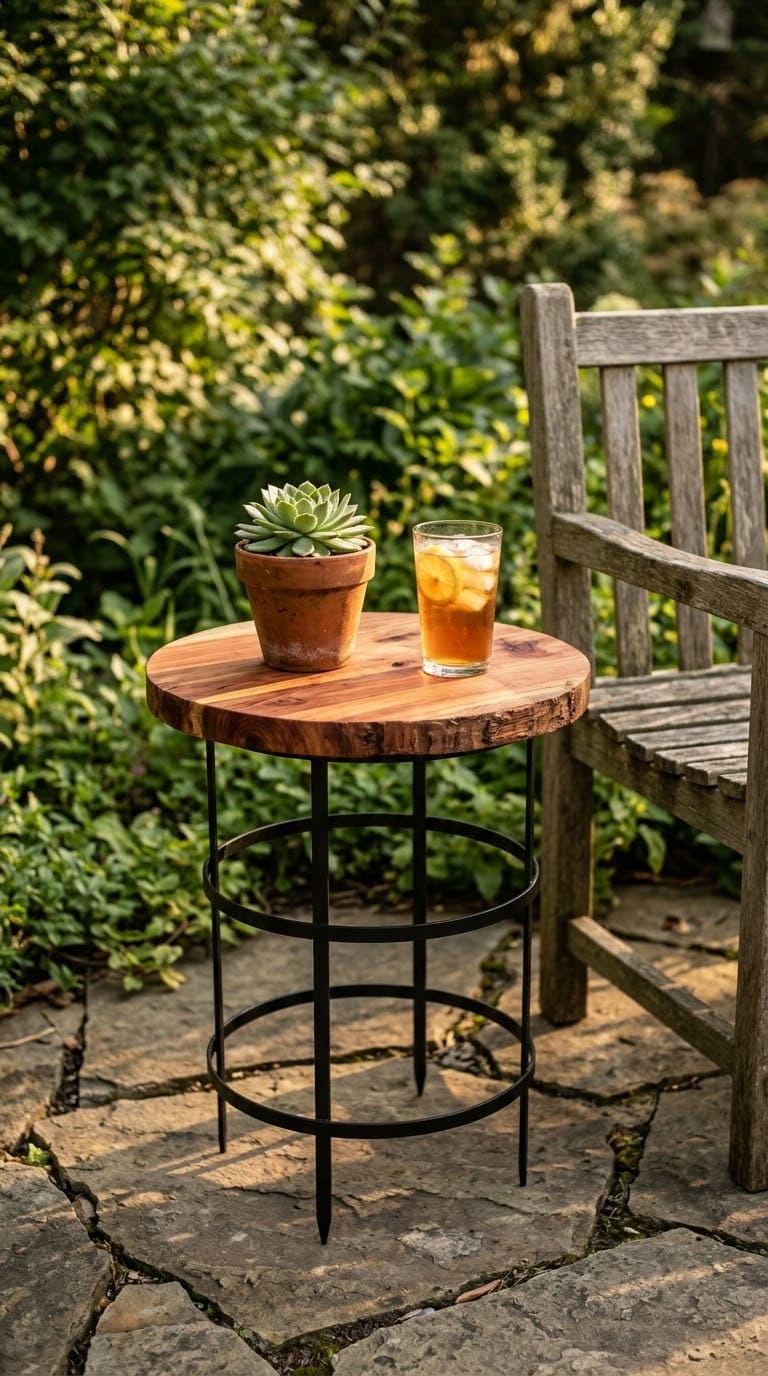
17. Outdoor Side Table
What you need: Heavy-gauge tomato cage, round wood board or thick paving stone (about 14 inches wide), spray paint.
How to do it: Cut the legs of the cage down to 4 to 6 inches. Spray paint the cage in any color. Rest a round wood board or heavy paving stone on the top ring as the tabletop. Push the short legs into the lawn, or weigh the inside with a heavy stone for use on hard surfaces.
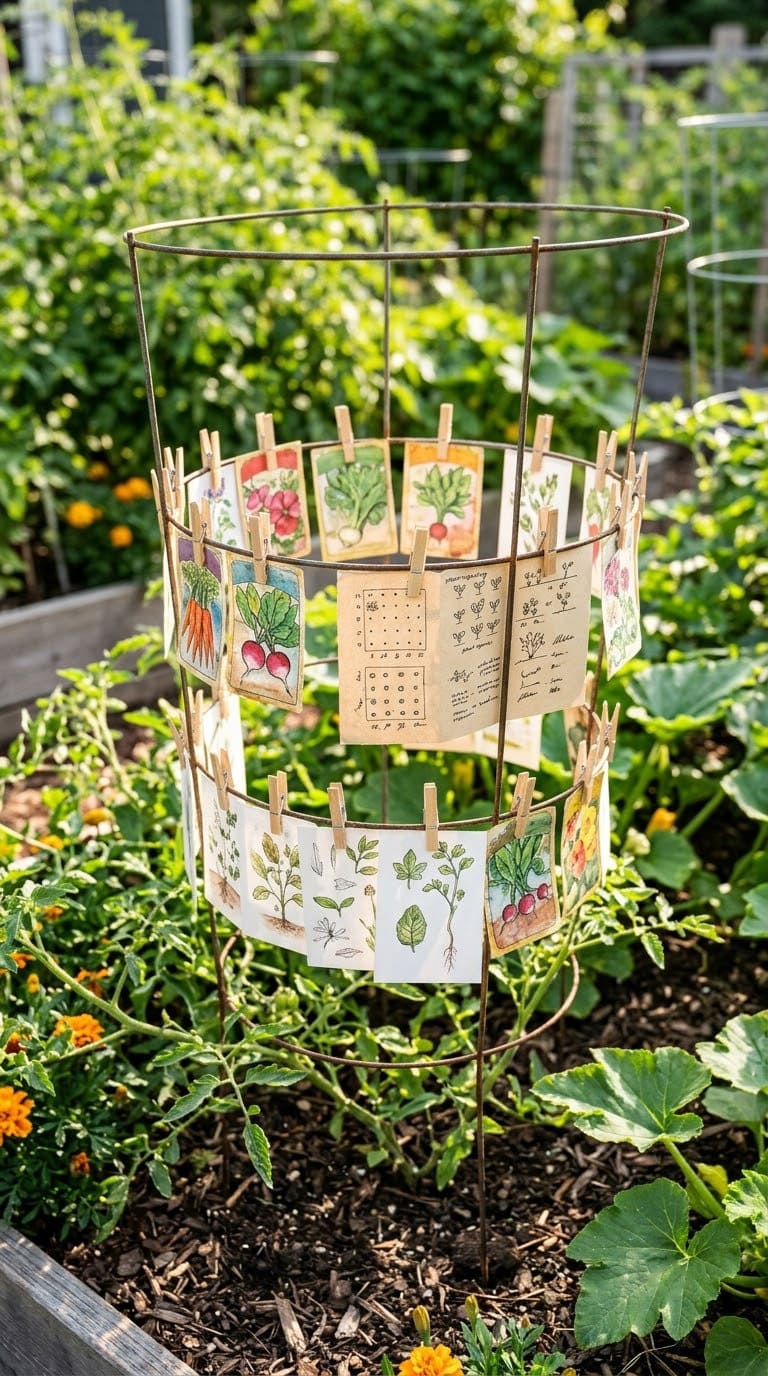
18. Outdoor Photo Display
What you need: Tomato cage, mini clothespins, photos or art prints.
How to do it: Push the cage into the soil or place it in a weighted pot. Clip photos, art cards, or seed packet labels to the rings with mini clothespins. This works especially well for garden parties, seed swaps, or outdoor gatherings.
What to Do With Broken Tomato Cages
A cage with snapped rings or bent uprights does not have to go in the trash.
Cut straight wire pieces into 8 to 12-inch plant stakes for holding down ground cover or securing landscape fabric. Tie short wire sections to a larger ring with fishing line to make windchimes.
For cages that cannot be repaired or repurposed, take them to a scrap metal recycler. Wire is recyclable, but curbside bins are the wrong place for it. Wire tangles in sorting equipment at recycling facilities and causes damage.
Conclusion
A stack of tomato cages is not clutter. It is a set of tools waiting for the next use. Start with frost protection or vine support if you grow vegetables. Try the bird bath or solar lantern for a quick decorative project this weekend. And when the seasons turn, those same cages are ready for Halloween ghosts and Christmas trees.
The best part is the cost. Most of these hacks use things you already own. The most expensive one on this list (the winter perennial protection) needs a bag of leaves that are already in your yard.
Common Mistakes to Avoid
Using a light cage for a bird bath. Flimsy cages flex under the weight of a filled saucer. Use heavy-gauge cages for anything that needs to hold weight.
Leaving row cover on too long. Row cover blocks some light even on sunny days. Remove it as soon as frost risk passes so plants can grow normally.
Burying the legs too shallow. A cage that is only 2 to 3 inches deep in the soil will tip in wind. Push legs in at least 4 to 6 inches for stability.
Putting wire in the curbside recycling bin. Wire wraps around sorting equipment. Take broken cages to a scrap metal recycler instead.
Never miss an update — choose FarmFoodFamily as your preferred source on Google.
How it works: Tap the button below to open Google's settings page, then check the box next to FarmFoodFamily.
Tap the checkbox to turn it blue — that's how you know it's set.