
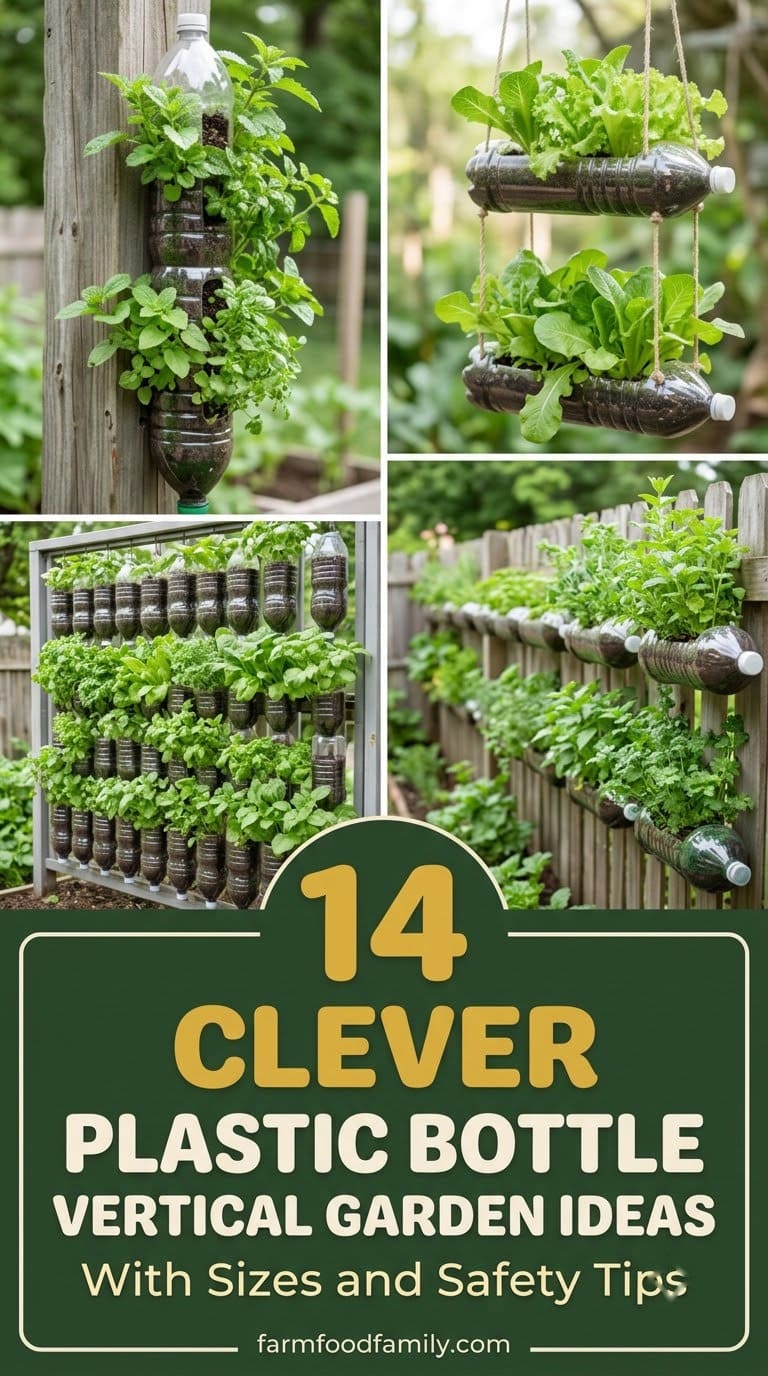
14 Clever Plastic Bottle Vertical Garden Ideas (With Sizes and Safety Tips)
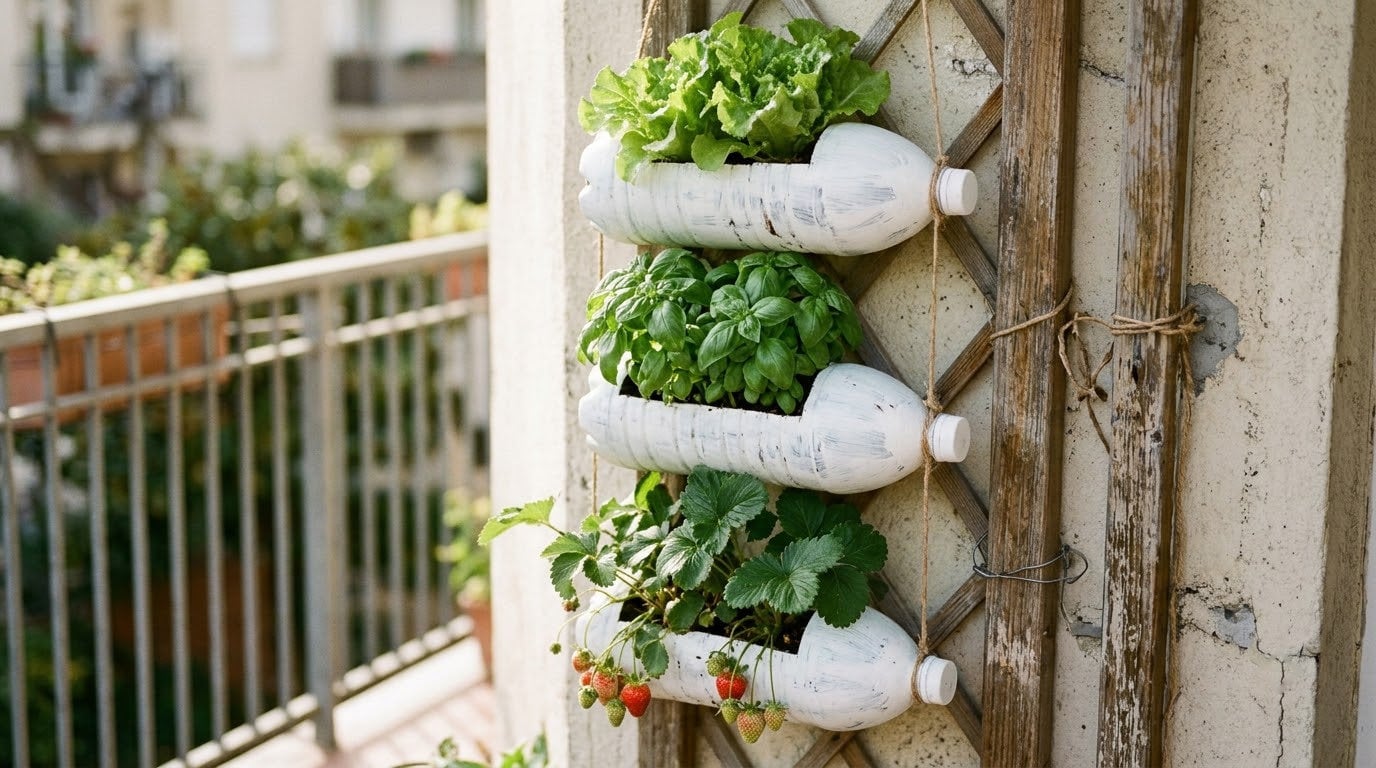
Old soda bottles can grow herbs, lettuce and strawberries on a wall or pole, as long as you plan for drainage, depth and sunlight.

Never miss an update — choose FarmFoodFamily as your preferred source on Google.
How it works: Tap the button below to open Google's settings page, then check the box next to FarmFoodFamily.
Tap the checkbox to turn it blue — that's how you know it's set.
Old soda bottles can grow herbs, lettuce and strawberries on a wall or pole, as long as you plan for drainage, depth and sunlight.
Products We Recommend
This post contains affiliate links. We may earn a commission on qualifying purchases at no extra cost to you.

ILIKEEC 5mm Jute Twine, 328 Feet Braided Jute Rope
Strong natural twine for hanging the bottle planters in ideas 1, 3 and 5
Shop Now
Krylon Fusion All-In-One Spray Paint, Satin White, 12 oz, 2 Pack
Indoor and outdoor spray paint for coating bottle exteriors white, as in idea 2
Shop Now
Gardens are a great way to add natural beauty to any space. You can plant flowers or even grow essential ingredients for your kitchen.
They also make for great DIY projects and can be started anywhere. In this article, we look at some ideas for plastic bottle vertical gardens.

In this article
Answer 4 quick questions and get matched to the exact fix for your yard — drainage, budget, layout, or something else entirely.
Take the Free QuizQuick Answer
A plastic bottle vertical garden turns soda bottles into stacked planters on a wall, fence or pole. The simplest version hangs cut bottles in a column. The most proven version is a tower of bottles on a post, taught by University of Florida Extension.
Three things decide whether it works. Every bottle needs drainage holes.
The soil needs enough depth, since UC Master Gardeners say containers should be at least 6 inches deep. And the bottles need protection from strong sun, because plastic gets brittle over time.
But skip bottles that held anything other than drinks. Below are 14 builds, each with the plants that suit it and the care it needs. We also explain when to paint bottles and when to leave them clear, and how to keep mosquitoes out of any water reservoir.
How do you make a hanging garden out of a plastic bottle?
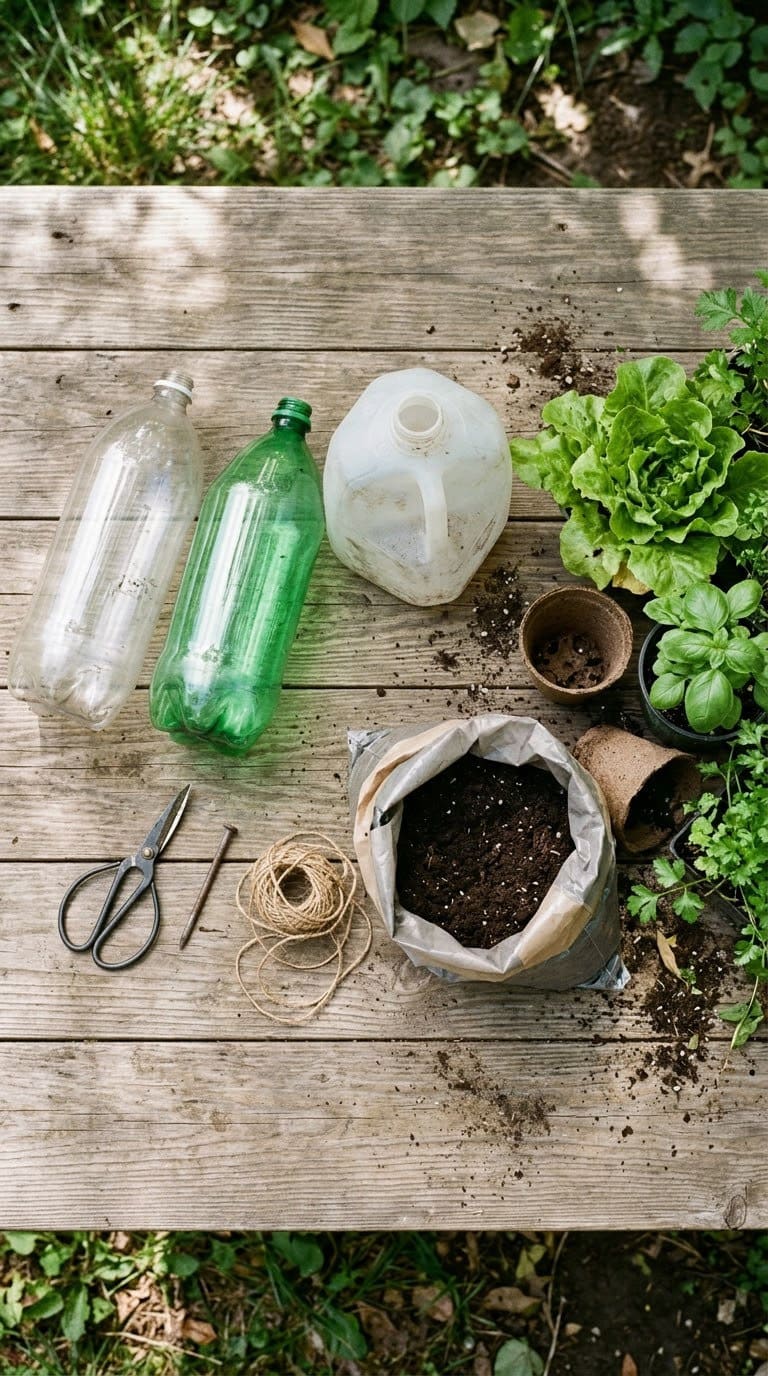
To start you off on your hanging garden, you will need some essential materials as listed below:
- Four plastic bottles. Old two-liter soda bottles are perfect.
- A skewer
- String
- Hardened paper. An old cereal box will do just fine.
- A pair of scissors
- Gardening soil. You can get this from a flower store or dig some dirt from your yard.
- Seedlings. You have a wide selection to choose from when you visit your local gardening store.
Step 1
Cut the bottles horizontally on one side and remove the extra piece. The final result should resemble a water trough like the one used by animals on farms.
Most yard problems trace back to one specific, fixable cause. Find yours in 4 quick questions.
Take the Free QuizThe plants will grow out from here, and it needs to be large enough for you to be able to work. The area between the neck of the bottle and the base is large enough for this space. Ensure the bottle cap is still on to prevent the soil from draining out once you fill it in
Step 2
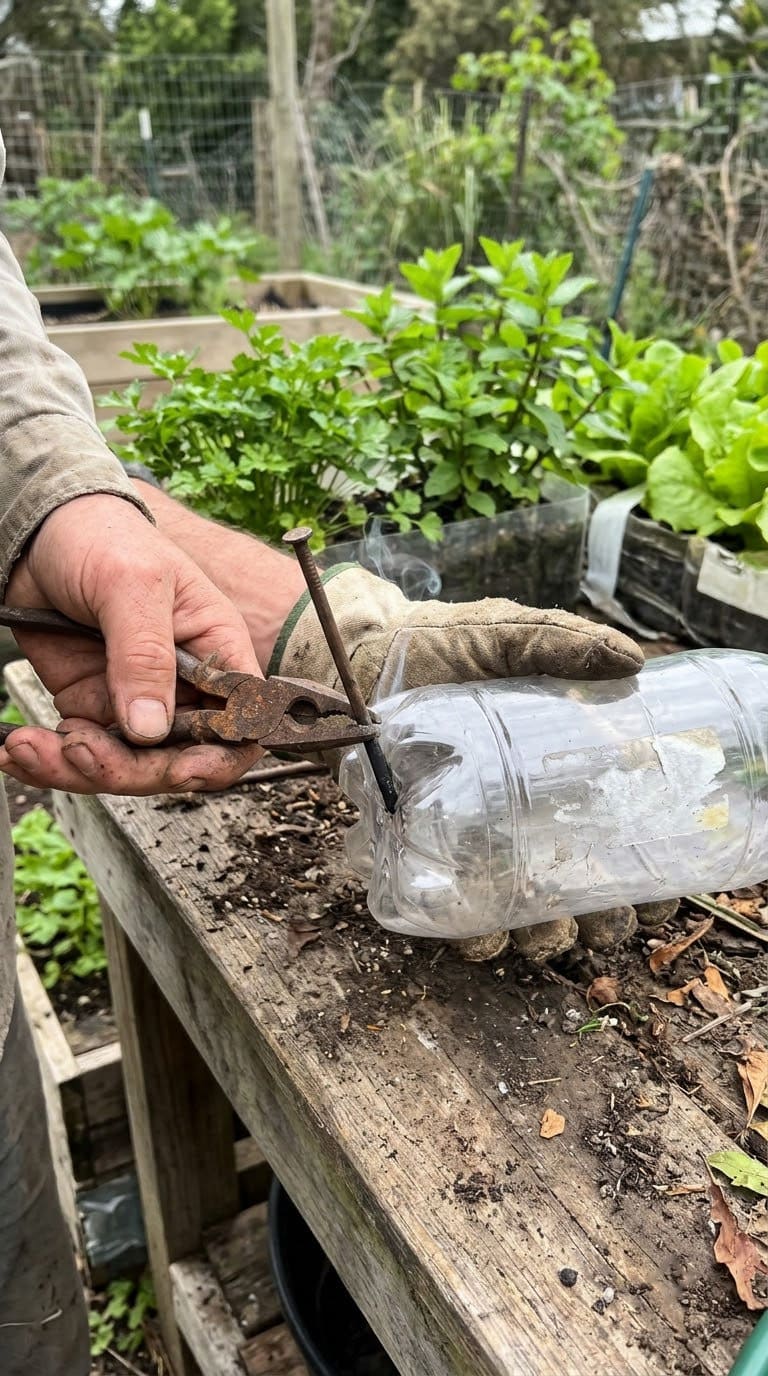
Poke holes along the side and base of the container to provide drainage holes. Pass the string through the holes closest to the ends.
These will be used to hang your garden. Line the interior of the bottle with the paper and then fill in the gardening soil.
Step 3
Transplant your seedlings into the new garden and then add the required amount of water. Hand the plastic garden to whatever area that you see fit around your home.
Which Bottles Make Good Planters?
Start with clean beverage bottles, such as 2-liter soda bottles or milk jugs. Skip any bottle that held motor oil, bleach, pesticide or other chemicals. Rinse bottles well and peel off the label.
Pick bottles with a sturdy shape and a screw cap. The cap helps in several builds, either as a seal or as a spot for a wick or drip hole. Light-colored, plain plastic holds up best outdoors.
Should You Paint the Bottles or Leave Them Clear?
Sources disagree here, so we put both views side by side.
Strong natural twine for hanging the bottle planters in ideas 1, 3 and 5
Shop NowThis post contains affiliate links. We may earn a commission on qualifying purchases at no extra cost to you.
| Source | Advice | The reasoning |
|---|---|---|
| Popular DIY guides | Use clear or very light bottles | Light reaches the plants |
| UF/IFAS Extension | Paint each bottle (its materials list calls for black or white spray paint) | Reduces direct sunlight penetration |
The UF/IFAS authors, Bielinski Santos, Teresa Salame-Donoso and Shawn Arango, built their tower for a soilless medium, where bright light on the roots is a problem. Our take: paint the outside of bottles that hold roots and leave a clear window only for seedlings. White paint keeps the bottle cooler.
Does Sunlight Wreck Plastic Bottles?
Over time, yes. Researchers at the University of Cape Town and the University of Leicester tested HDPE bottle lids and canisters. They found that black, white and silver colorants protect plastic from UV light, while other pigments do not.
The average homeowner spends $616/year on yard fixes that don't address the real problem. Find out what yours actually is — before you spend another dollar.
Take the Free QuizTheir blue, green and red lids became brittle and broke into microplastics within three years on a roof in Leicester. They tested lids and canisters, not clear soda bottles, so treat this as a warning and not a lifespan. See the UCT report.
So plan on replacing bottle planters every few seasons. Check them each spring for cracks. Pick up any fragments you find in the soil.
How Deep and Wet Should the Soil Be?
Small containers dry out fast. The UC Marin Master Gardeners say containers should be at least 6 inches deep. They also note that smaller containers dry out very quickly in summer, and deeper ones keep roots cooler and closer to moisture.
They advise checking containers daily and watering when the top inch of soil is dry, until water runs out the bottom. Drainage holes are essential. And they warn not to add gravel to the bottom, since it impedes drainage.
| Rule | What to do with a bottle planter |
|---|---|
| At least 6 inches deep | Stand bottles upright or use tall jugs for deep rooters |
| Drainage holes | Punch several in the lowest part |
| No gravel layer | Fill with potting mix right to the holes |
| Check daily | Water when the top inch is dry |
What Grows Best in a Bottle Tower?
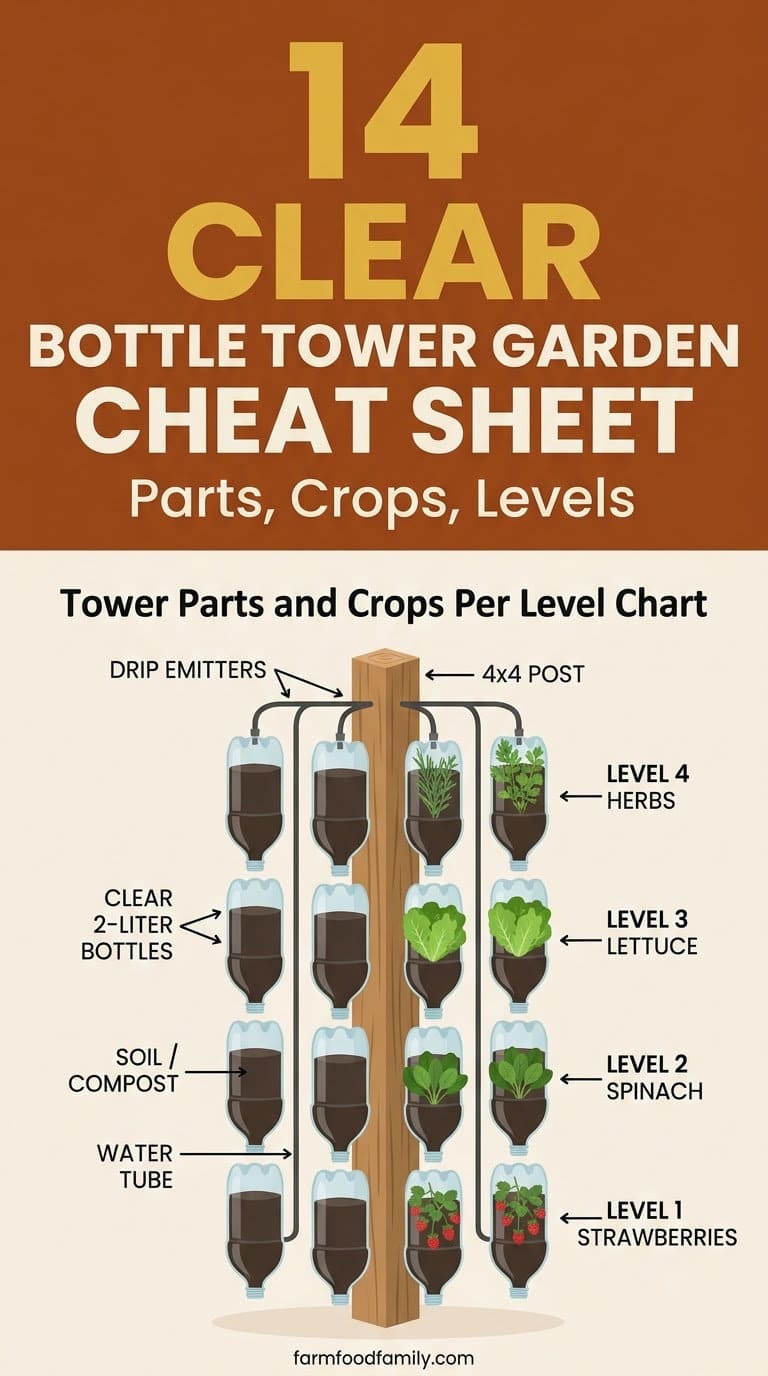
The UF/IFAS tower puts different crops on different levels. The upper levels get more sun. Their list for the top two or three levels includes strawberry, eggplant, determinate pepper, lettuce, arugula, cilantro and basil.


For the lower levels, they suggest onion, leek, collards and other cole crops. Bottom pots catch excess water, fertilizer and salt, so they suit crops that tolerate more salinity. The tower runs on gravity, with water dripping down from the top.
How Do You Keep Mosquitoes Out of Bottle Reservoirs?
Any bottle that holds standing water can breed mosquitoes. The CDC lists items such as buckets, birdbaths and flowerpot saucers and says to empty and scrub them once a week.
Cap or screen the openings of water bottles. Use a drip bottle instead of an open tray. Tip out and rinse any saucer under a planter every week.
What Do You Need to Build the UF/IFAS Tower?
The University of Florida publication gives a full parts list for one four-level tower. It is the most detailed bottle garden plan we found, so here it is in short form.
| Item | Amount |
|---|---|
| Post or pole | One 4 by 4 inch post, preferably 8 feet tall |
| Plastic bottles | Sixteen 2-liter bottles for four levels |
| Screws | A box, about 1 inch long, one per side per level |
| Irrigation hose or tubing | 10 feet |
| Spaghetti tubing and emitters | 4 feet of tubing and four emitters |
| Bottom pots | Four 3-gallon pots |
| Growing medium | About 20 gallons |
| Pipe pieces for drainage | Sixteen pieces, about 6 inches long |
| Paint | Black or white spray paint |
| Water timer | Optional |
You also need scissors, a screwdriver, a single-hole puncher and a shovel. Set the post 2 feet into the ground, and saturate the growing medium with water before planting. Growing medium means a soilless mix such as perlite, pine bark, coconut fiber or compost.
Which Build Fits Your Space?
Pick the format that suits your space and your patience for watering. This table is our guide, built from the ideas below.
| Space | Best build | Watering effort |
|---|---|---|
| Open yard with a spare post | Bottle tower (idea 2) | Low with drip |
| Sunny fence | Fence-hung row (idea 3) | Medium |
| Balcony railing | Railing strip (idea 12) | High, small soil volume |
| Bare wall | Wall panel (idea 4) | Medium |
| Windowsill or shelf | Sideways planters (idea 6) | Medium |

Some awesome vertical garden ideas that might interest you:
1. DIY Plastic Bottle Gardening Wall

Ever wanted to jazz up that plain boring old wall with something fun, colourful and environmentally friendly?
Why not cut a trough into one side of a soda, pop or water bottle and fill it with soil, plant some seeds, water daily and watch life grow from within? Hang them by a string or screw the bottles into the wall and maybe make a funky pattern from them!
Make as many as you like! A great way to spend a Sunday afternoon with the kids!
2. DIY Plastic Vegetable Garden

Those 5-litre bottles you buy for cooking oil or water often get tossed away but did you know you could use them to create your plastic vegetable garden?
Rectangular in shape they lie perfectly flat on one side enabling you to cut open the other side, fill it with soil and seeds and watch as your once drab patio floor becomes a nourishing accompaniment to your favourite meals.
Grow anything you like in there; lettuce, herbs, carrots – anything that doesn’t need more than five or six inches for its roots!
3. Bottle Drip Irrigation

Ever wondered why you see corrugated plastic tubes wedged in the roots of trees and plants? Sometimes there just isn’t enough irrigation available to feed the roots below the soil, so a tube is strategically placed to allow water to flow into the base of the plant directly.
To achieve this with a bottle destined for landfill, simply cut your bottle in half and burrow a hole a few inches below the surface of your new tree or plant. Place the perforated screw cap end into the ground and fill up the soil around it to hold it in place. You won’t believe the difference this makes to the speed at which your plant flourishes!
4. Plastic Bottle Stone Fairy House

Here’s something else for the kids to make on a rainy day. It’ll require a little visit out to the forest to gather a few things first but at least that’s where the fairies live – so best ask them what you need whilst you’re there!
Simply cut a square hole in the bottom of an orange or apple juice bottle to make a doorway and then using PVA or hot glue begin to stick small pebbles around the outside. You’ll begin to see the fairies dying to get in!
Follow the link below to complete this super cute feature for your garden.
5. DIY Hanging Plastic Bottle Planter Garden

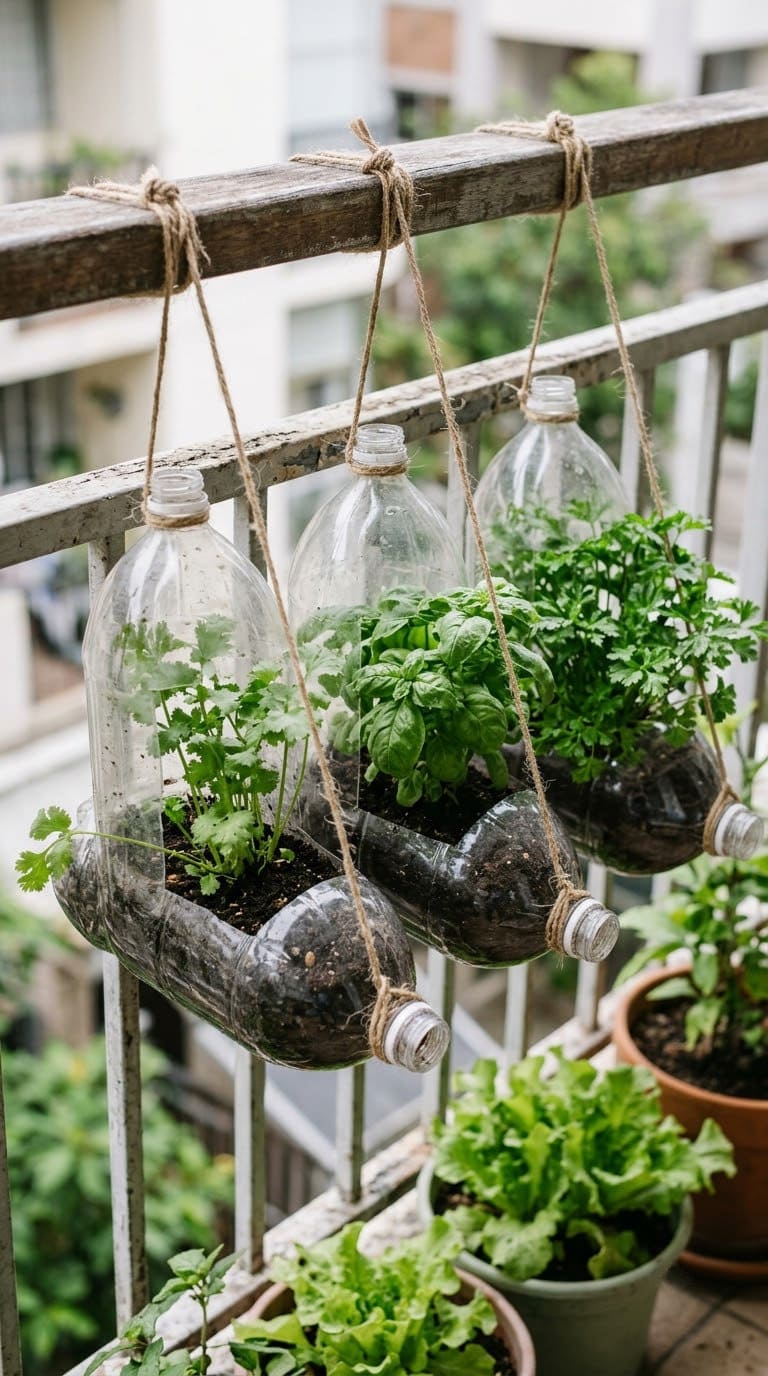
Double up your bottle-cutting skills by cutting TWO holes on either side of a two-litre bottle and place your soil and seeds or buds in the base. Suspend them using string around the neck from an overhanging ledge or pergola and marvel as life peers out of either side of the plastic vessel.
6. DIY Self Watering Seed Starter Pots

For those who want to save the planet but just don’t have the time to spend watering their botanical babies, cut open a two-litre bottle in half and open the neck end upside down into the base. Pop some wicking fabric in the opening and fill it with soil and seeds.
Add some water to the base and when you return from a hard day’s work each day you can watch your begonias thrive in their new recyclable home.
7. DIY Plastic Bottle Mushroom Garden

Think you’re a bit of a fungi? Not mushrooms in the house? Then here’s your answer:
Cut open a rectangular bottle and fill it with, wait for it, used coffee grounds and mashed cardboard! A generous dose of H20 and revel in the apparition of oyster mushrooms in your backyard.
8. DIY Plastic Water Sprinkler

This won’t need much of an explanation. Simply grab a bottle and, using a pin, prick a load of holes down one side and affix to the end of your hose. There really couldn’t be a simpler, cheaper way to evenly water your lawn.
9. Vertical Plastic Bottle Onion Tower

Love an onion? Who doesn’t?
Using a heated circular metal tool or a craft knife, carefully cut one-inch diameter holes evenly around a plastic bottle and remove each end. Fill the vessel with onion sprouts and tasty soil, water generously, and leave on the windowsill. Before long you’ll have your own vertical sprouting onion garden. Genius.
10. Plastic Bottle Tower Gardening

What better way can there be to feel smug and proud of your environmental actions by making a sprouting green wall out of the freshwater that you drink?
If you have a trellis in the garden and want plants growing up to the heavens then grab your once-wasted bottles and follow the link below to see what our Dutch friends have devised.
11. Hanging Trough Planters
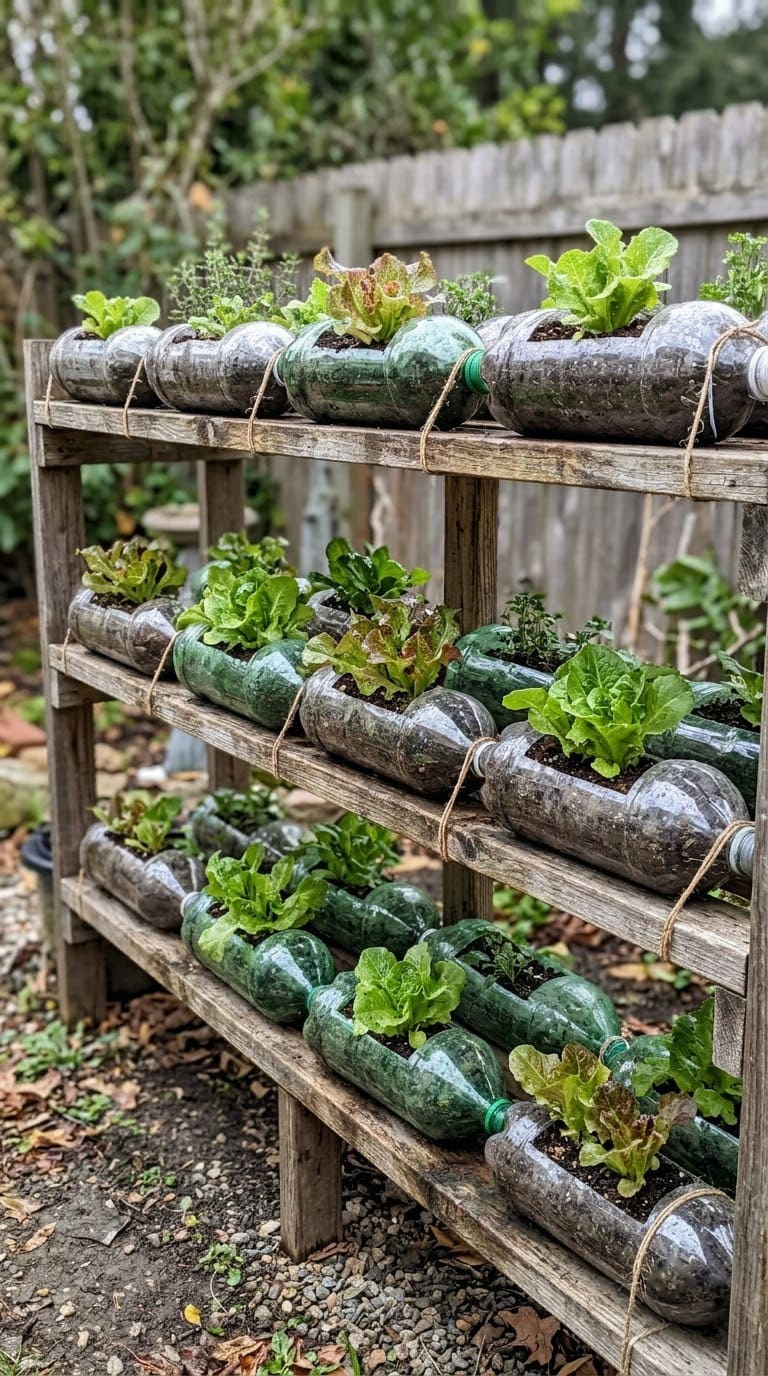
Cut a window in the side of a 2-liter bottle and hang it sideways on twine. Keep the cap on so soil stays in. Punch drainage holes in the low side.
Hang three or four in a column. They suit herbs like cilantro and basil. Loop the twine through two holes near the top so the bottle hangs level.
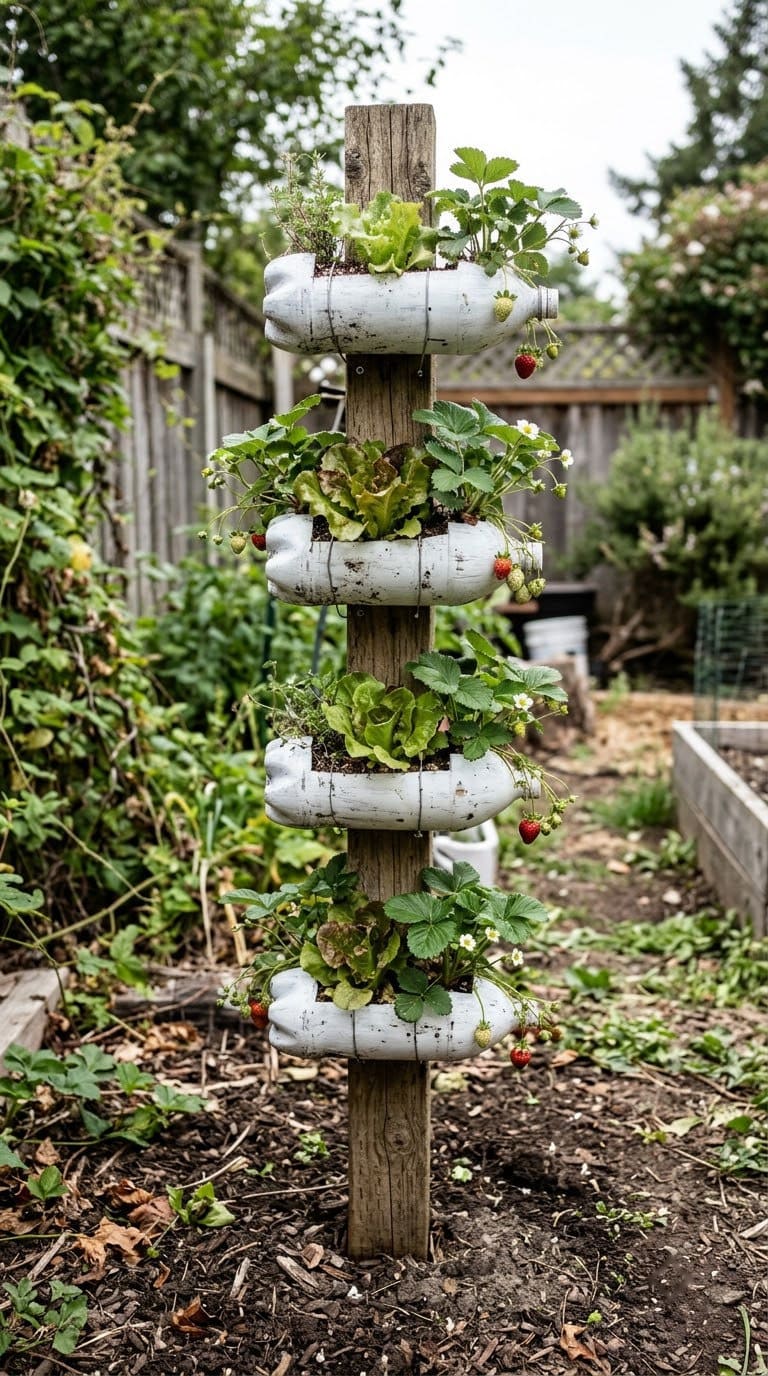
12. Bottle Tower on a Post
This is the UF/IFAS design. Set a 4 by 4 inch post, preferably 8 feet tall, 2 feet into the ground. Hang bottles from screws, four to a level.
The authors used sixteen 2-liter bottles for four levels and painted each one to cut direct sunlight. A bottle needs a tab about 3 inches wide so it hangs from the screw. Use a water timer if you can.
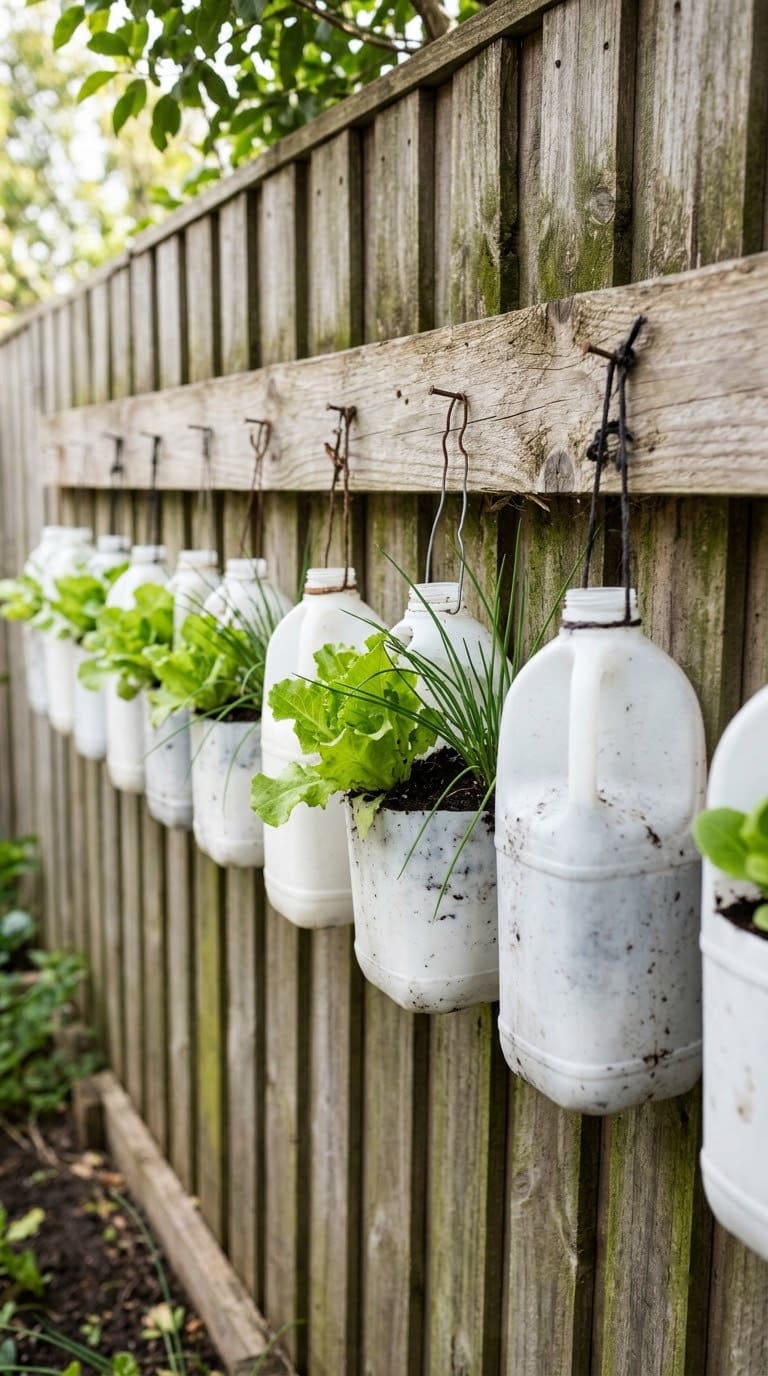
13. Fence-Hung Bottle Row
Screw a board to a fence and hang bottles from it in a row. Hang bottles at hand height for easy watering. Space them wide enough so leaves don’t crowd.
Fill them with lettuce or herbs. Check that the fence can carry the weight when the soil is wet. Our fence trellis ideas show other ways to use a fence.
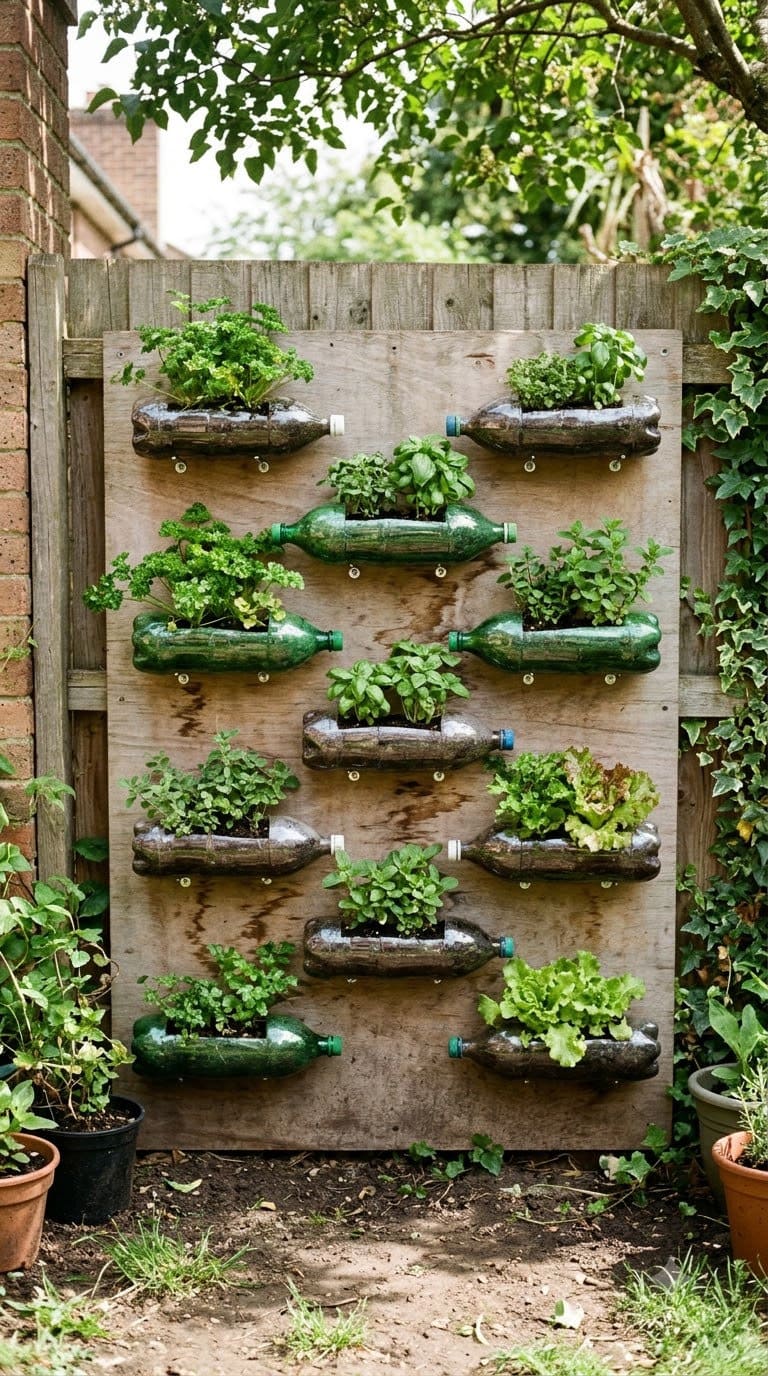
14. Bottle Wall Panel
Screw bottles sideways to a plywood backing, then hang the panel on a wall. Stagger them like bricks for a neat pattern. Leave room between rows for drip.
The panel is heavy once soil is wet. Fix it to studs or use wall anchors. See more wall ideas in our vertical pocket planters guide.
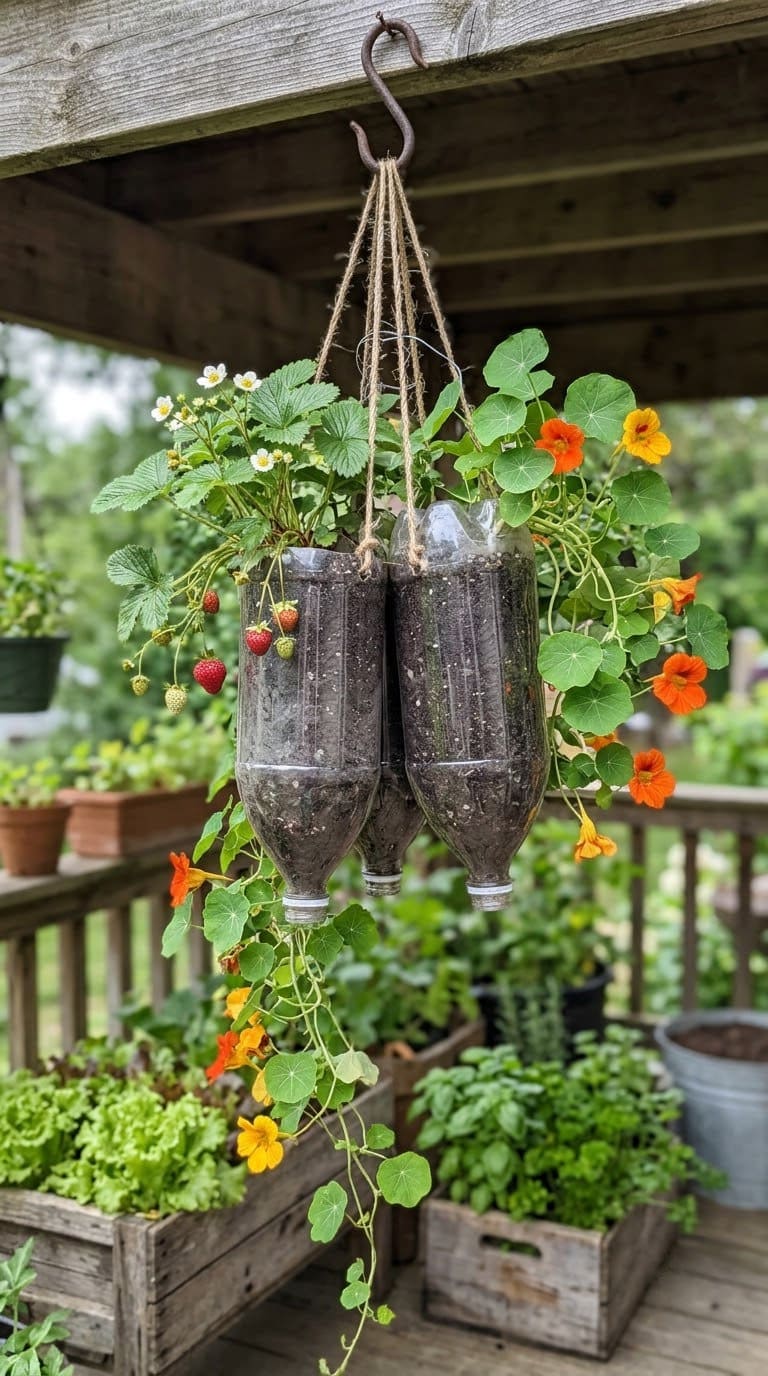
15. Neck-Down Hanging Planter
Cut the bottom off a bottle and hang it neck-down with the cap off. Plant through the wide end. A small piece of mesh over the neck keeps soil in.
This design drains fast, so water often. It suits trailing plants like nasturtium. Use light potting mix so it isn’t too heavy.
16. Sideways Window Planter
Lay a bottle on its side, cut a window in the top and plant inside. It is the easiest design for lettuce. Prop the bottle on bricks so it doesn’t roll.
Make the window long enough to plant three or four seedlings. Add drainage holes in the bottom. Stack a second row on top for height.
17. Wick-Fed Self-Watering Column
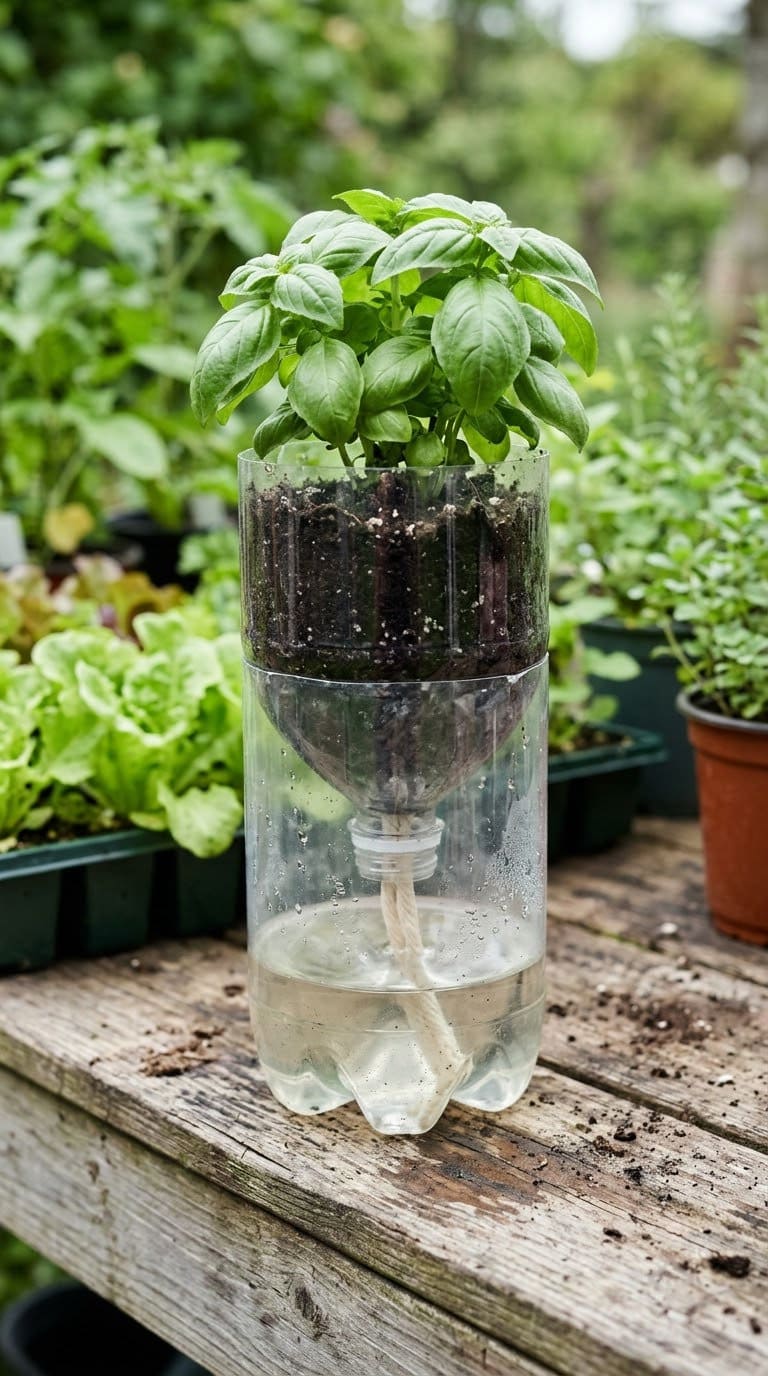
Cut a bottle in half, fill the bottom half with water and rest the top half upside down in it. Thread a cotton cord from the soil down into the water as a wick. This feeds the plant between waterings.
Use it for herbs and seedlings. Keep the reservoir covered so mosquitoes can’t lay eggs. Refill it each week and rinse the water.
18. Drip Bottle for a Tower
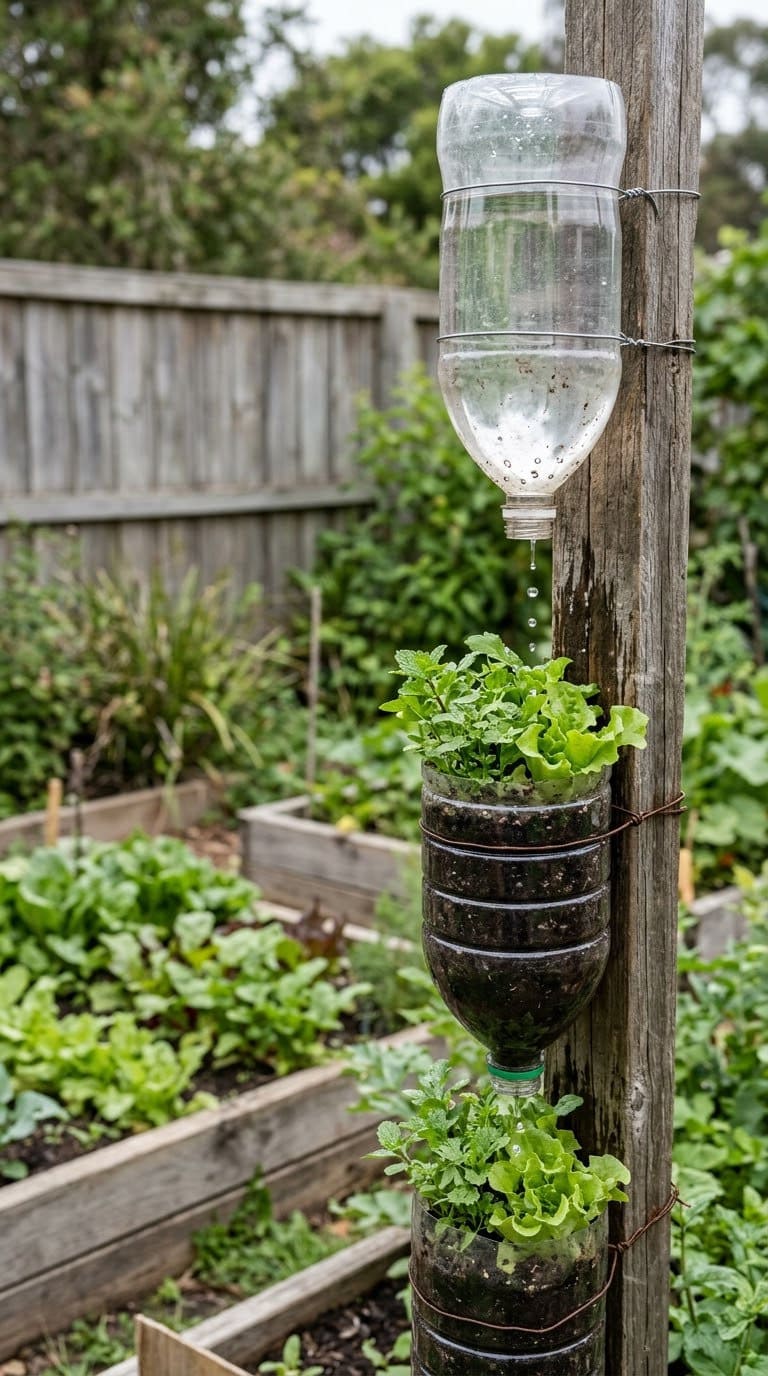
Poke a few small holes in a bottle cap and invert the full bottle into the top planter. Water drips slowly down. It stretches your watering between visits.
Test the drip rate before you leave for a trip. Refill the bottle when it empties. The UF/IFAS tower uses a similar gravity idea with drip emitters.
19. Onion Tower
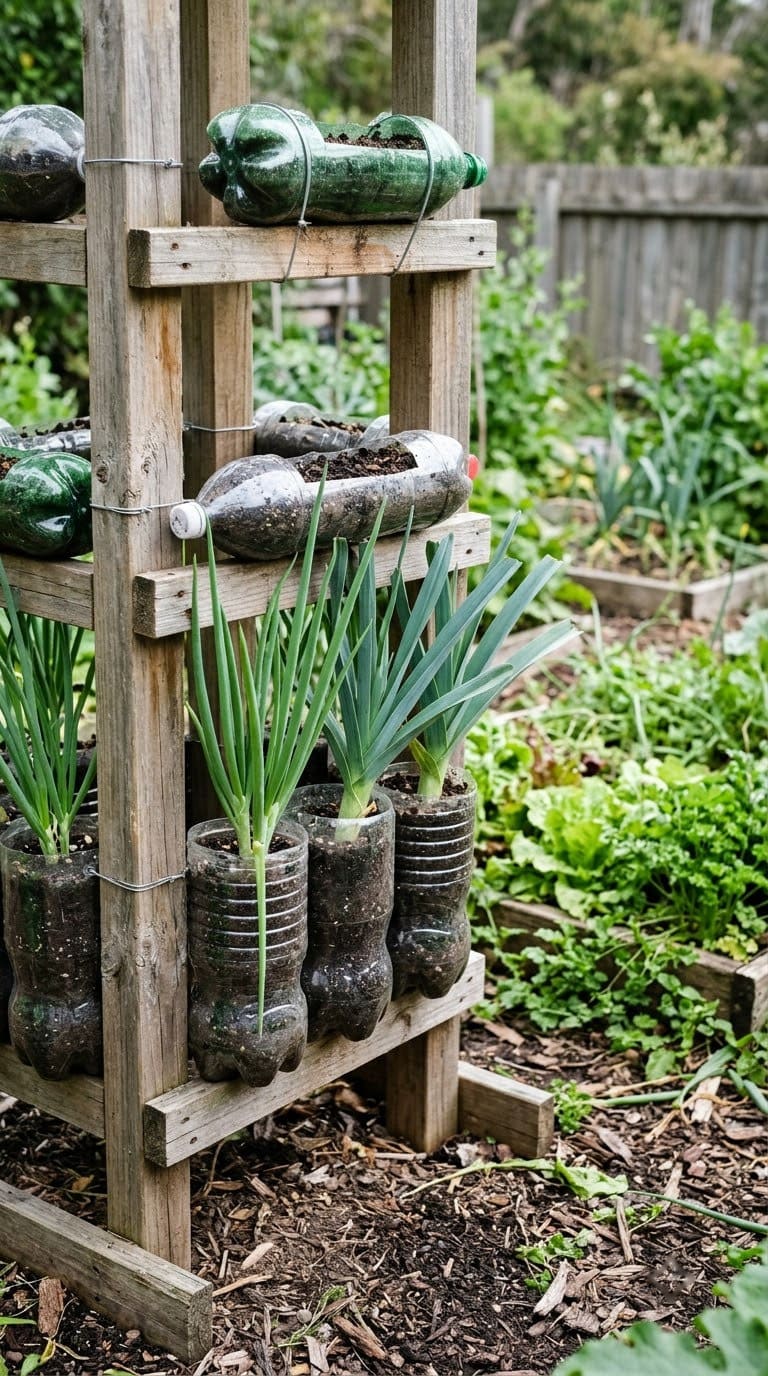
UF/IFAS suggests onion, leek and cole crops for the lower levels of a tower. Plant onion sets in the lower bottles and add a few green onions as a fast crop.
Keep the soil damp but draining. Pull green onions as needed. The lower levels get less sun, which suits these crops.
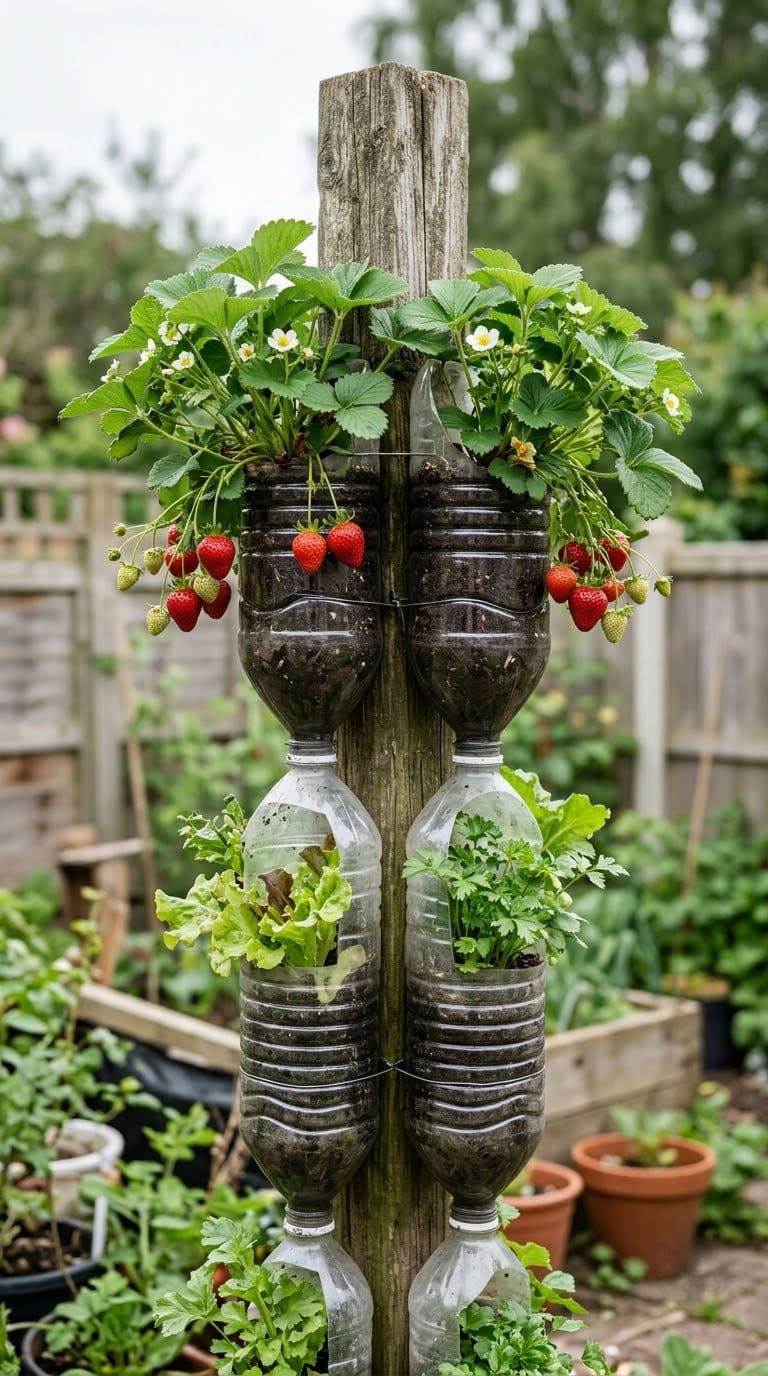
20. Strawberry Bottle Tower
Strawberries sit in the upper levels of the UF/IFAS tower, where sunlight is strongest. Plant one crown per bottle. Keep the crowns at soil level.
Pinch off runners if you want bigger berries. Water at the base so fruit stays dry. Our vertical strawberry guide covers care.
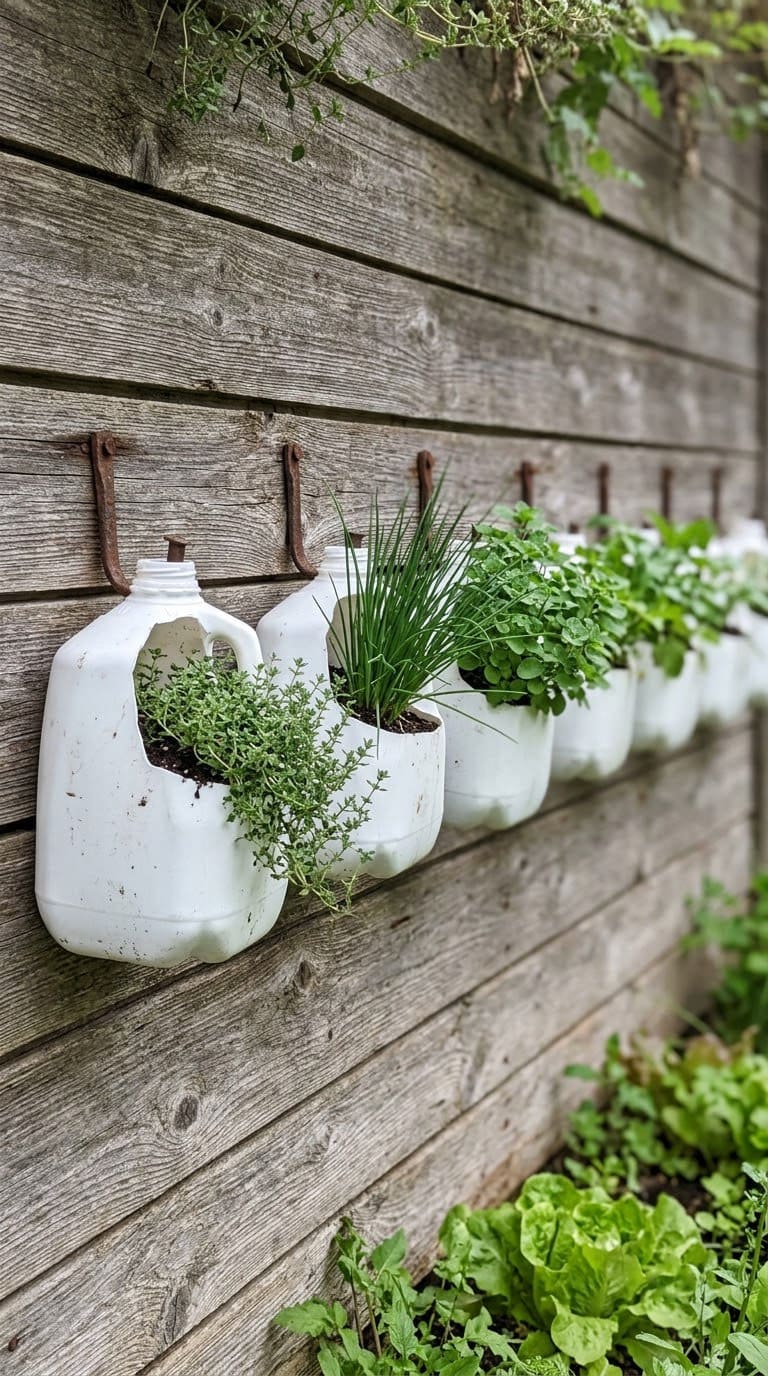
21. Milk Jug Herb Wall
Milk jugs hold more soil than soda bottles. Cut a window on the side of a jug and hang it by its handle. Use a jug for each herb.
The handle makes hanging easy. Wash the jug well and punch drainage holes. Choose thyme and chives for sunny spots.
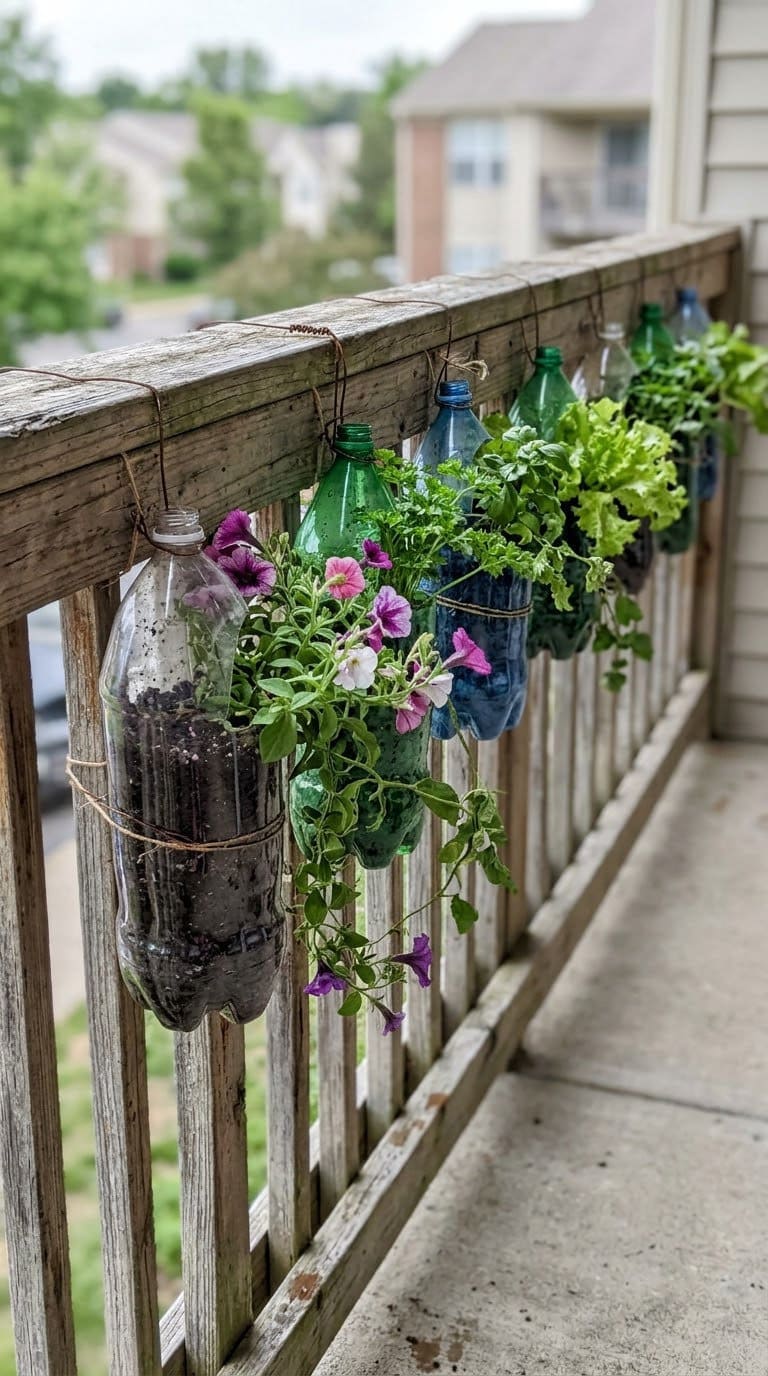
22. Railing Planter Strip
Cut a bottle lengthwise and wire it over a balcony railing so the cut face holds soil. Plant trailing flowers like petunias. Check that the wire holds firmly.
Don’t fill it fully, as wet soil is heavy. Position it so water doesn’t drip on a neighbor’s balcony. See more ideas in our balcony garden guide.
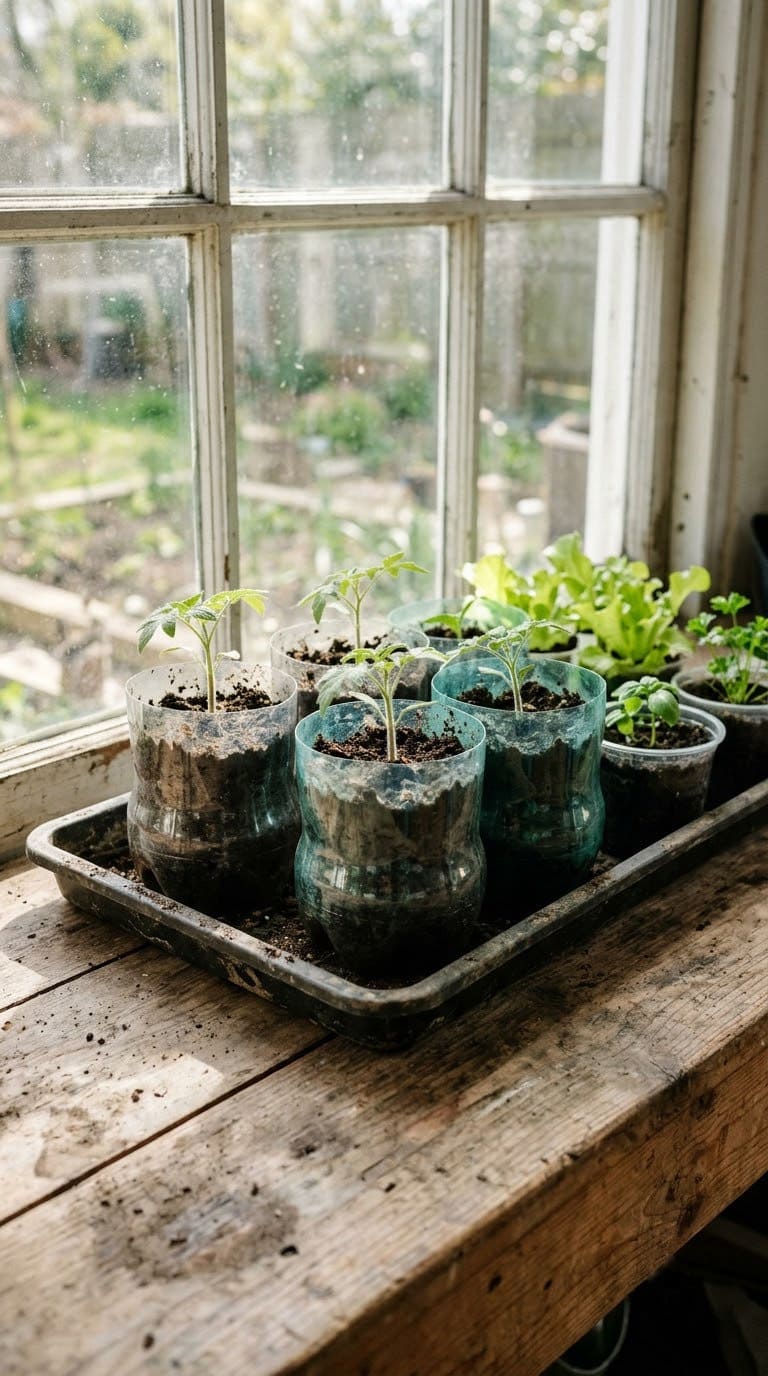
23. Seed Starter Bottle Pots
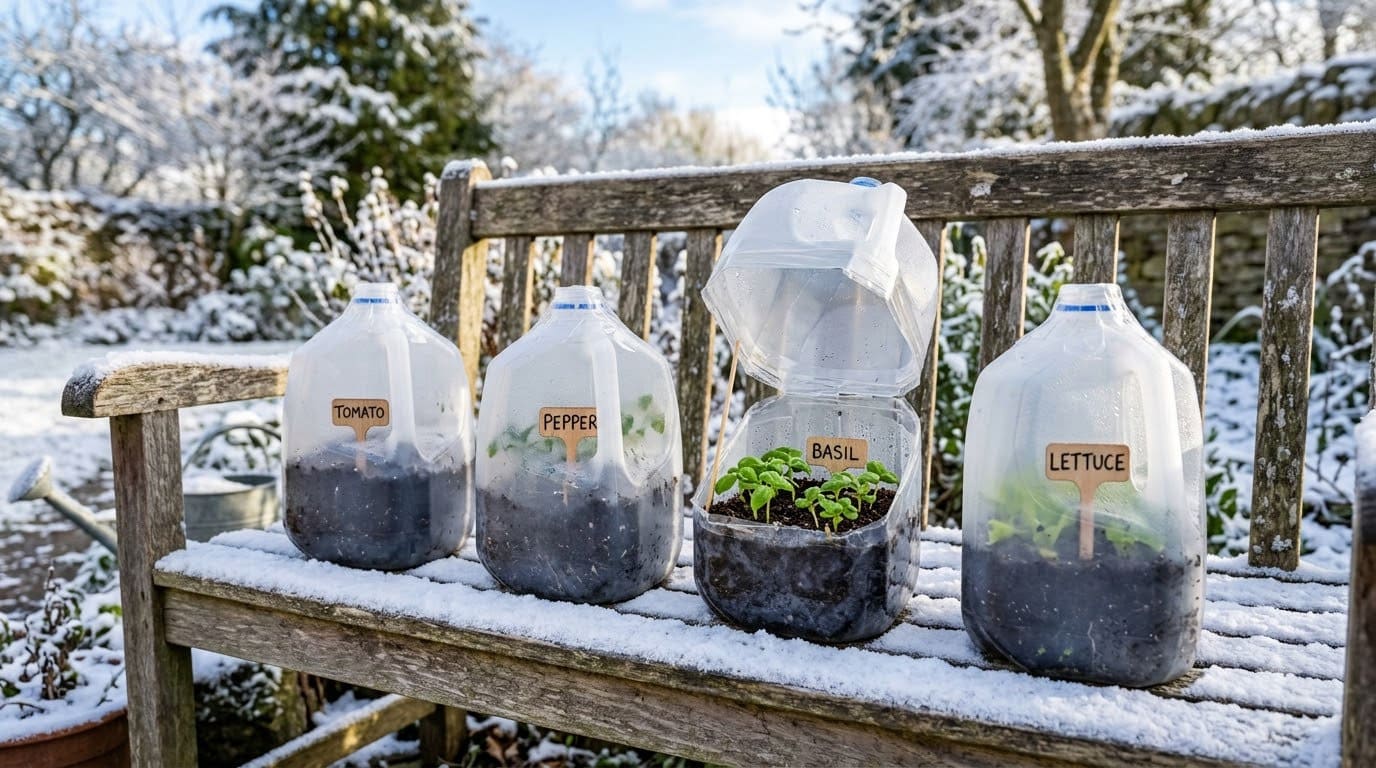
Cut the bottom third off a bottle, punch drainage holes and fill with seed mix. Sow tomato or pepper seeds and set the pots on a tray. Clear bottle tops make mini greenhouse domes.
Move seedlings out once they have true leaves. Label each pot with a marker. Rinse and reuse the pots next season.
24. Succulent Bottle Wall
Succulents tolerate shallow, fast-draining pots. Use cactus mix in small cut bottles and hang them on a sunny wall. Water only when the soil is dry.
Keep them in bright light. Don’t overwater, since bottle planters hold moisture at the base. Check the plants against the ASPCA list if you have pets.
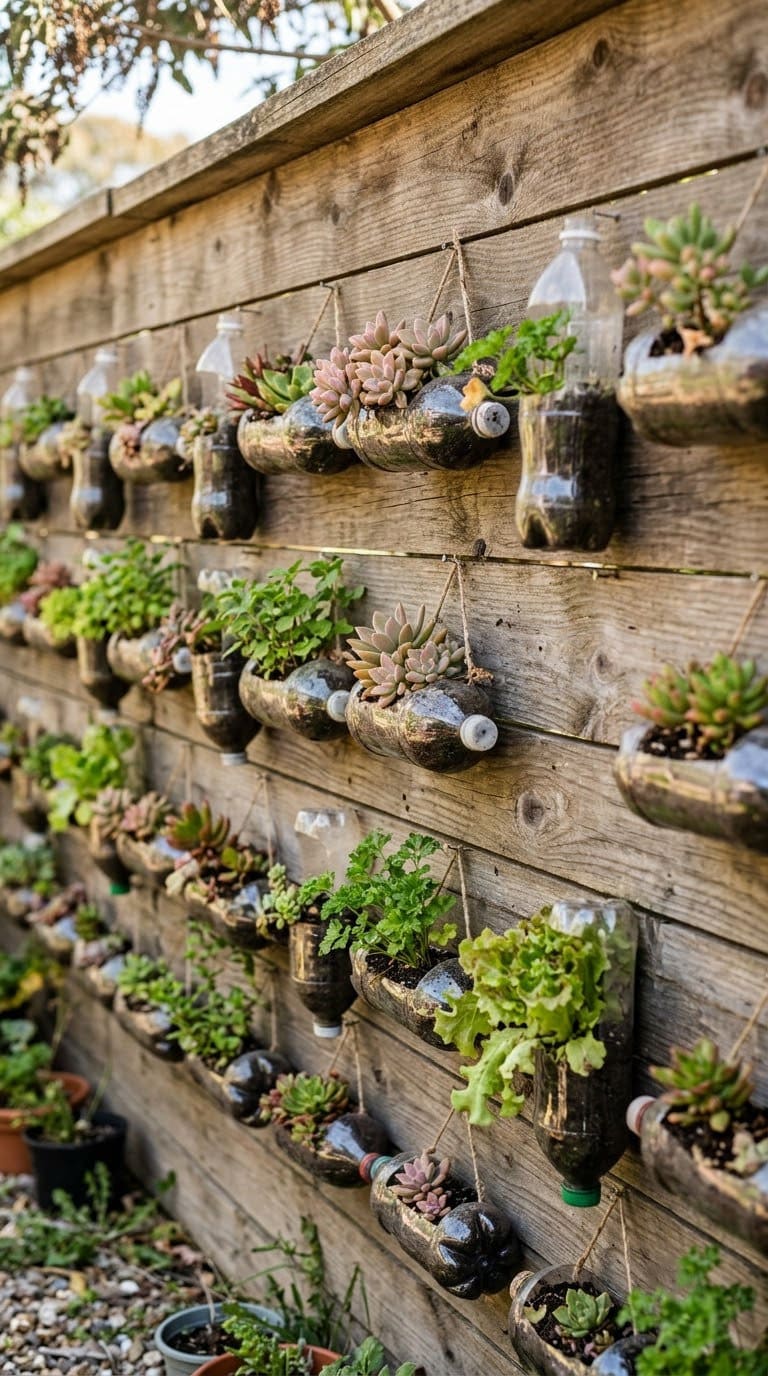
25. DIY Plastic Bottle

Source: theelitehotel
There are many ways you can arrange your plastic bottle gardens. You can plant a variety of flowers and herbs and combine them to create fantastic foliage patterns.
Areas such as your terrace, backyard wall, or even the porch are great places to have these arrangements.
Common Mistakes to Avoid
The first mistake is letting the planters dry out. The UC Marin Master Gardeners say smaller containers dry out very quickly in summer, and they advise checking containers daily and watering when the top inch of soil is dry.
The second is poor drainage. They say drainage holes are essential and warn against adding gravel to the bottom, since it impedes drainage.
The third is leaving bottles in strong sun. The UCT study found that blue, green and red HDPE lids became brittle within three years, and UF/IFAS paints its tower bottles to cut direct sunlight. A full wet planter is also heavy, so fix wall boards to studs or posts.
If you only fix one thing, choose the plants before the bottles. Put lettuce and herbs on the upper levels and onions on the lower ones, as the UF/IFAS tower does.
Frequently Asked Questions
Are plastic bottles safe for growing vegetables?
Use clean beverage bottles and skip any that held chemicals. We didn’t find a source that settles the question, so avoid very old, cracked or heat-damaged bottles. Keep edible plants in bottles that look intact.
What size plastic bottle is best for a vertical garden?
A 2-liter bottle is the common choice and is what the UF/IFAS tower uses. Milk jugs hold more soil. UC Master Gardeners say containers should be at least 6 inches deep.
Should I paint plastic bottles for a garden?
For bottles holding roots, UF/IFAS says to paint them to reduce direct sunlight, and its materials list calls for black or white spray paint. Many DIY guides prefer clear bottles. White paint keeps bottles cooler.
How long do plastic bottle planters last?
It depends on sun and plastic. A UCT study found colored HDPE lids became brittle within three years on a roof. Expect to replace bottle planters every few seasons.
How do I stop mosquitoes in a self-watering bottle?
Cap the reservoir and empty and scrub any water-holding container once a week, as the CDC advises. Use a drip or wick instead of an open tray.
Conclusion
Plastic bottle gardens are not only a cheap way to decorate your home but also help in reducing pollution in the environment. Do your part and recycle to make your area cleaner.
Never miss an update — choose FarmFoodFamily as your preferred source on Google.
How it works: Tap the button below to open Google's settings page, then check the box next to FarmFoodFamily.
Tap the checkbox to turn it blue — that's how you know it's set.





Hi its a very nice piece of art and a very helpfull one for our environement i would like to ask for a permission to imitate this art for our team project for our community so that we can help our environement by collecting all plastic materials and make an art like this for our potting materials instead we will buy new pots for our plants this is a very nice and helpfull tip for all of us here. Thank you!
Sure, Glenn
I love the DIY ideas, i can apply it in my recycling class. More Power!