20 Clever Ideas to Hide Your Garden Hose (Without Wrecking It)
Twenty real ways to disguise your garden hose, plus the actual freeze, sun, and kinking damage most “hide your hose” guides never mention.

Never miss an update — choose FarmFoodFamily as your preferred source on Google.
How it works: Tap the button below to open Google’s settings page, then check the box next to FarmFoodFamily.
Tap the checkbox to turn it blue — that’s how you know it’s set.
A coiled garden hose has a way of becoming the one thing your eye snags on every time you step into the backyard, usually draped over a spigot or piled in a heap by the narrow strip along the side of the house that rarely gets much design attention otherwise.
Hiding it is a genuinely easy fix. The part almost nobody tells you is that some of the most popular hiding spots also quietly shorten the hose’s life.
Will Hiding My Garden Hose Damage It?
Most “hide your garden hose” articles focus entirely on looks and skip what actually kills a hose early: freezing, sun exposure, and tight coiling.
Quick answer: Hiding a garden hose is safe as long as the storage method doesn’t trap water or force tight coils. Water left inside a hose expands when it freezes and can crack or rupture the hose wall, so any enclosed storage spot needs the hose drained first, and ideally moved to a shed, garage, or basement once freezing temperatures set in. Direct sun and heat also break down a hose’s outer fabric and latex core over time, which favors any hiding spot that offers real shade over one that bakes in full sun all day. Just as important: coil the hose in large 2- to 3-foot loops rather than tight bends, since tight coiling creates weak points that lead to kinking and eventual failure. A hiding spot that looks great but forces cramped, tight coils, or leaves the hose sitting in standing water, solves the visual problem while creating a new one.
Two more things worth knowing before you pick a method. First, garden hoses aren’t usually named specifically in HOA covenants, but general “no visible clutter” or screening clauses in stricter communities can still apply, worth a quick check of your actual governing documents if you’re in a strict HOA.


Second, Katherine Aul Cervoni, Founder & Principal of Staghorn NYC, makes a point that’s easy to miss when you’re focused purely on concealment: whatever screen or hedge you use, leave “ample space behind the shrubs for easy access,” since a hiding spot you can’t actually reach quickly just means the hose gets left out on the lawn instead.
Which Hiding Method Actually Protects Your Hose Best?
Here’s how the four main approaches compare on the things that actually matter for a hose’s lifespan, not just how well they hide it.
Answer 4 quick questions and get matched to the exact fix for your yard — drainage, budget, layout, or something else entirely.
Take the Free Quiz| Approach | Freeze/UV Protection | Typical Cost | Access Speed | Maintenance |
|---|---|---|---|---|
| Landscaping (shrubs, foliage, raised beds) | Low, hose still exposed to weather unless also stored indoors seasonally | DIY-cheap to moderate | Fast if planted with real access room | Ongoing (pruning, seasonal draining) |
| Decorative containers/vessels (pots, urns, baskets) | Moderate, shade helps but drainage matters | DIY-cheap to moderate | Fast | Low |
| Enclosed structures (bench, cabinet, box, shed) | Highest if built with drainage and used seasonally for winter storage | Moderate to bigger investment | Depends on latch/lid design | Low |
| Wall-mounted reel or rack | Moderate, depends on whether it’s under an eave or fully exposed | Moderate | Fastest, no lid or lifting required | Very low |
Which Landscaping Options Hide a Garden Hose Well?
1. A shrub or hedge border
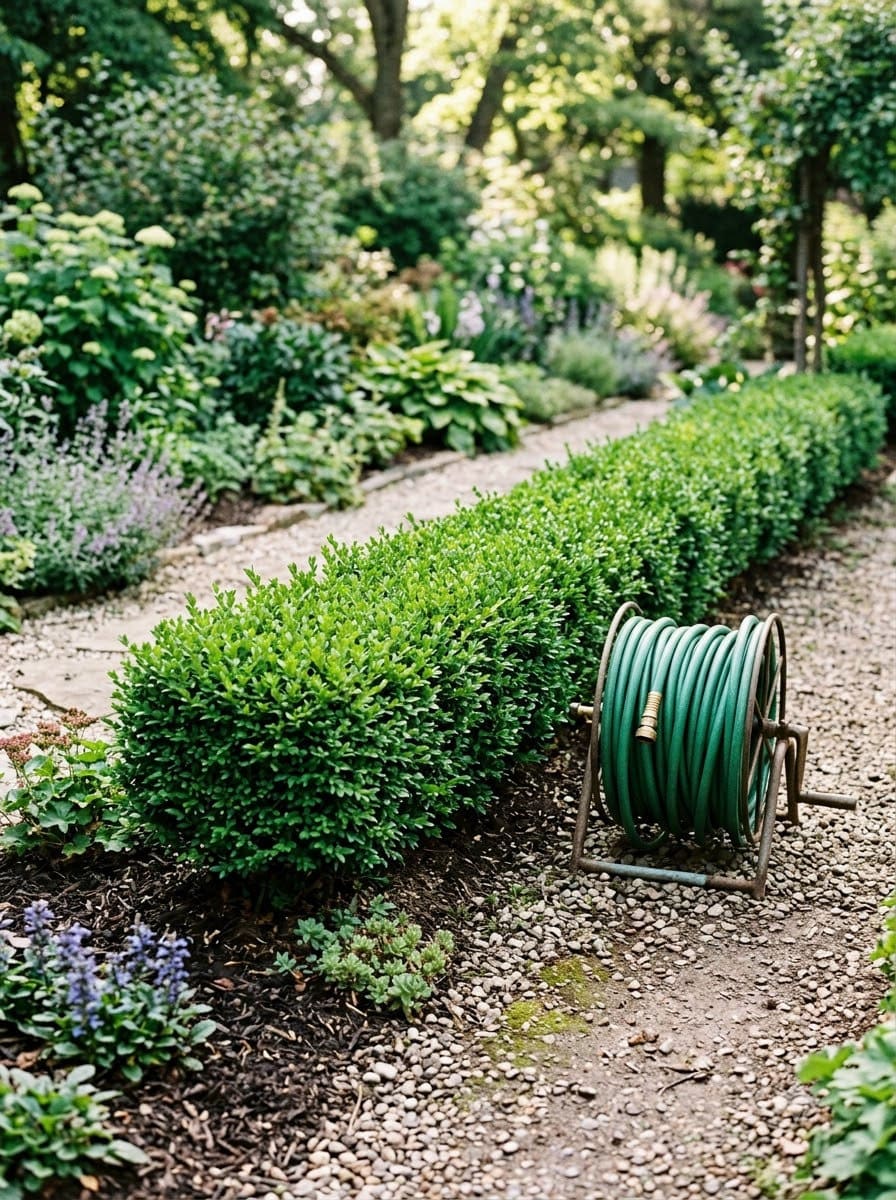
A low evergreen hedge, boxwood or dwarf holly spaced 18-24 inches apart, planted along the hose’s usual resting spot screens it from the main sightline while staying green year-round.
Katherine Aul Cervoni’s access-room caveat applies directly here: leave at least 18-24 inches of real space behind the shrubs, not just a decorative gap, so pulling the hose out doesn’t mean fighting through branches.
Budget tier: DIY-cheap with young 1-gallon stock, moderate for mature 3-5 gallon specimens that fill in immediately. Pairs well with idea 3’s tucked planting-bed approach if you want the hose to disappear into an existing garden bed rather than a dedicated hedge.
2. A foliage screen of tall perennials
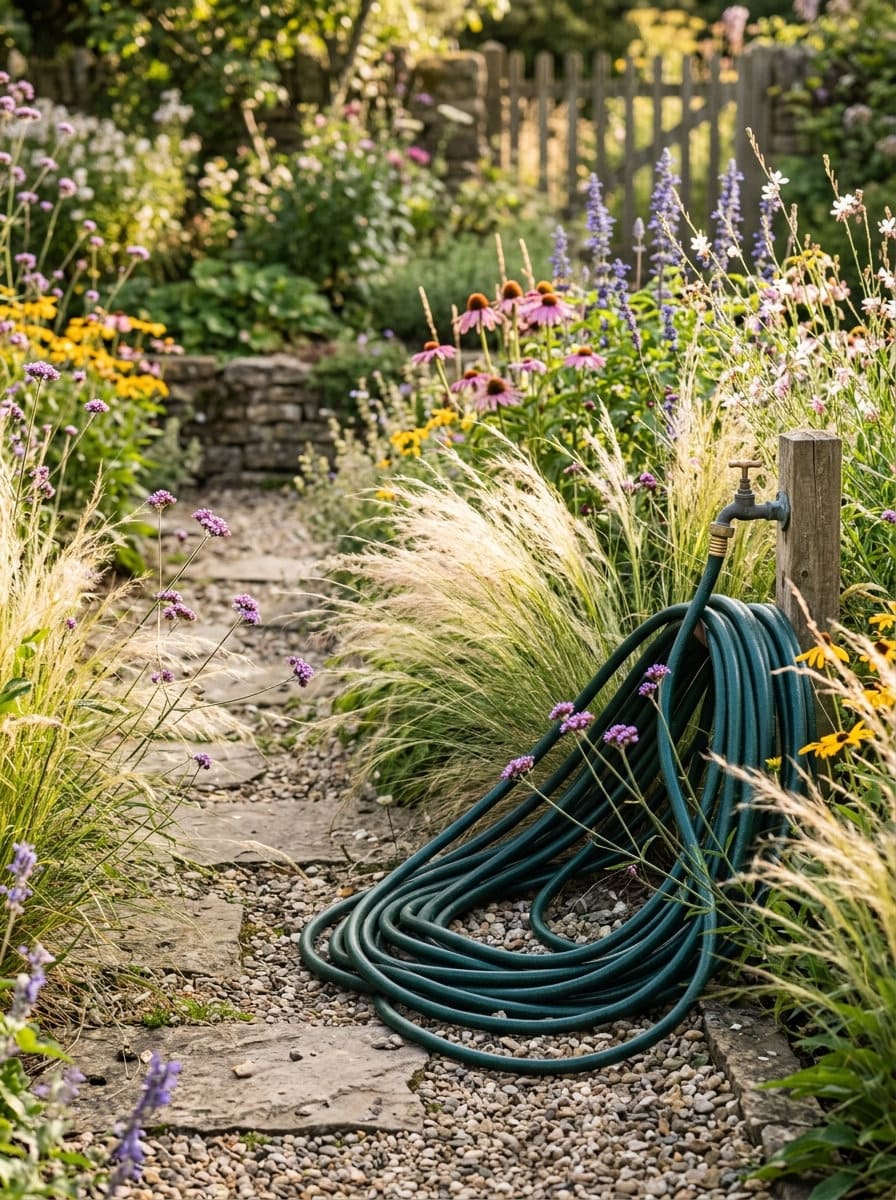
Ornamental grasses (feather reed or maiden grass, both reaching 3-4 feet) or tall perennials planted in a loose cluster soften the hose’s outline without a full structural hedge, and they’re far cheaper and faster to establish than shrubs, often reaching full size in a single growing season versus 2-3 years for shrubs.
Cut back hard each late winter, down to 4-6 inches from the crown, so old growth doesn’t tangle with the hose itself. Budget tier: DIY-cheap.
3. Tucked into an existing planting bed
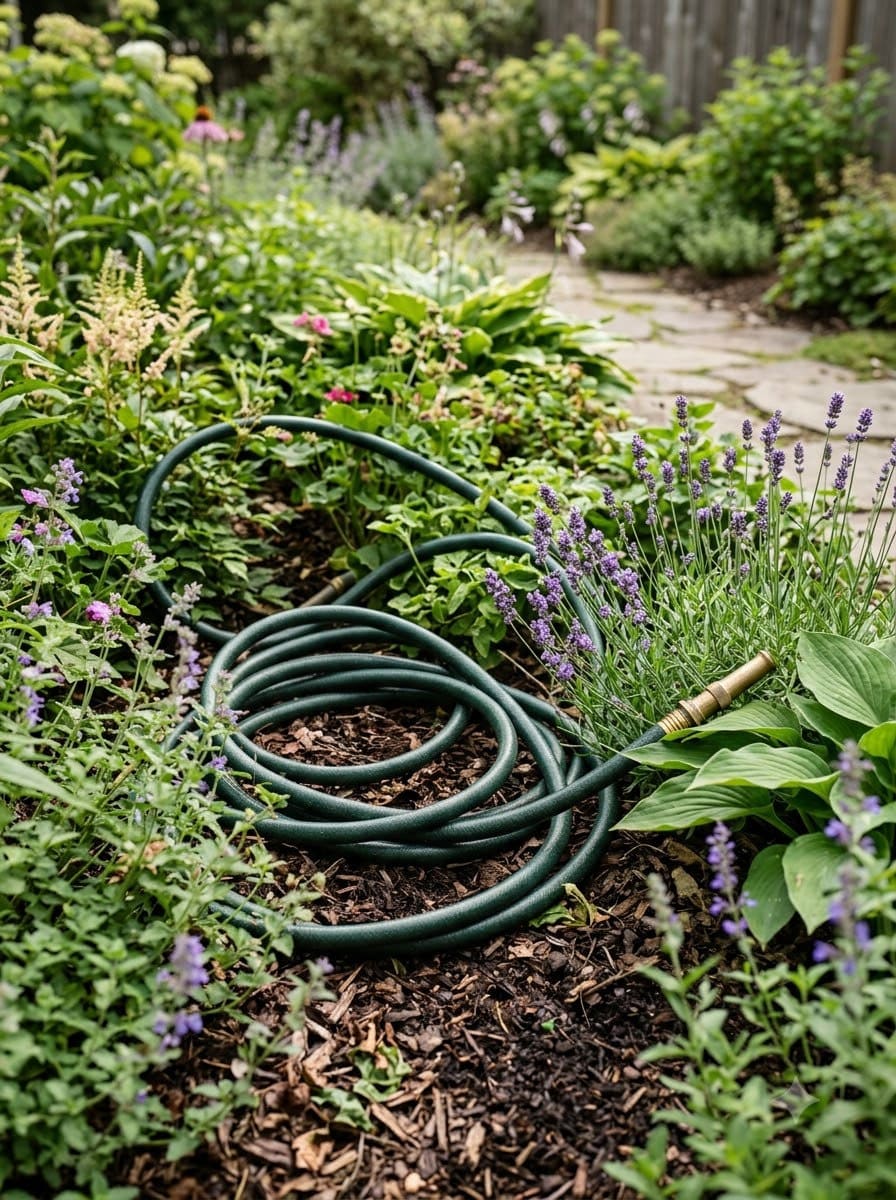
Rather than building a dedicated hiding spot, simply routing the hose’s resting coil into an already-planted garden bed (behind established perennials or under a spreading groundcover) uses landscaping you already have.

Purpose-built version of idea 11, the fastest-access option on the list, 4.0 stars / 3,575 ratings, live-verified
Most yard problems trace back to one specific, fixable cause. Find yours in 4 quick questions.
Take the Free QuizThis post contains affiliate links. We may earn a commission on qualifying purchases at no extra cost to you.
Keep the coil loose, in loops at least 2 feet across, and off bare soil where water can pool underneath it, a few inches of mulch or gravel under the coil solves that. Budget tier: free to DIY-cheap, arguably the least expensive option on this entire list.
4. A faux rock cover
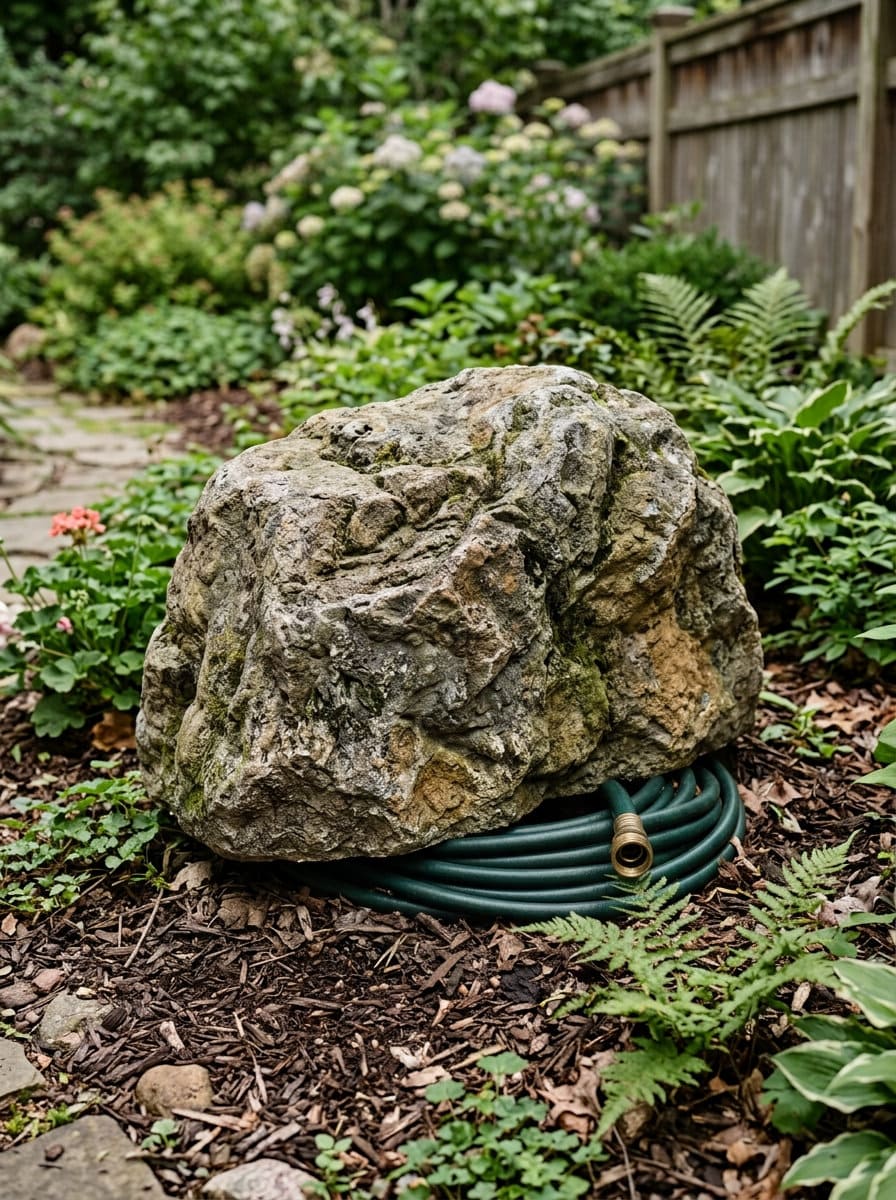
A hollow, realistic faux boulder, typically sized to cover a 2-3 foot coil footprint, placed over the hose’s coiled resting spot reads as a natural landscape feature rather than a hiding spot, and lifts off easily (most weigh under 15-20 pounds despite their solid-stone look) for full access.
Look for one with a real base at least a few inches wider than the hose coil so it doesn’t rock or shift underfoot. Budget tier: moderate.
5. A raised garden bed with a hidden hose nook
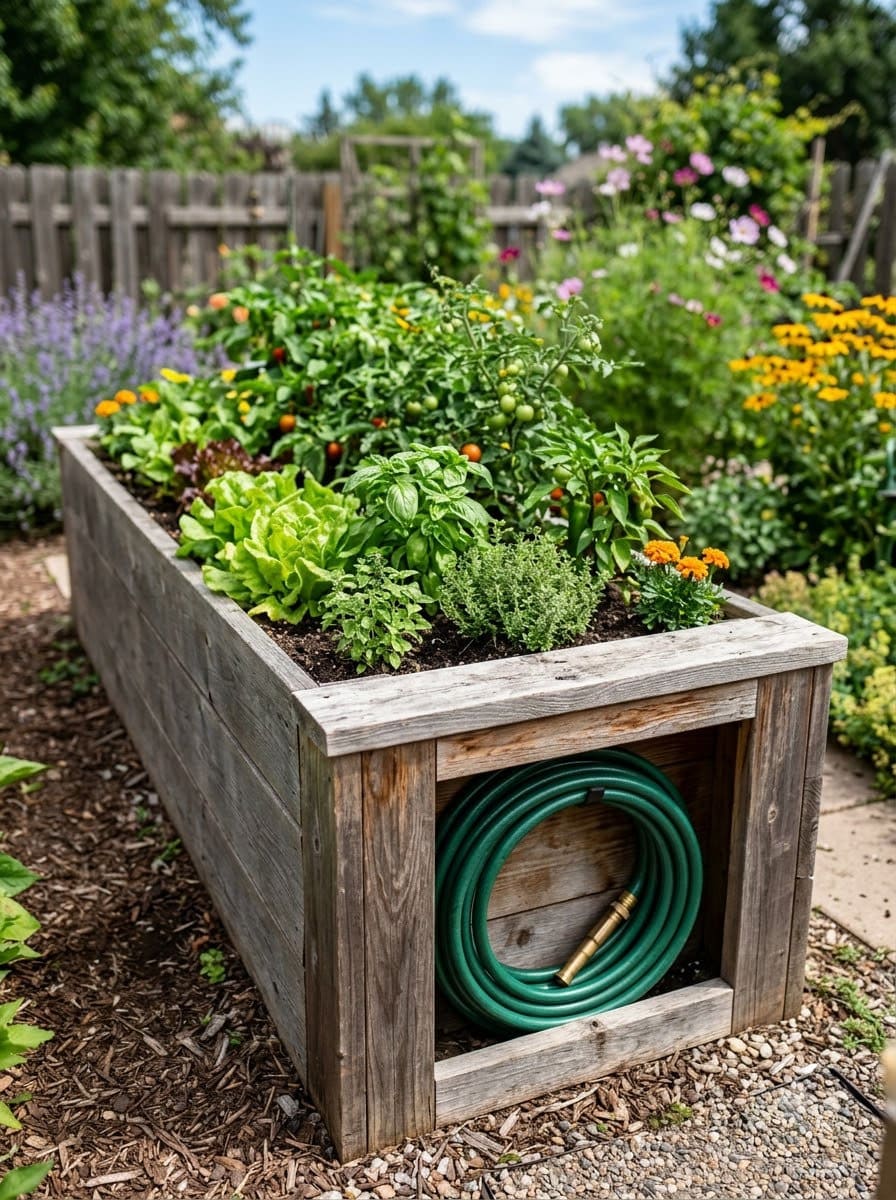
Building a raised bed with a small open cavity at one corner, roughly 12×12 inches and a foot deep, sized for a coiled hose, combines two projects into one and keeps the hose shaded and out of direct sun for at least part of the day.
If you’re starting the bed from scratch anyway, there’s more on building a planter box with a dedicated storage cavity worth a look first.
Budget tier: bigger investment if building the raised bed from scratch, moderate if retrofitting an existing one.
Which Decorative Containers Work Best for Hiding a Hose?
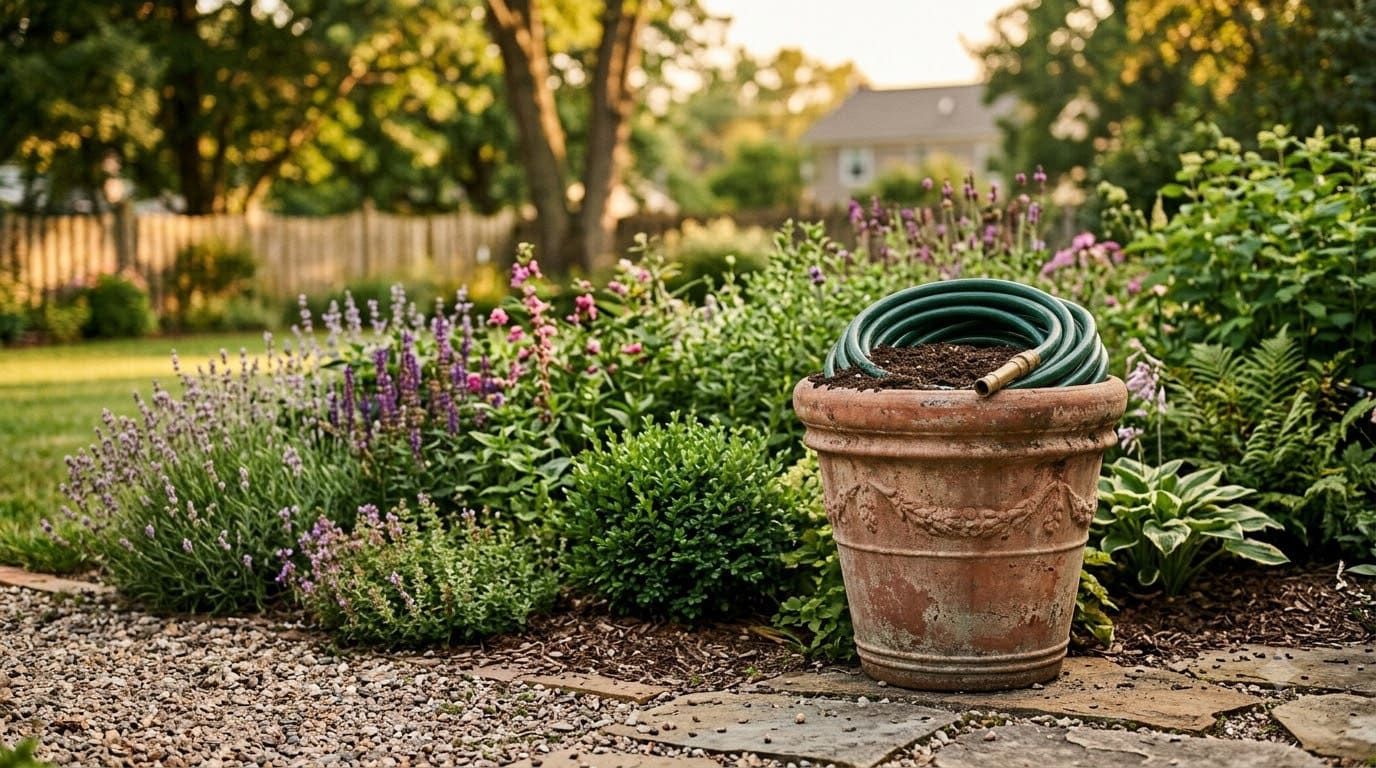
6. A decorative terracotta, stone, or copper hose pot
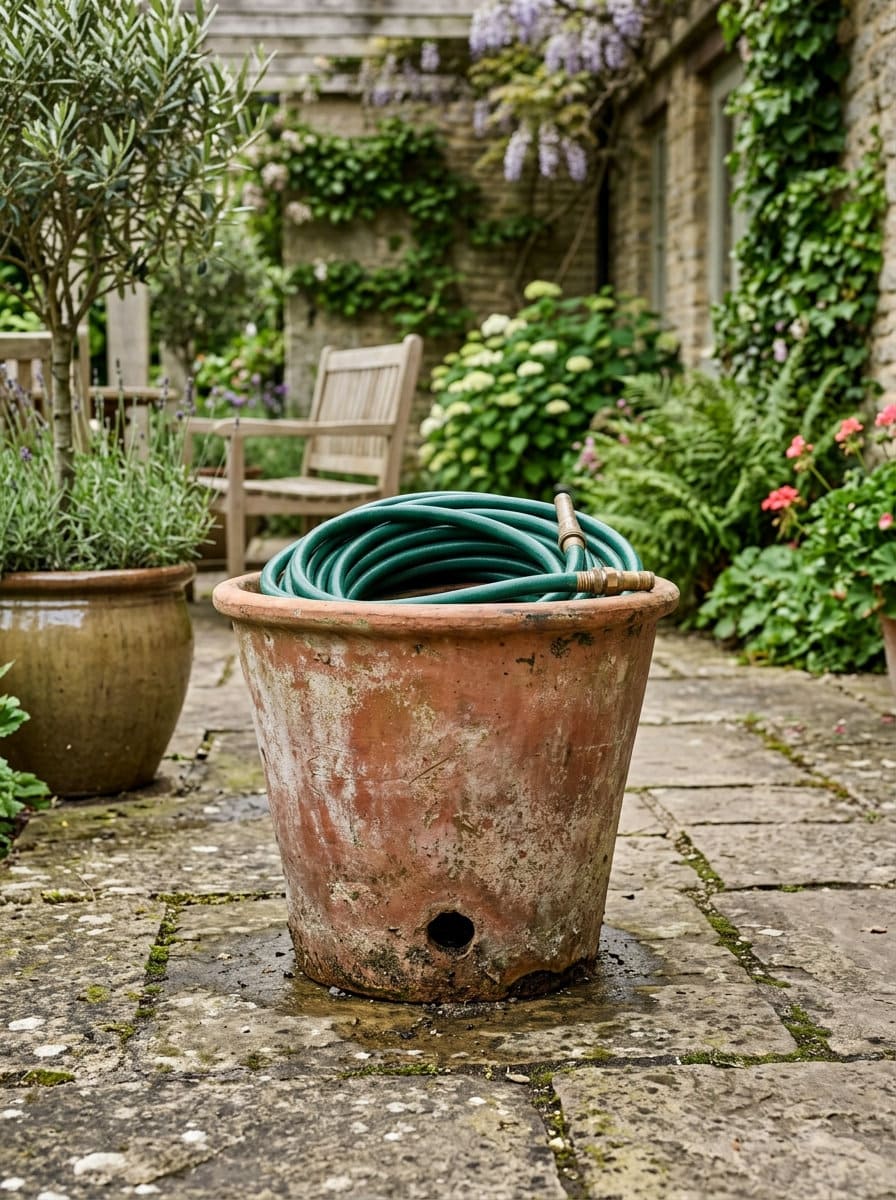
Tracy Morris, Founder of Tracy Morris Design, recommends exactly this: a real stone, copper, or aged terracotta vessel, typically 18-24 inches tall and wide enough (12-14 inches) to hold a coiled 50-75 foot hose without cramming it, that reads as a design feature rather than a utility cover.
Drill or buy a pot with a drainage hole so the hose isn’t sitting in trapped rainwater, tying directly back to the freeze-damage point in Before You Start.



Budget tier: moderate to bigger investment for a real stone or copper piece.
7. A large ceramic urn
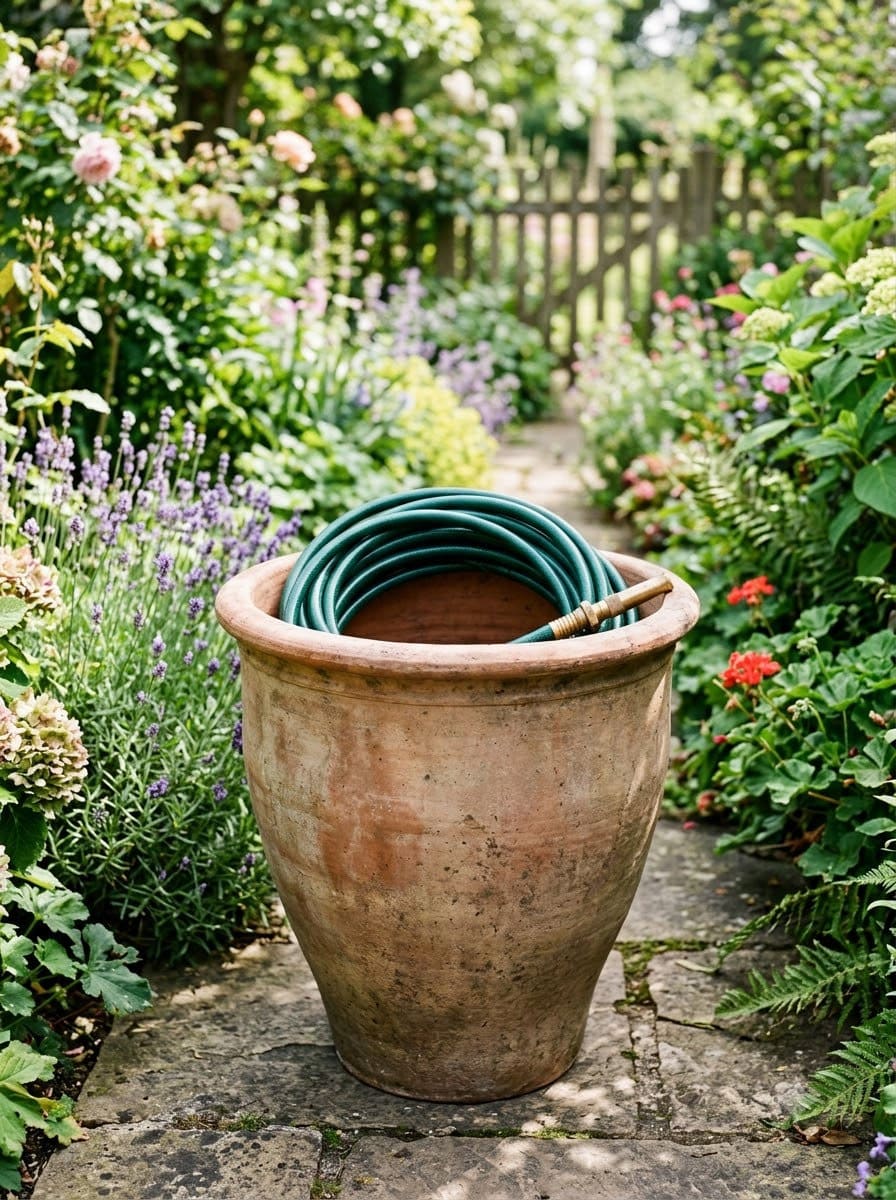
Similar to idea 6 but often available at a lower price point in a wider range of finishes, a large ceramic urn with a wide 10-12 inch mouth makes pulling the coiled hose in and out easier than a narrow-necked pot.
The average homeowner spends $616/year on yard fixes that don't address the real problem. Find out what yours actually is — before you spend another dollar.
Take the Free QuizBudget tier: moderate.
8. A wire basket
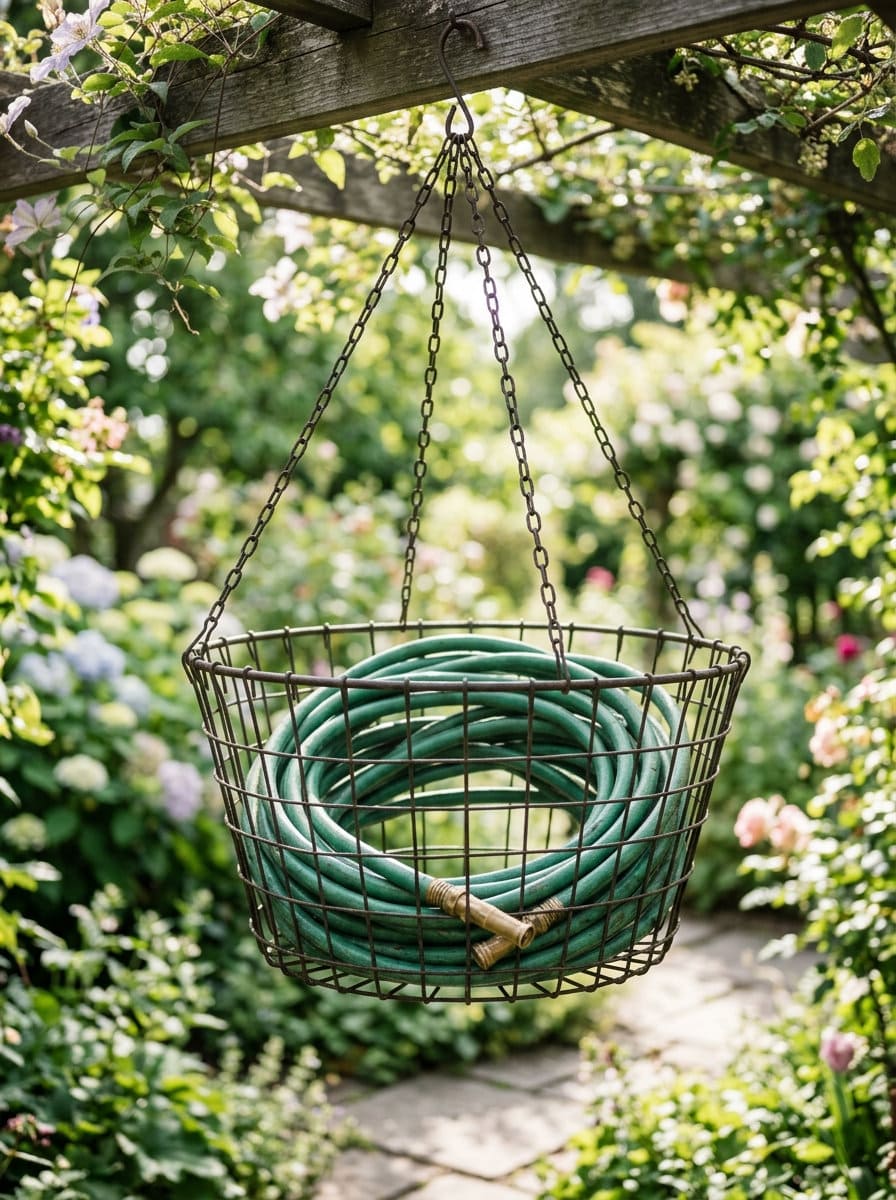
An open wire basket, sometimes styled to look like a plant basket, roughly 16-20 inches in diameter, holds the coiled hose loosely enough to avoid the tight-coiling problem entirely, since the open weave doesn’t force a compressed shape the way a narrow solid container can. Budget tier: DIY-cheap.
9. A buried storage box with the lid exposed
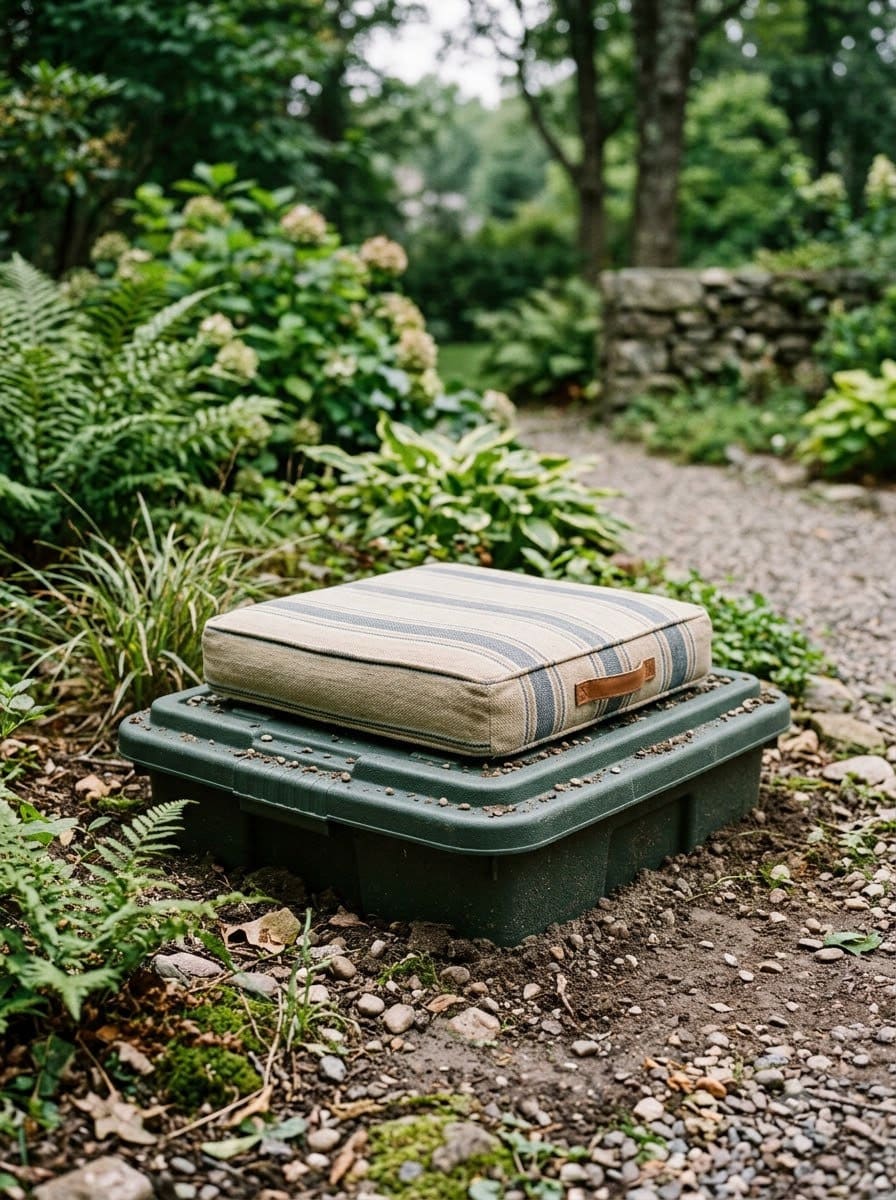
A plastic storage box, sized a few inches larger than the hose’s coiled diameter on every side, sunk into the ground with just a flush lid visible keeps the hose completely out of sight, and a cushion on top doubles the lid as extra patio seating.
Make sure the box has real drainage (a few half-inch holes drilled in the base work) or sits above the water table in your soil, an airtight buried box with no drainage is exactly the trapped-water setup that leads to freeze cracking.
Budget tier: DIY-cheap to moderate.
10. A faux barrel planter
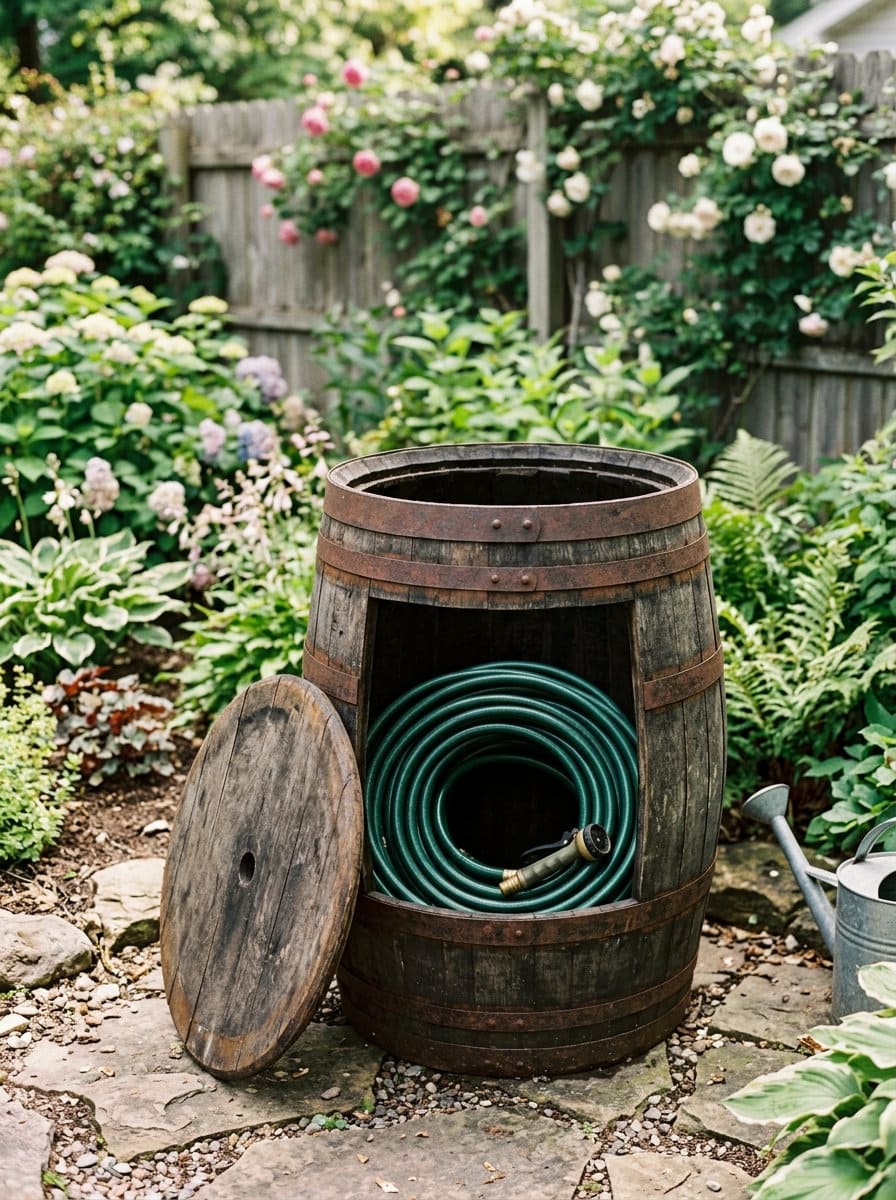
A hollow faux wine or rain barrel, typically 20-24 inches tall and sold at most home improvement stores, gives a rustic look that reads as intentional yard decor.
Choose one with a lid or a large enough opening, at least 10-12 inches across, that you’re not wrestling the hose through a narrow gap every time.
Budget tier: moderate.
Which Structures Make the Best Hose Storage?
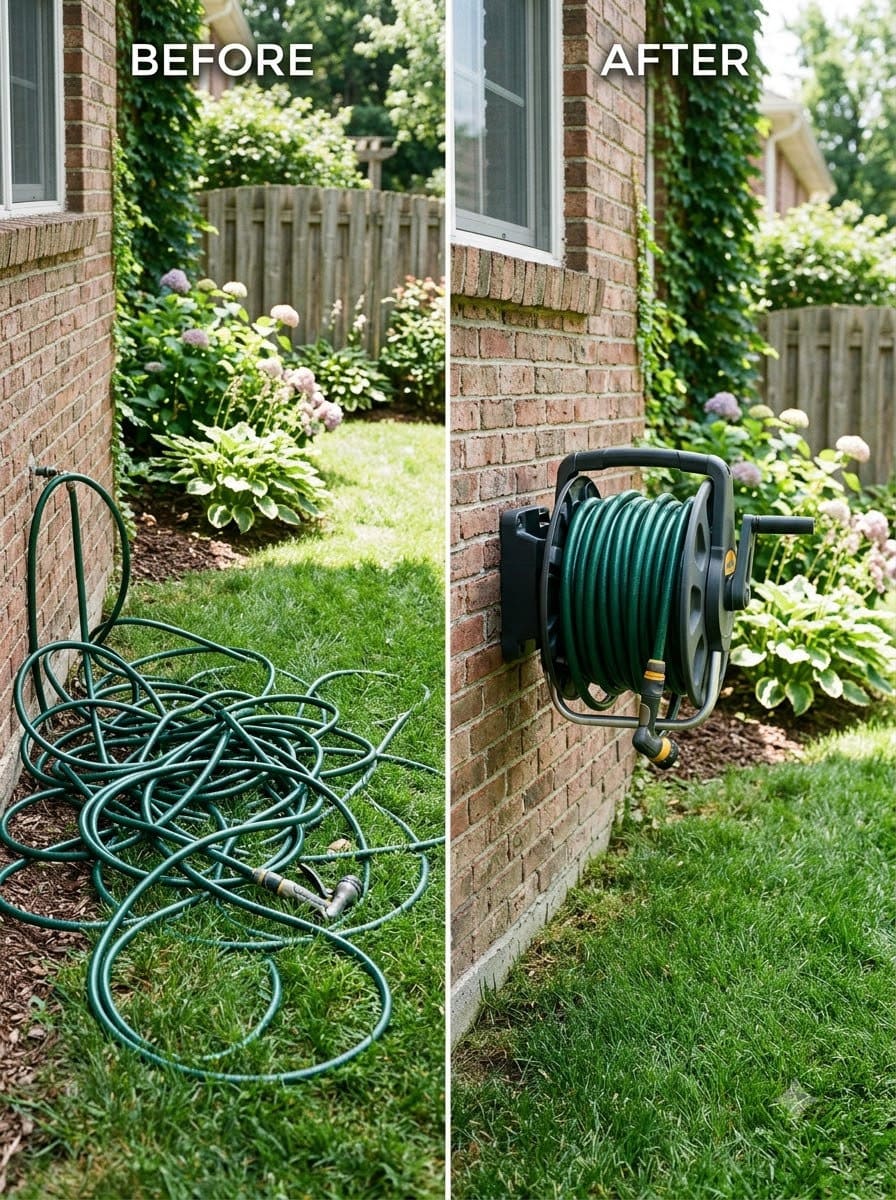
11. A wall-mounted hose reel or rack
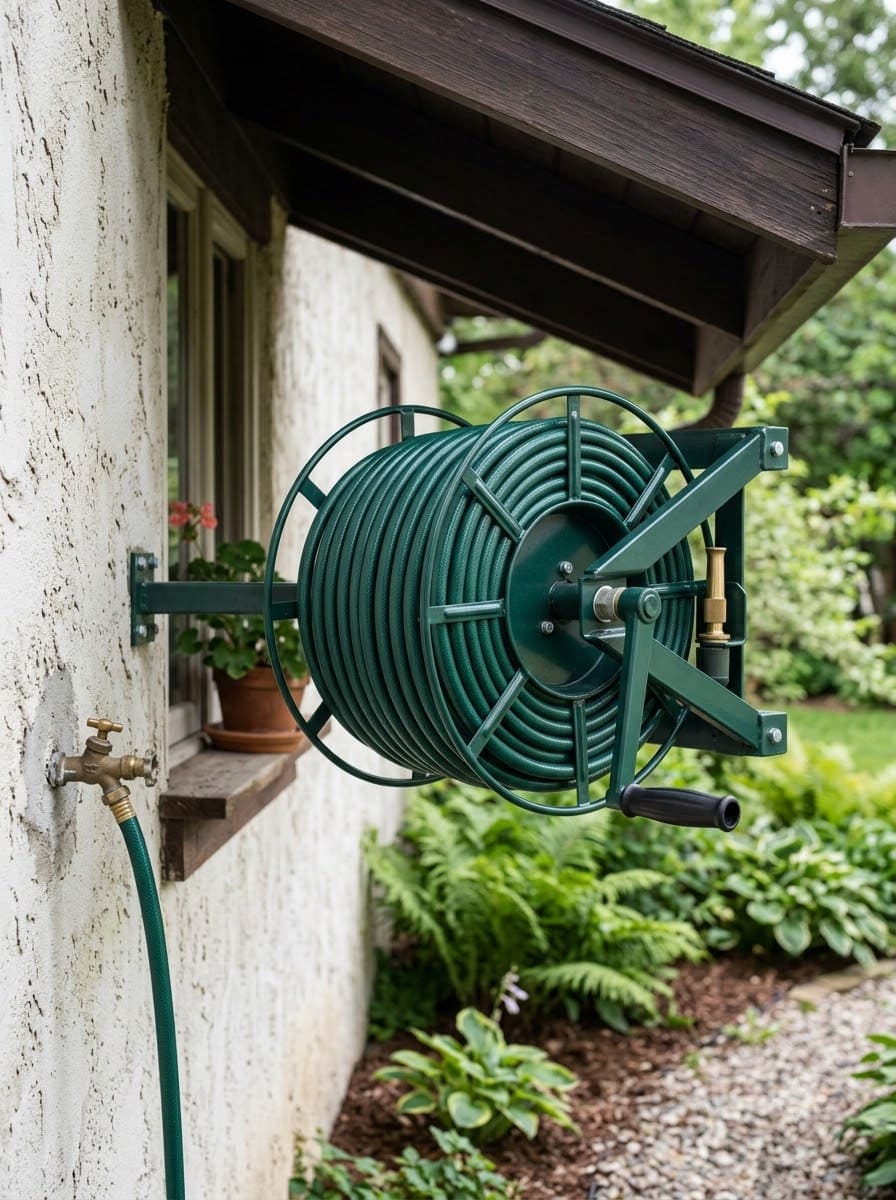
The fastest-access option on this entire list: a bracket or reel (most rated for 100-150 feet of standard 5/8 inch hose) mounted directly on an exterior wall means no lid to open and no lifting required, and a manual crank-handle reel actively prevents the tight-coiling problem since it winds the hose onto a consistent radius, typically an 18-20 inch diameter drum.
Mount it under an eave or overhang if possible, even a 12-18 inch roof overhang cuts most direct rain and sun exposure.
Budget tier: moderate.
12. A storage bench with a hidden compartment
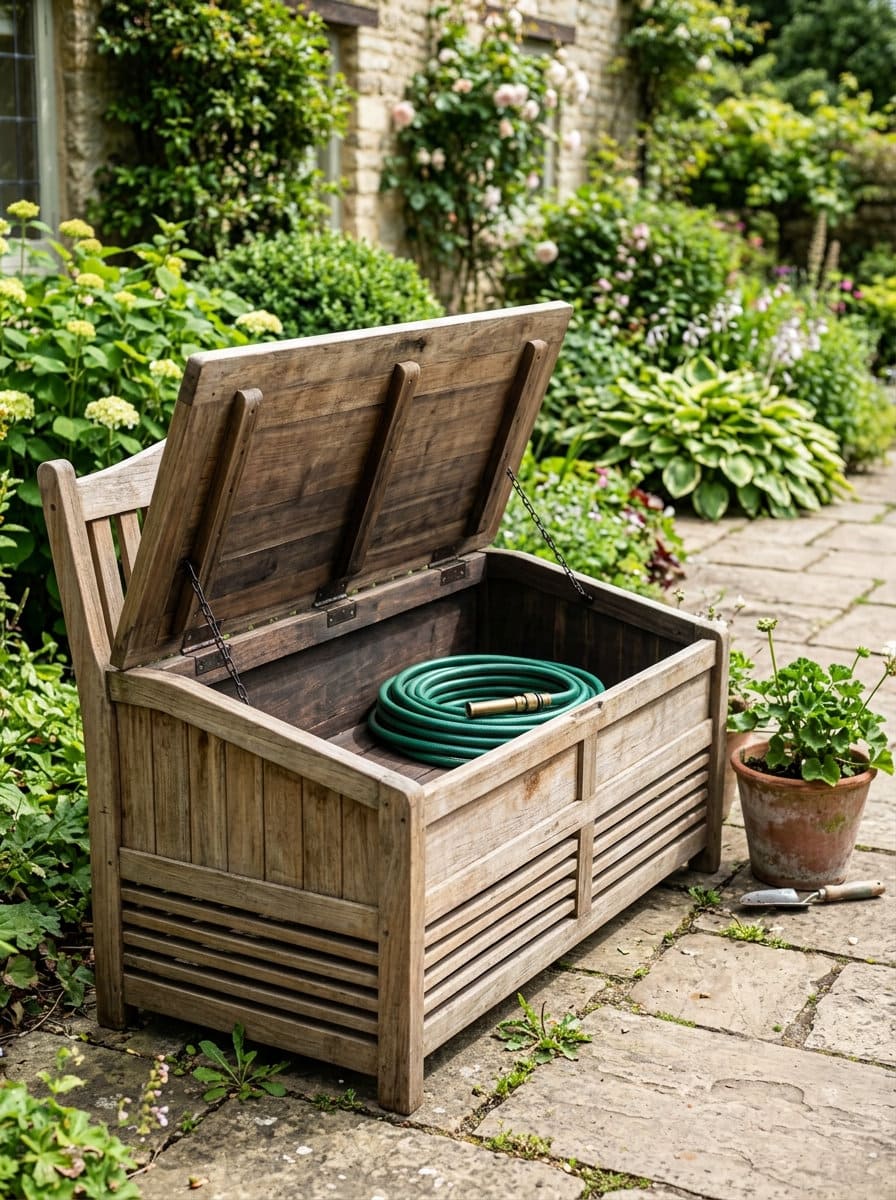
A hinged-lid bench, interior sized at least 20×20 inches to fit a coiled hose loosely, doubles as actual patio seating, and putting it within a few feet of the spigot keeps access fast.
Build or buy one with a vented or gapped base (a half-inch gap around the base perimeter is enough) rather than a fully sealed box, so the interior doesn’t stay damp after a rainy stretch.
Pairs well with idea 6’s terracotta pot if you want a planter-style accent on one end of the bench.
Budget tier: moderate to bigger investment.
13. A small outdoor cabinet or trunk
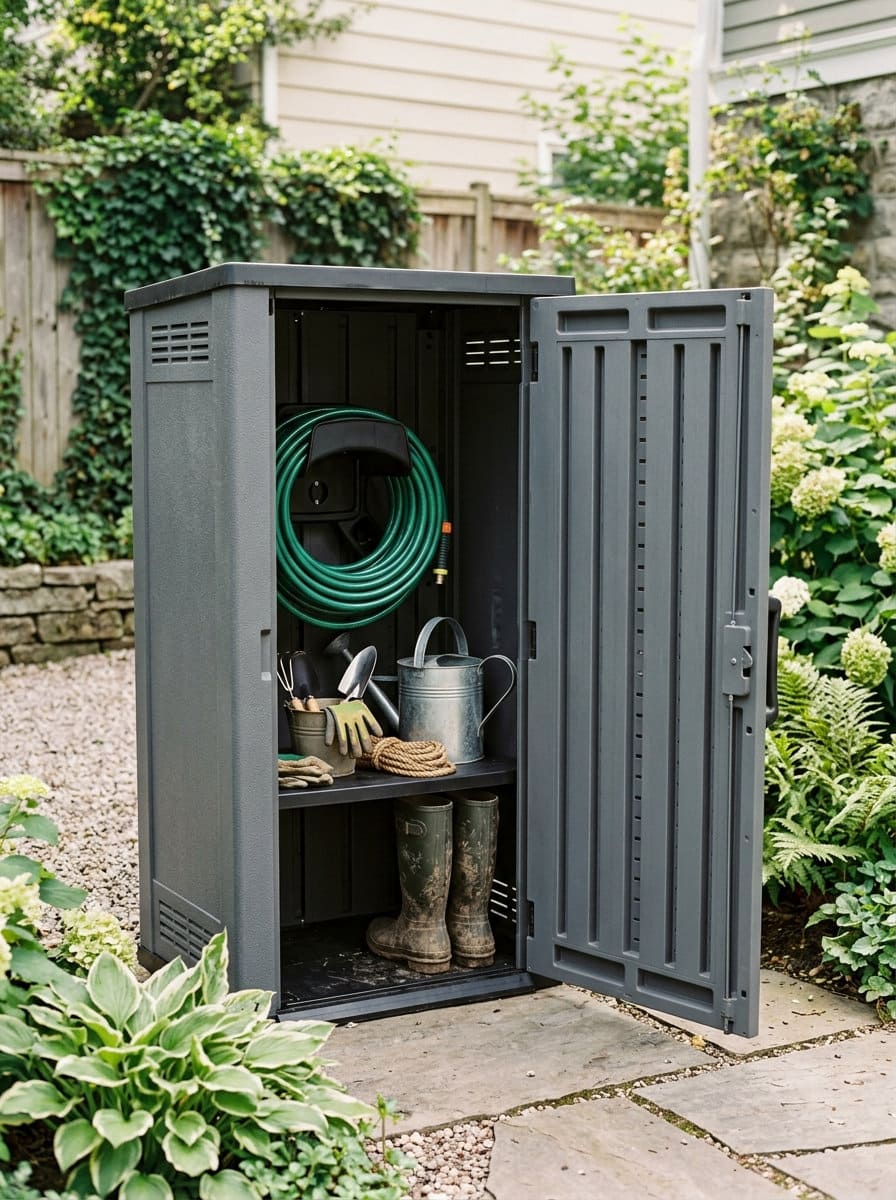
A weatherproof outdoor cabinet or trunk, styled more like furniture than storage, works well for a patio or deck location where the hose sits alongside other outdoor gear.
If you’d rather build the hose storage into a larger garden work station, there’s a roundup of organized setups for keeping garden tools and supplies together that covers the same idea.
Look for one with real ventilation slats or gaps, cabinets marketed for cushion storage aren’t always built with hose drainage in mind and can trap the same moisture a sealed box would.
Budget tier: moderate to bigger investment.
14. A painted wood crate
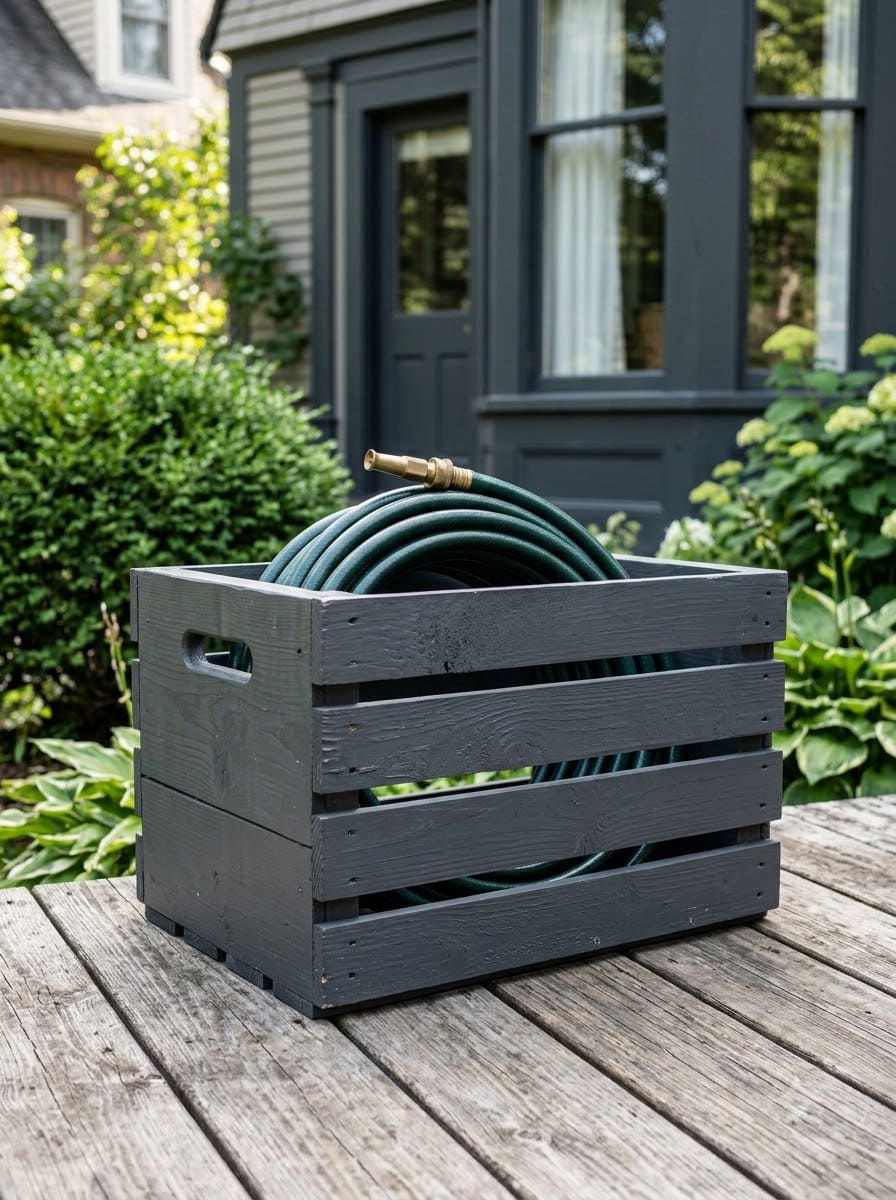
A simple wood crate, sized to at least 18x18x18 inches for a standard hose coil, painted or stained to match your deck or house trim is one of the cheapest true storage options here, and reads as intentional styling rather than a leftover shipping crate once painted.
Leave a quarter to half-inch gap between boards for airflow.
Budget tier: DIY-cheap.
15. A lattice screen enclosure
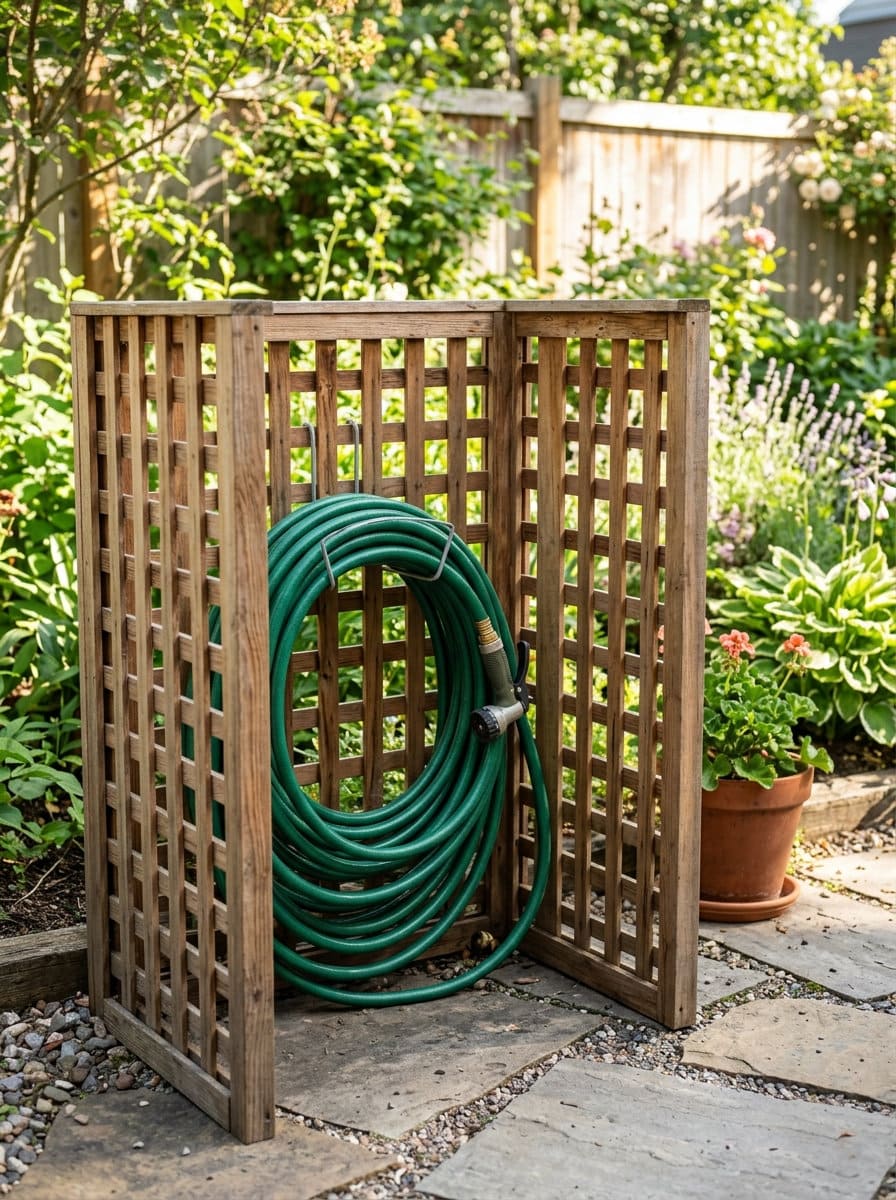
The same open-grid lattice principle used for AC units and trash cans works here too: three lattice panels, sized a few inches larger than the hose’s resting footprint on every side, around the hose’s resting spot break the sightline while letting air and light through, which helps the hose dry out between uses instead of sitting in a damp corner.
Budget tier: DIY-cheap to moderate.
16. A small utility box or mini shed
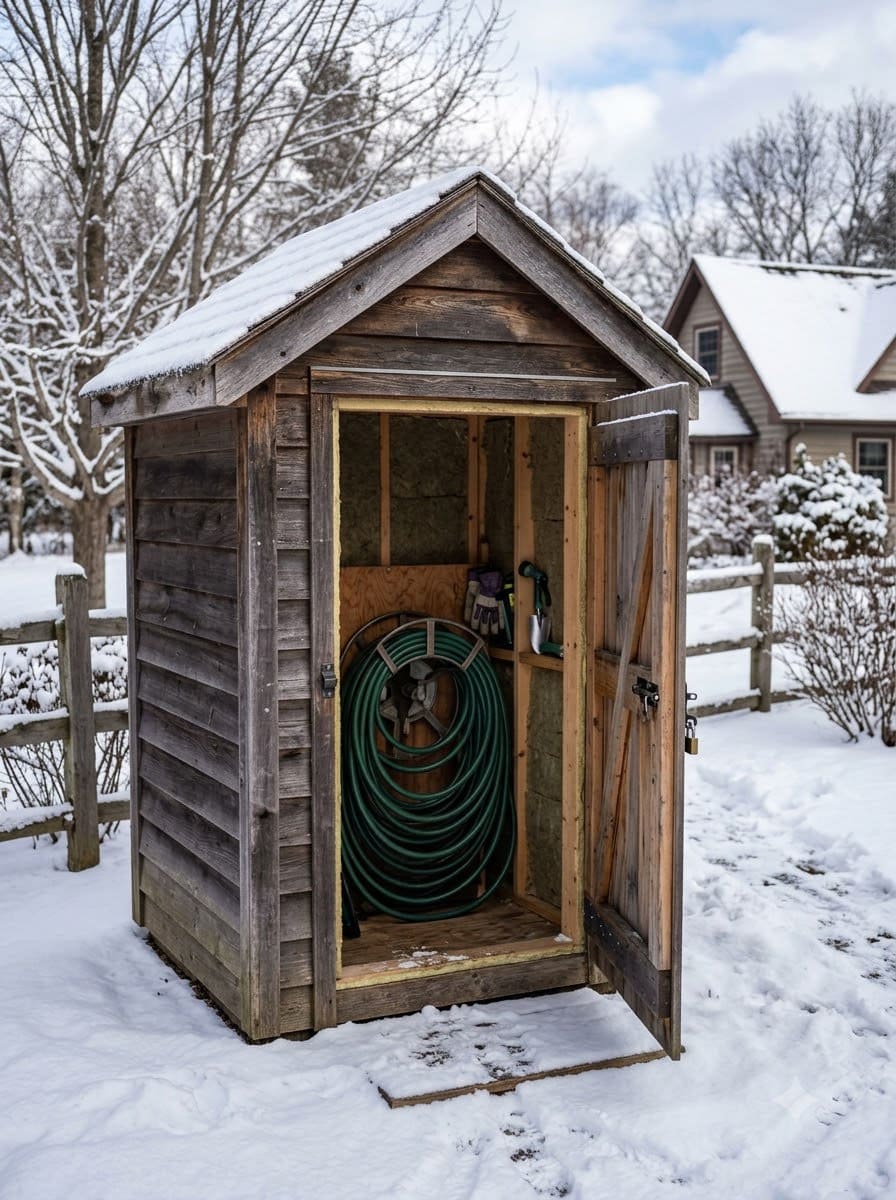
For a hose that’s frequently used in cold-climate winters, a proper small shed or insulated utility box (even a 2×2 foot footprint is enough for one or two coiled hoses) gives real shelter, drain the hose fully before storing it here through freezing months, per the mechanism explained in Before You Start.
Budget tier: bigger investment.
What Modern or Practical Upgrades Help Most?
17. A retractable hose reel system
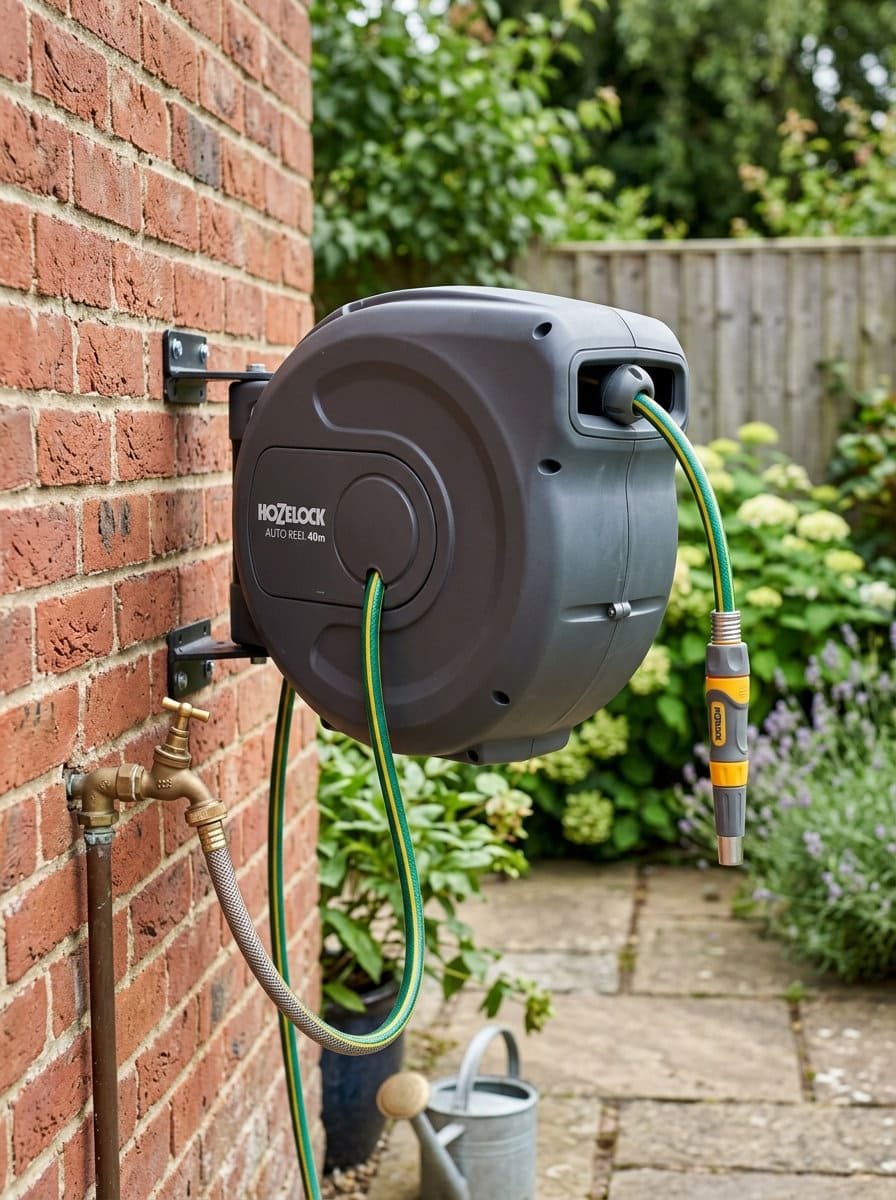
An automatic or side-crank retractable reel keeps the hose wound at a consistent radius, typically 16-20 inches depending on the model, every time, which is the single most reliable fix for chronic kinking since it removes the human tendency to coil unevenly under time pressure.
Most residential models handle 50-100 feet of hose, check the rated capacity against your actual hose length before buying, an undersized reel will jam or fail to fully retract.
Budget tier: moderate to bigger investment depending on hose length capacity.
18. Swapping to a dark-colored hose
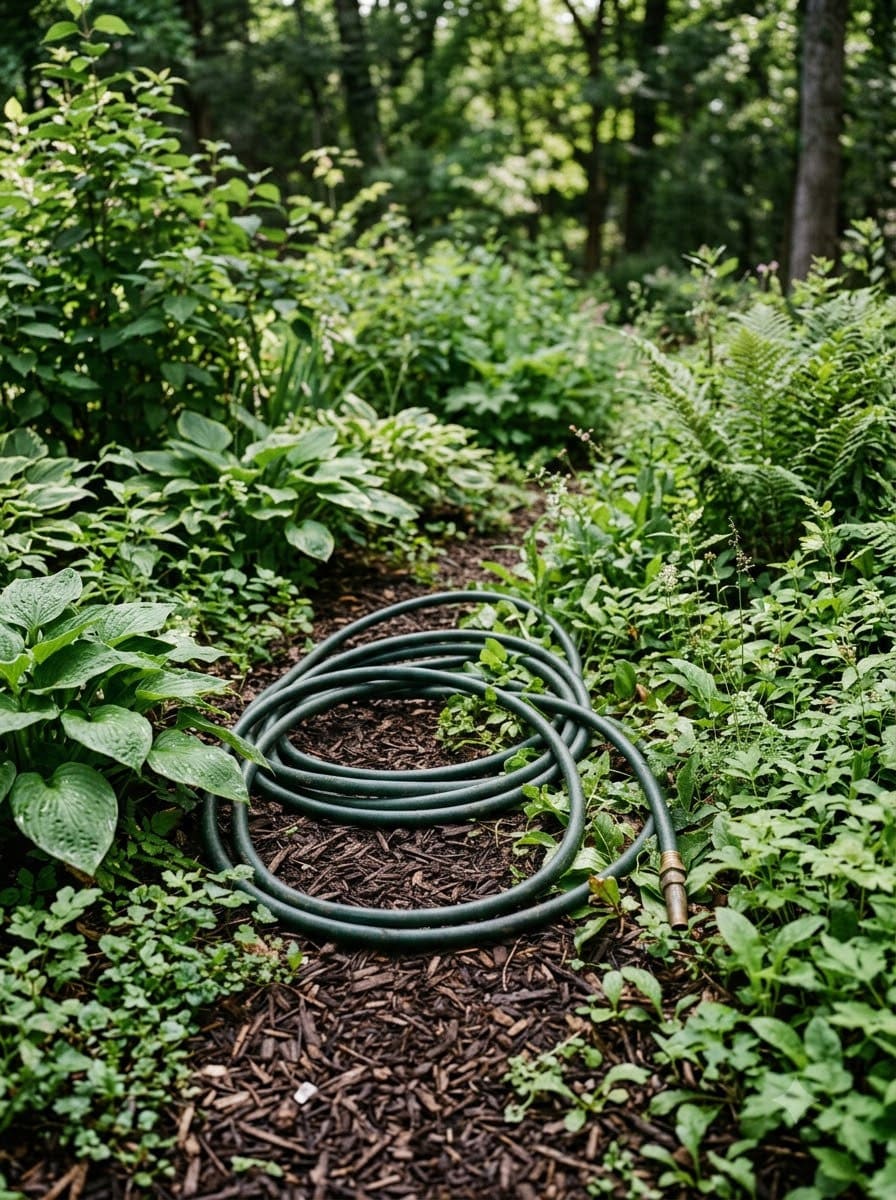
Sometimes the simplest fix isn’t hiding the hose at all, just choosing a dark green, gray, or black hose that blends into mulch, shadow, and foliage far better than the standard bright green or black-and-yellow options.
Combine with any landscaping idea above (especially idea 1’s hedge or idea 3’s planting-bed tuck) for the least visually obvious setup on this list, a dark hose coiled in mulch under a hedge is genuinely hard to spot from more than a few feet away.
Budget tier: DIY-cheap, essentially free if you’re due for a hose replacement anyway.
19. A hose hanger mounted near the spigot
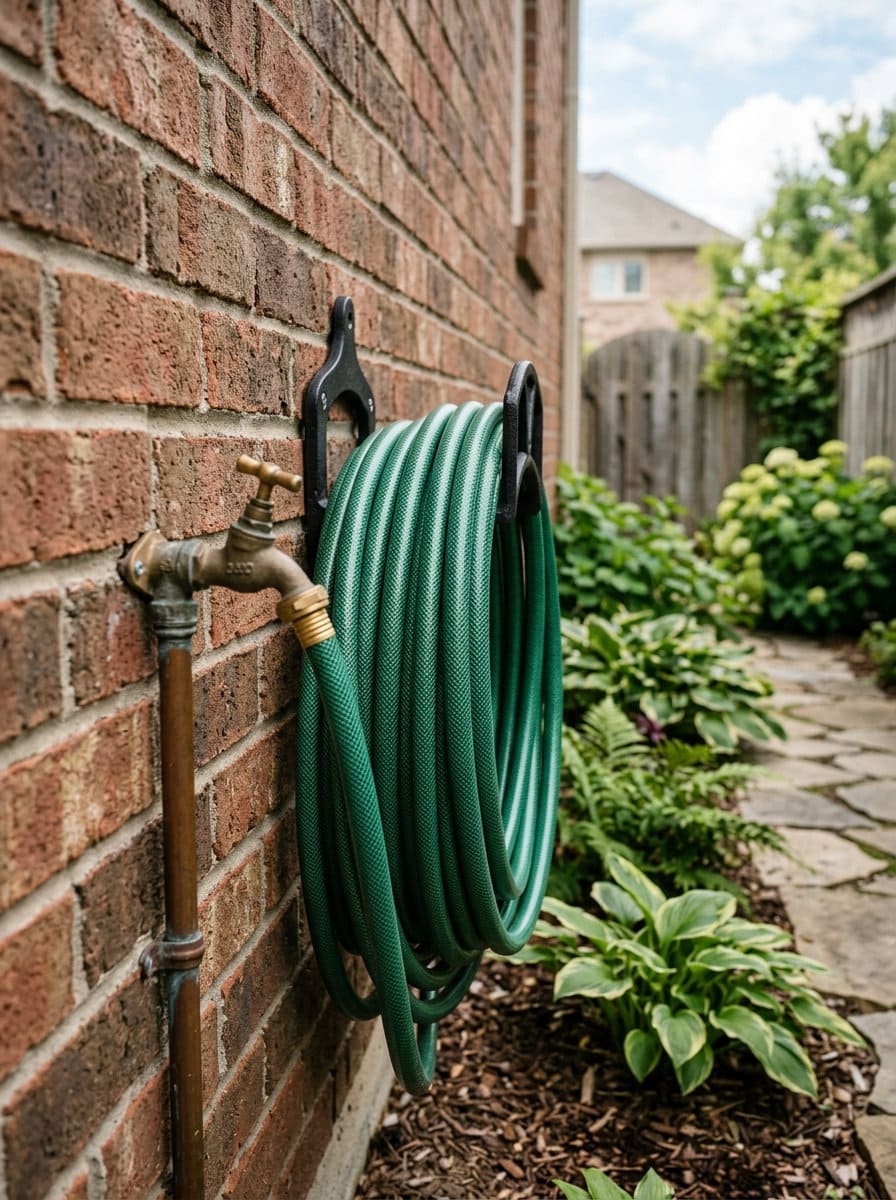
Placing the storage solution within arm’s reach, ideally under 3-4 feet, of the actual water spigot solves the real access-distance pain point: a hanger or reel more than a few steps from the tap gets skipped in practice, and the hose ends up abandoned on the lawn regardless of how nice the storage looks.
Budget tier: DIY-cheap.
20. Hose guide stakes near garden beds
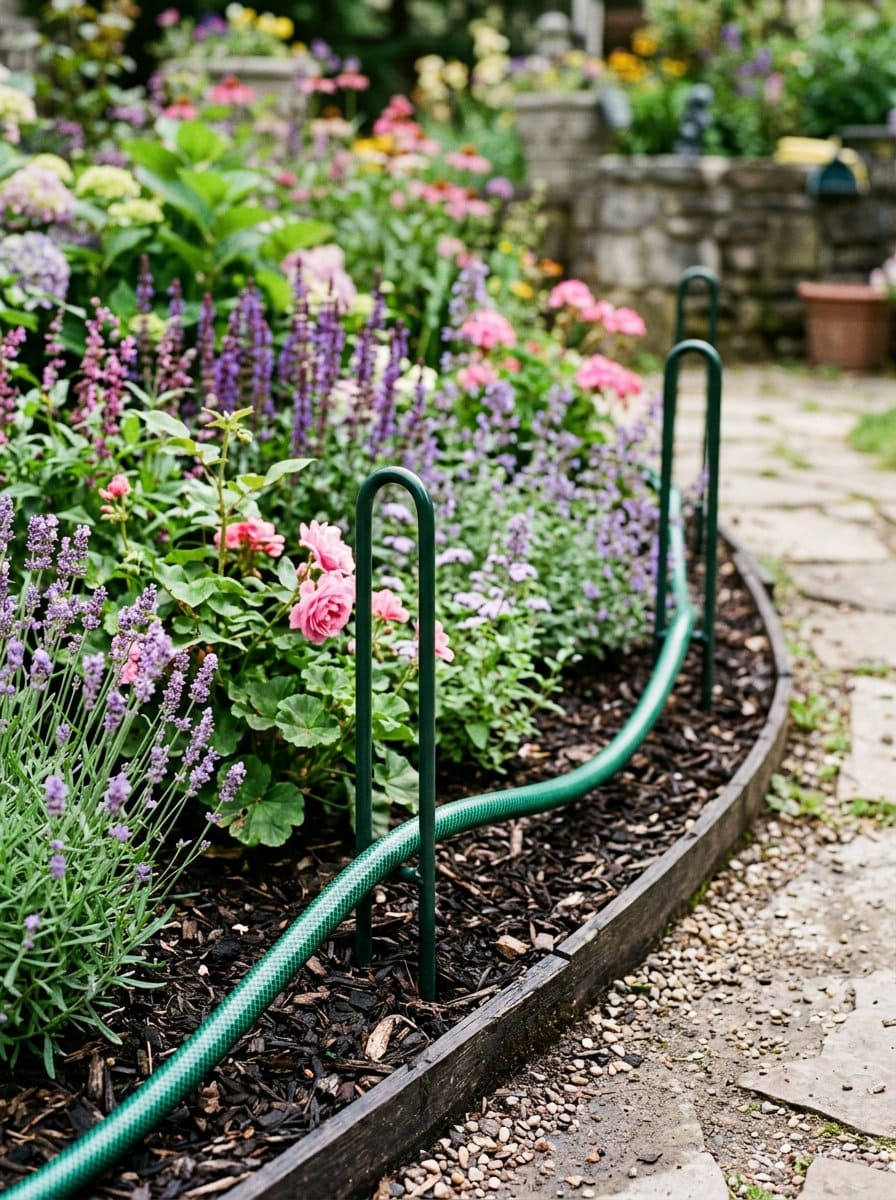
Small stakes, typically 12-18 inches tall, placed at the corners of garden beds guide the hose around plantings instead of dragging straight through them, which isn’t concealment exactly but solves the related real problem of a hose crushing flowers on its way to and from storage.
Space stakes 3-4 feet apart along any bed edge the hose regularly crosses. Pairs well with idea 1’s shrub border to protect the hedge itself from repeated dragging.
Budget tier: DIY-cheap.
What We Learned the Hard Way
The most common mistake isn’t an ugly hose, it’s a hiding spot that quietly ages the hose faster than leaving it out in the open would have.
A buried storage box with no drainage or a faux rock cover set directly on wet soil traps moisture right against the hose, and by the following spring, the wall is already showing the early cracking that comes from repeated freeze-thaw cycles.
The second mistake is coiling under time pressure. Everyone’s tempted to just shove the hose into whatever container looks nice as fast as possible, tight loops and all, and tight coiling is exactly the habit that creates the weak points leading to kinks and eventual splits.
If there’s one thing worth doing differently, it’s taking the extra thirty seconds to coil in large, loose loops every single time, regardless of which storage method you pick.
And the one nobody plans for: distance from the spigot. We’ve seen genuinely beautiful hose storage, a real stone pot, a built-in bench, sit unused because it was positioned for looks rather than for the actual watering routine, with the hose ending up coiled on the lawn instead within a few weeks.
Build or buy the prettiest option you want, but put it within a few steps of where the hose actually connects.
FAQs
Does hiding a garden hose in a container damage it? Only if the container traps water or forces tight coils. Choose a pot or box with drainage, coil the hose loosely in 2- to 3-foot loops, and it’ll last just as long hidden as it would in the open.
Can I leave my garden hose outside all winter? Not connected to the spigot in freezing temperatures. Water trapped inside expands when it freezes and can crack the hose. Drain it fully and, if you’re in a genuinely cold climate, store it in a shed, garage, or basement for the winter.
What’s the fastest way to hide a garden hose without slowing down access? A wall-mounted hose reel or rack mounted near the spigot, since there’s no lid to lift and the reel is right where you actually connect the hose.
Will an HOA make me hide my garden hose? Rarely by name, but general “no visible clutter” or exterior-appearance clauses in stricter communities can technically apply. Check your actual covenant wording rather than assuming either way.
What’s the cheapest way to hide a garden hose? Tucking the coiled hose into an existing planting bed (idea 3) or switching to a dark-colored hose (idea 18) cost close to nothing, both well under any container or built-structure option here.
If the hose isn’t the only thing you’re camouflaging, there’s a broader look at making AC units, trash cans, and other yard eyesores disappear elsewhere on the site, plus a piece on the nearly identical concealment problem for utility boxes.
Building a simple ventilated screen from scratch? There’s more on styling and constructing a bamboo screen that applies just as well to idea 15’s lattice enclosure.
Related Posts
- Outdoor Eyesore Hiding Ideas
- Landscaping Ideas to Hide Utility Boxes
- Bamboo Fence Ideas
- Side Yard Landscaping Ideas
- Potting Bench Ideas
Products We Recommend
This post contains affiliate links. We may earn a commission on qualifying purchases at no extra cost to you.
Suncast Sidewinder Wall Mount Garden Hose Reel (100 ft capacity)
Purpose-built version of idea 11, the fastest-access option on the list, 4.0 stars / 3,575 ratings, live-verified
Shop Now
Suncast Lattice Hose Pot (holds 300 ft expandable / 50 ft standard hose, built-in drainage)
Drop-in option for idea 6/7, real drainage tied directly to the freeze-damage point in Before You Start, 4.0 stars / 660 ratings, live-verified
Shop Now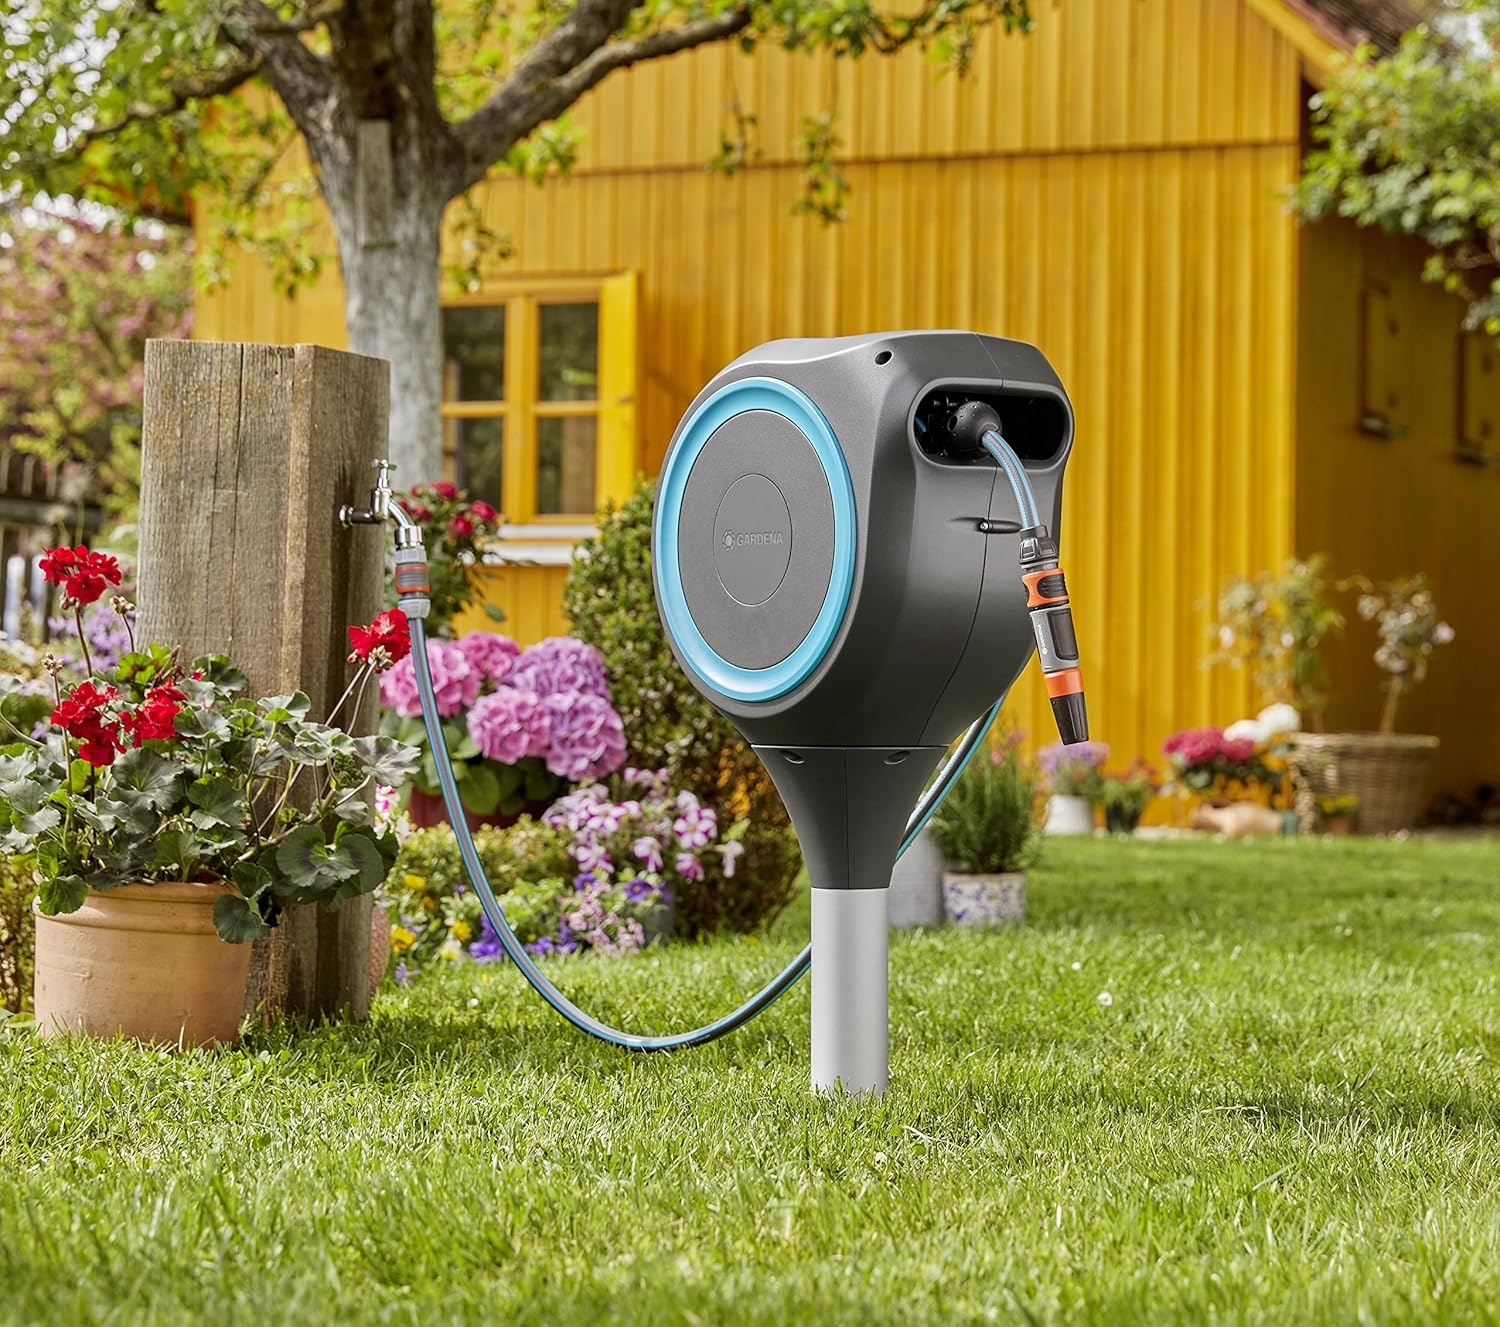
GARDENA Automatic Retractable Garden Hose Reel (50 ft, UV-resistant housing)
Direct product match for idea 17, the most reliable fix for chronic kinking, 4.4 stars / 1,391 ratings, live-verified $190.99
Shop NowNever miss an update — choose FarmFoodFamily as your preferred source on Google.
How it works: Tap the button below to open Google's settings page, then check the box next to FarmFoodFamily.
Tap the checkbox to turn it blue — that's how you know it's set.