14 Clever Low-Budget DIY Garden Pots That Are Safe for Plants and Food
Old colanders, boots and cans make charming garden pots for almost nothing, as long as they drain well and you keep tires and treated wood away from food crops.

Never miss an update — choose FarmFoodFamily as your preferred source on Google.
How it works: Tap the button below to open Google's settings page, then check the box next to FarmFoodFamily.
Tap the checkbox to turn it blue — that's how you know it's set.
Old colanders, boots and cans make charming garden pots for almost nothing, as long as they drain well and you keep tires and treated wood away from food crops.
Products We Recommend
This post contains affiliate links. We may earn a commission on qualifying purchases at no extra cost to you.

COMOWARE Step Drill Bit Set for Metal, 5 Pieces
A titanium-coated step bit that drills clean drainage holes in tin, steel sheet, wood and plastic.
Shop Now
Sinimaka Coco Liner Roll, 16 x 40 Inch
A natural coconut fiber sheet you can cut to line a colander, wire basket or window box.
Shop Now
FUIJOL Clear Nursery Pots With Saucers, 15 Pack
Plastic liner pots with drainage holes and matching saucers, for a teacup or a decorative pot with no hole.
Shop NowAlmost anything can become a garden pot if it drains. Punch or drill holes in the bottom, add potting mix and plant. For flowers and succulents, you have lots of freedom.
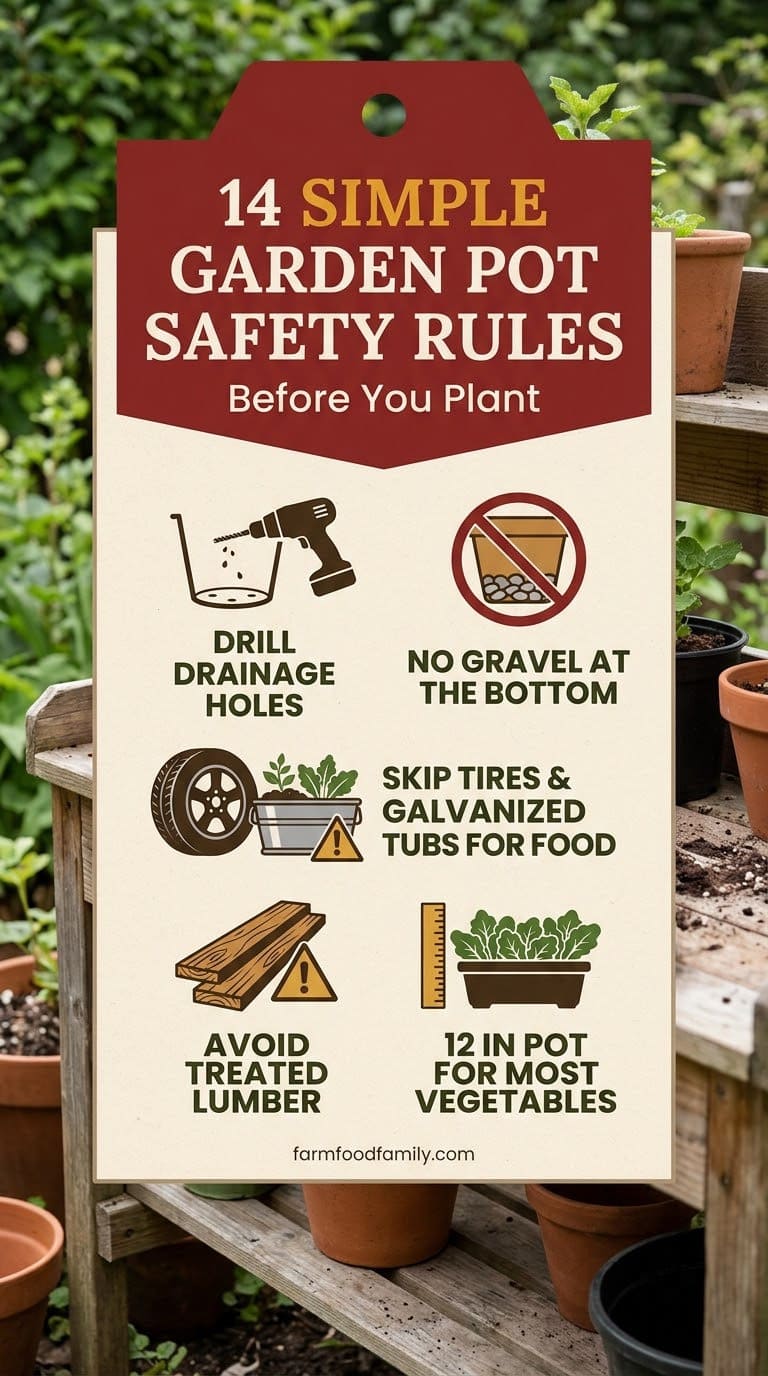
For vegetables and herbs, the rules are stricter. UVM Extension says to steer clear of anything not meant for food, including tires, galvanized tubs and kitty litter containers. Avoid treated lumber too.
Emptied milk jugs and yogurt tubs are safe choices, as long as you poke holes in the bottom. Use a pot at least 6.5 inches wide for herbs and greens, and about 12 inches for most vegetables. These 14 ideas show how to turn trash into pretty pots, with steps and styling tips for each one.
Answer 4 quick questions and get matched to the exact fix for your yard — drainage, budget, layout, or something else entirely.
Take the Free QuizBut check the safety rules first, because a pretty pot that leaches into your soil isn’t a bargain.
Which Containers Are Safe for Food?
Start with what you’ll grow. A flower can live in a boot or a teapot. A tomato or herb needs a container that won’t leach anything into the soil.
Debra Heleba of the UVM Extension Community Horticulture Program says to avoid containers not meant for food, including empty kitty litter tubs, tires and galvanized tubs. She says milk jugs, yogurt containers and other emptied food containers work, if you poke drainage holes. She also says to avoid treated lumber.
The Cornell Small Farms Program agrees that recycled containers must contain no toxic substances. It adds that painted or treated wood is a problem for food crops.


Use the table to sort your finds.
Most yard problems trace back to one specific, fixable cause. Find yours in 4 quick questions.
Take the Free Quiz| Container | Flowers and succulents | Vegetables and herbs |
|---|---|---|
| Emptied milk jug or yogurt tub | Yes | Yes, with drainage holes |
| Emptied food cans | Yes | Sources differ, see idea 3 |
| Old boots, teacups, colanders | Yes | Only if the material is food-safe |
| Painted wood or treated lumber | Use a liner | Avoid |
| Tires | Not our pick | Avoid |
| Galvanized tub or wheelbarrow | Yes | Avoid |
| Kitty litter container | No | Avoid |
When in doubt, use the pot for flowers. It’s the simplest rule, and it keeps your food clean.
How Do You Make a Pot Drain?
Drainage is the one rule that never changes. Illinois Extension’s container drainage guide says a hole at the bottom of the container is critical, because roots need air that standing water blocks.
It also says gravel in the bottom does little to keep the soil above it from being saturated.
So skip the gravel and focus on the hole. If a pot has no hole, drill one. Small holes let water out with little soil loss.
Here’s how we’d do it:
- Use a metal bit for tin, a masonry bit for ceramic or a nail and hammer for thin plastic.
- Make three or four small holes, rather than one huge hole.
- Place the pot on bricks or pot feet so water can escape.
- Use a detachable saucer, so it doesn’t hold standing water. Illinois Extension prefers detachable saucers for this reason.
If you can’t drill a precious teacup, use it as a cover. Keep the plant in a plastic liner pot, and lift it out to water.
What Size and Soil Do You Need?
Size matters for vegetables. Heleba says a pot needs a minimum size of 6.5 inches, which is about 2 quarts.
A titanium-coated step bit that drills clean drainage holes in tin, steel sheet, wood and plastic.
Shop NowThis post contains affiliate links. We may earn a commission on qualifying purchases at no extra cost to you.
Leafy greens and herbs do well there. For most other vegetables, aim for a 12-inch pot of 7 to 9 quarts.
Use potting mix, not plain garden soil. Heleba says topsoil is too dense for containers. If you want to make your own, mix 1 part topsoil, 1 part sand and 1 part compost.
The average homeowner spends $616/year on yard fixes that don't address the real problem. Find out what yours actually is — before you spend another dollar.
Take the Free QuizIf you reuse a pot, clean it between crops. Heleba says to wash off debris, then soak the pot in 1 part bleach to 9 parts water for at least 10 minutes, and rinse well.
1. Colander Hanging Basket
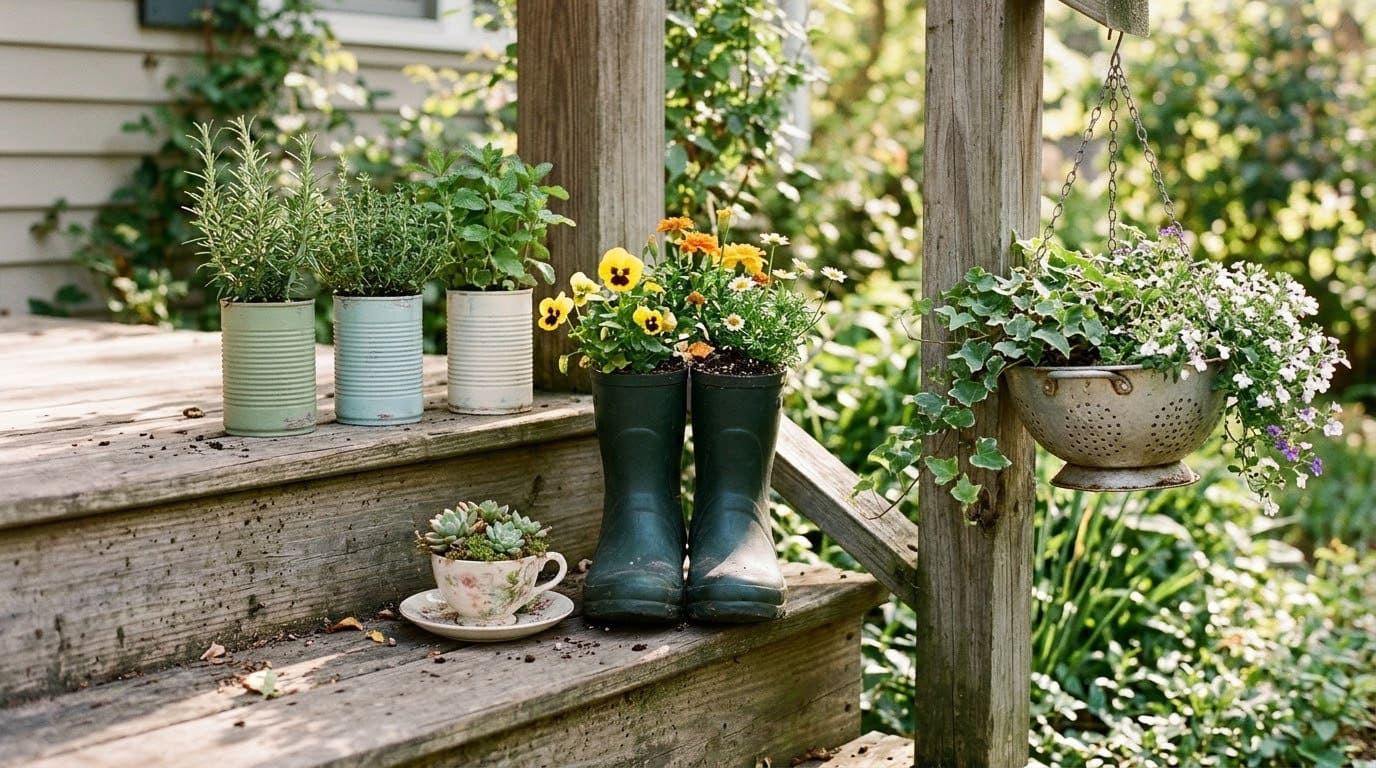
A colander already has drainage holes. That makes it the easiest upcycled planter. Line it with coconut fiber or landscape fabric, and hang it from three chains.
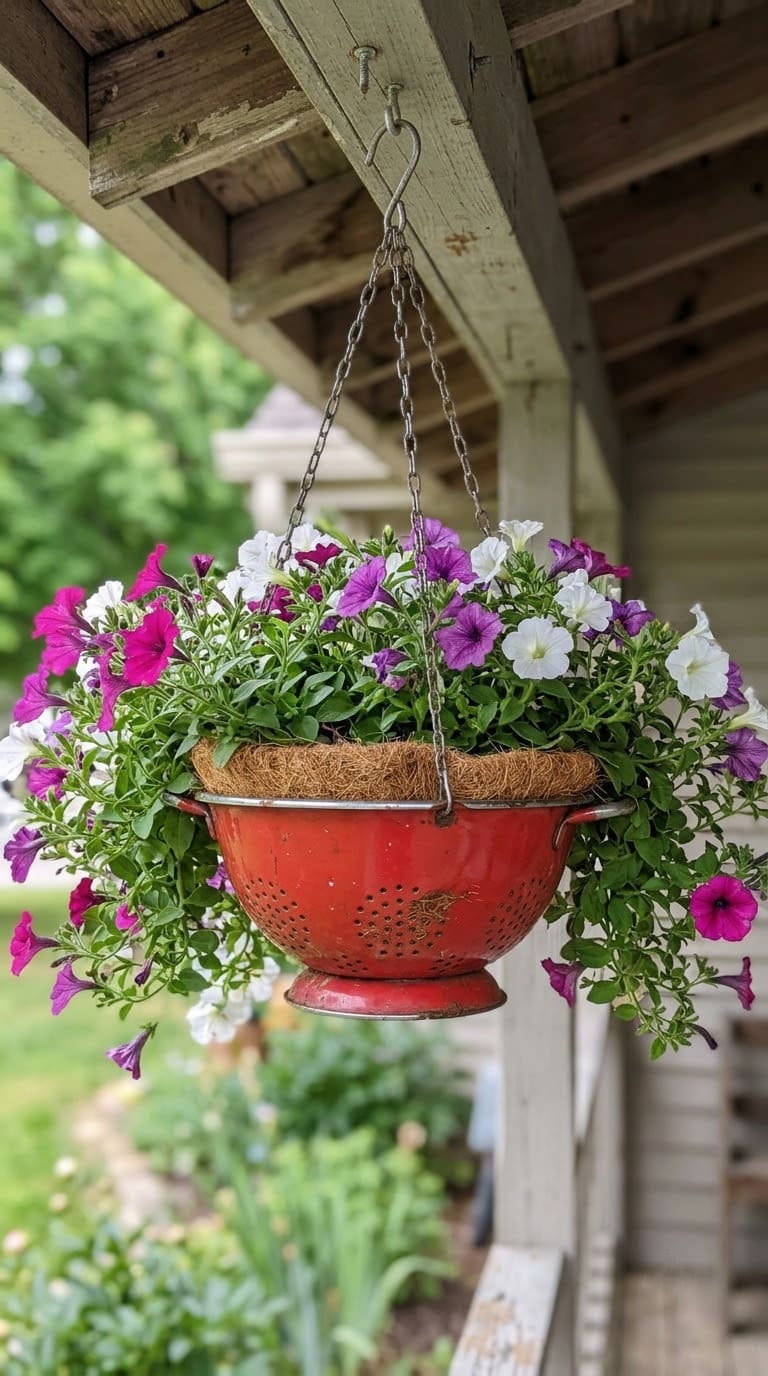
- Choose a metal or enamel colander without rust.
- Line the inside with coir or fabric to hold in the soil.
- Fill with potting mix and plant trailing flowers like petunias.
- Hang from three S-hooks or chains to a sturdy hook.
Style tip: a red or blue enamel colander adds a country look.
Where it goes: a porch beam or a fence post. See our outdoor hanging planter ideas for more.
2. Boots and Shoes Planter
Old rain boots make cute flower pots. They’re free, and they add color to a step. Bright boots look best against a plain wall.
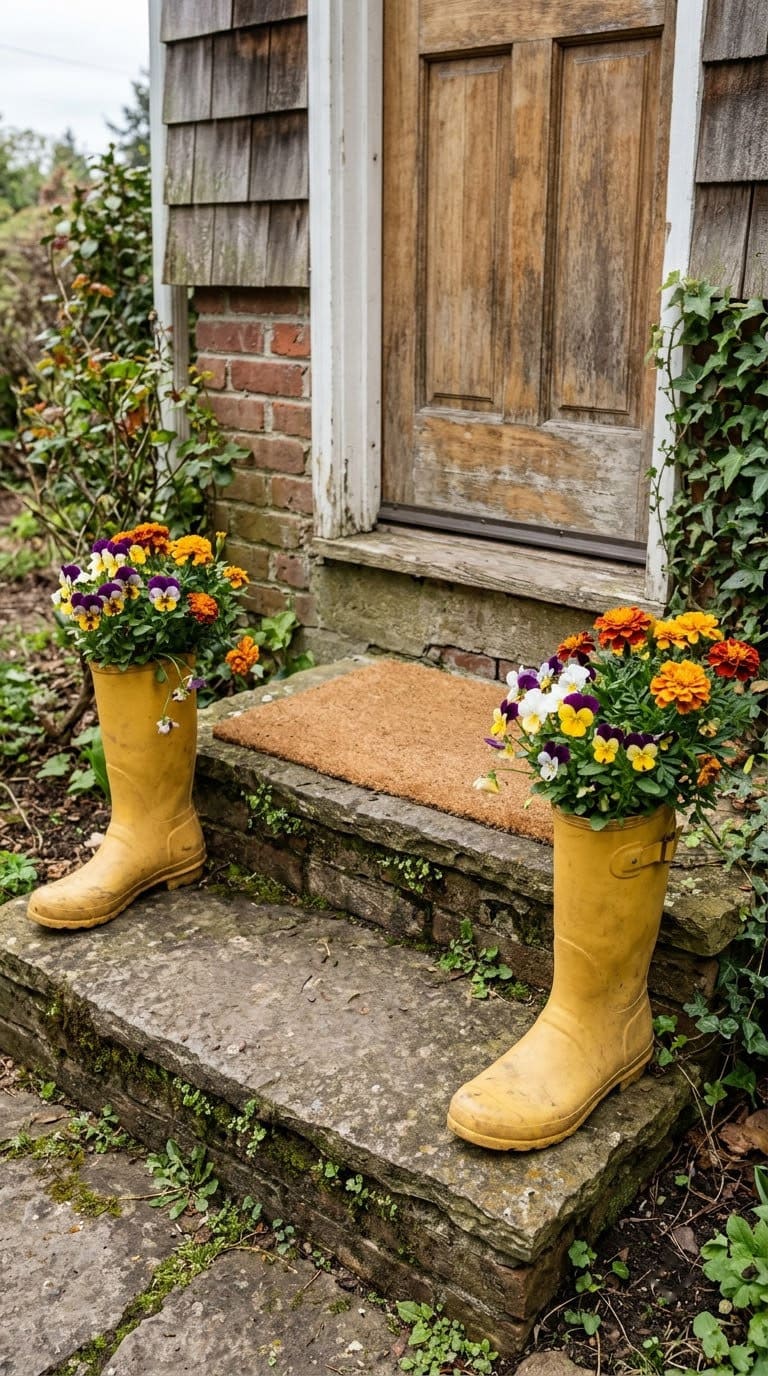
- Punch four or five holes in the sole with a nail and hammer.
- Add a plastic liner or a coffee filter over the holes to hold in the soil.
- Fill with potting mix to the ankle.
- Plant short flowers like pansies or marigolds.
Style tip: use a pair, one on each side of the door.

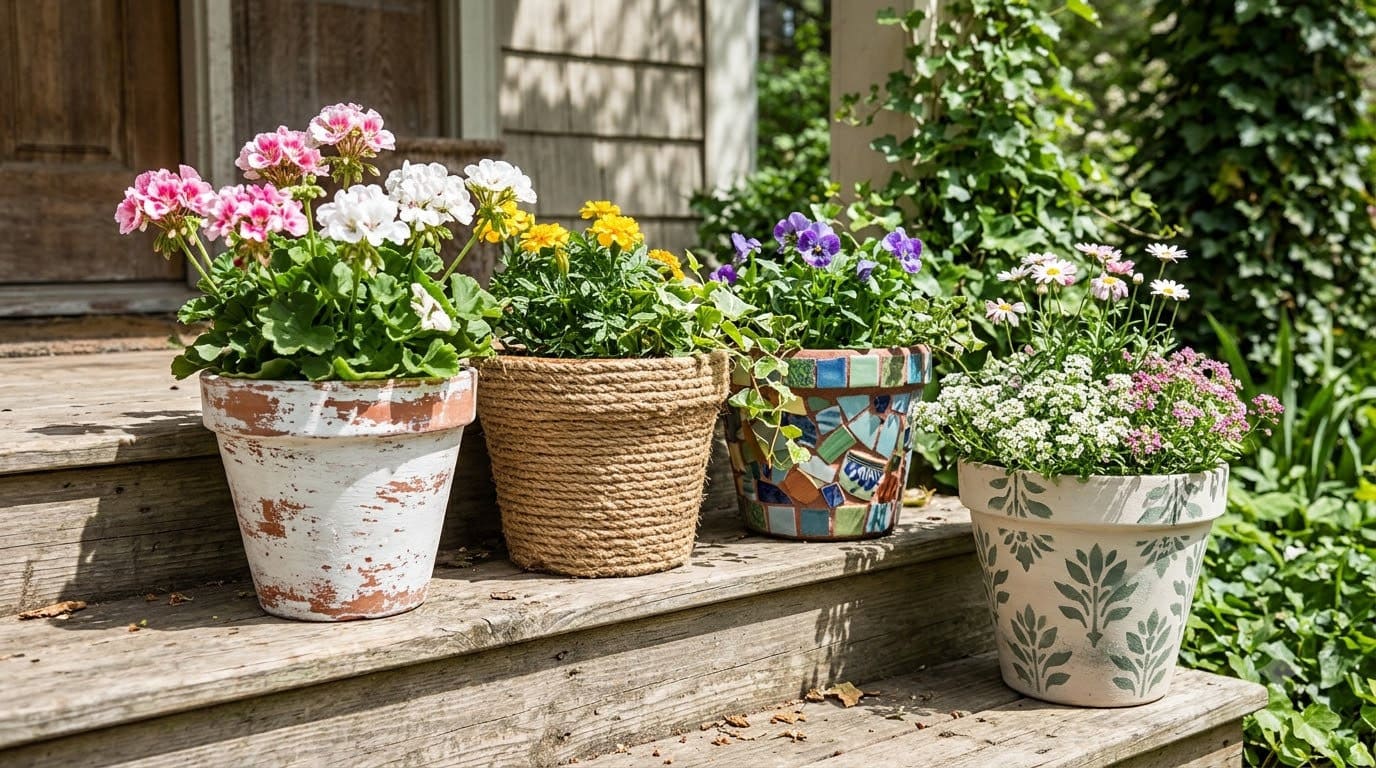

Safety: keep to flowers. The rubber isn’t made for food.
3. Painted Tin Can Pots
Tin cans are the classic cheap pot. A coat of paint turns them into a matched set. Use emptied food cans, and wash them well.
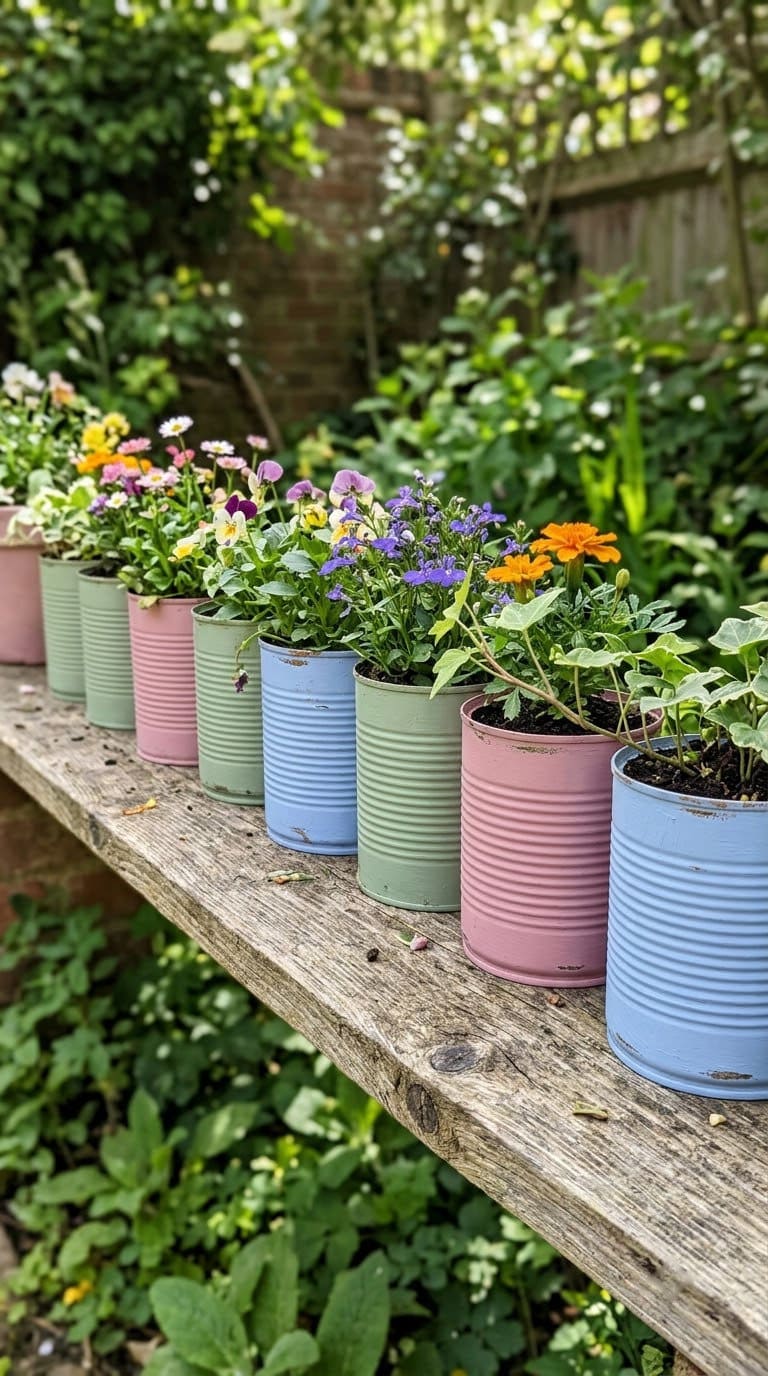
- Remove the label and wash the can. Check for sharp edges and press them flat.
- Punch three or four holes in the bottom with a nail and hammer.
- Paint the outside with outdoor paint, and let it dry.
- Fill with potting mix and plant herbs or flowers.
Style tip: paint a row in three colors, and line them on a shelf.
Note: sources differ on metal for food crops. UVM allows emptied food containers, but Cornell lists metals among materials to avoid.
Keep cans for flowers if you’re unsure, and keep paint on the outside only. See our guide to DIY painted garden decorations.
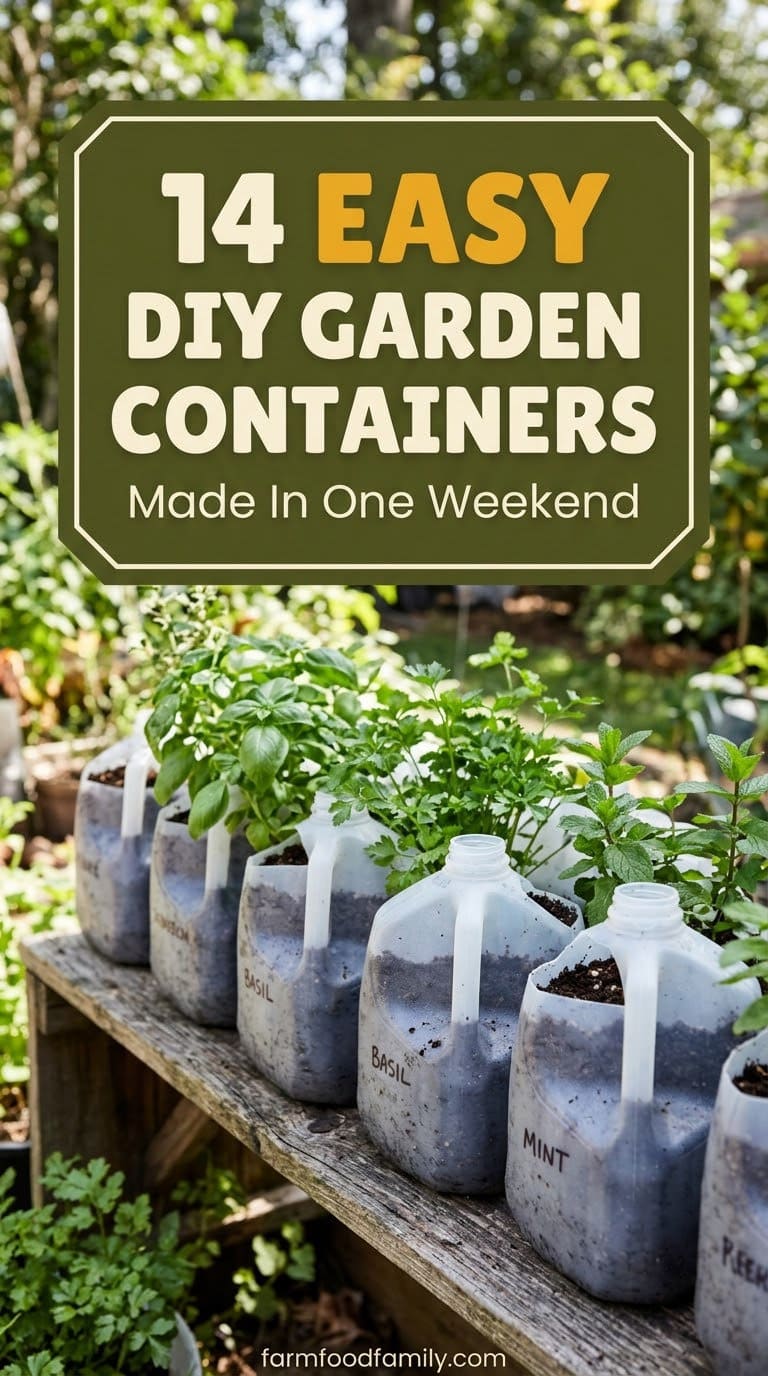
4. Milk Jug and Soda Bottle Planters
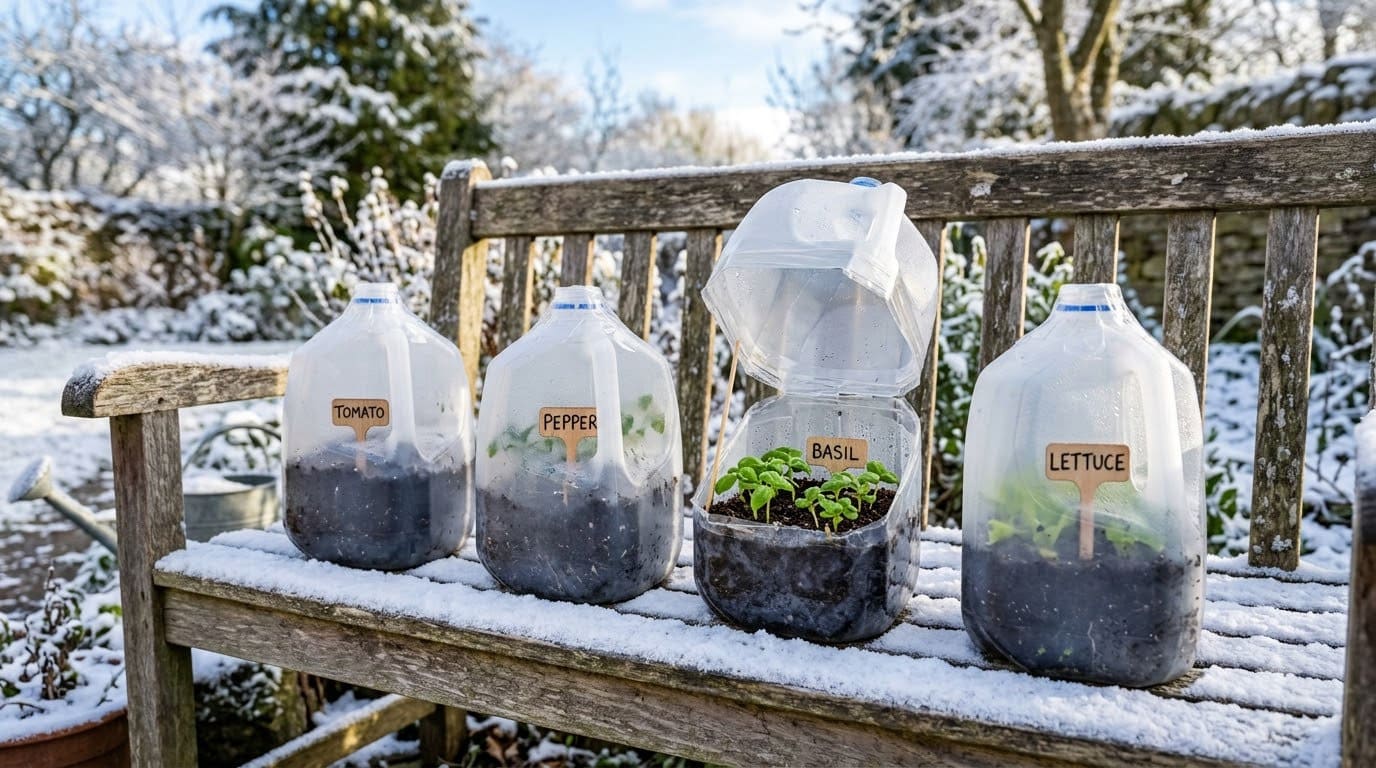
Milk jugs and plastic bottles are free and safe for food crops. UVM Extension says emptied milk jugs and yogurt containers work, with holes poked for drainage. A cut-off bottle can even become a self-watering herb pot.
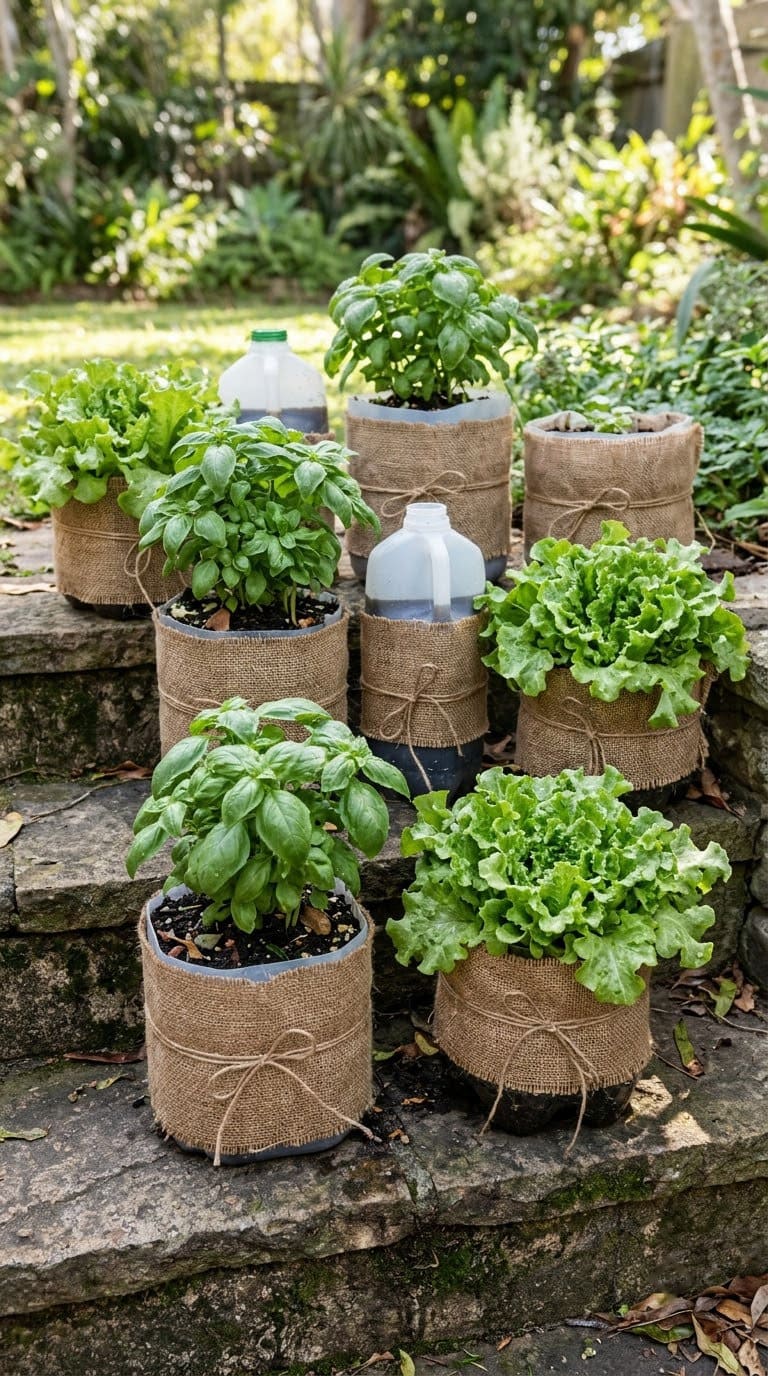
- Rinse the jug or bottle well.
- Cut off the top third with scissors, and poke holes in the bottom.
- Fill with potting mix and plant herbs or greens.
- Set the pots in a tray on a sunny sill or step.
Style tip: paint the outside, or wrap it in burlap for a rustic look.
More: see our container herb garden guide.
5. Teacup Succulent Garden
A teacup is a sweet home for a small succulent. It looks lovely on a windowsill or a patio table. It also uses a thrift store find.
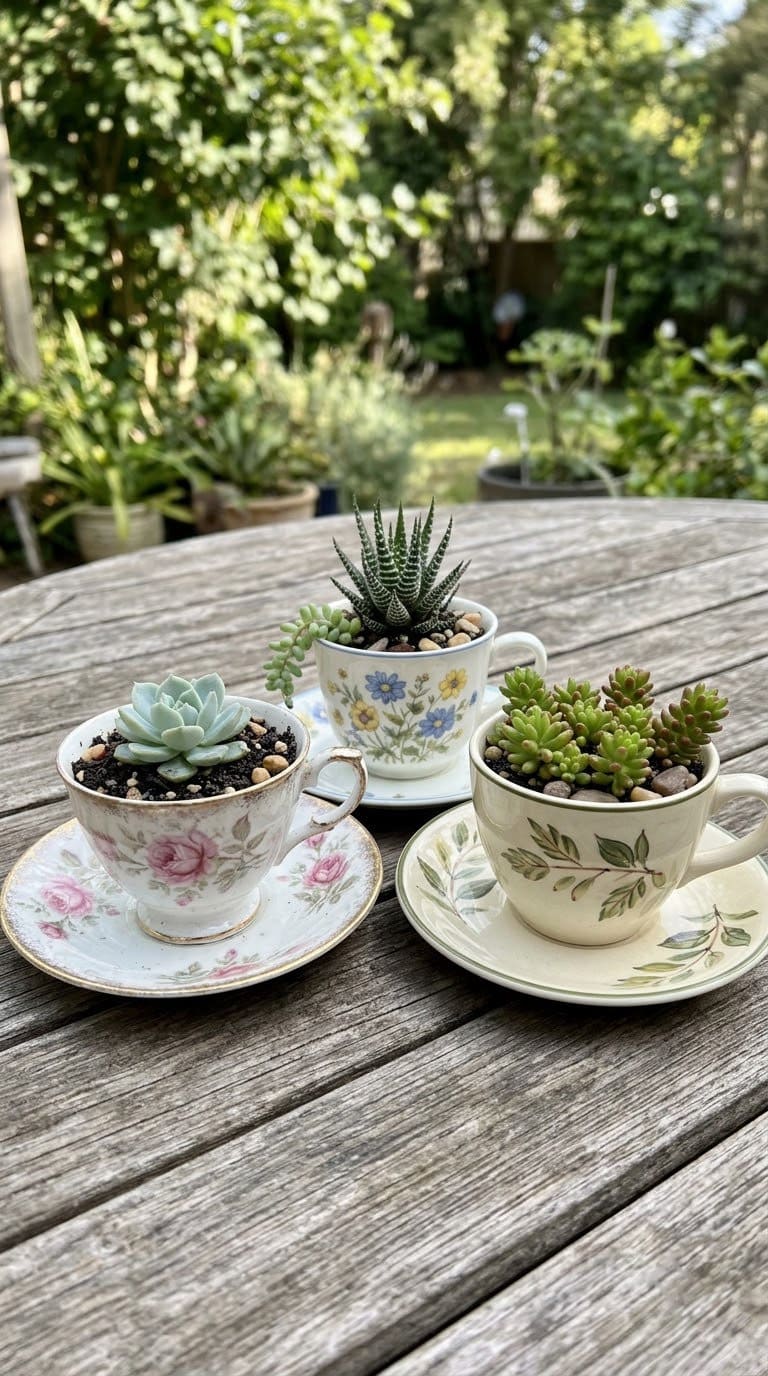
- Choose a cup with a wide mouth, and check it for chips.
- Put the succulent in a small plastic liner pot with a hole.
- Set the liner inside the teacup, and lift it out to water.
- Add a layer of pebbles on top for looks.
Style tip: mix patterned cups for a vintage tea party look.
More: our guide to planting succulents without drainage covers the details, and our teapot garden page shows more.
6. Wheelbarrow Flower Bed
An old wheelbarrow makes a big planter you can roll to the sun. It holds a lot of soil, so it dries out slowly. It’s a showpiece in a small yard.
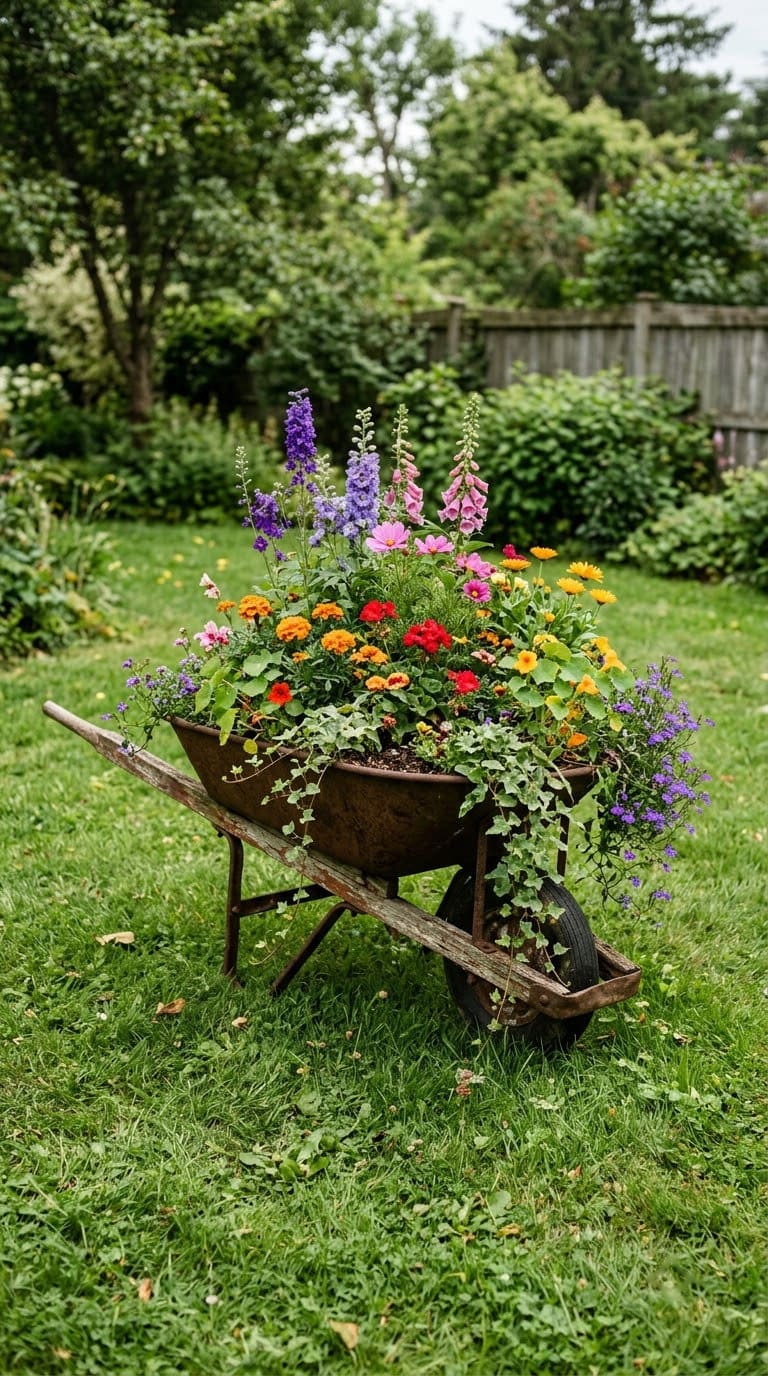
- Drill several holes in the bottom of the tray.
- Check for rust holes, and patch anything sharp.
- Fill with potting mix and a mix of tall, medium and trailing plants.
- Roll it to a sunny spot and park it on level ground.
Style tip: leave the rust and chipped paint for a rustic feel.
Safety: keep the wheelbarrow for flowers. UVM says to avoid galvanized tubs for vegetables.
7. Cinder Block Planters
Cinder blocks have built-in holes. Stack them and fill each hole with soil and a plant. It’s one of the cheapest planters you can build.
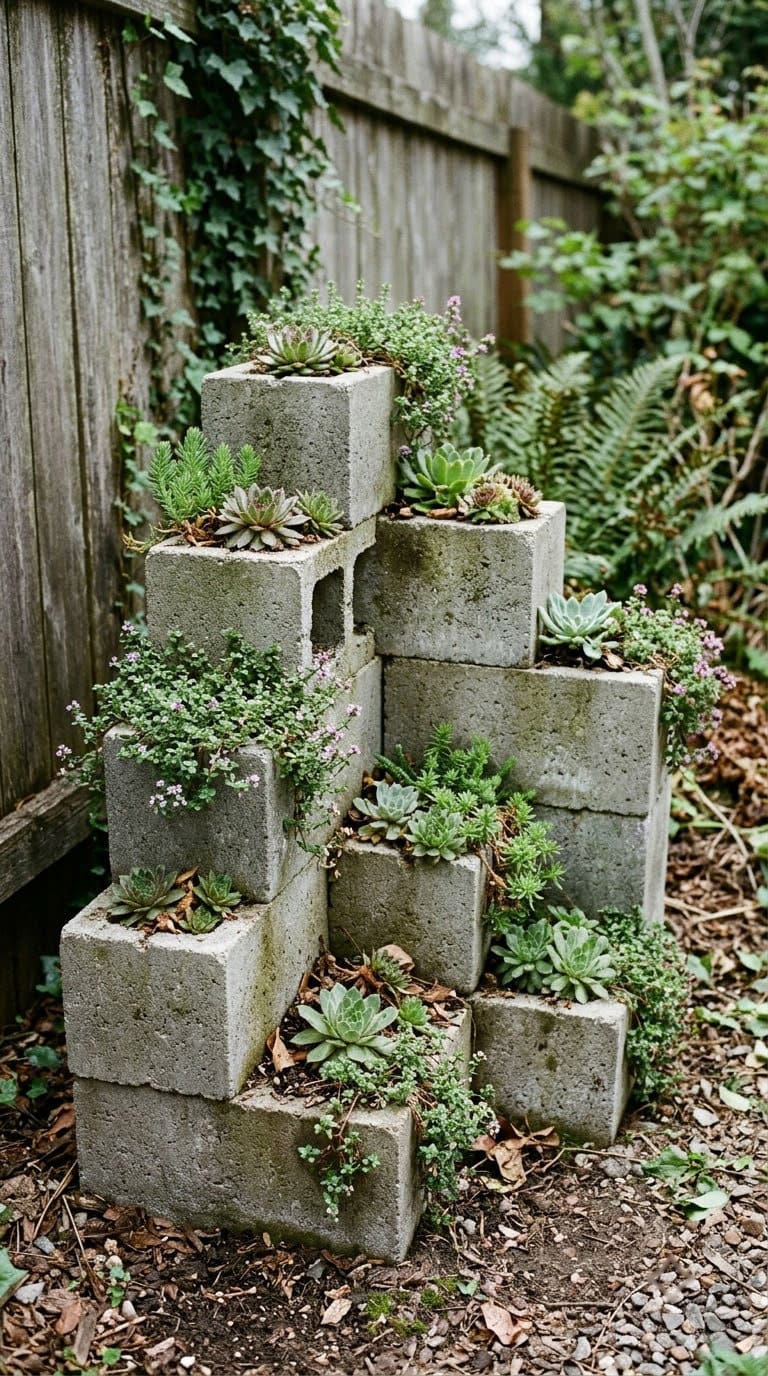
- Set the blocks on level ground, with the holes facing up.
- Stack a second layer in a staggered pattern.
- Fill each hole with potting mix, and plant flowers or succulents.
- Paint the outside with masonry paint, if you want color.
Style tip: use sedum and creeping thyme to spill over the edges.
Safety: blocks are heavy. Wear gloves and lift with your legs.
8. Crate and Drawer Planters
An old wooden crate or dresser drawer makes a long, shallow planter. It’s perfect for lettuce and flowers. It fits on a deck rail or a bench.
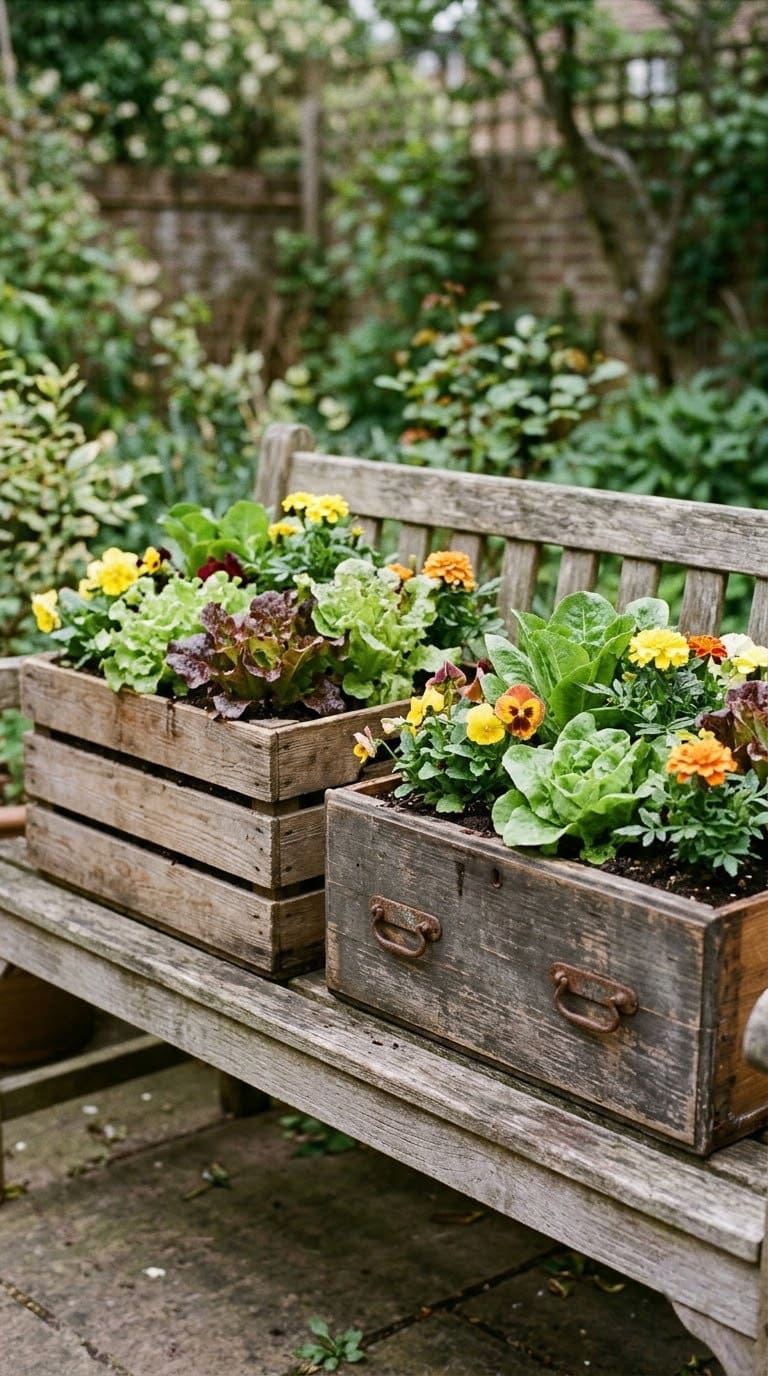
- Choose untreated wood, since UVM says to avoid treated lumber for food.
- Line the inside with plastic, and cut slits in the bottom for drainage.
- Fill with potting mix, and plant lettuce or flowers.
- Set the crate on bricks so water can escape.
Style tip: a crate with an old label looks charming on a porch.
More: see our DIY pallet and wood planter box ideas.
9. Denim Jeans Planter
Old jeans make a soft, quirky planter. Fill the legs and hang them on a fence. They’re a fun way to use up worn clothes.
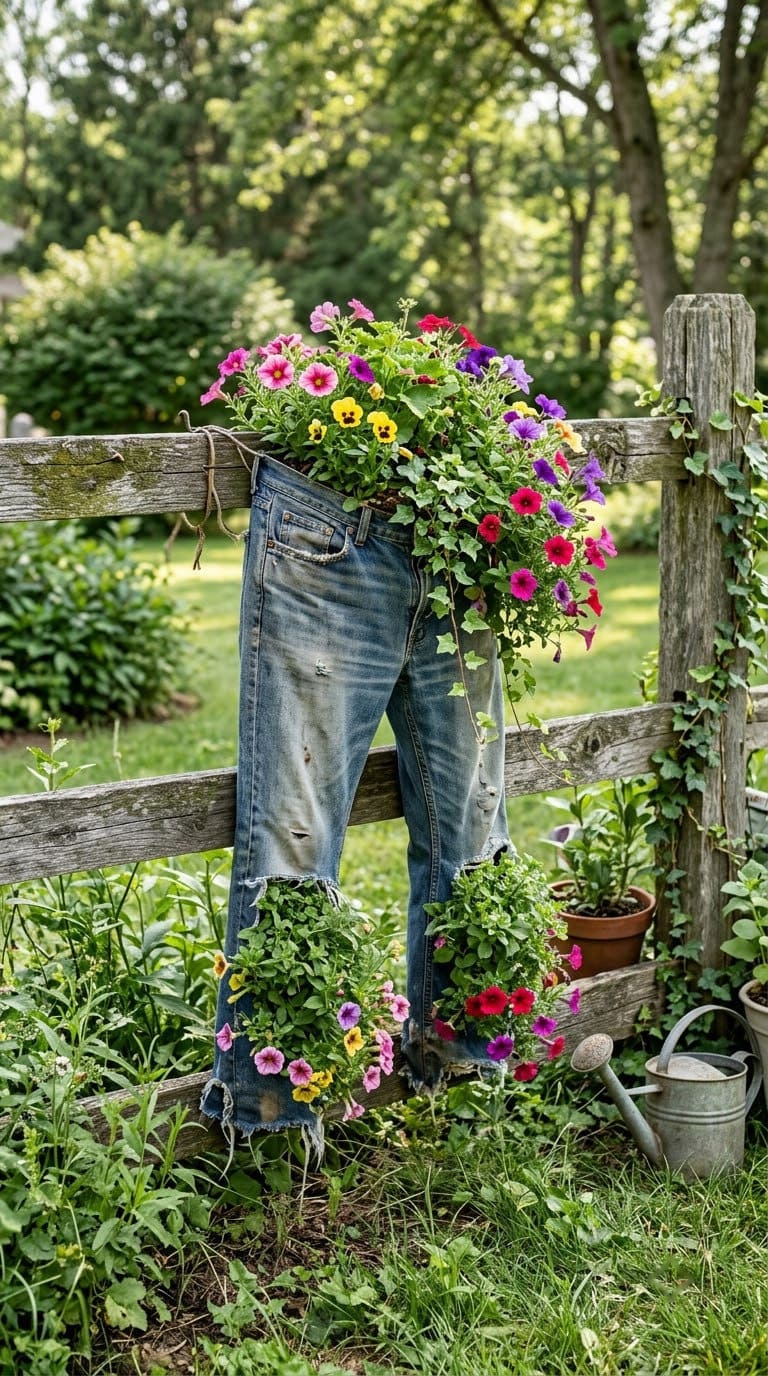
- Cut the jeans below the pockets, and sew or staple the bottom shut.
- Poke a few small holes in the bottom for water.
- Fill with potting mix and plant flowers.
- Hang by the belt loops from a sturdy hook.
Style tip: use a mix of denim shades for a patchwork look.
Note: denim dries out fast. Water often in summer.
10. Hypertufa Pots
Hypertufa pots look like stone and cost very little. You mix cement, peat moss and perlite, then press it into a mold. It takes a weekend to cure, but the result lasts for years.
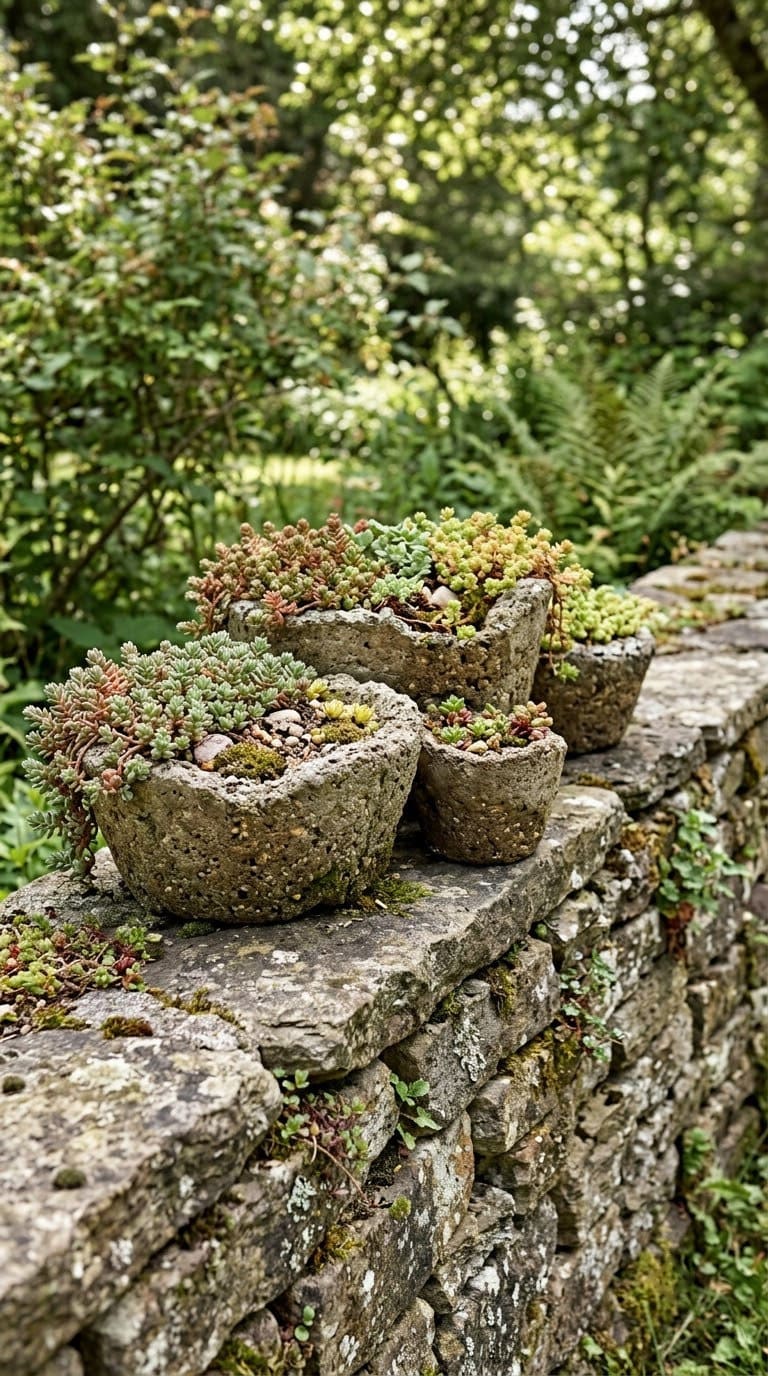
- Wear gloves and a dust mask when you mix dry cement.
- Follow a trusted recipe for the mix, and add water until it holds when squeezed.
- Press the mix into a plastic tub, and make a drainage hole with a dowel.
- Let it cure for a few days, and unmold gently.
Style tip: brush the surface with a wire brush for a weathered look.
Safety: cement is caustic. Wear gloves and eye protection.
11. Broken Pot Fairy Garden
A cracked terra cotta pot is not trash. Tip it on its side, and let the plants spill out. Add a tiny path and a few figures.
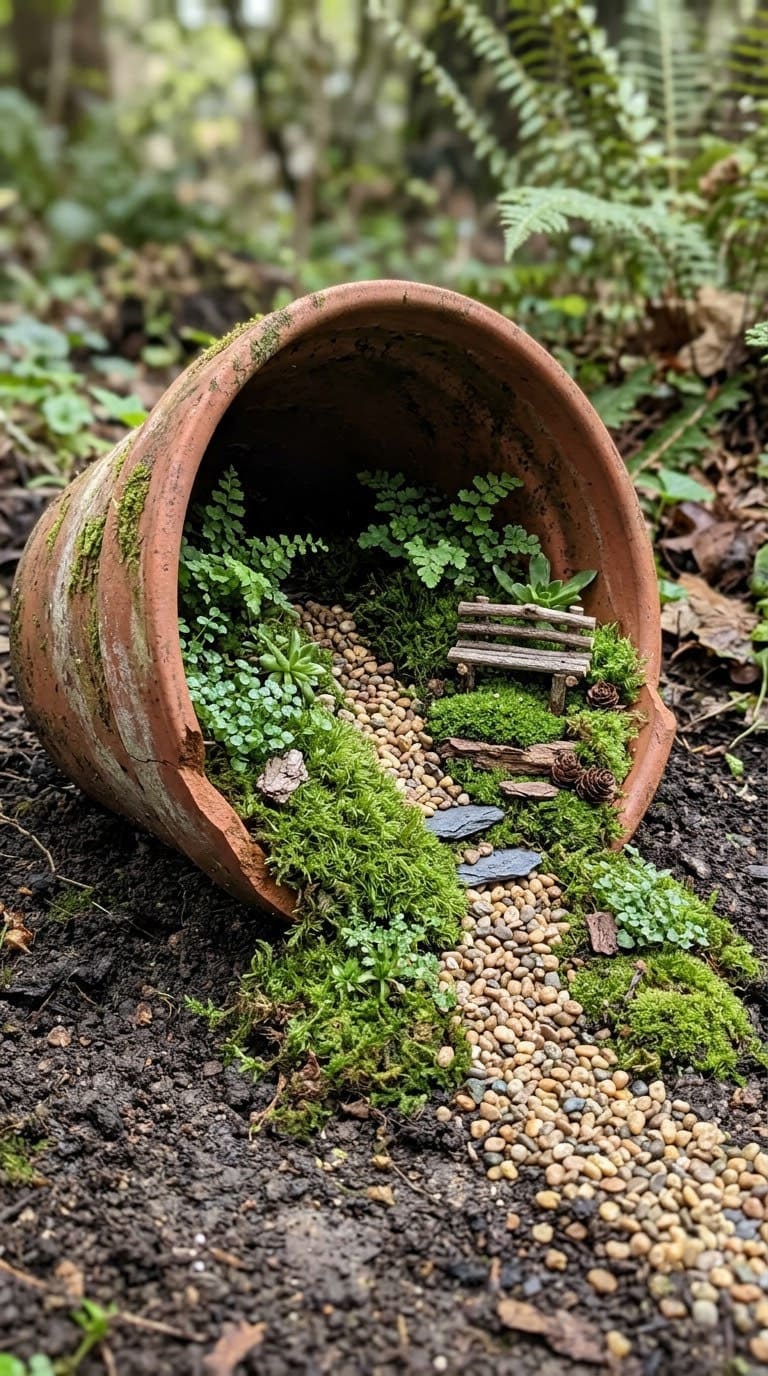
- Set the pot on its side, and wedge it with stones.
- Fill the inside with potting mix and let the soil spill out.
- Plant small, low plants like moss or baby tears.
- Add pebbles, a mini bench or a tiny door.
Style tip: keep to one theme, like a woodland cottage.
More: see our spilled flower pot ideas and clay pot garden crafts.
12. Shoe Organizer Vertical Garden
A hanging shoe organizer turns a fence into a vertical garden. Each pocket holds a small plant. It’s perfect for a small patio.
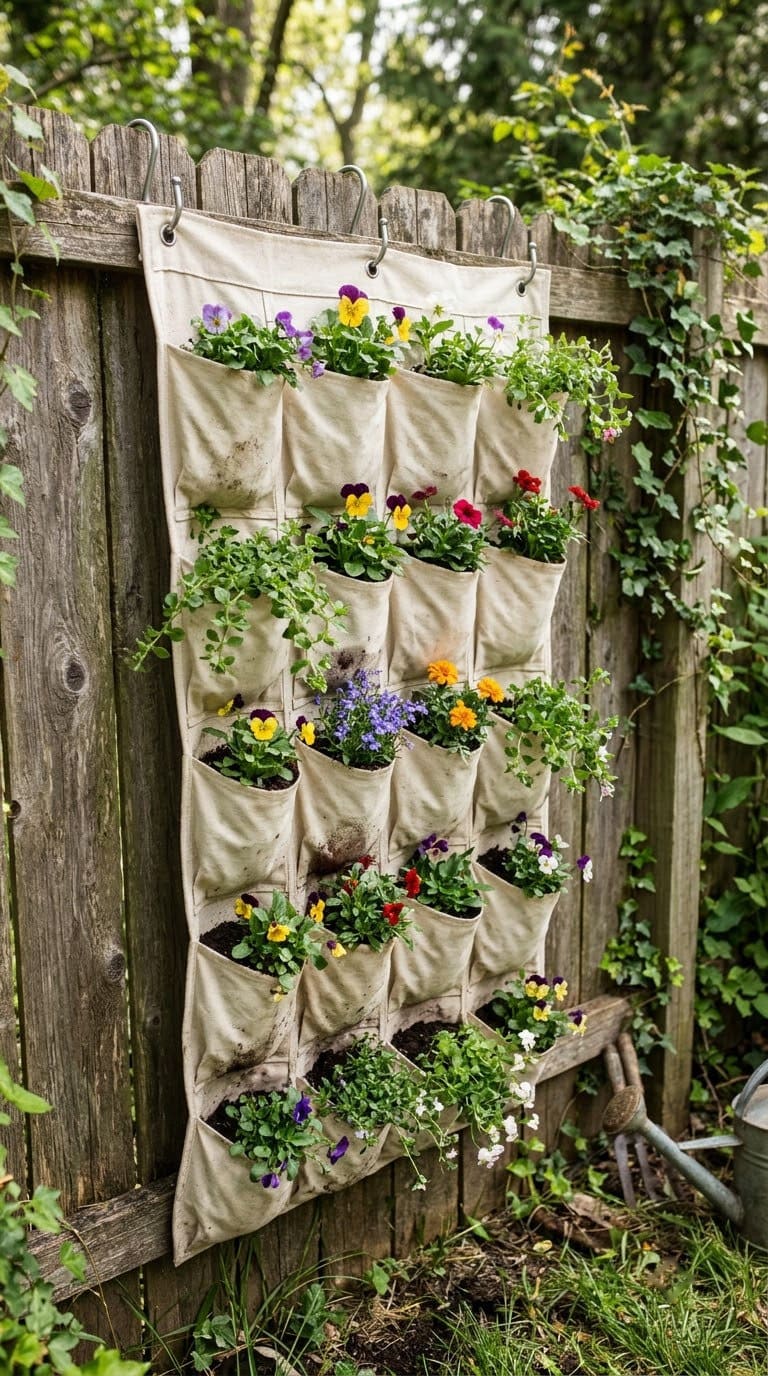
- Choose a sturdy fabric organizer with pockets.
- Poke a hole in each pocket for water.
- Hang it on a fence or wall, in a spot with sun.
- Fill each pocket with potting mix, and plant flowers.
Style tip: use trailing plants in the top row and upright ones below.
Safety: keep to flowers unless the fabric is made for growing food.
13. Log and Stump Planters
A log or a stump gives you a natural pot. Hollow the top and fill it with soil. It looks lovely in a woodland garden.
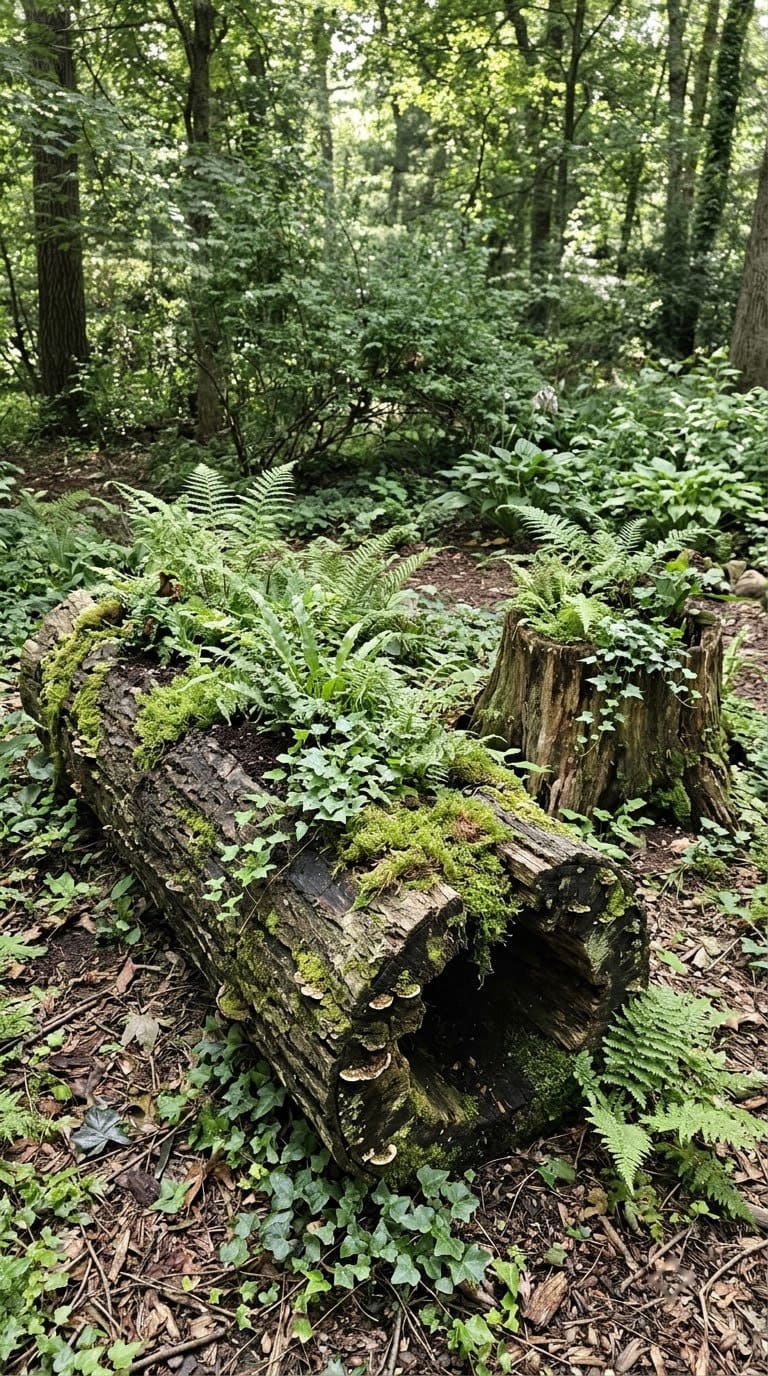
- Use a dry log or stump about 12 inches across.
- Hollow the top with a chisel, or use a drill to make a few deep holes.
- Fill with potting mix, and plant moss, ferns or flowers.
- Set it in the shade, since it’ll decay over time.
Style tip: group two or three logs of different heights.
Note: wood rots, so expect a few seasons of use.
14. Bicycle Basket and Bucket Pots
An old bike makes a charming garden feature. Fill the basket with a liner and flowers. A rusty bucket does the same job.
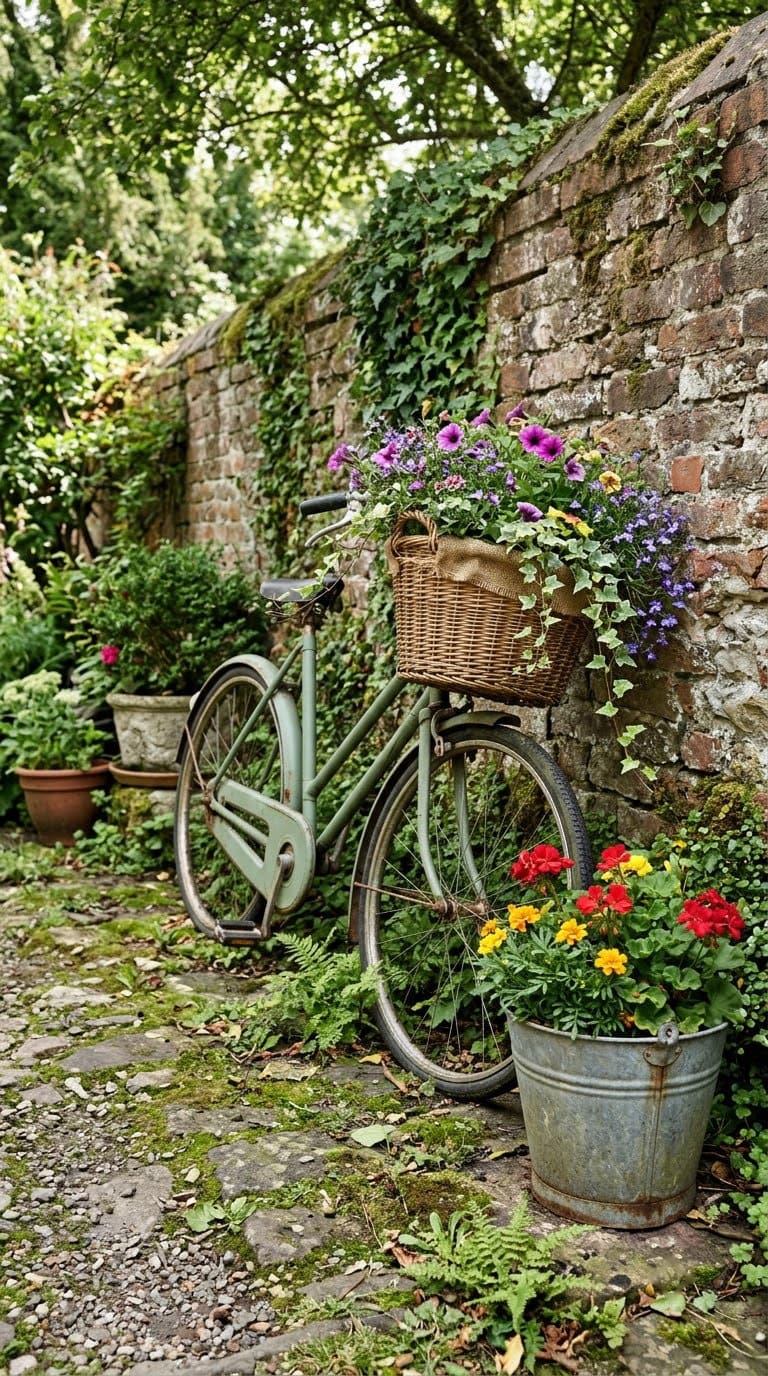
- Line the basket with coir or a plastic liner with holes.
- Fill with potting mix and plant trailing flowers.
- Lean the bike against a wall or a fence.
- Add a bucket by the back wheel for a second pot.
Style tip: paint the bike in a bright color to pop against green.
More: see our bicycle planter ideas and repurposed garden containers.
Quick Comparison: Which Pot Fits You?
Here’s how the 14 ideas compare. Use it to pick by cost and what you plan to grow.
| Idea | Cost | Best plants | Food-safe? |
|---|---|---|---|
| Colander | Free to low | Trailing flowers | Check the material |
| Boots | Free | Pansies | No |
| Tin cans | Free | Flowers, herbs | Sources differ |
| Milk jugs | Free | Herbs, greens | Yes |
| Teacup | Low | Succulents | No |
| Wheelbarrow | Free to low | Mixed flowers | No |
| Cinder block | Low | Succulents | Not our pick |
| Crate or drawer | Free to low | Lettuce, flowers | Untreated wood only |
| Denim | Free | Flowers | No |
| Hypertufa | Low | Succulents | Not our pick |
| Broken pot | Free | Moss, small plants | No |
| Shoe organizer | Low | Flowers | Check the fabric |
| Log | Free | Ferns, moss | No |
| Bike or bucket | Free to low | Trailing flowers | No |
How Do You Make Cheap Pots Look Good?
Cheap pots look best in groups. A single boot looks odd, but three boots of different heights look planned. Pick one color family and repeat it.
Paint helps. A coat of the same color on mismatched pots makes them a set. Use outdoor paint on the outside only.
Then add plants that fill the pot. A tall plant, a medium one and a trailing one make a full look. And group the pots at different heights, using bricks or crates.
For more ideas, see our guides on flower garden ideas for containers and DIY flower pot ideas.
Common Mistakes to Avoid
Skipping drainage holes. Illinois Extension calls a bottom hole critical, since standing water blocks the air roots need.
Adding gravel instead of a hole. Illinois Extension says gravel in the bottom does little to keep the soil above it from saturating.
Using tires or galvanized tubs for food. UVM says to steer clear of tires, galvanized tubs and kitty litter containers for vegetables.
Using treated lumber for food. UVM says to avoid treated lumber. Choose untreated wood.
Picking a pot that is too small. A vegetable needs about 12 inches. UVM says leafy greens and herbs need at least 6.5 inches.
A One-Weekend Pot Project
You can make a whole set in a weekend. Here’s the order we’d follow.
Friday evening: Gather containers. Sort them into flowers only and food-safe.
Saturday morning: Wash and sand each one. Punch or drill the drainage holes.
Saturday afternoon: Paint the outsides and let them dry. Add liners where you need them.
Sunday: Fill with potting mix and plant. Group the pots at different heights, and water slowly.
FAQ
What can I use as a cheap garden pot?
Colanders, boots, tin cans, milk jugs, crates and teacups all work. Add drainage holes, and use potting mix.
Is it safe to grow vegetables in recycled containers?
Yes, if the container is food-safe. UVM Extension says to avoid tires, galvanized tubs, kitty litter containers and treated lumber.
Do I need to drill drainage holes?
Yes. Illinois Extension says a hole at the bottom is critical. If you can’t drill, use a liner pot inside the decorative one.
How big should a vegetable pot be?
About 12 inches for most vegetables. UVM says leafy greens and herbs need at least 6.5 inches.
Should I put gravel at the bottom?
No. Illinois Extension says it does little to stop the soil above from being saturated. Use a drainage hole instead.
Related Posts
Never miss an update — choose FarmFoodFamily as your preferred source on Google.
How it works: Tap the button below to open Google's settings page, then check the box next to FarmFoodFamily.
Tap the checkbox to turn it blue — that's how you know it's set.