20 Charming DIY Shell Decoration and Craft Ideas (With Cleaning Tips)
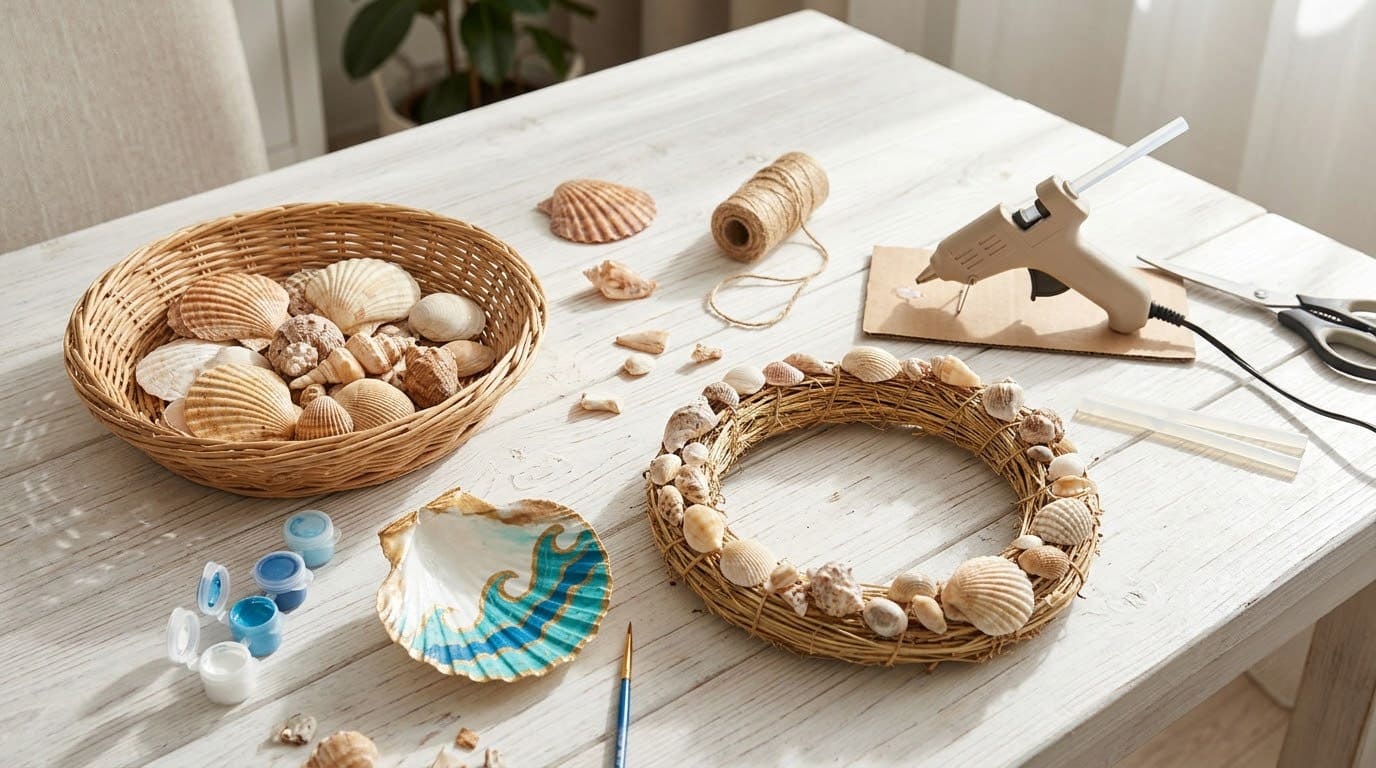
A bag of beach shells can become a wreath, a mirror, a nightlight, or a soap dish, as long as you clean them well first and only bring home empty ones.

Never miss an update — choose FarmFoodFamily as your preferred source on Google.
How it works: Tap the button below to open Google's settings page, then check the box next to FarmFoodFamily.
Tap the checkbox to turn it blue — that's how you know it's set.
A bag of beach shells can become a wreath, a mirror, a nightlight, or a soap dish, as long as you clean them well first and only bring home empty ones.
Products We Recommend
This post contains affiliate links. We may earn a commission on qualifying purchases at no extra cost to you.

E6000 Plus Clear Multipurpose Adhesive, 1.9 oz
A clear, flexible glue that holds shells to glass, clay, wood, and metal. Use it for planters, vases, and soap dishes where hot glue would let go. It has a strong smell, so work in fresh air.
Shop Now
12 Pack 12 Inch Metal Wire Wreath Frames
Plain wire rings sized for the driftwood and shell wreath in idea 3. Wrap one in burlap before you glue anything to it. A 12 pack leaves plenty for gifts or a second try.
Shop Now
PPCLION Tiny Starfish and 2,000 Mini Clam Shells
A big bag of tiny clam and spiral shells with 50 small starfish. Good for filling gaps on mirrors, vases, and shadow boxes. The pieces are small, so keep them away from young kids.
Shop NowShells are free, pretty, and almost impossible to ruin. Most of these crafts need only glue, a little paint, and the shells you already have in a jar.
We kept the original tutorial link for each idea, so you can see the maker’s own steps. Below each one, you’ll find what it takes, how to put it together, and the small details that make it look finished.
In this article
Answer 4 quick questions and get matched to the exact fix for your yard — drainage, budget, layout, or something else entirely.
Take the Free QuizQuick Answer
Start with empty shells only. In Florida, for example, taking a shell with a living animal inside needs a saltwater fishing license, and Lee County bans live shelling, as FOX 13 reports. Check local rules wherever you collect.
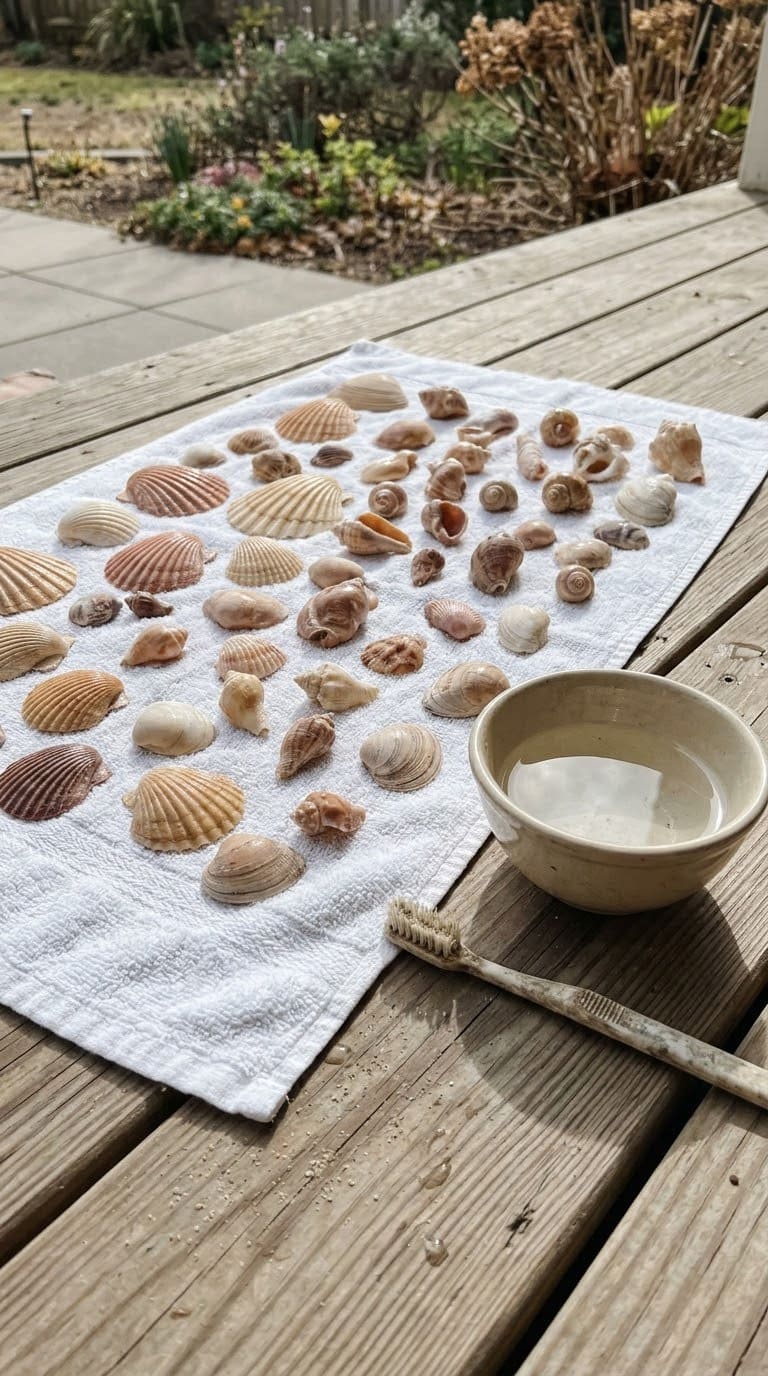
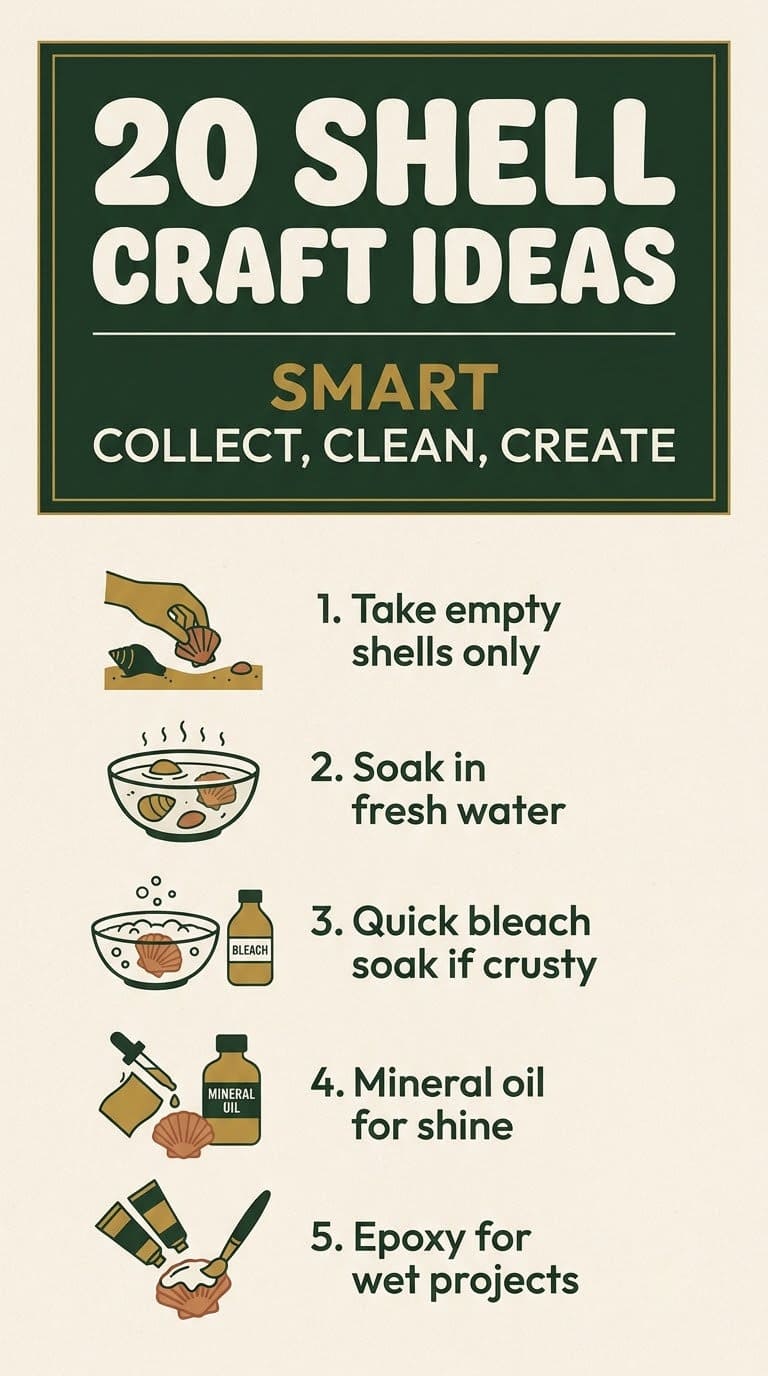
Clean the shells before you craft. Soak them in plain water to loosen sand, then scrub with an old toothbrush. For crusty or smelly shells, a short soak in a mix of about half bleach and half water is a common fix.
Rinse well and let them dry for a day. Then rub on a drop of mineral oil to bring back the color.
Use hot glue for light crafts and clear epoxy for anything that holds weight or gets wet. Acrylic paint covers shells well. Seal painted shells with a clear coat so water won’t lift the paint.
Where Can You Collect Shells Legally?
Rules change by place, so check before you fill a bucket. Here’s a quick guide to the most common cases.


| Where | General rule | What to do |
|---|---|---|
| Most public beaches | Empty shells are usually fine | Take a few, leave the rest |
| Florida | Live shells need a saltwater fishing license | Collect empty shells only |
| Lee County, Florida (incl. Sanibel) | Live shelling is banned | Check every shell for an animal |
| National parks | Collecting is often limited or banned | Ask the park or read posted signs |
| Sand dollars and sea stars | Live ones are animals, not shells | Put live ones back in the water |
A quick test helps. If the shell is heavy, wet inside, or something moves when you tap it, put it back. Empty shells are also homes for hermit crabs, so leave a few behind.
Most yard problems trace back to one specific, fixable cause. Find yours in 4 quick questions.
Take the Free QuizWhat Do You Need Before You Start?
Most of these crafts share the same short tool list.
- A bucket, an old toothbrush, and a small bowl for soaking.
- A hot glue gun with clear glue sticks.
- Clear two-part epoxy or E6000 for heavy or wet uses.
- Acrylic paint, small brushes, and a clear sealer spray.
- A small drill with a fine bit for hanging projects.
- Gloves when you use bleach.
You can also buy clean craft shells if you don’t live near the coast. And they come sorted by type and size, which saves time.
20 Shell Decoration and Craft Ideas
1. Clean and Preserve Your Shells
Every good shell craft starts here. Soak new shells in fresh water for a few days, changing the water daily. Then scrub off sand and bits of seaweed with a toothbrush.
For a deeper clean, soak them in a bleach and water mix for an hour or two, wearing gloves. Rinse them well and dry them in the sun.
A thin coat of mineral oil brings back the shine. This guide to cleaning and preserving shells covers more methods.
2. Decorate Seashells With Puffy Paint
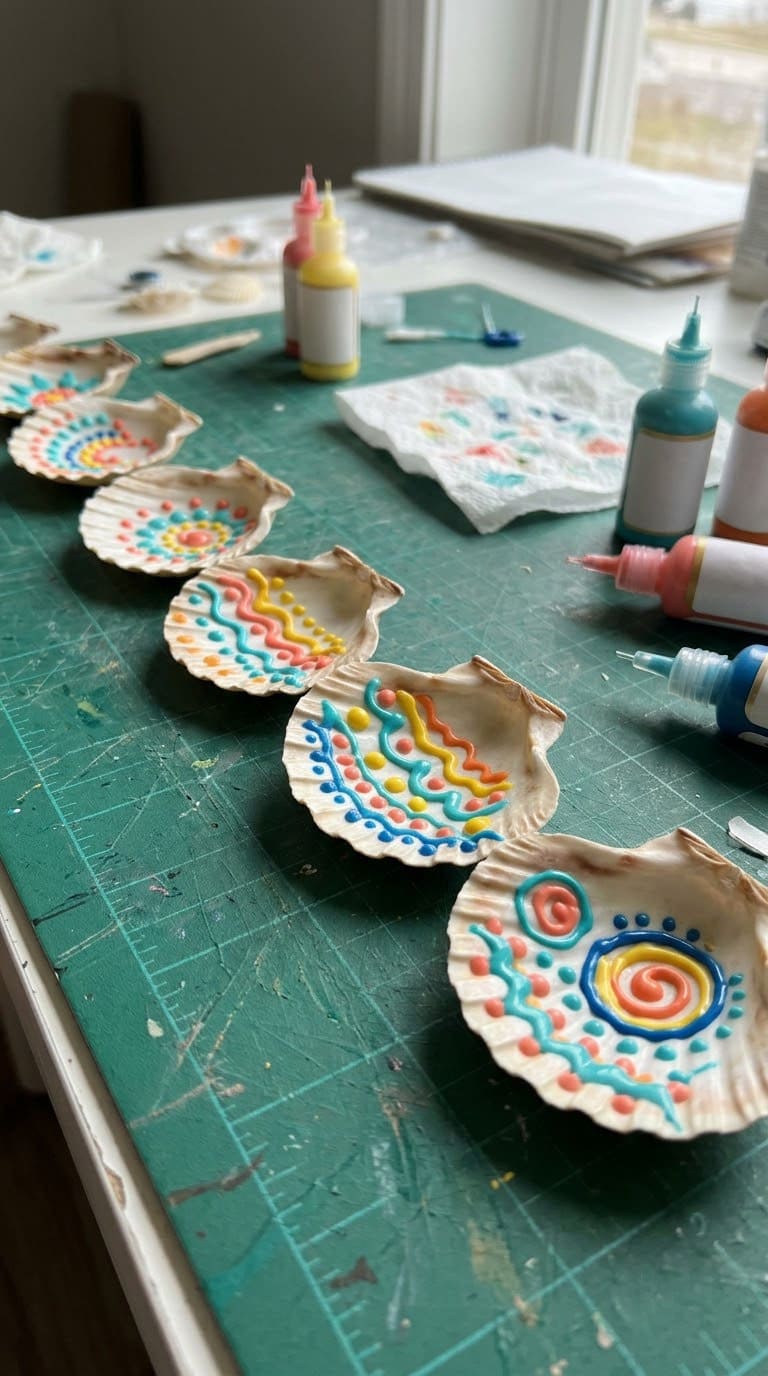
Puffy paint adds bold color and raised texture. Brush a background coat on the inside of a clam or scallop shell. Add a second coat if you want it more solid.
Then draw dots, lines, and waves on top with the puffy paint bottle. A cotton swab wipes away mistakes. The Color Made Happy tutorial uses white acrylic first on darker shells so the colors pop.
A clear, flexible glue that holds shells to glass, clay, wood, and metal. Use it for planters, vases, and soap dishes where hot glue would let go. It has a strong smell, so work in fresh air.
Shop NowThis post contains affiliate links. We may earn a commission on qualifying purchases at no extra cost to you.
3. Driftwood and Shell Wreath
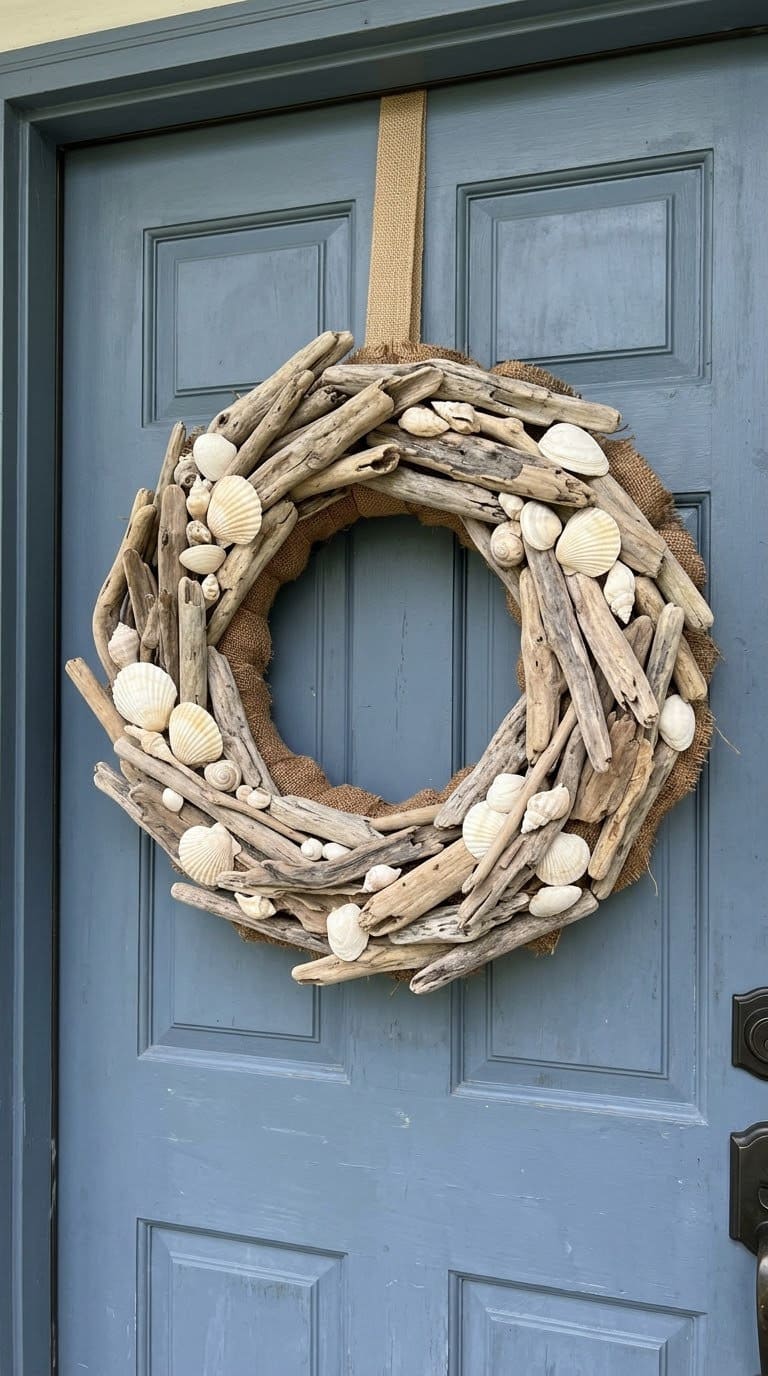
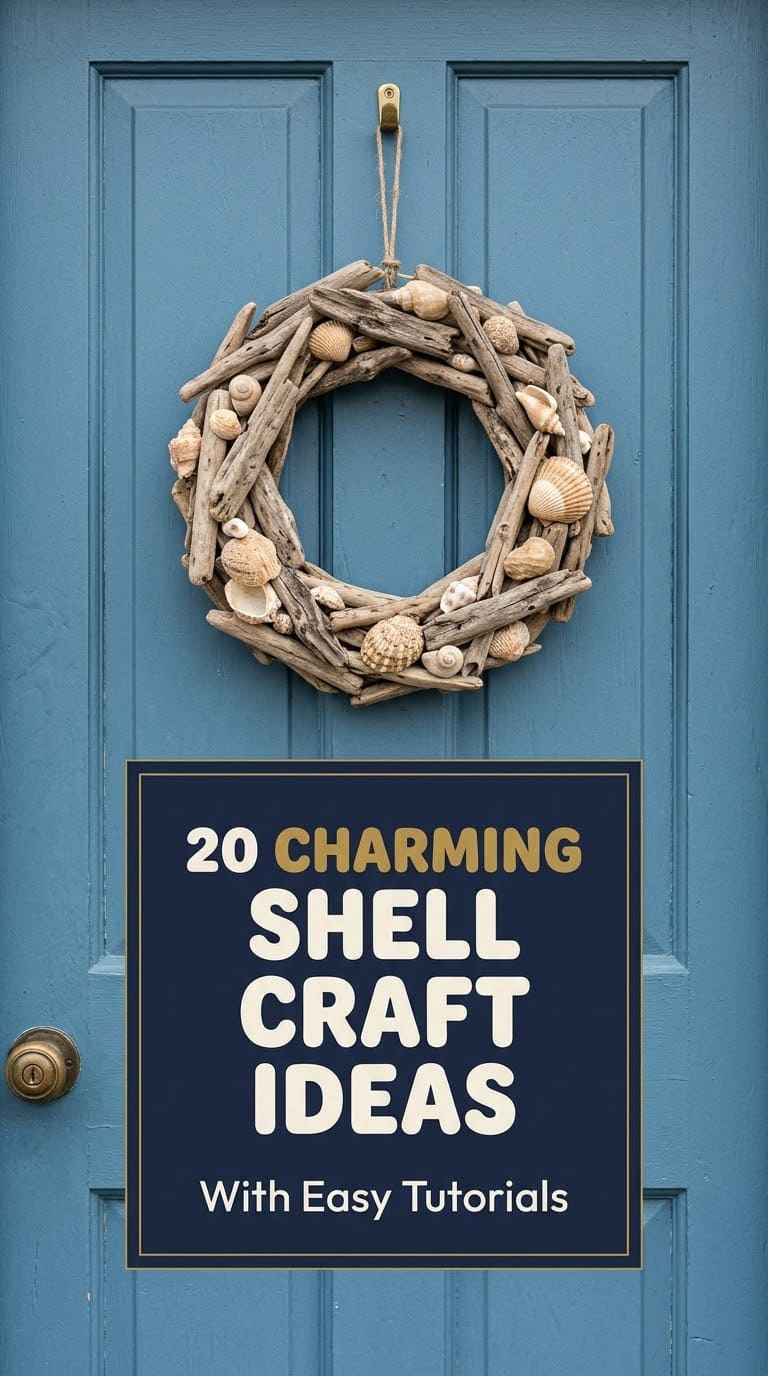
This wreath brings the whole beach to your door. Wrap a wire wreath frame in burlap and glue down the ends. Leave a bare spot at the top for hanging.
Glue the biggest driftwood pieces first, then add shells from largest to smallest. Group them into small clusters for a natural look. The H2O Bungalow wreath breaks long driftwood pieces to fit the curve.
The average homeowner spends $616/year on yard fixes that don't address the real problem. Find out what yours actually is — before you spend another dollar.
Take the Free QuizIf you have extra wood, try more driftwood craft projects.
4. Shell-Covered Planter
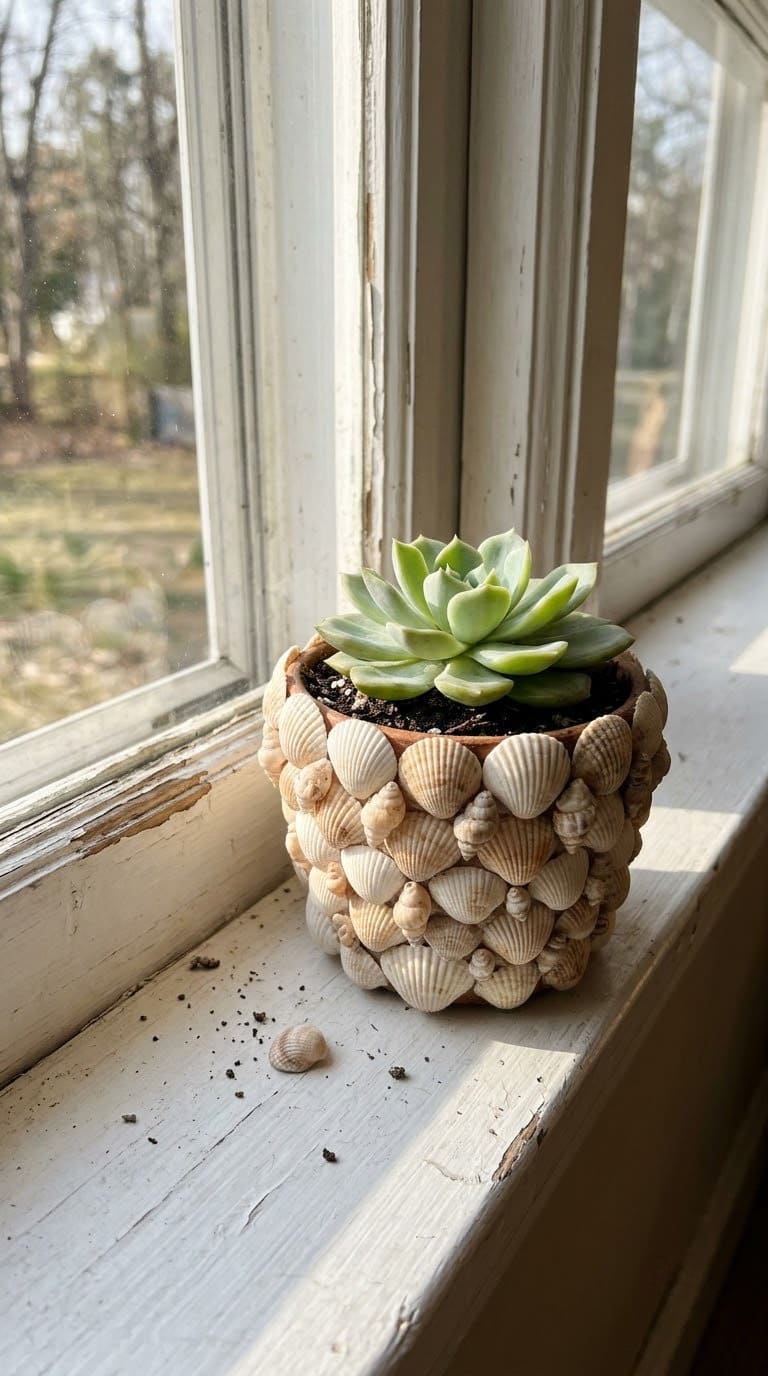
Turn a plain plastic pot into a coastal planter. Glue shells around the outside in rows, starting at the bottom. Fill gaps with tiny shells or sand.
Use epoxy or E6000 instead of hot glue, since watering can loosen hot glue. This shell planter tutorial shows a simple pattern. A succulent or a small air plant fits the beach look.
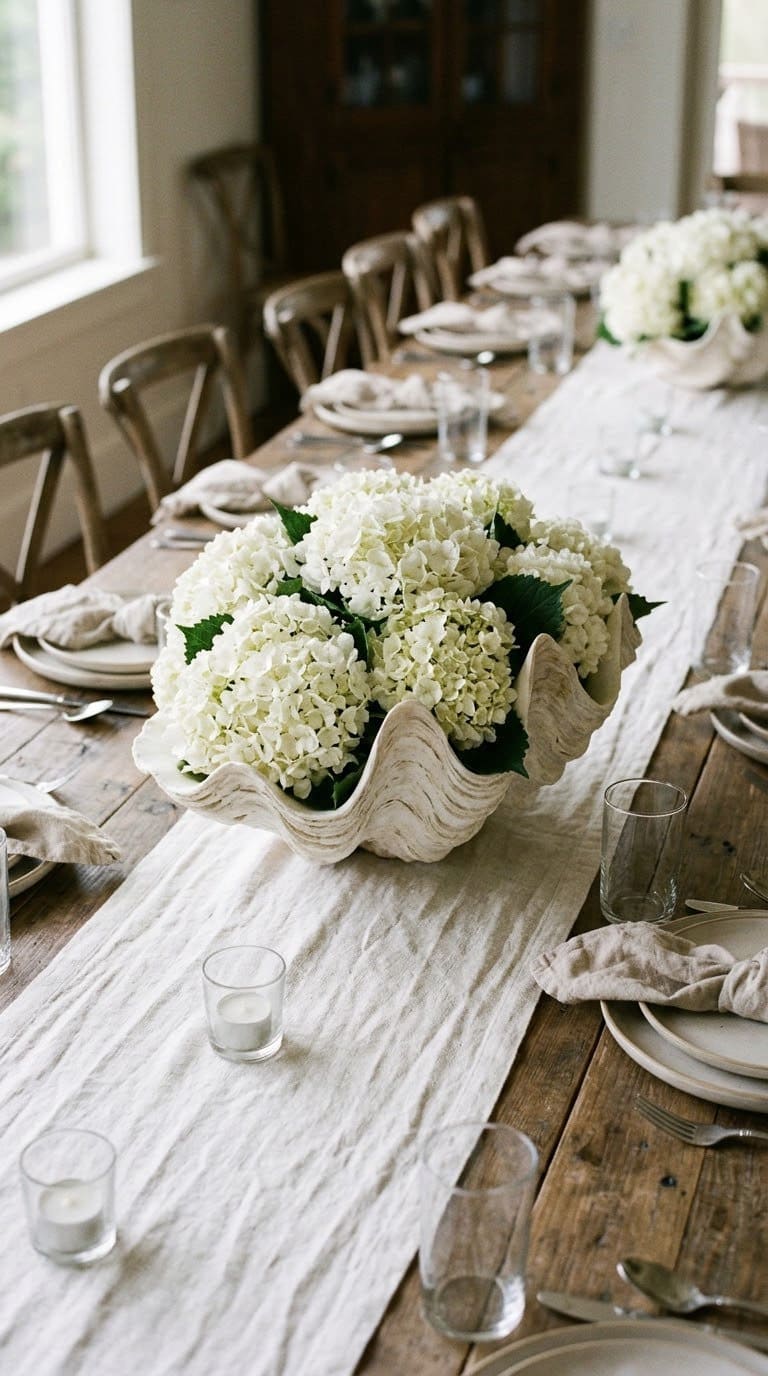
5. Clamshell Centerpiece
A large clamshell makes a striking table bowl. Set it in the center of the table and fill it with flowers, candles, or fruit. It needs almost no work.
Big clamshells are hard to find on most beaches, so many people buy one. This clamshell centerpiece is a ready-made version. Set a small glass dish inside if you use fresh flowers, so the water doesn’t stain the shell.
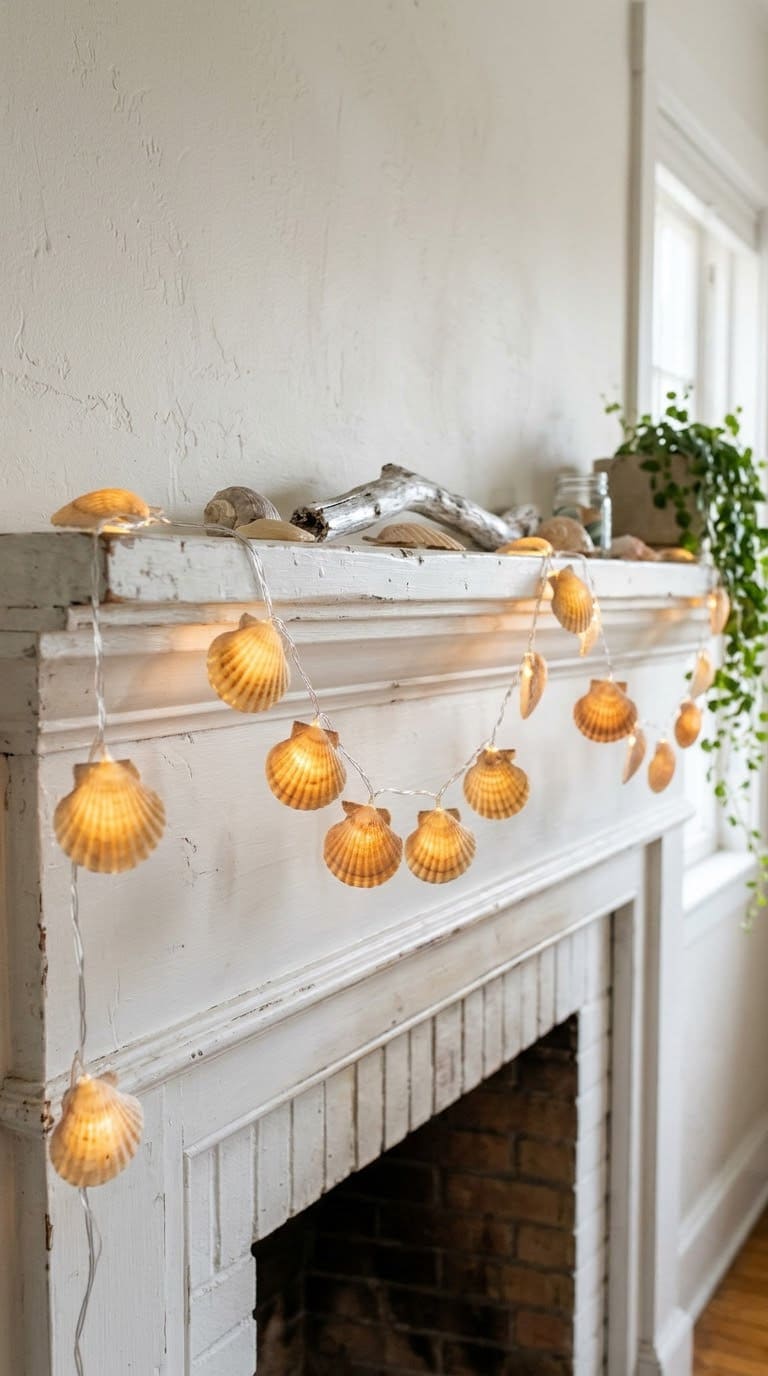
6. Seashell String Lights
Many thin shells let light glow through them. Drill a small hole in each shell and slip it over a bulb on a string of LED lights. Scallops and jingle shells work well.


Use LED lights only, since they stay cool. The Martha Stewart seashell lights idea shows the effect. Hang them over a mantel or a bed for a soft beach glow.
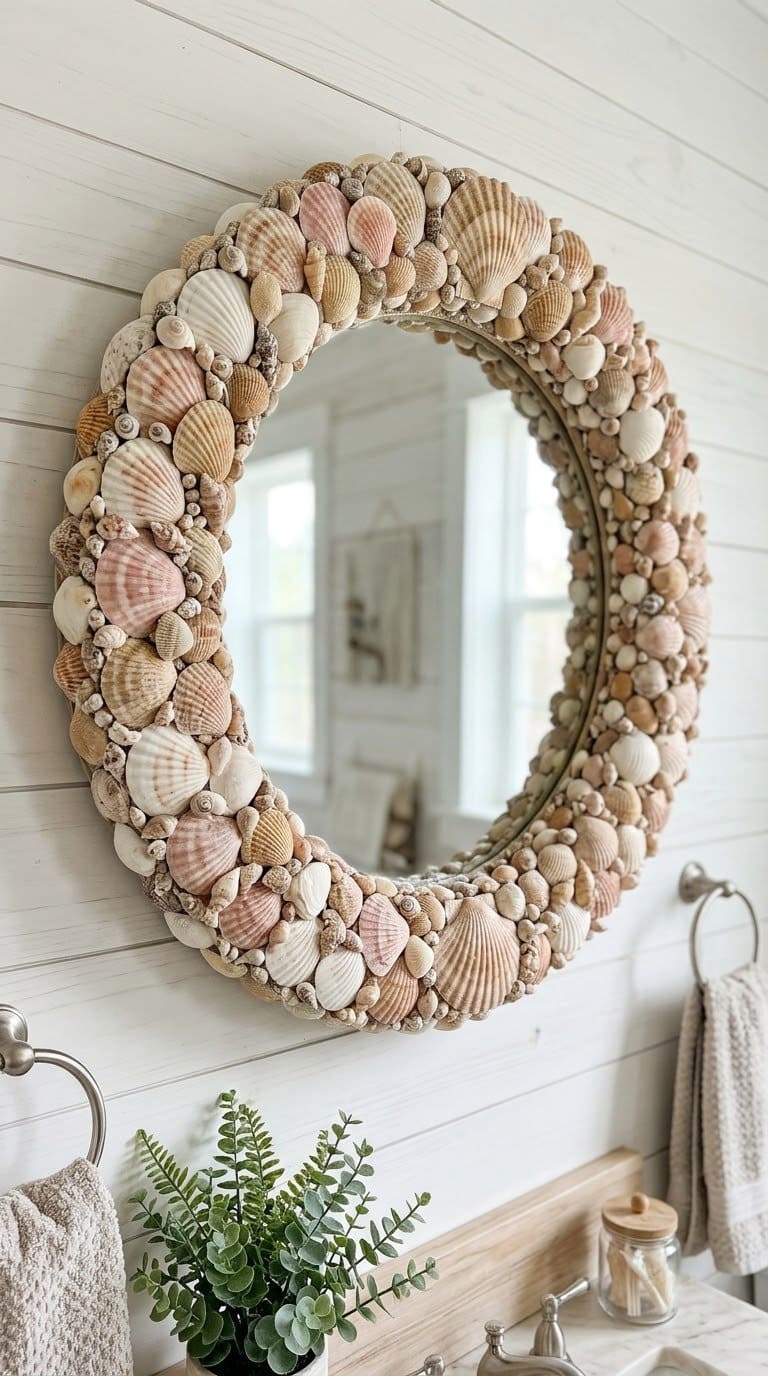
7. Seashell Mirror
A shell frame turns a plain mirror into a focal point. Lay the mirror flat and plan your design on the frame before you glue anything. Mix big shells with small ones.
Glue the larger shells first, then fill gaps with smaller ones. This Instructables seashell mirror covers the whole frame. Use strong glue and let it cure flat for a full day before you hang it.
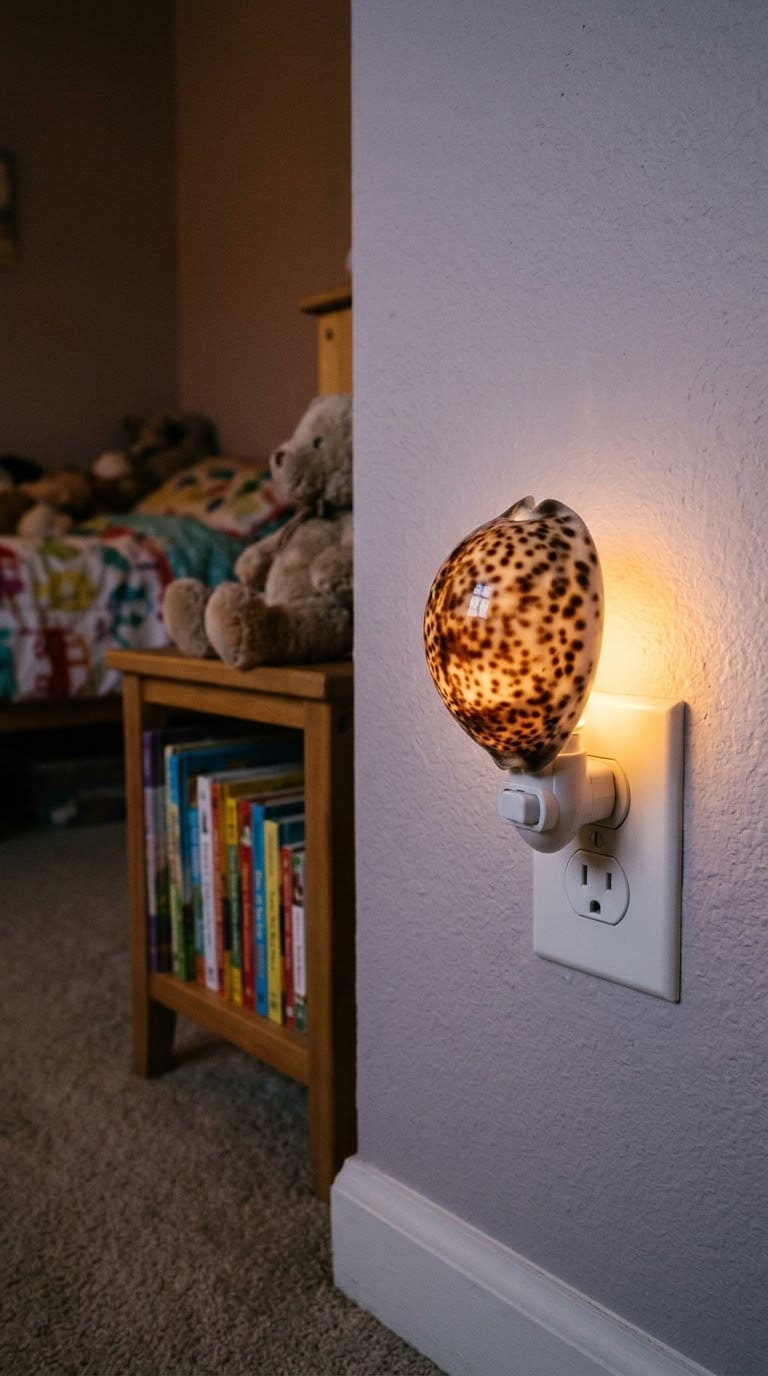
8. Seashell Nightlight
Light through a thin shell makes a soft nightlight. Glue a cowrie or scallop shell over the front of a small plug-in LED nightlight. Keep the shell clear of any vents.
You can buy carved versions too, like this carved cowrie sea turtle night light. Use only cool LED nightlights. Never glue shells over a hot bulb.
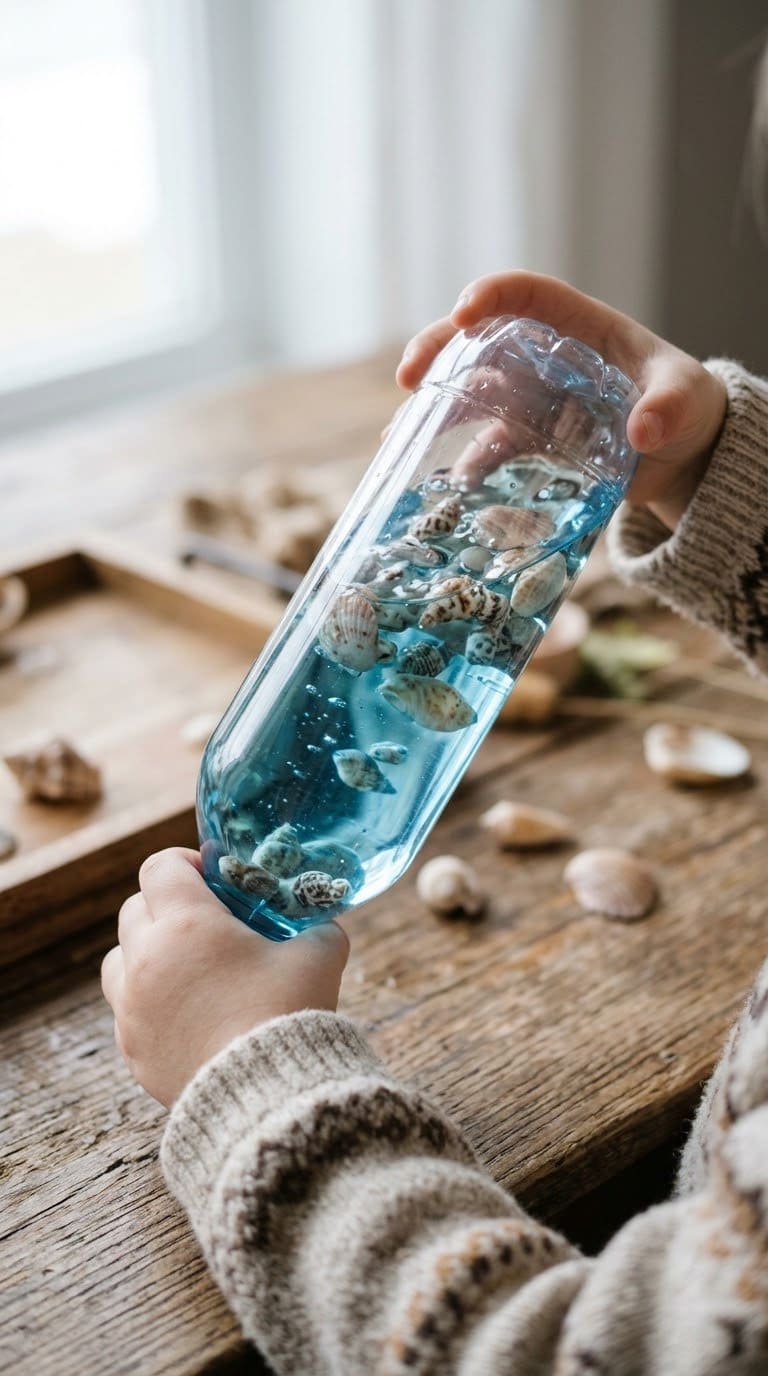
9. Sensory Shell Play Bottle
This bottle calms kids and costs almost nothing. Wash a clear bottle and drop in about a third to half a cup of clean shells. Fill it with water and a little clear soap or glue so the shells sink slowly.
Add a drop of blue food coloring for an ocean look. The Rhythms of Play sensory bottle says to glue the lid shut for young kids. Keep play supervised, since small shells can be a choking risk.
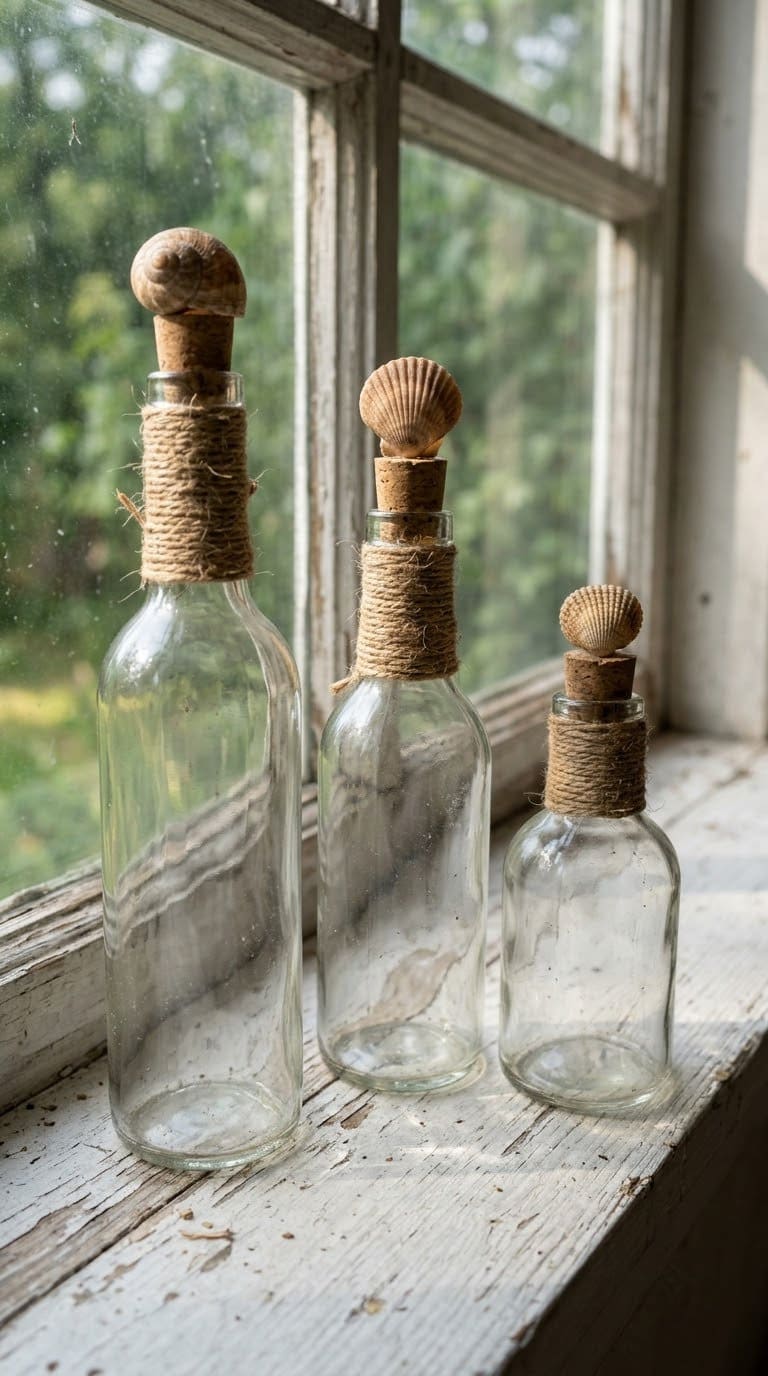
10. Shell-Topped Bottles
Glass bottles become beach decor with one shell on top. Clean an old bottle and remove the label. Glue a shell, a starfish, or a small cluster of shells to the cork or the bottle neck.
Wrap the neck in twine first for a rustic touch. The Beach Bliss Living shell-topped bottles group several heights together. Line them up on a windowsill so light shines through the glass.
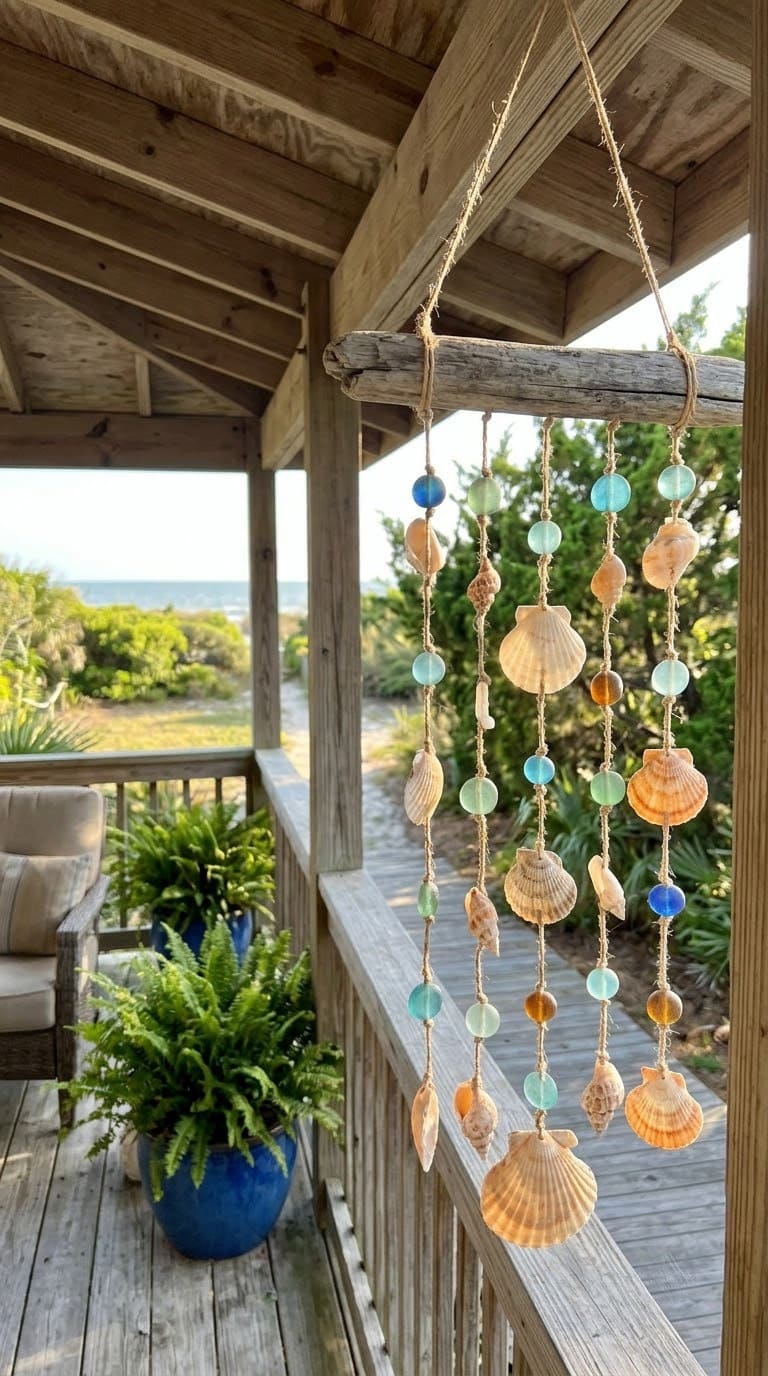
11. Shell and Bead Wind Chime
Shells make a soft clinking sound in the wind. Drill a small hole in each shell. Thread them onto fishing line with beads between them.
Tie four or five strands to a driftwood stick or a metal ring. The Artsy Chicks Rule wind chime mixes glass beads with shells. Hang it on a porch, or browse more wind chime ideas for other styles.
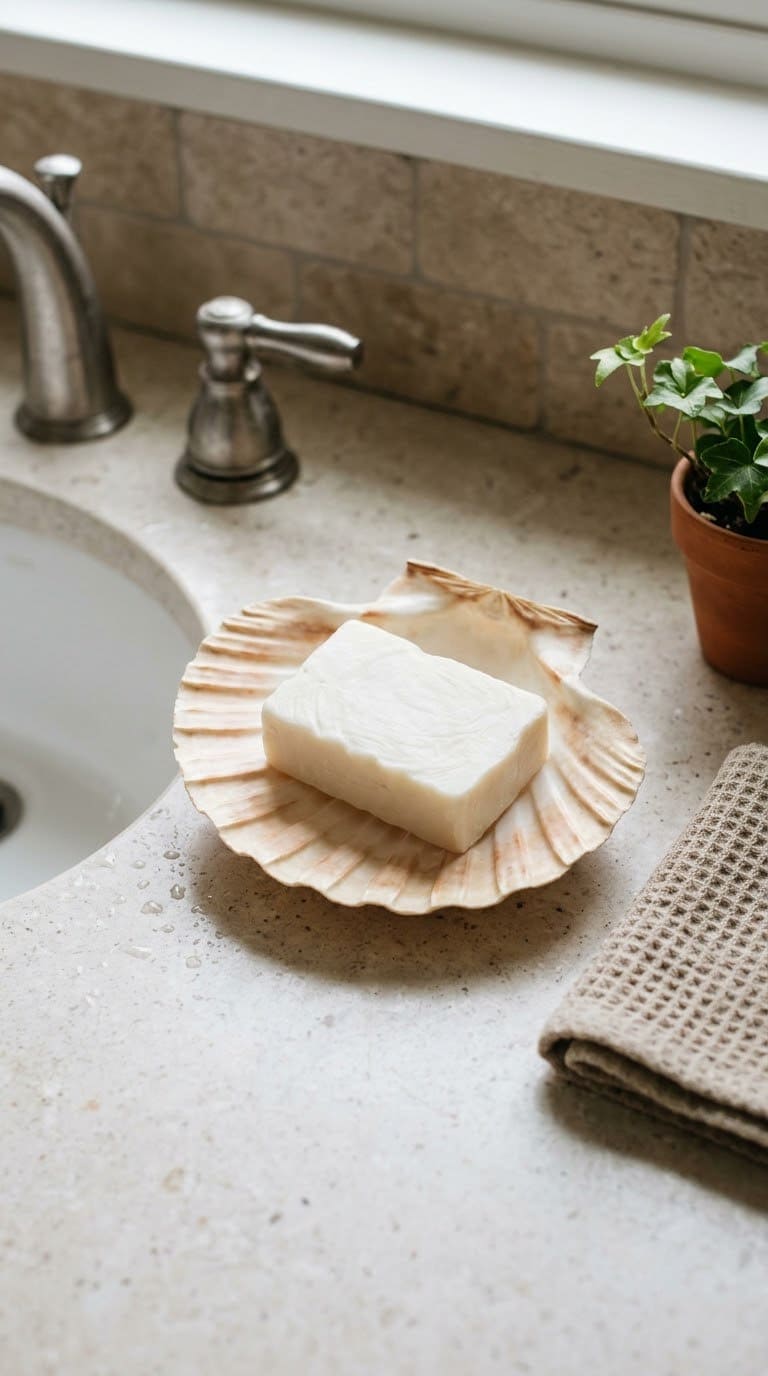
12. Shell Soap Dish
A big flat shell makes a pretty soap dish. Pick a clam or scallop with a deep bowl and a flat bottom so it won’t tip. Glue three small shells underneath as feet if it rocks.
Seal the inside with a clear waterproof coat so soap doesn’t stain it. Rinse it now and then so soap doesn’t build up. It fits right in a coastal bathroom.
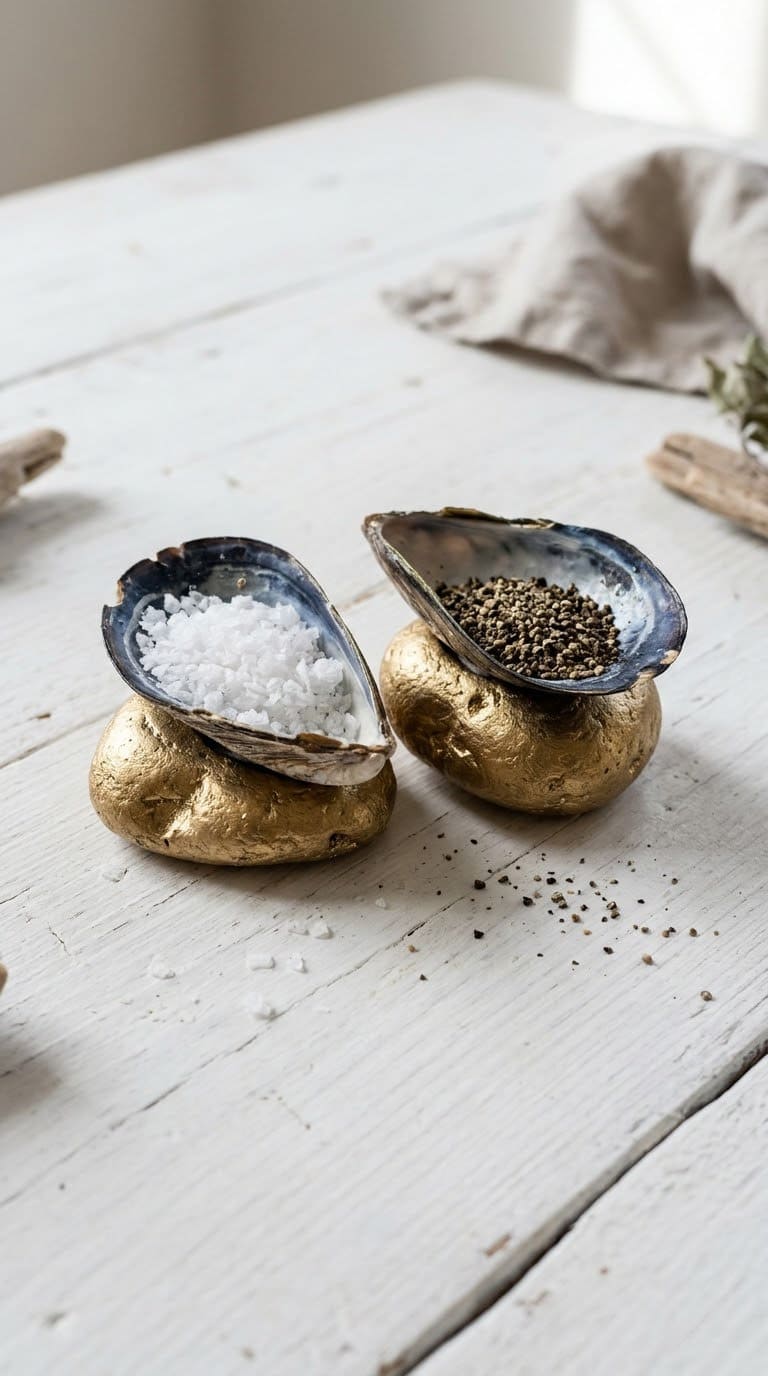
13. Shell Salt and Pepper Pinch Pots
These little pots bring the beach to your table. Paint a few smooth, flat rocks gold or silver. Once dry, glue a mussel or scallop shell on top of each rock.
The Lilly Higgins pinch pots use super glue and gold paint. Clean the shells well before they touch food. Keep paint and glue on the outside only, away from the salt.
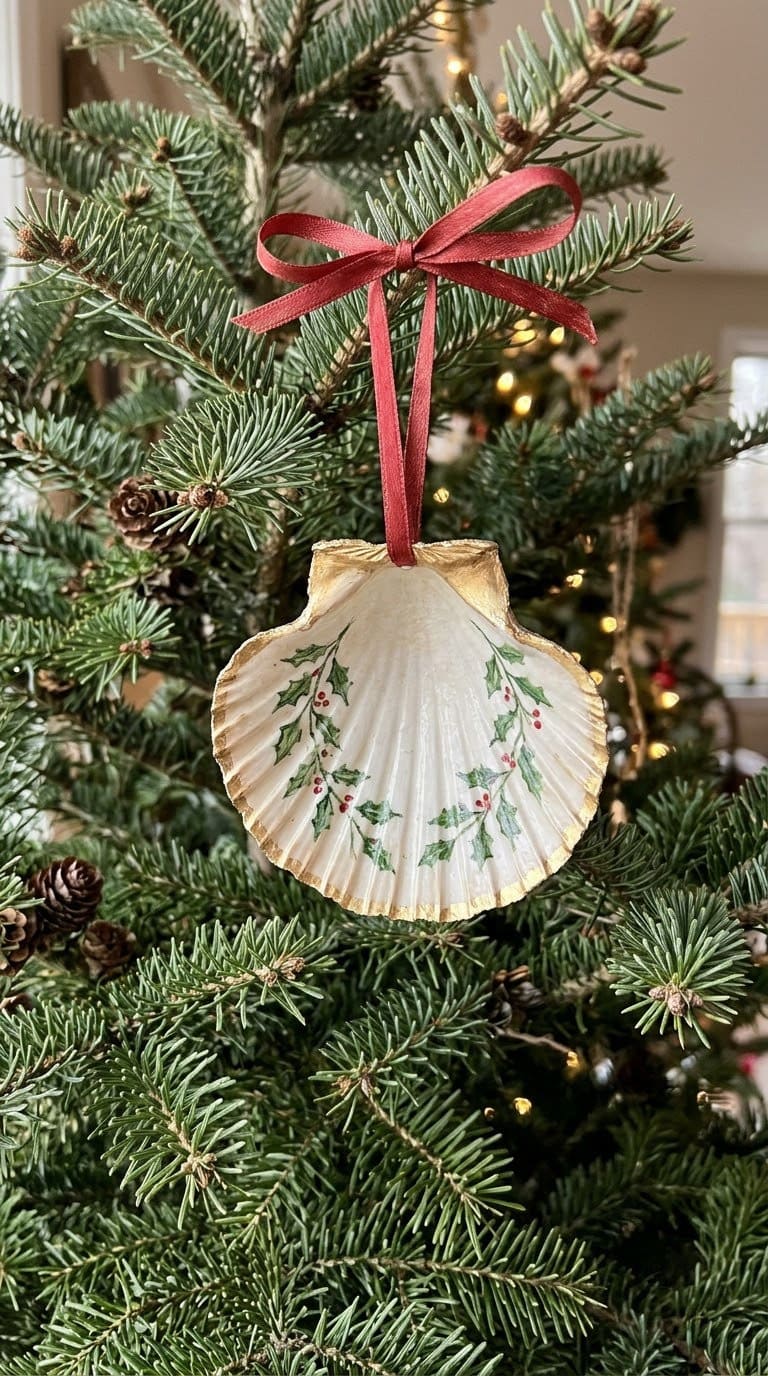
14. Shell Christmas Ornaments
Shells make lovely ornaments for a coastal tree. Glue small shells inside a clear glass ball, or paint a scallop and add a ribbon loop. A bit of glitter on the edge adds sparkle.
The Hobbies on a Budget shell ornament keeps a beach trip memory on the tree. Write the year and place on the back. For more, see these Christmas ornament ideas.
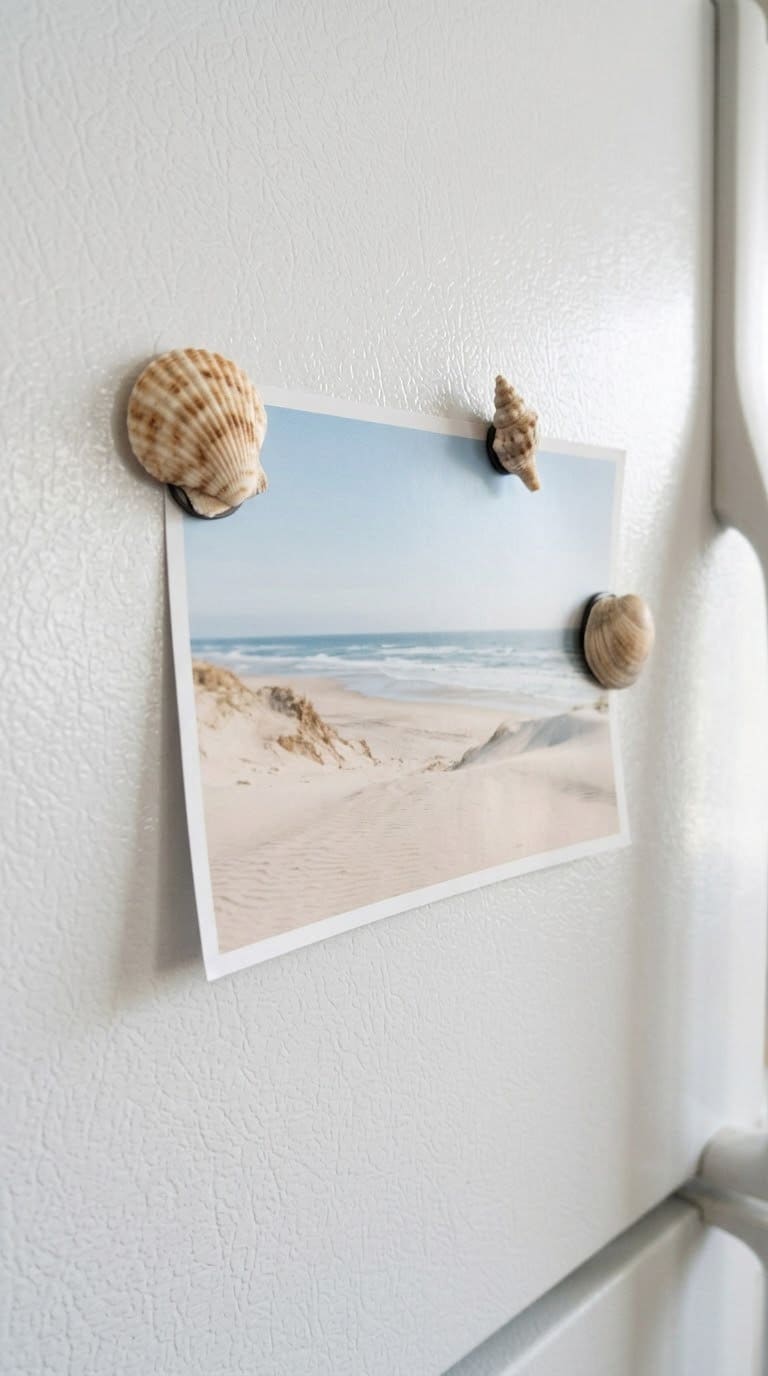
15. Shell Fridge Magnets
These magnets are a quick win. Glue a small strong magnet to the back of a flat shell. Use small, thick shells so they don’t snap.
The Sustain My Craft Habit magnet guide shows which glue holds best. Keep strong magnets away from young kids, since swallowed magnets are dangerous.
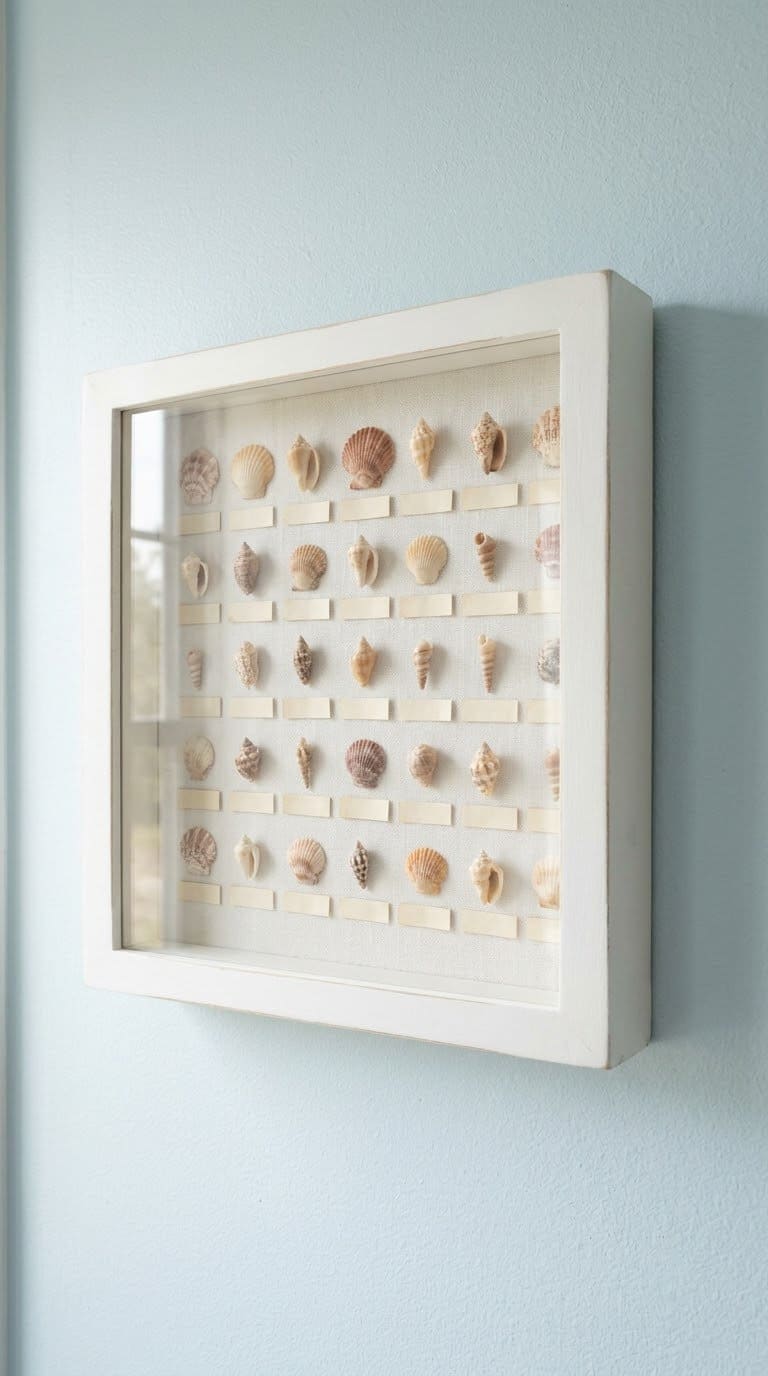
16. Seashell Shadow Box
A shadow box keeps your favorite shells safe from dust. Lay the shells on the back panel and plan the layout. Glue each one down with a small dot of glue.
Add a tiny label with the beach name and date. The Lovely Etc. shadow box keeps the layout simple.
Hang it in a hall or a coastal bedroom where you’ll see it every day.
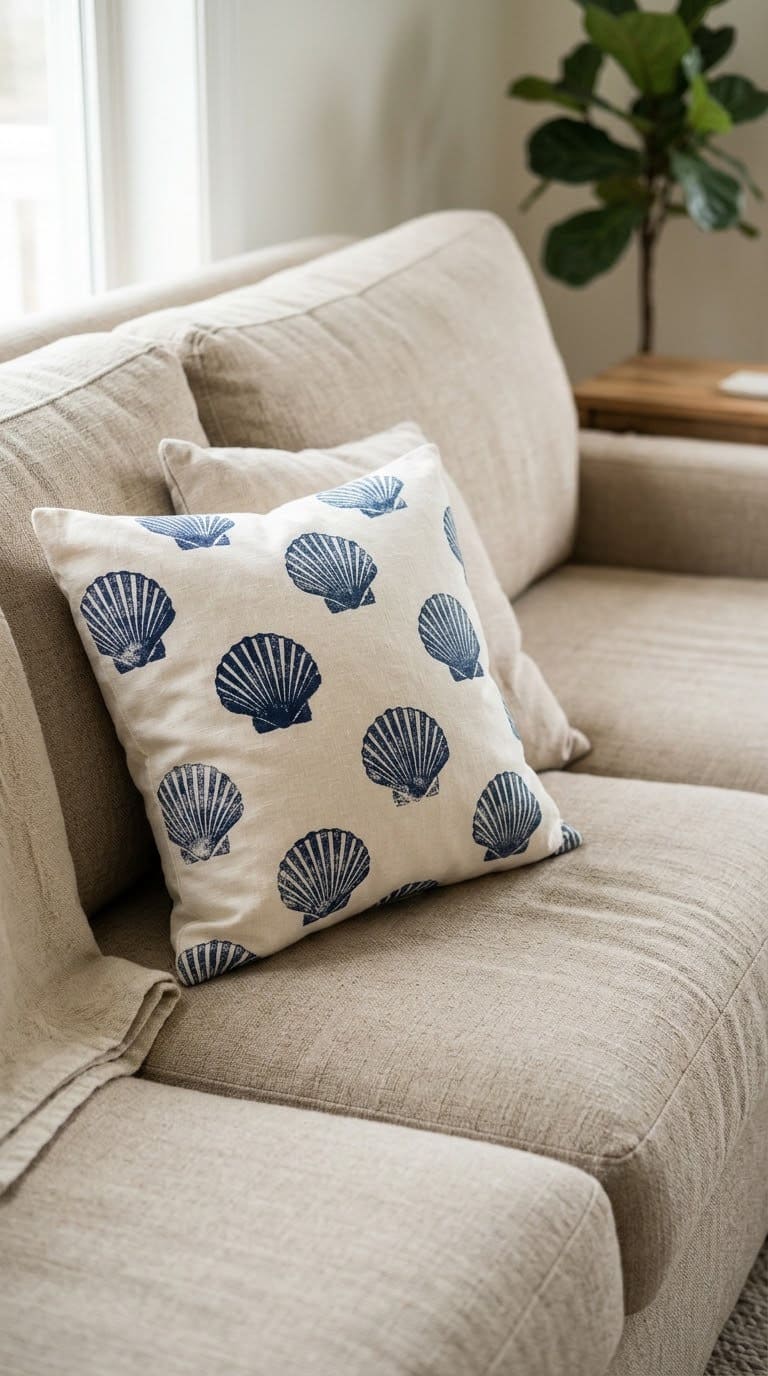
17. Shell-Stamped Pillows
Shells can print patterns too. Brush fabric paint on the ridged outside of a scallop shell. Press it firmly onto a plain cotton pillow cover.
The Kim Six Fix stamped pillows use one shell over and over. Put cardboard inside the cover so paint won’t bleed through. Heat-set the paint with an iron as the label says.
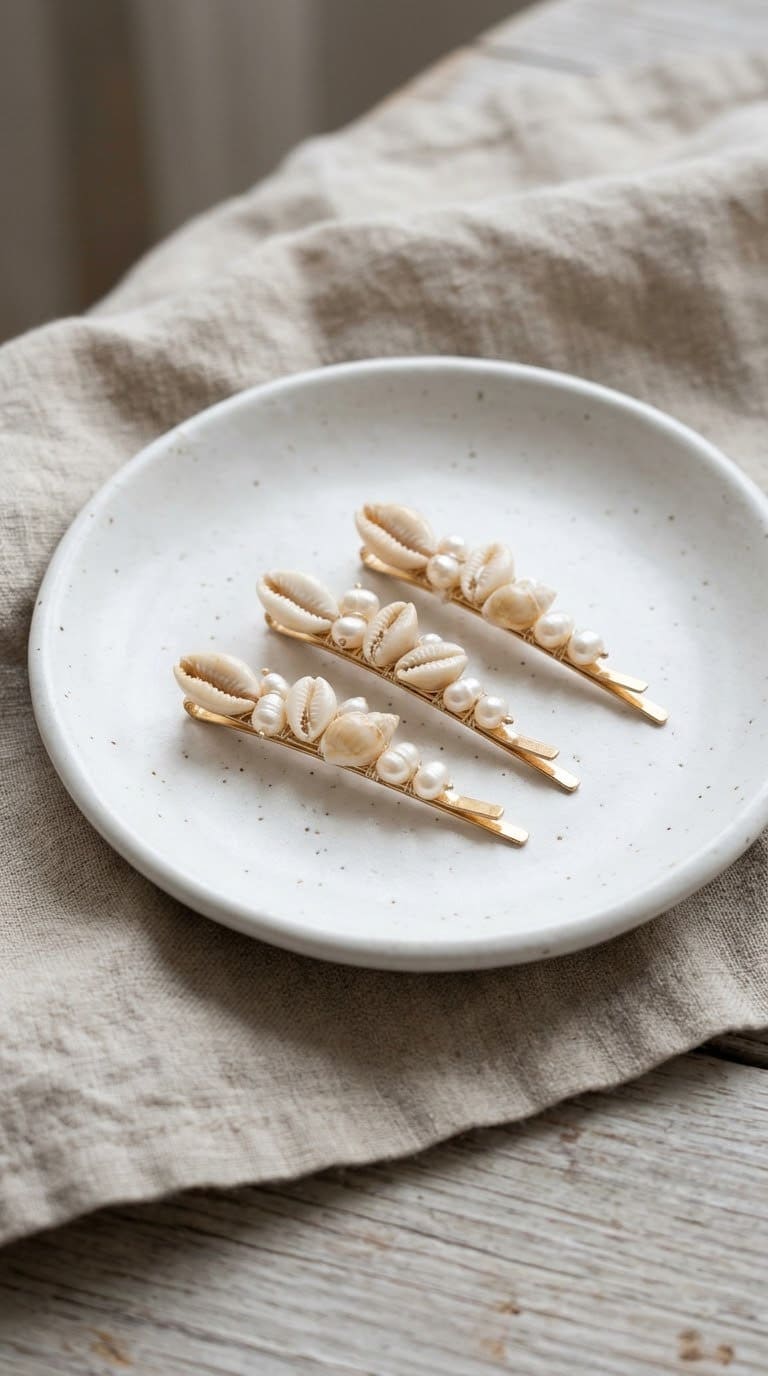
18. Shell Hair Clips
Your beach finds can be worn too. Glue a small shell or two onto a plain metal hair clip. Tiny cowries and scallops work best.
The Darice shell barrettes add pearls between the shells. Use strong jewelry glue and let it cure overnight. Sand the back of the shell lightly so it sits flat.
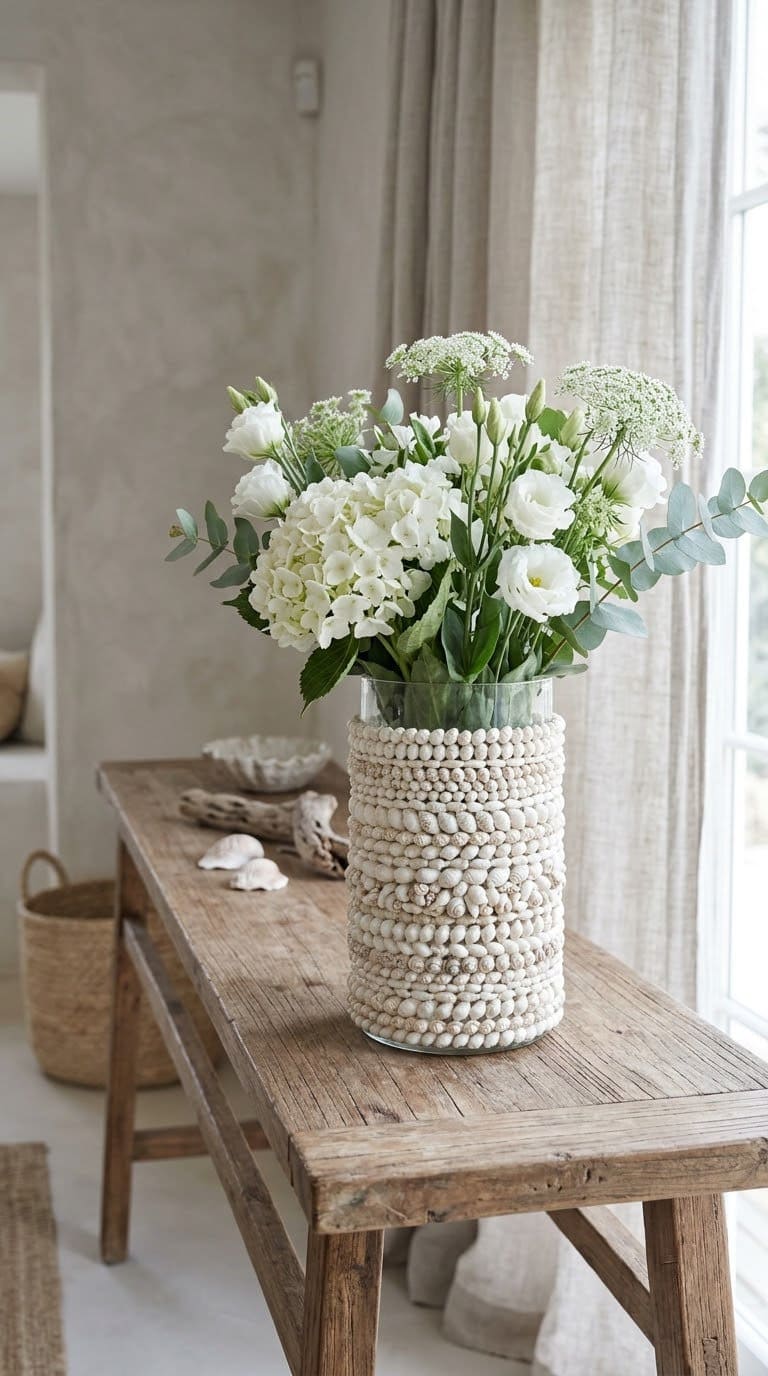
19. Shell-Covered Vase
A plain glass vase gets a beach makeover with shells. Glue small shells in bands or a spiral around the outside. Leave some glass bare so water still shows.
The Consumer Crafts shell vase keeps the pattern simple. Use clear epoxy, since vases get wet. Fill it with sea grass or white flowers.
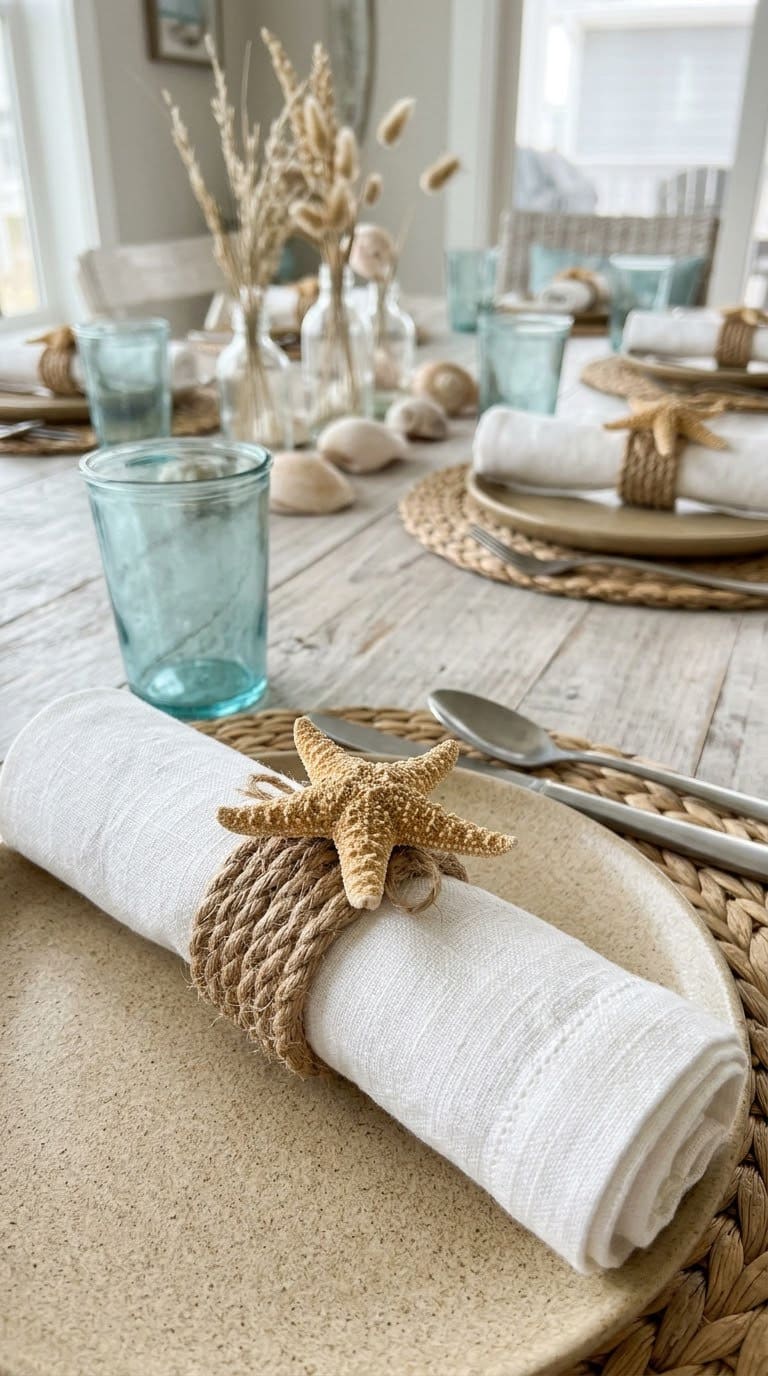
20. Starfish Napkin Rings
These rings make a beach dinner feel special. Glue a small dried starfish to a plain wood or rope napkin ring. Hold it for a minute so it sets.
The Coastal Wandering napkin rings use simple rope rings. Buy dried starfish from a craft store. Never take a live sea star from the beach.
Which Shell Craft Should You Make First?
| Project | Skill level | Time | Best for |
|---|---|---|---|
| Fridge magnets (15) | Beginner | 30 minutes | A first try |
| Puffy paint shells (2) | Beginner | 1 hour plus drying | Kids |
| Sensory bottle (9) | Beginner | 30 minutes | Toddlers, with a glued lid |
| Shadow box (16) | Easy | 1 to 2 hours | Saving a trip |
| Shell planter (4) | Easy | 2 hours | Gifts |
| Shell mirror (7) | Moderate | Half a day plus curing | A focal point |
| Driftwood wreath (3) | Moderate | Half a day | Front doors |
| String lights (6) | Moderate | 2 hours | Soft lighting |
Common Mistakes to Avoid
Taking live shells. A shell with an animal inside isn’t a craft supply. In many places it’s also against the law.
Skipping the cleaning. Unclean shells can smell for weeks. Soak, scrub, and dry them before you glue anything.
Using hot glue on wet projects. Hot glue lets go in water. Use epoxy or E6000 for planters, vases, and soap dishes.
Soaking too long in bleach. Long soaks can fade and weaken shells. Check them every 30 minutes and rinse well.
Putting shells near hot bulbs. Shells and glue near heat can crack or melt. Use cool LED lights only.
Leaving small parts near kids. Tiny shells and magnets are choking and swallowing risks. Keep those crafts out of reach.
How Do You String Shells Together?
Strung shells make easy garlands and chimes. Drill a small hole near the top of each shell with a fine bit. Go slow and keep the shell damp to stop cracks.
Thread the shells onto fishing line or cotton string. Tie a knot about every 3 inches to keep them spaced. This eHow guide to stringing shells covers hanging them as a chime.
Frequently Asked Questions
How do you clean seashells for crafts?
Soak them in fresh water, then scrub with a toothbrush. For tough buildup, soak them briefly in a half bleach, half water mix. Rinse well and let them dry for a day.
What paint works best on seashells?
Acrylic paint works well on most shells. Seal it with a clear spray so water won’t lift it. Puffy paint adds raised texture.
What glue holds shells best?
Hot glue works for light, dry crafts. For heavy or wet pieces, use clear epoxy or E6000. Let strong glues cure fully before you move the piece.
Is it legal to take shells from the beach?
Empty shells are often fine, but rules vary by place. Live shells are protected in many areas, and Lee County in Florida bans live shelling. Check local signs or rules first.
How do you make shells shiny?
Rub a drop of mineral oil onto clean, dry shells. For a lasting shine, spray them with a clear gloss sealer.
Can you drill holes in seashells?
Yes. Use a small drill with a fine bit and go slow. Keeping the shell damp helps stop cracks.
Related Posts
Never miss an update — choose FarmFoodFamily as your preferred source on Google.
How it works: Tap the button below to open Google's settings page, then check the box next to FarmFoodFamily.
Tap the checkbox to turn it blue — that's how you know it's set.